


By now I’m sure you’ve realised that I enjoy seeing the quilts, galleries and special exhibitions at the craft shows I go to as much as seeing what the suppliers have to tempt me with, and it was no different at the Harrogate Knit & Stitch Show in November.
One of my personal favourites of the whole show was the hall hosted by the Embroidery Guild which we almost didn’t find - it was at the far end of the hall we entered, though others were arriving through that door and were immediately immersed into it. I loved that in this part of the show there was an area to showcase recent graduates work, and in my first few posts I’m going to focus on these.
Let’s start off with a look at Emily Cox’s stand, and if you know me then you know I do like a Waitrose shop, so I was curious to see if that coat really was made from Waitrose bags - and spoiler it was, but more on that later.
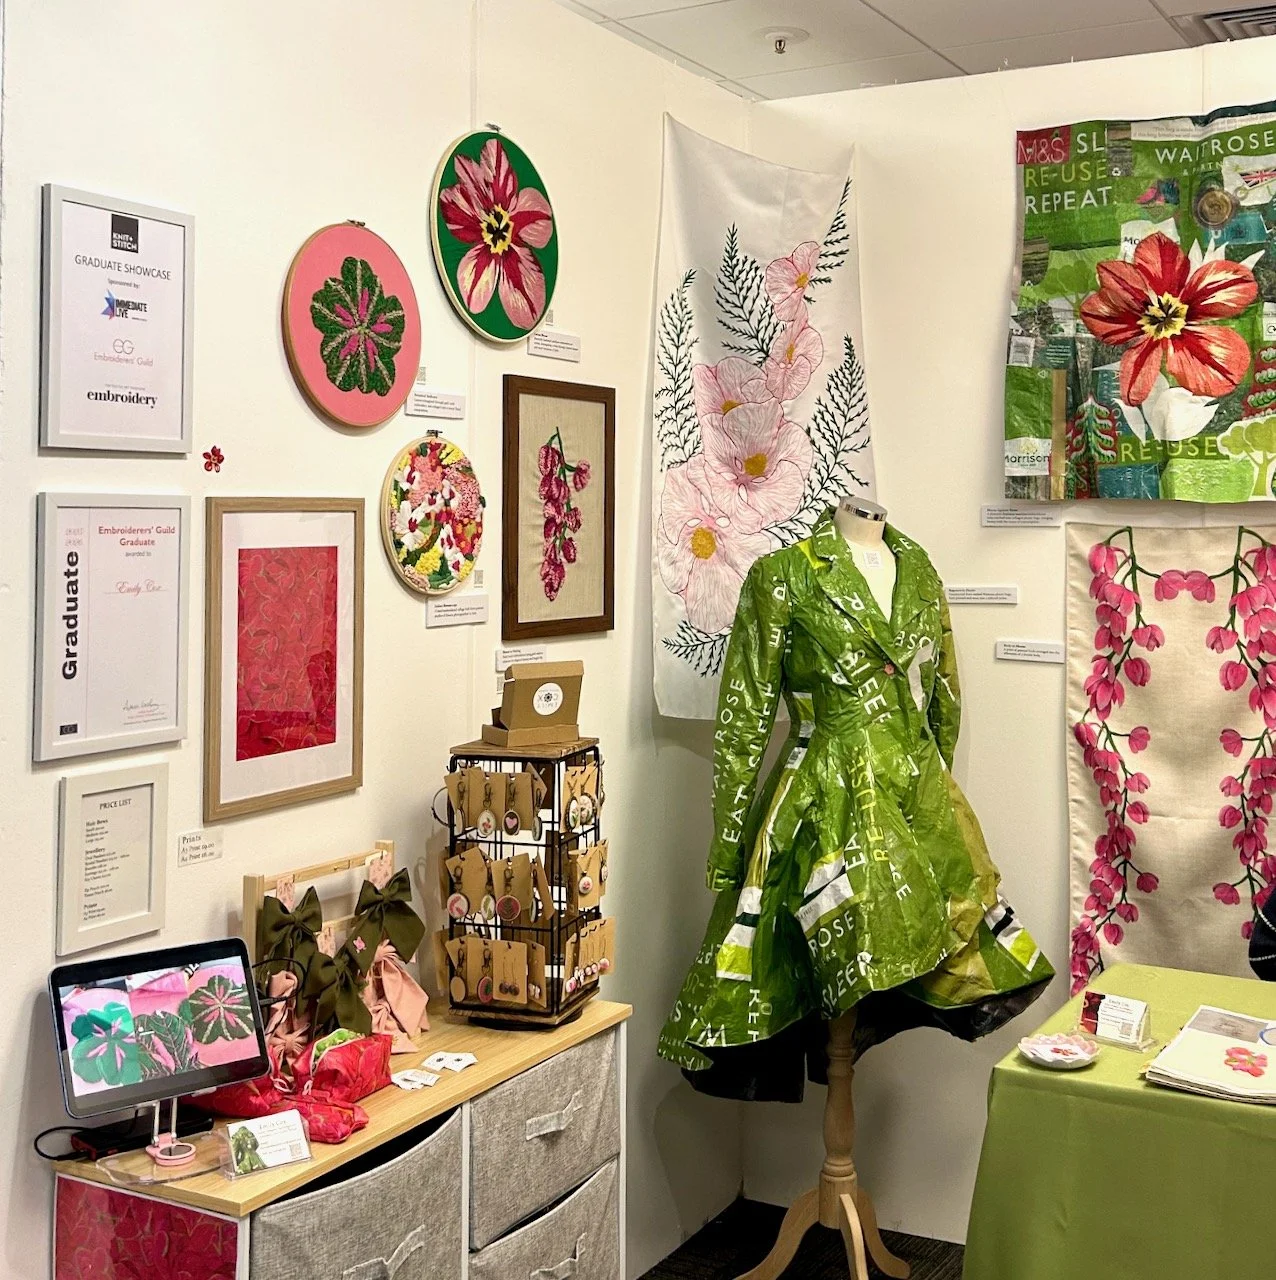
EMILY COX, KNIT & STITCH SHOW HARROGATE 2025
Emily says that ‘embroidery is central to her practice’ and allows her to ‘form an intimate relationship with her work, each stitch elevating the emotional and conceptual connection behind the pieces’.
Nature is a recurring theme as Emily admits she is ‘fascinated by the patterns, colours and textures that surround us, that often go unnoticed’ - I could have spent a lot more time looking at all of these pieces in much more detail.

BREATH BETWEEN THREADS, EMILY COX, KNIT & STITCH SHOW HARROGATE 2025
If you’re wondering how the ‘Breath Between Threads’ piece is created the label beneath it reads ‘Domestic freehand machine embroidery on fabric, with cut-outs to create depth and shadow between the leaves’ - and isn’t it gorgeous?
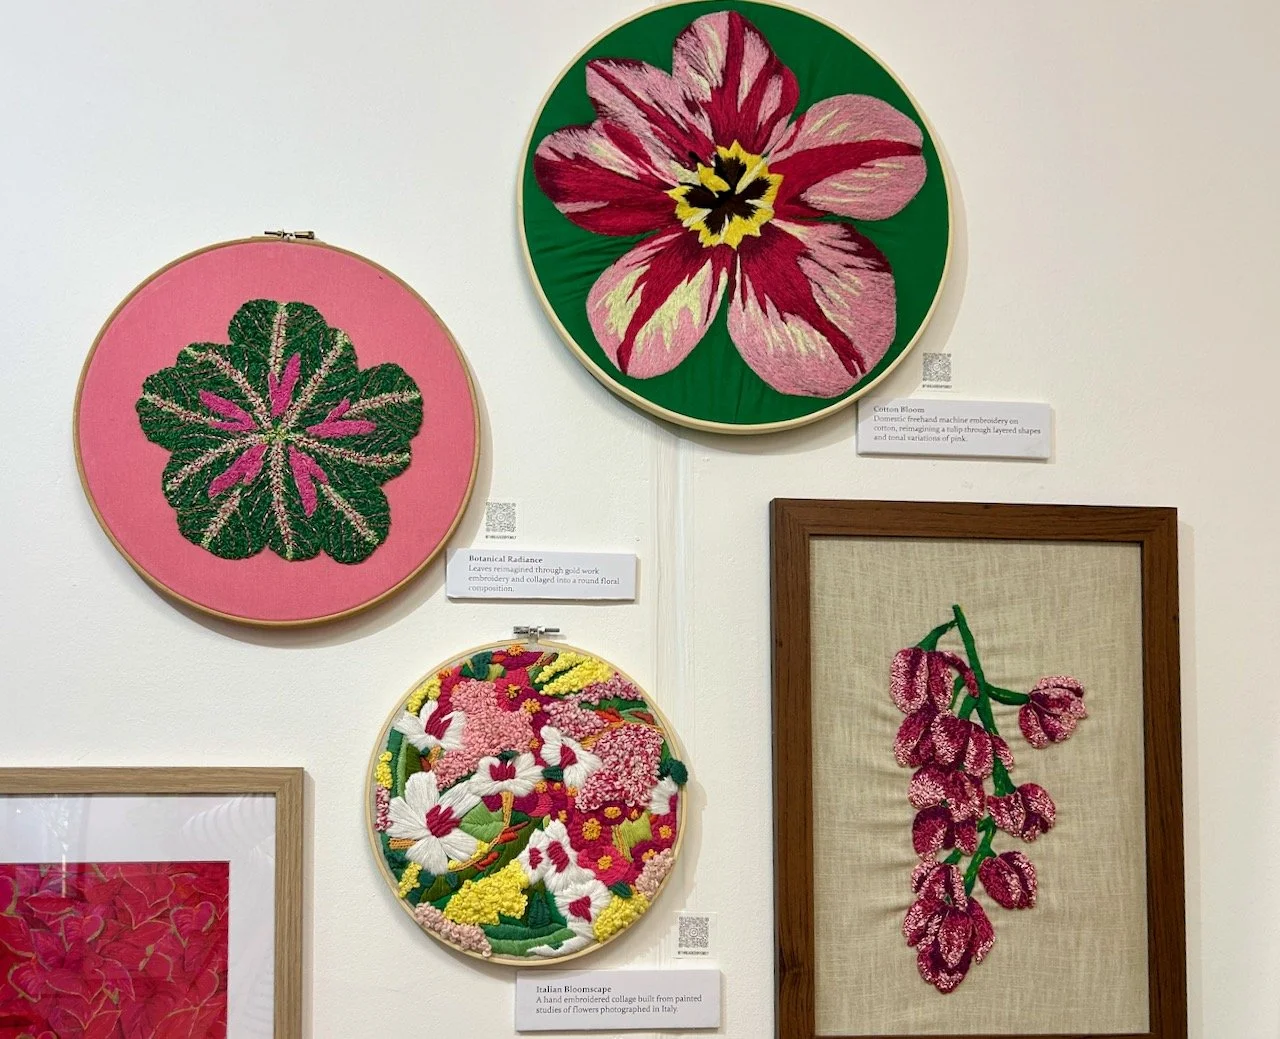
EMILY COX, KNIT & STITCH SHOW HARROGATE 2025
I love the texture and the colour detail in all of the pieces above, though in the image above I think the one with the pink background, which reminds me of a gloriously rich coleus is my favourite.

BLOOM AGAINST WASTE - EMILY COX, KNIT & STITCH SHOW HARROGATE 2025
And then I saw the embroidery on plastic hanging on the back wall - it’s a collage of plastic bags with a freehand machine embroidered tulip stitched on which ‘merges beauty with the traces of consumption’.
And that Waitrose plastic bag coat? Here’s a closer look at it.
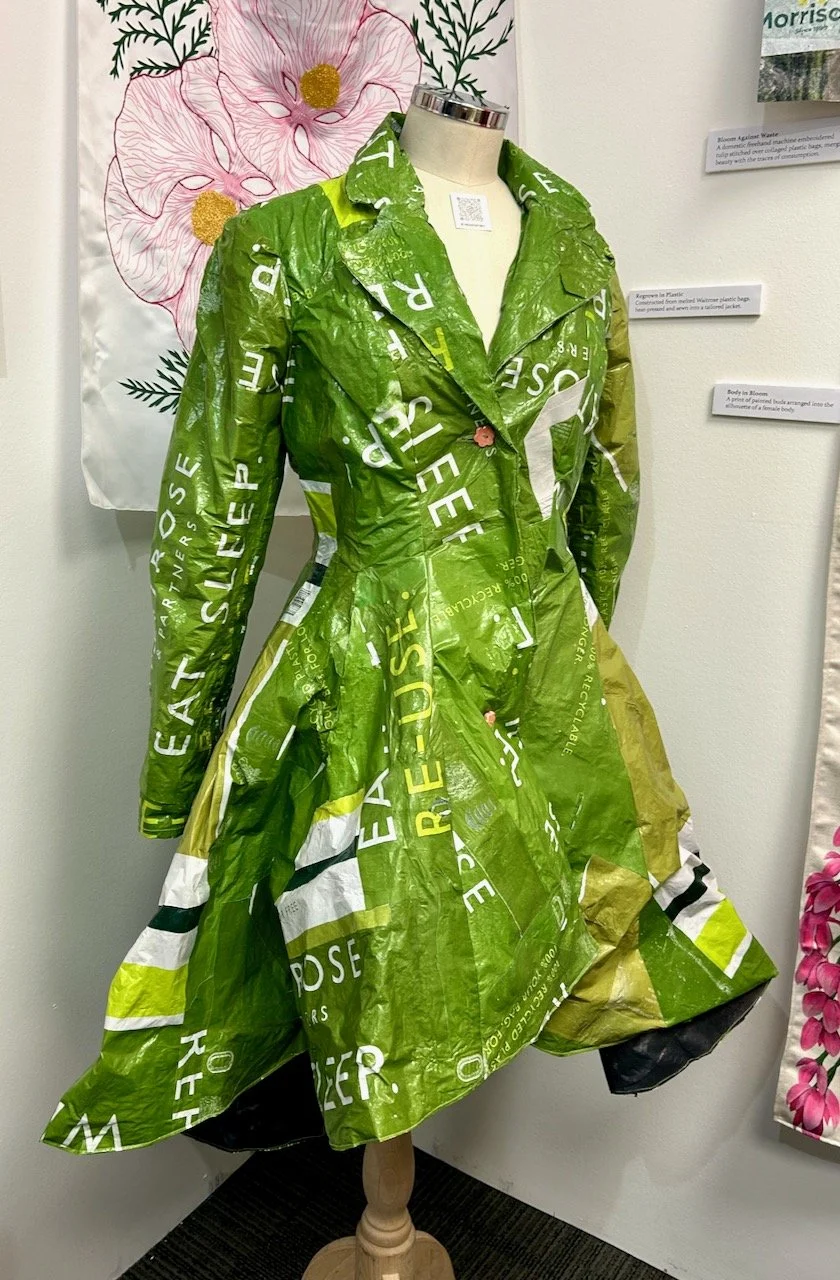
REGROWTH IN PLASTIC - EMILY COX, KNIT & STITCH SHOW HARROGATE 2025
It’s a fantastic way to reuse reusable plastic bags to make a statement, as well as a beautifully tailored item of clothing - yes clothing, as Emily was due to model this on the Knit & Stitch Catwalk during the show, sadly not on the day we were there.
But it’s totally a plastic mac with a difference isn’t it?


