


Before I went away I had what seemed like an ever growing list of things I wanted to do before I went, which at times got revised down so it was shorter, and then again to include just the essentials. But one of the things that stayed on the list was completing my new pouch, and spoiler I did it - I was thankful that there was a sewing group morning the day before we travelled so if I needed to I could devote those three hours to finishing it. I didn’t need the three hours in the end, but I did finish it the day before I went. Phew.
This pouch was in the Day 14 box of my Advent Calendar last year, and after moving a pile of projects in my craft room I rediscovered it, so I thought why not get it done.
The instructions were good, but I hit a small stumbling point early on. The kit was supposed to have four pieces of fabric, but I had only three - I knew this when I opened it in December, and well let’s be honest, I knew I’d have some fabric that I could substitute for the missing piece.
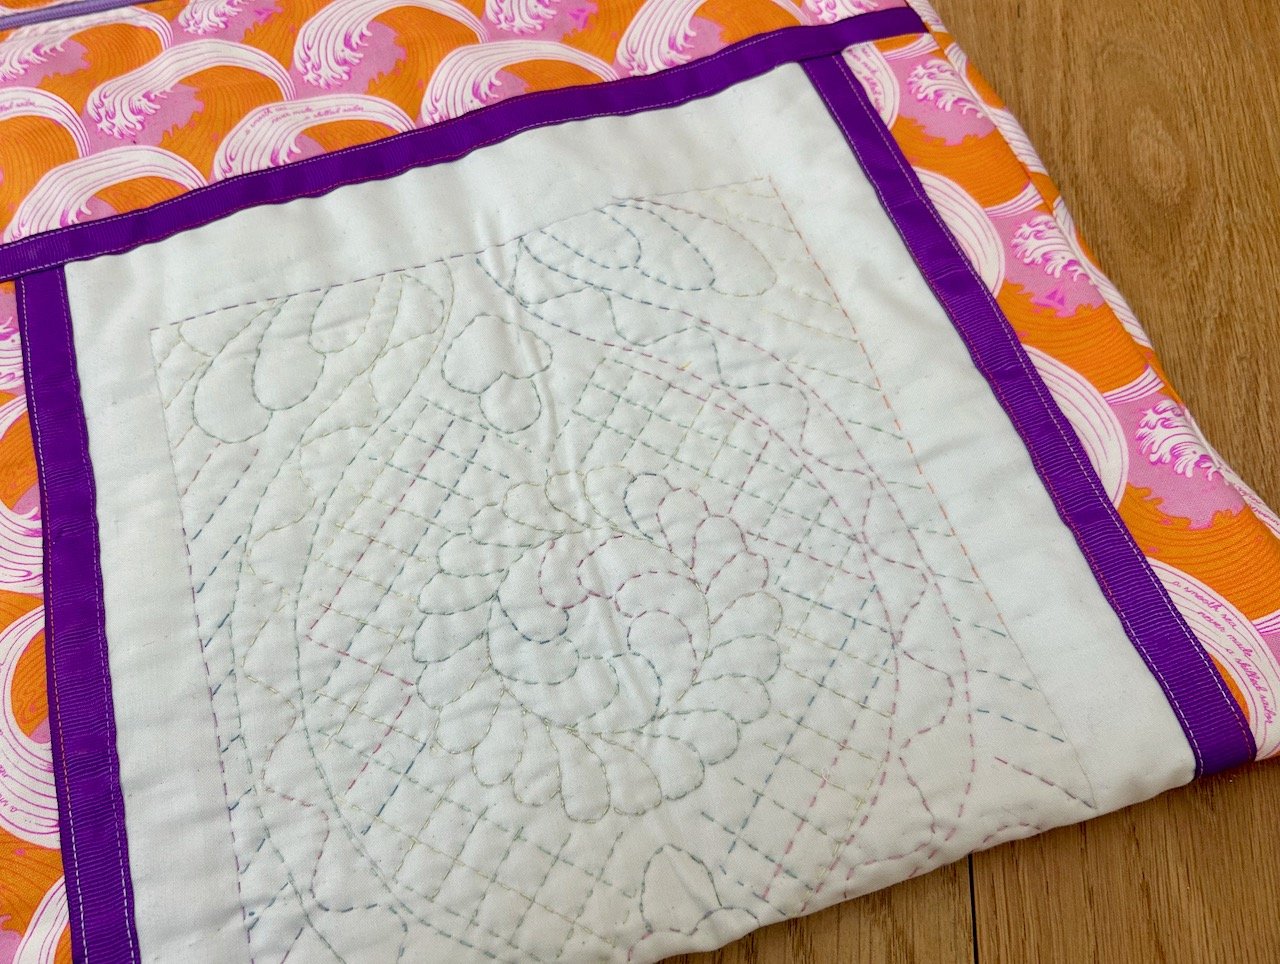
What I didn’t realise until my focus was on making this pouch was that I’d pulled a piece from my stash that worked, and used that earlier in the year to practice some quilting on with one of the variegated cottons I’d bought.
It was perfect, and just what I wanted - although it was about an inch smaller than the other pieces. Problem solved, my pouch would be an inch smaller. And so I followed the instructions (which were clearly written) and all was well until I got to the line which said: ‘quilt as desired’.
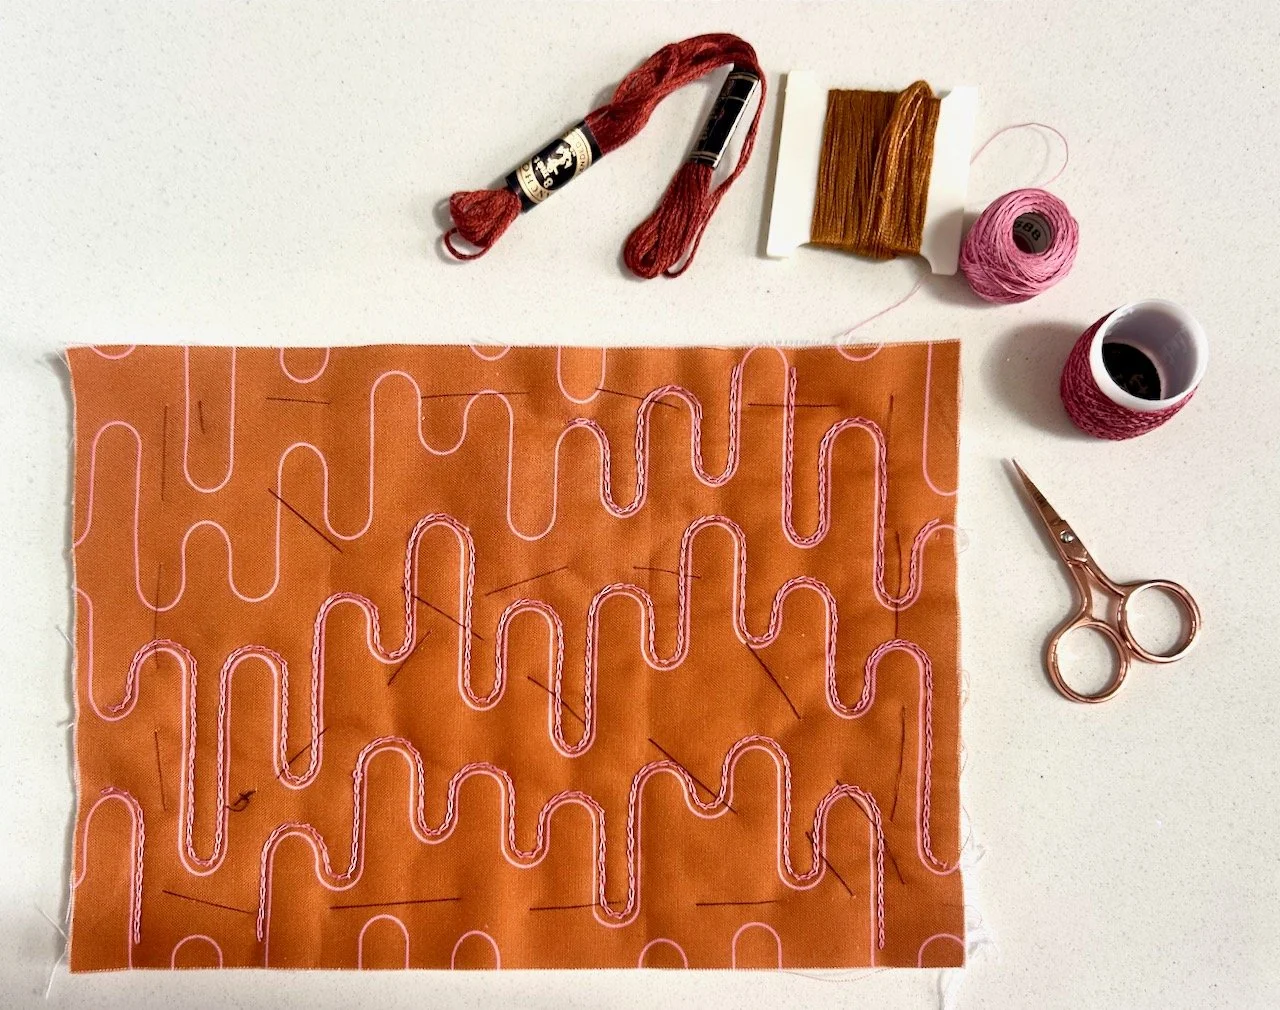
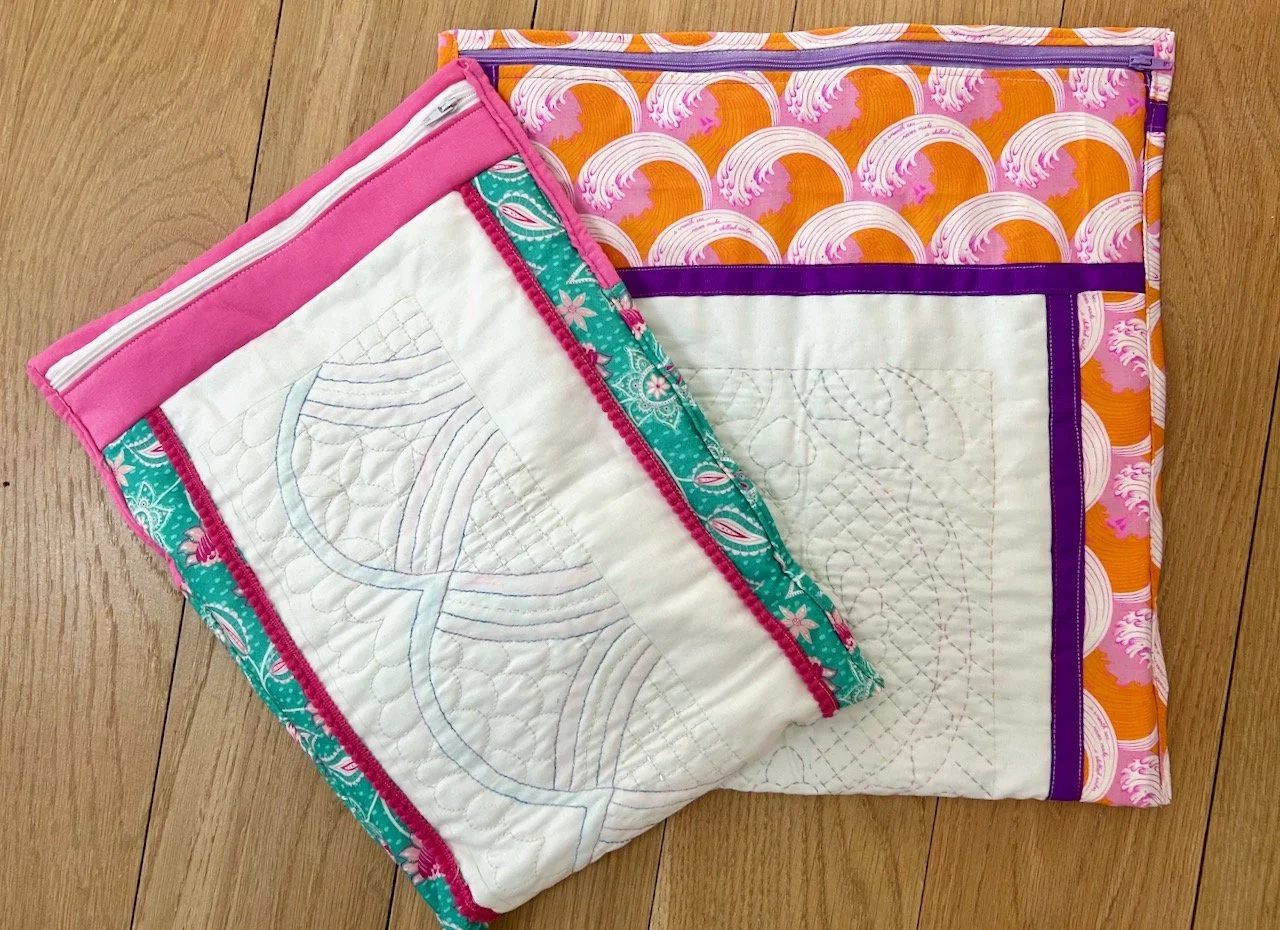
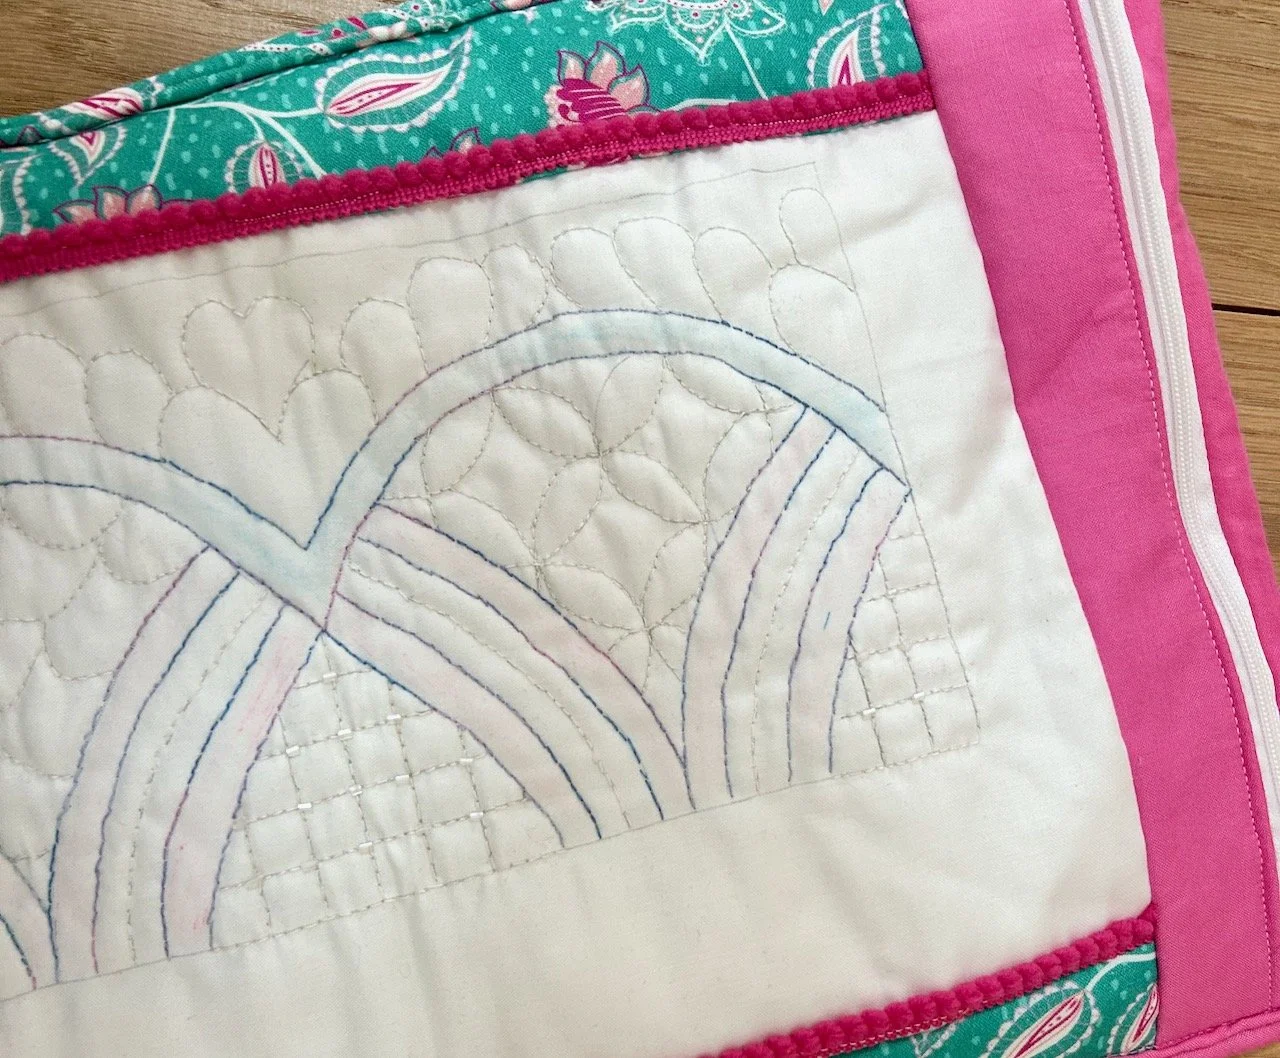
In my head that turned out to be hand quilt this with tiny chain stitches in three different coloured cottons, and follow the wavy design. I shared this picture in my This May post, so you’ll be pleased to know that progress happened, and the pouch actually got made!
And yes, I then did decide to hand embellish the substitute side as well, clearly I’m a glutton for punishment.
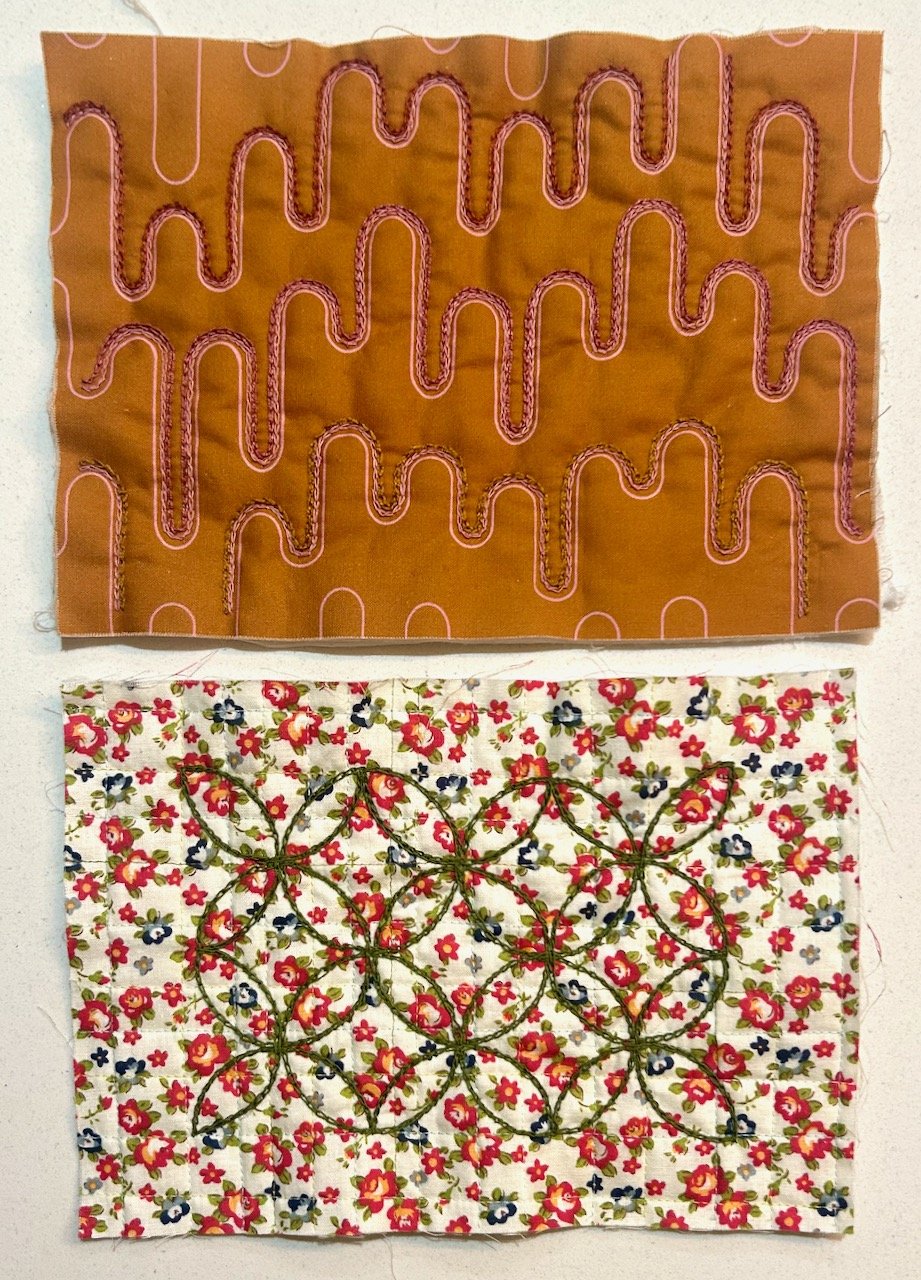
But they do look good!
The kit also came with a navy zip, but as you can see I opted for an orange one from my stash instead, I think it helps tie both sides together - and it’s far more interesting than navy!
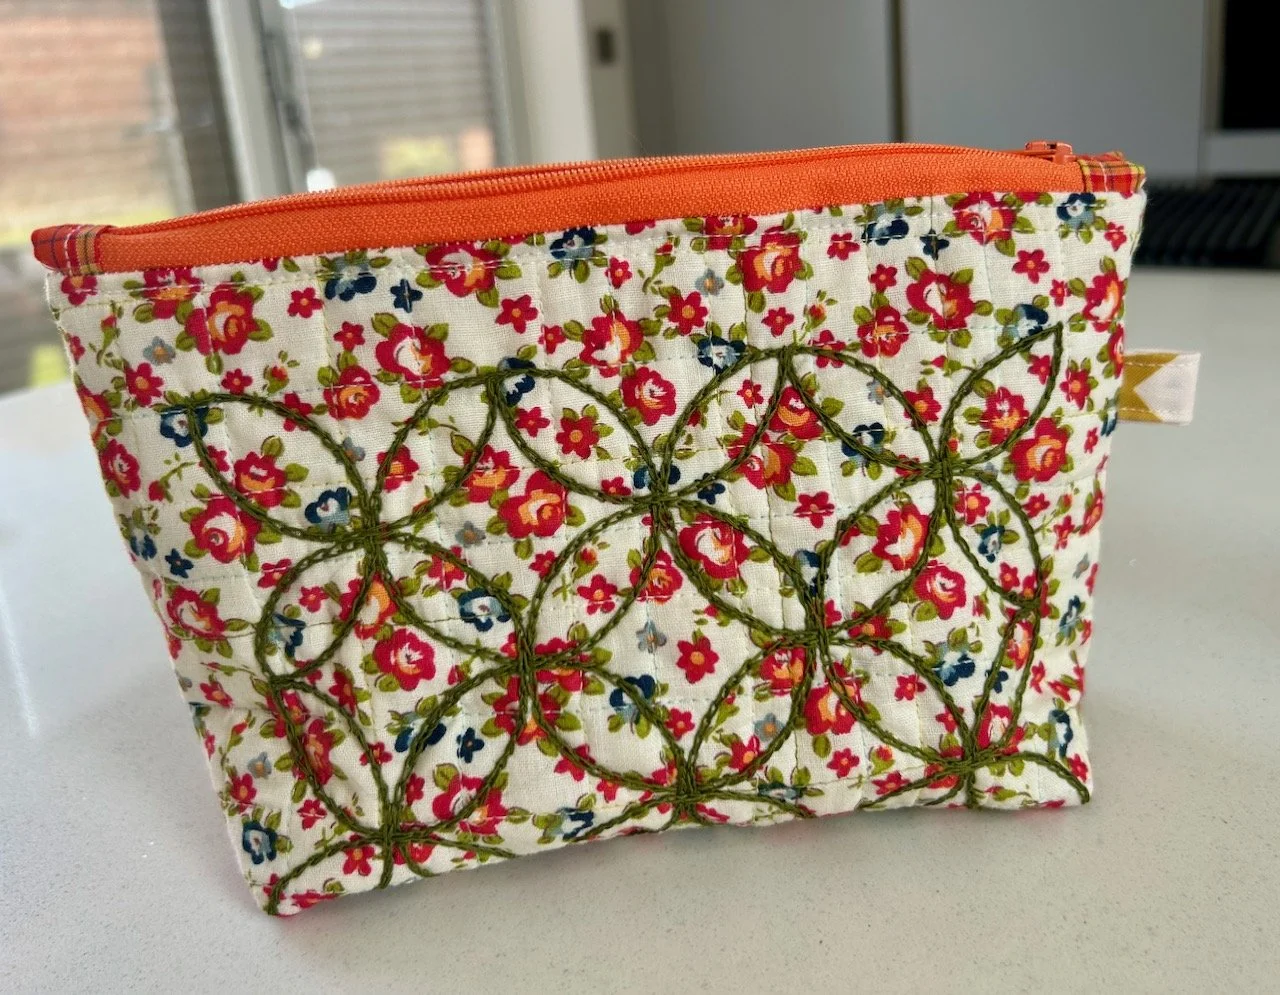
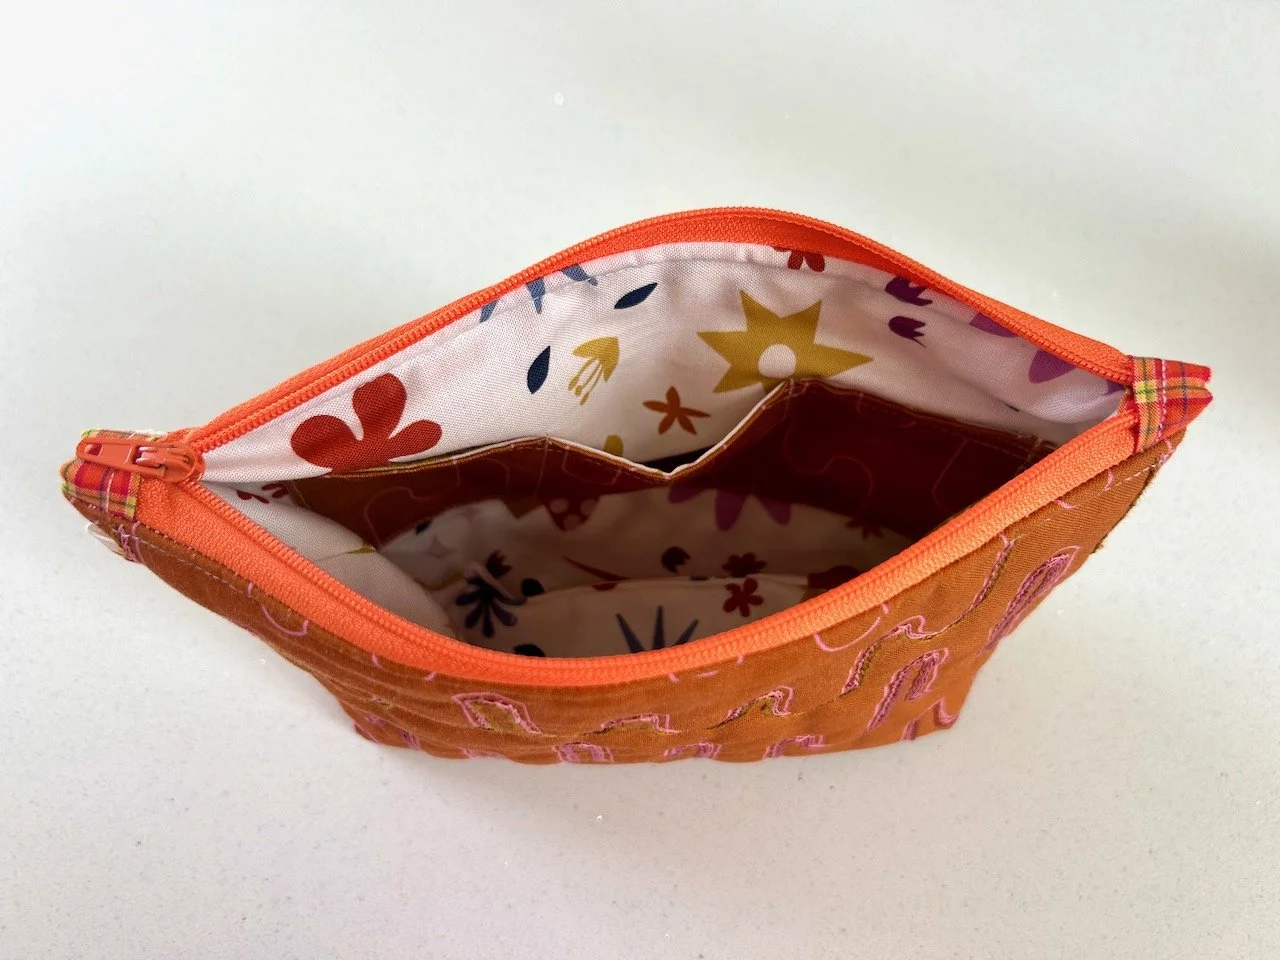
It’s the first time I’ve added a tag on the side, and that worked well - the fabric is fussy cut from remnants from the lining fabric. I even added a custom sized internal pocket with three individual spaces to hold smaller items, which were just the size I needed them to be.
I’m really pleased with how this new-shape-to-me-pouch worked out, and I can see that I’ll be making some more. I love the finish the zip tabs give the pouch, and the boxy bottom means it stands up too.
So that’s another pouch to my repertoire, and a pretty and practical one at that.