A couple of weekends ago I didn’t make it along to my patchwork group as planned - it’s a long story, but water in your heat pump isn’t a good thing as we discovered, and so our morning was a little disrupted trying to sort that out. It seems it was a morning for disruptions as there was also some confusion getting into the village hall for the patchwork group too, they did get in but I decided to stay home instead of arriving a fair bit later, and so I had my own ‘sew day’ - which was fabulous.
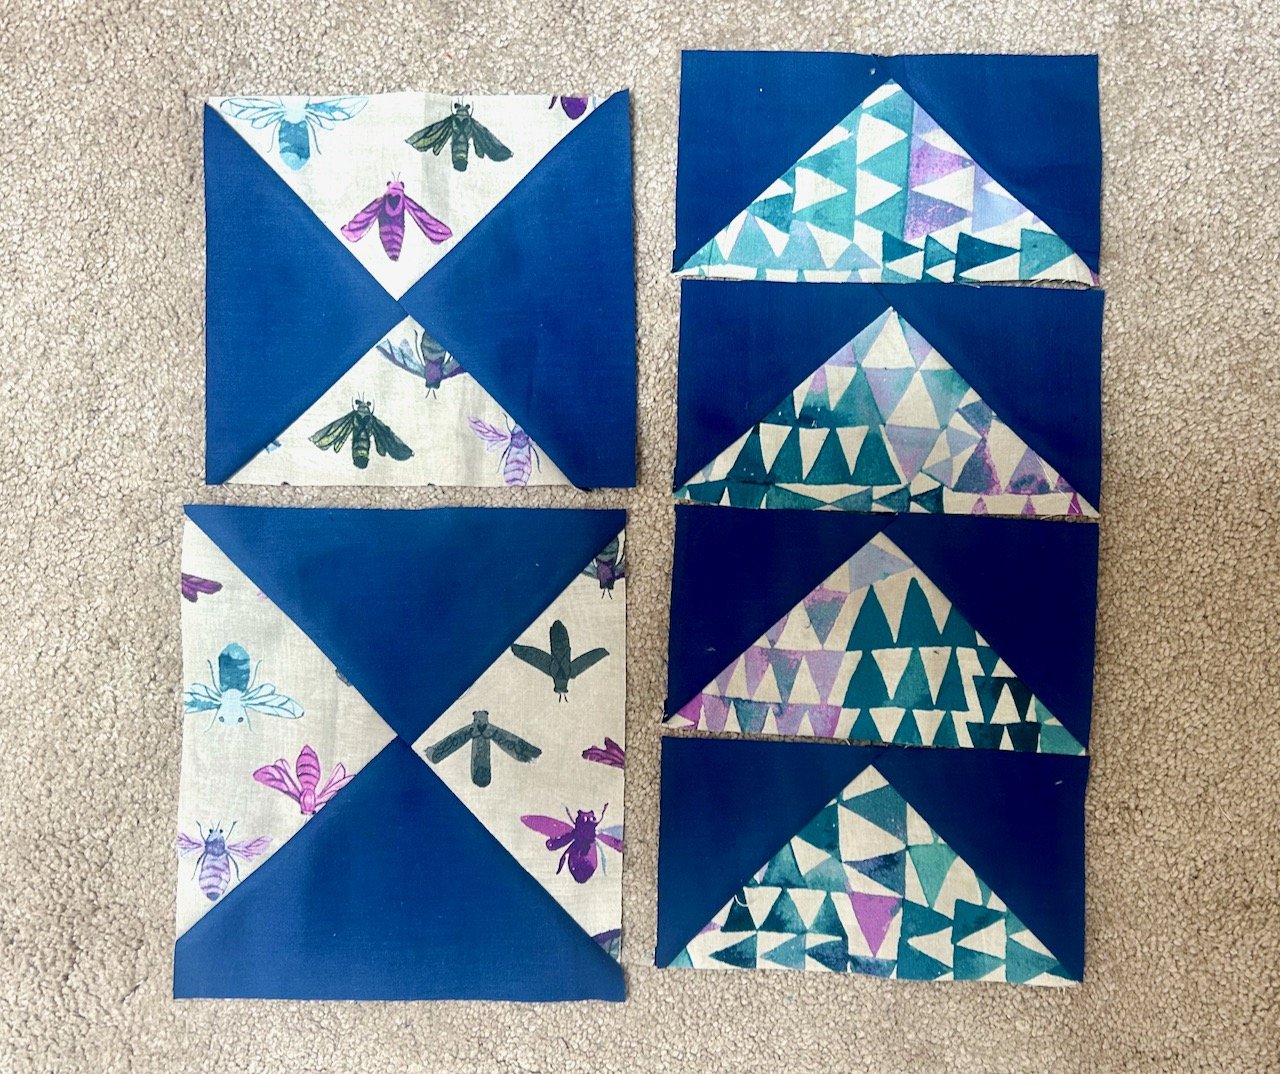
I’d already decided to test out my Flying Geese rulers to see if this method worked better for me, and I stuck with that. I’d made some Flying Geese way back for my first charity quilt, and while on the whole that method worked, it wasn’t foolproof and some of my geese had an extra piece of fabric at their point. As I’m planning to make a larger quilt full of these blocks I wanted to perfect my approach.
A first attempt, then progress
I’d pulled some fabrics from my stash which included the leftover fabric from the first vinyl fronted pouches I made and some plains: the blue from one of MOH’s old work shirts (and my Stars and Spots charity quilt) and the grey from an old duvet cover which I’ve used in multiple charity quilts already.
My first attempt wasn’t so good!
I misinterpreted the instructions, and so I went again. This time with a lot more success, thankfully or else it would have been a long and frustrating day!
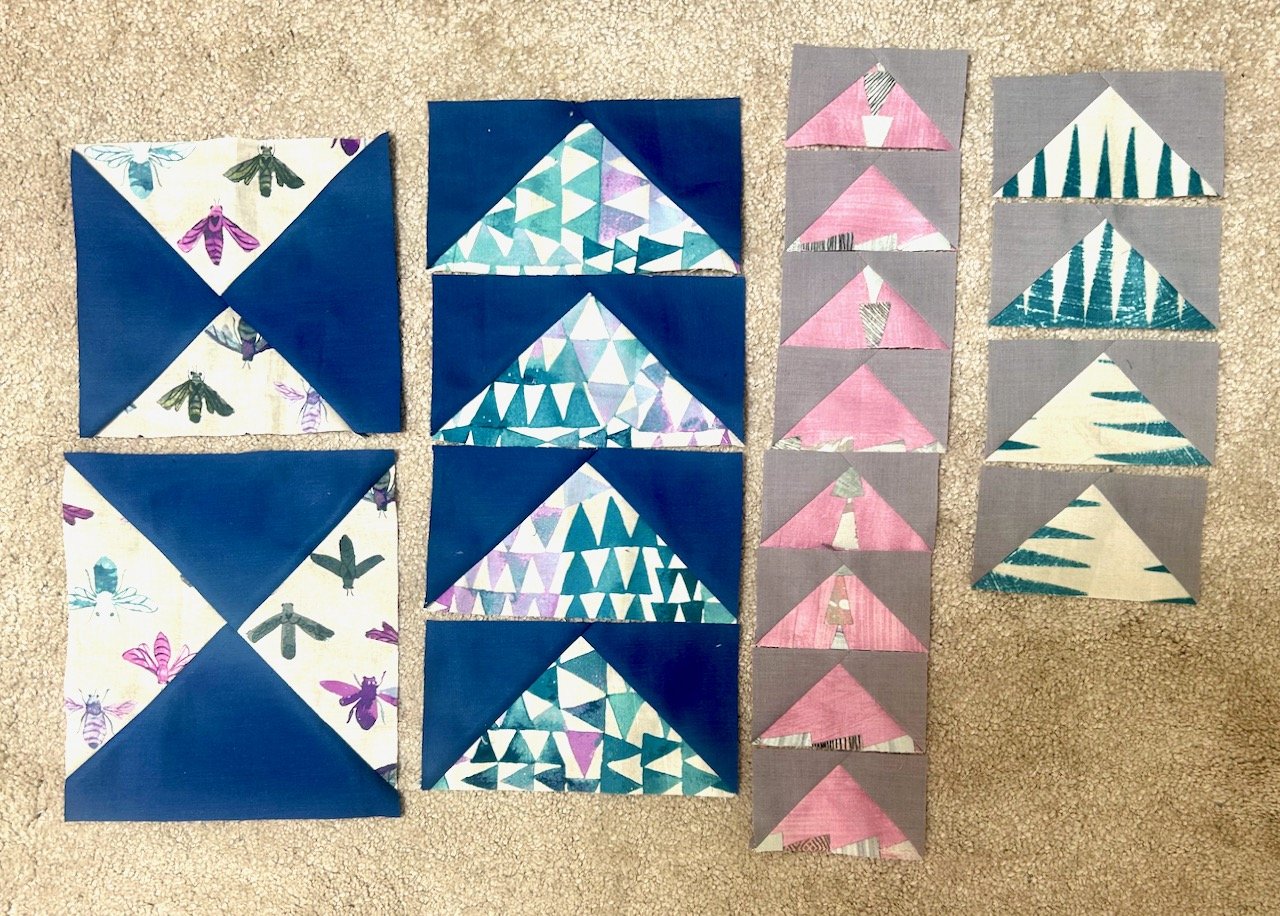
And then I couldn’t stop. Geese of almost every size appeared alongside those first attempts, which I think have a certain charm, and which I was also keen to keep, and use somehow. Having accomplished my plan of successfully using my Flying Geese rulers, and sooner than I expected I needed a new plan before I became overrun with geese.
A new plan
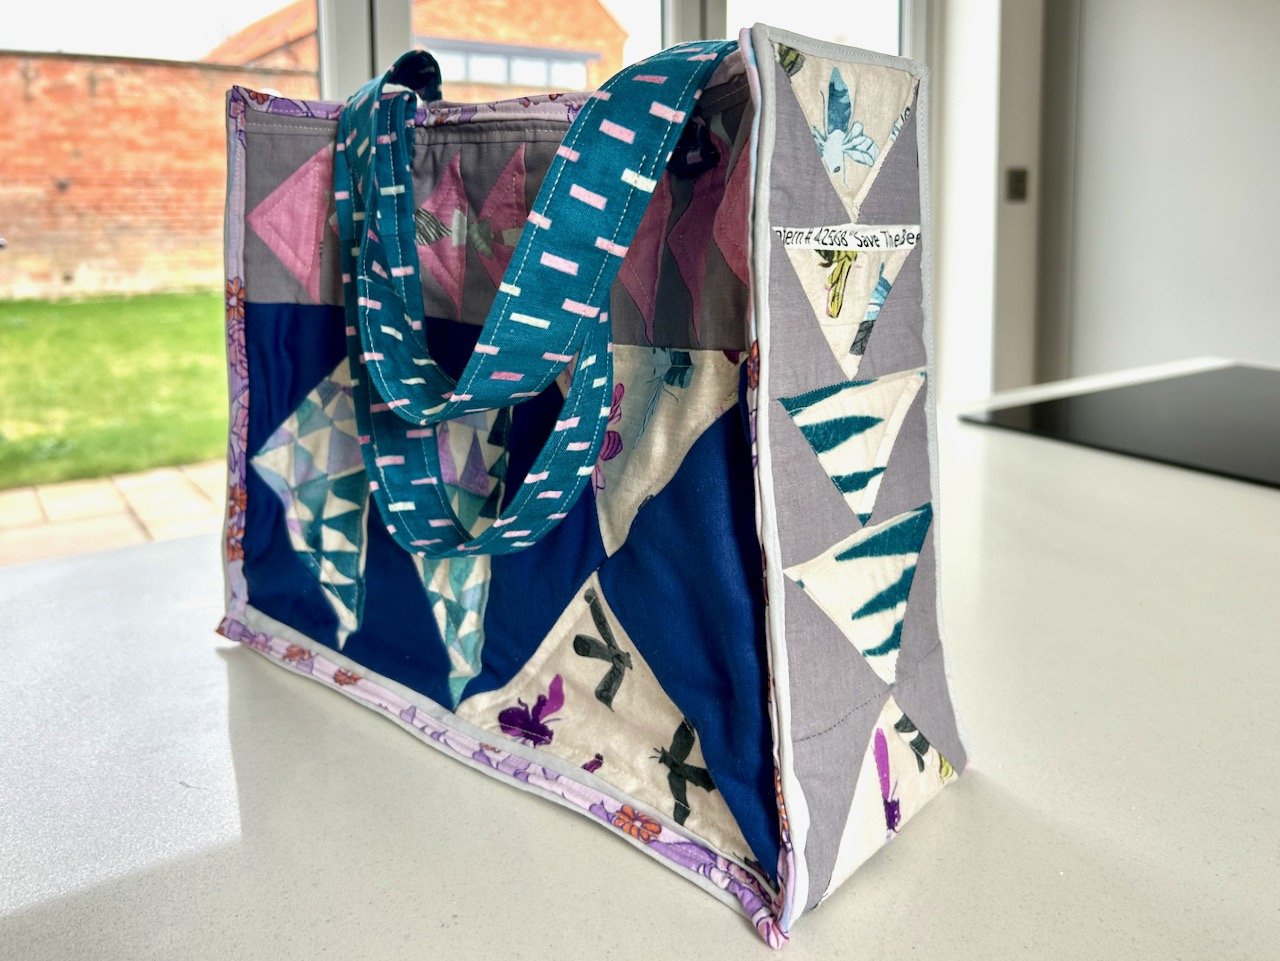
I could have started on my long awaited Teal Flying Geese quilt, but I was keen to avoid abandoning my test geese. With a flash of inspiration I boldly decided to make a small tote bag, like you do.
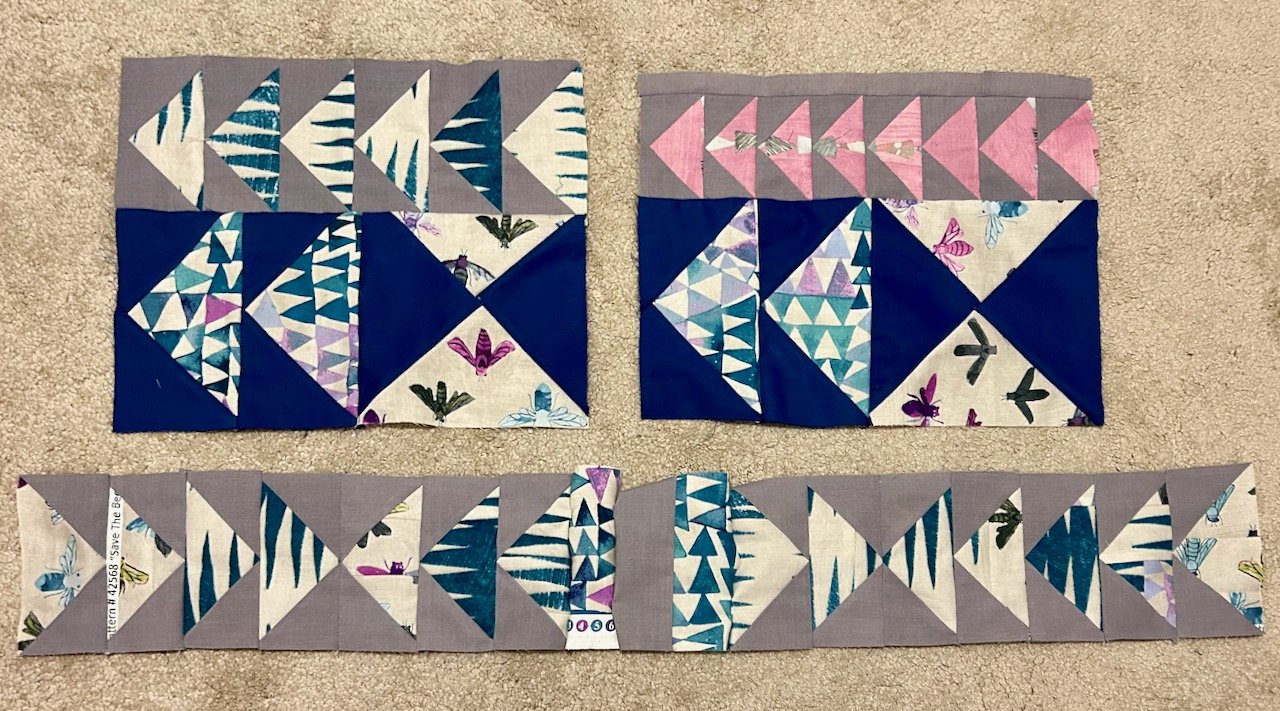
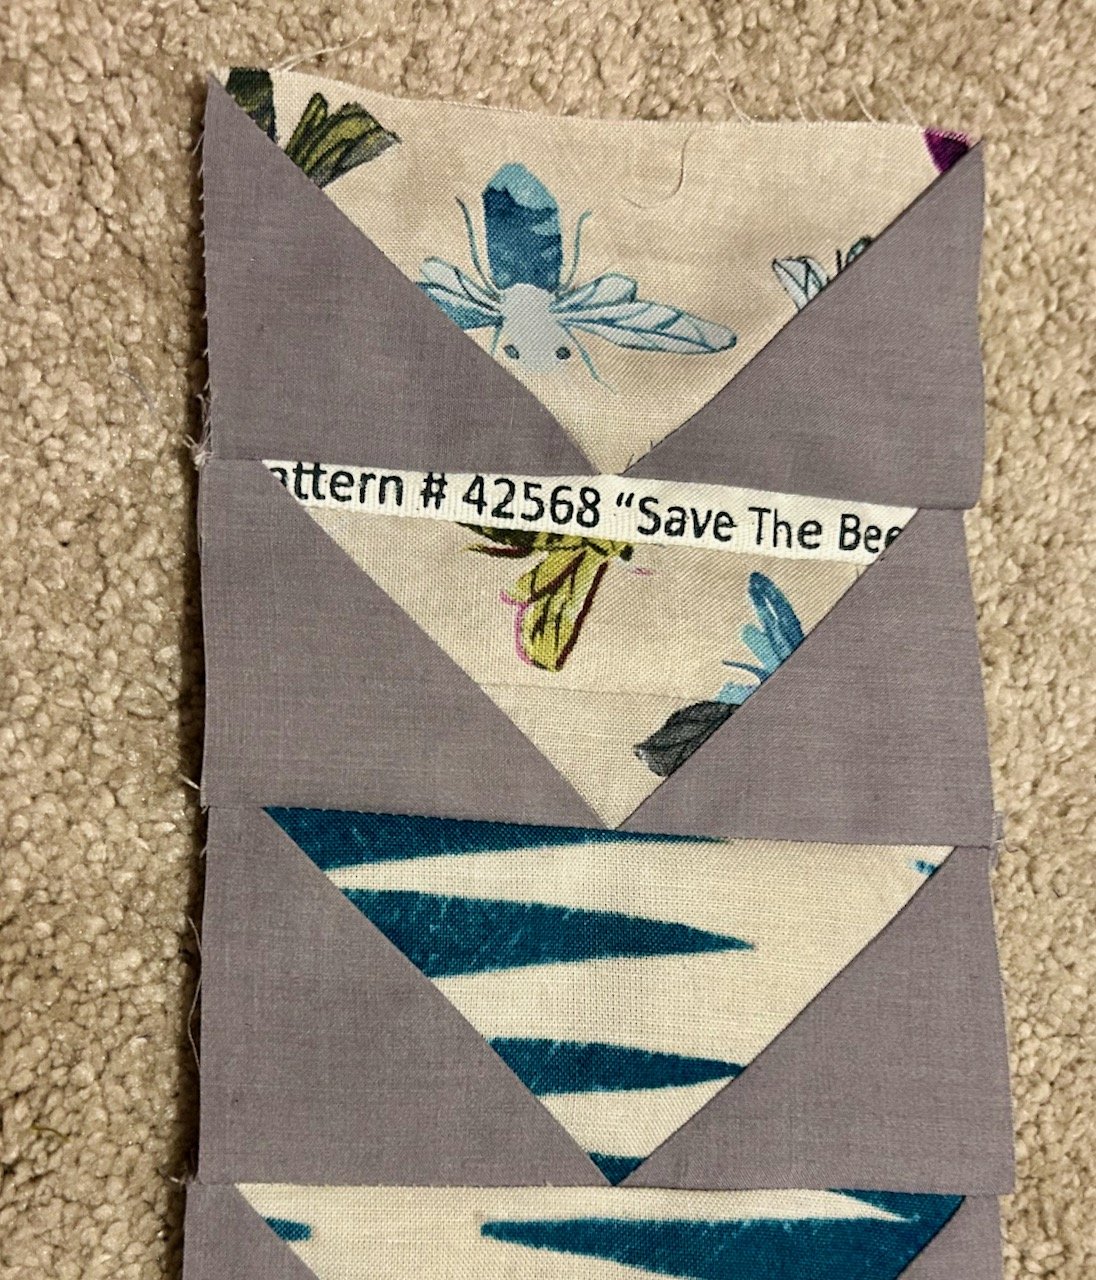
With the layouts decided, and an extra strip here and there and a few more geese summonsed to the fray, I had a sort-of plan and some potential bag shaped pieces. At this point my sewing got even more experimental when I decided to sew strips of the fabric together to make patchwork effect geese (look at the two end geese on the long piece above to see how they worked).
I think my favourite one is where I’ve incorporated the selvedge with the fabric’s name, but also an important message re saving bees.

Those wonky geese still make me smile!
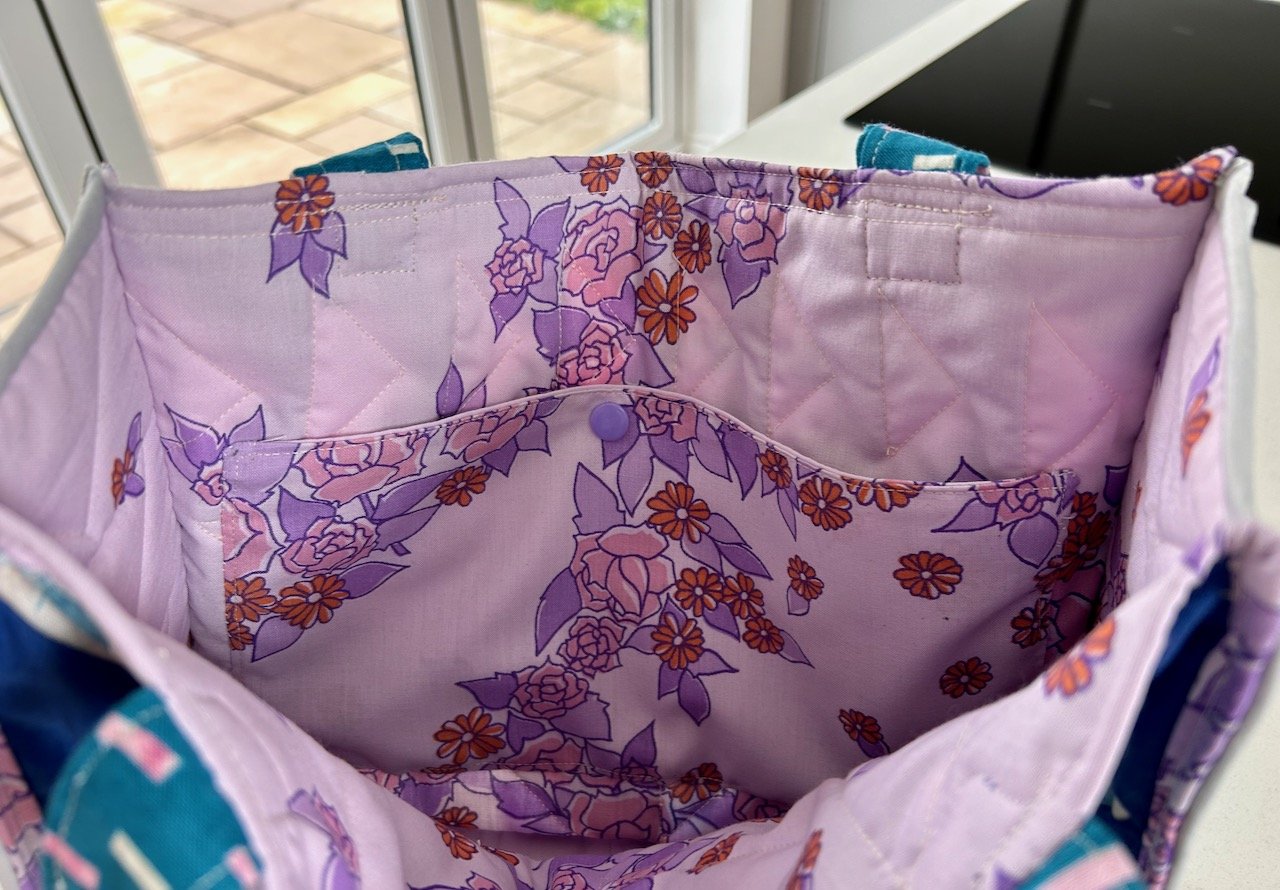
And so does the very 1970s lilac material I chose for the bag’s lining. I’m sure we had duvet covers that were similar back then, most likely yellow, orange, blue and pink variants, but not lilac. This material I picked up at a stash sale became it reminded me of those long ago duvet covers, and it’s perfect for this project too.
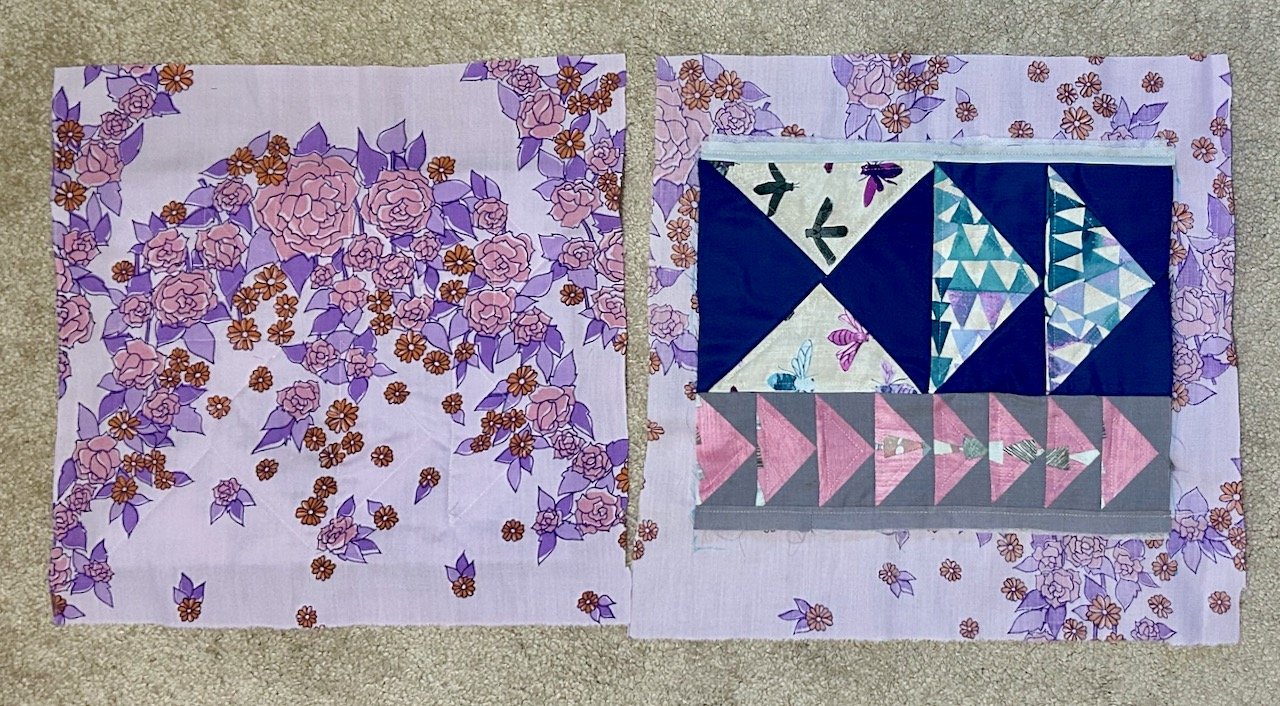
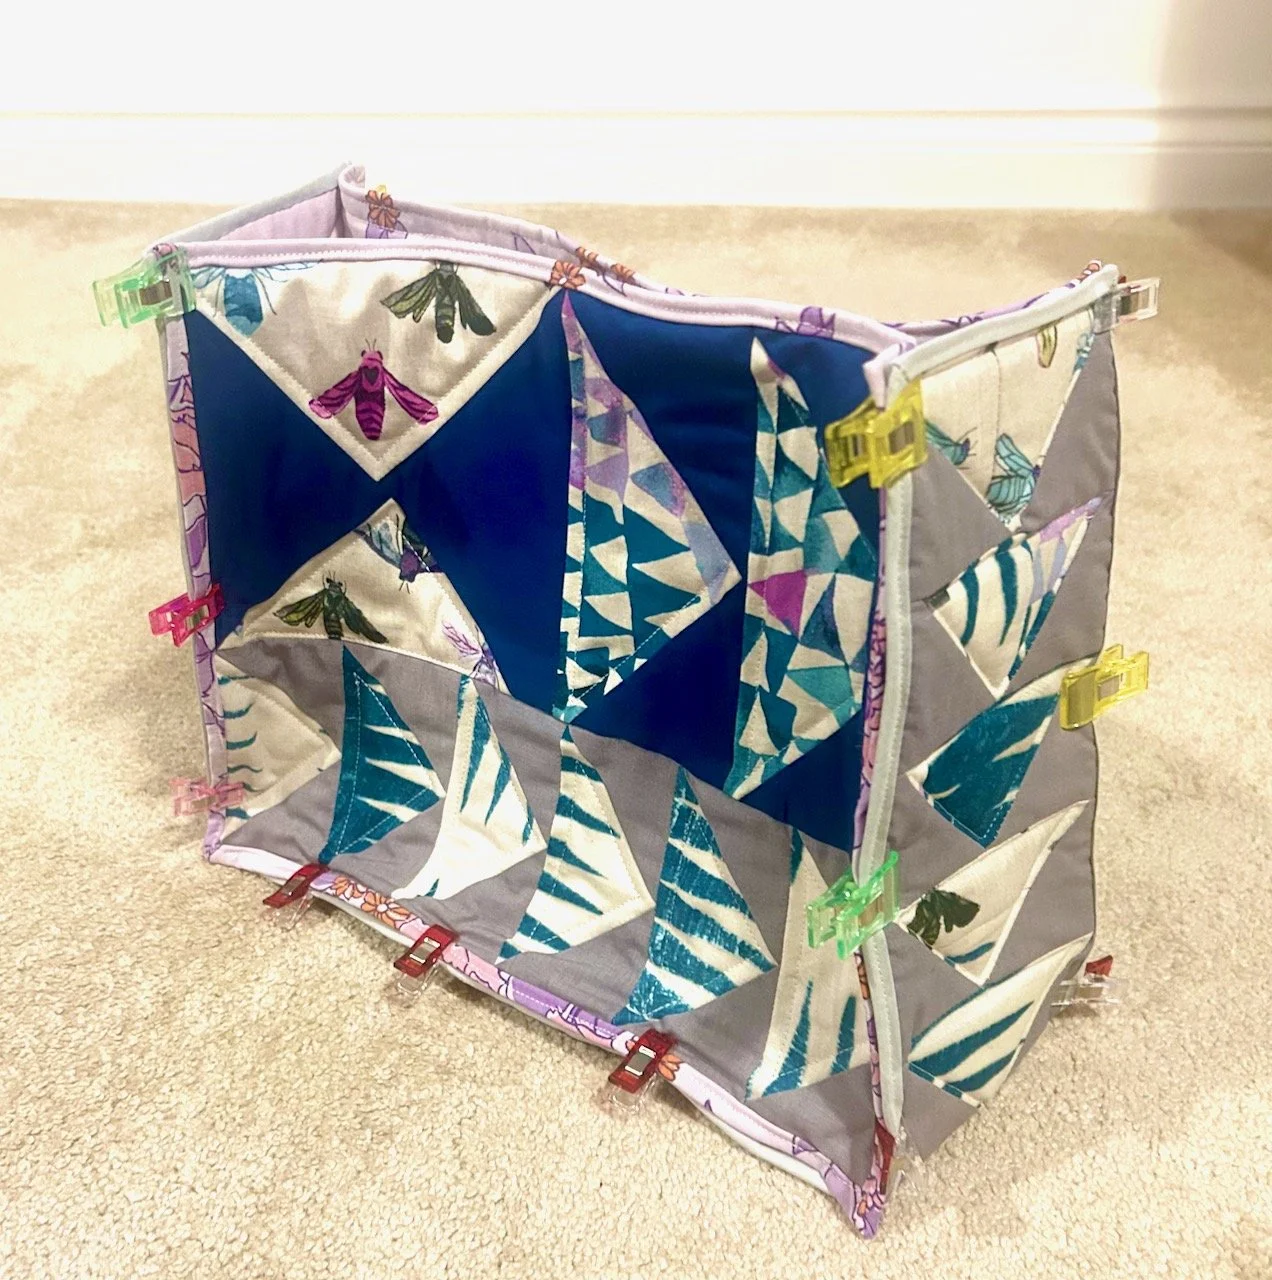
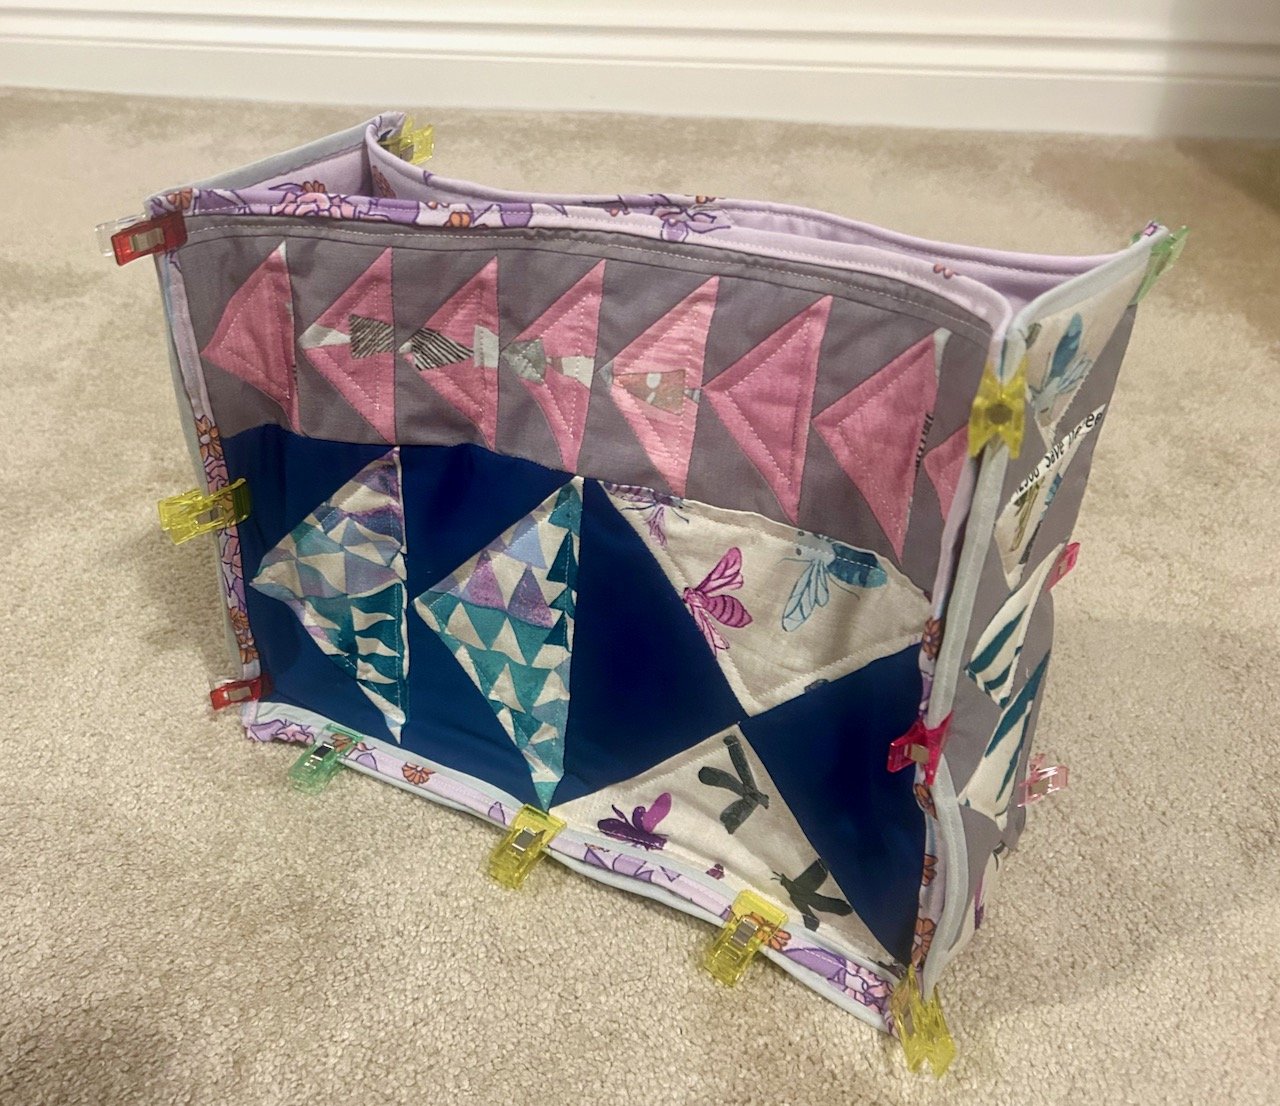
At this point I was just hoping that my very rough plan for assembling the bag would work. I’d used ‘soft and stable’ bag lining for the longest piece - I bought it for another project which I haven’t got to yet, but thankfully have enough for this as well - and leftover quilt wadding for the bag’s sides.
Using plenty of clips I proved my construction theory - the bag stands on its own thanks to the soft and stable, and the insert piece was the right size. I really do love it when a plan, and an impromptu one at that, comes together!
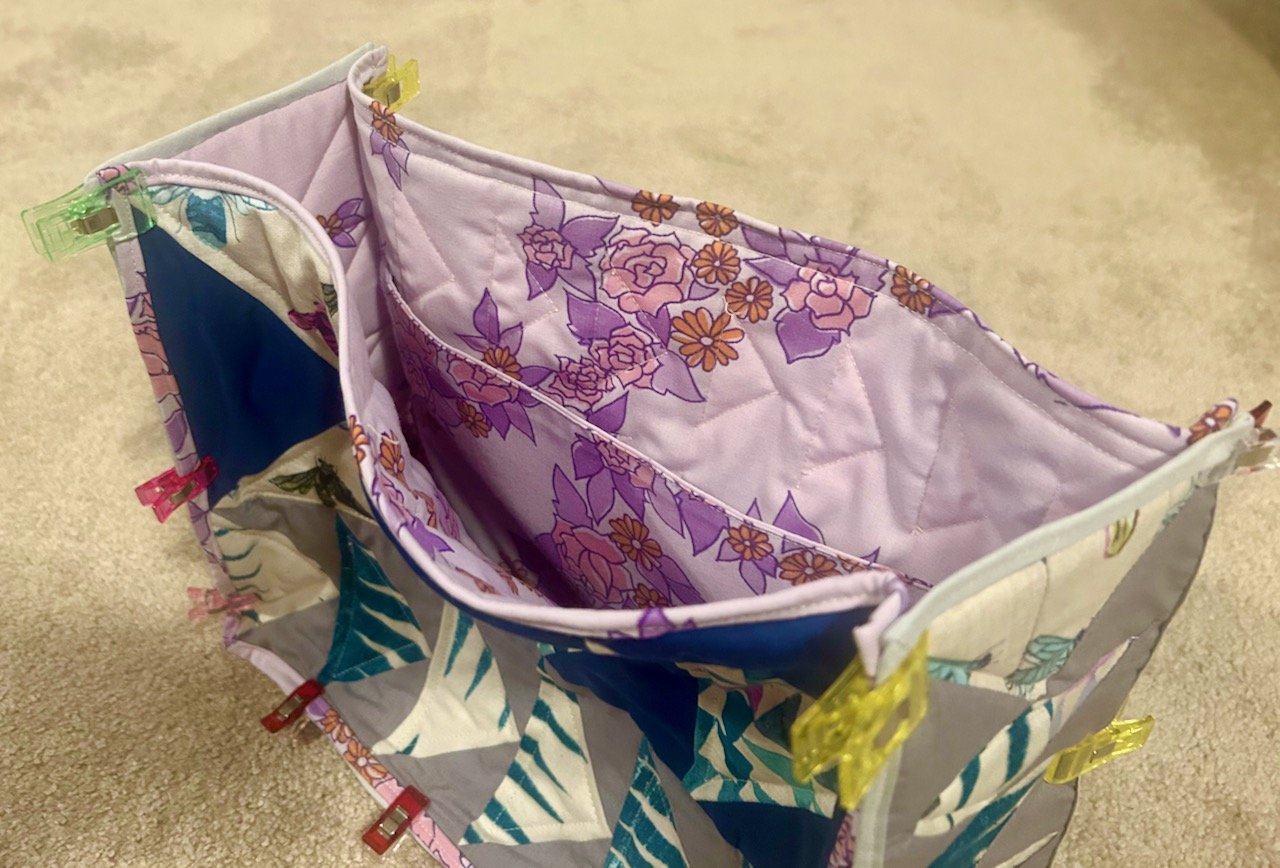
I’d even thought to add an internal pocket, and impressed myself by not actually quilting it in place. Instead adding it after the quilting, hand sewing it in place. It’s a big pocket though and to avoid it gaping I added a popper, lilac on the inside and blue on the outside.
Two needles down
Having tested out quilting and sewing together scraps of the bag lining, I was ready to actually construct the bag. First piece joined successfully, the second piece less so.
Clunk. Broken needle.
After much searching I cleared the broken needle, including some that remained in the bag’s seams. I was ready to go again, with my new needle.
Clunk. Broken needle. Again.
This time I was back up and running much quicker, but decided to skip the bit that was giving me trouble, which was thankfully right at the bottom of the bag (I hand stitched the inch I skipped later), and then the second piece was joined and I had the body of my bag.
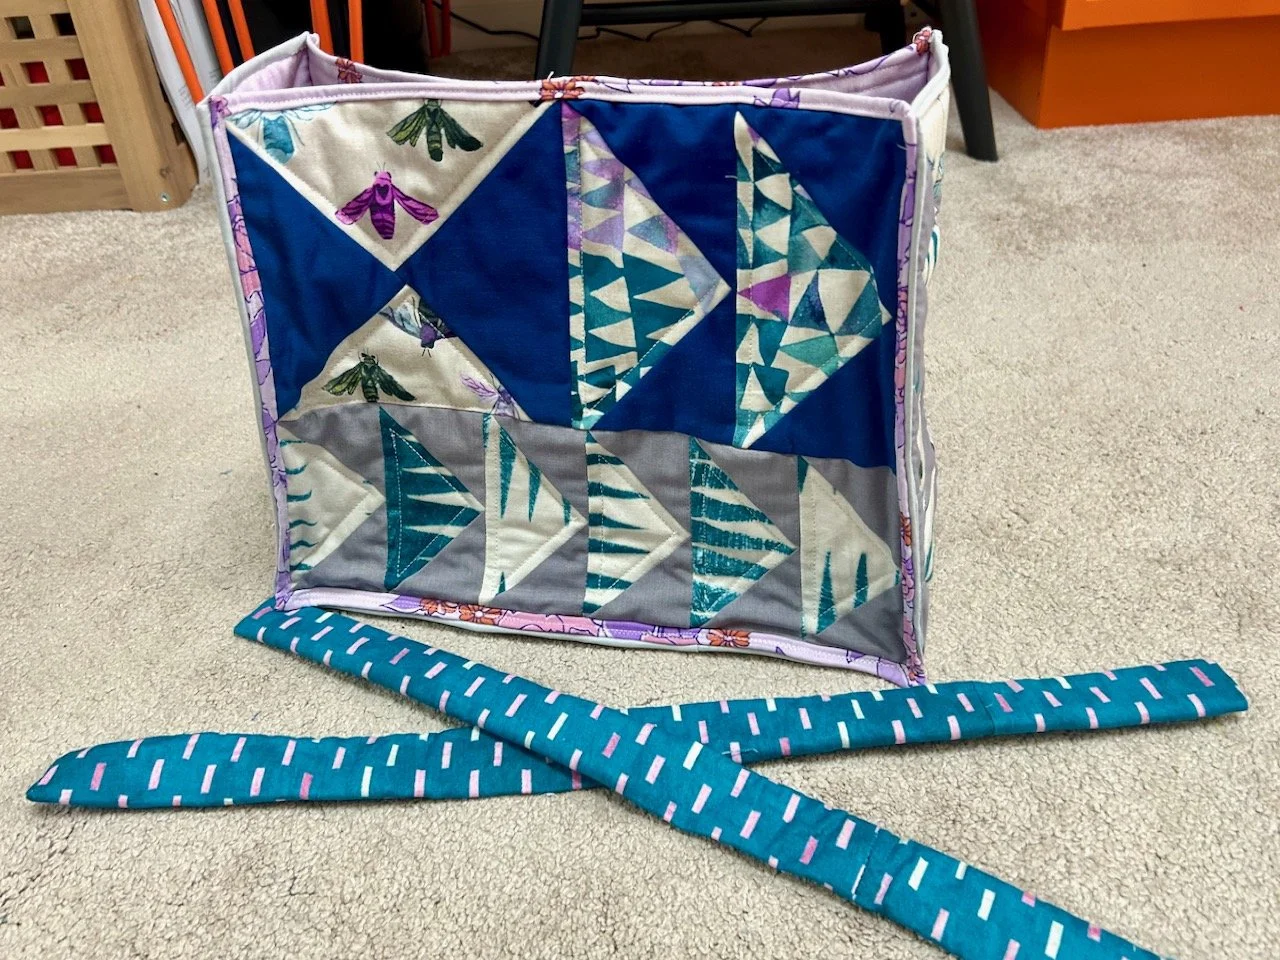
New needles were ordered, and two straps were made. Instinctively I used interfacing on the bag’s straps before sewing them into tubes and turning them through, and I caught myself smiling when I realised how far I’d come since my bag making course. Back then I wouldn’t have thought to use interfacing, let alone know which to use or be able to identify fusible interfacing from the sew in type.
(FYI fusible interfacing has small bobbles or glue dots on one side, make sure that’s on your fabric, not your iron!)
Straps made, and thankfully both still the same length, they were attached to the body, and my bag was made. It took me longer than a day to complete, even allowing for dithering.
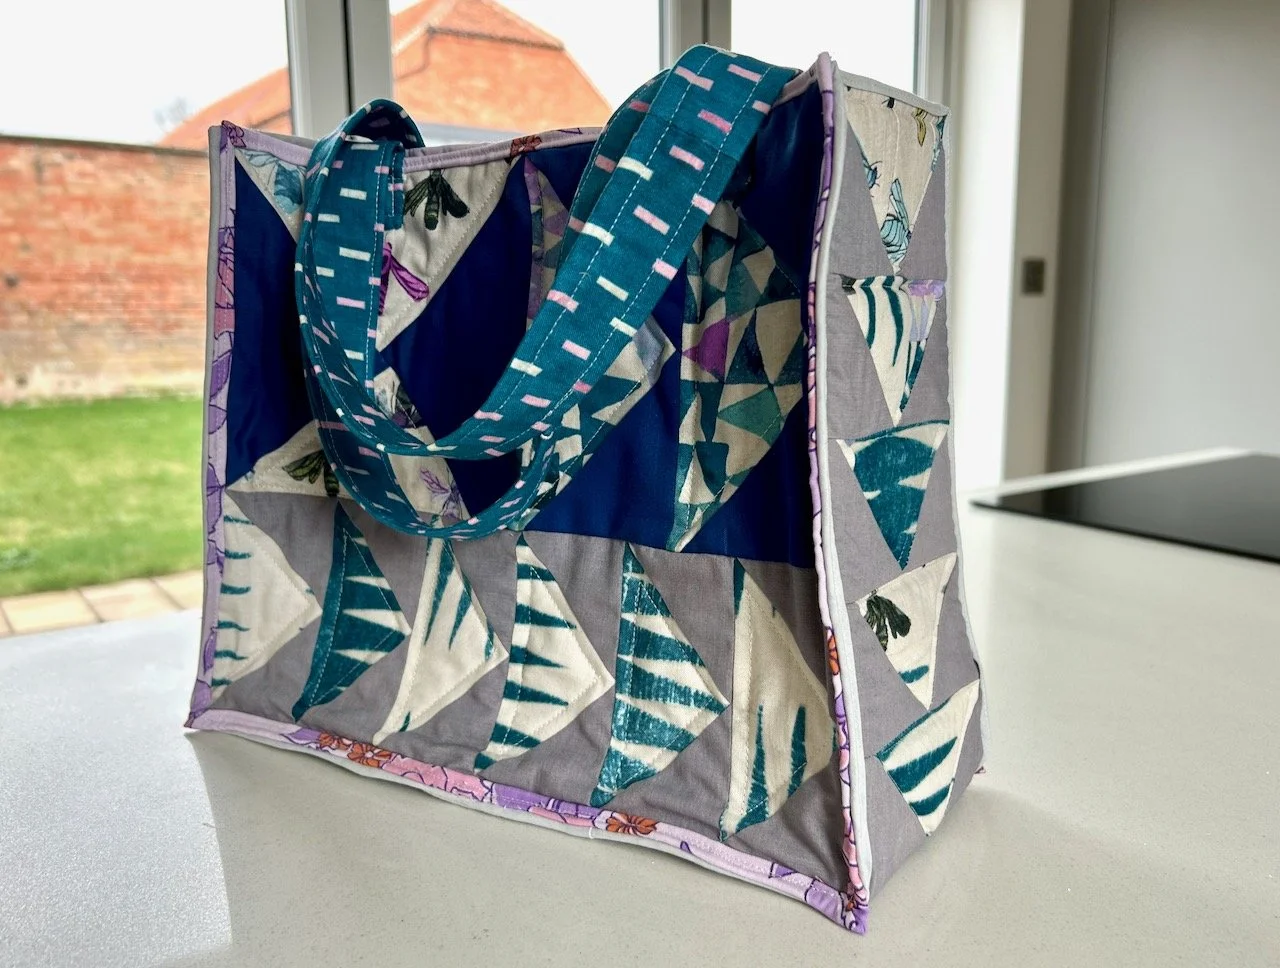
I’m really pleased with how it’s turned out, and while it’s not huge it’s perfect for what I wanted. And that ‘save the bees’ selvedge, well that worked out pretty well too.
With those ‘Flying Geese’ rulers mastered, there’s a very strong chance that my Teal Flying Geese quilt could be up next!