Repurposing old clothes as pouches

You know I like a pouch or two, and you’ve probably worked out that I don’t really like to throw things away if they still have another use in them. Today I’m sharing a couple of recent makes which combines both of those, and I’m very happy with the outcomes, and hopefully you’ll be persuaded to try projects with clothes you have loved too.

T-shirt to project bag

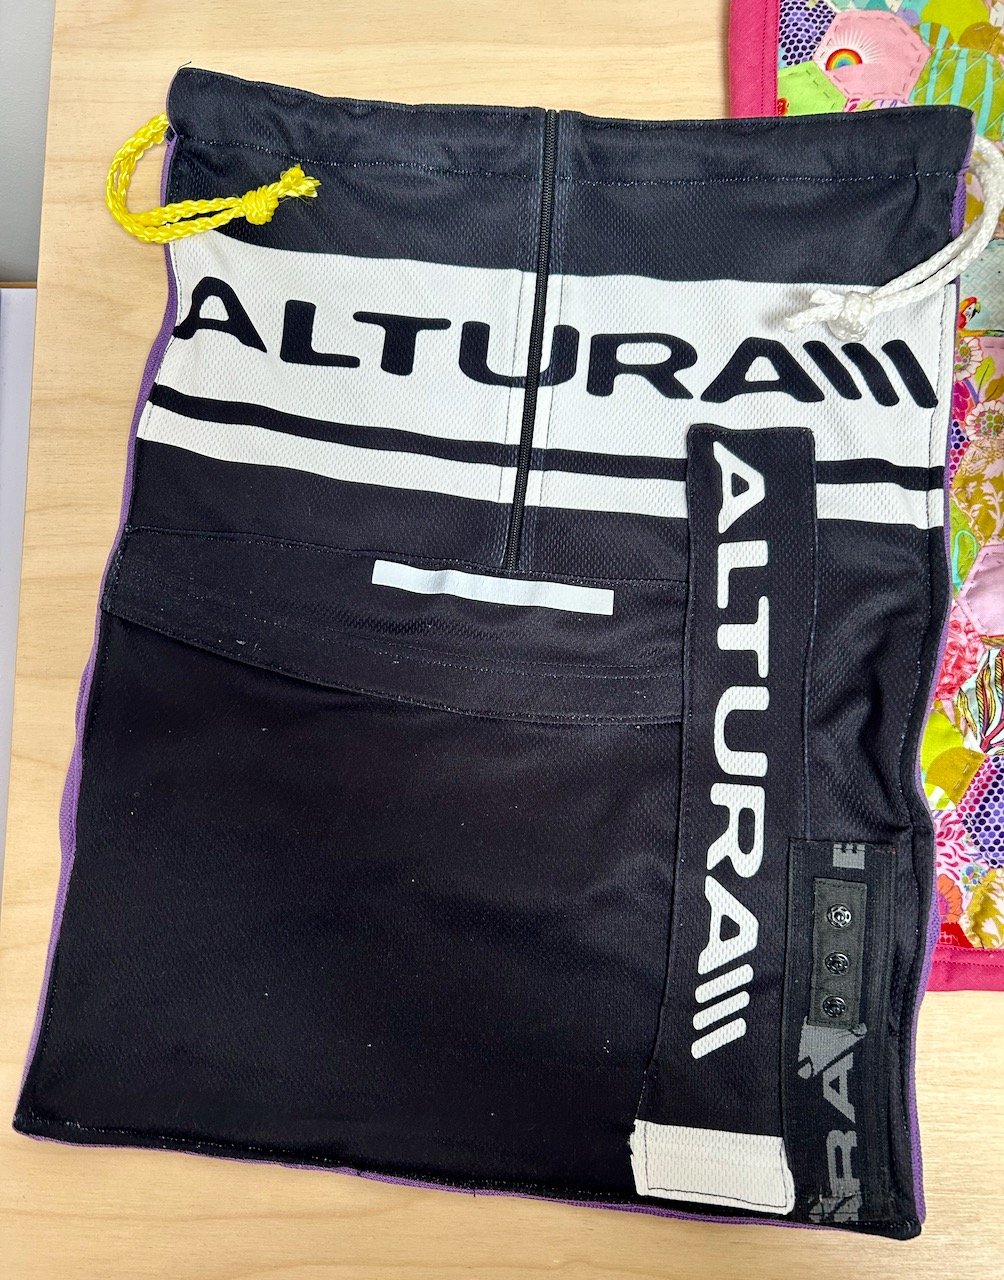
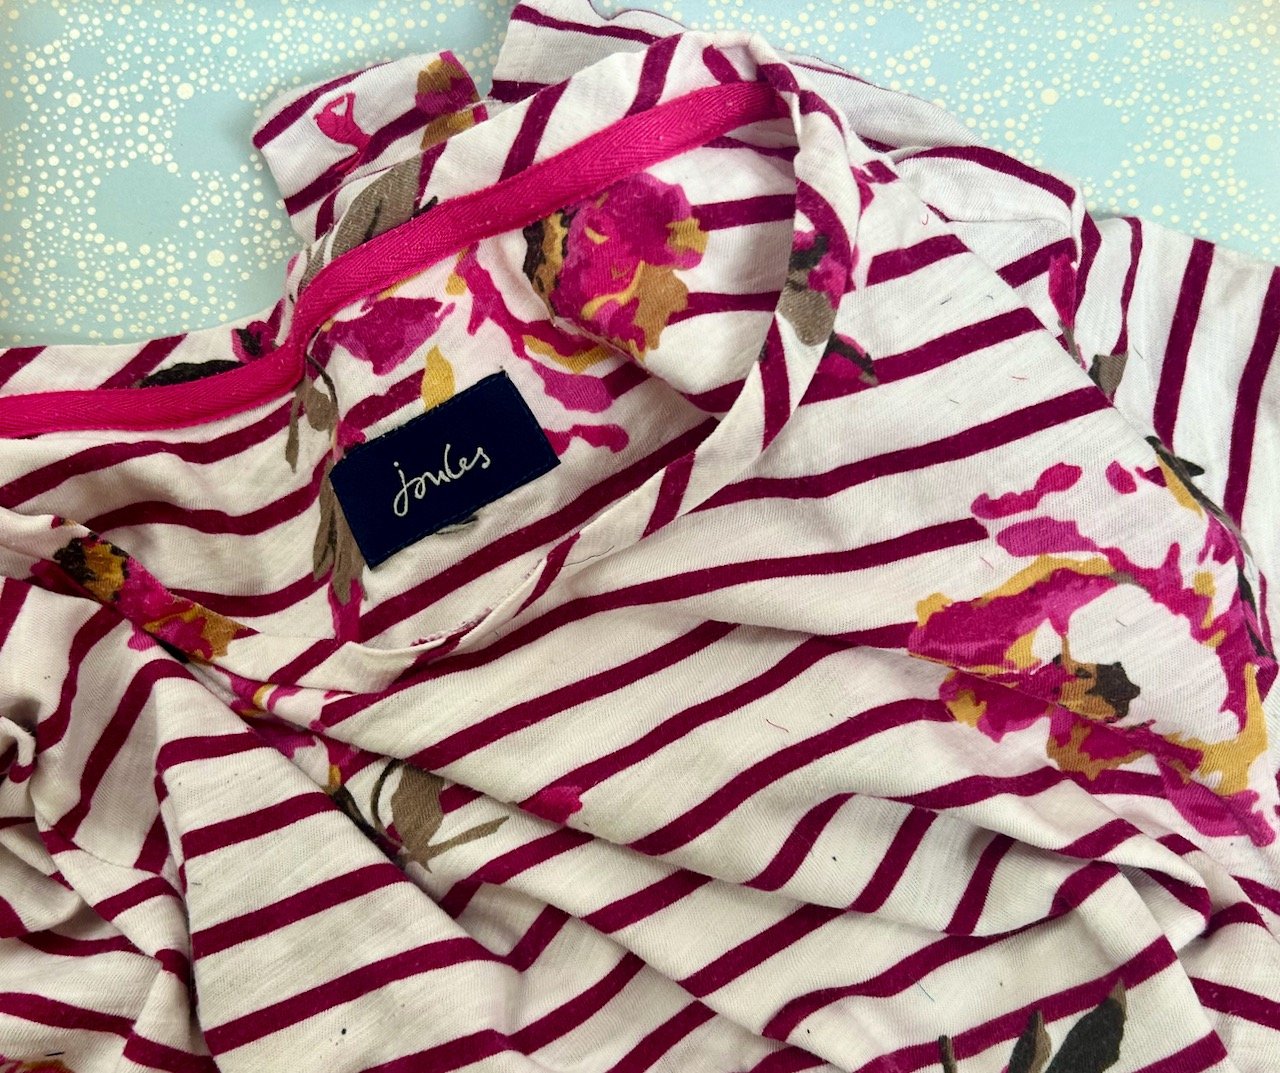
I really loved this Joules t-shirt and was happy to rediscover it in my wardrobe this summer, but really it was long past its best to wear - even for gardening, and so it was retired briefly. But I kept seeing it in the corner of my craft room, and I knew that if I didn’t cut it up soon then it might very well make its way back into my wardrobe.

So I had a look through the rest of my scraps, and in particular the old clothes that I’d already cut up before we moved and found the remnants of an old brightly coloured Phase 8 tunic which made the perfect pairing. Once again I loosely followed the instructions for the vinyl fronted pouches, but without the vinyl front and supersized.

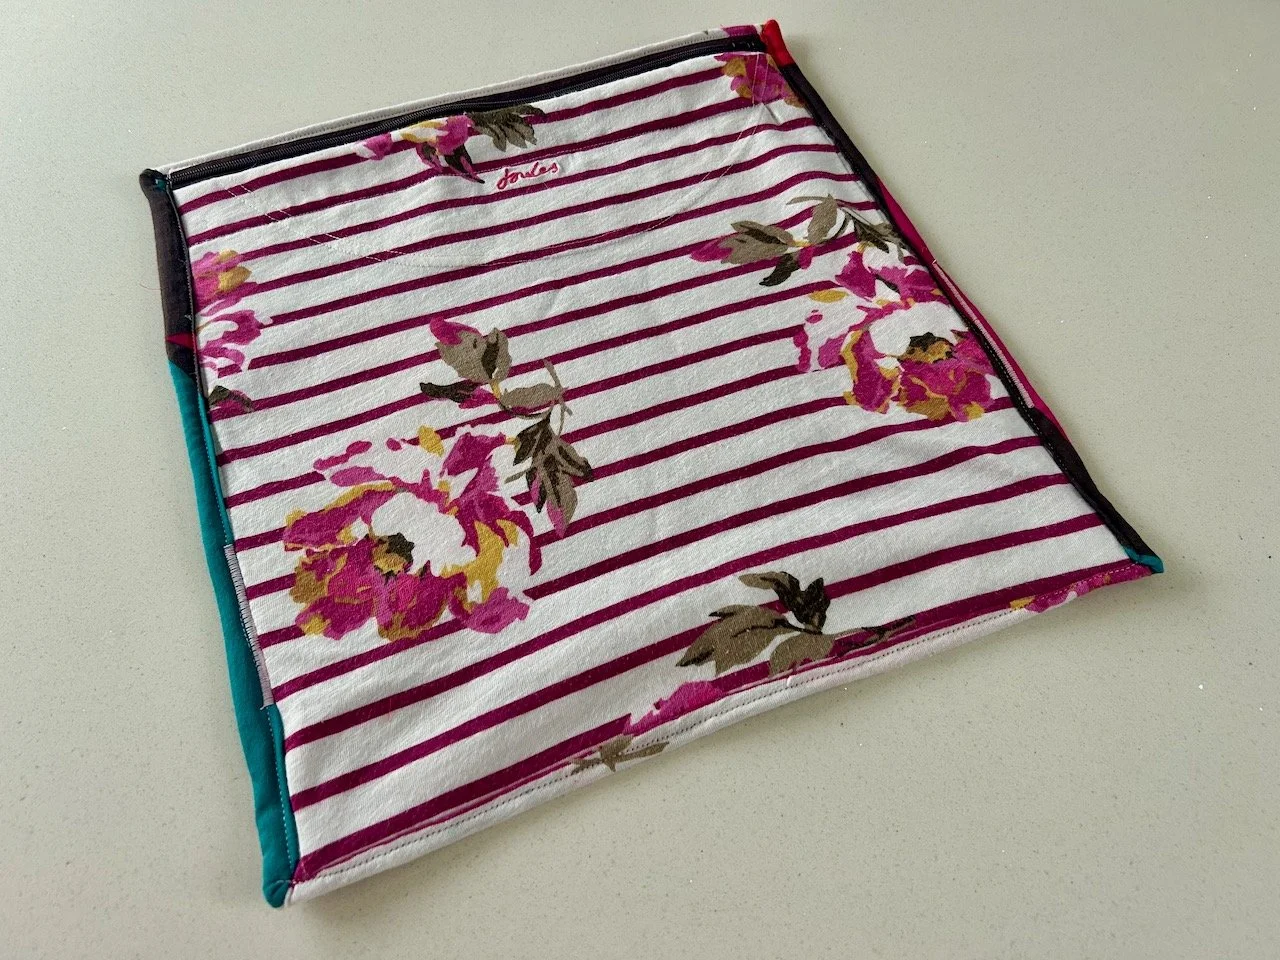
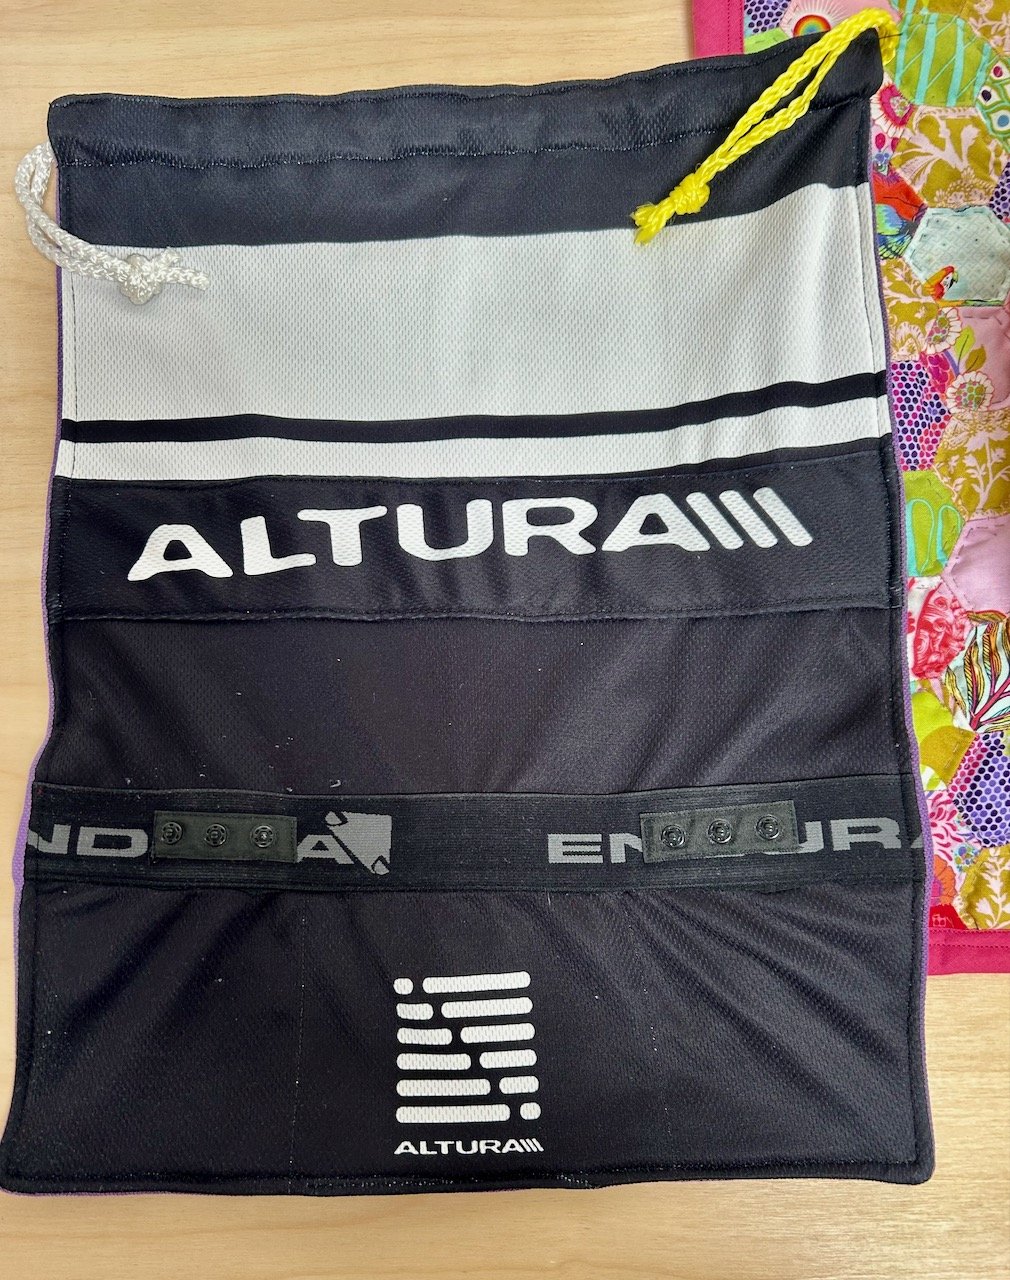
I wanted to keep the embroidered Joules logo, and so cut the front of my new project bag from the back of the t-shirt. As I was sewing I realised that I also wanted to see snippets of the fabric I’d chosen for the lining, which if I’m honest looks better as this pouch rather than with the brown trousers I regularly used to pair it with for the office!

That meant I needed to add a strip of the lining fabric to the back section of the project bag to be, so that when I turned the surplus fabric over to encapsulate the rough edges it would be on display. Mission accomplished, and a few decorative splashes of zigzag additions to bolster some of the seams and I was done.

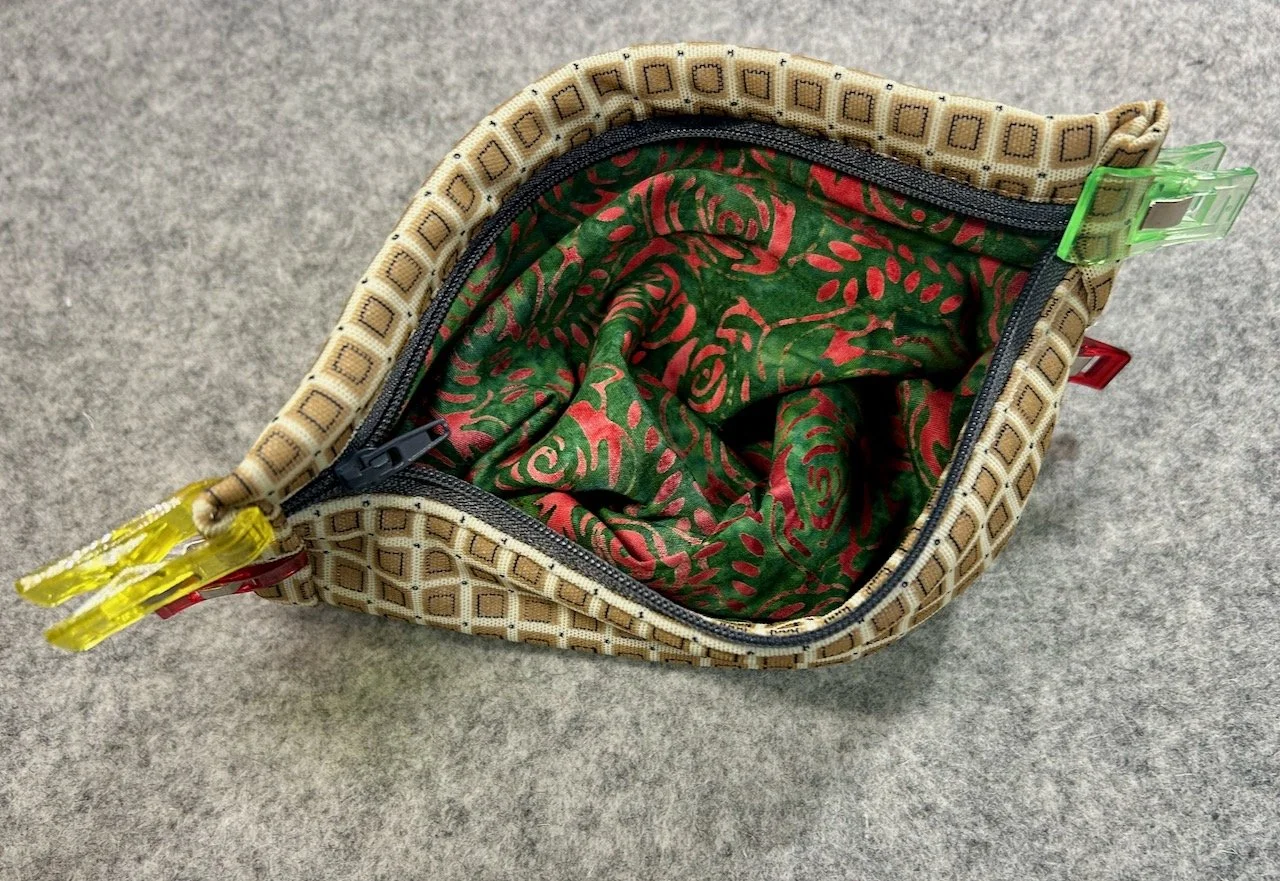
I told you the lining was bright, didn’t I? I’ve immediately put this project bag to use and its currently storing a selection of fabrics for a future make I’m contemplating - in fact it came with me to my patchwork group like this, and after lots of playing around testing out the placements of fabric it came home looking pretty much the same, but with the added ideas and advice from more experienced quilters than me.

I’ve a feeling this will be a small make for the new year unless I have a burst of inspiration, time and inclination!

Geometrical yo-yo storage

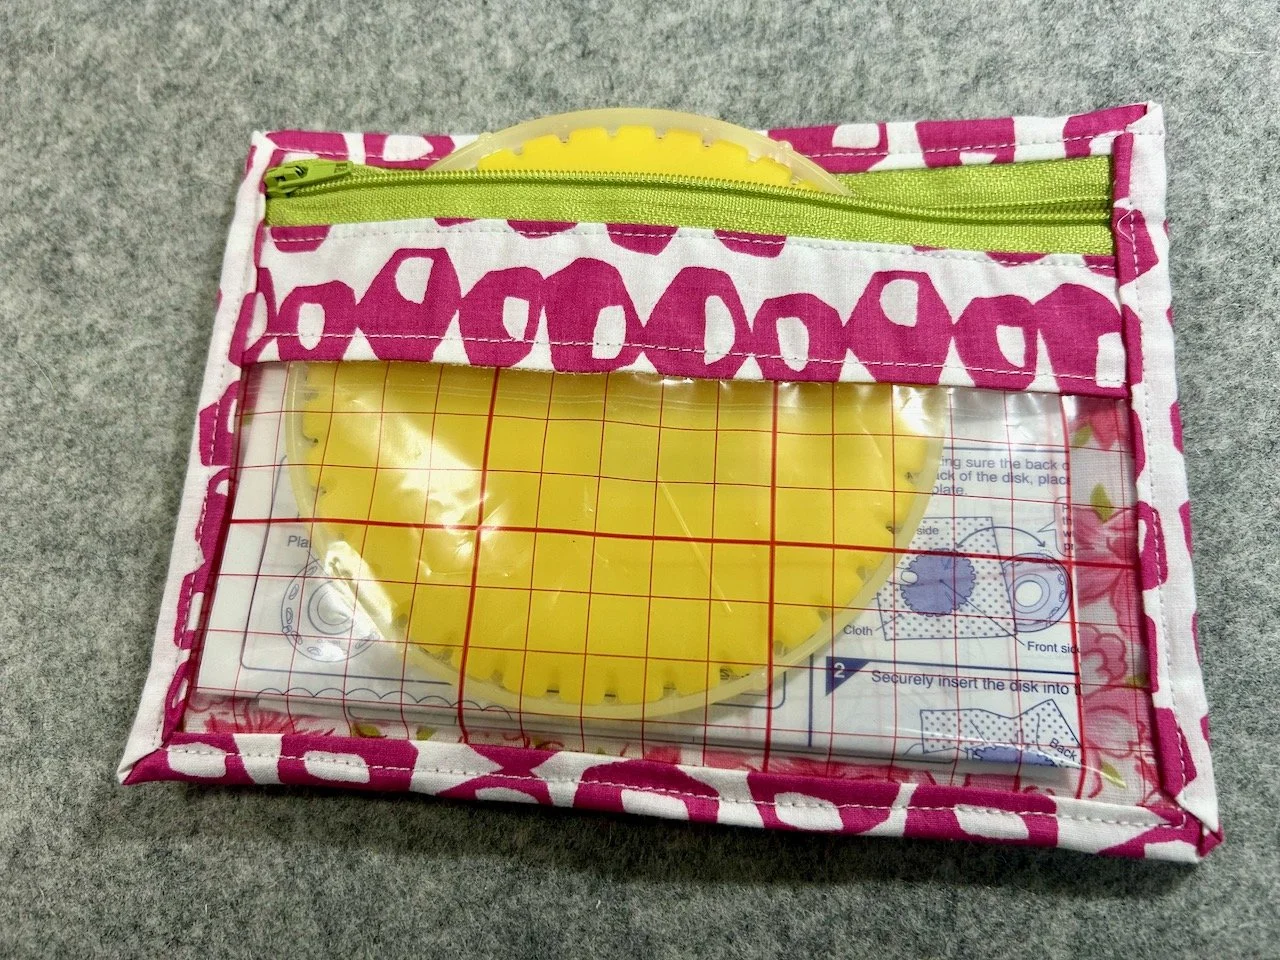
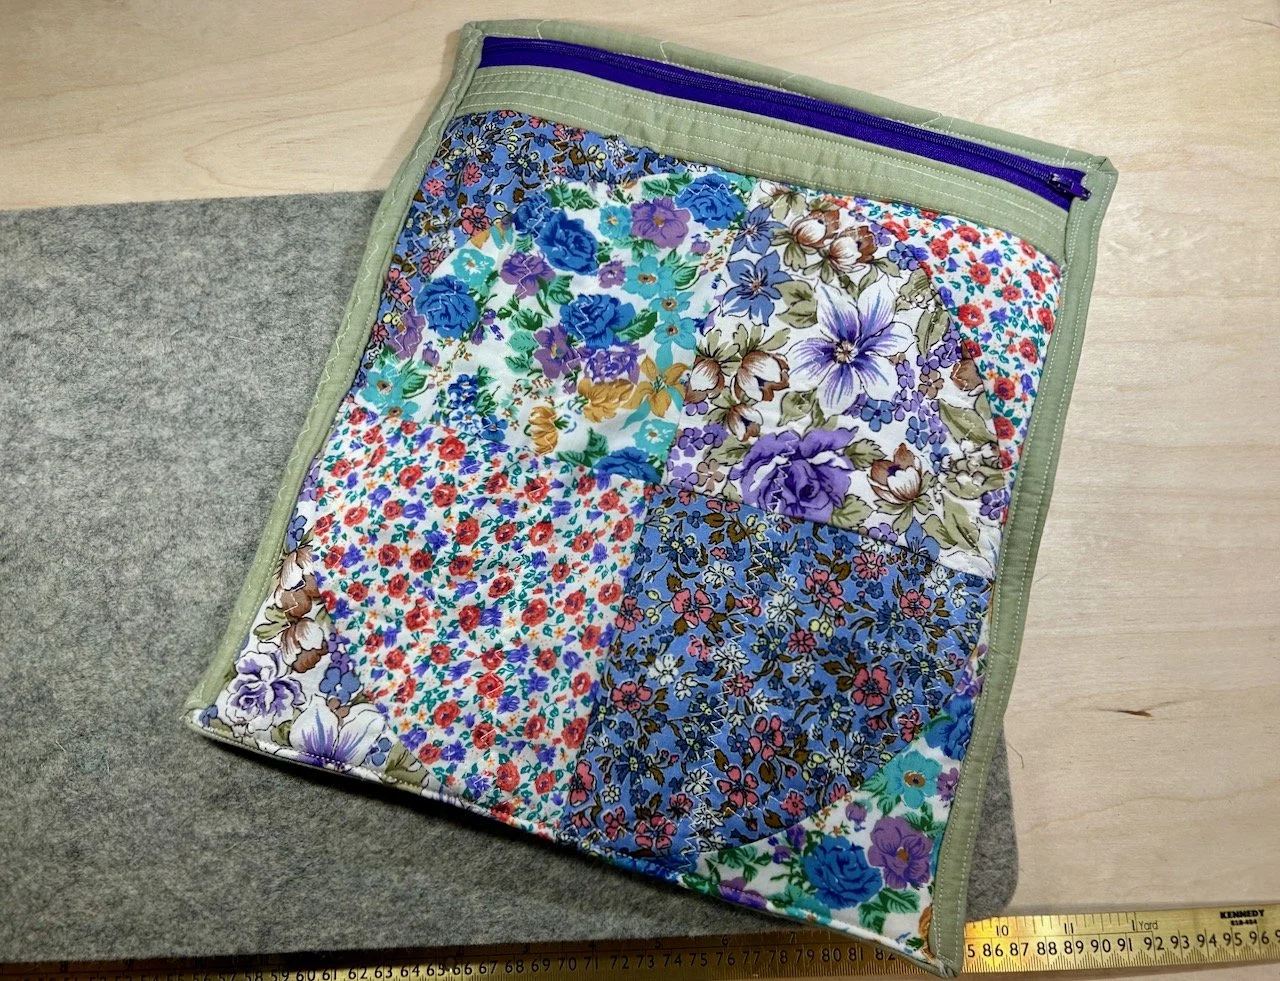
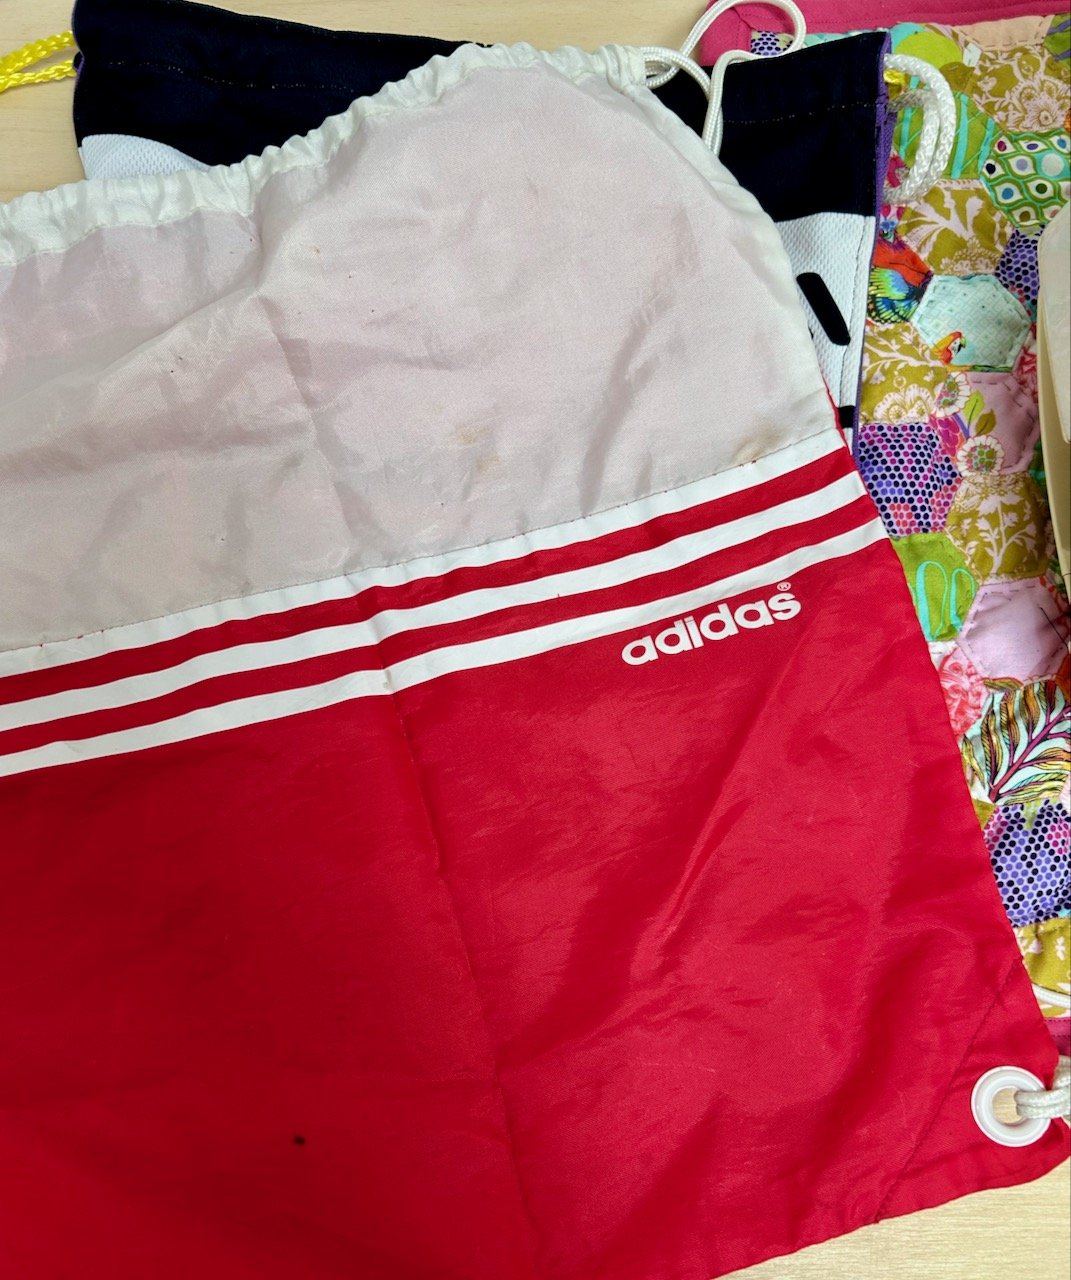
The second pouch is one that I’ve made this week to solve a specific problem (not really a problem, but it’s definitely solved). The material I’ve used was once a vest top, and unusually for me is more coordinating than contrasting, well on the outside anyway.

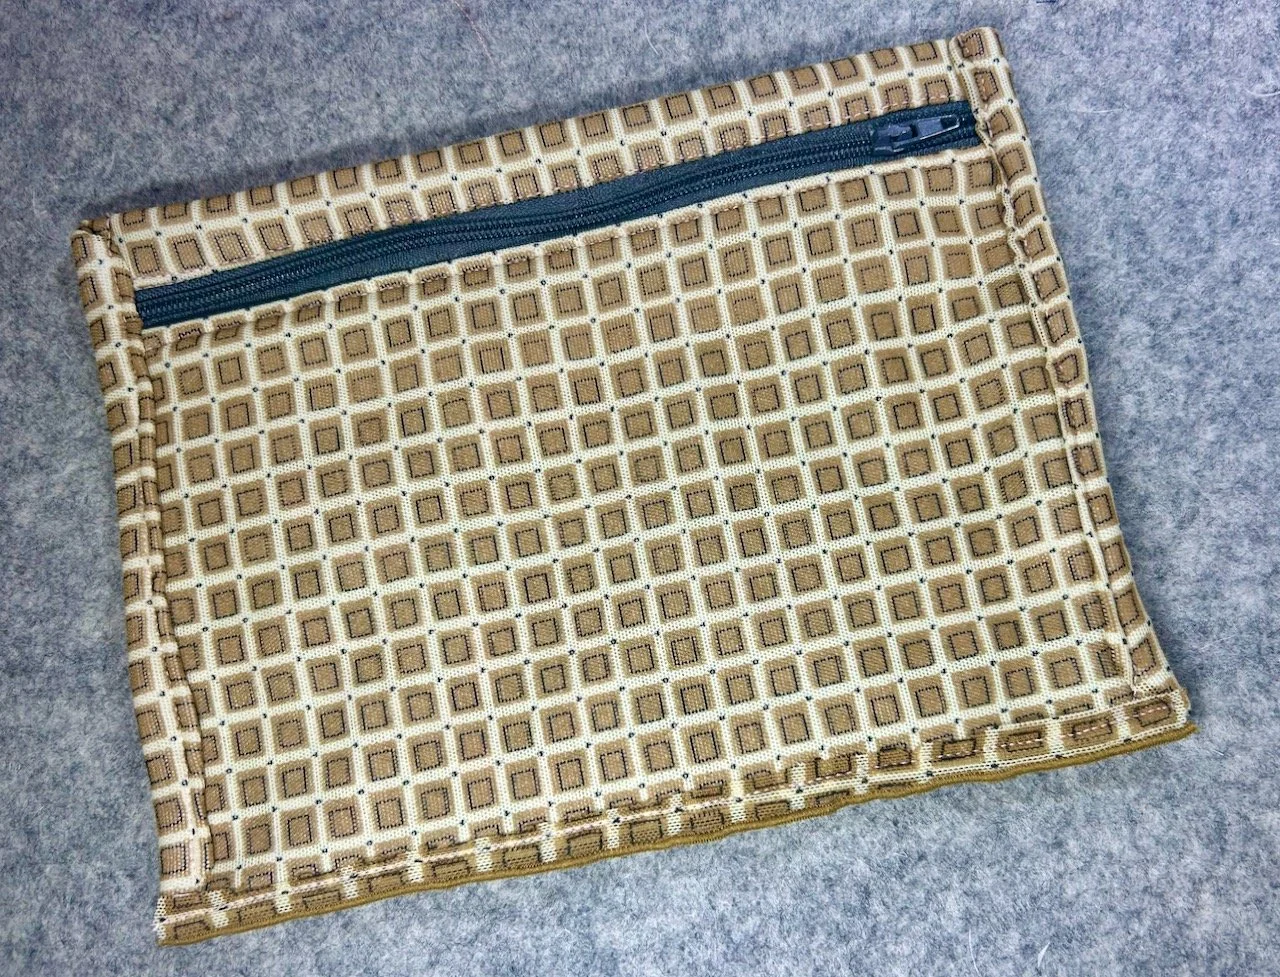
I wasn’t sure how this fabric would sew as it’s quite stretchy, so instead of using another t-shirt I had in mind I opted for this contrasting batik fabric which I’m sure I bought back at one of the larger shows I went to in London and was well due a sewing outing.

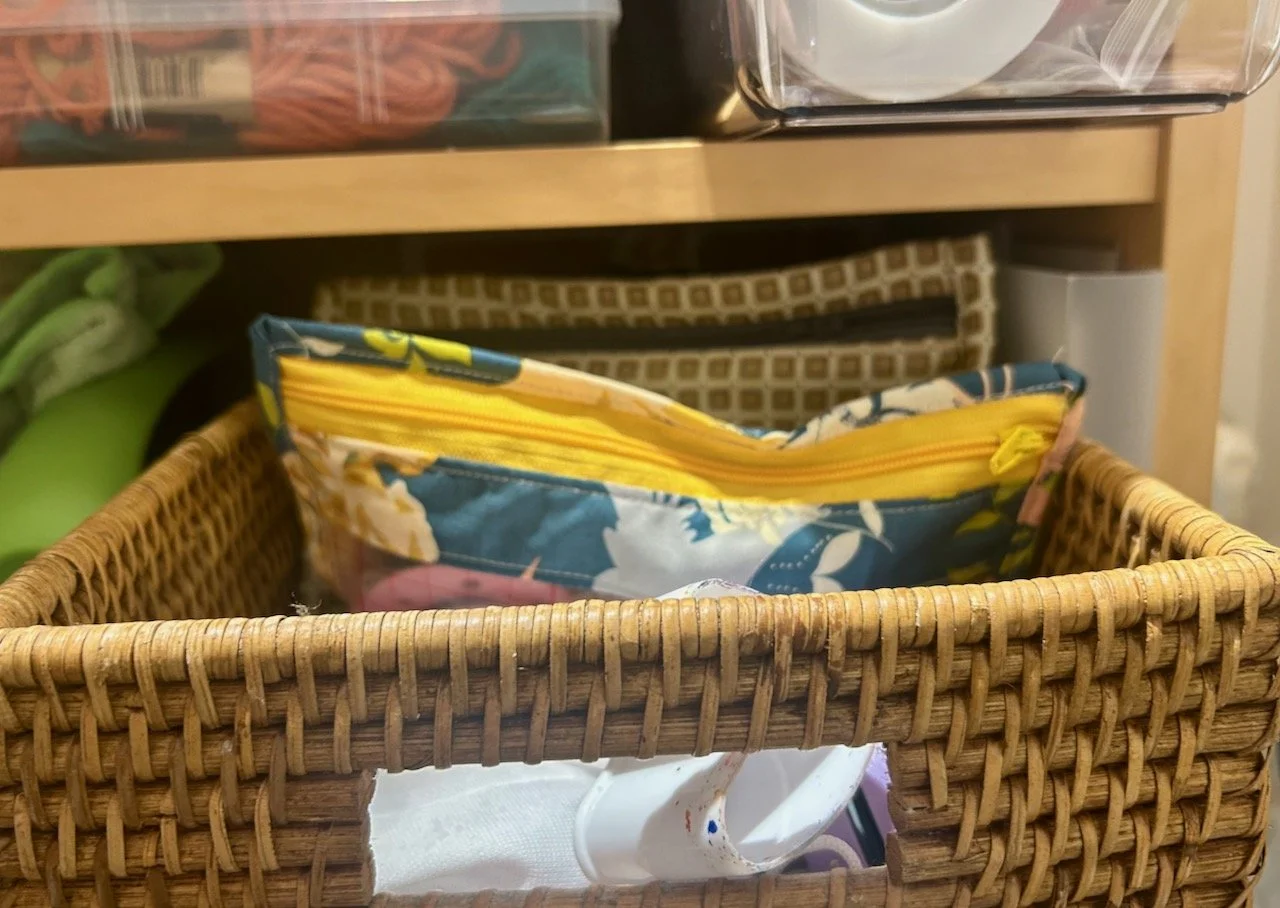
The problem it needed to solve was to provide a home for my giant yo-yo maker (well it’s the biggest one I have), which as you can see was struggling to fit into one of the pouches from the recent batch I’d made.

And it does - phew. The maths had me doubting myself at one or more points, but my reasoning for adjusting the original pattern instructions worked out ok.

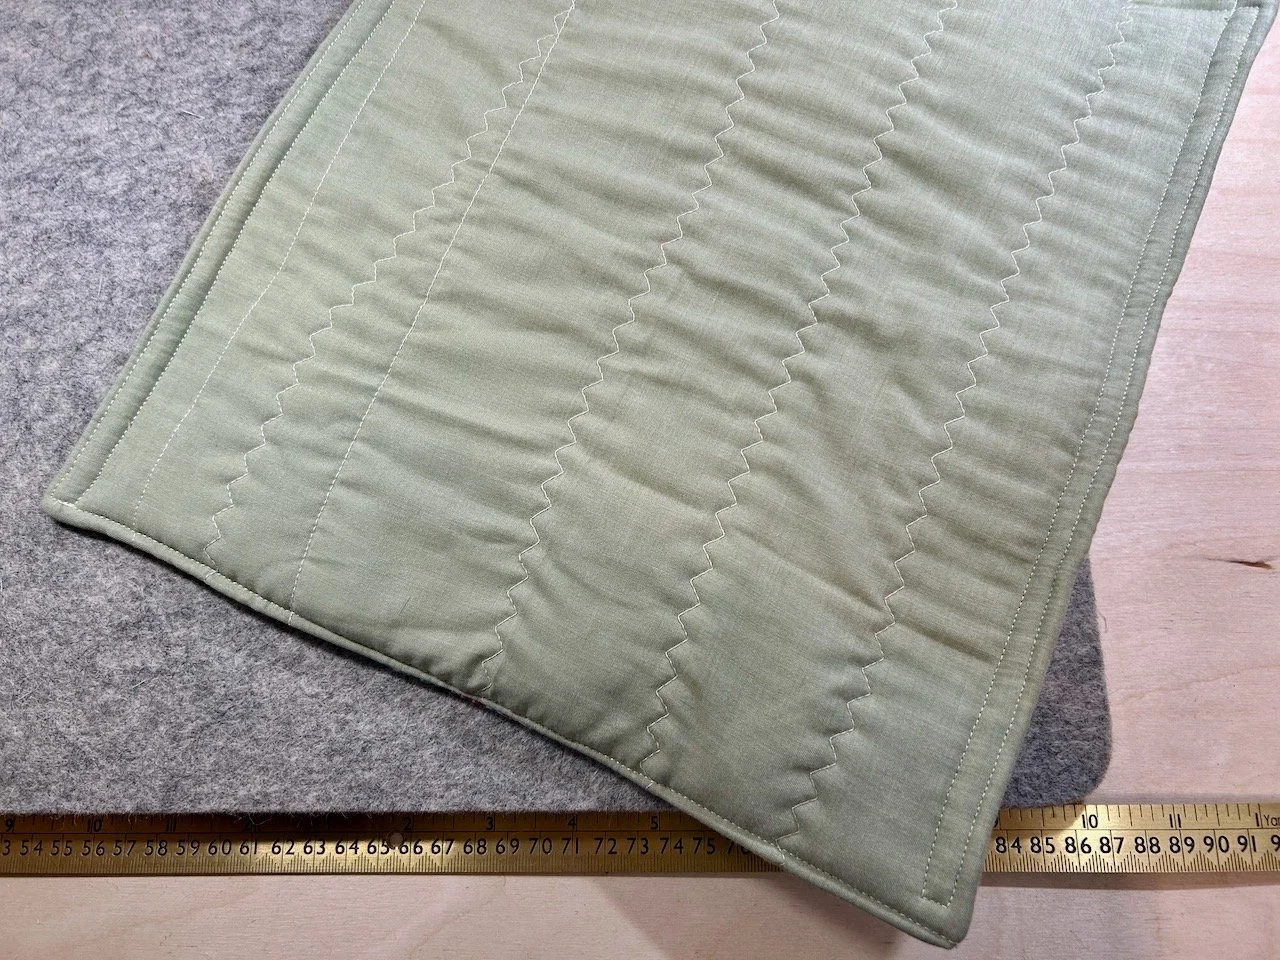
I even added some of the rolled hem detailing to the bottom of the pouch as a reminder of its previous purpose. And I smiled to myself as I put the completed pouch back in its new home, wondering if my choices has been influenced at all by the wicker basket this time round…

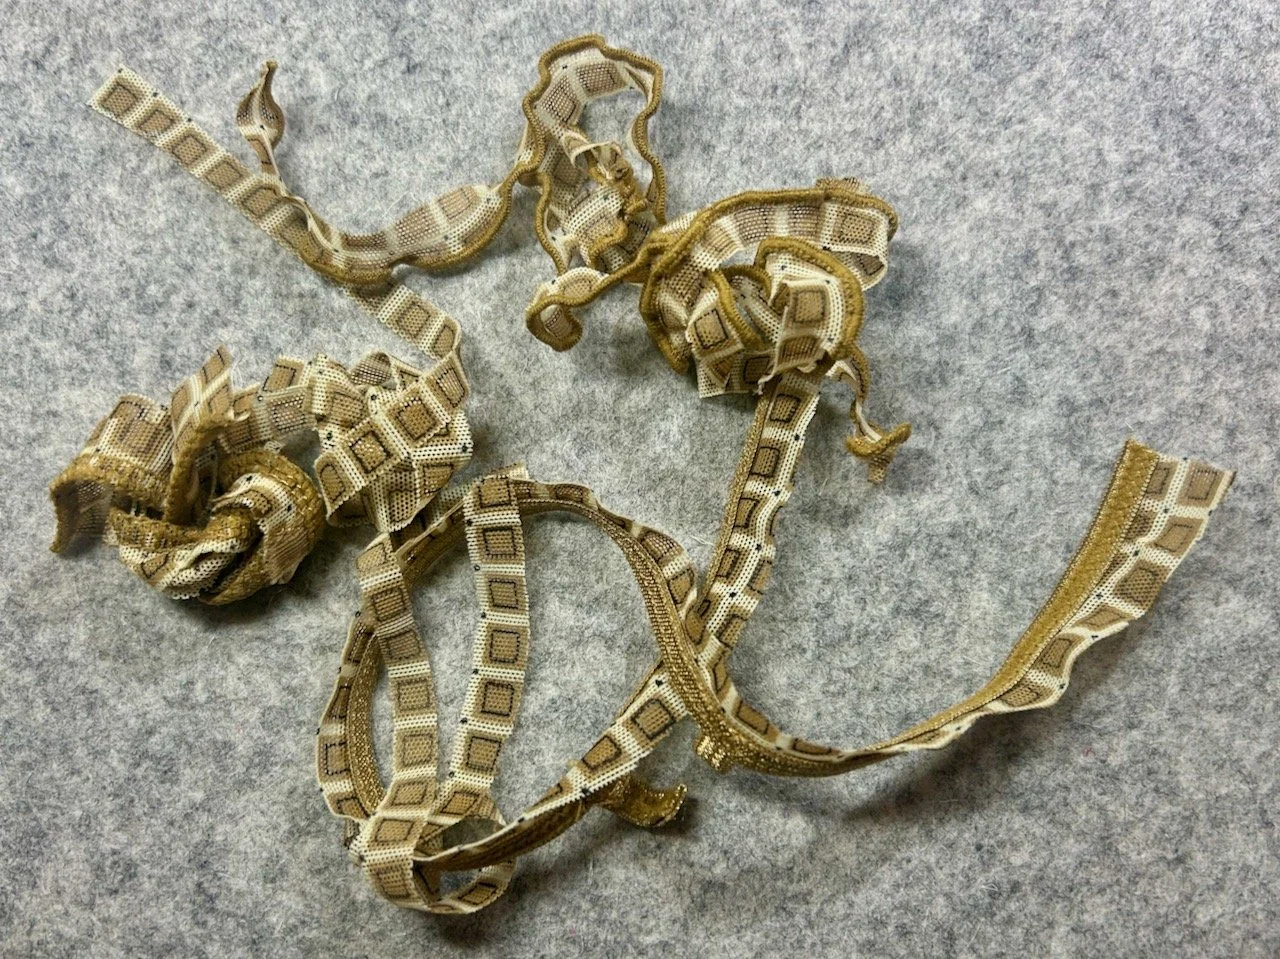
But what’s even better is that I’ve still some of this fabric left, and I have the trimmings which are now very happily wound together and sitting in my waste weaving pile, no doubt they’ll show up in another project one day!

'All the patterns' project bag

Before starting to make my Noughts and Crosses quilt I had a trial run of sewing curved blocks using all the patterns I’d pulled out of my stash, which left me with a very colourful test run. And as I don’t like to see anything go to waste, I was sure that I could do something with it.

And sure enough I could, even though it took a little while for the idea to materialise, let alone come to fruition. But as you’ll see, it’s the answer* to a question I regularly have, and so it’s a wonder it took so long.

It’s fair to say at almost 33cm by 30cm it’s the largest pouch I’ve made, but `I didn’t want to cut into the circle, which if you look close enough is just about visible in the jumble of patterns.

It also uses the same pale green backing material as the quilt, and I’ve frankenbatted some offcuts of wadding to give both the front and the back some extra oomph, even though that’s meant I’ve ended up with some wonky zigzag lines - but I’m ok with that, and will call it character!

The pale green back quilted with offcuts of wadding - hence some of the more wavier lines

THE ZIGZAG QUILTING FOLLOWS THE SHAPES OF THE OFFCUTS OF WADDING

*Yes, the answer is invariably ‘you need a pouch for that!’ - but unusually in this instance I’m not exactly sure what the question is, though I have plenty of projects which I’m sure will soon make themselves known.

Repurposing a cycling top

Over the winter MOH spent some time creating a workout space in the garage, as let’s face it not many of us put our cars in there these days and there’s no longer a gym or such like on our doorstep. There’s still space for all our junk (though there’s getting less and less of that as we continue to sort through our moving boxes), the usual paraphernalia and my greenhouse station, so all’s good.

We’ve spent the summer using the space and it’s been really good to have - I already know we’ll appreciate it even more in the winter months - but it is kind of, well functional. There’s some finishing touches that I want to add and I’m hoping to get to more of those soon.

We’ve also finally had our large inbuilt wardrobes kitted out so we can make the most of the space we have (more on those another day!) and so we’ve been sorting through our clothes; some have headed to the charity shop and others are for sale on eBay and Vinted (with many more to list!) and some I’ve kept to reuse. One of MOH’s first cycling tops was in the reuse pile, along with one of his now holey Superdry t-shirts.

In our workout space we knew that storage was going to be key, and we’ve hooks of all shapes and sizes to add to the walls (when we decide where things need to go) but sometimes you just want to shove stuff out of sight don’t you? And away from the spiders (or as much as we can, anyway).

And so the idea for a drawstring bag was born.

A pile of fabrics from a cycling top, and old t-shirt and elastic from the top of some old cycling shorts ready to be repurposed

Having looked for an easy tutorial on YouTube I set about creating the front and backs using the purple t-shirt as lining. I wanted to keep the cycling top details, so cut off the Altura logos from the parts I wasn’t using and supplemented these with the elastic waistband of some cycling shorts which were heading for the bin.

Rather than start by sewing the bag together, my first job was to piece the logos and elastic to add detail to the front and back of the bag, which I’d used the main body of the cycling top for. It was only then that I could actually make the bag, and it turned out pretty well.

The front of the repurposed cycling top bag, complete with additional logos and reflective strips

THE FRONT, COMPLETE WITH THE CYCLING TOP ZIP IN ITS ORIGINAL PLACE

I kept it simple and kept the zip from the front of the cycling top, though at one point my sewing machine grumbled about that. The front has an additional logo (at right angles) and some of the elastic with poppers on the front, as well as the curved lower edge of the back, complete with the reflective strip.

The back, which is the back of the cycling top has another logo added across the back, and thinking ahead to spider-proof this (you can never be too careful) on this side the waist of the cycling shorts was used to seal the pockets.

THE BACK OF THE BAG USES THE BACK OF THE CYCLING TOP WITH ADDITIONAL LOGOS ADDED AND ELASTIC TRIM SEALING THE POCKETS

AND THE BACK, THE THREE REAR POCKETS HAVE BEEN SEALED WITH THE ELASTIC TRIM

The yellow and white cord I’d kept from carrier bags - you know the duffle bag type - which were no longer used (and in fact had already been recycled long before we moved).

I’d planned to make myself a bag along the same lines, but was undecided about which of my netball kits to use. In the end I found my Adidas gym bag which I used to take to netball matches - I know this because it still had the eight safety pins pinned into in for pinning on those velcro bibs to non-velcro-ed tops - something I’d completely forgotten about!

A pink and white adidas drawstring rucksack from my netballing days

So I’m reusing this one as a starting point, though I’ve a feeling that turning old sports kit into drawstring bags could become a bit of thing - and I’m not sad about that at all!

PostCommentLove