


One of the first galleries that we stumbled across and spent time looking around was hosted by The Quilters’ Guild who were displaying some amazing items from the Quilt Collection, featuring items from the domestic Homefront, to commemorate the 80th anniversary of the end of the Second World War.
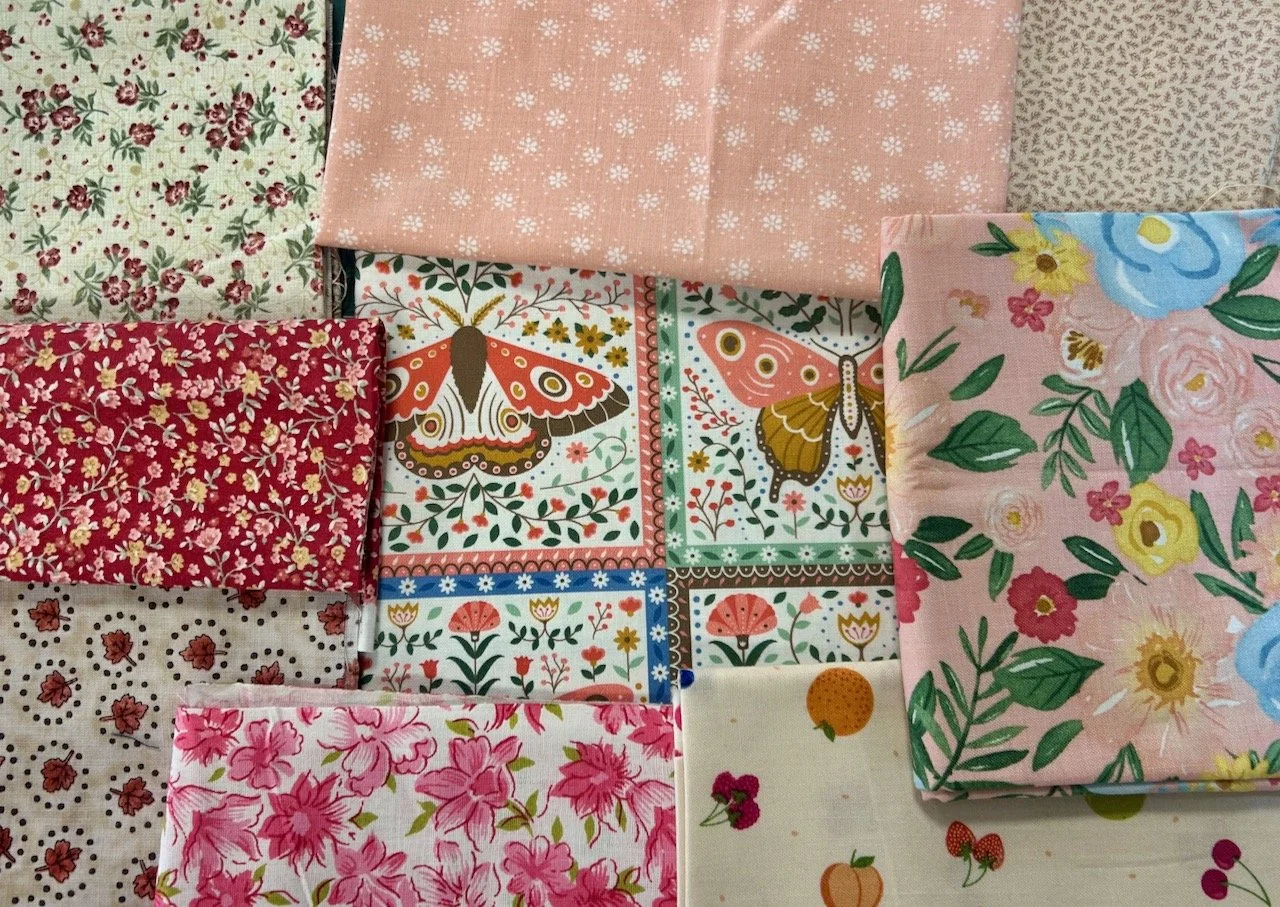
The items were displayed in chronological order starting on the eve of War with a range of items made during the 1930s and my favourites, and which I’m including here, are the patchwork pieces which show the typical fabrics and prints of the day.
Clearly the outbreak of war saw dramatic domestic changes with everyday life geared towards making what precious resources were available last as long as possible, and with fabrics and clothing rationed. As the war progressed and bombing caused destruction to homes and possessions charities such as the Canadian Red Cross Society became vital and thousands of quilts were sent over to Britain from anonymous needlewomen abroad.
At the end of the war patchwork and quilting became less popular as the were often seen as ‘making do’ and with the new age of fashionable style in clothing and domestic interiors becoming available it’s easy to see why these traditional methods were considered old fashioned. Alongside this more women worked outside the home as the decade progressed and therefore had less time, skills and inclination to continue tradition, and that’s when the ready made shiny eiderdowns and candlewick bedspreads came into their own.
I can remember having my eiderdown as a child, and I definitely remember the candlewick bedspreads - in fact I can remember when duvets, or continental quilts as they were called then, became the rage, but I digress!
The quilts in this part of the show were amazing as pieces of needlework, and then even more amazing for the time in which they were made.
War, Peace and Needlework
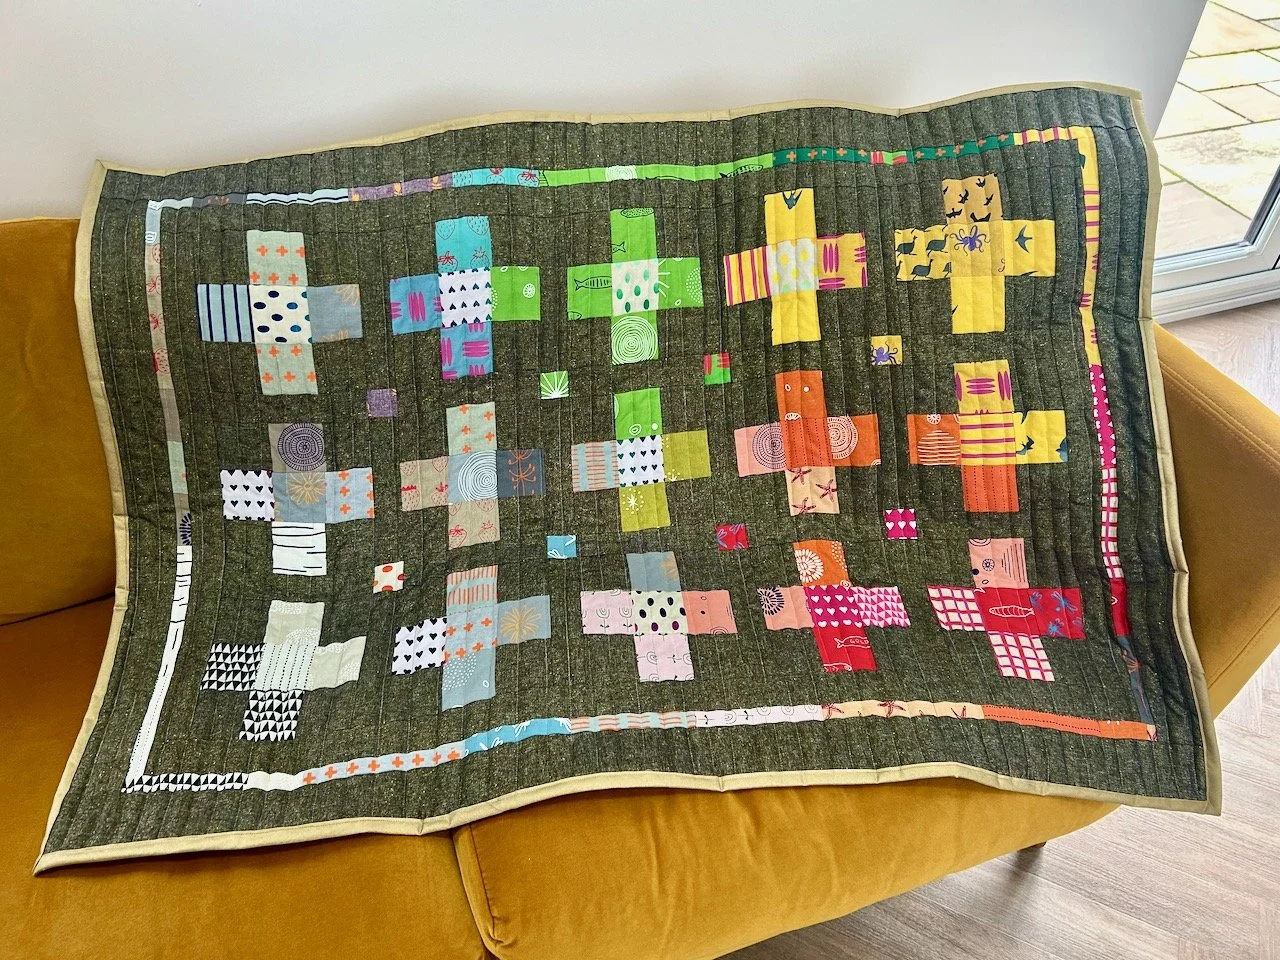
The colourful mosaic patchwork quilt top below was made from 1 inch squares of printed fabric arranged in a ‘Trip around the world’ block design, and according to the notes alongside the quilt, it still has the thick card templates attached in the reverse.
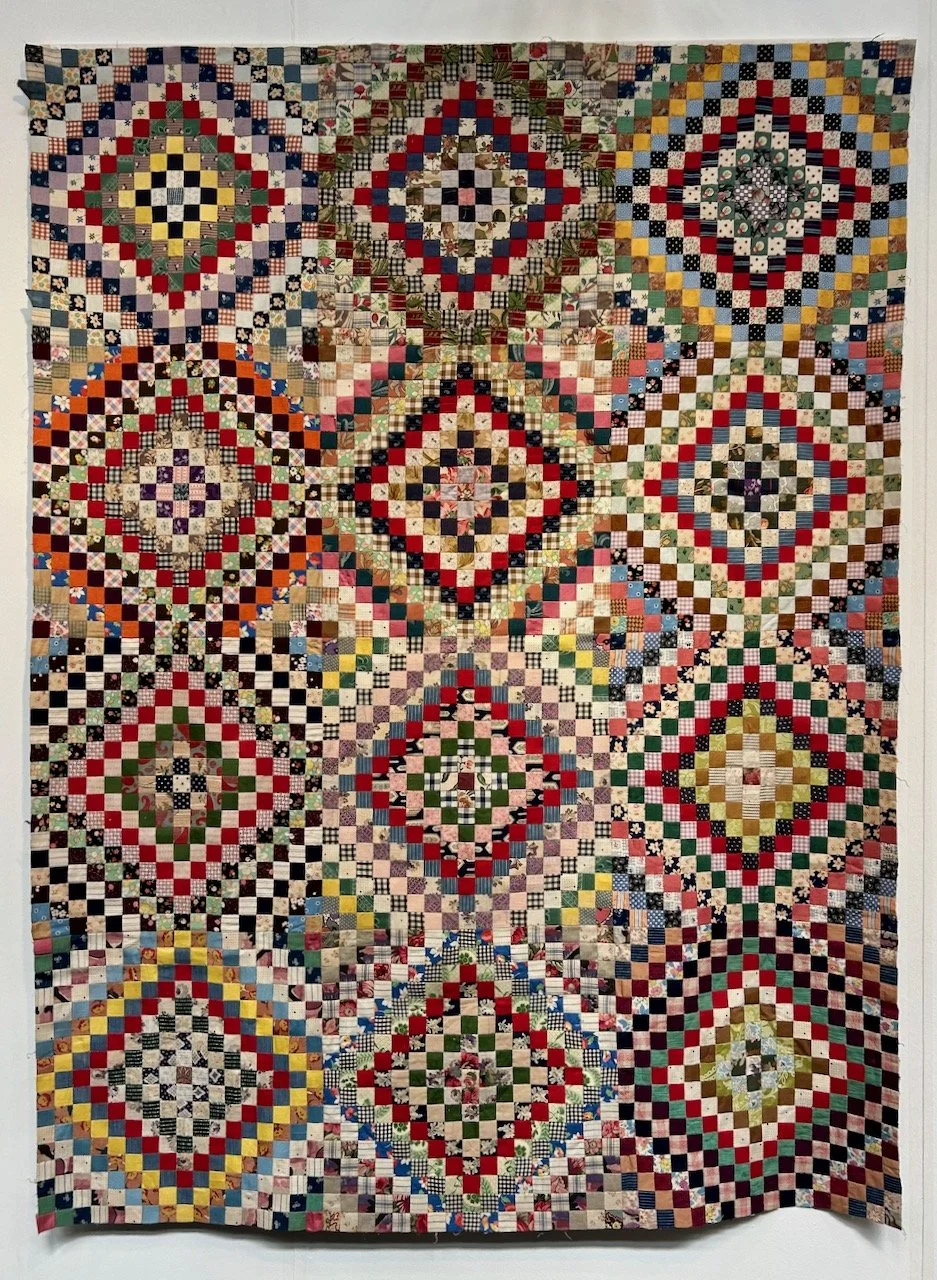
SMALL SQUARES TOP, 1930-1939, MAKER UNKNOWN
Although the quilt has been neatly finished at the edges, it doesn’t have a backing. A closer look at the fabrics reveals some of the details of the fabrics used, which includes 1930s dress prints and furnishing fabrics.

SMALL SQUARES TOP, 1930-1939, MAKER UNKNOWN
This colourful log cabin patchwork was made during the 1930s and again uses dress fabrics and furnishing fabrics to create the light and dark tones for the log cabin block - and if the block looks vaguely familiar and you think you’ve seen here before, then it was probably my charity quilts which use log cabin borders that jogged your memory.
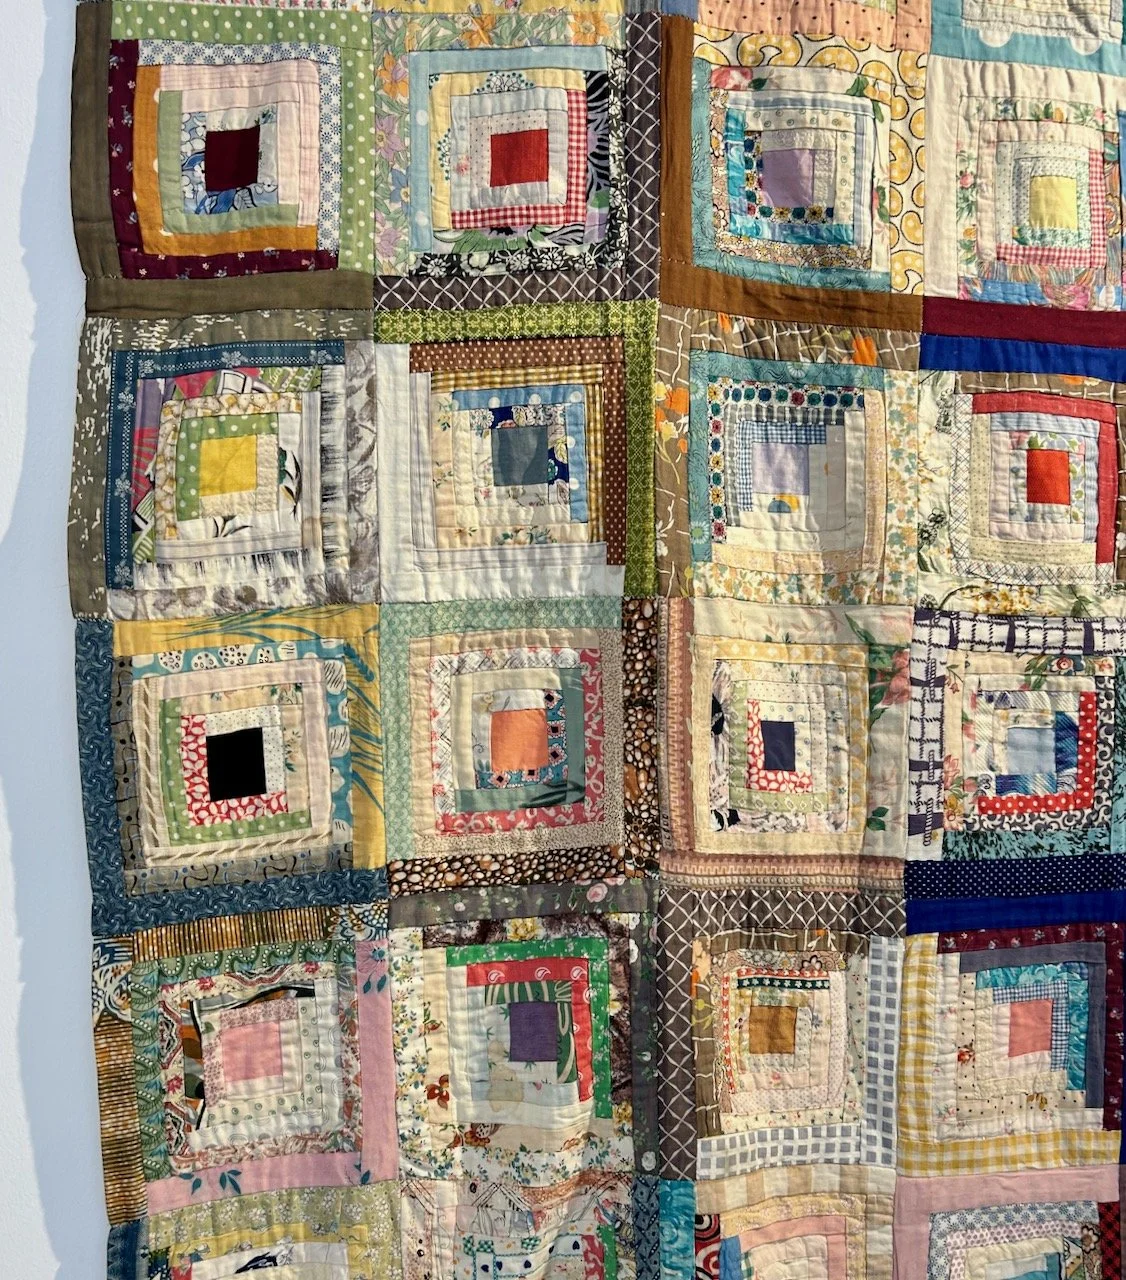
LOG CABIN COVERLET, 1930-1939, MAKER UNKNOWN
These log cabin blocks though were sewn by hand, joined together and the seams have been opened and flattened on the back, then the seam allowance has been sewn down with a herringbone stitch - so this quilt wasn’t going to come apart.
This next quilt is an example of mosaic patchwork which is complex and individual in style. The central circular medallion is thickly padded with a coarse open weave fabric on the reverse holding the wadding in place. It is thought that the maker originally intended to make a cushion but then extended it into a larger coverlet.
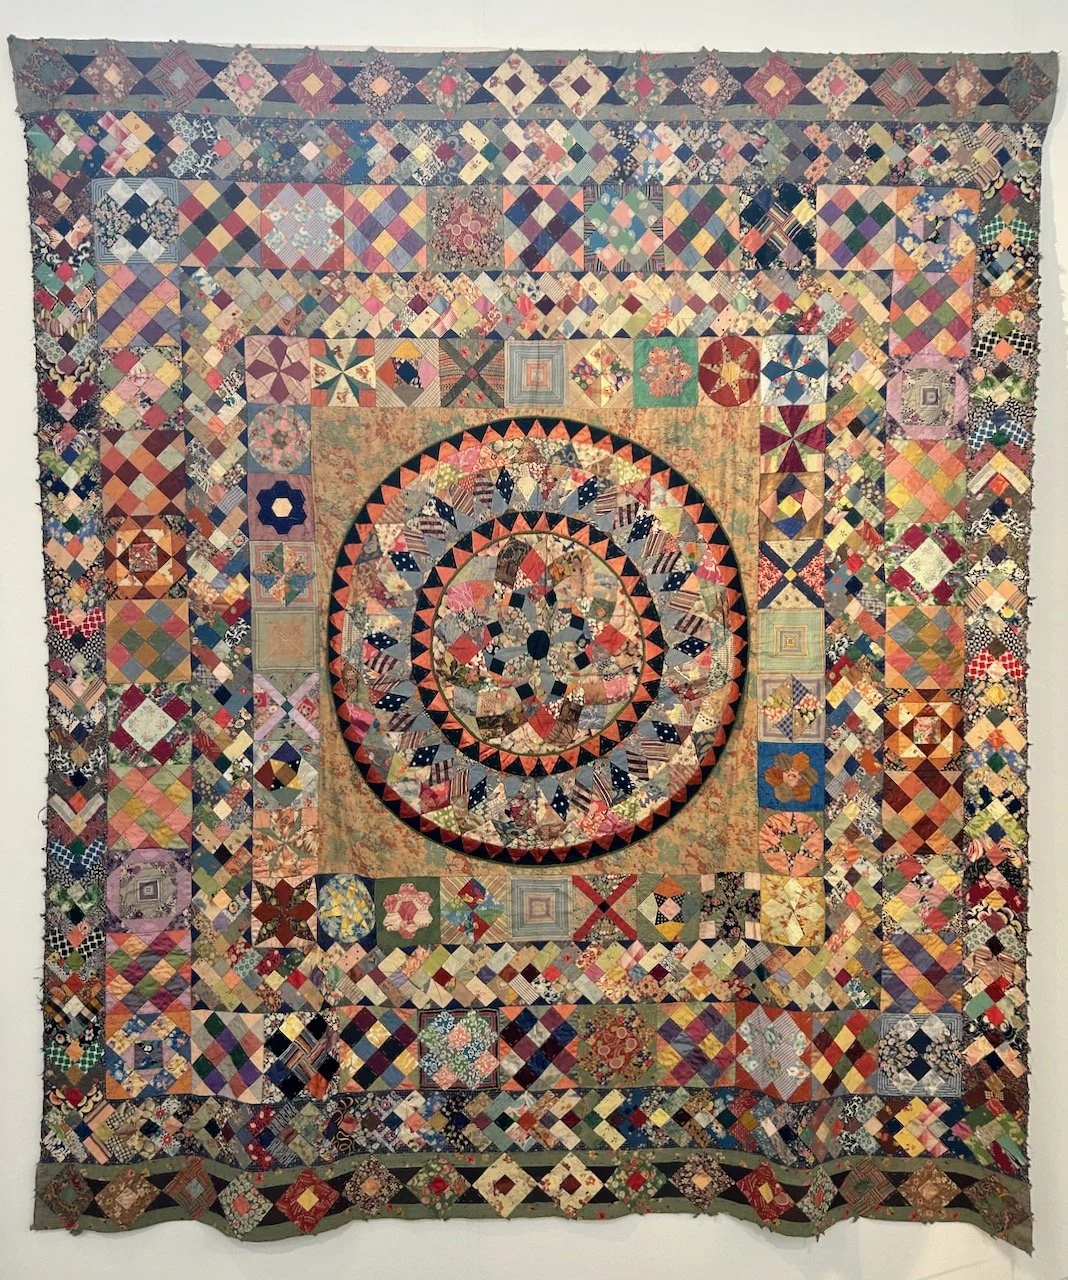
MOSAIC PATCHWORK, 1930s - 1940s, INA MACRAE
This was made by Ina MacRae who used materials from her scrap bag, recycled garments and remnants from the family’s haberdashery business. Ina never married, although she was engaged for a short time during the 1940s. The family story is that she broke off the engagement, and presumably lost enthusiasm for her patchwork project, leaving it unfinished with papers intact.
The quilt below is a Canadian Red Cross Society quilt and is made from alternate 16 patch squares and plain squares of orange floral print cotton, and was one of five given to Miss Alice Treeby’s family after she had returned from evacuation.
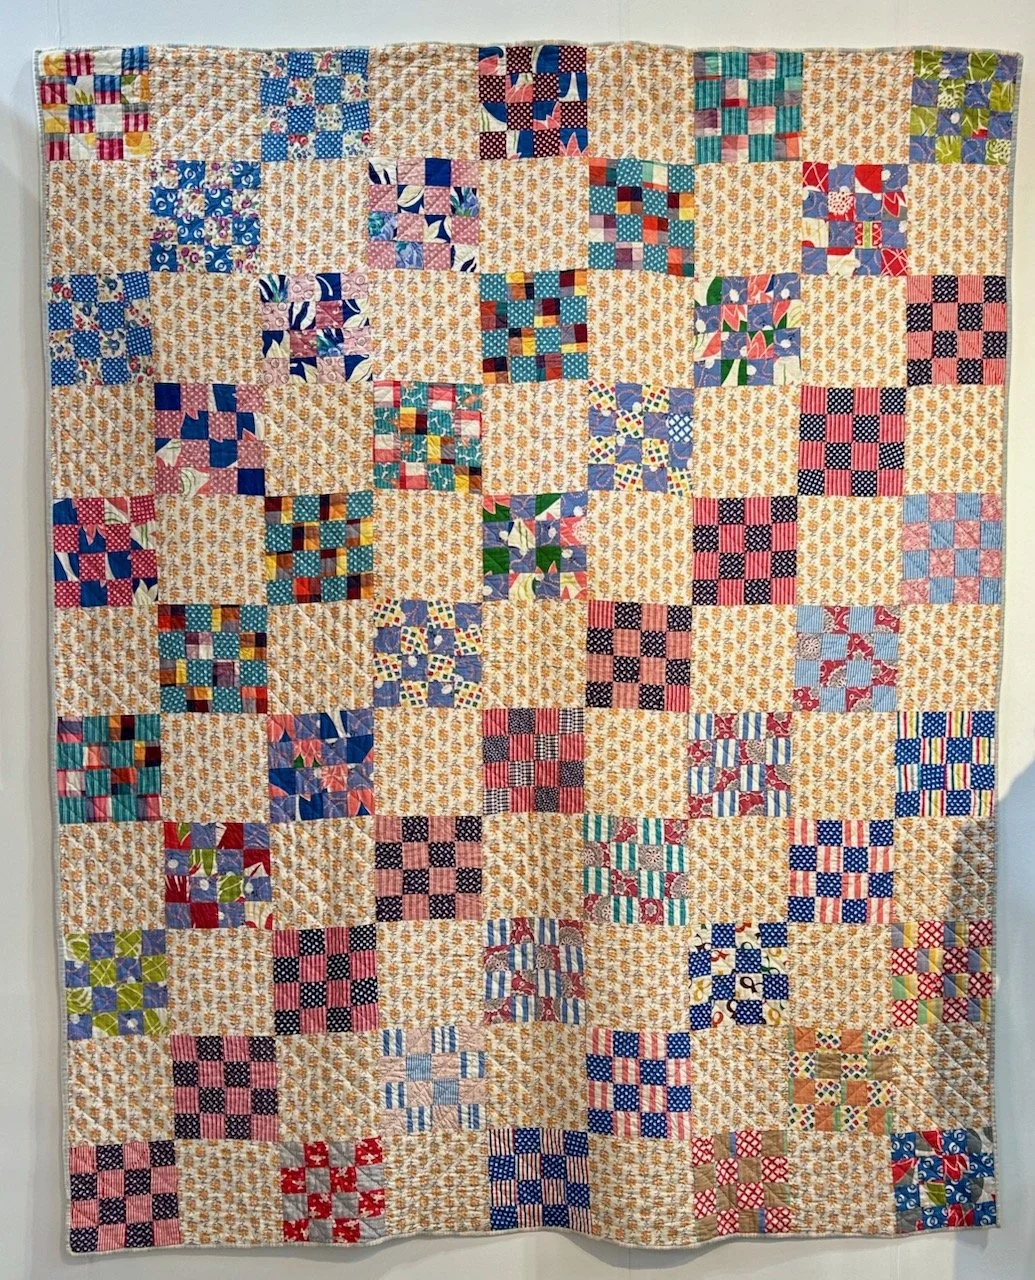
MISS TREEBY’S QUILT, 1939-1945, CANADIAN RED CROSS SOCIETY
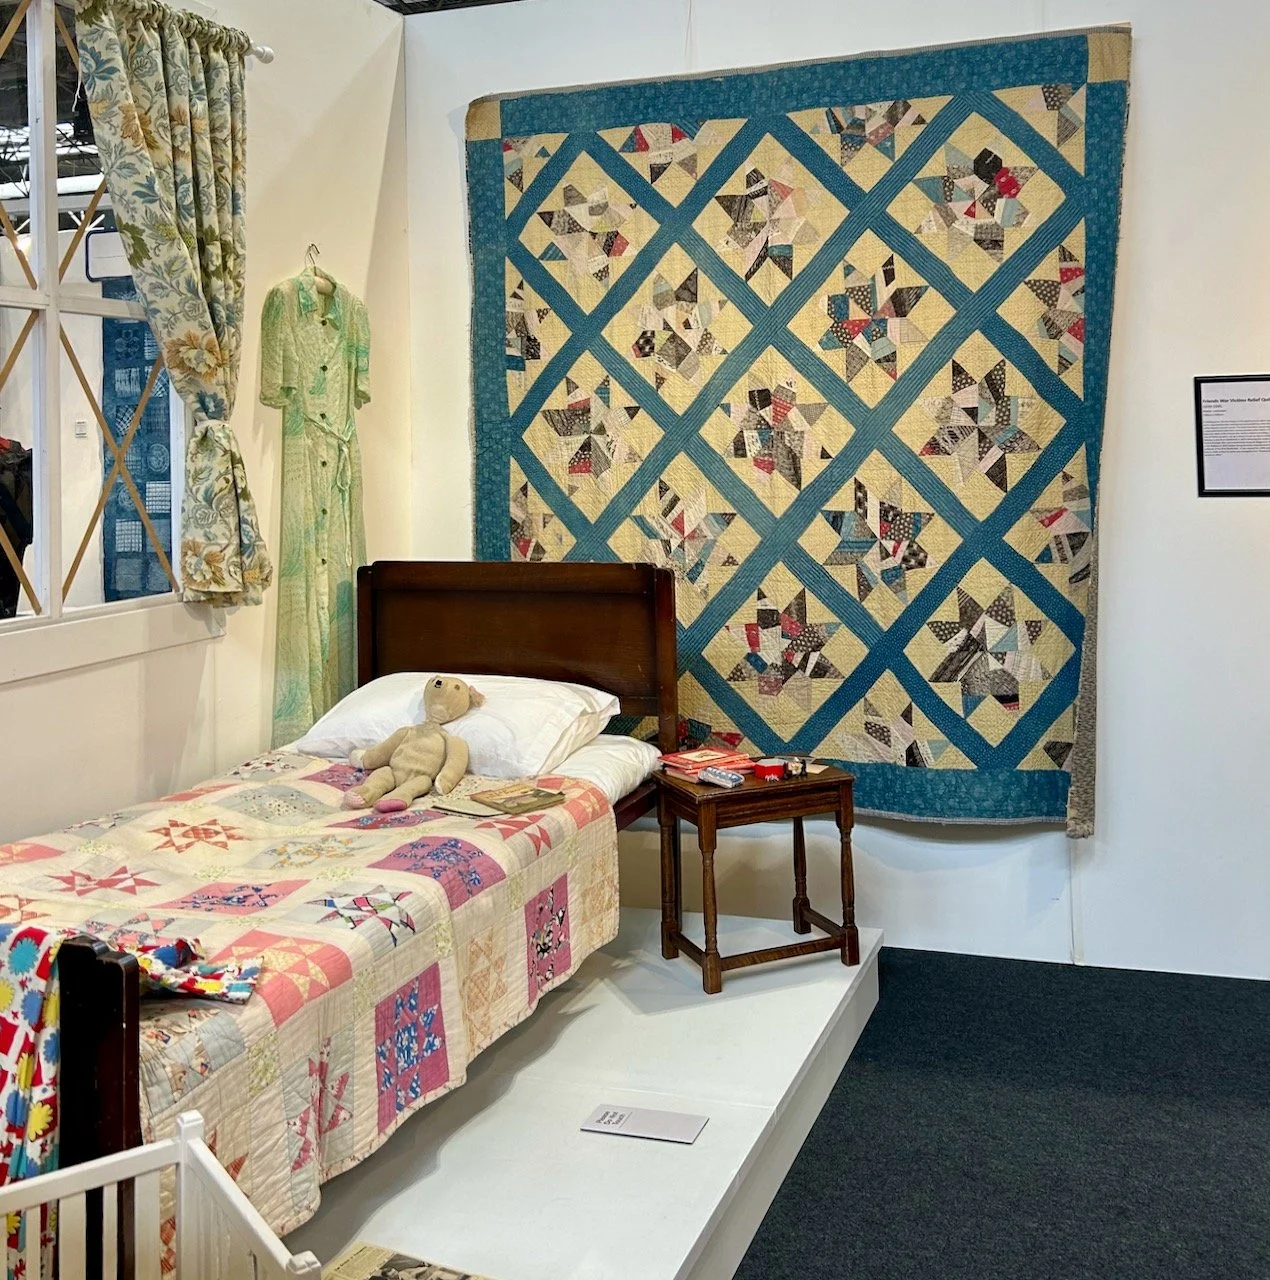
FRIENDS WAR VICTIMS RELIEF QUILT, 1939-1945, MAKER UNKNOWN
This striking stars in square block quilt includes stars which are ‘crazy patchworked’ using various cotton print fabrics and bears the label of the Friends War Victims Relief Committee, an official arm of British Quakers set up to relieve civilian distress in times of war. The group has a long history dating back to 1870 and with five revivals, the last being in 1940, before its name was changed to the Friends Relief Service in 1941.
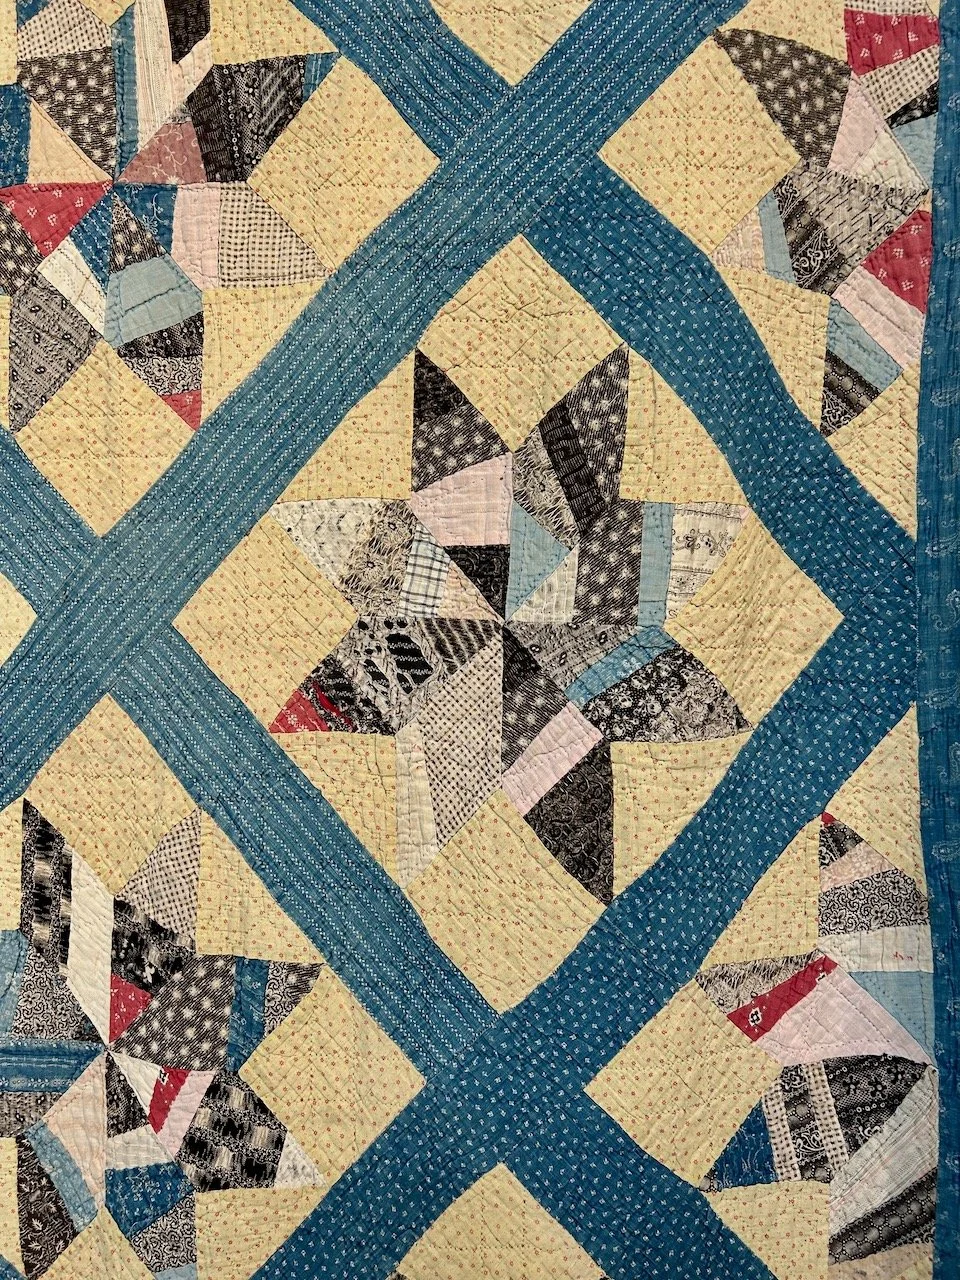
FRIENDS WAR VICTIMS RELIEF QUILT, 1939-1945, MAKER UNKNOWN
Crazy patchwork blocks feature again in this quilt - and that makes a lot of sense with materials hard to come by, but it could also indicate that it was made by a group of women in the Canadian Red Cross. Blocks were often made at home to standard sizes at home, then brought into the Red Cross premises to be joined together and finished off with materials supplied in bulk by the society.
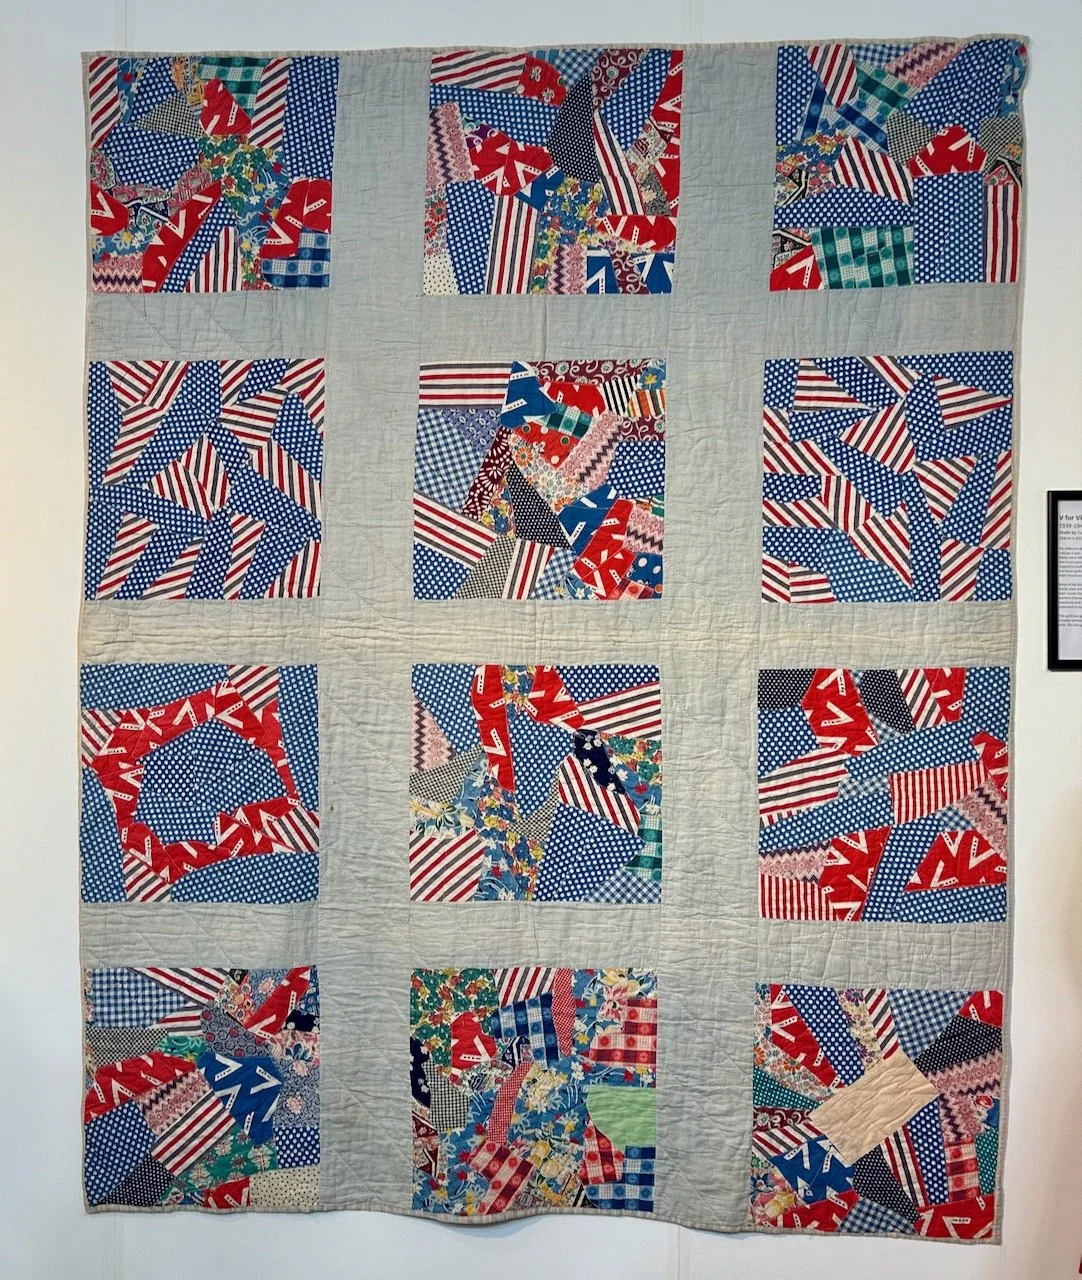
V for VICTORY QUILT, 1939-1945, MADE BY CANADIAN RED CROSS SOCIETY
This one has been machine stitched, and uses ‘Patriotic Prints’ - look for the white V on the red/blue background - in the V there’s morse code printed ‘dot dot dot dash’. These prints were printed with various wartime themes and often endorsed by female celebrities to increase their popularity and made into clothing, and as we can see above incorporated into quilt tops.
This quilt was give to the donor’s mother-in-law who lived in West Croydon where her house was damaged 5 times during the bombing raids, and it was during that time at some point that she was given this quilt.
The whole exhibition was full of poignant stories, alongside the fantastic historical quilts, which made me look at our lives today and realise how very fortunate we are that such sacrifices were made for us. We all know of stories from the First and Second World Wars, but somehow seeing them through these quilts gave a perspective that is rarely seen.
If you enjoyed this post from my visit to the Festival of Quilts 2025 then please do check out my other posts from the show. Even though my mind was blown by the sheer volume of quilts on display, I’m pretty sure I’ll be going again!