The 'New' Build Garden

* I was invited to this year’s Gardeners’ World Live and provided with a pair of tickets to the show, therefore all my posts will be marked as 'Ad’ though as usual my views and opinions are very much my own.

Knowing where to start with my individual garden appreciation posts from this year’s show was quite the challenge. I shared my highlights from around the show, and I expect you thought I’d start by sharing either the ‘Best in Show’ Where there’s water, there’s life garden or Nick Bailey’s Plant-based garden, but in fact I’ve chosen neither of of those (though they are on my list to share).

I have as you can see from the title of this post chosen to start with The ‘New’ Build garden, as it was more than you’d expect it to be, and in fact we’ve been lucky with our new build garden being more than we expected it to be too.

This garden was designed by brother and sister designers, Henry and Lucie Ponsford at Mimosa Design. Their garden transforms new build home gardens into lush, sustainable retreats by blending repurposed waste materials with ancient crafts, and offering luxury without compromise.

The eco-hot tub in the foreground and black shed at the rear - both surrounded with planting

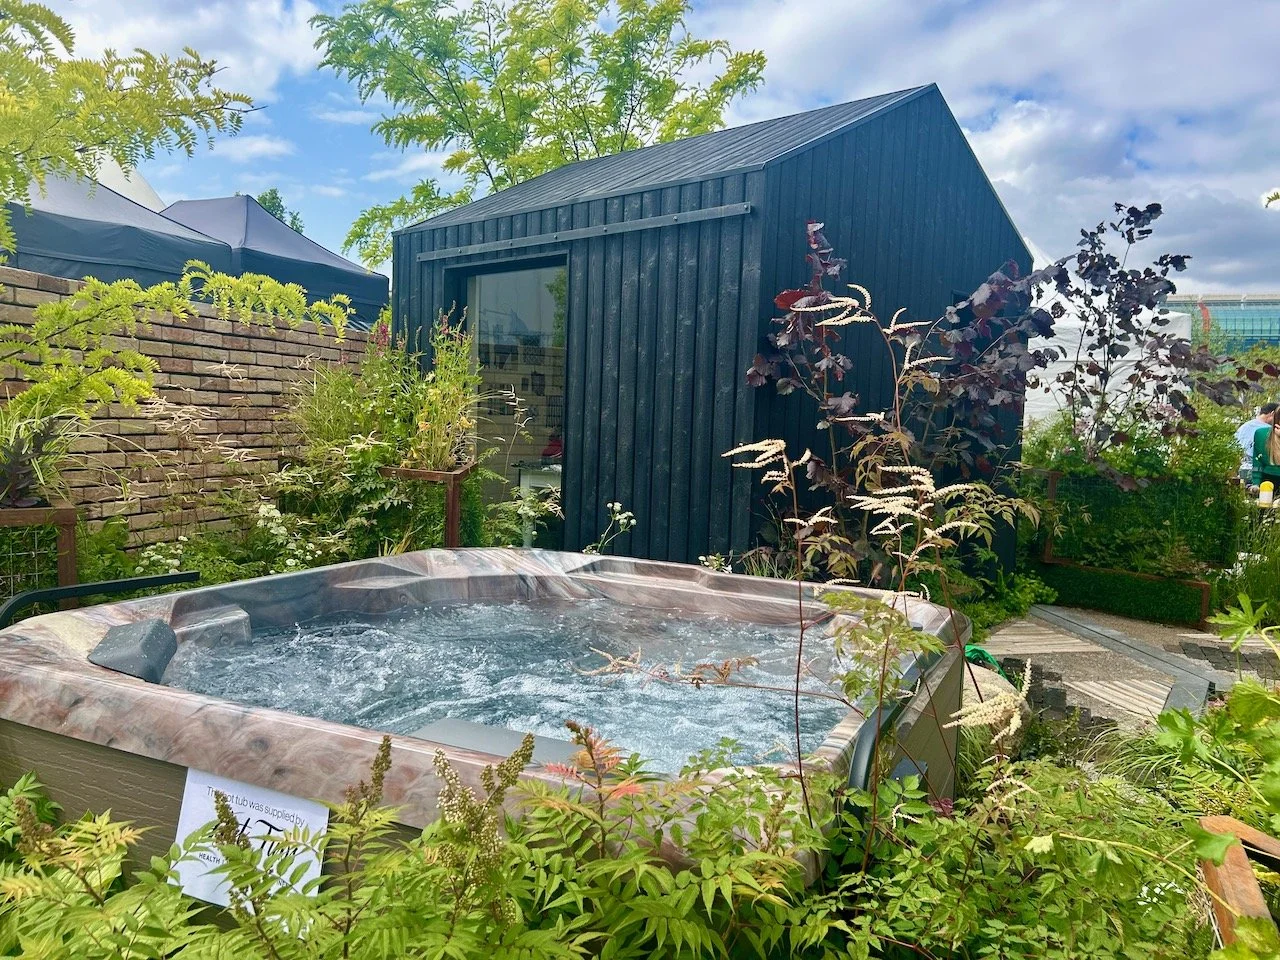
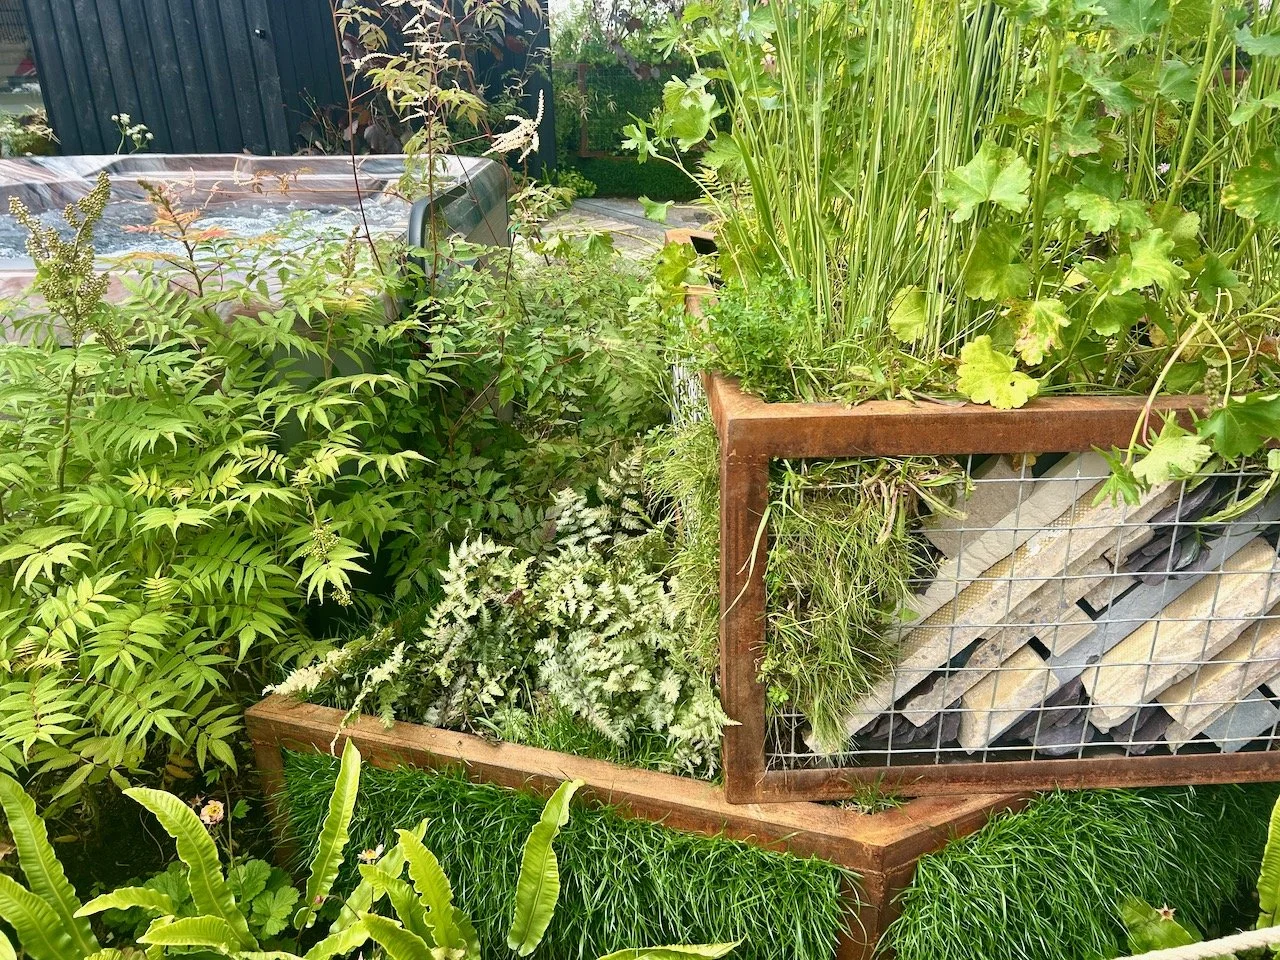
Knowing this I was still quite surprised to see an hot tub, albeit an eco one, in the garden alongside the handcrafted hut, but as the blurb on the board said it’s purpose is to ‘show that style and sustainability can coexist.’

I’m all for that.

They have aimed to reduce landfill impact by using intelligent and creative solutions, such as fast-install permeable paving and soil-relocating gabions - you’ll recall I was rather taken with these.

One of the triangular gabions complete with slabs on a diagonal with planting above and surrounding the structure

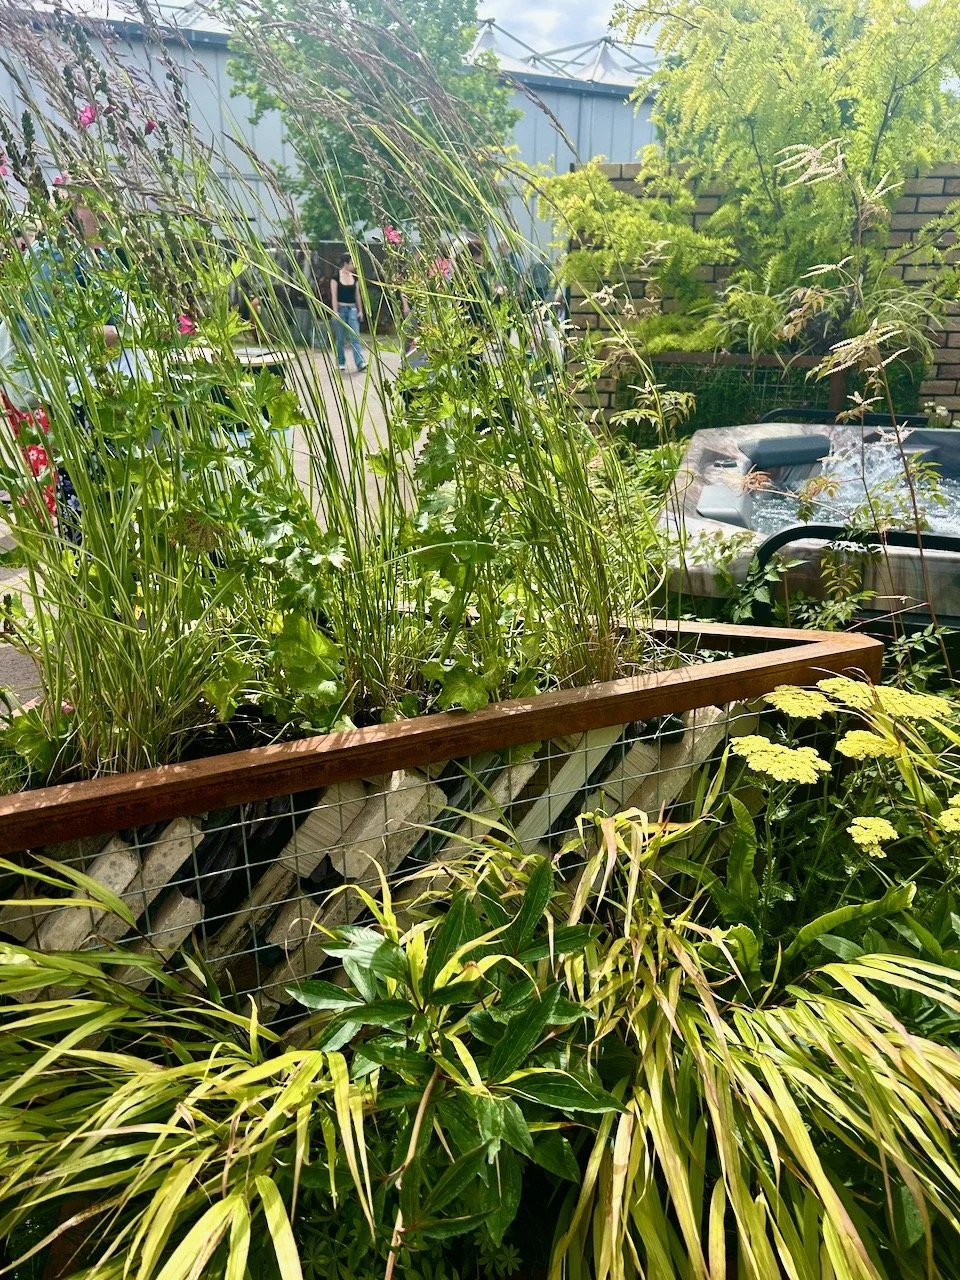
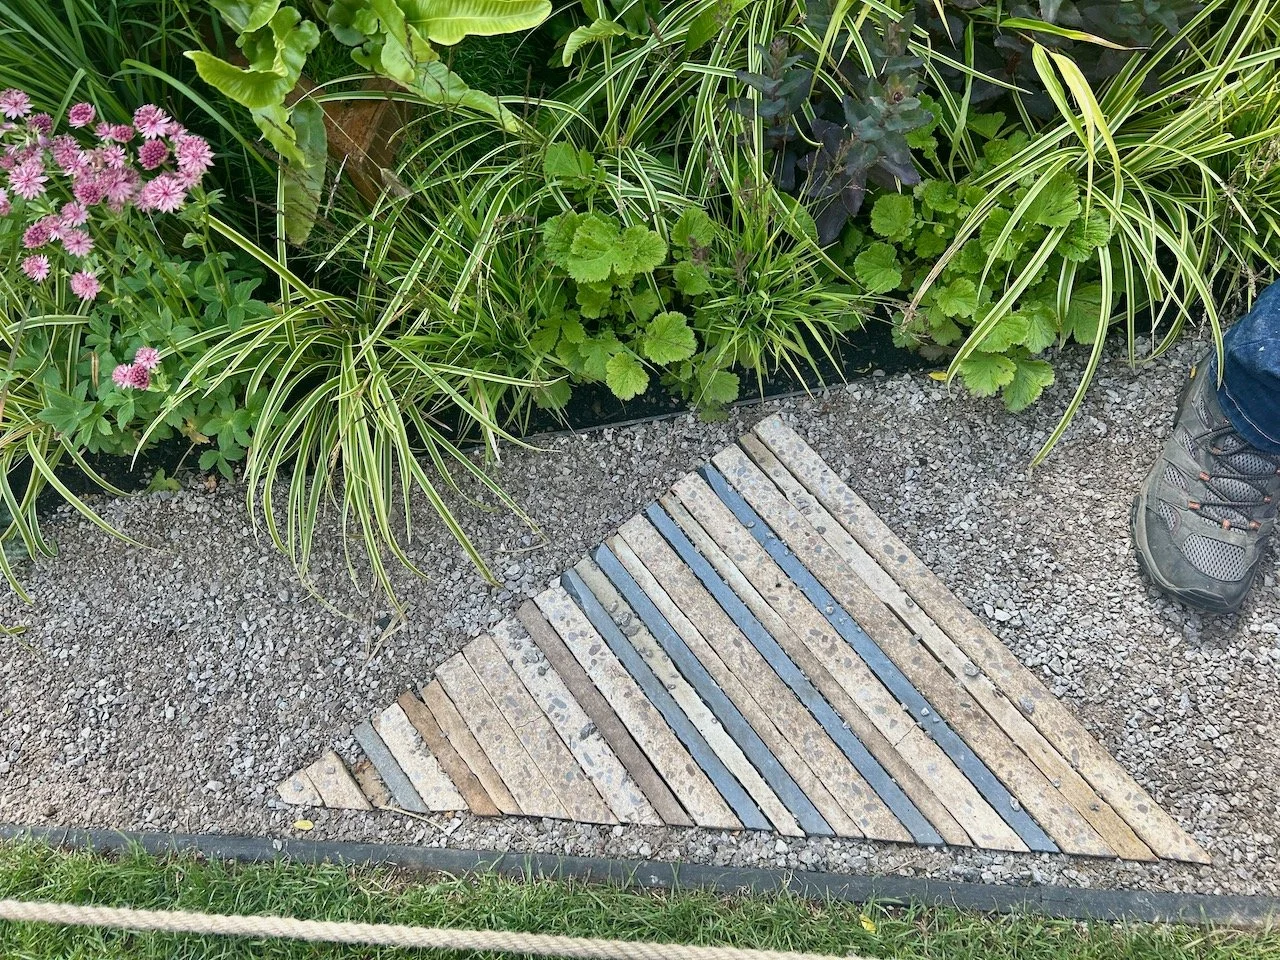
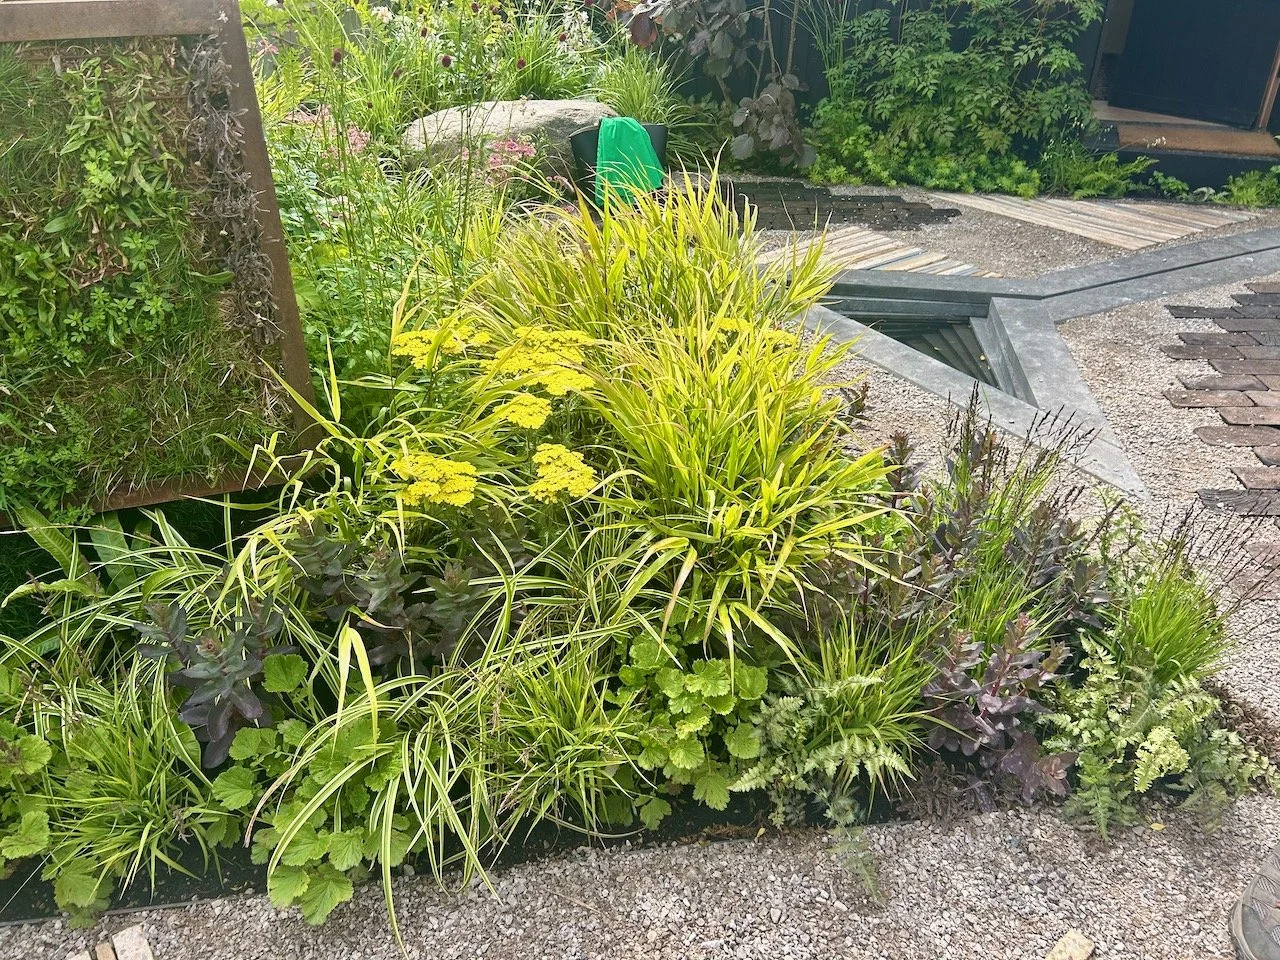
But it wasn’t just the angular gabions that I liked in this garden - though filling them with old paving slabs stacked on an angle was a great idea and a great way to bring even more texture into the space. There was another use for old paving slabs, that might not have been immediately apparent.

The triangular sections in the paths were also old paving slabs cut into narrower strips then inserted into the permeable path on their ends to give this effect. Simple (in design if not necessarily to replicate), but very effective, don’t you think?

Looking down to the triangular upended slabs inserted into the gravel-like path

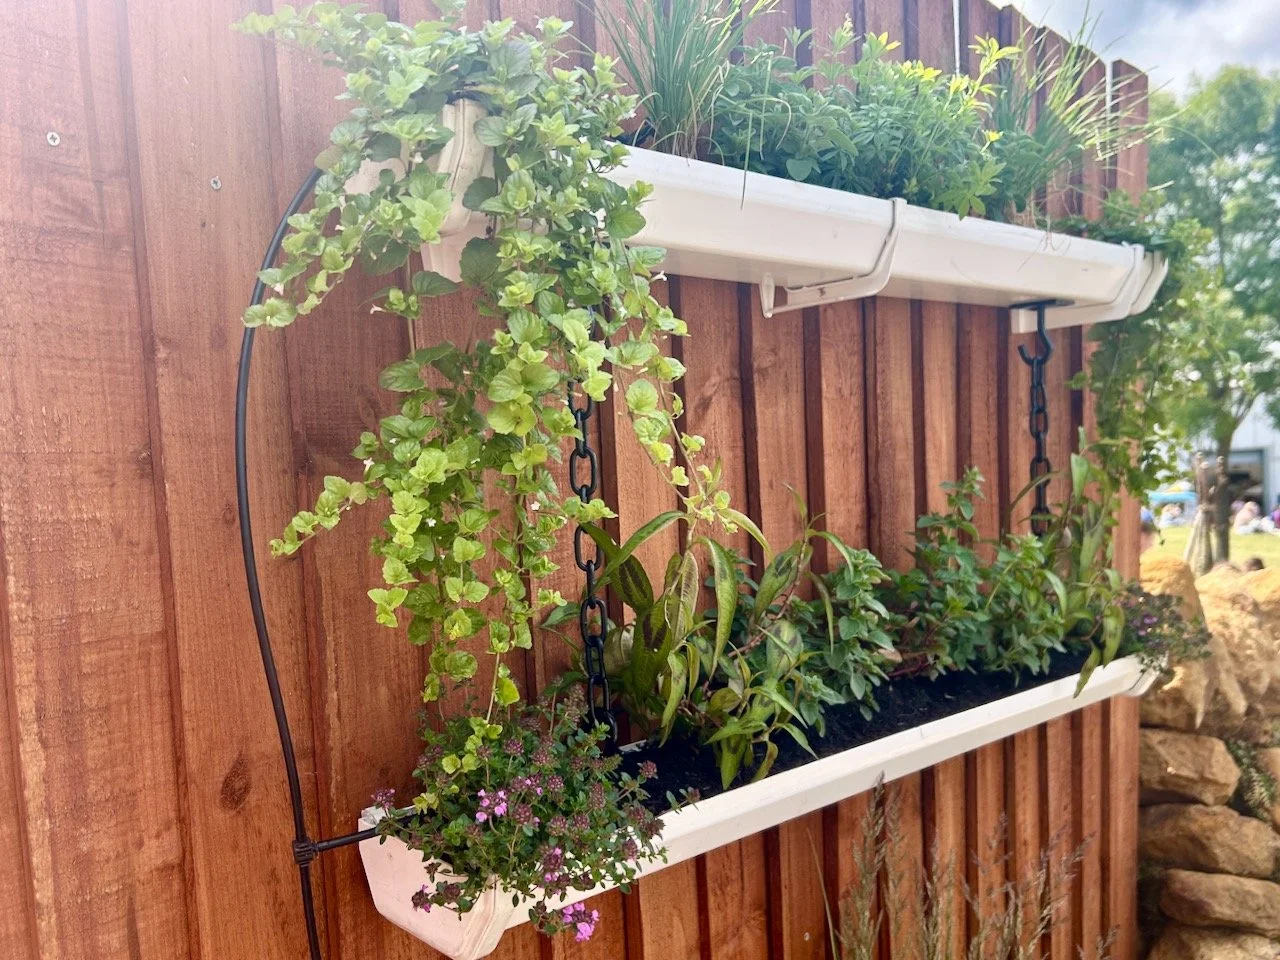
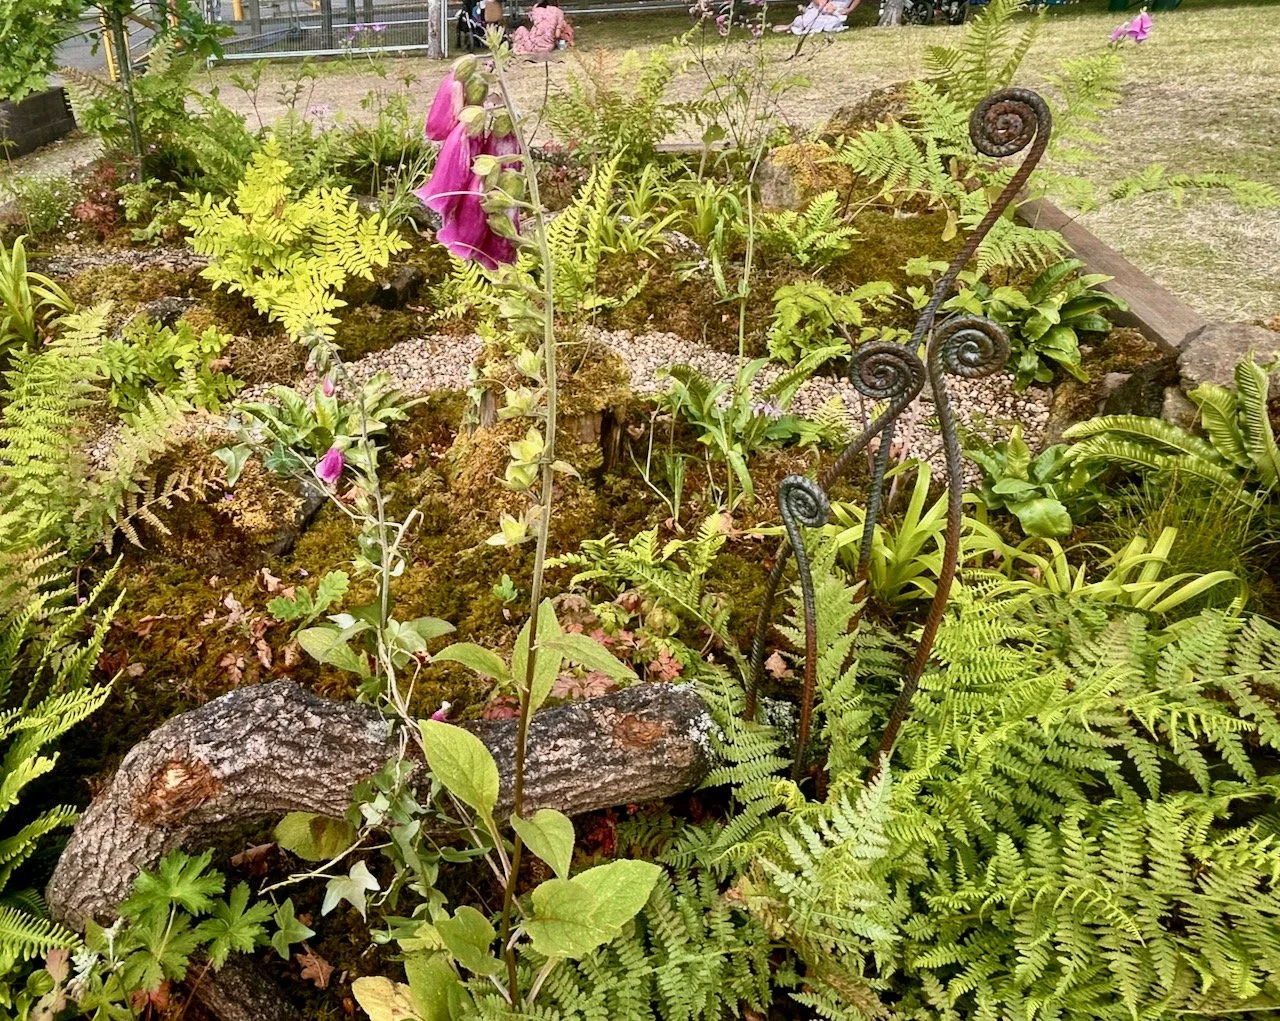
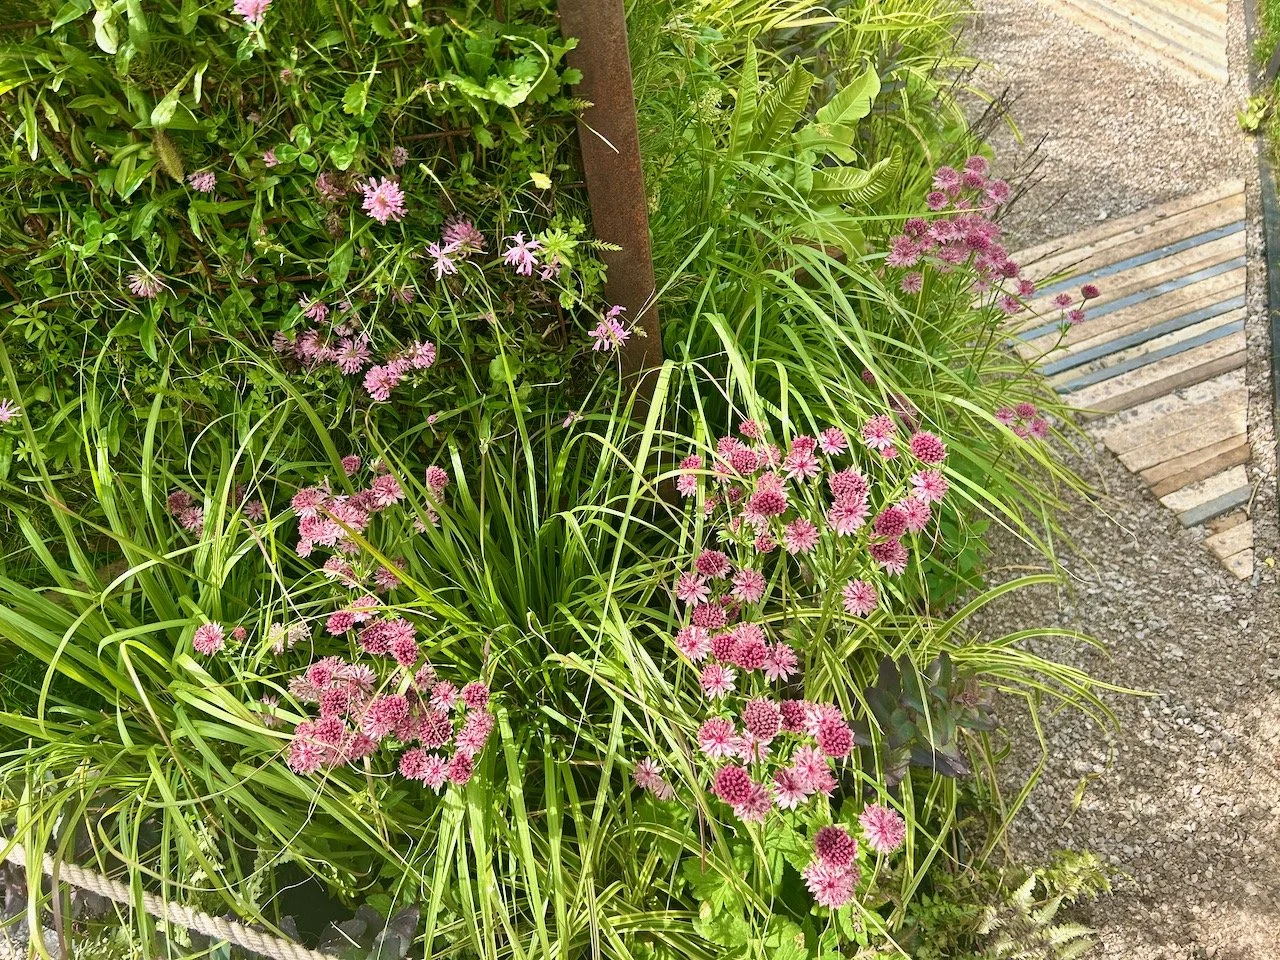
There’s gutters at ground level as attractive solutions to channel and gather water - something we all probably need to do more of, and with the inclusion of astrantias in the planting I was always going to stop by to learn more about the garden.

The gutters leading to a triangular 'pond' with the wooden pammits used on the path on show, planting of grasses  in the foreground
astrantias tumbling onto the path

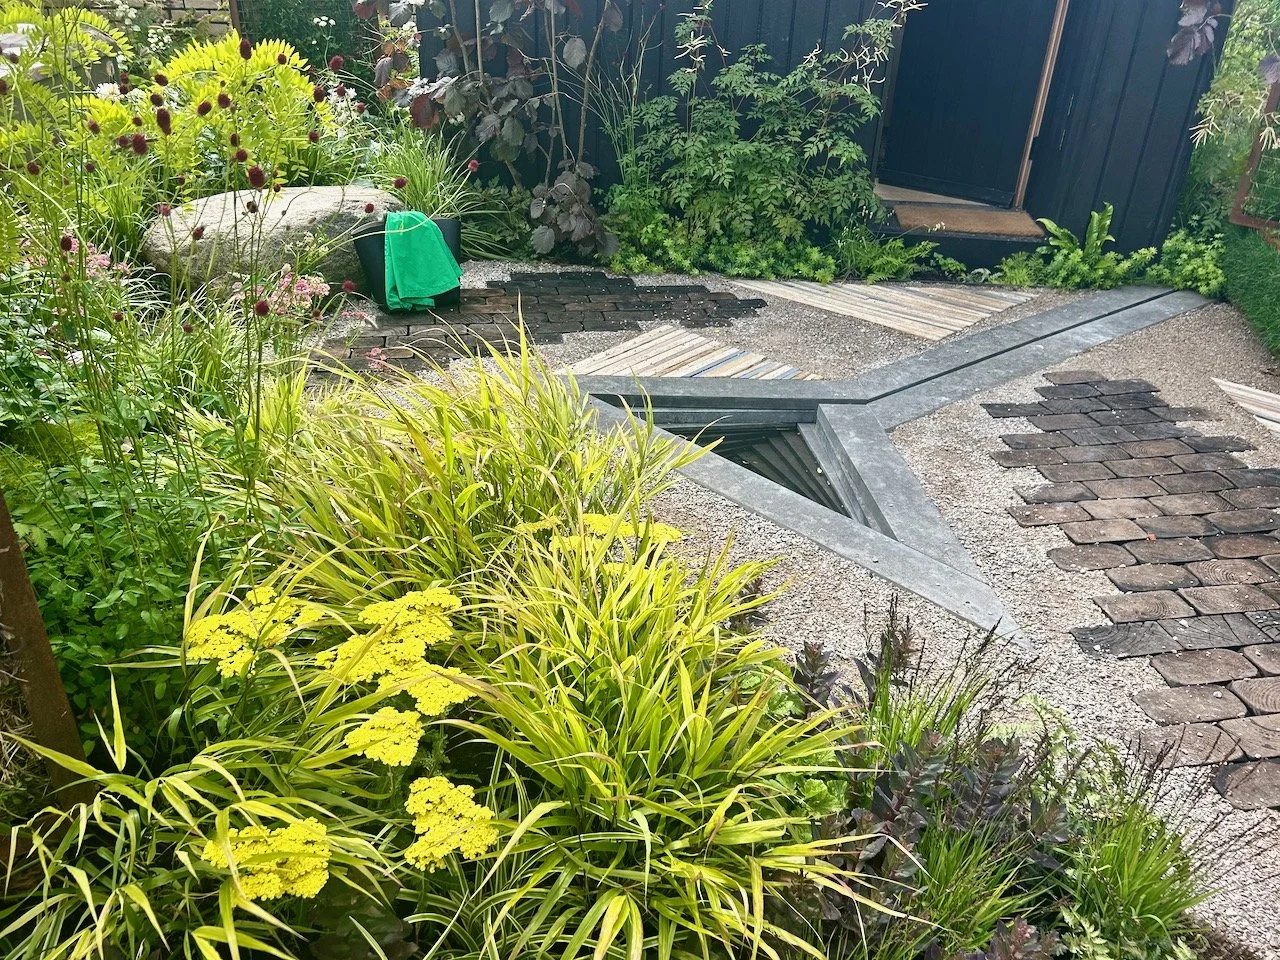
I can see how the gutters at ground level could work and bring both calmness and a practical solution to the garden, but I’m still in two minds about water elements in gardens and the need for keeping them clean easily. I’m all for water storage though, as these past few weeks (and actually months) has shown, we need to do more to conserve rainwater when it comes.

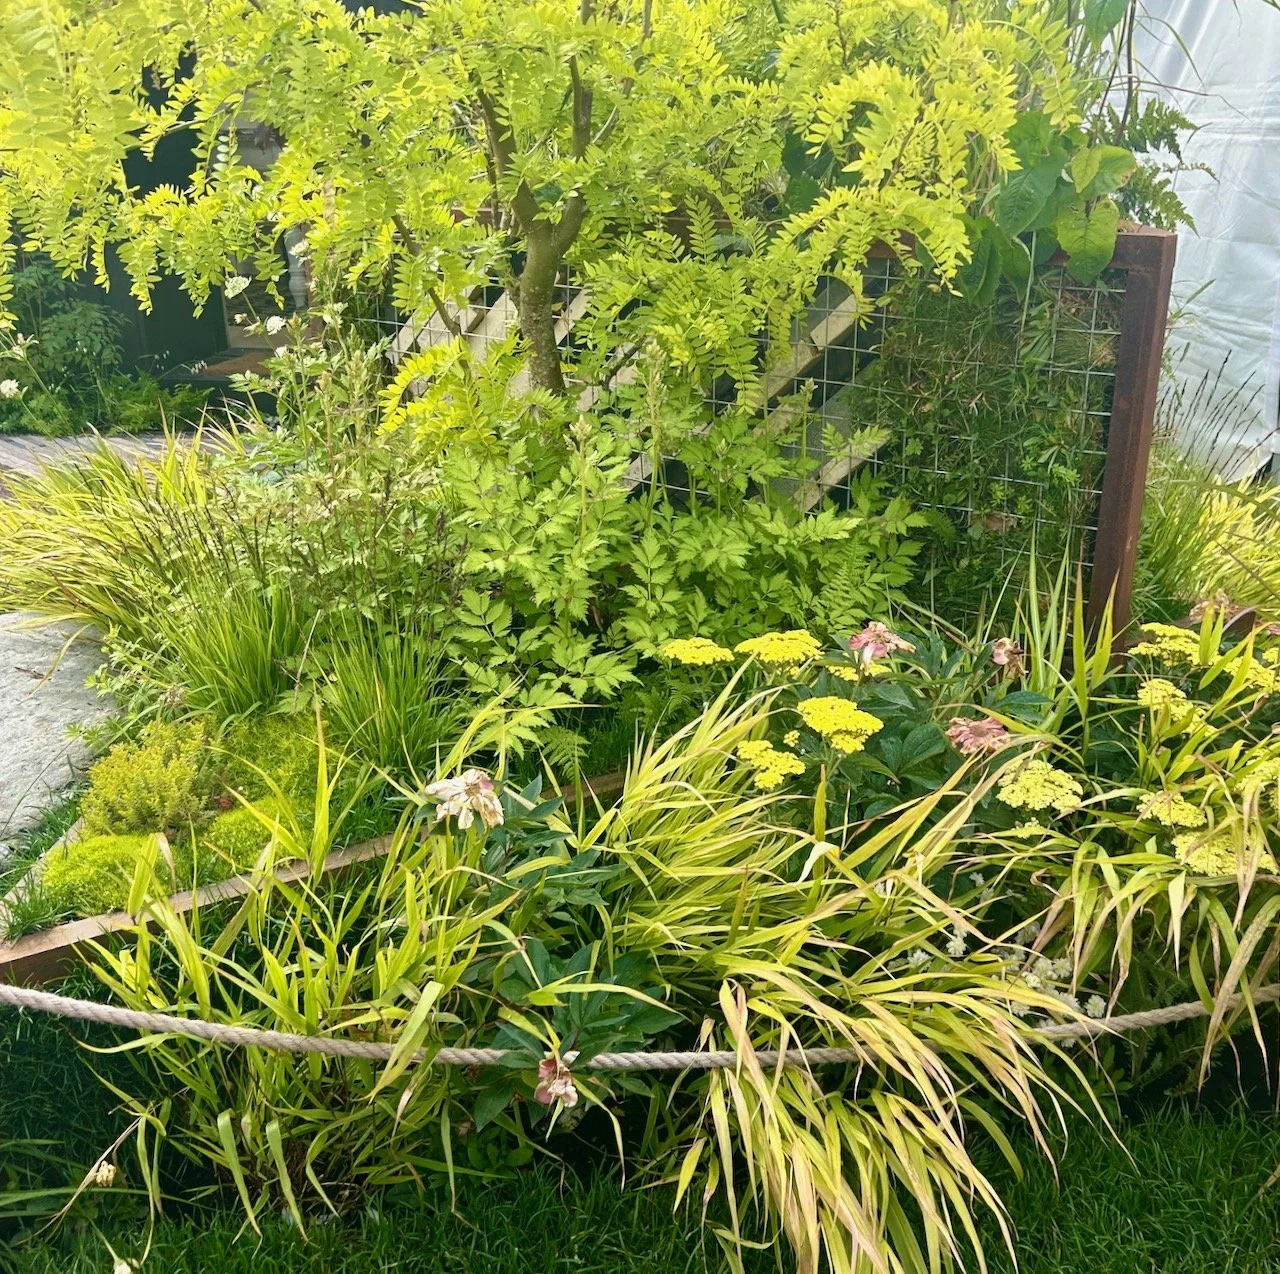
And those angular gabions amongst all of the other angles are designed to reflect a landscape on a precipice, but still allow the garden to become a sanctuary for people, water and plants. And through their designs they’ve demonstrated that new builds can connect us more deeply to nature than you’d think, and don’t have to be the standard ‘square of grass’ left by the developer (if you’re lucky).

A double layer of triangular gabions with the eco-hot tub in the background
A taller angled gabion this time - still planted, but with a rowan tree in front providing height in the garden

And I agree, they’ve definitely shown that style and sustainability can work together. The permeable walkways were something we spoke to the garden representatives about, and while I’m keen to have something permeable we don’t think these are for us. In this garden they’ve added the wooden cobbles in ‘high traffic’ areas as the surrounding surface could be muddier than you’d like after rainfall, something to consider as I definitely don’t want muddy footprints in the house.

gutters, gabions and a focus on the triangular bed planted with textural plants

* With thanks to Gardeners’ World for inviting me to Gardeners’ World Live, it was quite a show! I’ll be sharing more from my visit to this year’s show throughout the year - I hope you enjoy them as much as I did the show.

Making my Mystery Block of the Month: May 2025

You’ll have seen that I plan to complete Sherri’s mystery block a month quilt and yesterday I shared the test blocks which I made into my seventh charity quilt, today I’m sharing the centre block I made for my own quilt.

And yes, it’s July and I’m only just sharing my May block - holidays, heatwaves and life have played their part here!

In last month’s post I speculated that the next block wouldn’t be a star, and I was right. It’s a flower, though this one looks decidedly less tulip-like, though I think that’s down to my colour choices.

I remembered to pay attention to my seams and I’m happy with how they turned out. They’re not all perfect, but then again this is a flower and not all flowers are the same, and they all still seem to look pretty good.

Head-scratching? Which border…

Even though I have my handy hand-scribbled plan for the eventual quilt layout, I still found myself scratching my head to work out which of the green borders to use, and which side of the block they should go.

It took way more brainpower than it should have, but I ended up with this visual reminder to save me going over it all, and doubting myself each time. It’s not necessarily conventional, but it worked.

I’m pleased with my completed block, and couldn’t resist seeing what it looked like next to April’s block.

I’m even more pleased with this small preview of how the quilt will turn out, and although the green borders are not the same I’m happy with how they’re working out. It’s back to a star for June’s block so I’ll be back to the navy fabrics again, and hopefully I’ll be sharing it sooner than you know…

Join me hopefully later this month to see how I get on with the next mystery block, and check out my previous posts for my mystery block quilt or the charity quilts made from the test blocks.

The Friendly Bee

I’ve updated the final section of this post now that the quilt is fully complete. I’d hoped to finish this shortly after our holiday, but what with life, the heatwave it hasn’t happened until now. Though the heatwave has gone, it’s still warm in my sewing room - and plenty warm enough to have a quilt on my knee sewing the binding. But It’s finished, and I think it looks good.

I’ve made another quilt as part of my quilting ‘stretch’ project this time using the April block from Sherri at A Quilting Life’s mystery block a month. As I said then I don’t know if I’ll manage to make a quilt a month, but I won’t really know unless I try…

When I saw this one was another star I questioned my commitment to my challenge, and also my sewing ability. But, it wasn’t as bad as I thought it would be, so phew.

My sixth charity quilt

As I said above, I wasn’t really looking forward to tackling another star block - the February vintage star block had many small pieces, which made me question why I cut up pieces of fabric to sew them back together again! Which is a fair point, when you look at it like that, but in for a penny, in for a pound and all that.

My original intention was to pull ‘yellow’ fabrics from my stash, as I thought this might lift my mood - but as you can see they ended up more beige than I expected.

Well not entirely beige, there’s some gold and rust colours in there too. The fabrics for this quilt included some more of the old orange curtains and of the duvet cover I used as backing last month, some checked material which I used back in January for the cute little houses, two vintage pillowcases and some new-to-me fat quarters bought for a much reduced price at my sewing group’s recent stash sale, plus some ‘wood effect’ material which dare I say it, I wasn’t in love with and some much smaller scraps which I used as the background on two of the blocks.

But actually it wasn’t anywhere near as daunting as I thought it might be once I started. Now isn’t there a life lesson in there?!

The blocks surprised me and came together relatively quickly.

I find it easier to lay all the elements of the blocks out in their approximate location - this means I don’t either over, or under cut the pieces I need, and it gives me a look at how the blocks might work.

I think the colours work well together - I needed to add the pink flowered background (used on the two blocks on the right) as I didn’t have enough of the fabric used for the blocks on the left, but the colours tone.

And with a bit more sewing I had four friendship star blocks.

Introducing the bees

You’re probably wondering why I’ve named this quilt the Friendly Bee, well the border fabrics should help explain that.

Laying out the border fabric - with two bee fabrics - to see how they work together

As you can see both of the materials bordering the Friendship star have bees, hence the Friendly Bee name.

The ‘wood effect’ fabric actually works well in this quilt, and tones nicely with the honeycomb fabric used alongside it. The two outer borders are the vintage pillowcases, and as they’re the material I had the most of they were obvious choices for the longer borders.

With the blocks attached I added the outer border, this time using two different fabrics - and I think this works, I wasn’t keen on having two of the same pattern together, so by using the pink flowered material again here I’ve avoided that.

Finishing the quilt: Update

Last month I opted to quilt the Four pink hearts and a hug quilt with diagonal lines, and it worked well. My plan is to try that again, so that’s what I’m part-way through doing for this one too. Yes, this quilt isn’t finished but it’s pretty close - I’ll update this post when it’s actually finished.

I knew that some months it would likely be harder to fit in making a quilt around everything else that life has to offer, that’s why I’ve called it my ‘stretch’ project. I’ll let you know if a few weeks how it turned out.

Update

It’s taken me longer to finish this one than I’d hoped, but it’s finished and it looks great.

Before I went away I’d got all the sewing done, which left me the job of basting, quilting and binding. With the weather a little cooler, I managed to get that done in two days, just in time to start the next one!

I opted to quilt this one in vertical lines rather than the diagonal ones I mentioned above. I actually prefer this, which is good as not only was it easier and quicker to do, I was able to mark out two lines at a time - speed quilting, if you would!

Using tape to guide my quilting stitches

From this I learnt it’s easy to reposition the tape, but it’s also easy for the tape to move about a bit, so I’ve experimented with the optimal number of pins to keep it in place. That worked, and using the tape as a guide also worked, and so it’s something I’ll do again.

The finished - quilted and bound - friendly bee quilt

It looks pretty good doesn’t it? And way better than I could have hoped for when I pulled those mostly beiges from my stash!

You can see my other quilts which I’ve made to donate to Project Linus - a charity whose mission is to provide love, a sense of security, warmth and comfort to children, who are sick, disabled, disadvantaged or distressed through the donation of new, homemade, washable quilts and blankets, including those that are part of this ‘stretch’ project in earlier posts. I’m aiming to publish an update on my progress in the last week of each month for the remainder of 2025.