Marmalade hearts

I’ve made another quilt as part of my quilting ‘stretch’ project using the block from Sherri at A Quilting Life’s mystery block a month. As I said then I don’t know if I’ll manage to make a quilt a month, but I won’t really know unless I try…

And now I don’t want to not achieve this goal I’ve set and so on I go.

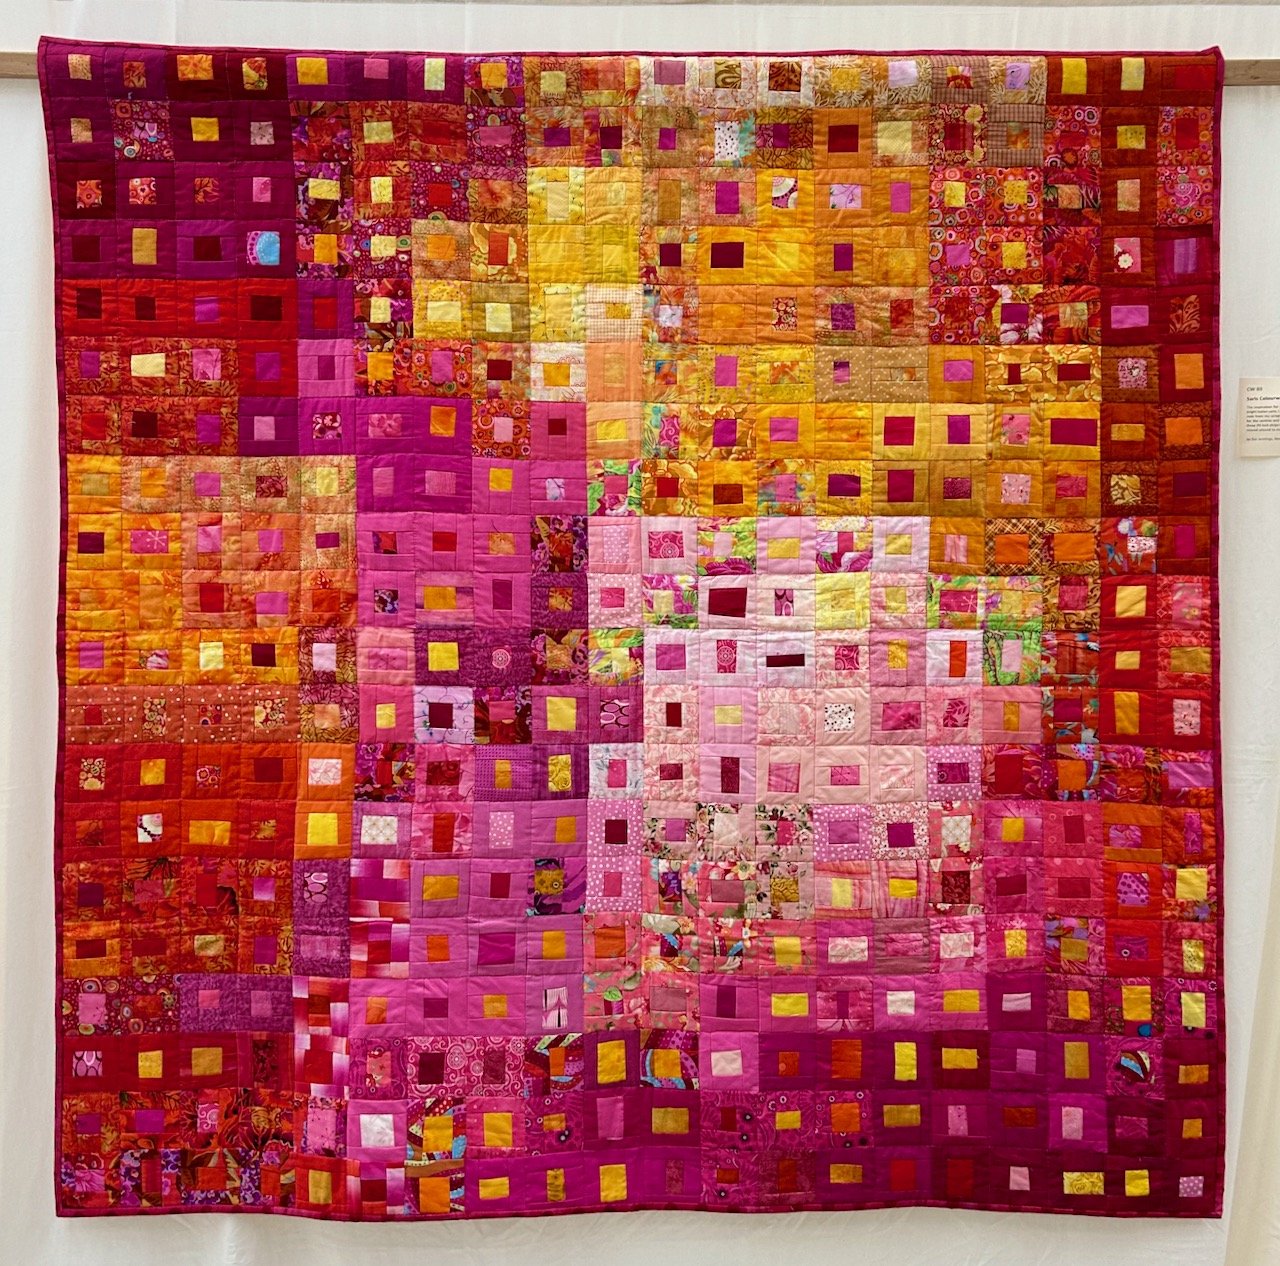
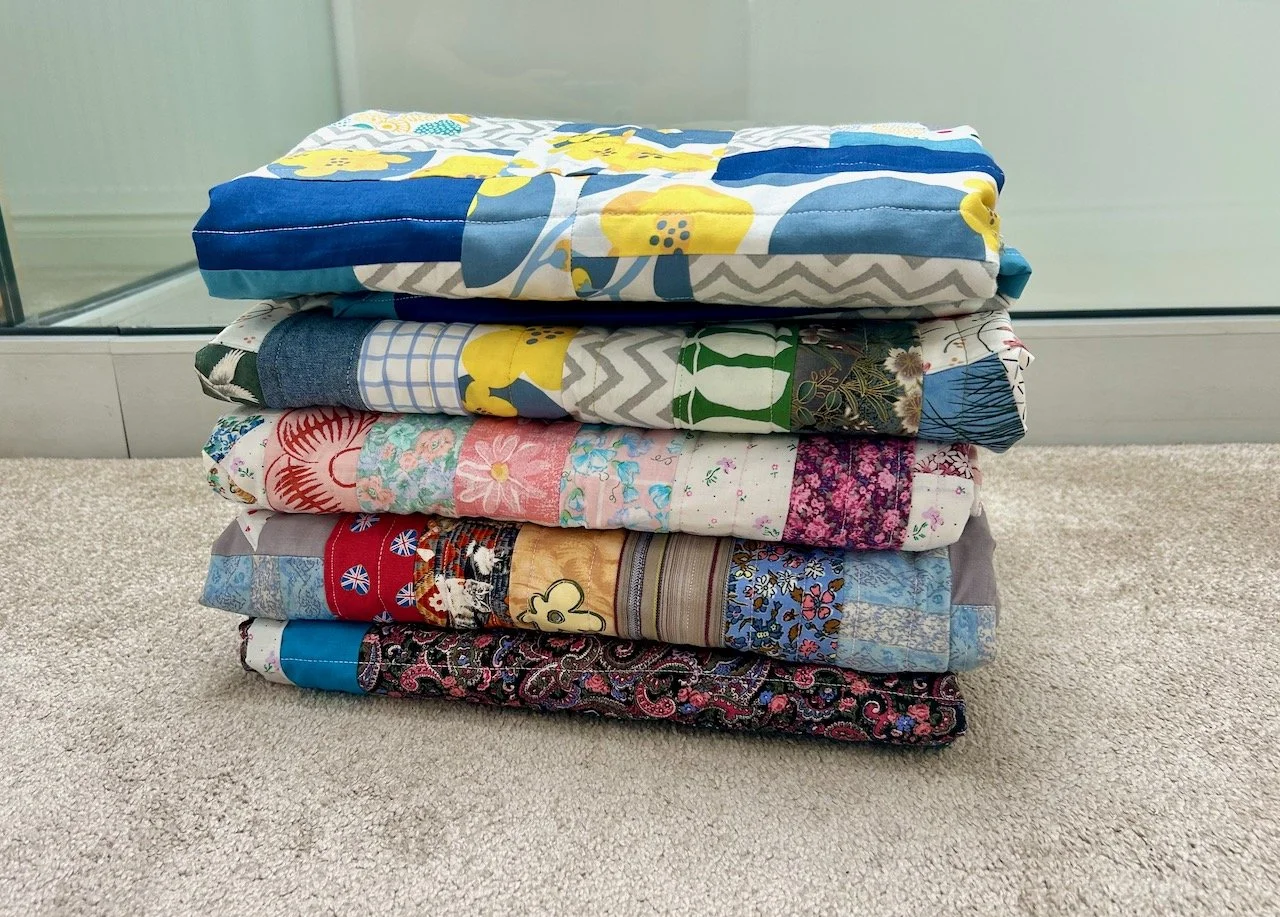
This month I’m sharing my eleventh charity quilt and my new pile is now growing, since the first nine have now been donated to the Mansfield Coordinator of Project Linus UK.

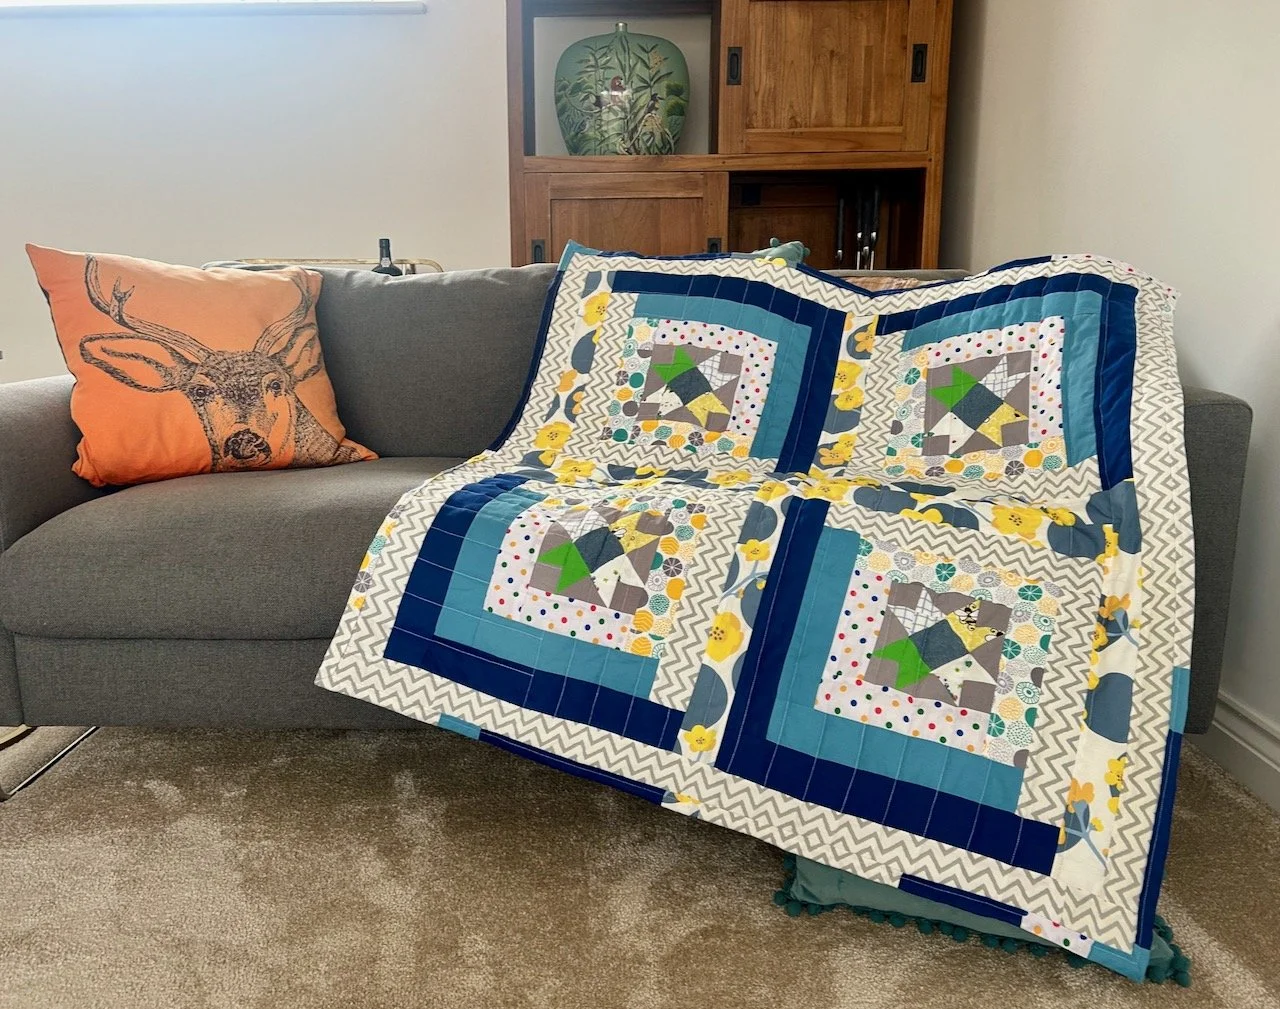
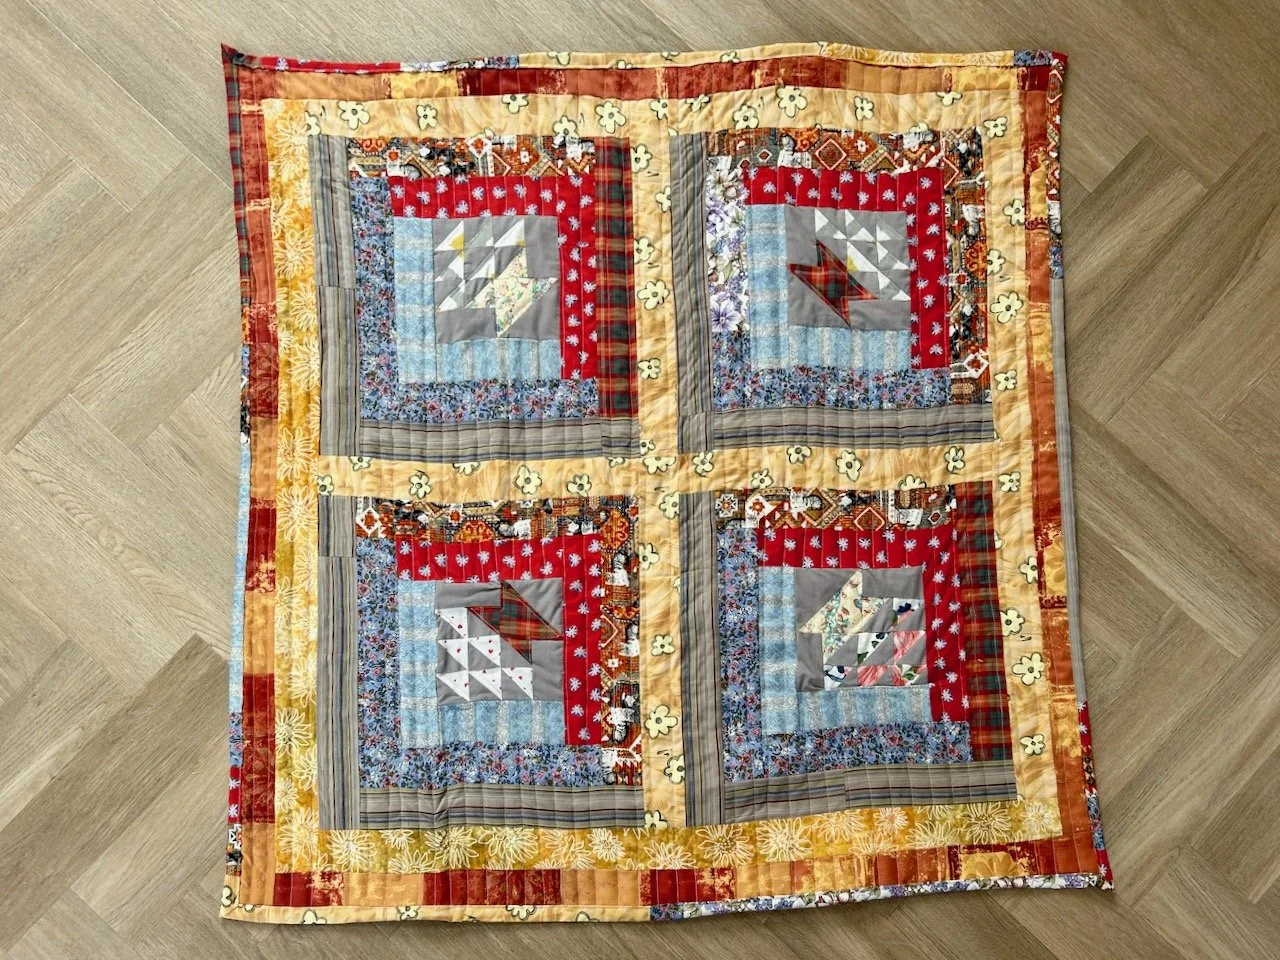
My eleventh charity quilt

I looked at this month’s block and thought to myself ‘oh boy, how many small pieces in that basket’ and I seriously considered my sanity and why a hobby might get you cutting up bits of fabric, only to sew them back together. Oh boy for sure.

Once again, and like last month’s quilt my plan was to avoid pinks if I could. I’ve had some red material which I wanted to use for a while and it just hadn’t happened, so this month I tried harder and found myself drawn to matching it with some blues, but mostly oranges - hence the marmalade part in its name. The hearts are on the red material and there’s also smaller red hearts on a white background used in some of the ‘baskets’ so the quilt once again named itself.

A selection of red/orange and blue/purple toning fabrics pulled from my stash for the quilt's borders

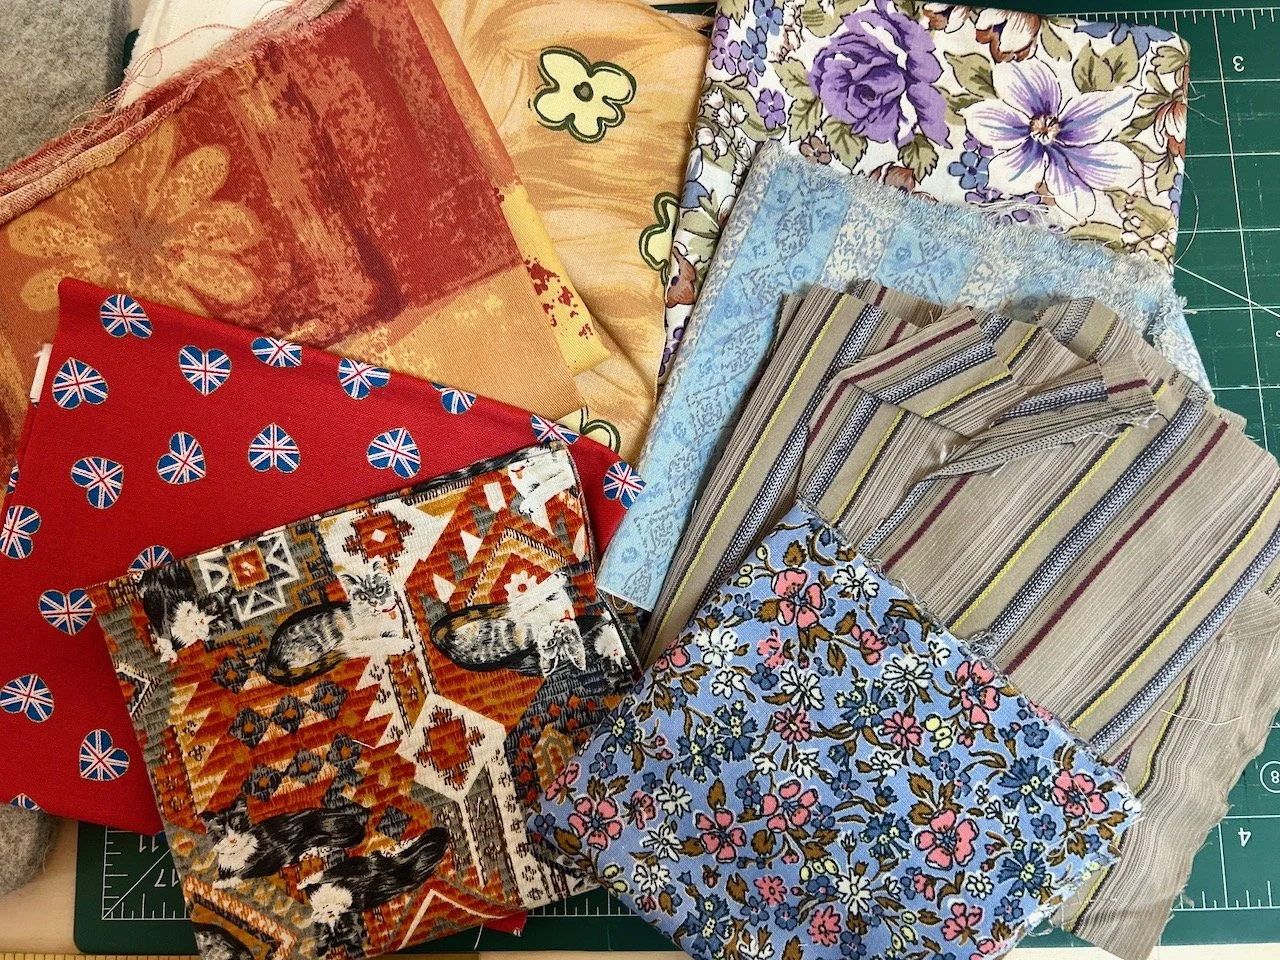
The fabrics I’ve used in this quilt are from a mix of fat quarters I’ve had for a while (the red hearts, the cats, and the purple and blue flowered pieces), a shirt of MOH’s (the multi-colour striped fabric), some old curtains (the patchwork orange material) and two pieces of fabric I’m sure I used when I was quilting back in the 90s (the large flowered piece and the blue striped smaller piece). So it definitely fits in with using my stash, and sustainable sewing.

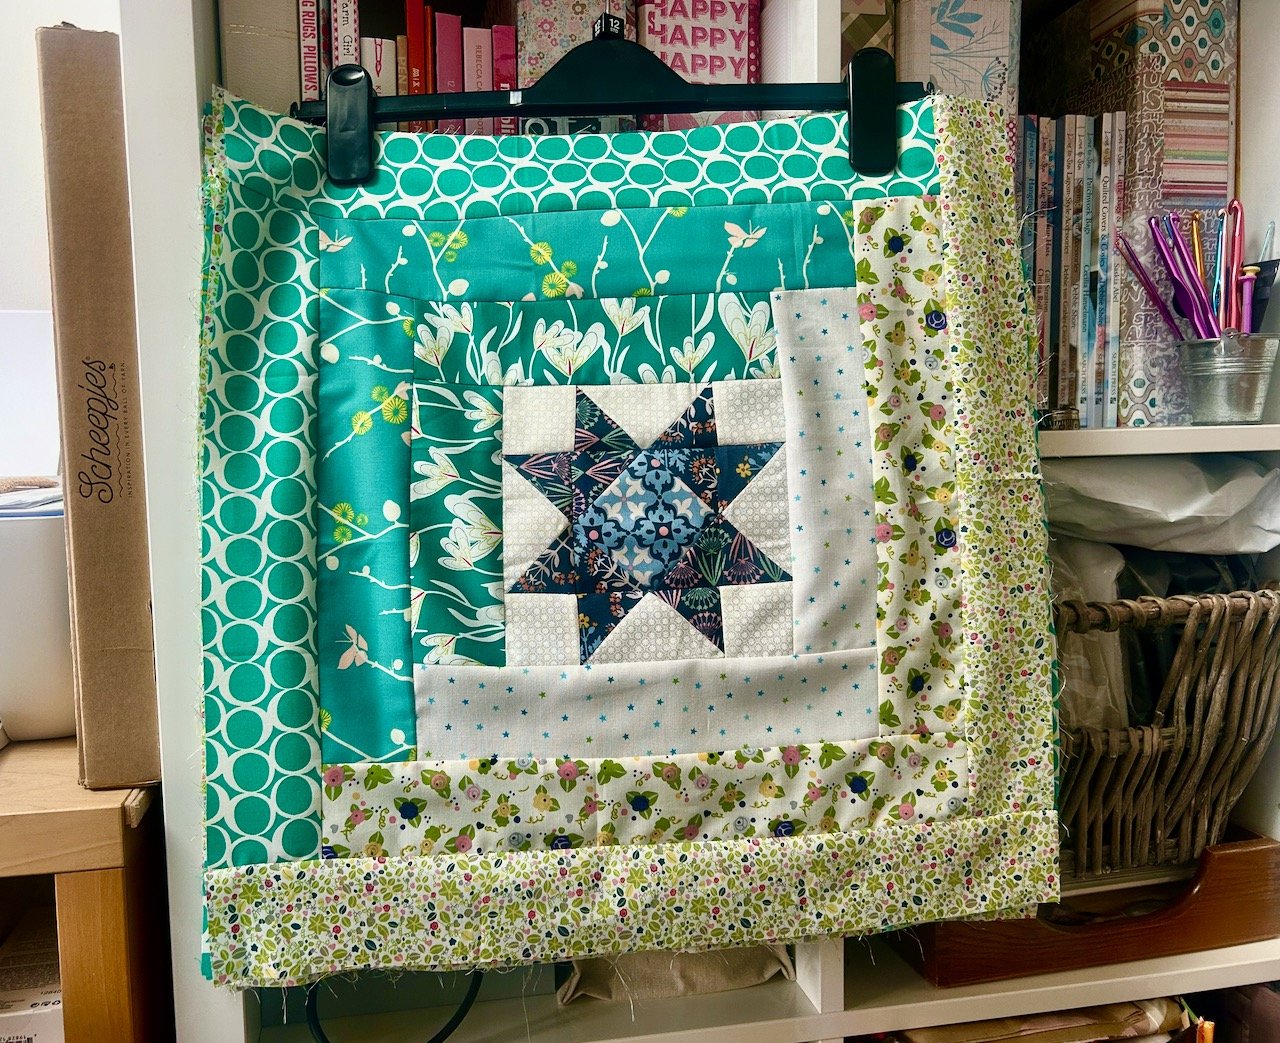
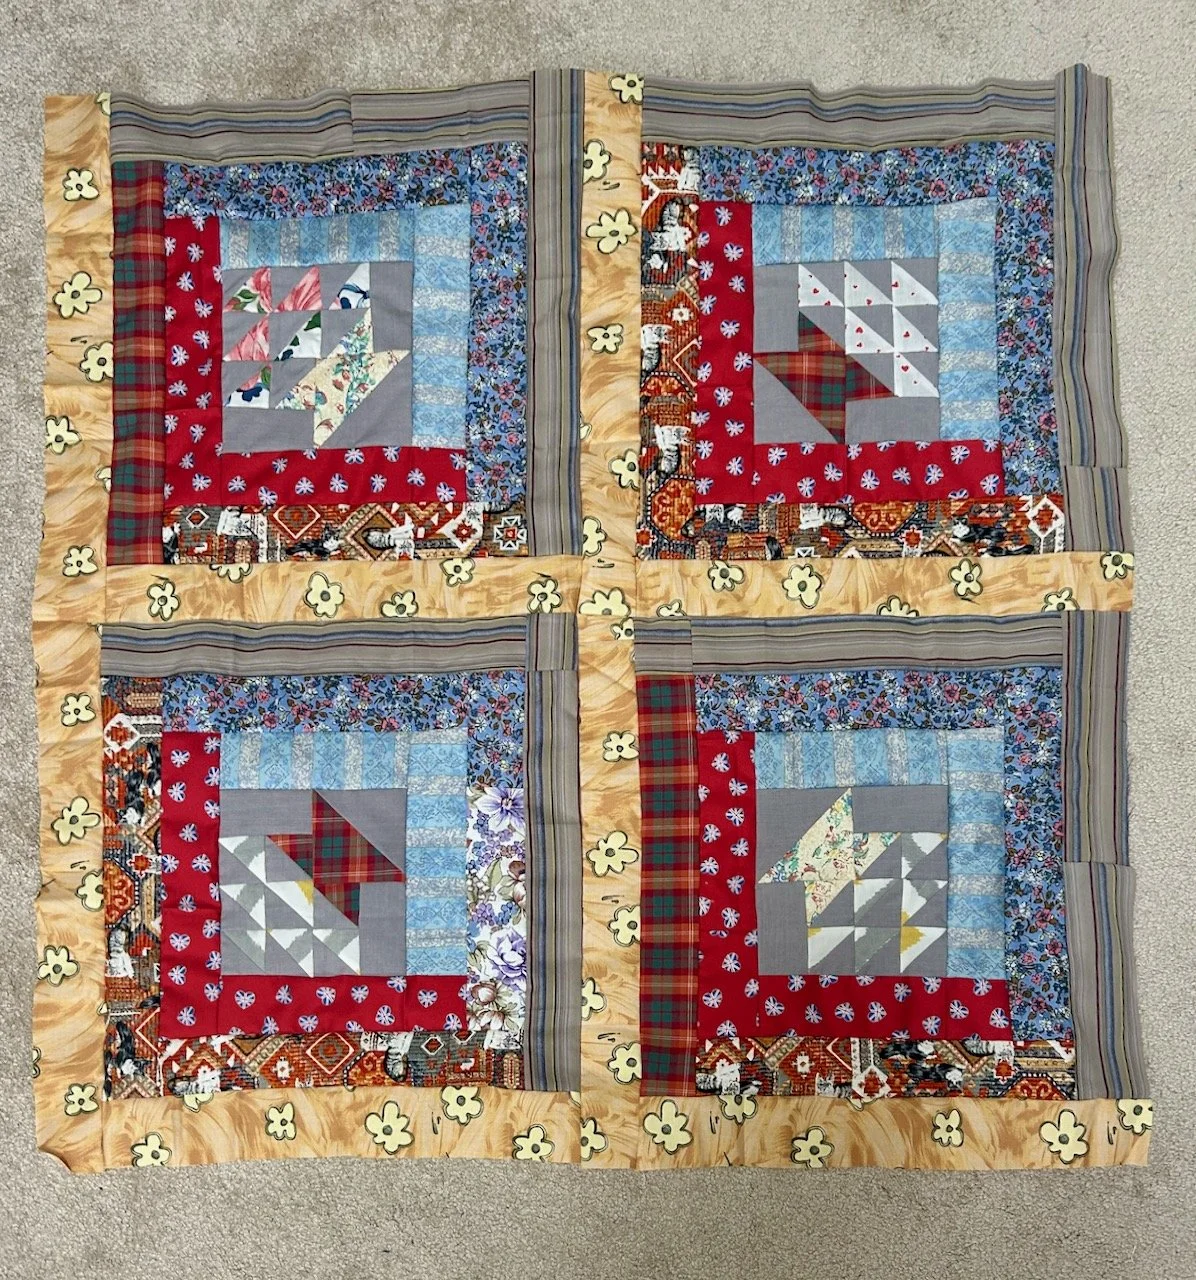
I’d made the four central blocks relatively early in the month, and almost without issue. Actually that’s not true, for the first time I had to completely restart a block which I’ll share more about in my next ‘craft room additions’ post as I think it will fit better there.

Laying out the borders

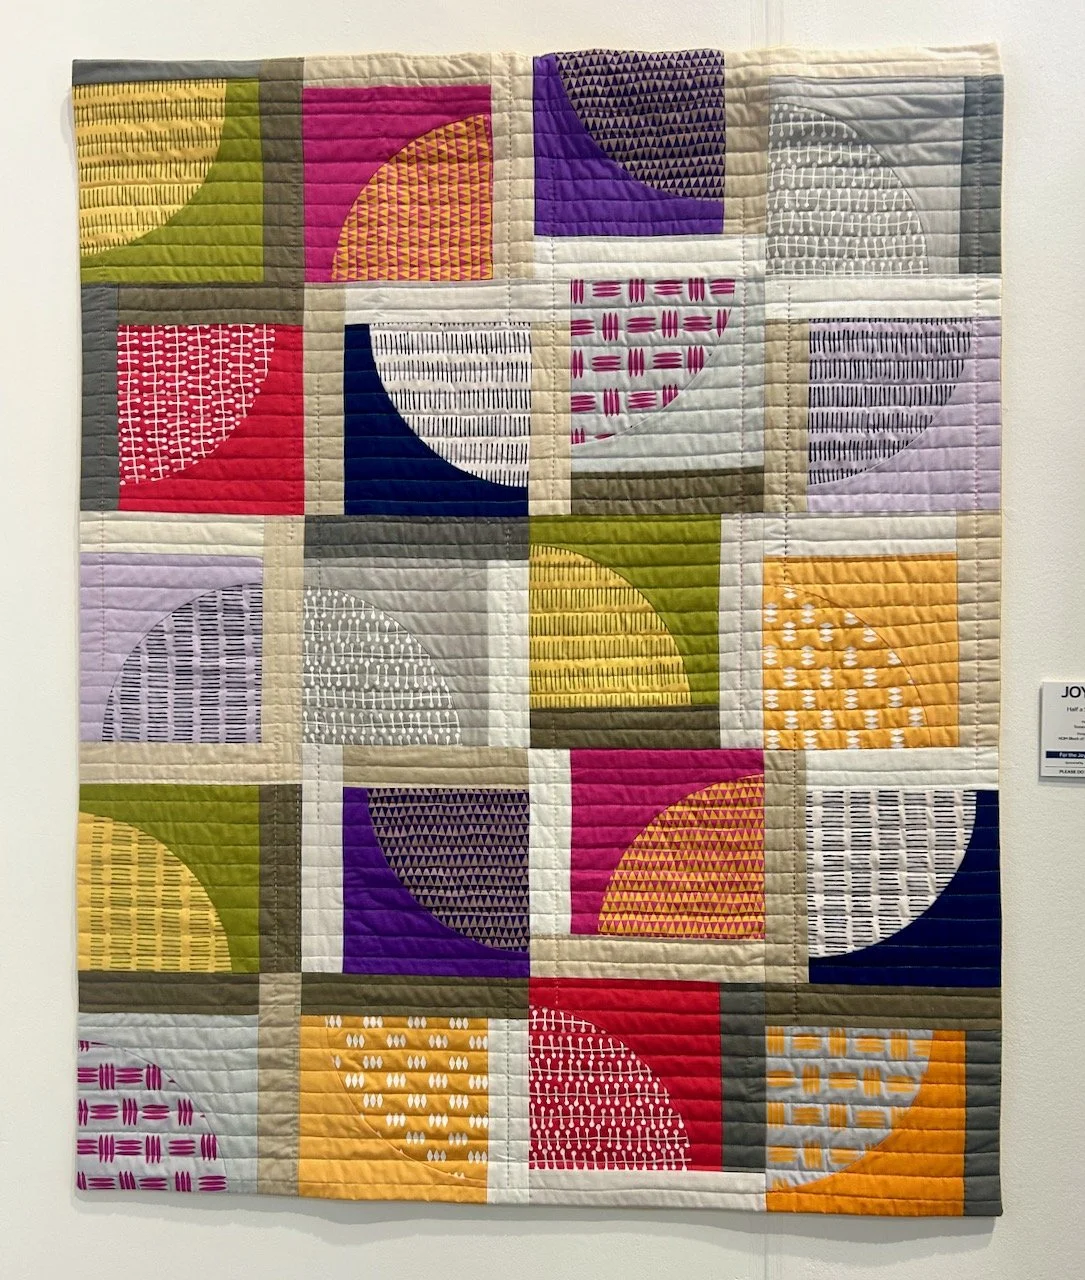
Learning from my ‘half the scraps’ quilt where I learnt it’s hard to do random, and that my eyes prefer balance I decided to lay out the borders and plan this more than I usually would as I knew I’d have to add in some toning materials as I was sure I didn’t have enough not to do this.

Laying out the four basket/centre blocks and laying two of the border fabrics alongside checking placement and layout

And it came together pretty easily - I was keen to have the baskets of the central blocks radiating out from the centre of the quilt, so laying it out like this helped me get that right too.

the four blocks, all with three borders each

With the final, and lighter border added to each central block I realised it needed more to retain the balance my eye craves.

4 blocks with three borders, now with the blocks all sewn together

And so with a quick dig through my stash I found a batik in a colour way that was pleasing to my eye.

With the addition of an L shaped border on the top and right hand side in a fabric similar in tone to the border on the opposite side

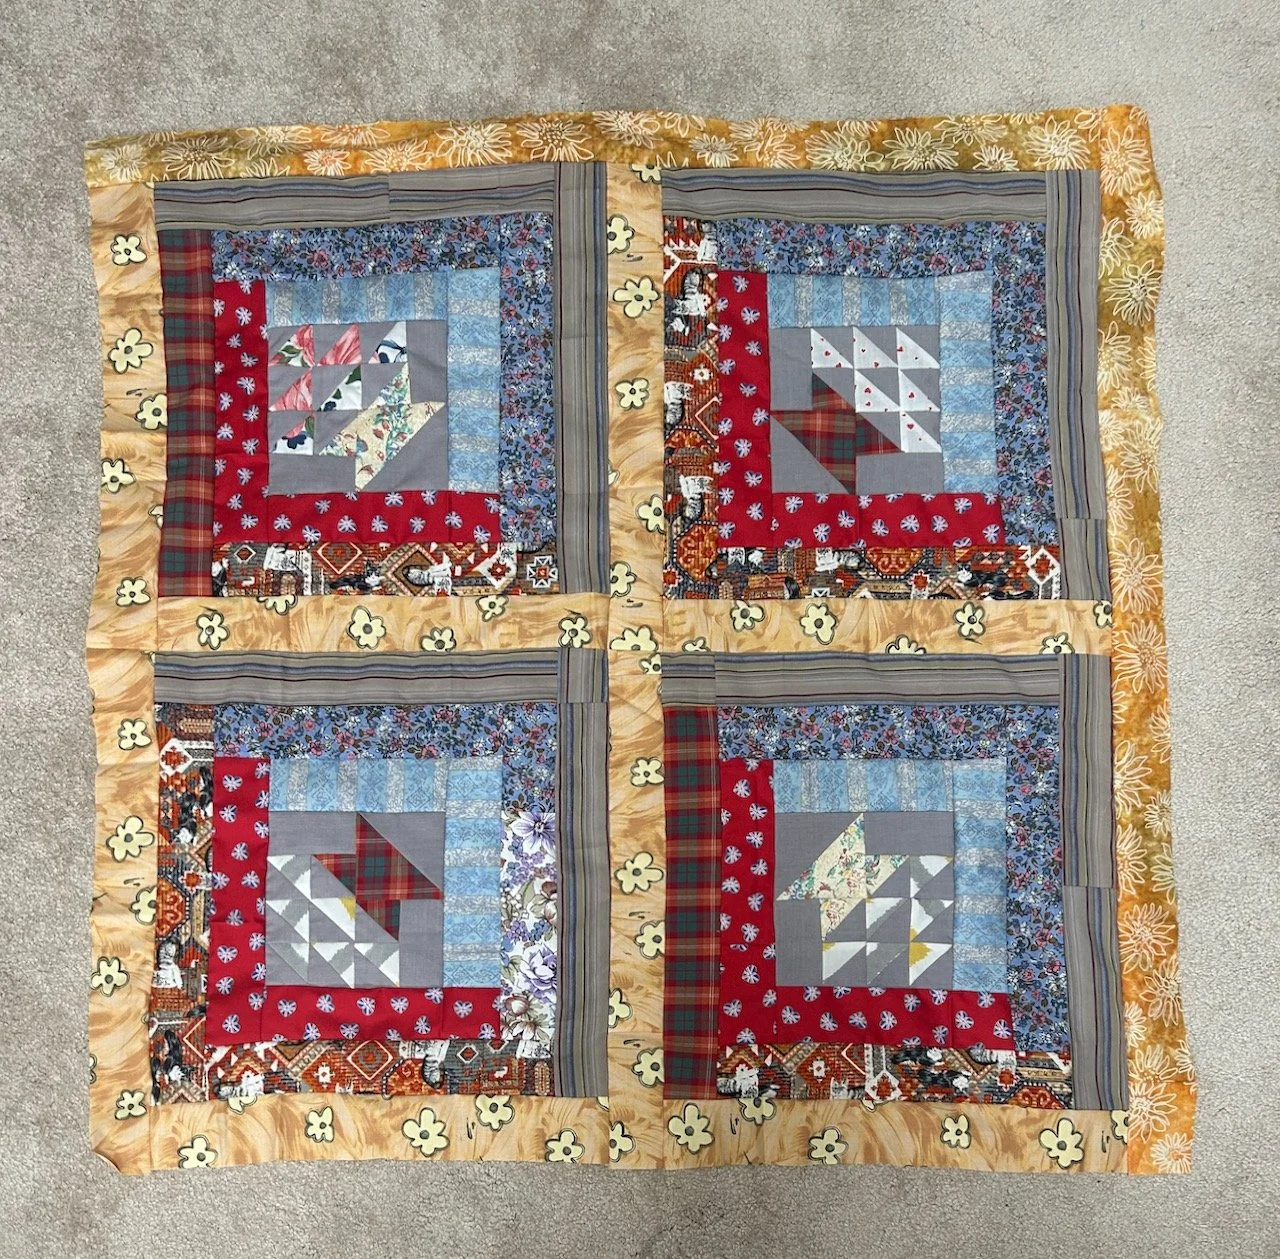
It looks so much better doesn’t it? And the eye is tricked into thinking there’s the same number of borders around the blocks, but when you look more closely, you’l see there isn’t.

I added a final border using the old curtains which I loved but have no use for now, and set about quilting this latest quilt top, reverting to my preferred straight line quilting and getting much braver with this opting not to use the tape markers again.

Quilting finished, with the batting still not trimmed

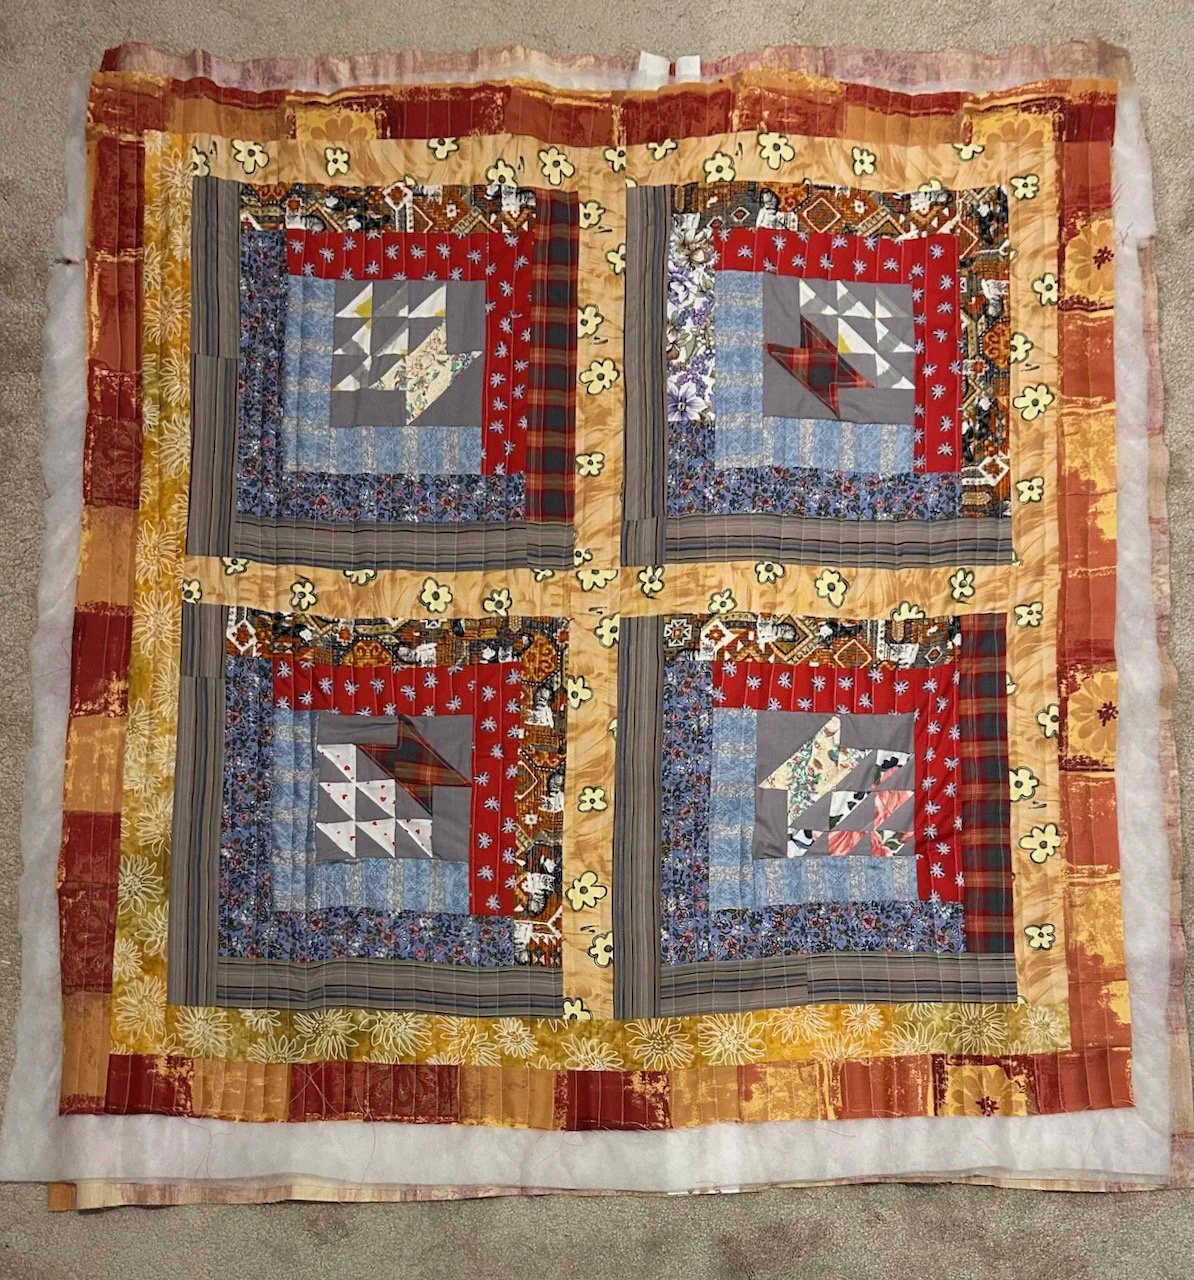
With the scrappy binding added, it was done - and its name of Marmalade Love feels right, and works on many levels for me.
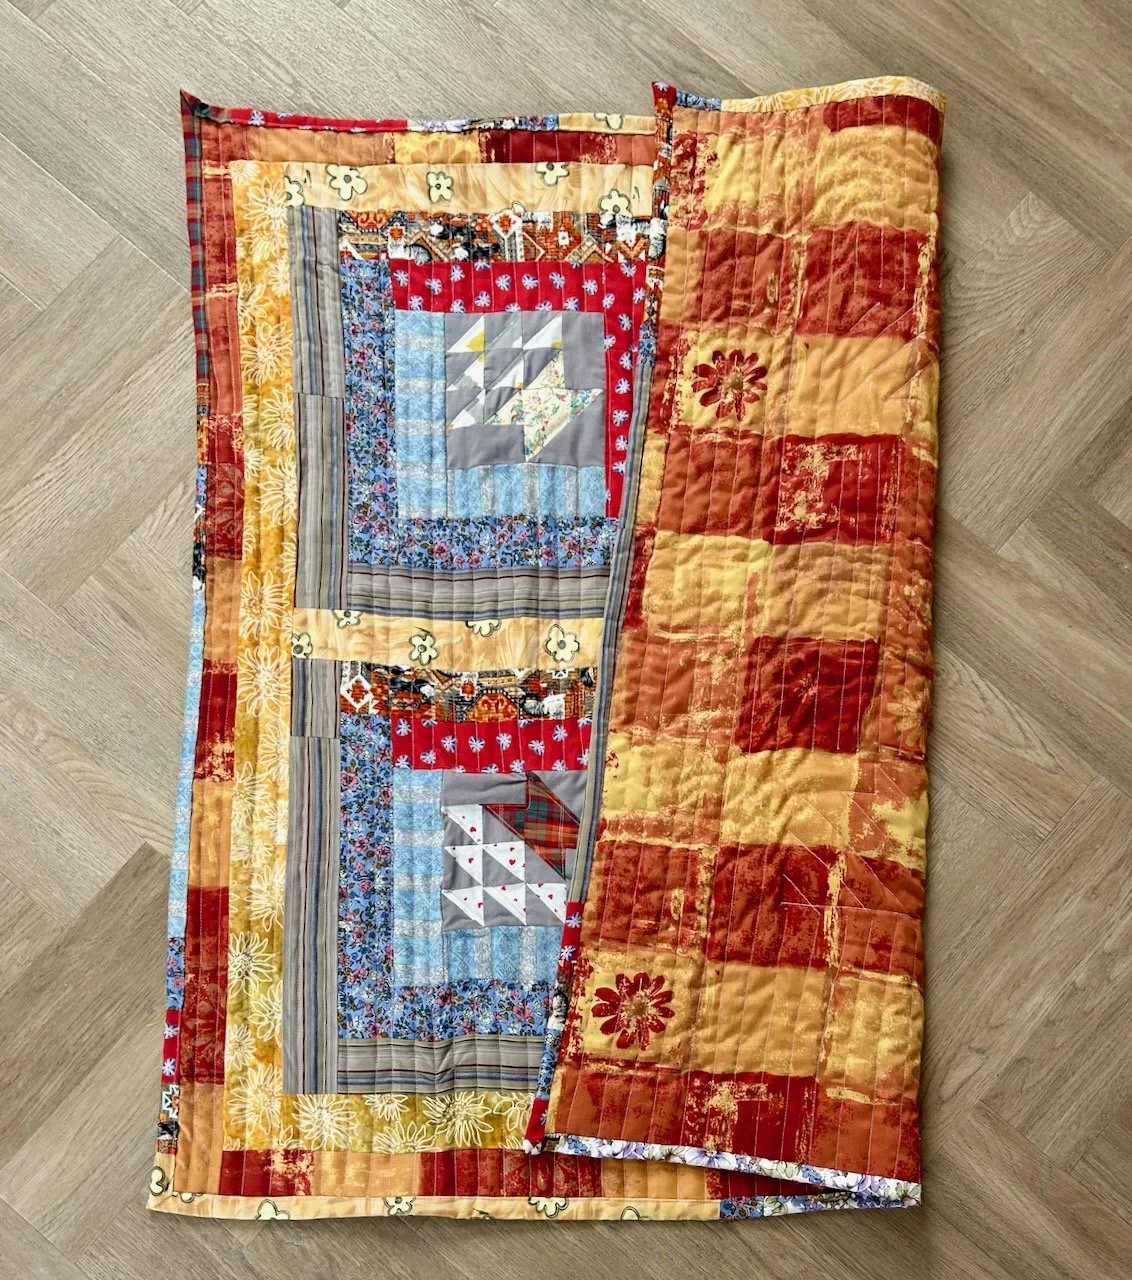
The top of the finished quilt, complete with scrappy fabric binding
The right hand side of the quilt is folded over on itself to show the backing fabric, which matches the final border around the whole quilt on the front

Even on the back!

So that’s the eleventh quilt done, and I’ve already made the central blocks for the next one - but more on that next month, though pop back tomorrow to see how I got on with making my own block for my Mystery Block of the Month Quilt.

You can see my other quilts which I’ve made to donate to Project Linus - a charity whose mission is to provide love, a sense of security, warmth and comfort to children, who are sick, disabled, disadvantaged or distressed through the donation of new, homemade, washable quilts and blankets, including those that are part of this ‘stretch’ project in earlier posts. I’m aiming to publish an update on my progress in the last week of each month for the remainder of 2025.

Thinking of the moon and stars, and bats...

* I was invited to this year’s Gardeners’ World Live and provided with a pair of tickets to the show, therefore all my posts will be marked as 'Ad’ though as usual my views and opinions are very much my own.

This garden, designed by Wouter Leyssen, was accompanied by and information stand hosted by one of the garden’s sponsors, the Bats Conservation Trust which is what initially caught our attention, but more on bats later.

To give this Beautiful Border it’s full title - The Milky Way - Thinking of the moon and stars, connects the night and day garden. Dark leaved plants allow the visitor to experience the alien world of the night garden during the daytime. When the usual green colours disappear, things start to look unfamiliar and look like a different world, and as you can see from the photos below it’s quite effective in replicating those night time shades.

Dark leafed plants either side of the gravel path which repesents the Milky Way

They’re hard to see in these photos, but the borders were scattered with white flowers (look bottom right in the photo below), and these represent the stars.

A wider view of the garden and the russet/black leaved hedging.  A black chair at the end of the path complete with a telescope

The white-green spherical evergreen shrub in front of the gate represents the moon, and the gravel path the Milky Way - which just goes to show with imagination almost anything can be replicated into a garden design, doesn’t it?

Looking at the chair and telescope from a different angle, with a galvanised watering can in the raised bed in the foreground

And the bats?

Well we were intrigued as we have a couple of bats which fly around our garden at twilight, and were keen to find out more about these peculiar little creatures. It was great to chat to the people on the information stand, and learn a little more about the fascinating species that so many of us are often quite oblivious about.

Did you know…

  • All British bats and their roosts are protected by law

  • A brown long-eared bat can hear a ladybird walking on a leaf

  • Bats are indicative of a healthy, diverse environment

  • A single pipistrelle can eat 3,000 tiny insects in just one night

  • Bats are the only mammal that can fly

  • Bats are gentle, clean and sociable animals

  • All of the 17 breeding species in the UK feed on insects

  • Bats can see but use their ears to hunt in the dark using echolocation

  • With wings folded a tiny pipistrelle could fit into a matchbox

  • Bats only have one baby each year, called a pup

  • Bats don’t make nests or chew wires when roosting in buildings

I didn’t know much about bats, but I did know some of the above. I didn’t realise that they fly all night either, which makes them truly fascinating. We recently joined a ‘bat walk’ organised by our local council at one of their parks, which was just as fascinating.

A fuzzy picture of the echolocator provided for our council organised bat walk

It was great to see so many people of all ages equipped with the provided echolocators (shown in the fuzzy picture above) keen to learn more, wandering around the park at dusk looking out and hoping to spot at least one or two of bats as they emerged for the evening.

From this walk we learnt that the bats in our gardens are most likely the tiny common pippistrelle, whose characteristics are the fast and jerky movements, but even so I’m pretty sure we’ll still be calling them Boris!

* With thanks to Gardeners’ World for inviting me to Gardeners’ World Live, it was quite a show! I’ll be sharing more from my visit to this year’s show throughout the year - I hope you enjoy them as much as I did the show.

Getting to know even more about my Bernina

When I bought my new sewing machine back in January I knew that Bernina offered a day’s training at their London HQ, and while I was keen to go along to this I wanted to take some time to get to know it at my own speed first. And since that post I’ve done quite a few projects and felt I was ready to learn more.

So at the start of this month I headed down to London for the day, prepared to take on more information. I wasn’t sure quite what, but I’d a short list of things I hoped to find out - and the day covered those and a lot more besides.

On the day

There were six of us attending with each of us using the same machine we had at home, which made a lot of sense and made it easier to transfer what we learnt to our own sewing rooms. The ability levels and familiarity with our Bernina machines were varied across the room, and I’m glad I had a good knowledge of using my machine before I went.

We started with practical stitches and needle positions, as well as learning some tips about automatic stitch sequences before moving onto embroidery stitches - including how to program the pattern end to avoid finishing mid emblem, as well as how to mirror those emblems - look at the bunnies in the image below!

The workbook also worked for me as not only were all the materials provided there was also space in the notes to stick in the sample for that section - and a stick of glue to secure it too.

We learnt how to program stitches into the memory, and to adjust the spacing in those. This has potential for lots of uses, especially for quilt labels so I think I’ll be playing, or rather testing, this out some more.

There was a section on stretch stitches, and this was timely as one of my planned makes is using material which is stretchier than I’ve used before.

We had a go at gathering using a cord, which was interesting and also basting, the latter I found least useful (it’s the sample at the back in the photo below). I’d tried it previously as I thought it might be useful, I’d ruled it out then and my views haven’t changed.

Then we got onto buttonholes. And sewing on buttons, with the machine. I’ve not tried either of these before and I managed to complete my first buttonhole successfully, the next few were a little more problematic but I did manage another one without a knot of stitches, so I know it can be done.

They’re still scary obviously, but like zips they’re something that can be done. I also learnt that the blade on a seam ripper can be used effectively to create the hole for the buttons - who knew?

Buttonholes were on my list, so it was good to get this one ticked off. The other thing on my list was to find out more about the BSR or Bernina Stitch Regulator. People rave about it, and it was one of the selling points to have this included rather than purchasing this separately afterwards, but I didn’t really know why I needed it.

I found out though, and it’s already been out of the box since I’ve been home. On the day we tried it to do some free motion embroidery, but it will also be useful for quilting and the other thing it does is to keep the stitches the same length whichever way you move it.

I said in my September Quilty Update that I was hoping to gleam some knowledge on my Bernina Day which I could use for my Floral Fancy and result of results, I did - the answer is to use my BSR. Since I’ve been home I added the white stitching to the sample above, having first dug the BSR (it’s in the tin) out from the arrangement on my desk!

Since the day

It’s not just the BSR which I’ve used since the training day, I’ve also taken a look under the stitch plate - a complete no go area for me beforehand. I was surprised to find quite so much fluff there - oops.

And by cleaning the automatic cutter I also reset the number of cut cycles - which had racked up to 718, and I don’t use it every time as I often chain sew, especially when patchworking. I also found out my total number of stitches, which was a little over 361,000 - it’ll be interesting to see how that increases.

I’ve also tested out using the knee lever to lift the need, which I think may also come in useful for my Floral Fancy. I’ve changed how the foot behaves when I stop sewing - it now hovers, rather than lifts, which means I can reposition my sewing more easily.

I’ve also remembered that I can just press the foot pedal, or the go button to start sewing without needing to put the needle down manually, again something I knew but rarely used. And I’ve started to use the back area of the foot pedal to stop, knot and cut sewing which is another great time saver.

I’m sure there’s still more to learn and discover, but a day learning from a Bernina expert using the same model machine as my own was absolutely priceless.