The Creative Spaces at John Lewis, Oxford Street

On my recent trip to John Lewis in Oxford Street where I had a long wander around their revamped Homewares department I stumbled upon something completely unexpected.

The introduction on the wall summed it up perfectly, and here it is:

A celebration of design and imagination, our Creative Spaces are designed to inspire. John Lewis offered space to four of the UK's most innovative interior creatives and gave them free rein to sign their perfect home environment. A relation of individual style, personality and taste, the Creative Spaces bring contemporary home design to life in an exciting and immersive way.

There were four spaces, so let's take each one in turn.
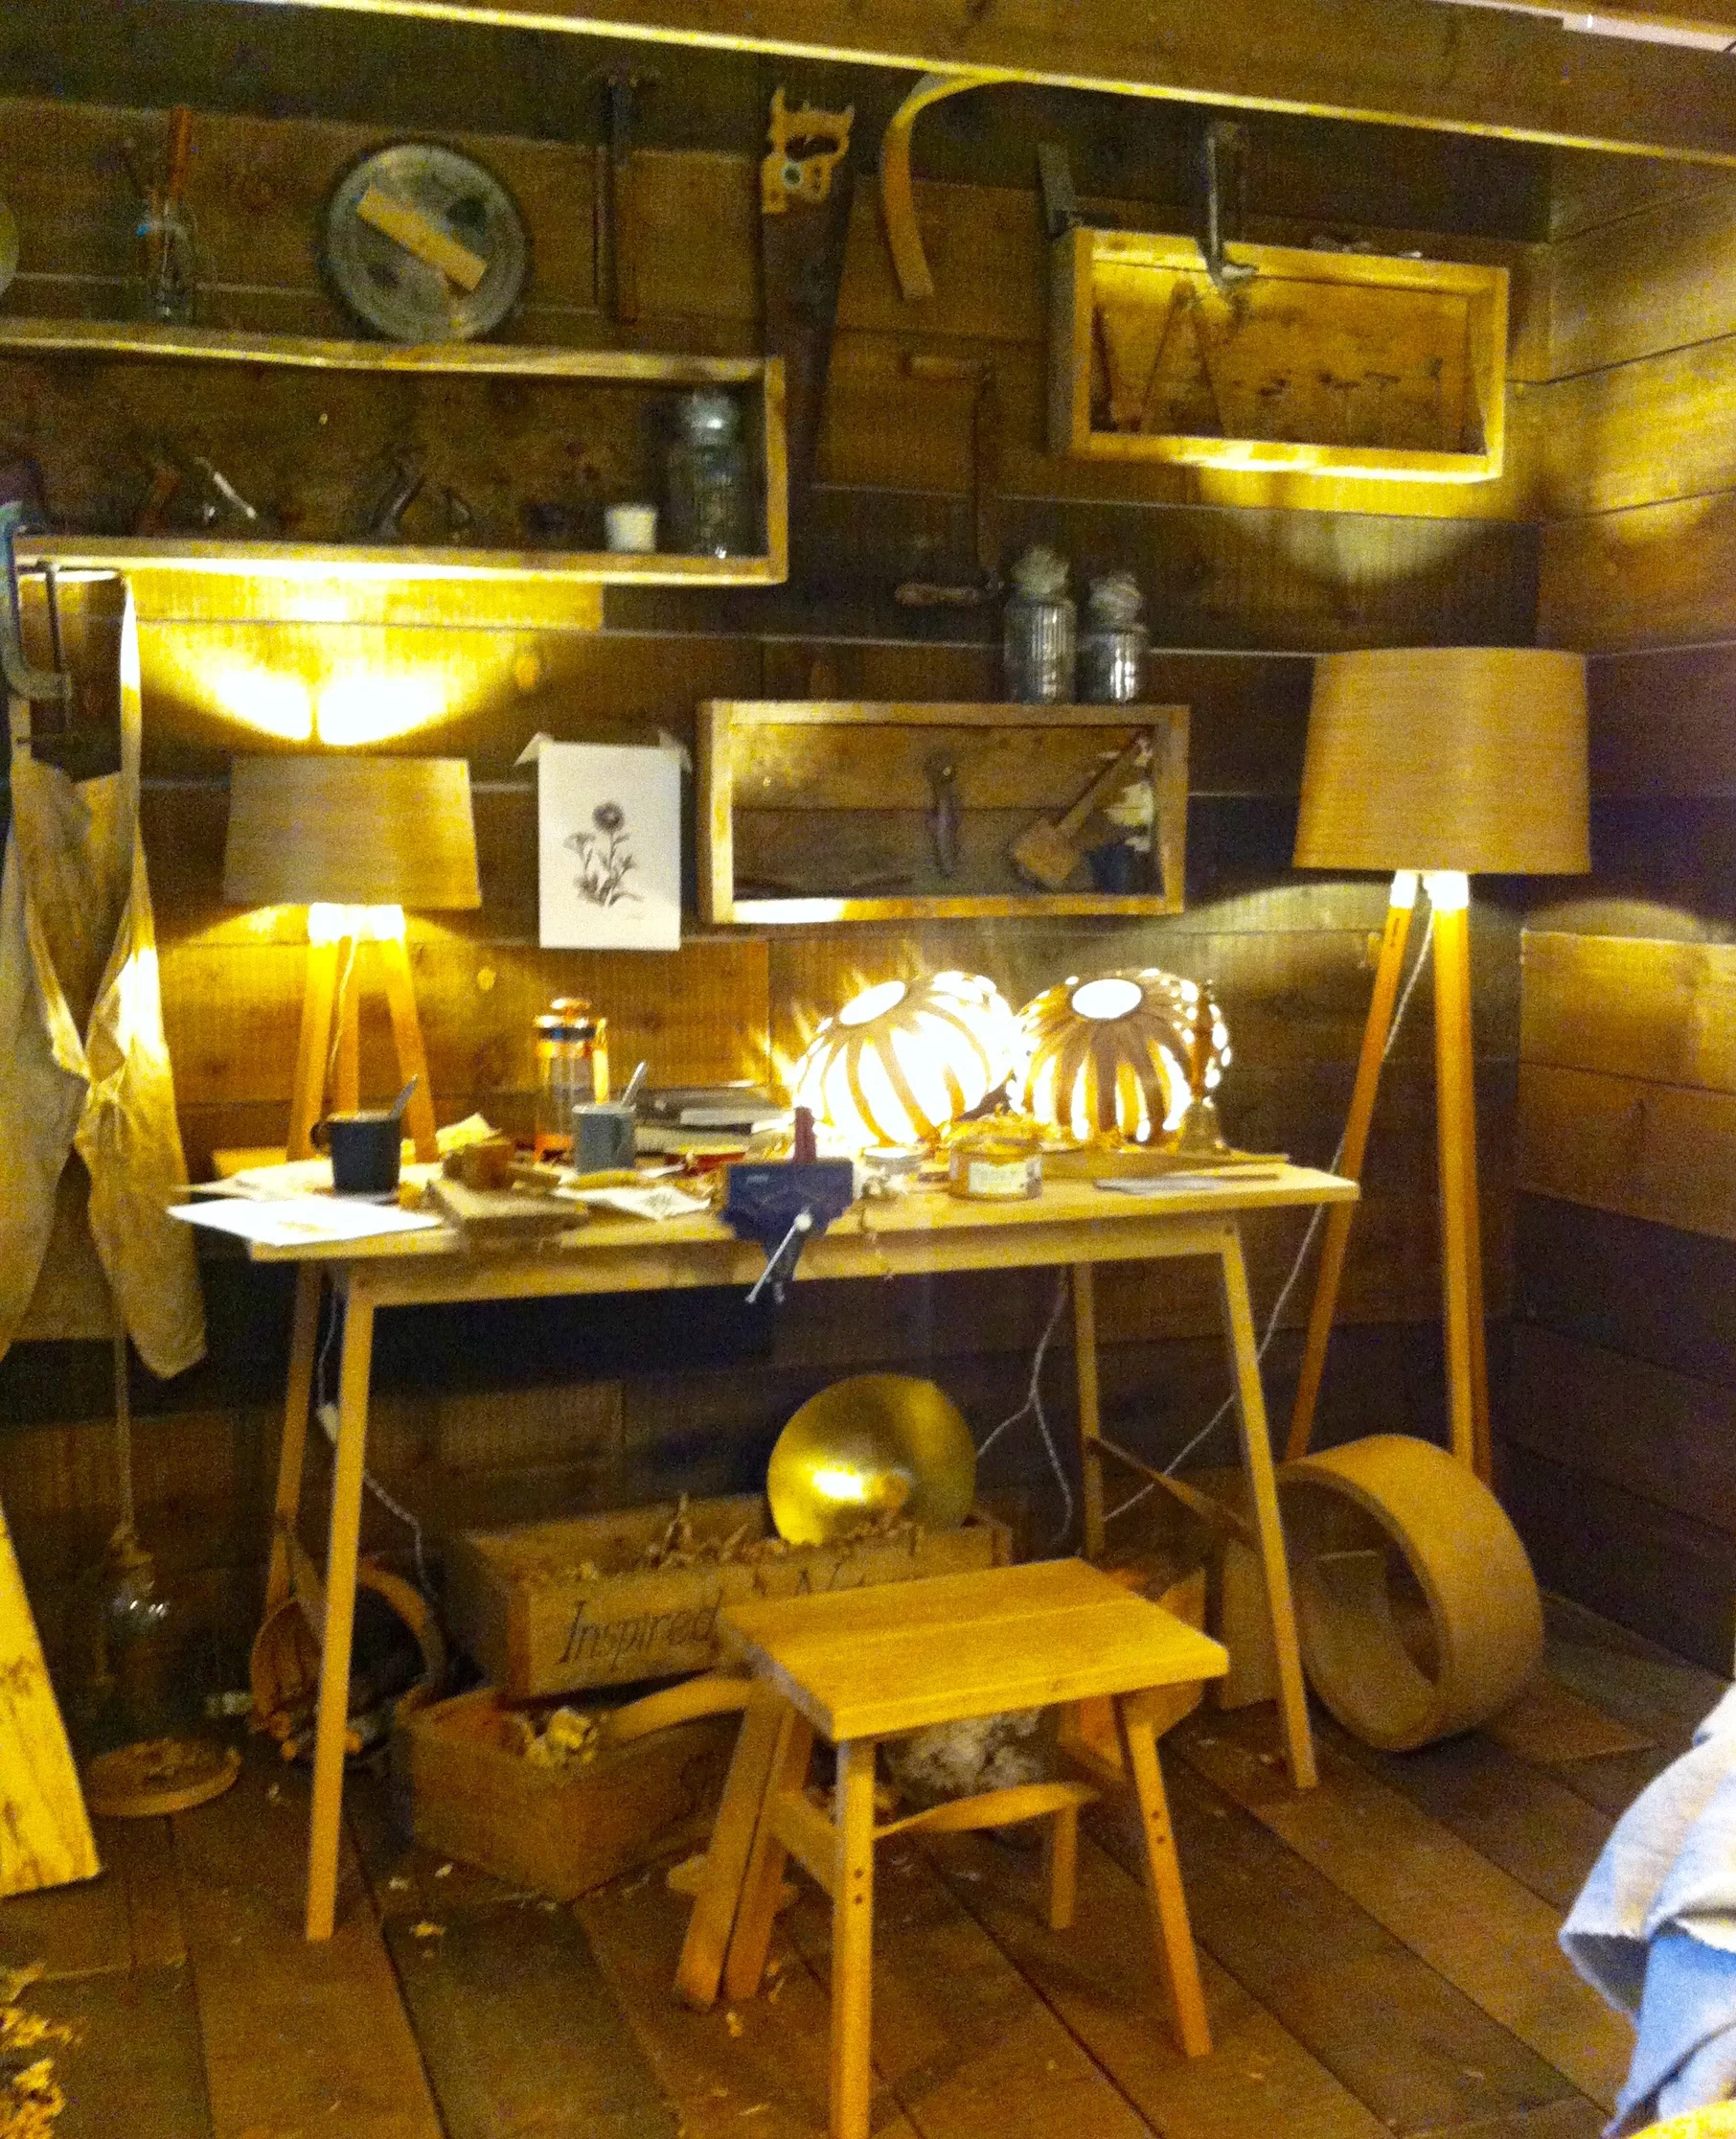
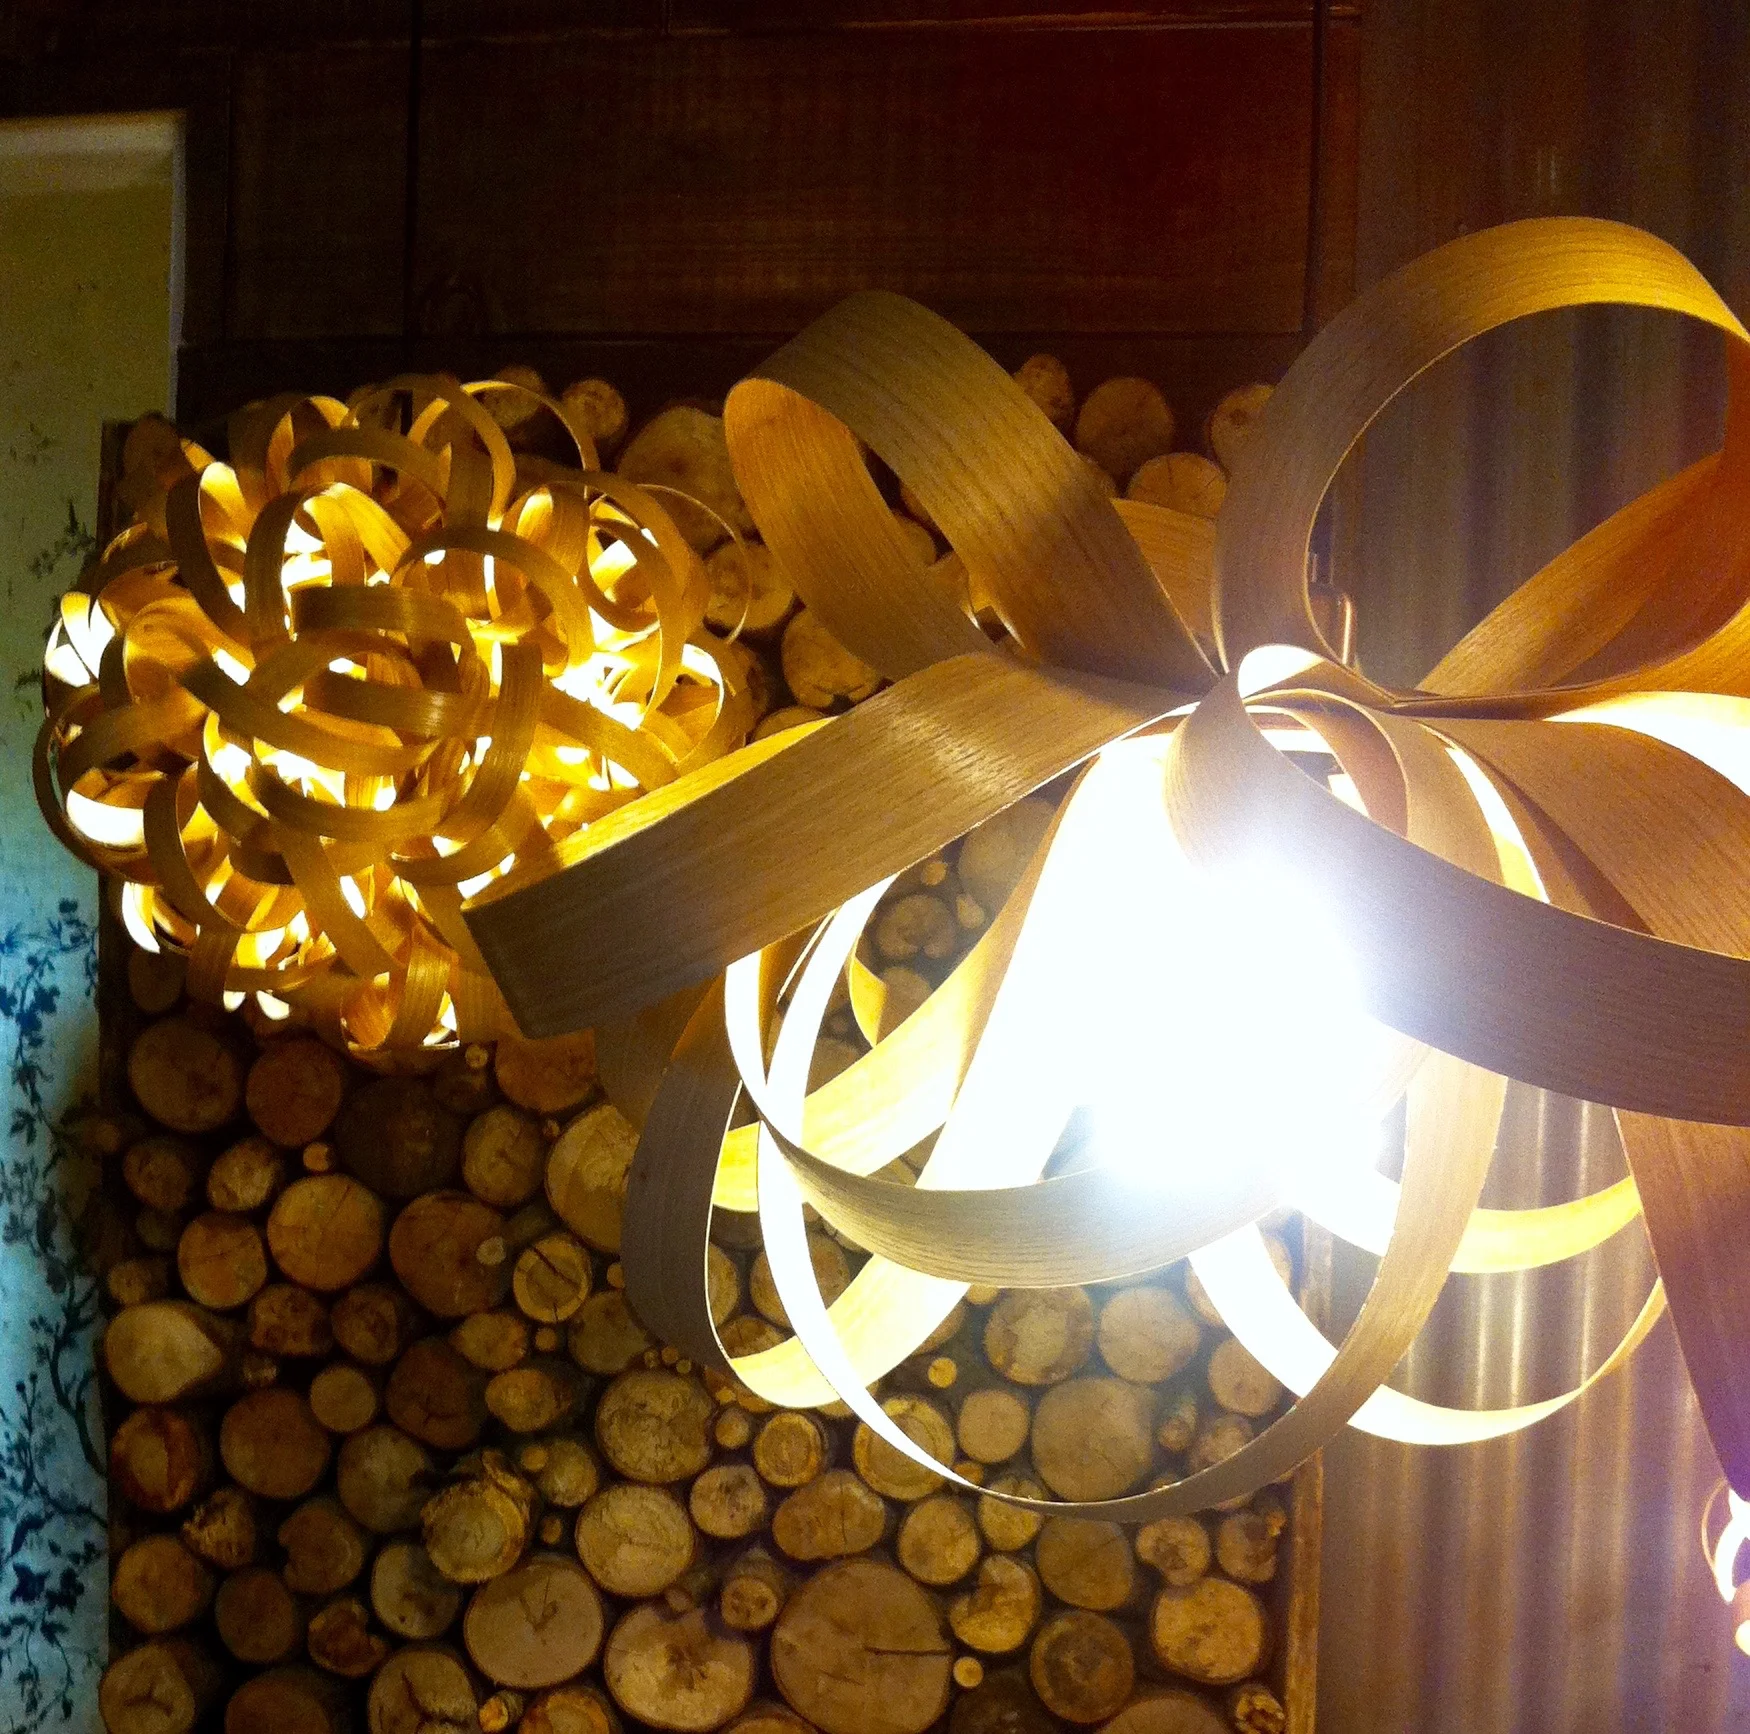
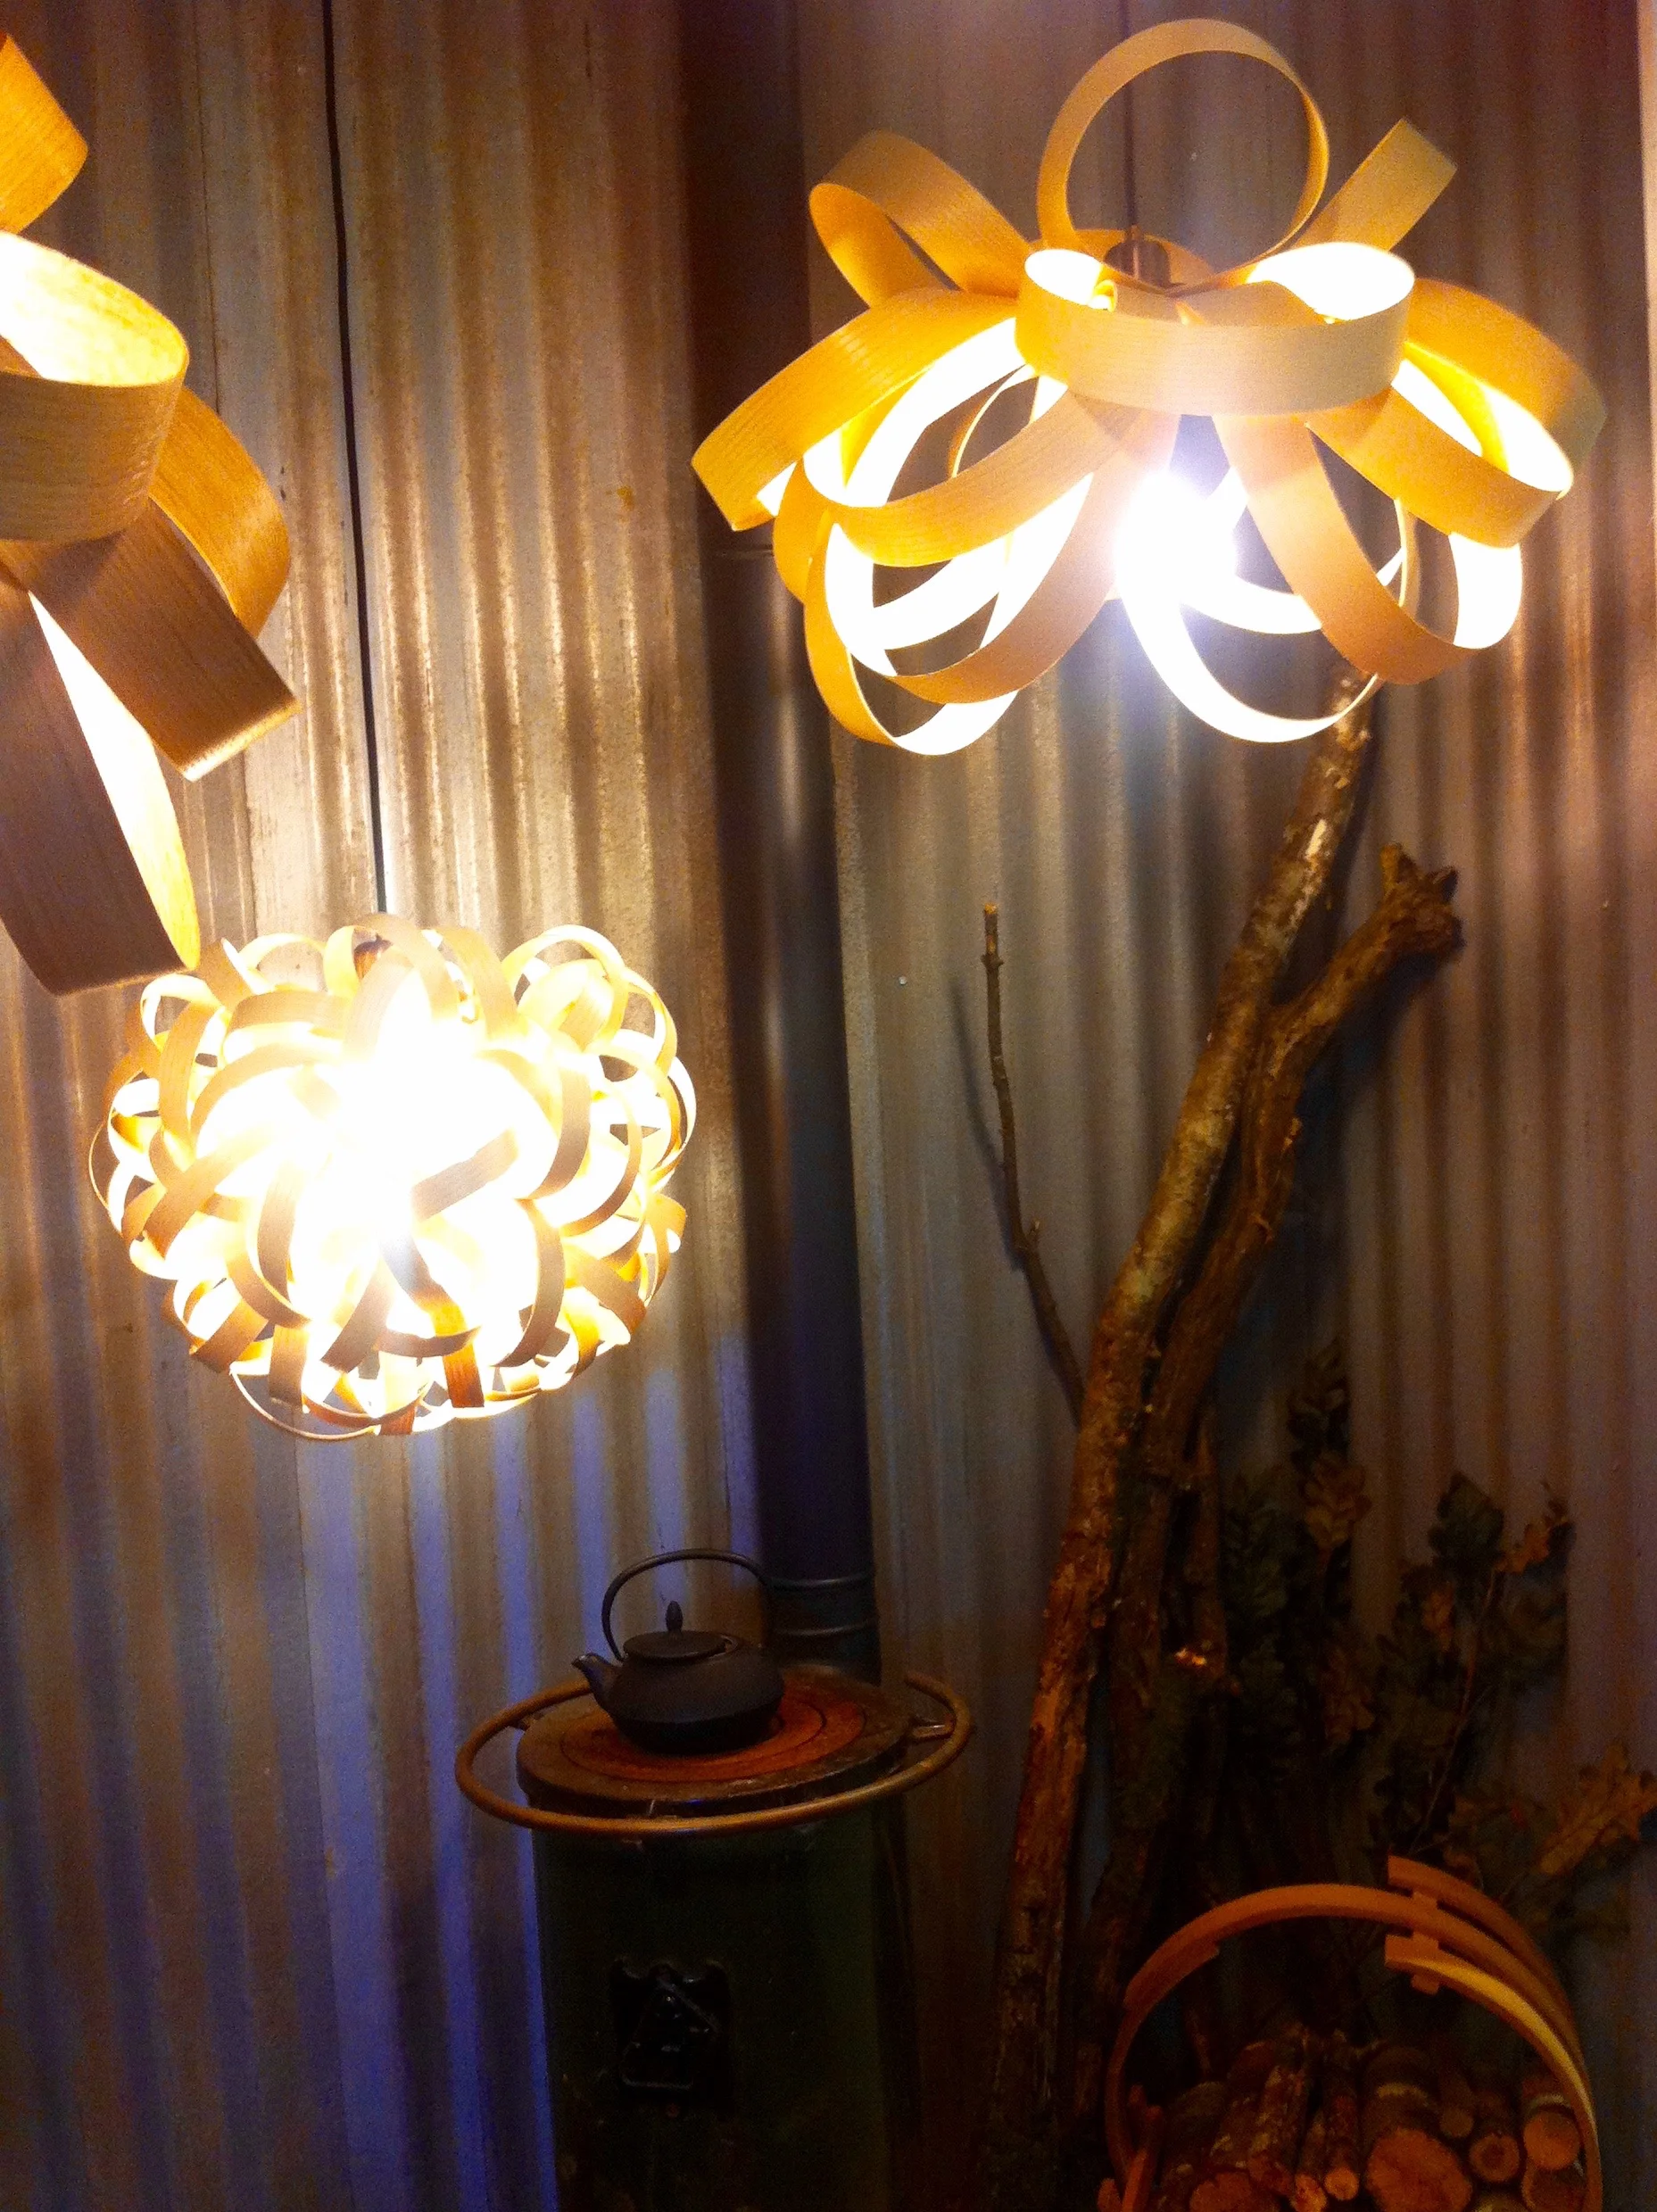
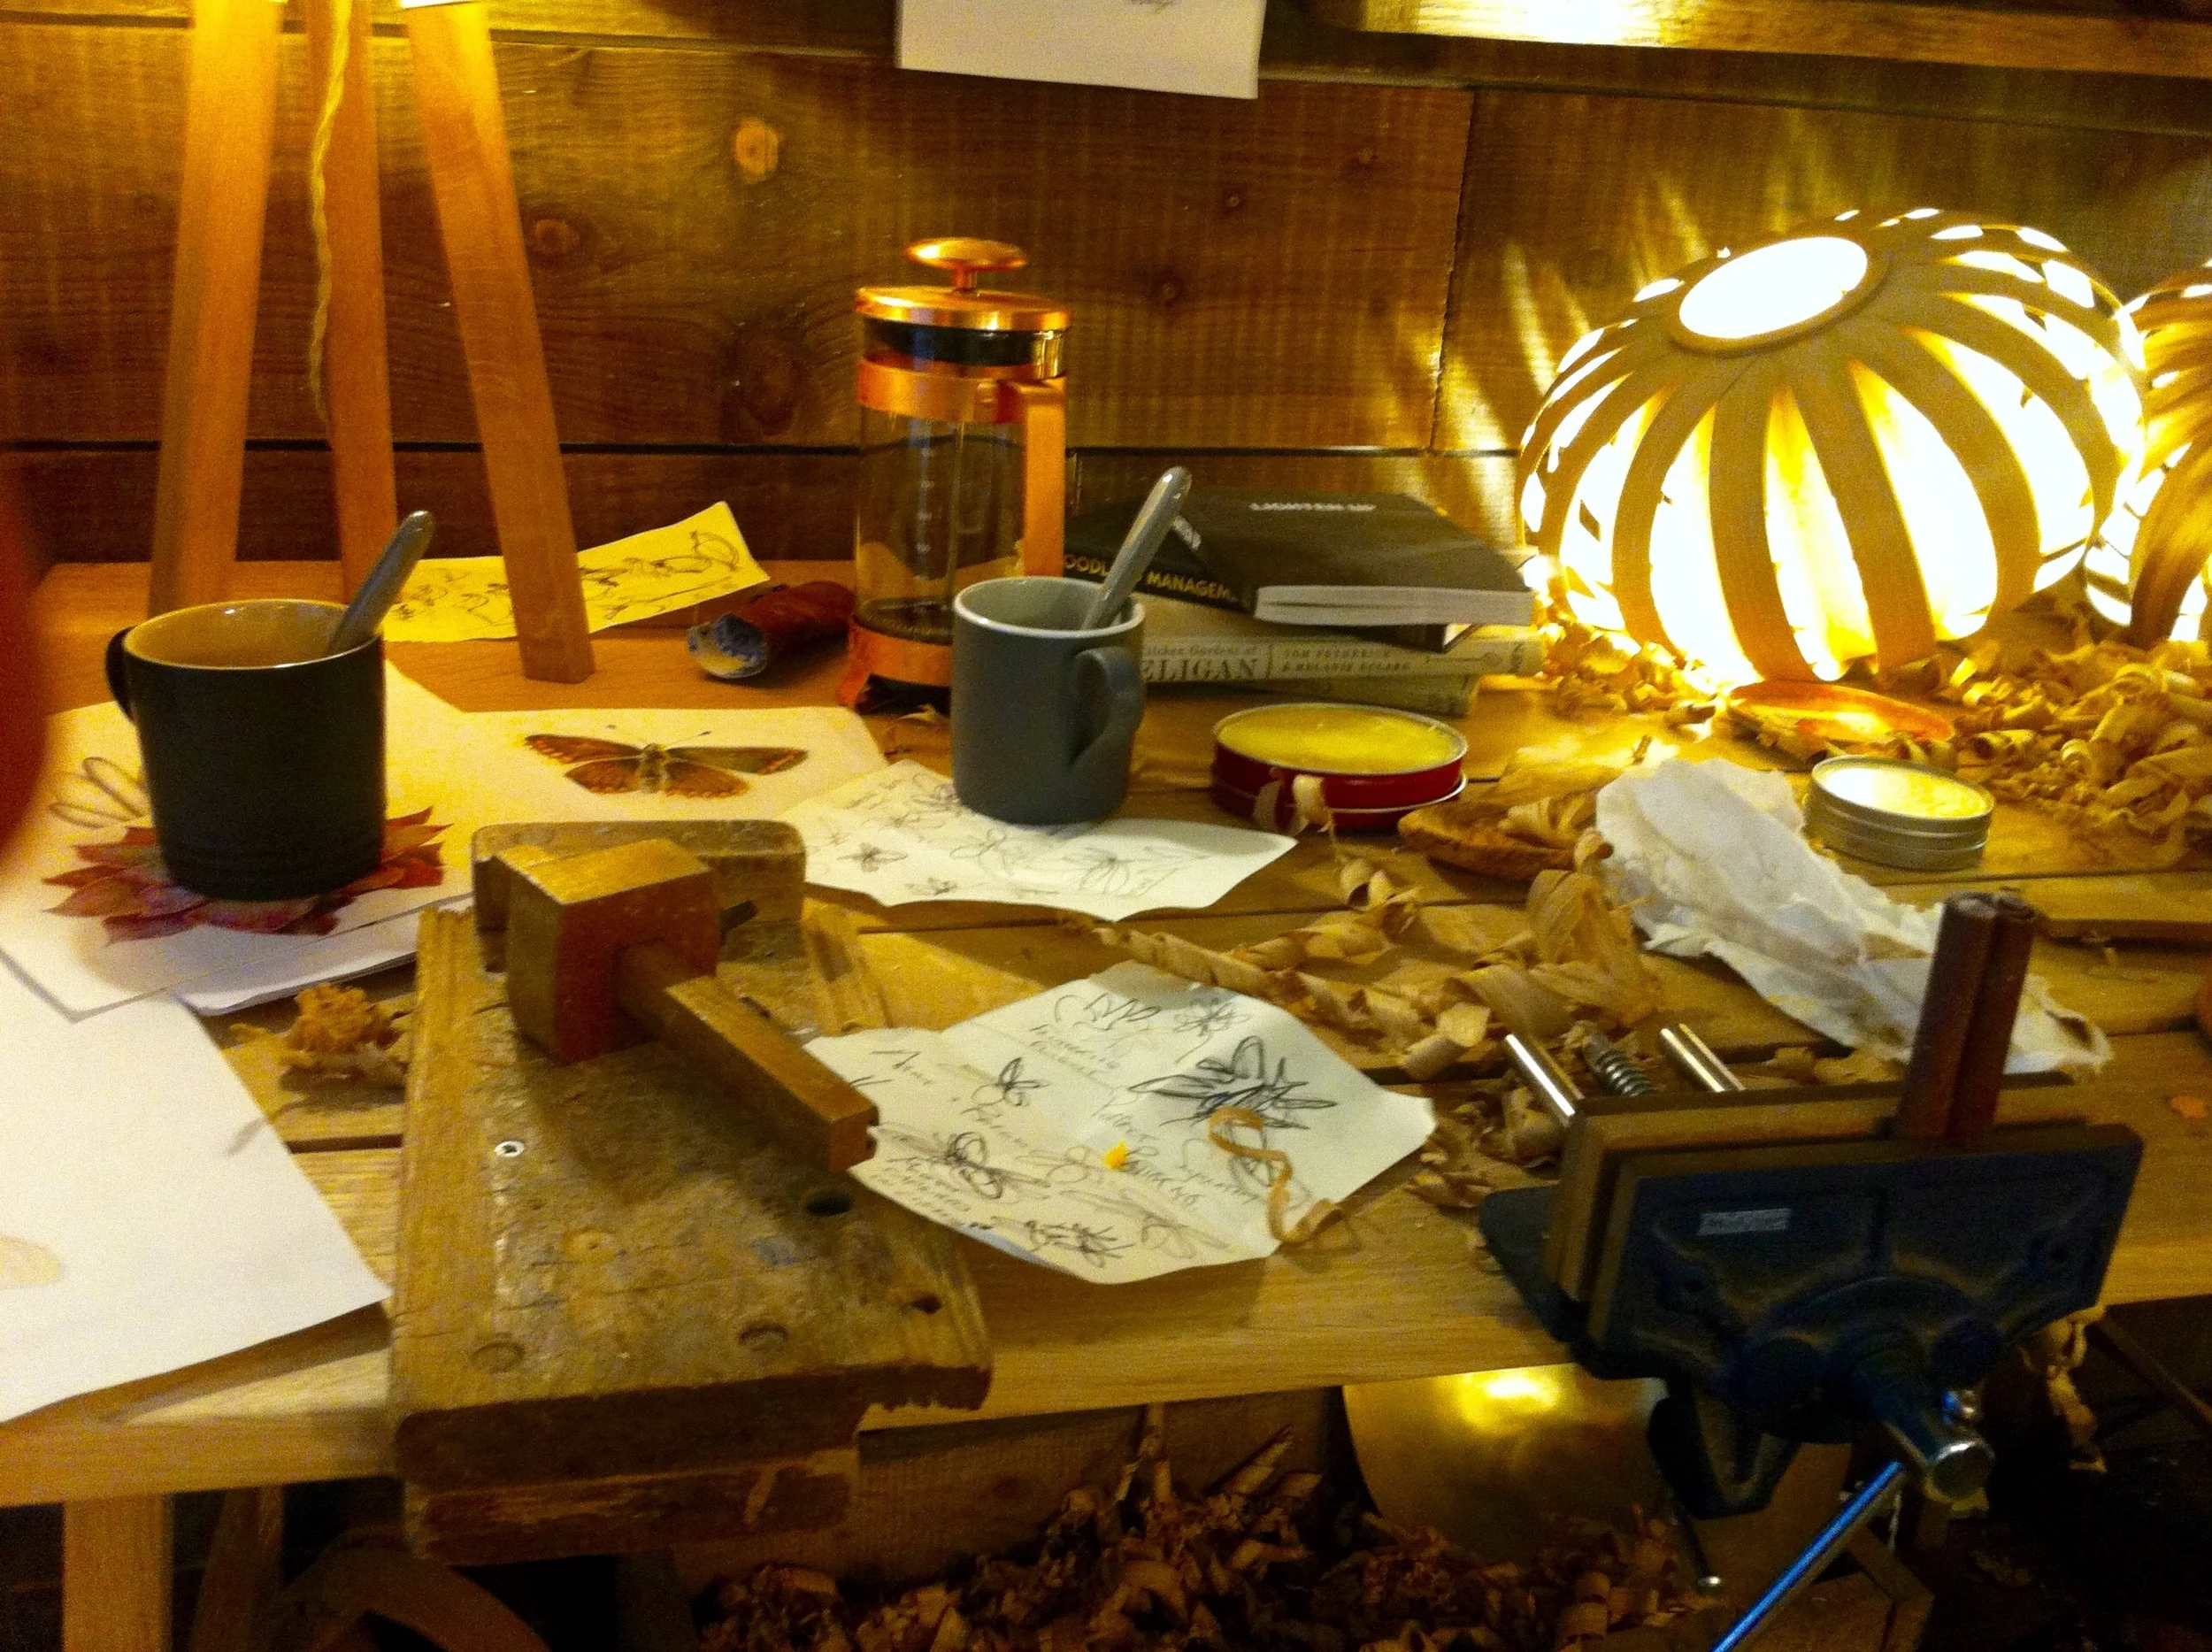
1. Tom Raffield

With his imagination stimulated by the beauty and wilderness of Exmoor where he grew up, Tom's designs are spectacular, ecologically sound and beautiful. He's a former winner of the Lighting Design Association's Lighting Design Award and it's easy to see why. 

His space is themed on a woodland cabin of someone who creates beautiful products using traditional methods. It's inspired by his home, a gamekeeper's cottage set in 30 acres of woodland in rural West Cornwall. Which if I'm honest sounds idyllic.

TomRadffieldJohnLewisCreativeSpaces.jpg

2. Buckinghamshire New University

Charlie Fowler, a member of John Lewis' Design Studio has worked as a furniture designer for ten years. His most recent outreach project involved third year students from the BA Furniture course at this university. The students designed furniture aimed at solving the problems associated with working from home.

The design brief reflects the increasing number of people who work from home and the blurring of boundaries, particularly in urban areas where pressure on space means that very few people have a dedicated room to use an a home office. These pieces have been designed to make the maximum use of space and to be multi-purpose and adaptable.

I've mixed feelings about these, I can see why they could be very popular and there was one piece that I really liked. But apart from that one piece - and I'm pretty sure you'll work out which one without me telling you - I couldn't ever see me buying these. 

BuckinghamshireNewUniversity.jpg

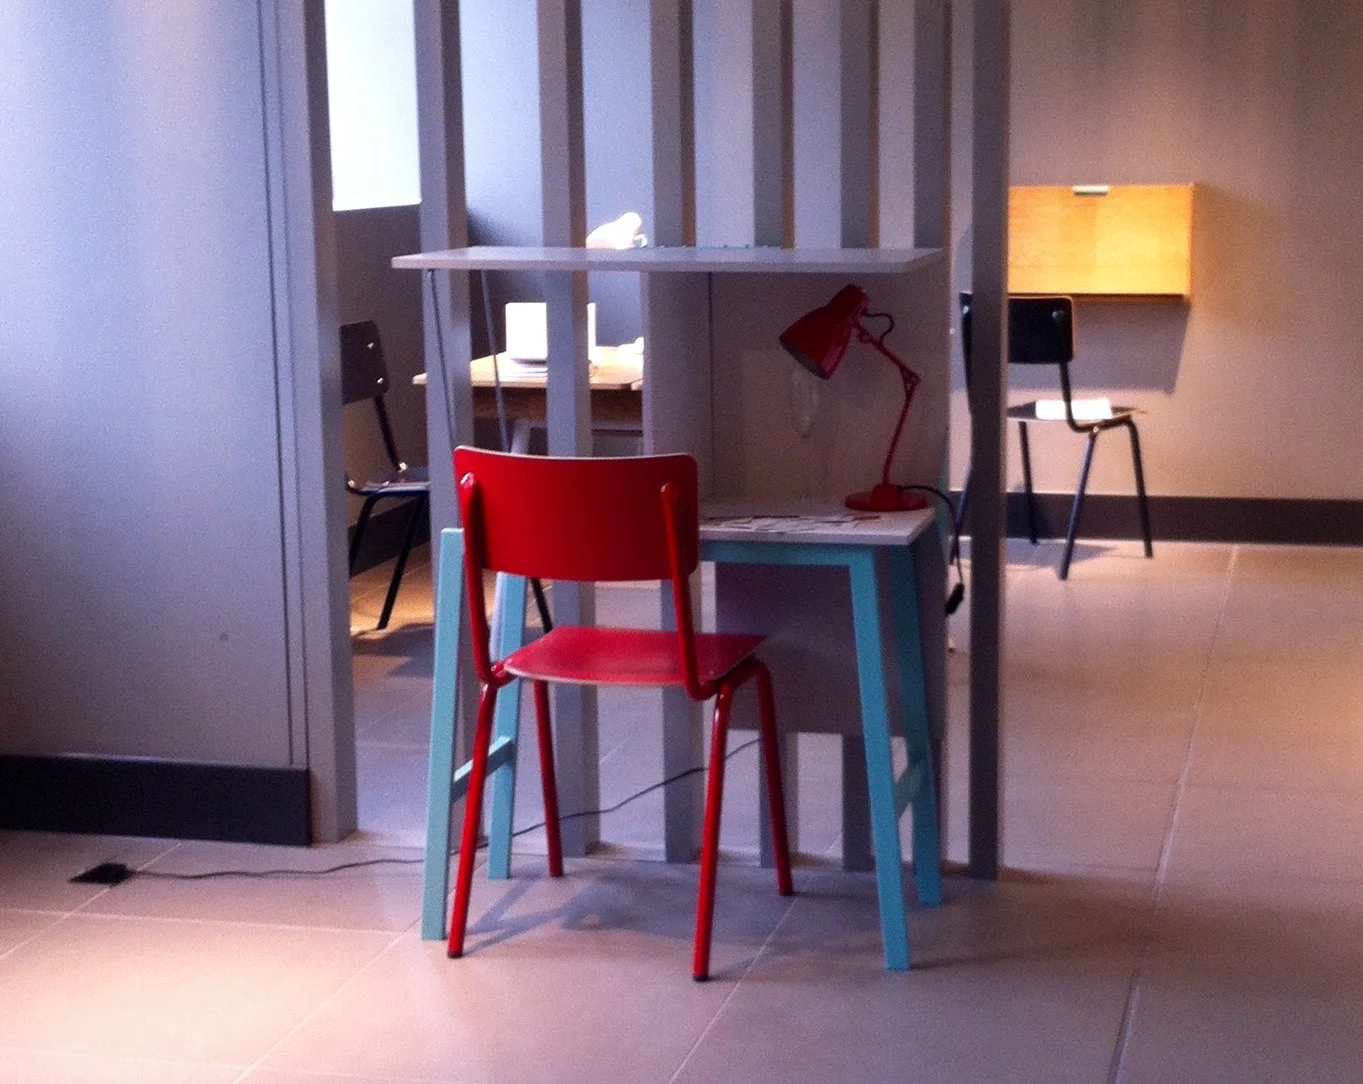
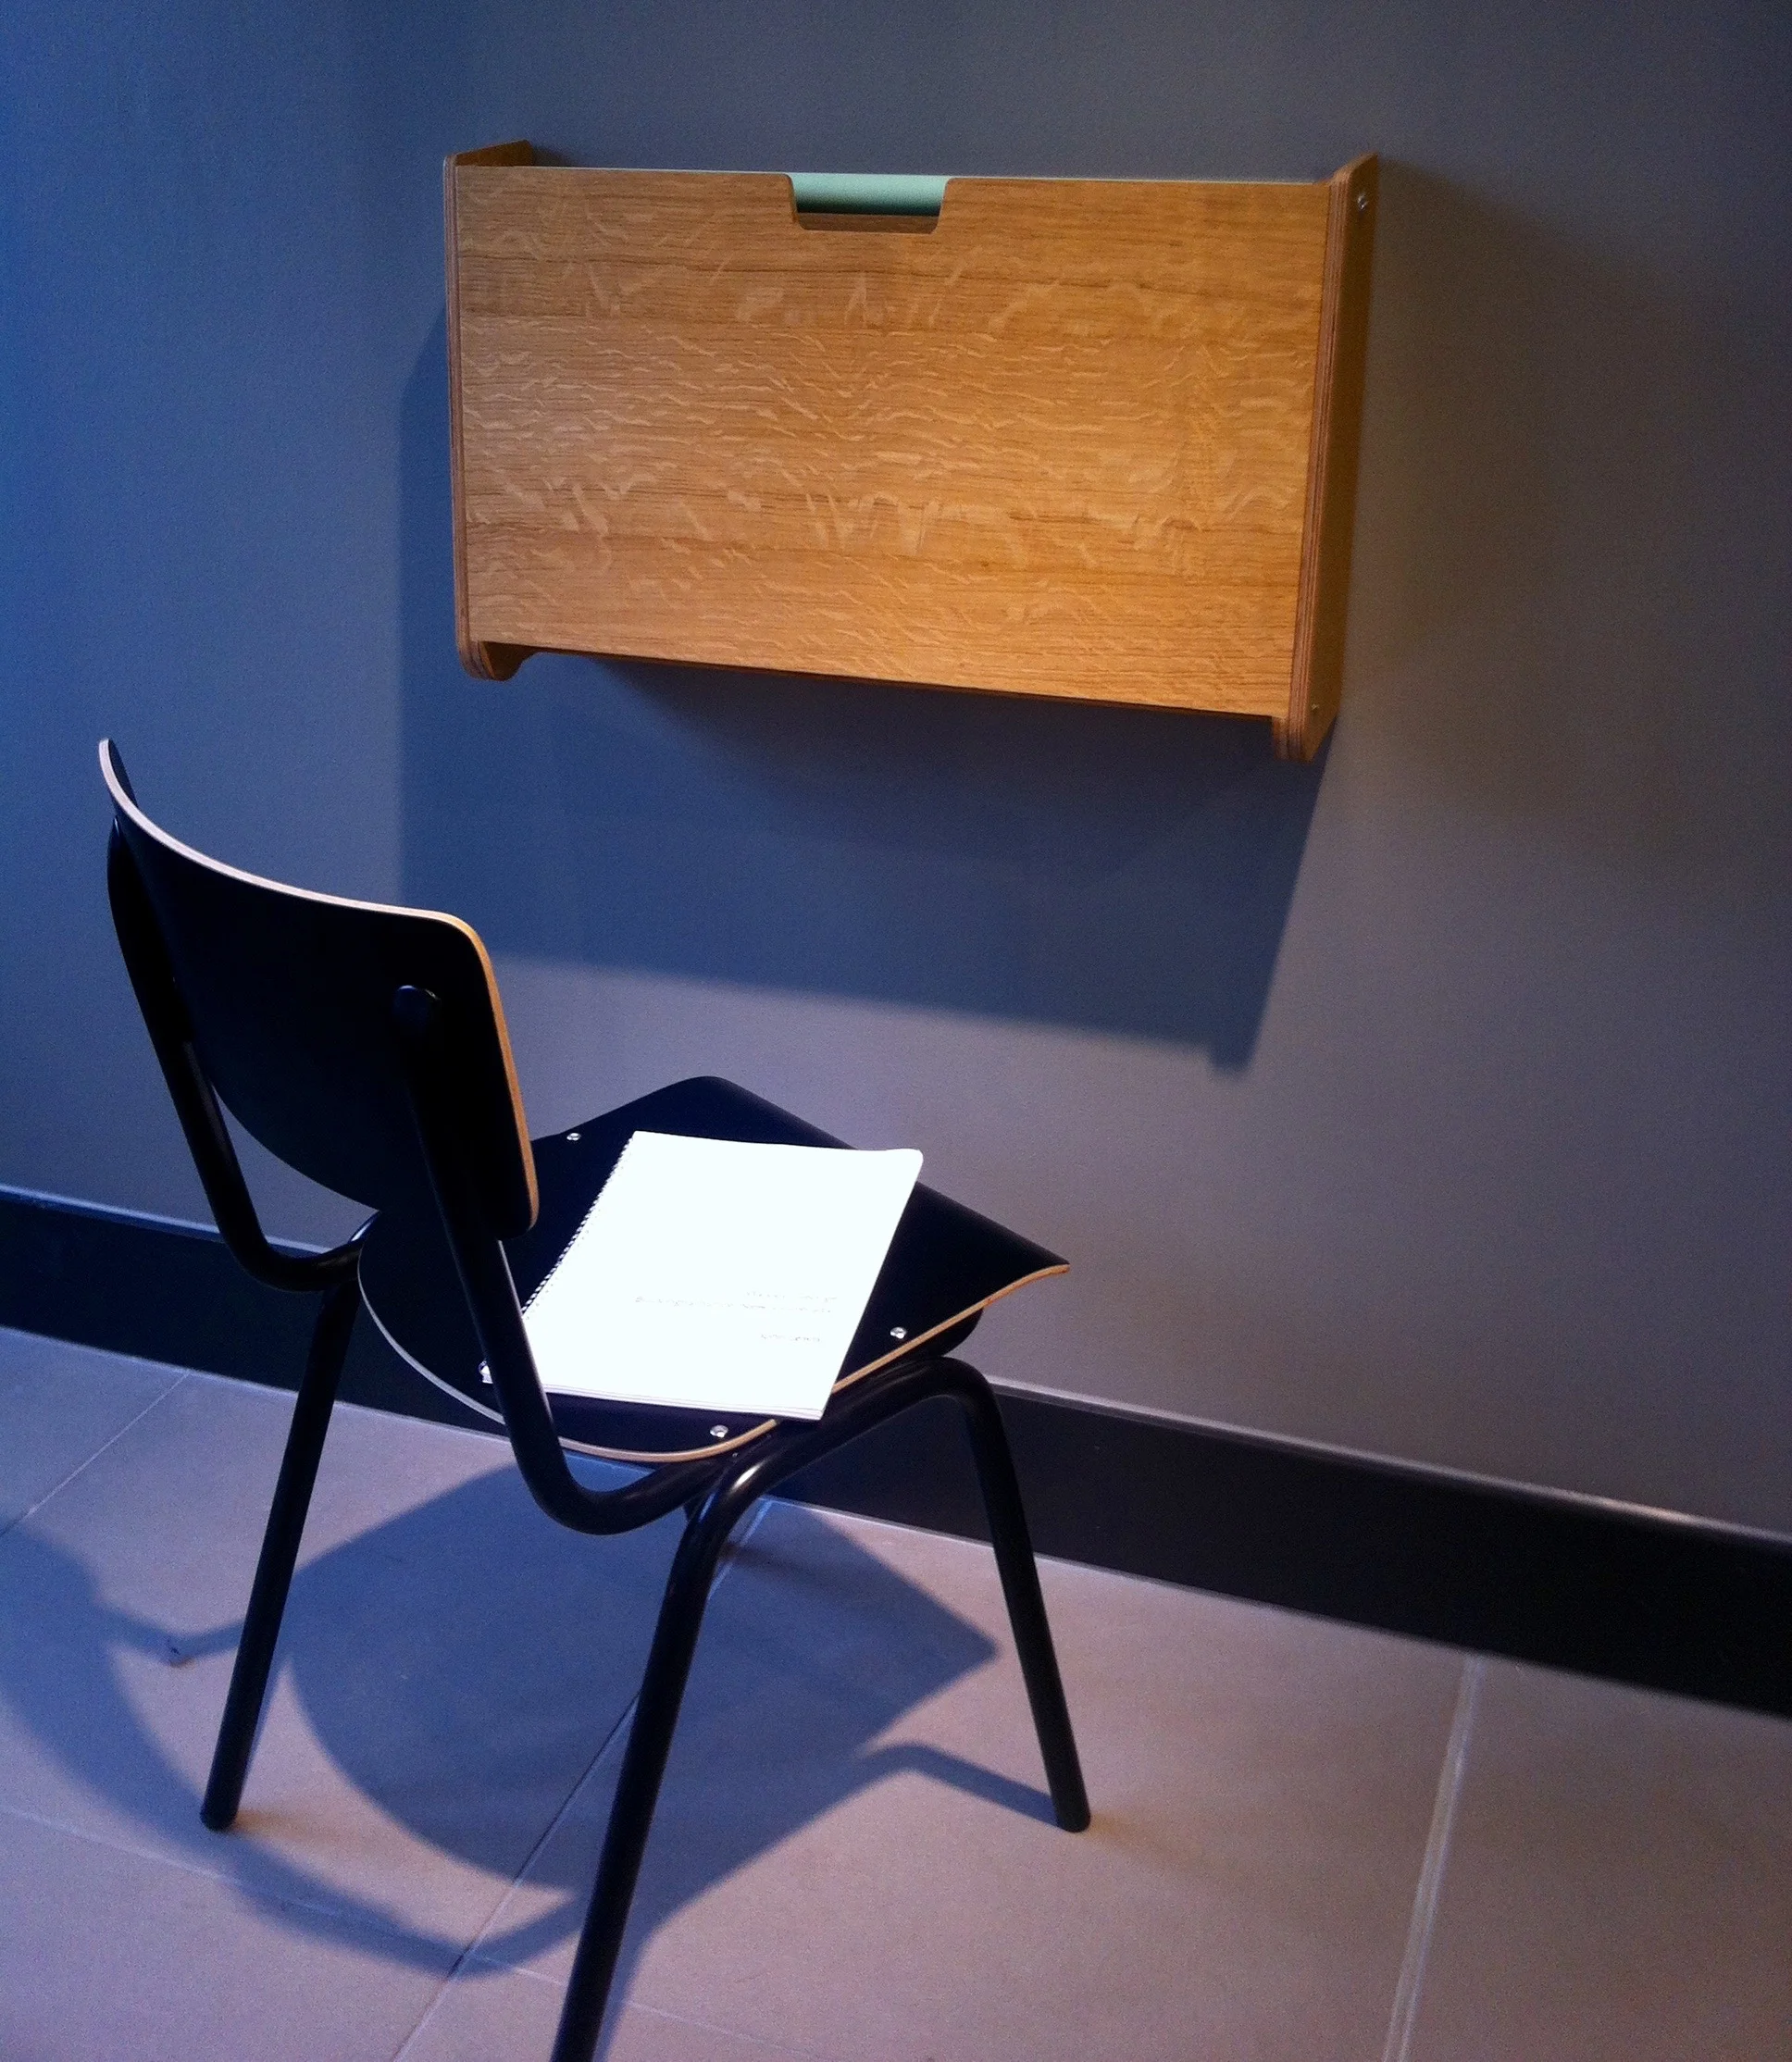
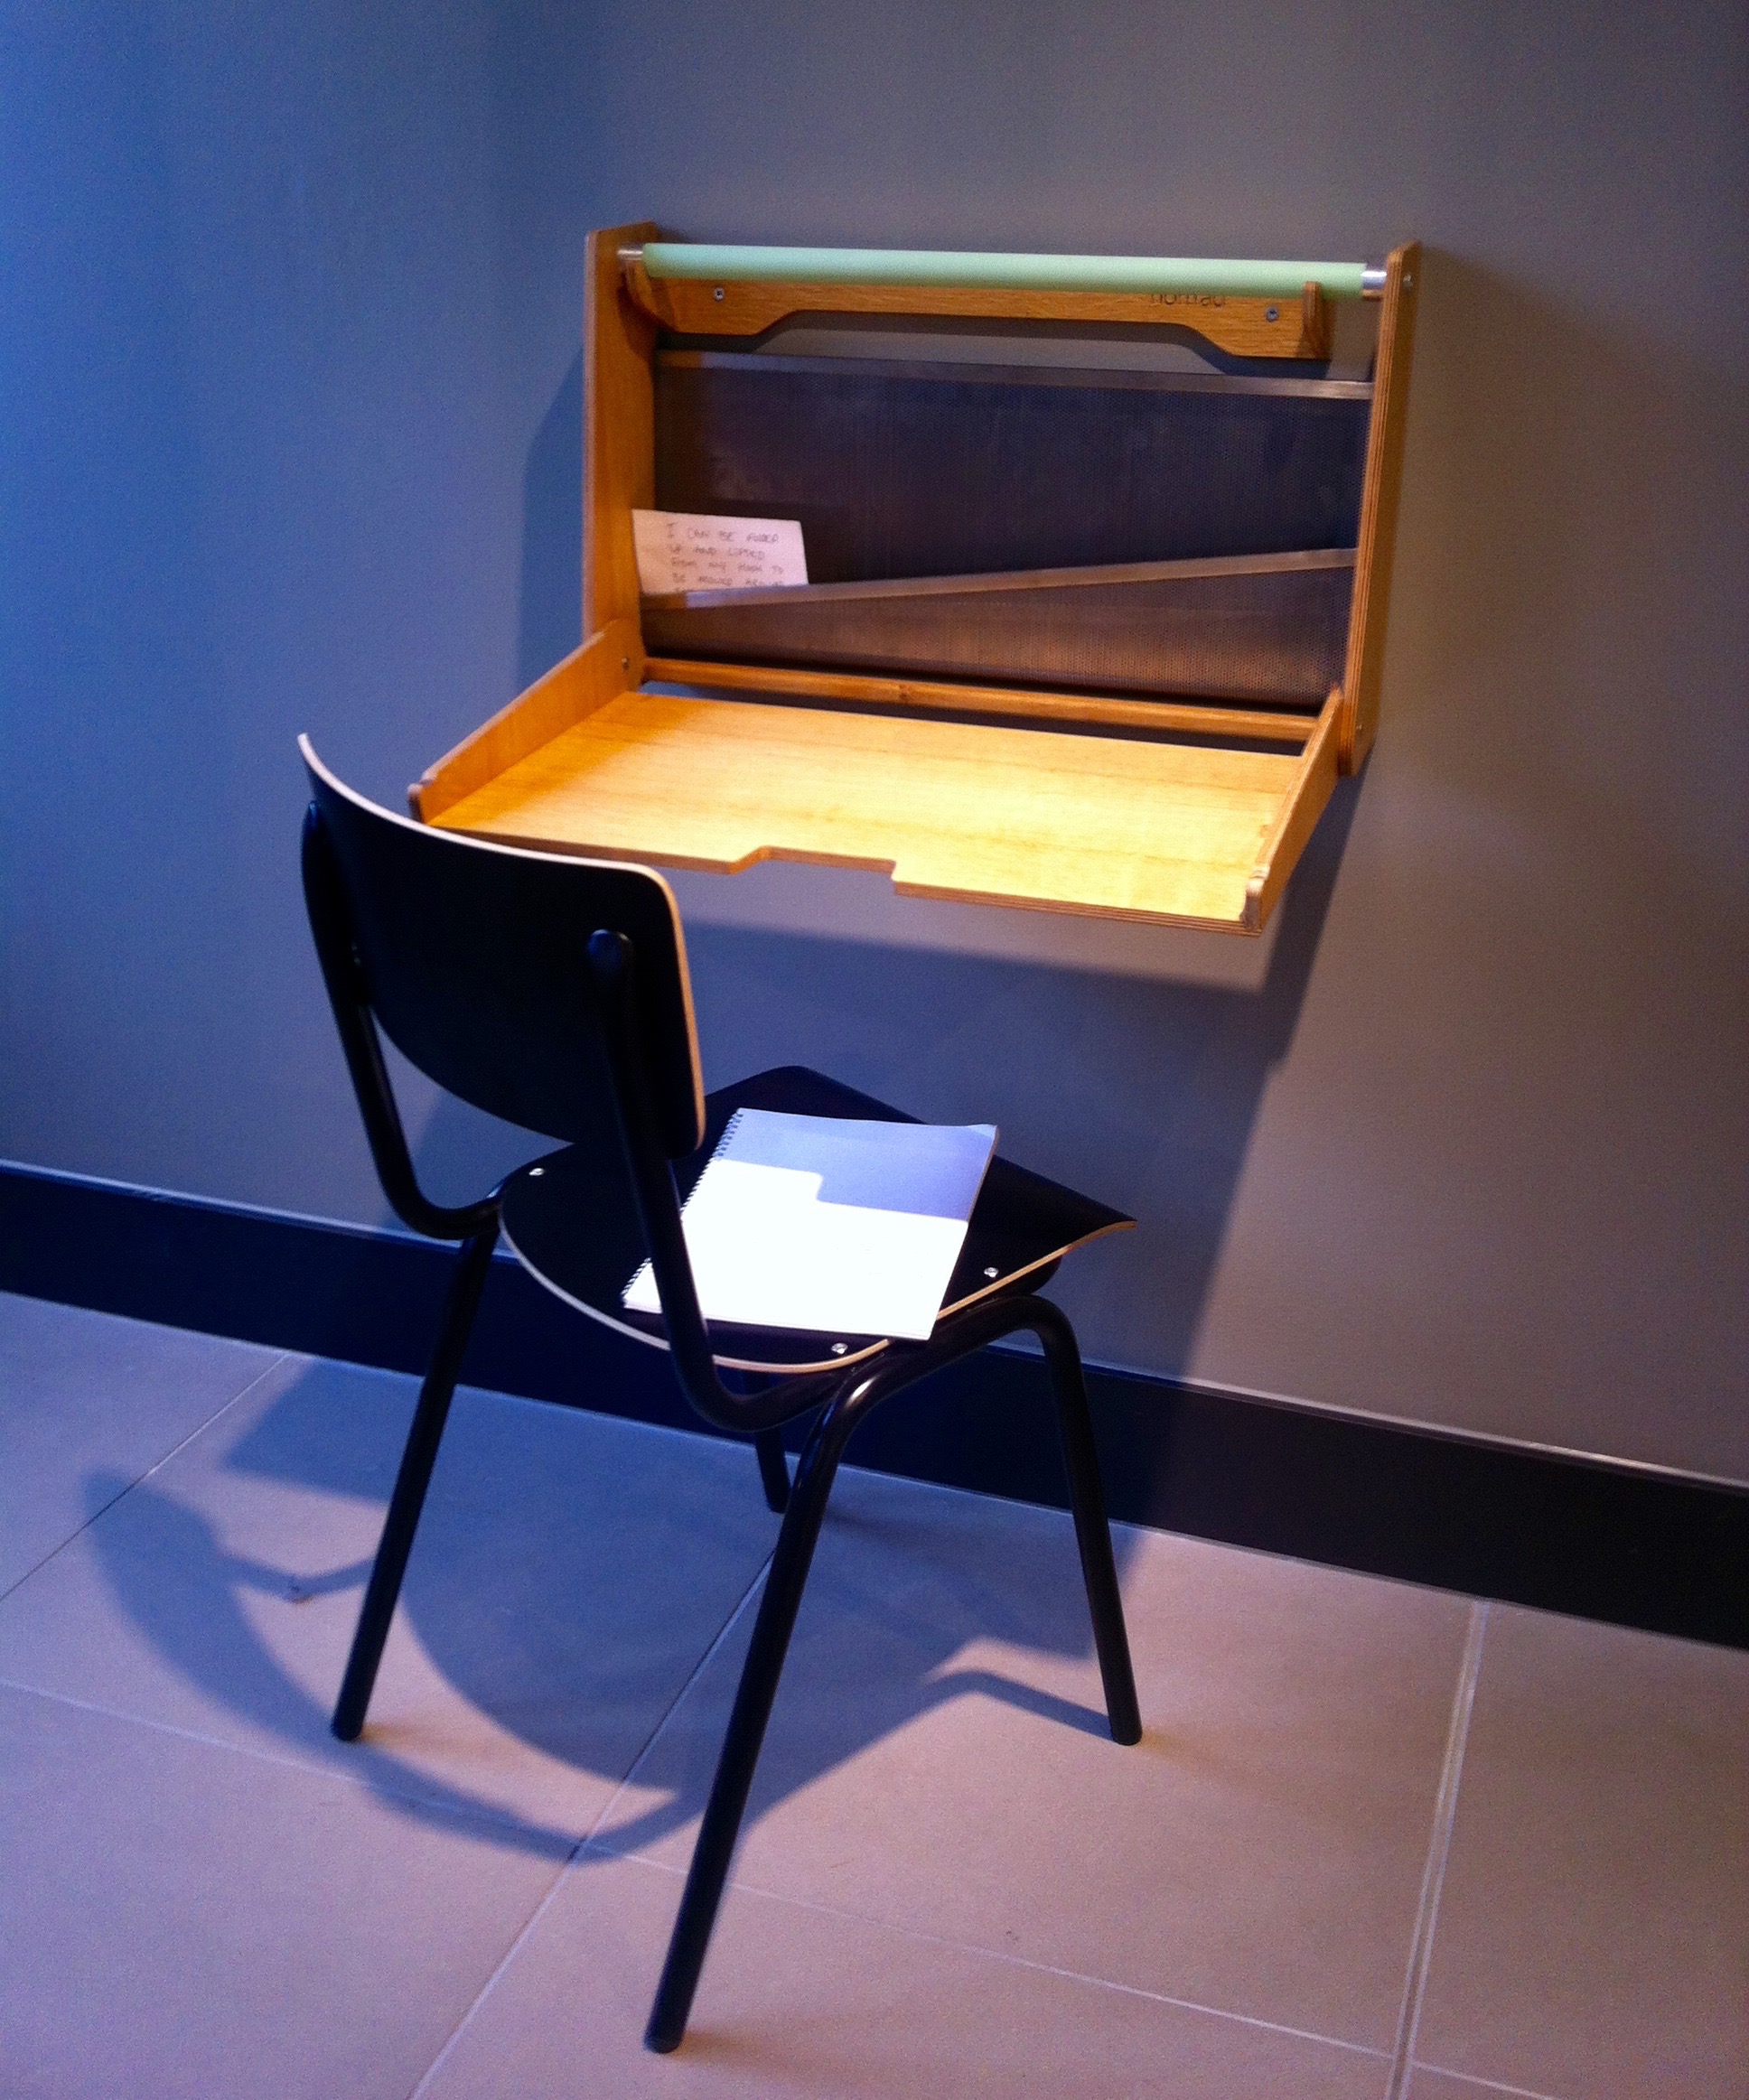
And yes, it was the fold-up desk on the wall that I was taken with. I think it's a clever way of incorporating a desk into almost any space. If I wasn't already running out of walls, or didn't have sloping walls upstairs I'd be looking into this further.

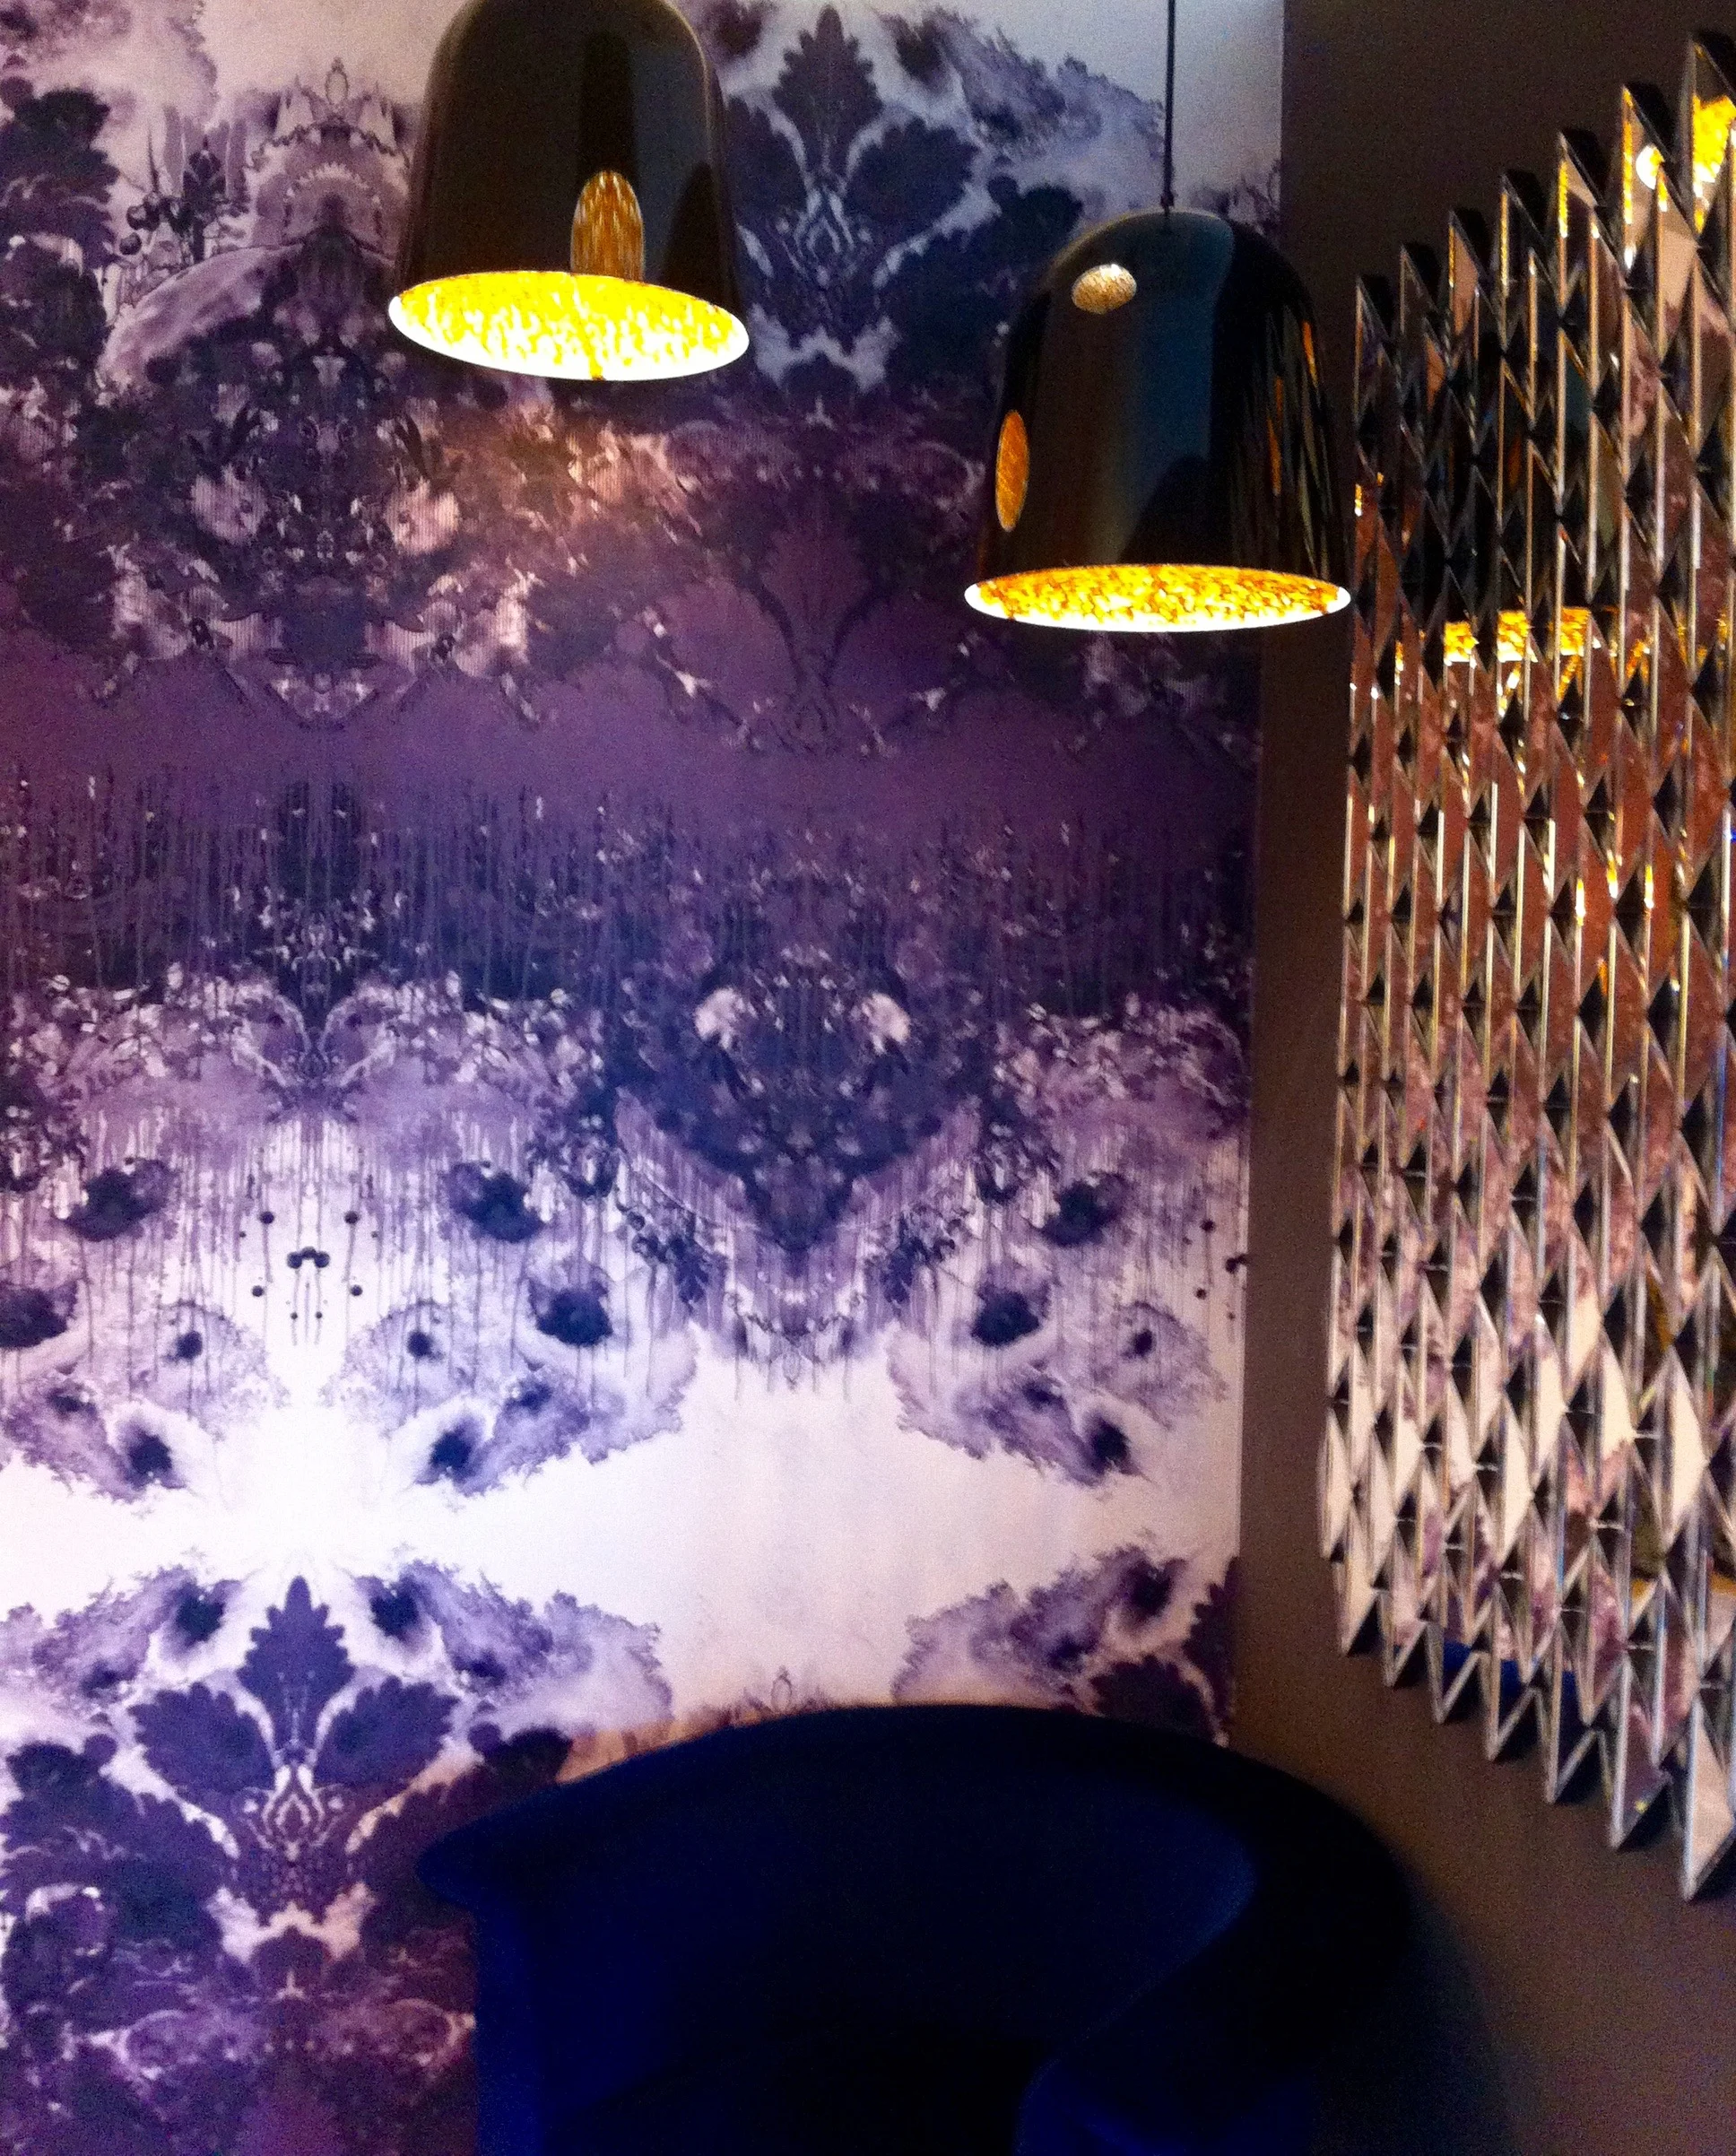
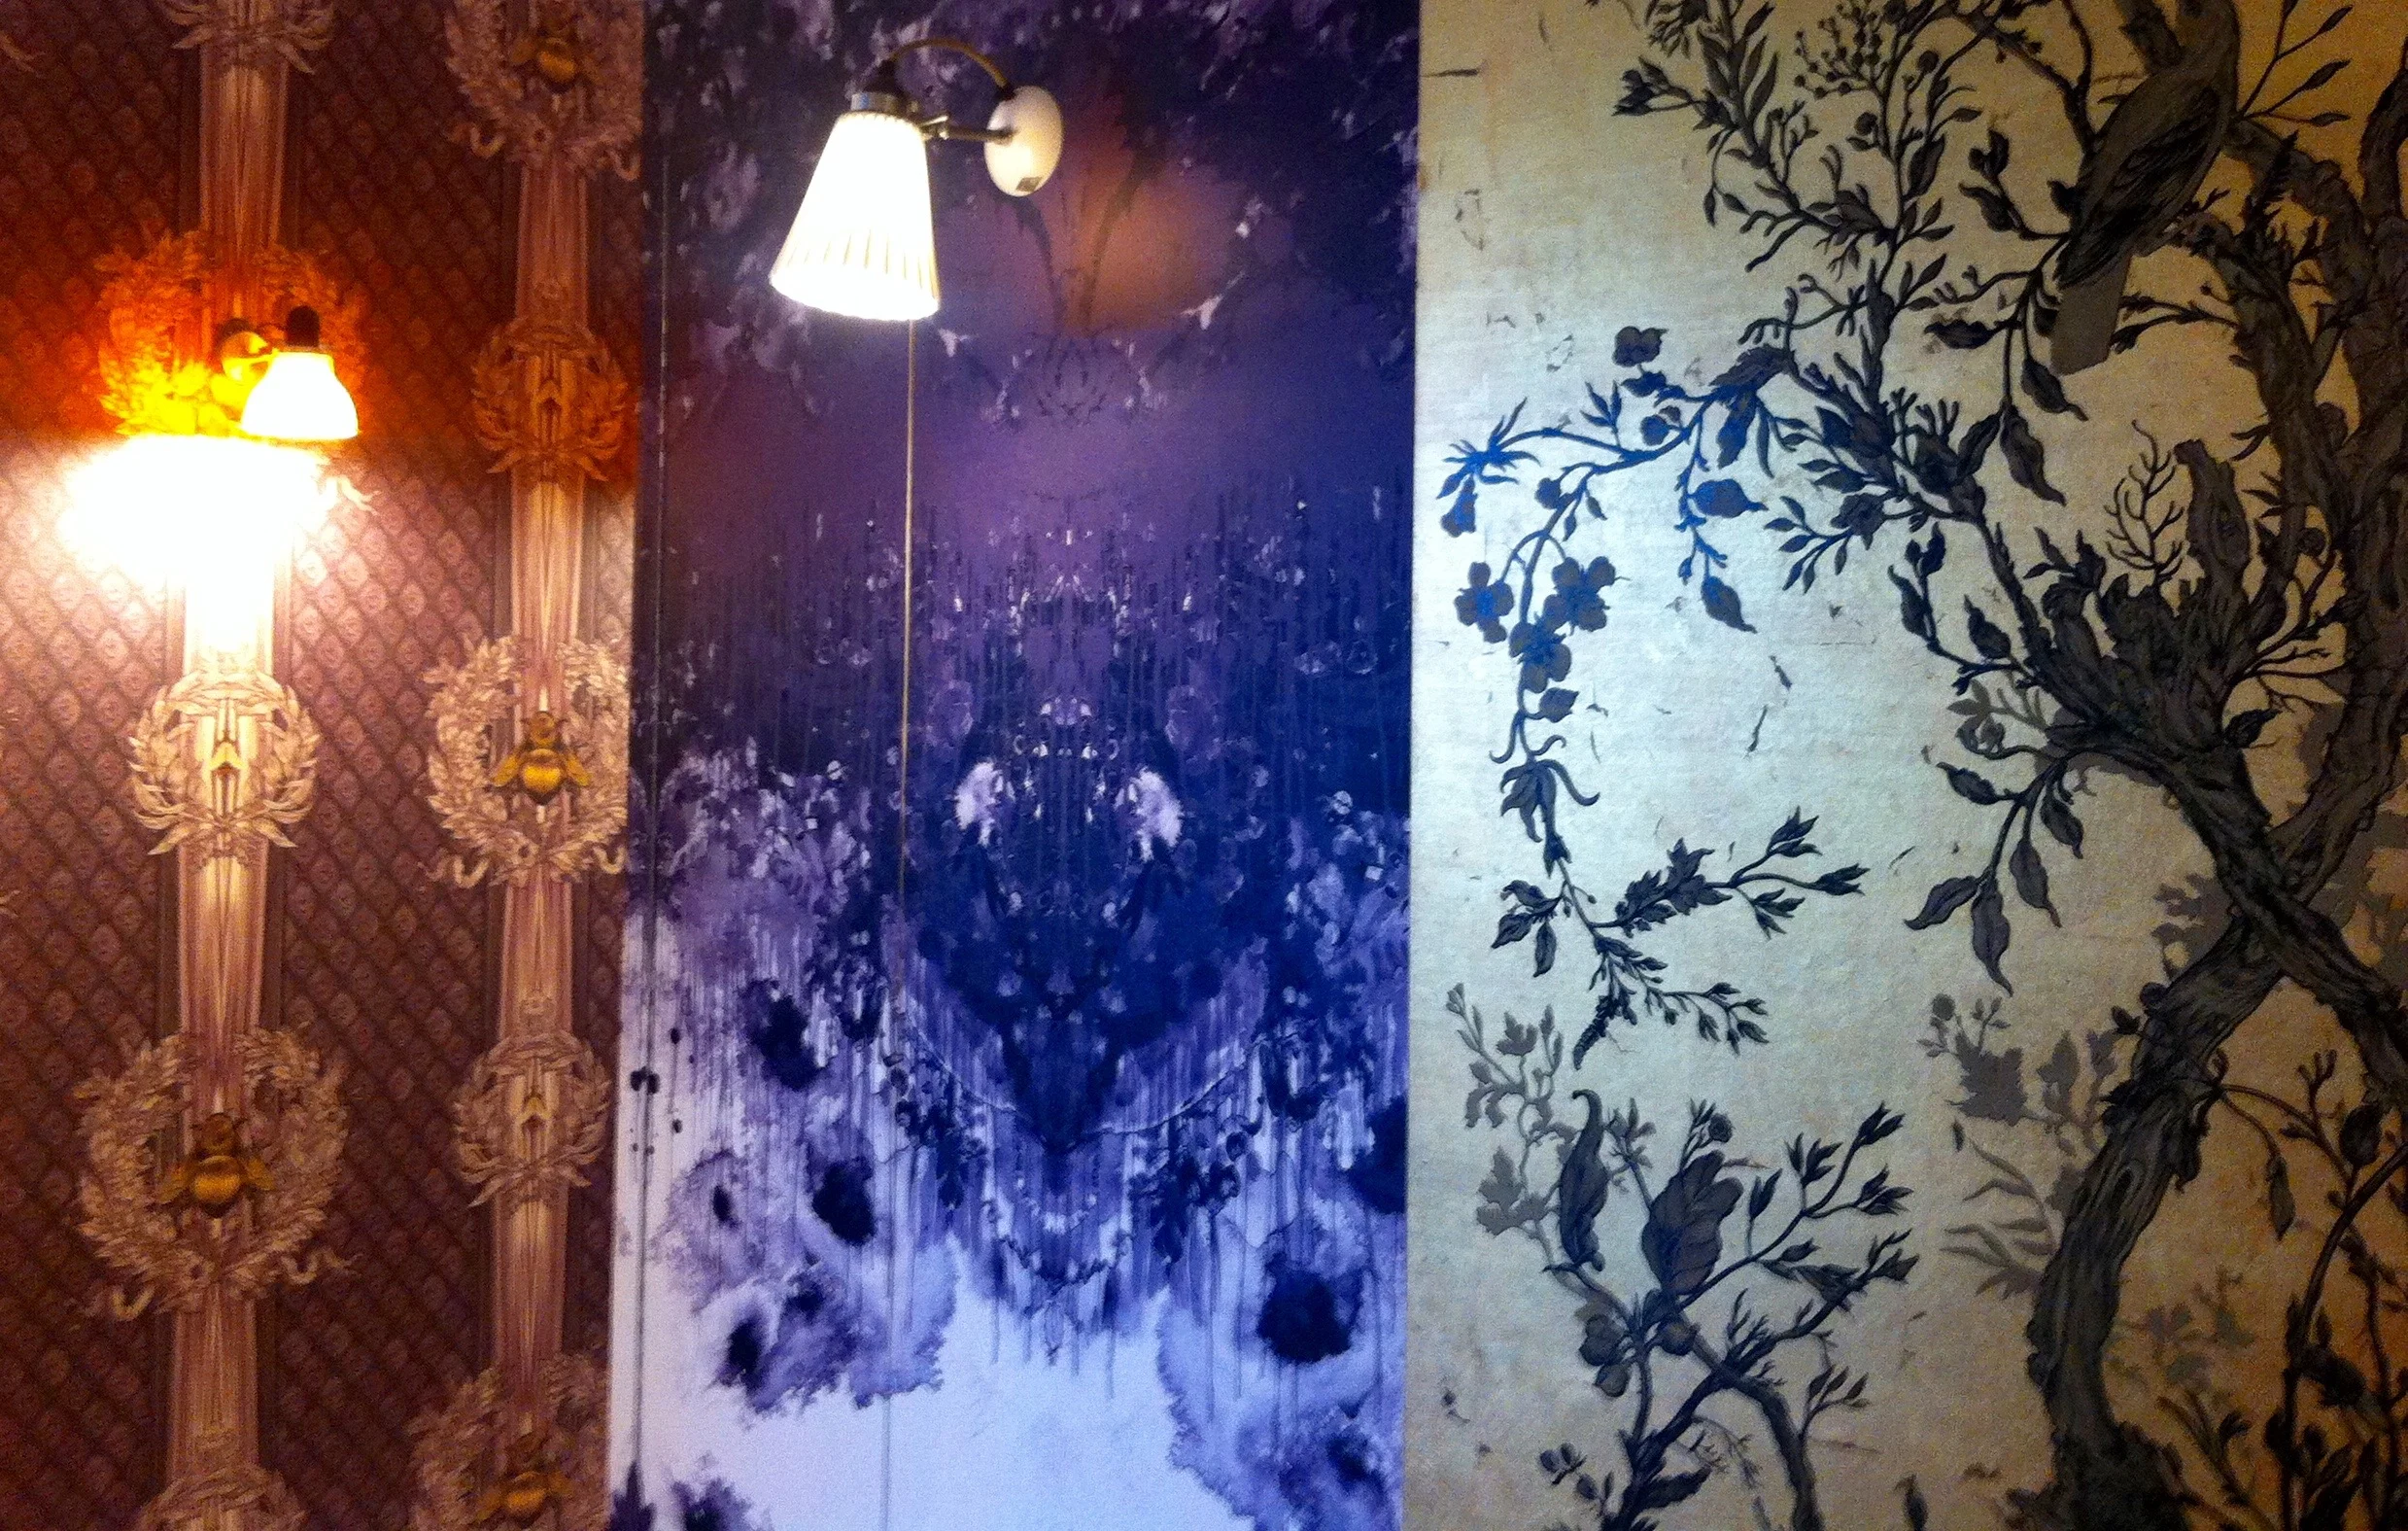
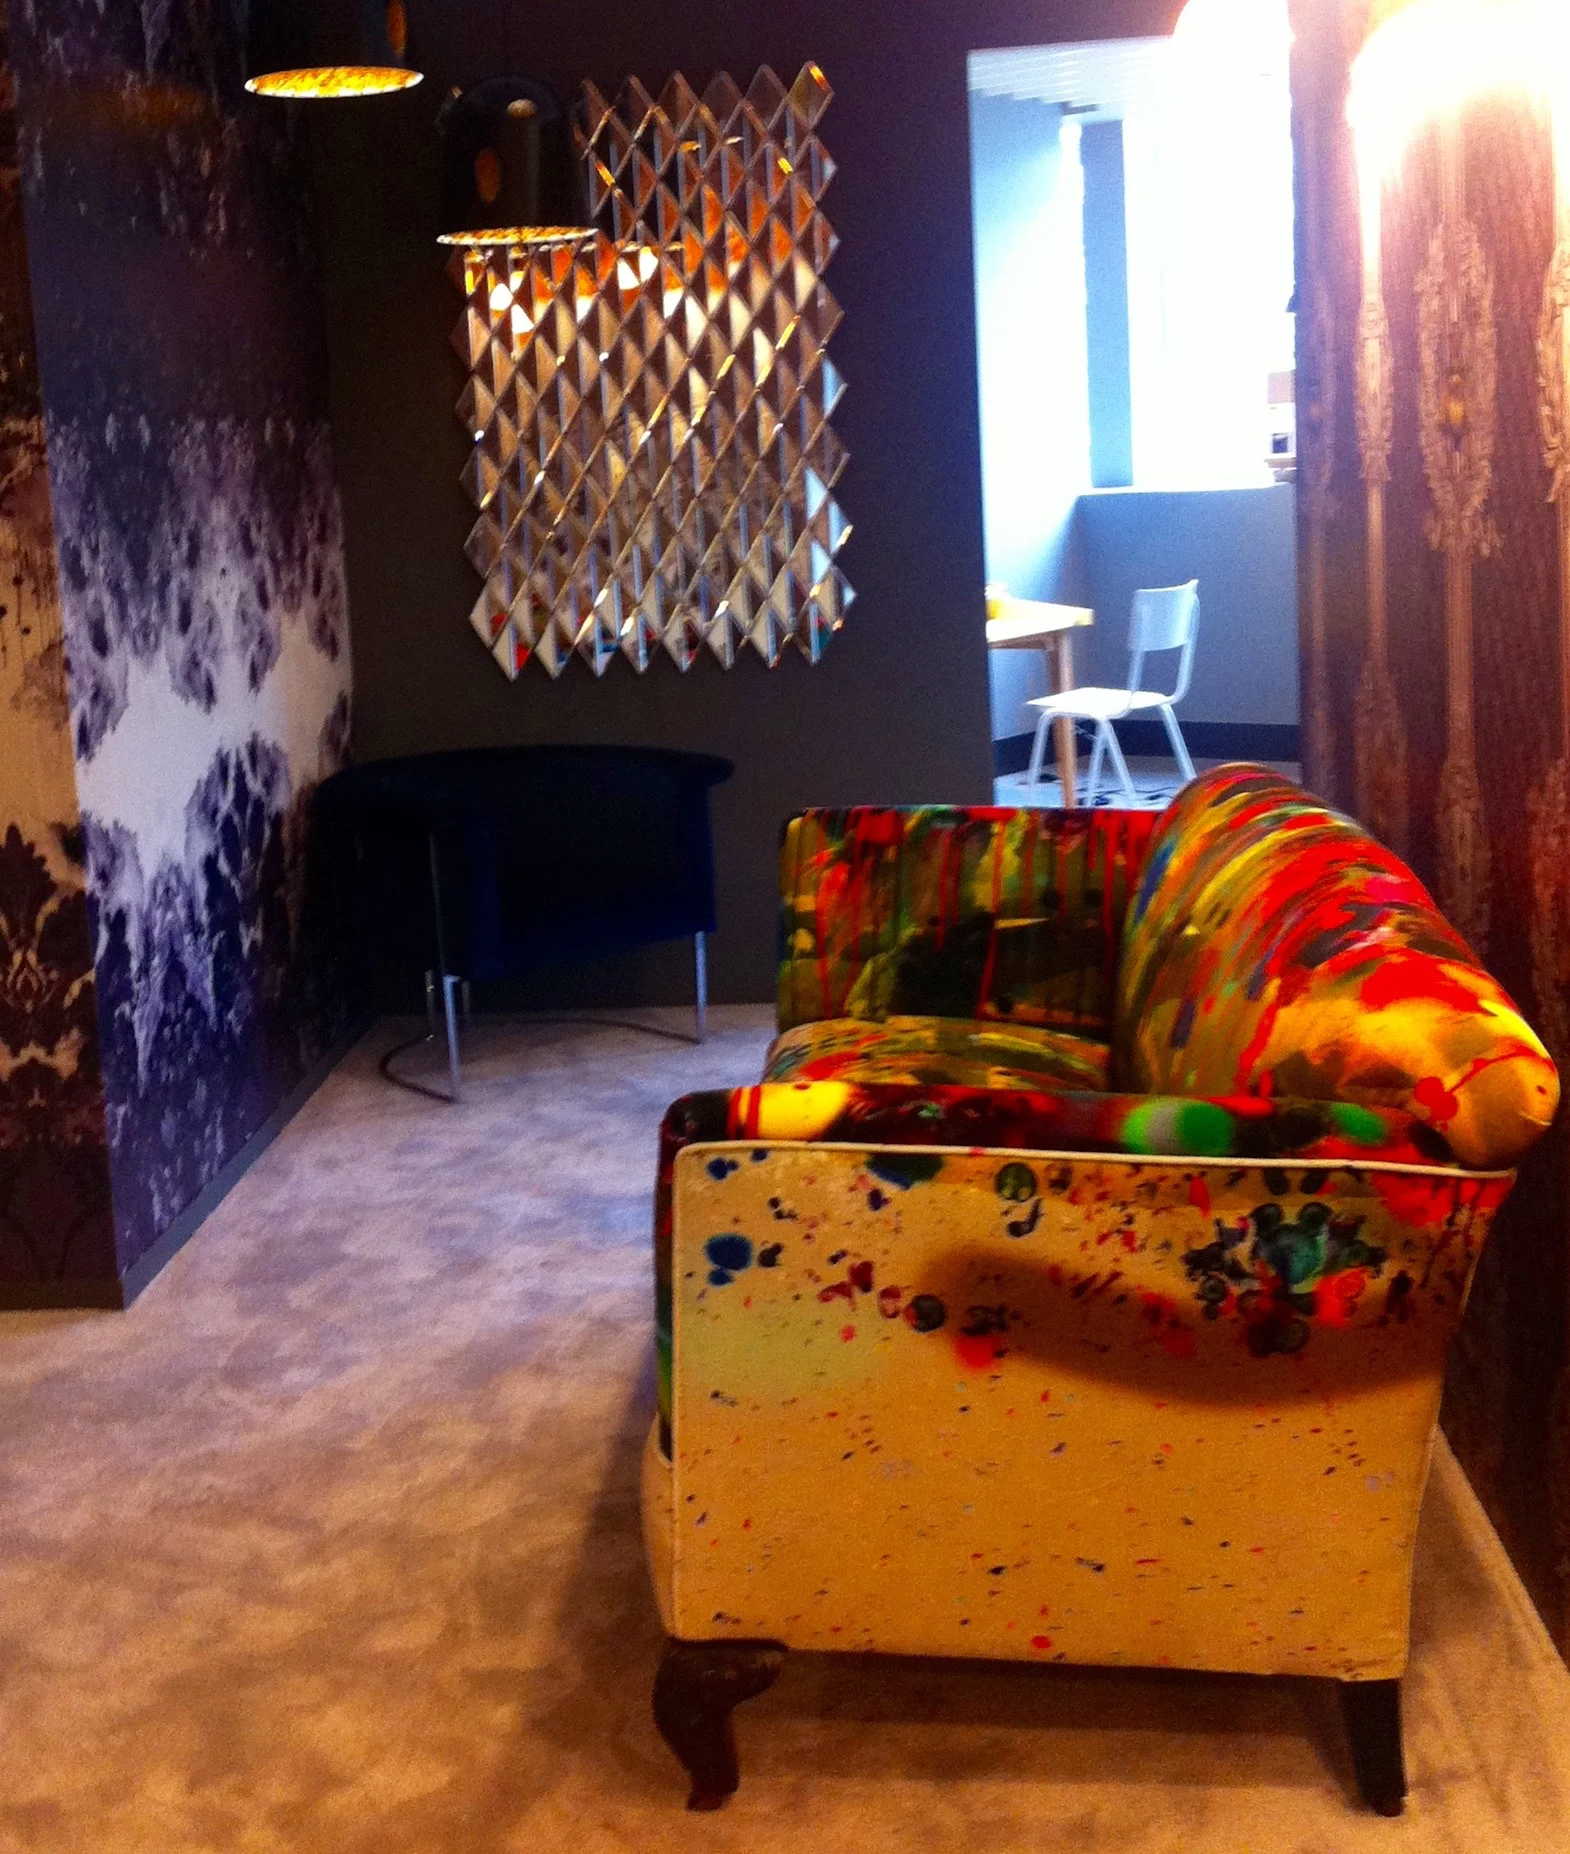
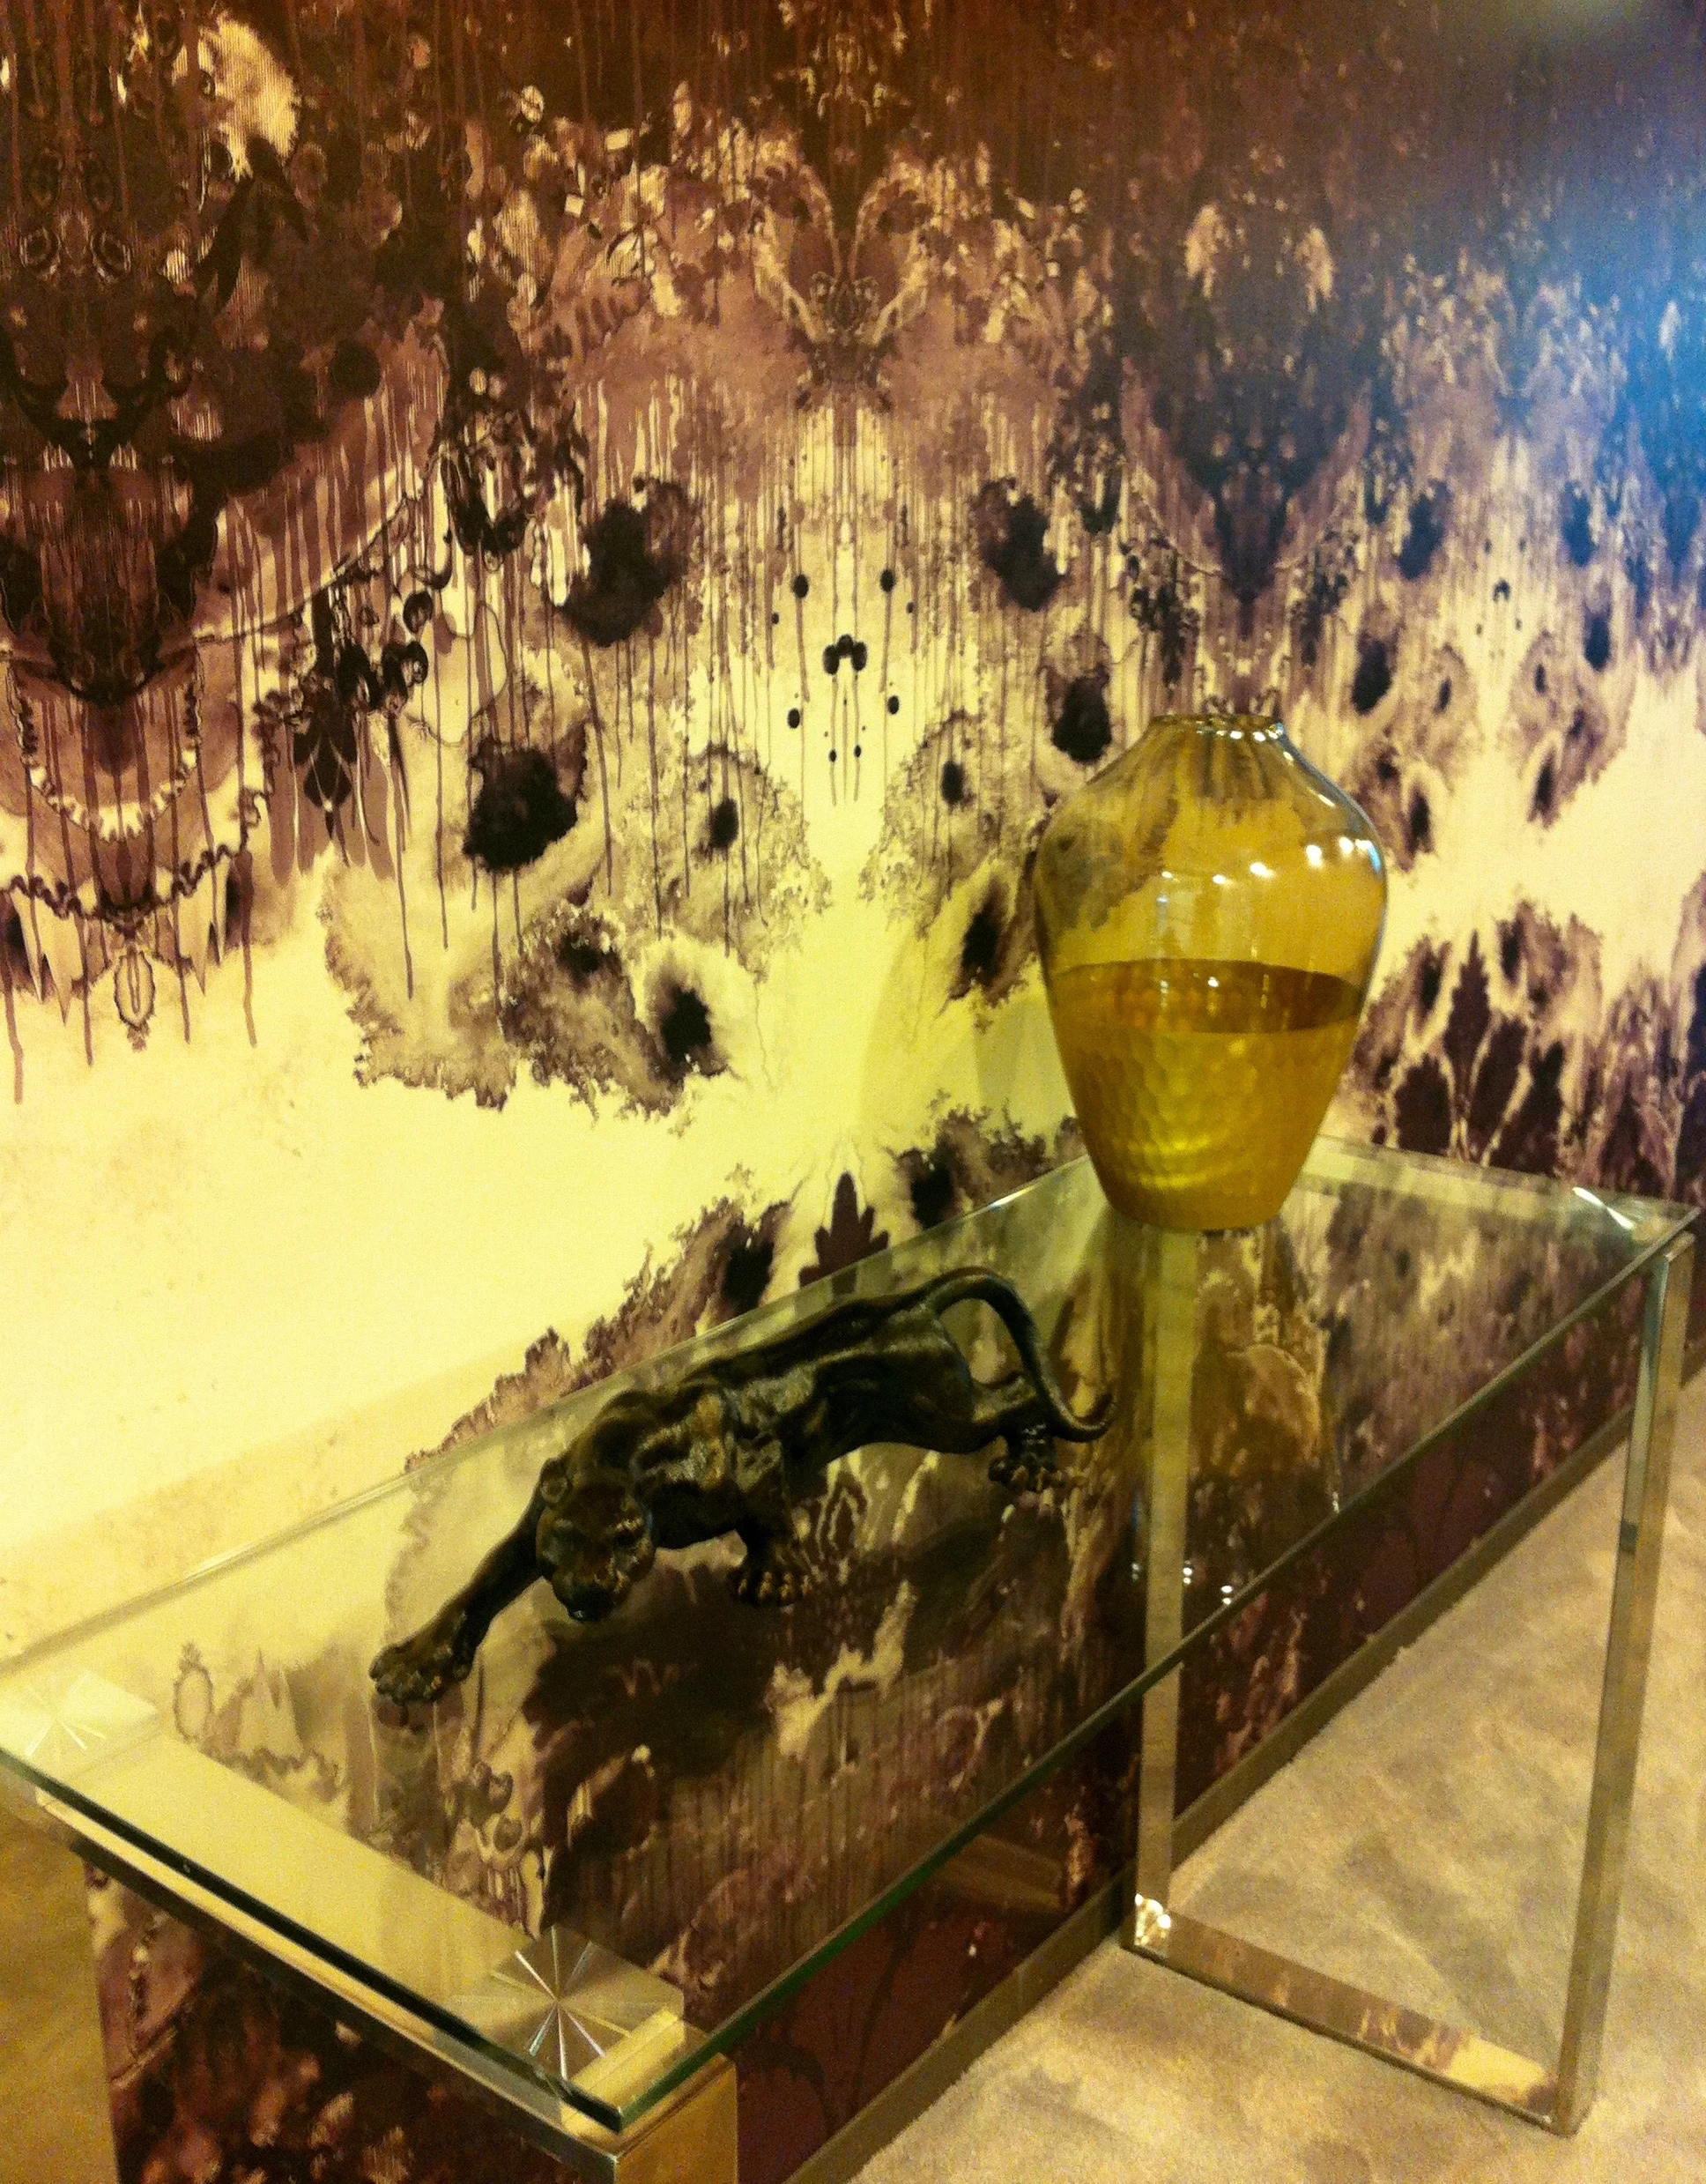
3. Timorous Beasties

Founded by Alistair McAuley and Paul Simmons in 1990, Timorous Beasties are noted for their surreal and provocative textiles and wallpaper. The studio is a diverse operation considered iconic by those in the know and has won many awards.

This space explores the great opportunities that hallways have. They're often the first space that greets you into your home or one that enables you to move from room to room, and they believe this means we can be more daring and provocative than in a conventional room. Here they have kept everything relatively dark to illuminate the rooms leading off the space, and this is a very deliberate attempt at reassessing an often neglected space.

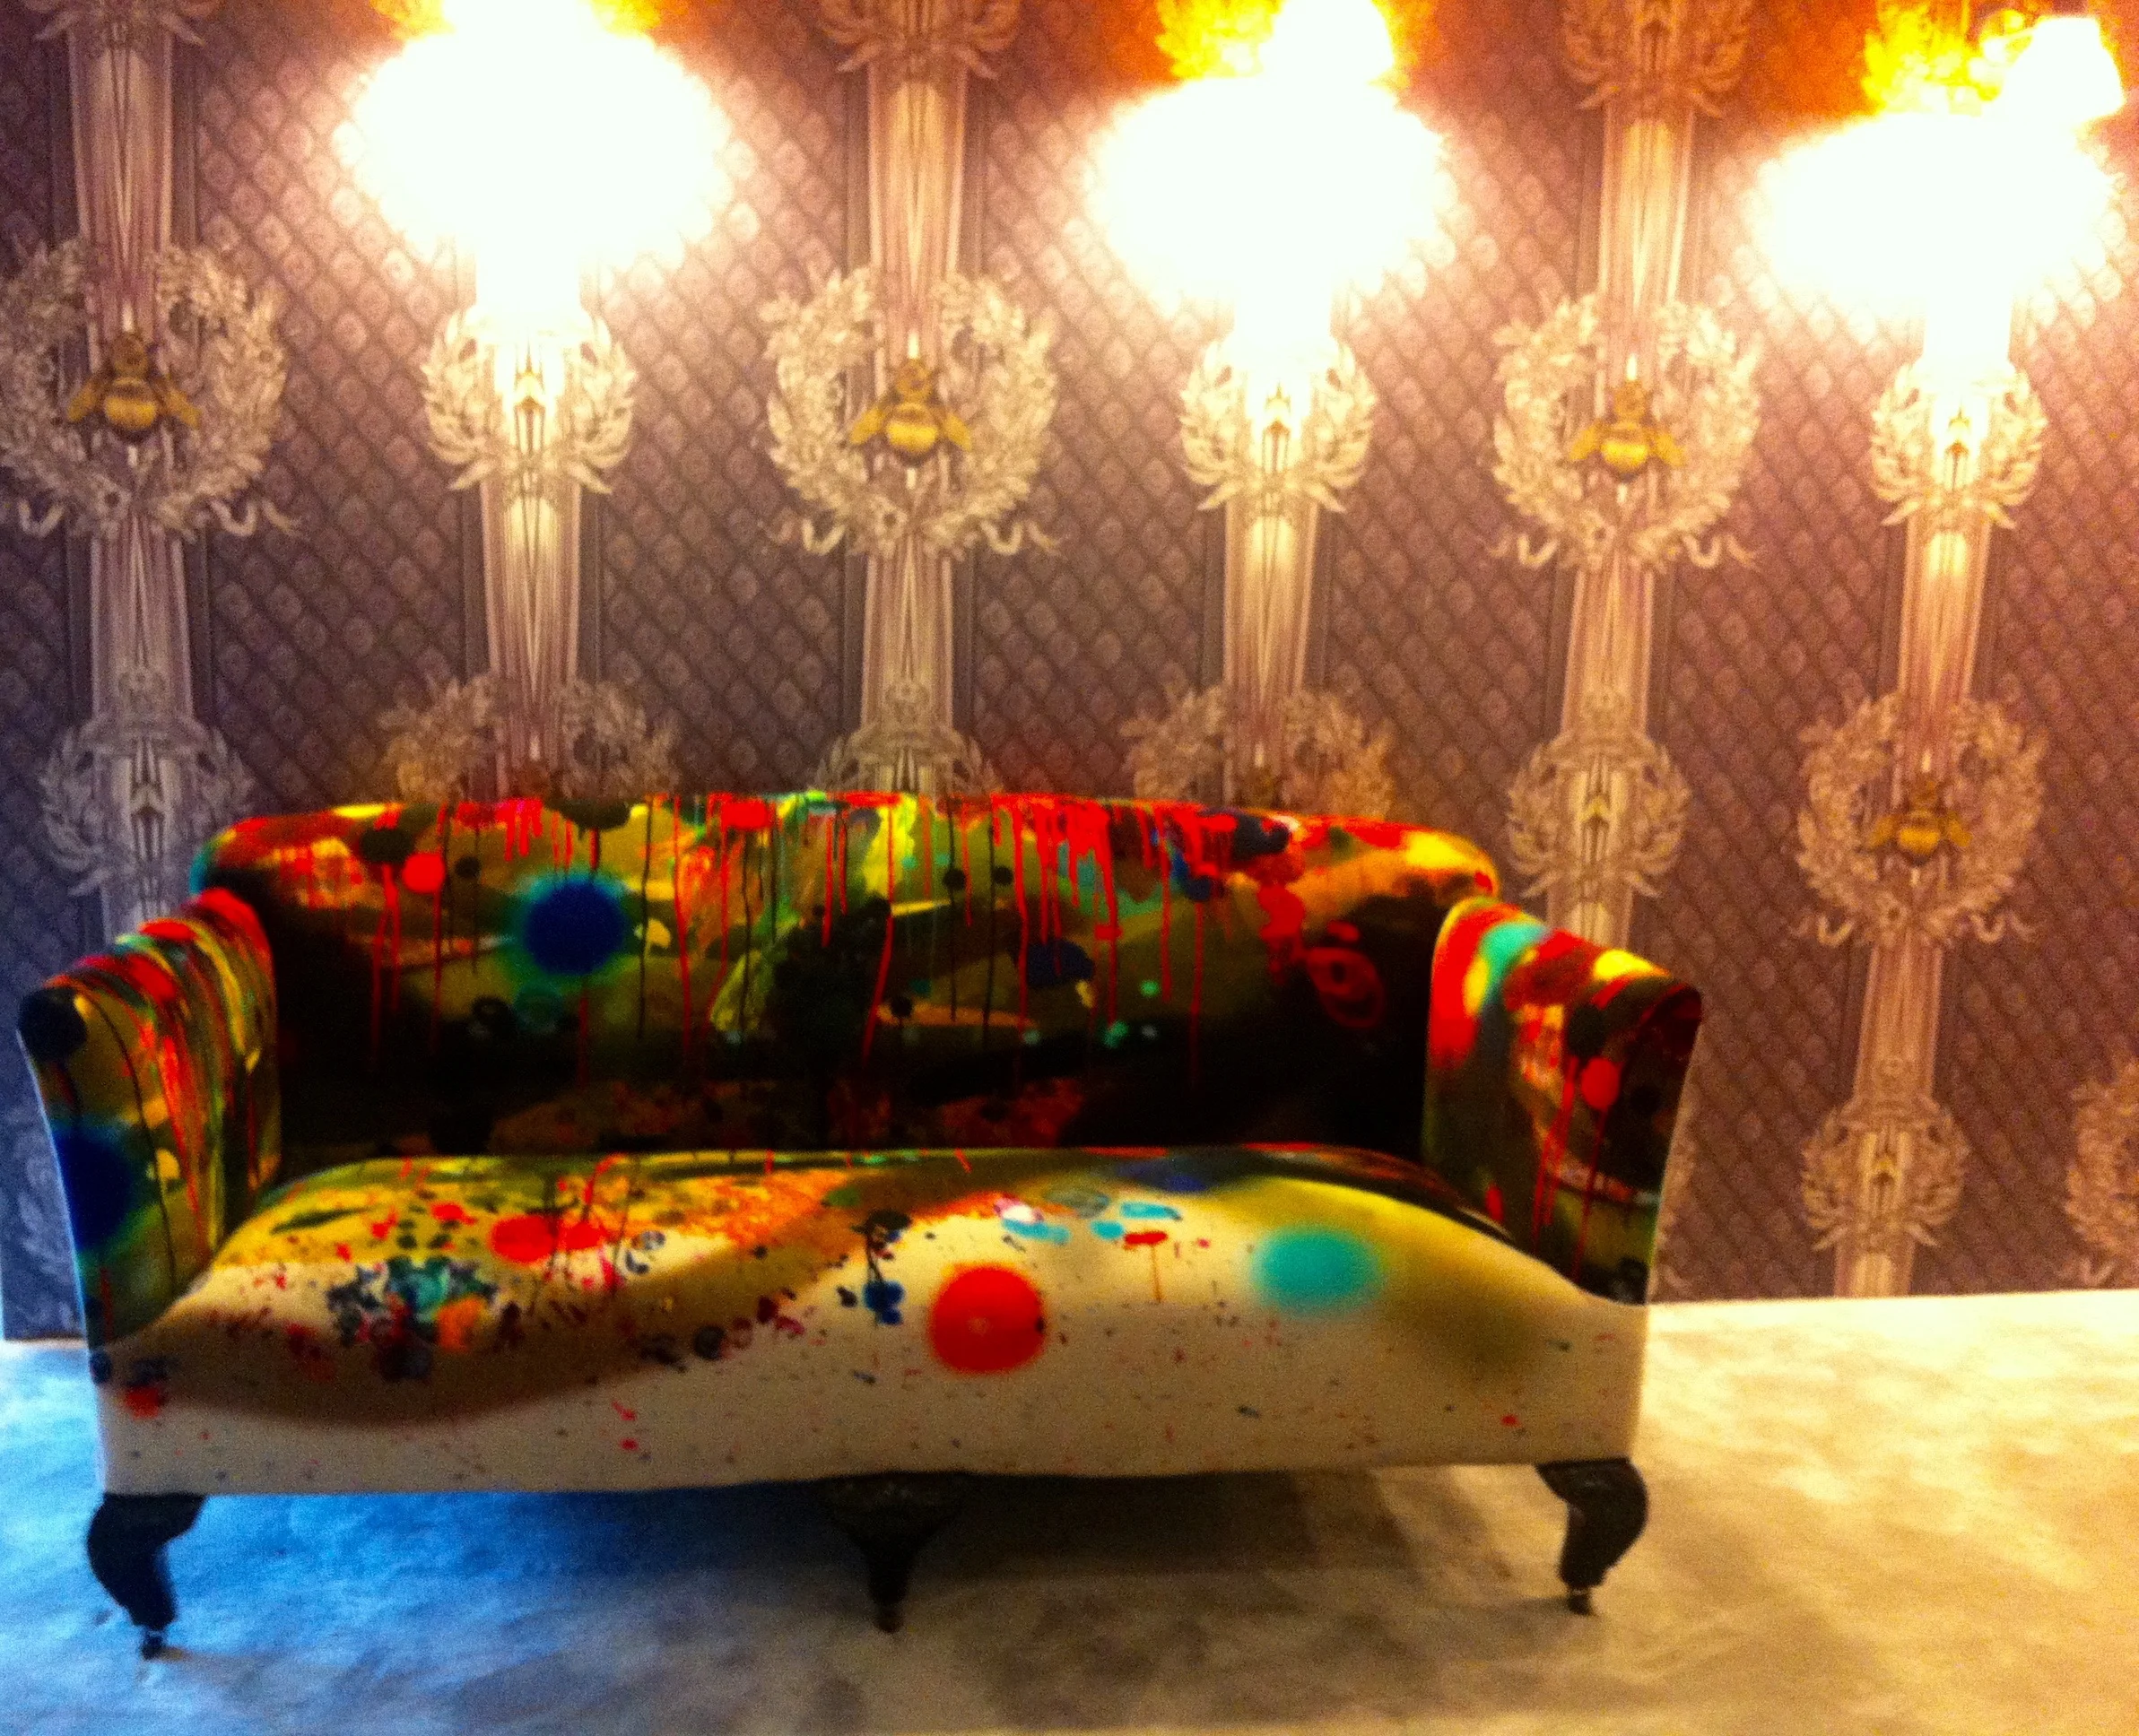
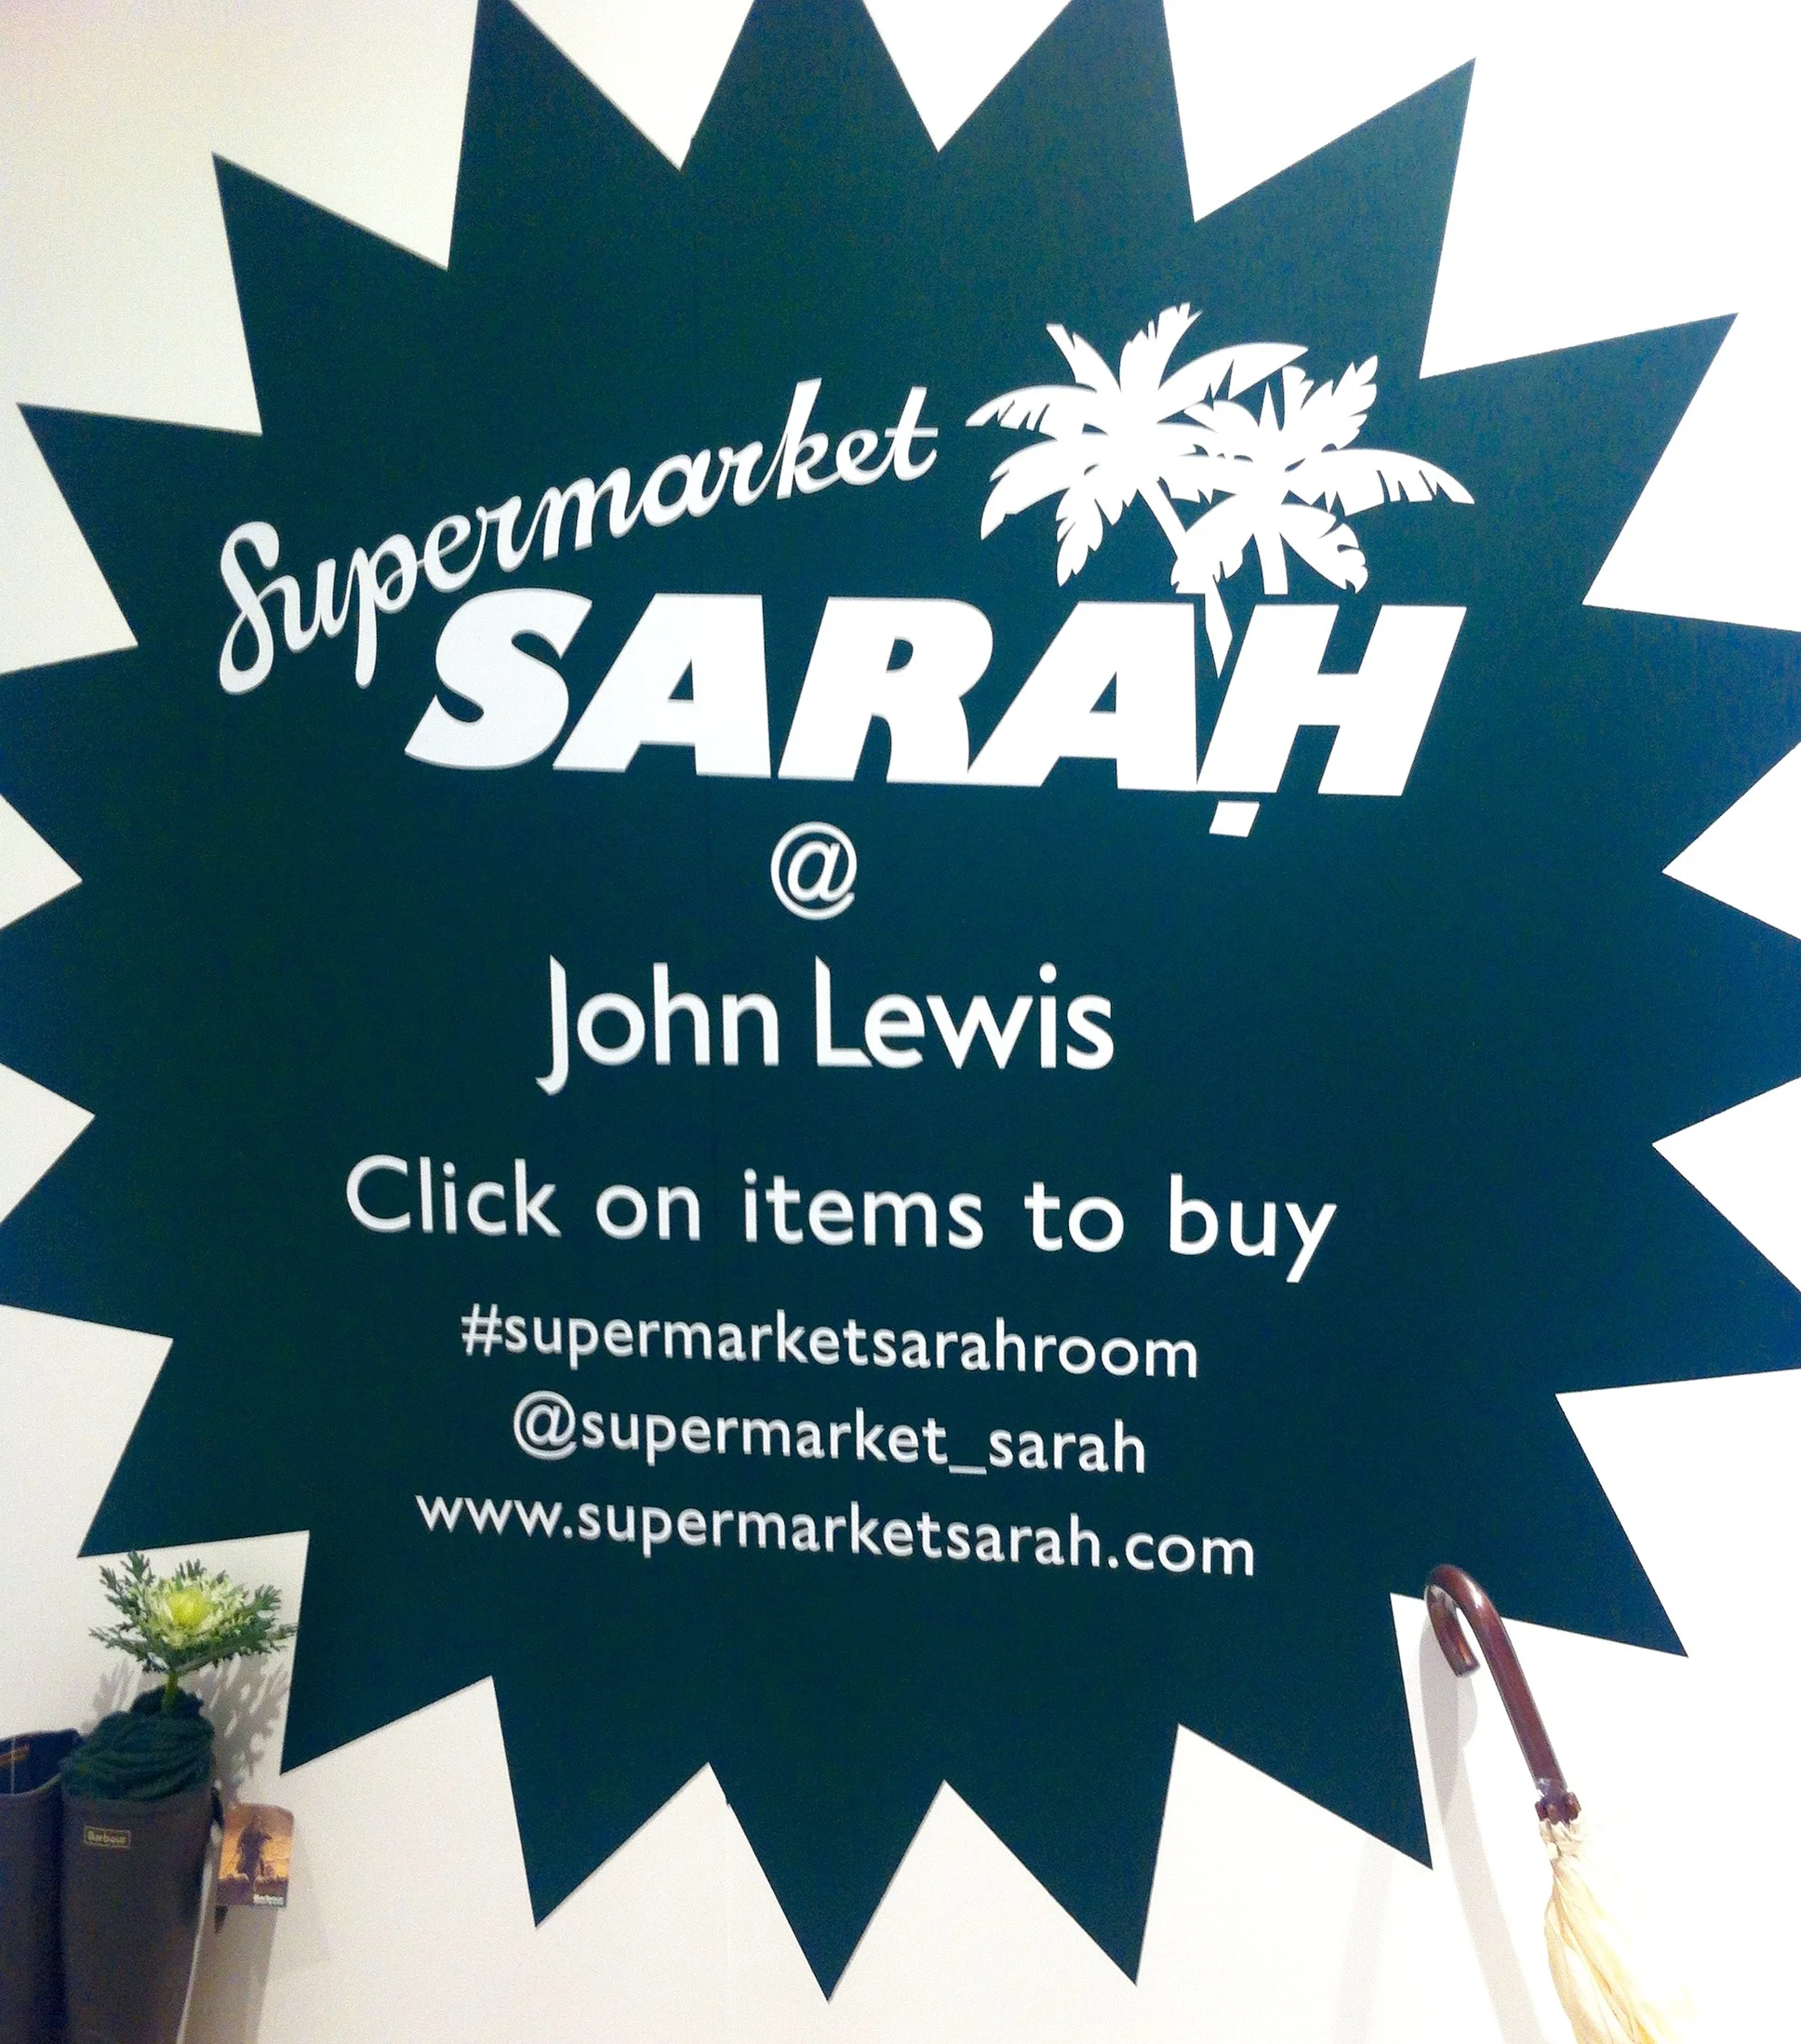
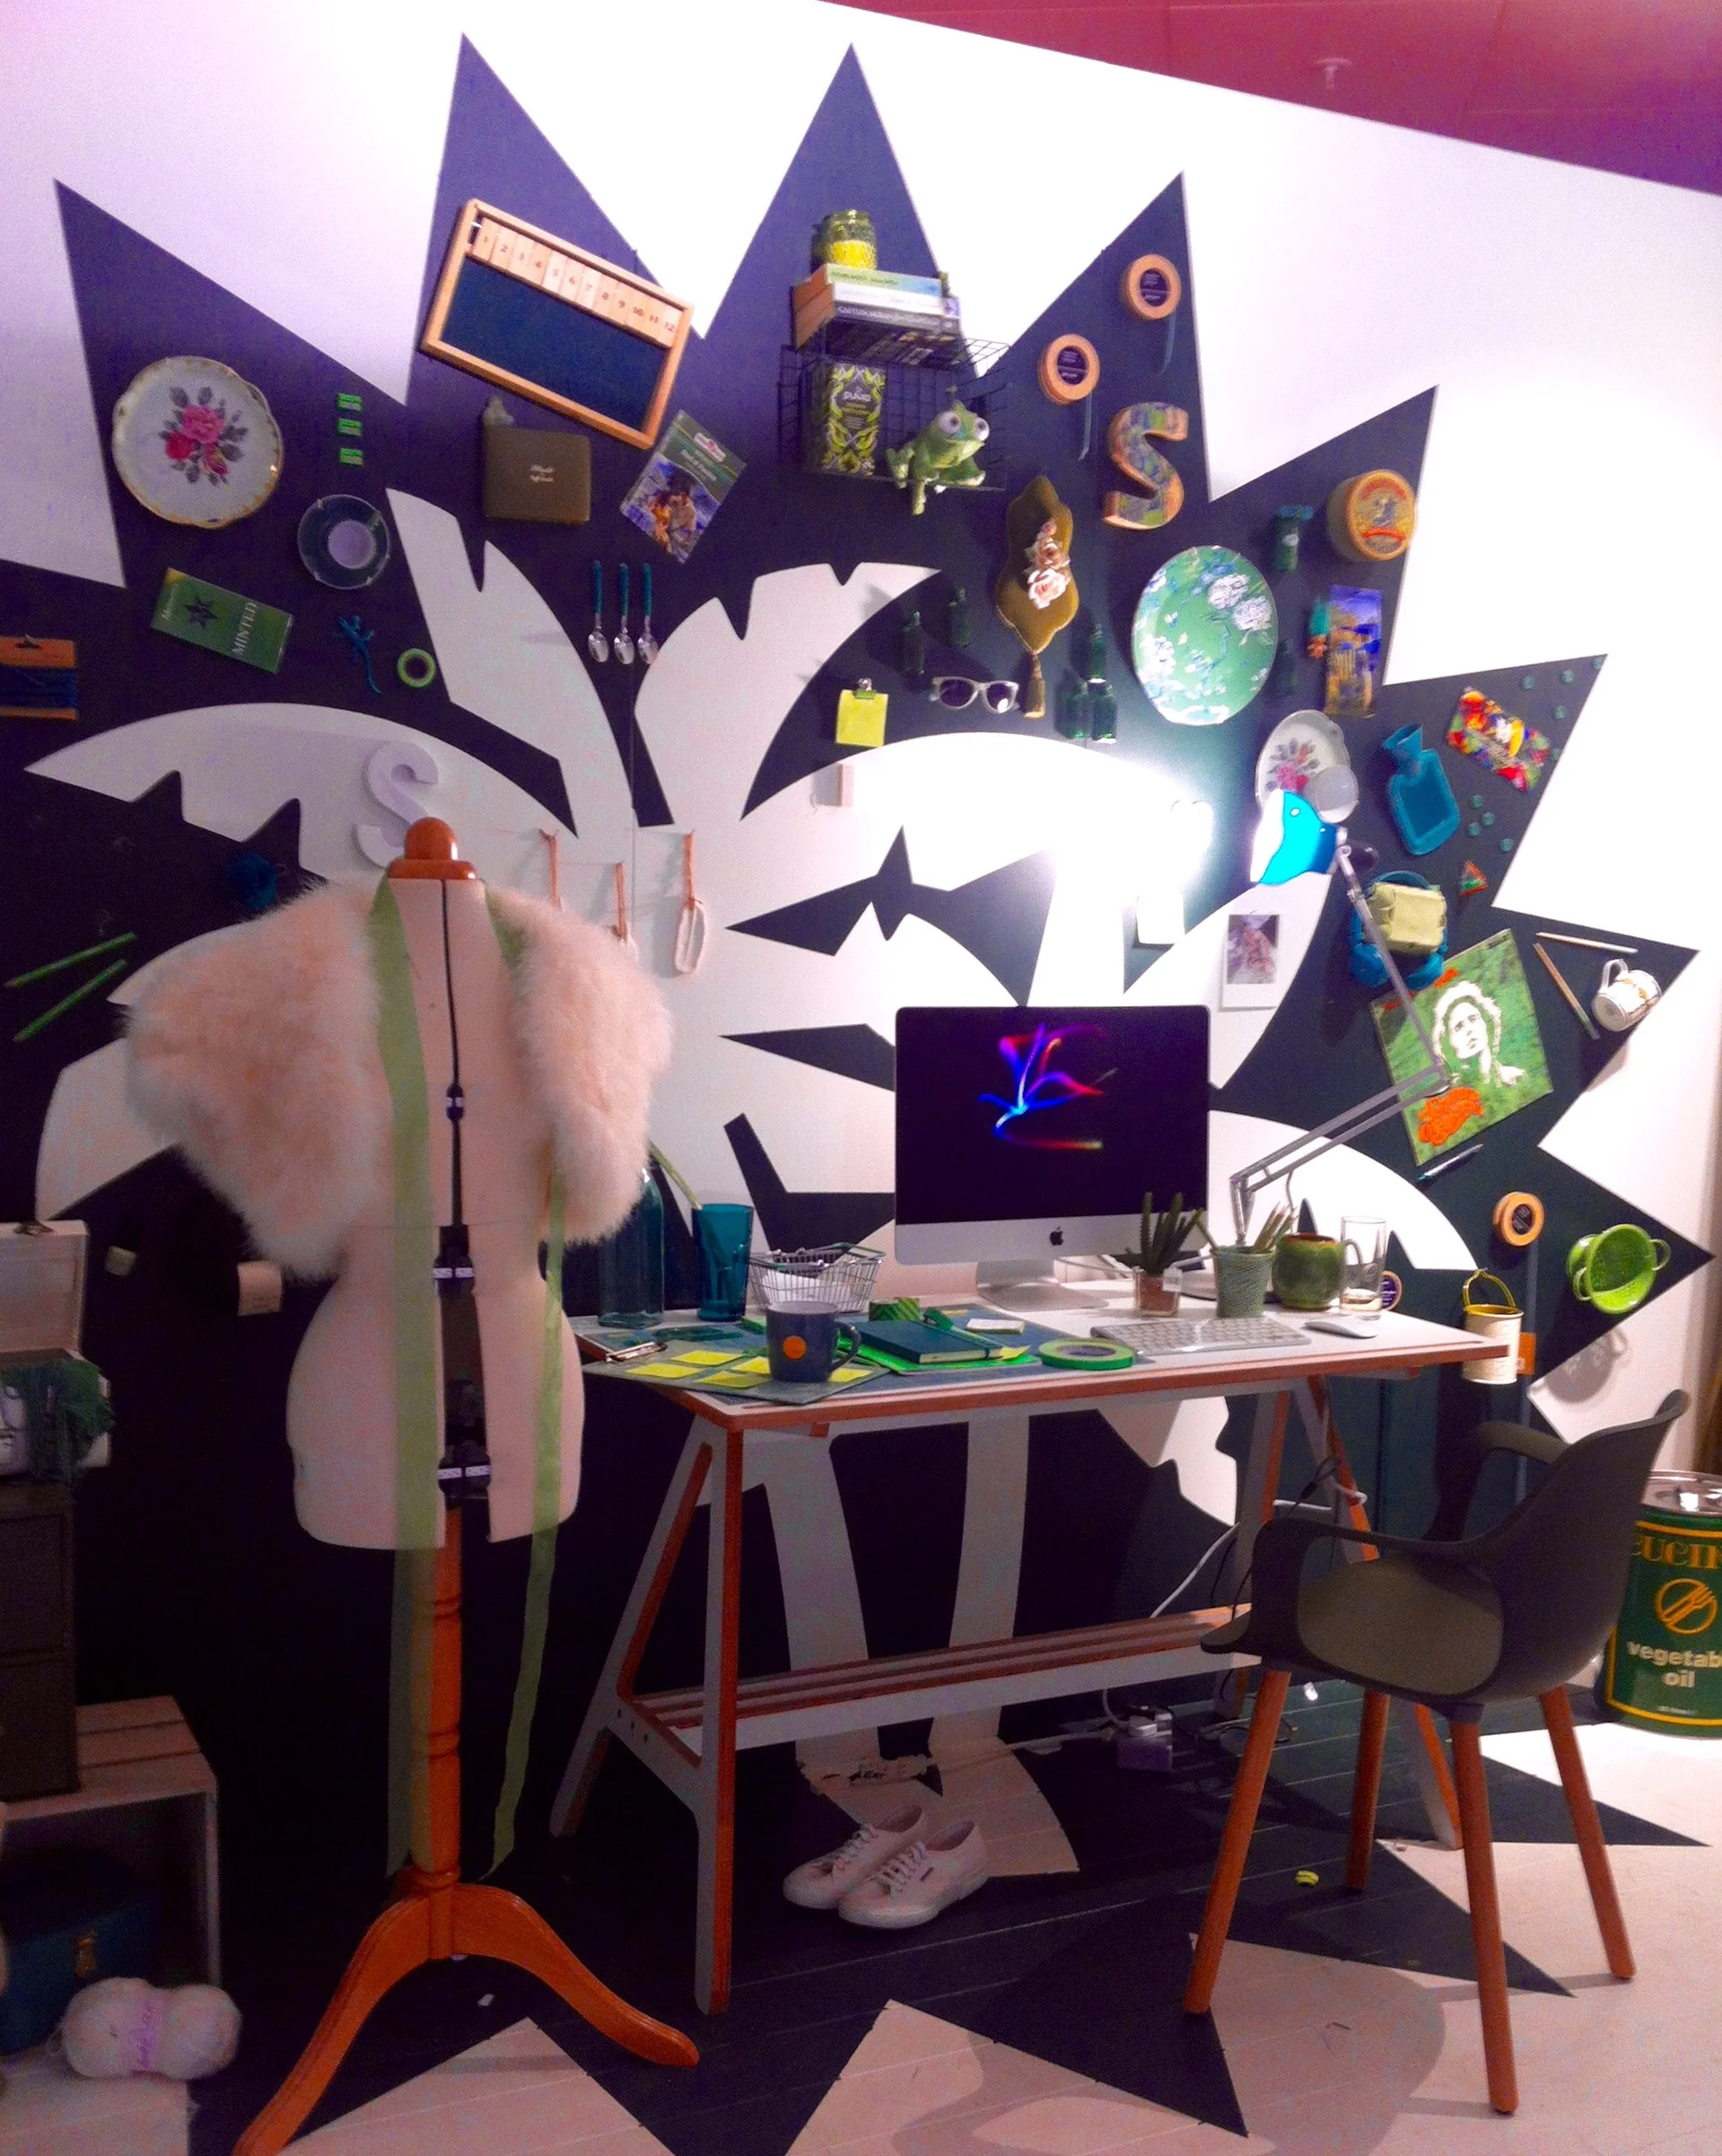
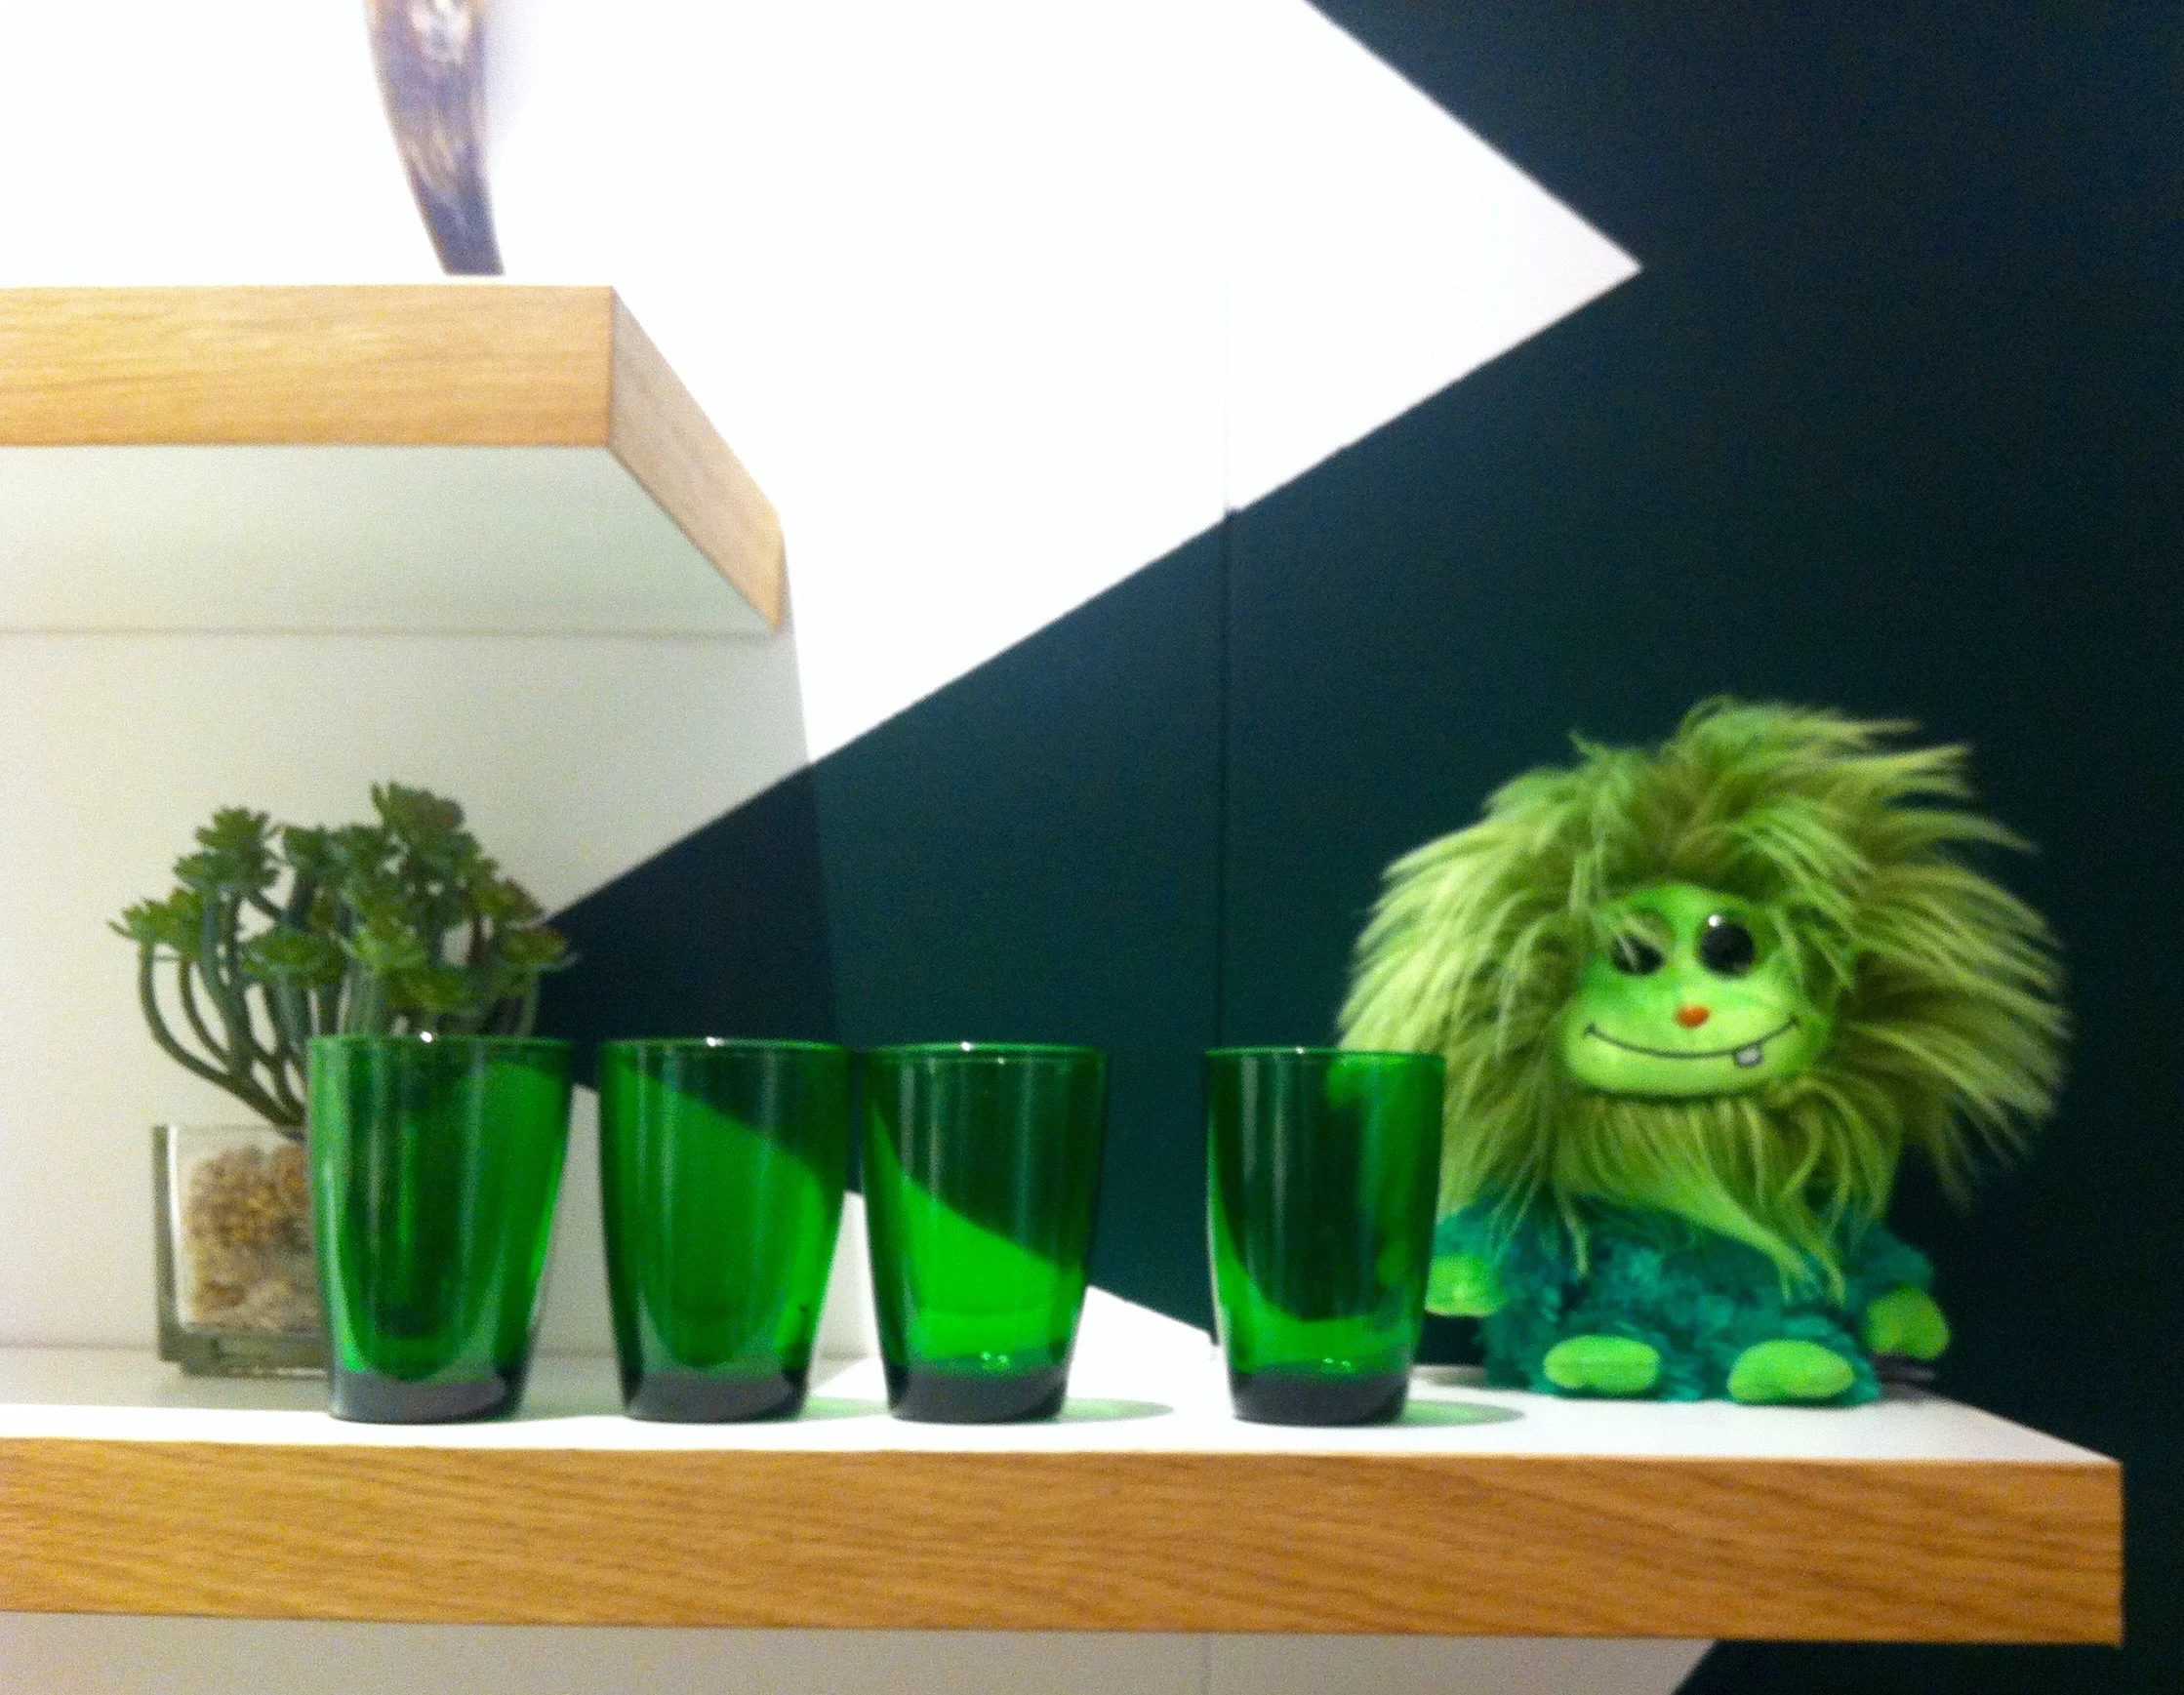
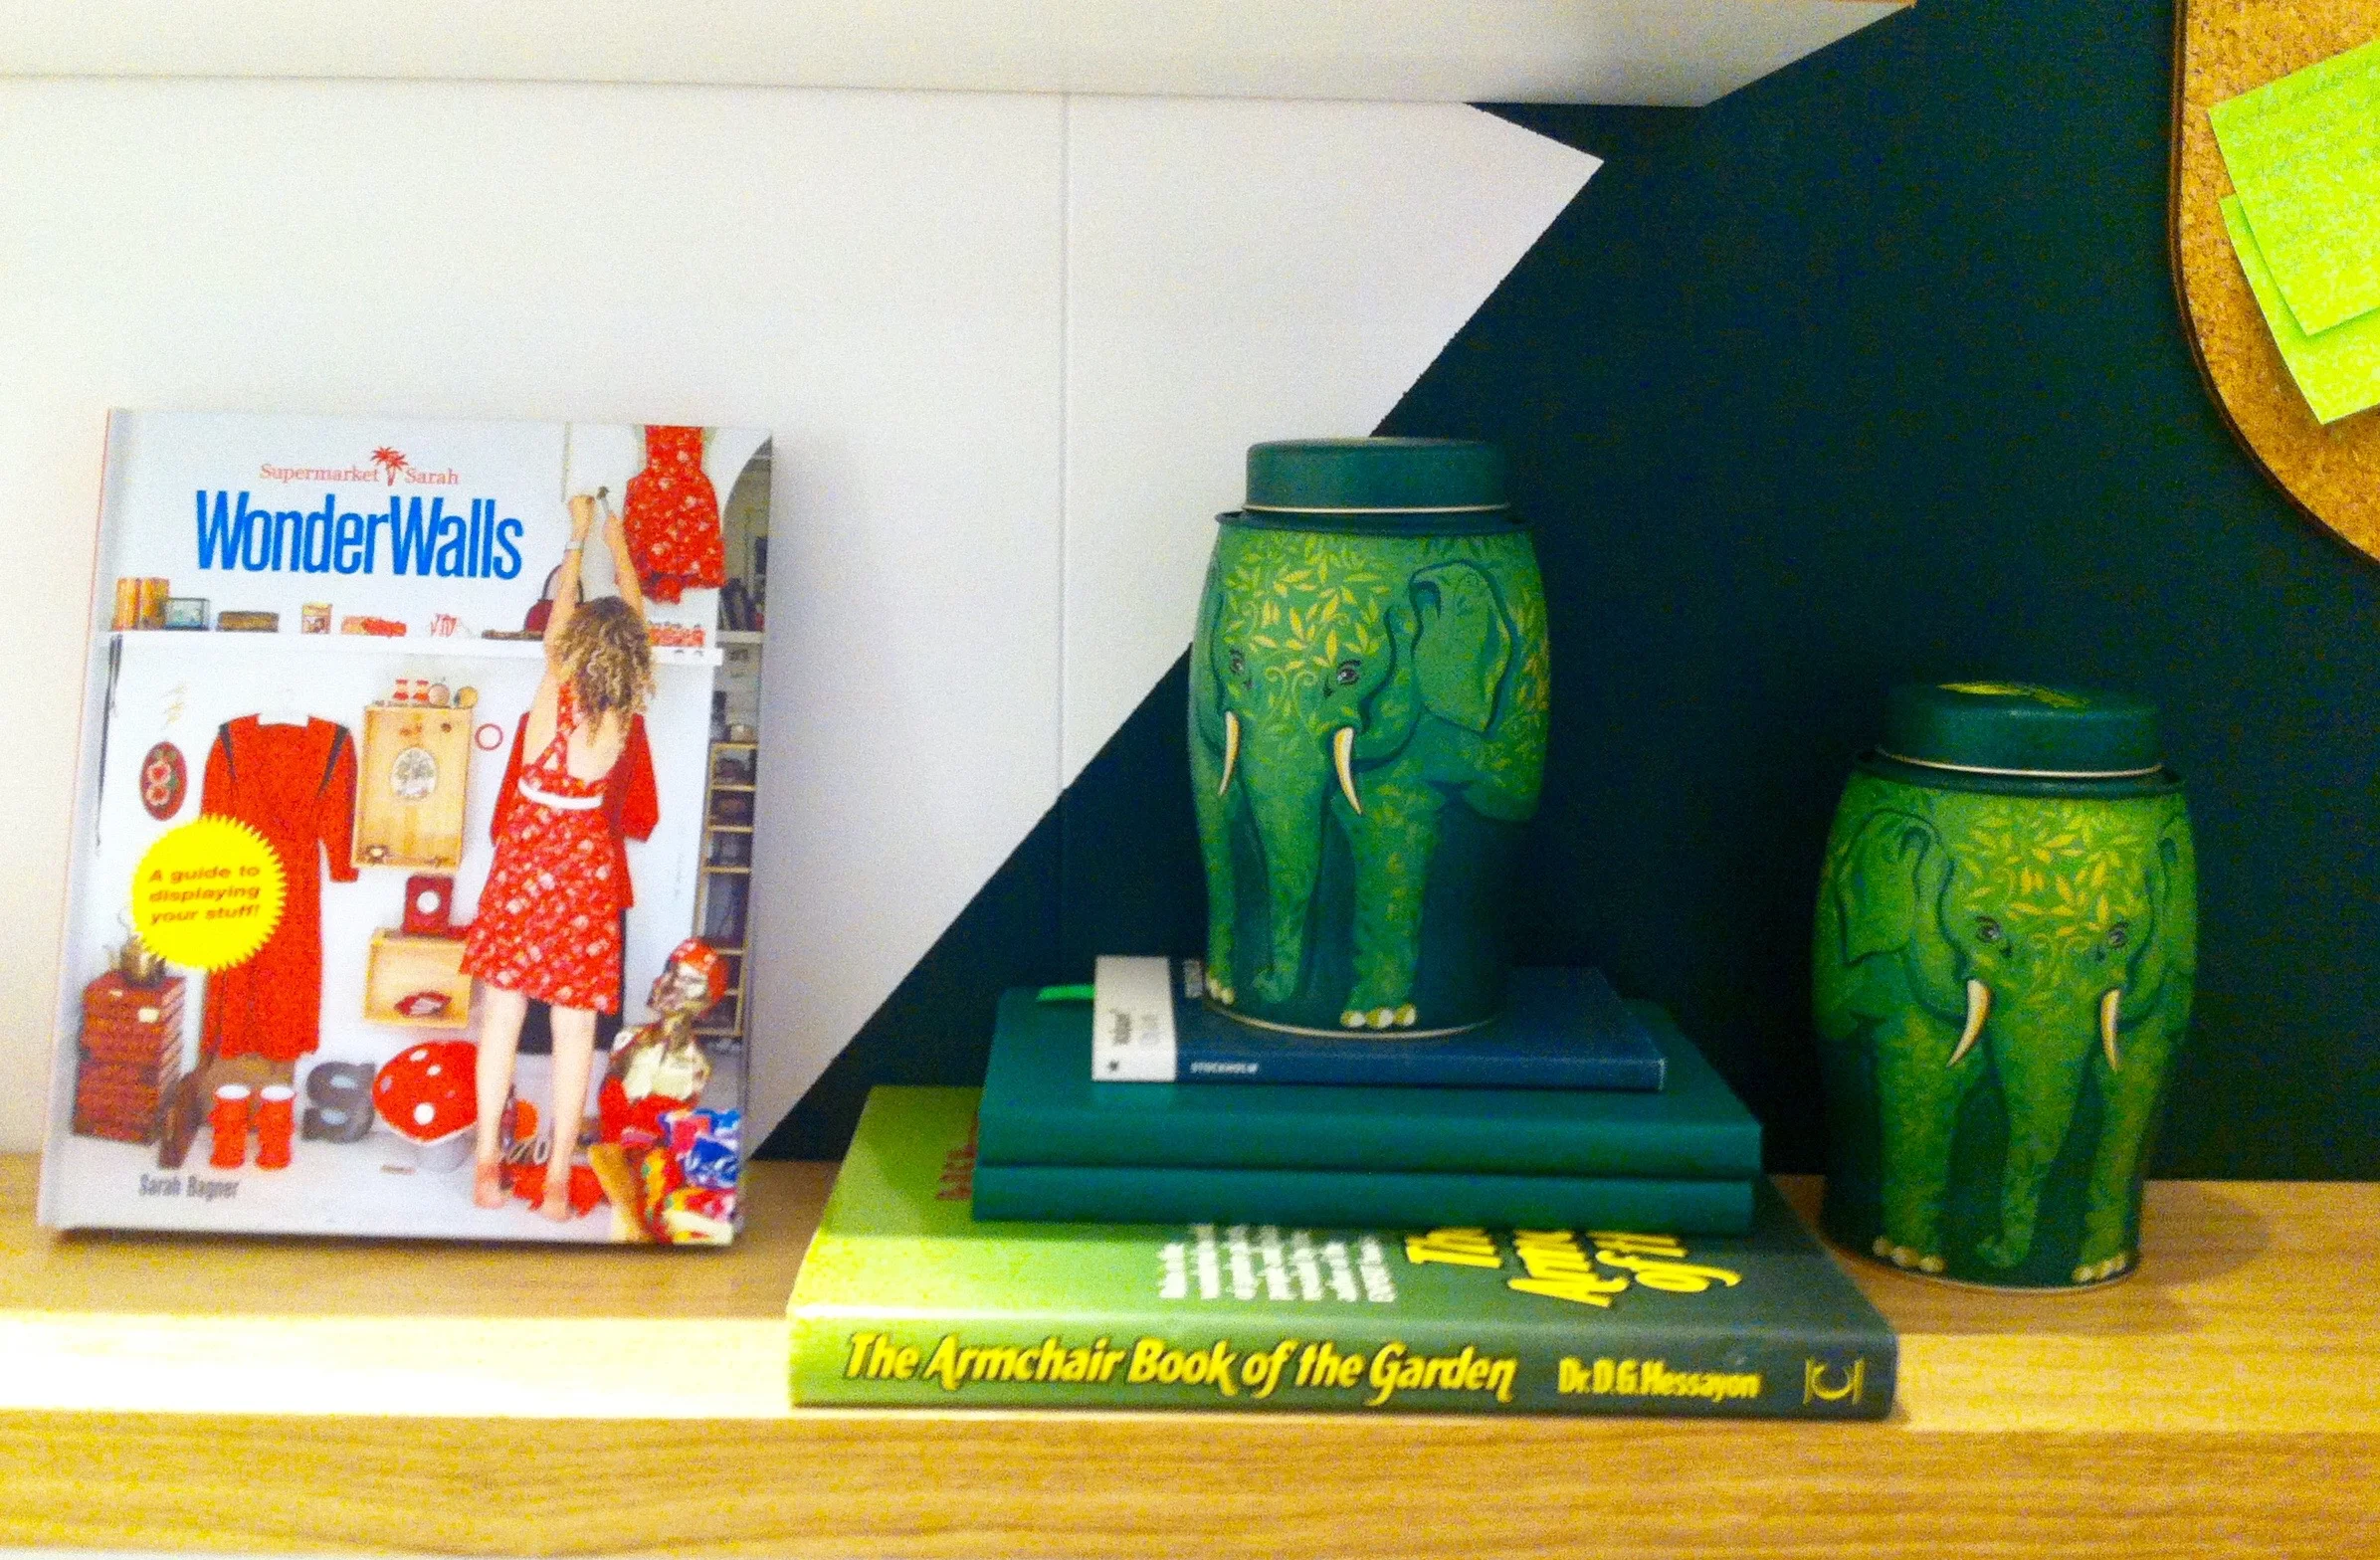
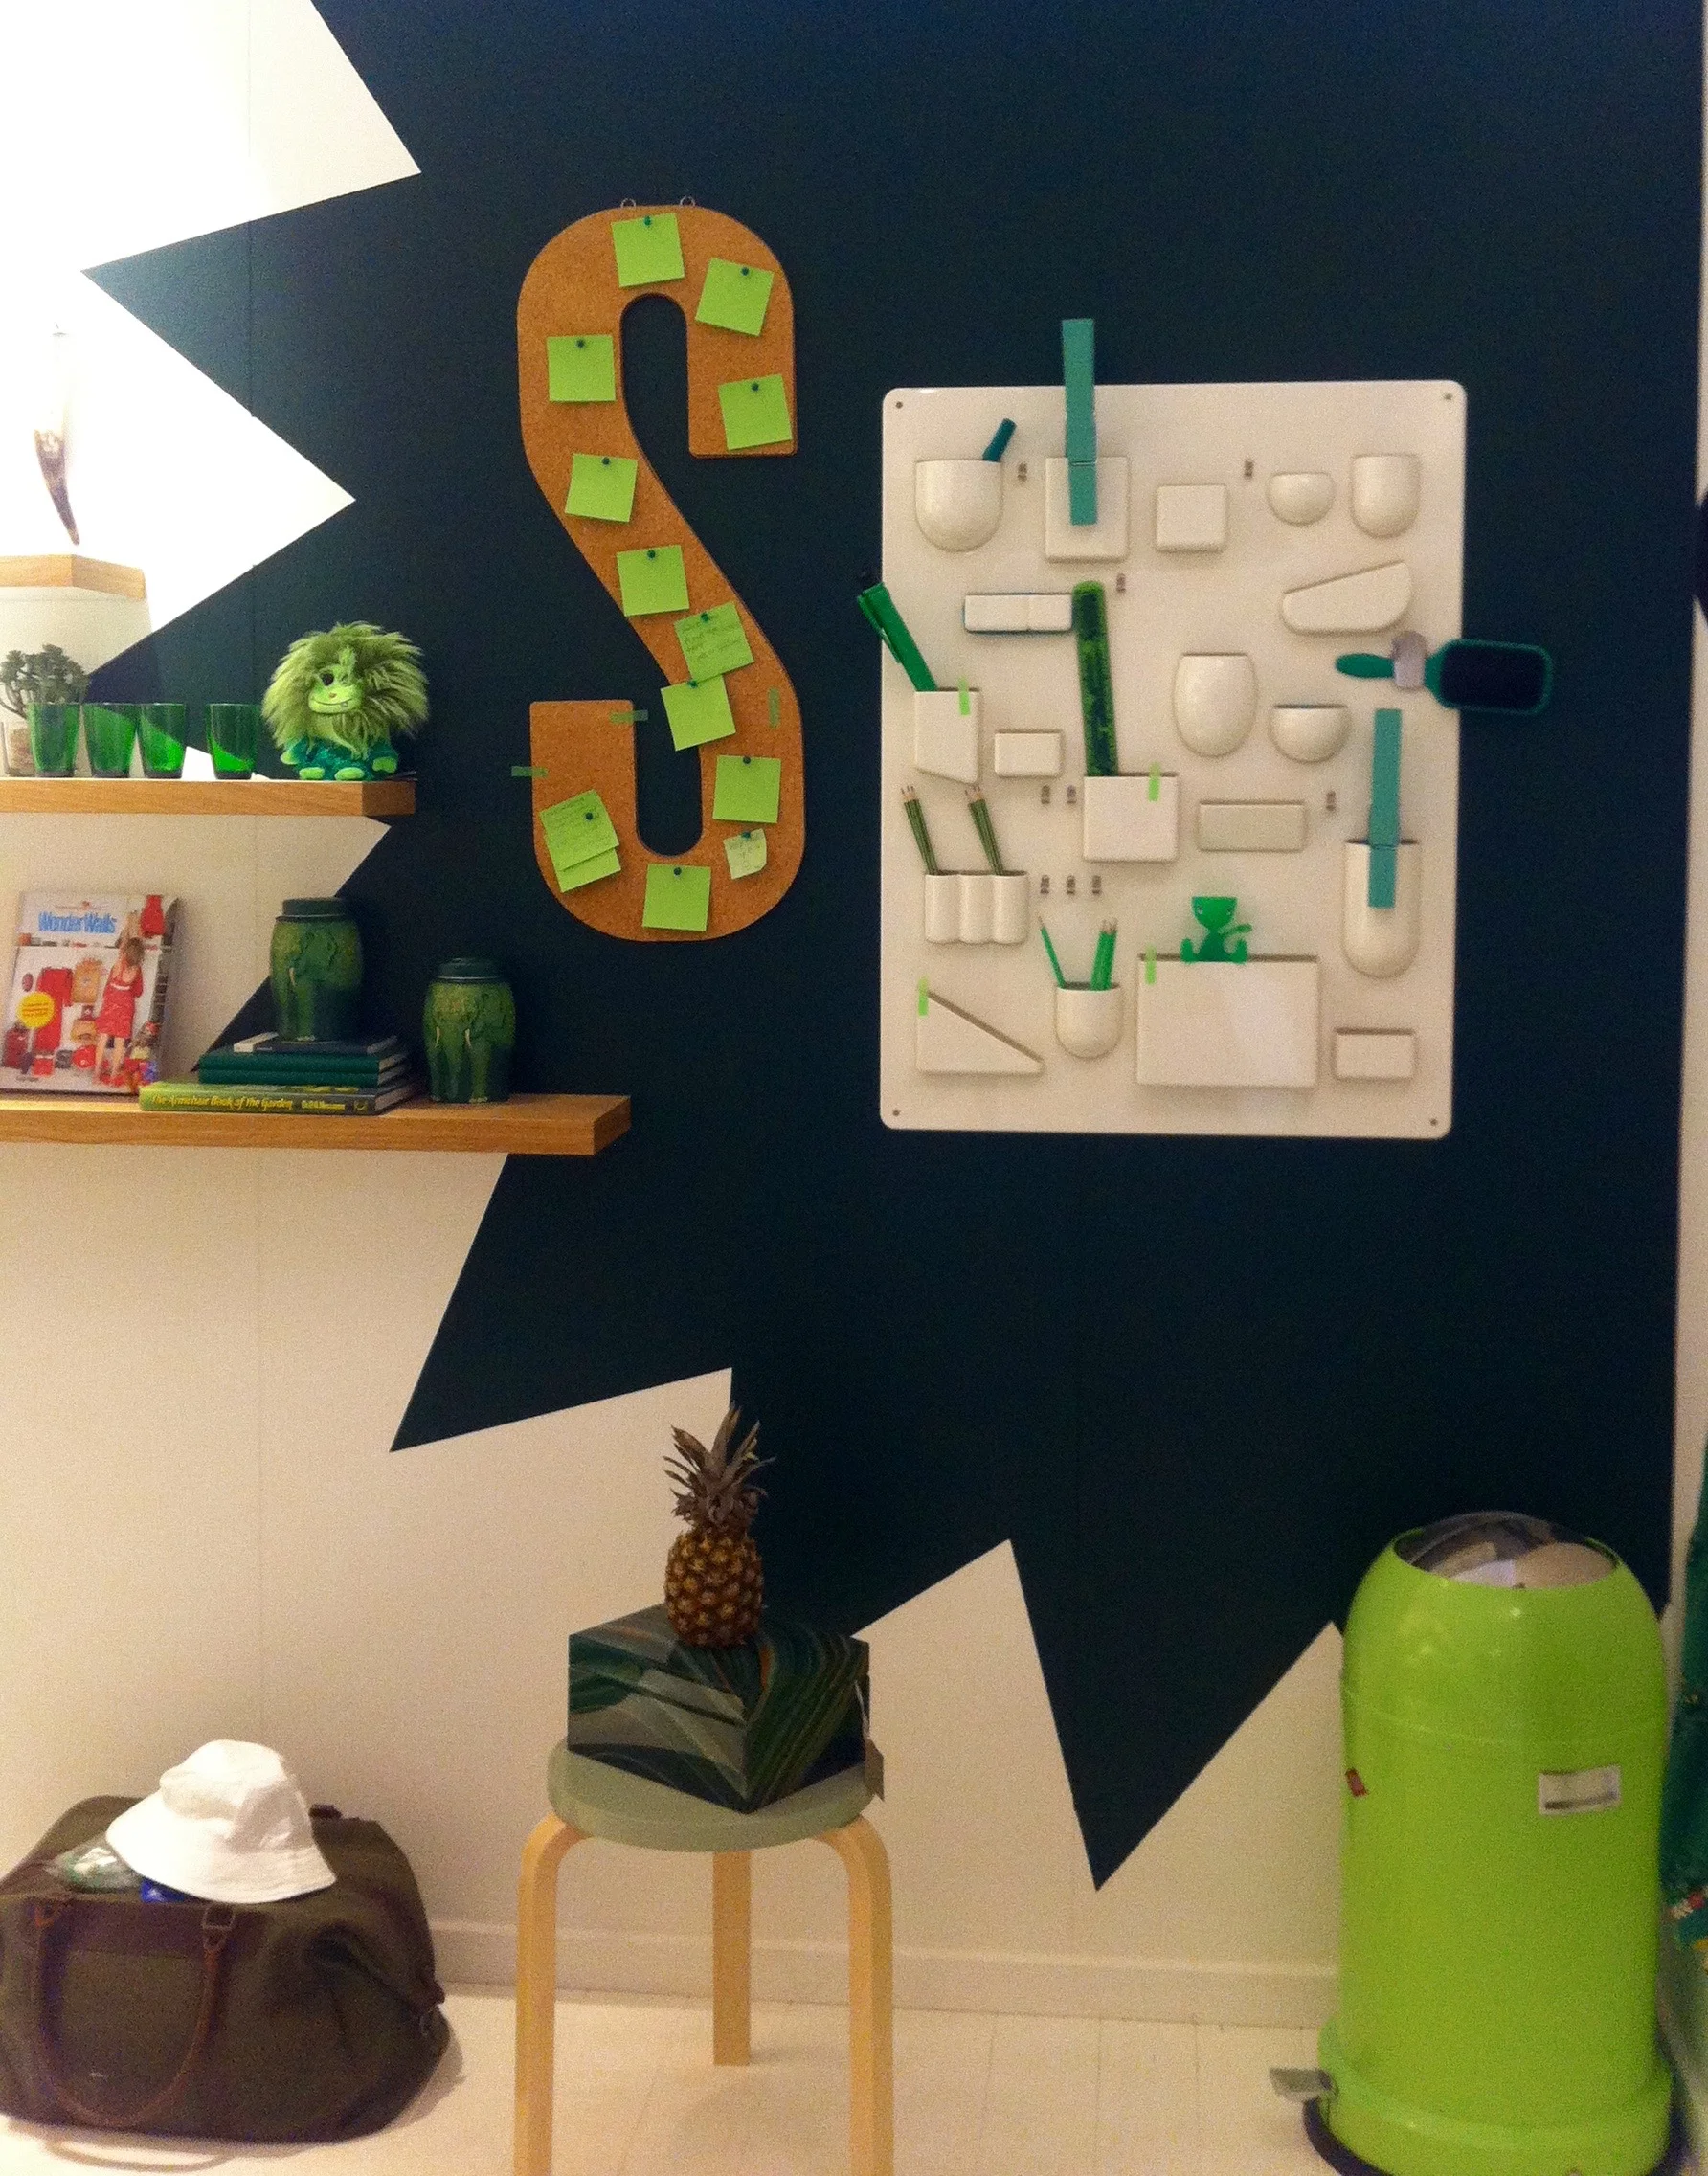
4. Supermarket Sarah

Sarah is a stylist and she wanted to mix her passion for fashion and interiors with a fun new way of shopping online. It's a simple idea and is a wall of "clickable" items. Sarah sells items on uniquely curated walls, the first of these went live from her living room. They soon spread to bars, galleries and major department stores. The site is now an open platform for creatives to sell their wares and Sarah works with major brands to create unique retail spaces and branded content.

Sarah's Supermarket room forms her signature splash which is normally in CMYK colours but is now in the John Lewis green, and she's picked her favourites for her ideal studio which embodies the feeling of studio play.

I found this to be a fun set and I as I'm rather partial to green, I found lots of things to like - especially the large S!

So there was quite a lot to take in in this relatively small space. And without knowing it was there either. I'm not sure how long it's there for, but I'm glad to have seen it. What do you think?

Home Etc

Styling the Seasons: September

This is the first time I've joined in with Styling the Seasons that Katy at Apartment Apothecary and Charlotte at Lotts and Lots run each month.  I've read lots of their posts and those of others that take part all the time thinking that my posts would never match any of those. But this month when I read Rachel from The Ordinary Lovely's post she inspired me to give it a go, mainly because if I'm not trying to style my photographs then I'm not going to get any better at it.

So off we go...

The prompt for September - and yes, I'm only just scraping in - is vintage, that was another push to join in. That and autumn being my favourite time for food...

So it's apt that my setting is a chopping board in my kitchen.

For me September is full of tomatoes and blackberries, and this year there's been apples and crab apples from the allotment too. None of those are vintage but they scream September to me.

The vintage items are these bun tins which were my great nan's and I photographed them a while back for the black and white photo project.

The Hovis tin is an original and was a birthday present from my parents. I love how that I can bake Hovis bread, just by using this tin. It's smaller than you think, but it sure holds a lot of tomatoes!

While the books aren't usually in my kitchen, I do regularly have my nose in and out of books during the month deciding just what recipe I'll be using this time round. I've some favourites of course, but it's always nice to try a new chutney recipe.

So far this year there's been blackberry and lime jam and some crab apple jelly. I'm planning some tomato salsa and I'm sure there'll be pasta sauce for the freezer and more, plus some apple compote for breakfasts too.

The cup and sauce are part of a six piece set that I've had for many years, picking them up at a jumble sale of all places. They're pearlescent and pretty and they're great for serving chocolate mousse in. Which reminds me, it's about time MOH made some more of that...

The jar clearly isn't vintage but it's an essential in the kitchen this month with all the preserving and chutney making I'll be doing.

So that's what September means to me, what does it mean to you?

Love this #61: Making a triangle pouch, or two...

A while back I stumbled upon this tutorial showing how to make a Triangle Pouch and bookmarked it for a later date. In fact I was so taken with them that I even bought some zips for the day that I felt the urge to make one. For some reason I have five zips, so perhaps I was anticipating a surge of demand for triangle pouches, who knows...

I've made two so far...

The second much quicker than the first and with less unpicking too, so that's something. The tutorial was clear, it was just my novice sewer experience that slowed me down.

The finished pouches are about 4 inches in size and they don't take that much material at all, so they're great as a scrap-buster project. The largest piece of material you need is for the lining, and that's only 8.5 inches x 4.5 inches.

  • With the four strips sewn together, and the seams pressed I was starting to see what my triangular pouch might look like.
  • The tutorial uses fusible wadding, but I clearly hadn't read that far before I started and didn't have any. So I improvised with a thin layer of non-fusible wadding. It seemed to work, but I did add extra rows of stitches on the outer edges to keep it in place. 
  • With the wadding trimmed, it was time for the clever bit. And that's to cut it in half and turn it round to form the pattern. Easy huh?
  • I got the zip in too - although I was lazy and didn't change to the zipper foot. With some strategic zipping and unzipping I managed. It's the first time I've done a zip for a very long time, and while my stitching isn't super straight I'm pleased with it and myself.
  • After the zip and some checks to make sure the lining was showing as I expected, then it was time to start assembling the triangle.
  • The bottom seam was sewn, and the ribbon in place - I learnt from my first try to pin it to the right side, so it didn't pop inside. It's not much use having a handy ribbon holder on the inside was it?
  • And then before I knew it, two were done. Cute aren't they?
  • I've got three more zips, so I think there'll be some more. And who knows, I might even buy some more zips!

They are pretty cute, and I've no idea what I'll use mine for. The other one's for my mum - she'll know which one is hers.