A garden for all weathers

* I was invited to this year’s Gardeners’ World Live and provided with a pair of tickets to the show, therefore all my posts will be marked as 'Ad’ though as usual my views and opinions are very much my own.

Given the weather we’ve had recently, which seems to have been everything from summer to winter in a matter of days, sharing this garden seems appropriate!

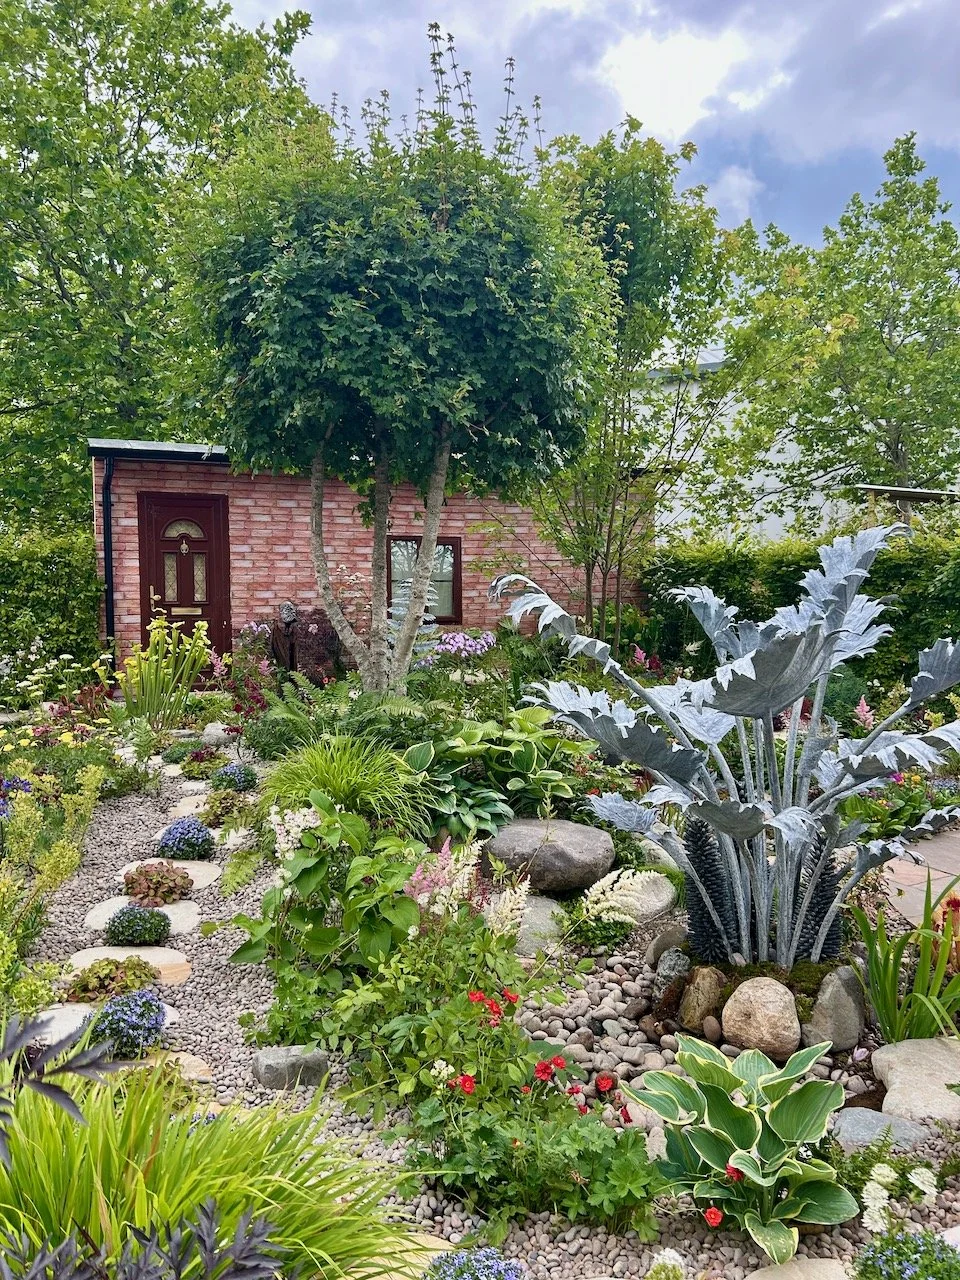
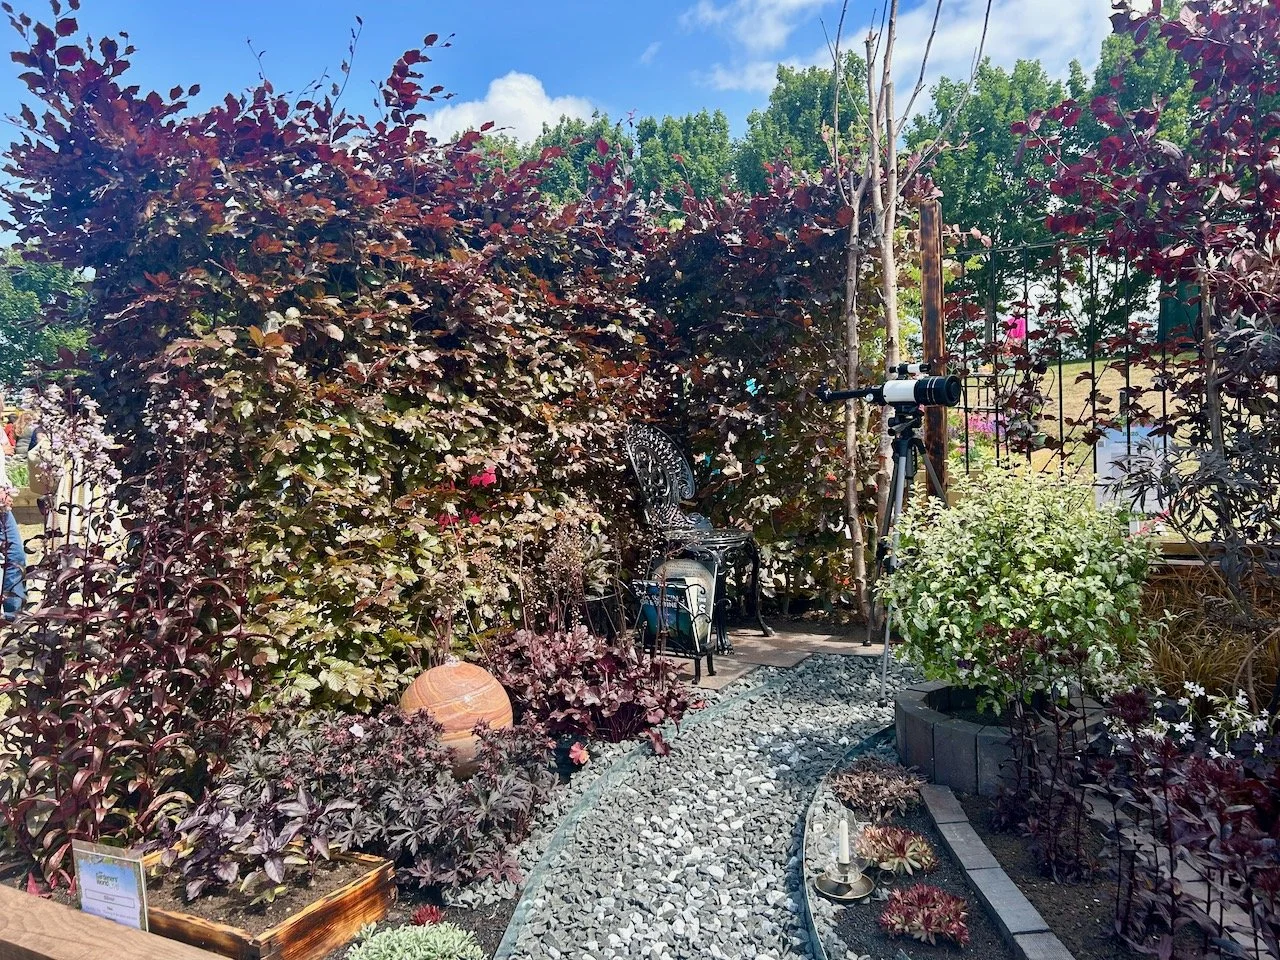
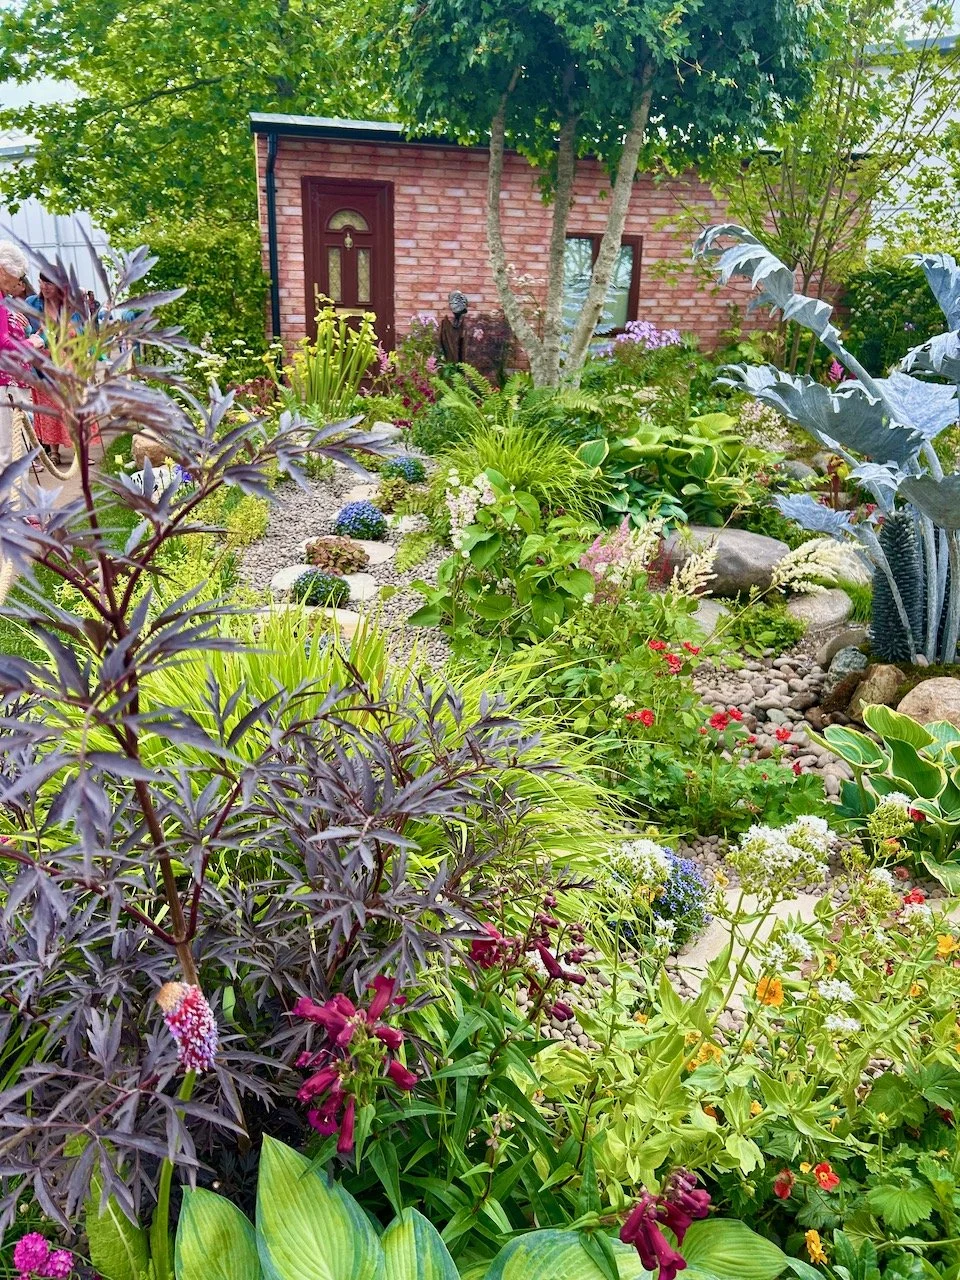
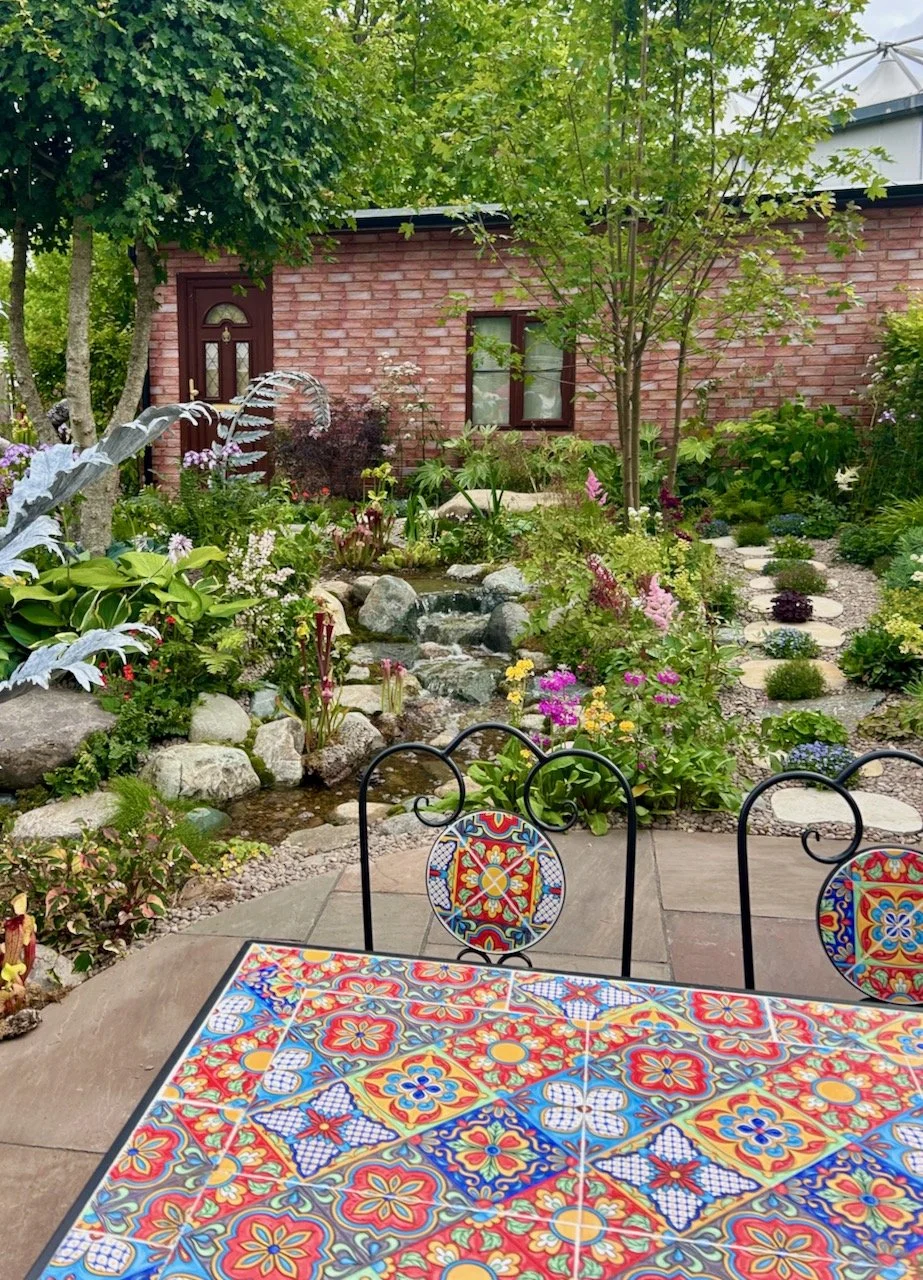
Lyn’s Garden: a garden for all weathers was designed and built by August Ponds Ltd and won a Silver Award at the show, and it looks at how we can continue to have a garden that can be enjoyed with year-round interest in light of changes to our climate, while also being mindful of the environment.

Looking towards the front door, through dense and lush planting with a stepping stone path dotted with plants
the gravel path with pavers and interspersed with plants on the left, with a small tree closer to the house and in the foreground a metal sculpture taking the form of gunnera and facilitating the waterfall

There’s much I like in this garden, but there’s also a couple of things that I’m unsure about.

To me that very much looks like a front door on the house at the back, and it’s great to have a good looking front garden, as well as a back garden but I can’t get my head around having a table and chairs in a front garden. And yes, I know this isn’t a real garden and is demonstrating what we could have.

The main feature of the garden is a pondless waterfall that is fed by rainwater collected from the house roof, which I could get on board with as given the amount of rain we have at times it would be good for us to manage the rainwater in our gardens. The waterfall means the water is aerated and therefore allows the water in the main harvesting unit to remain fresh for use for irrigation.

The planting with hostas, euphorbias and acers and plenty more

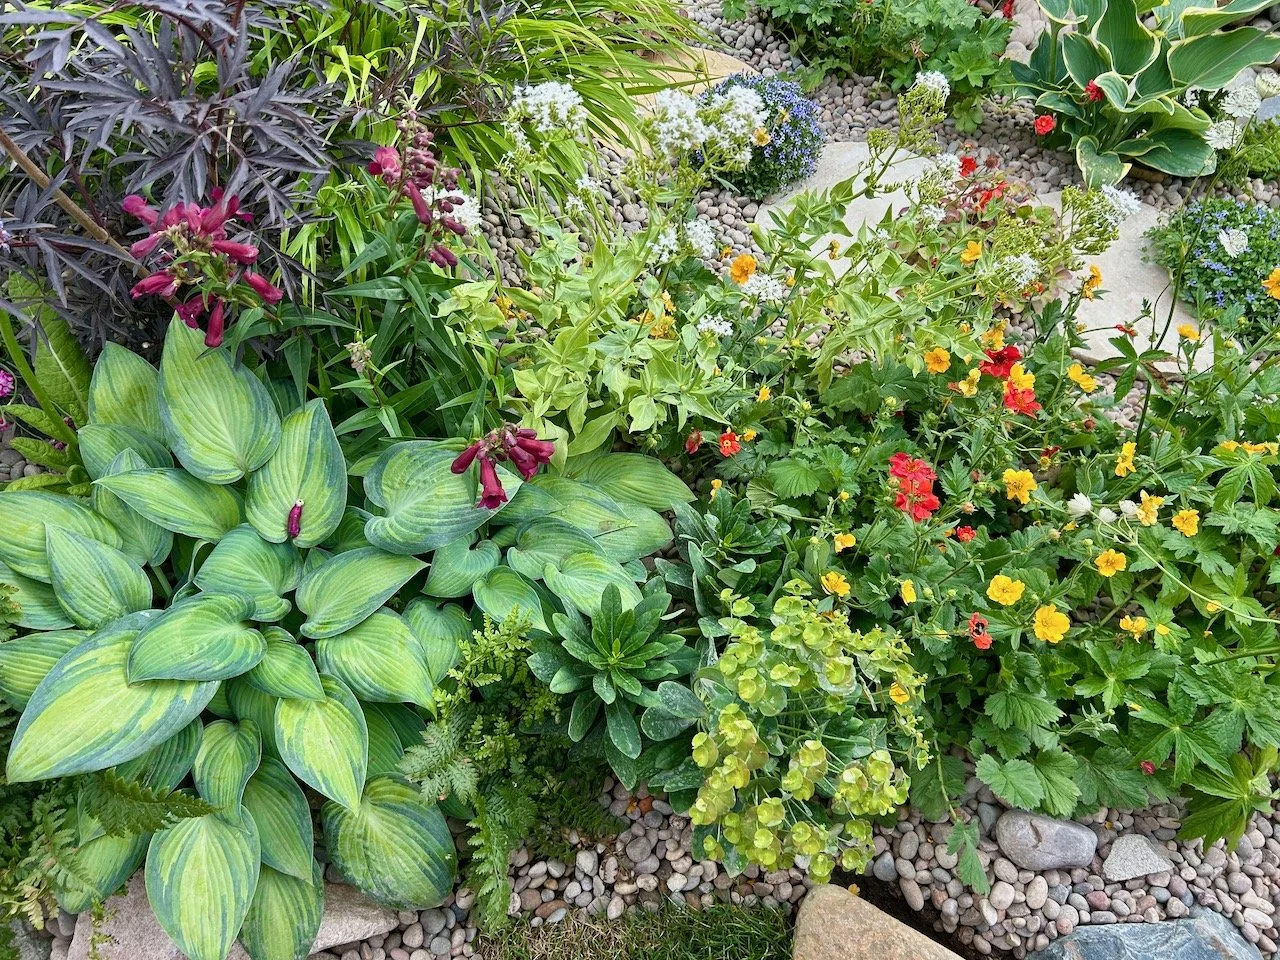
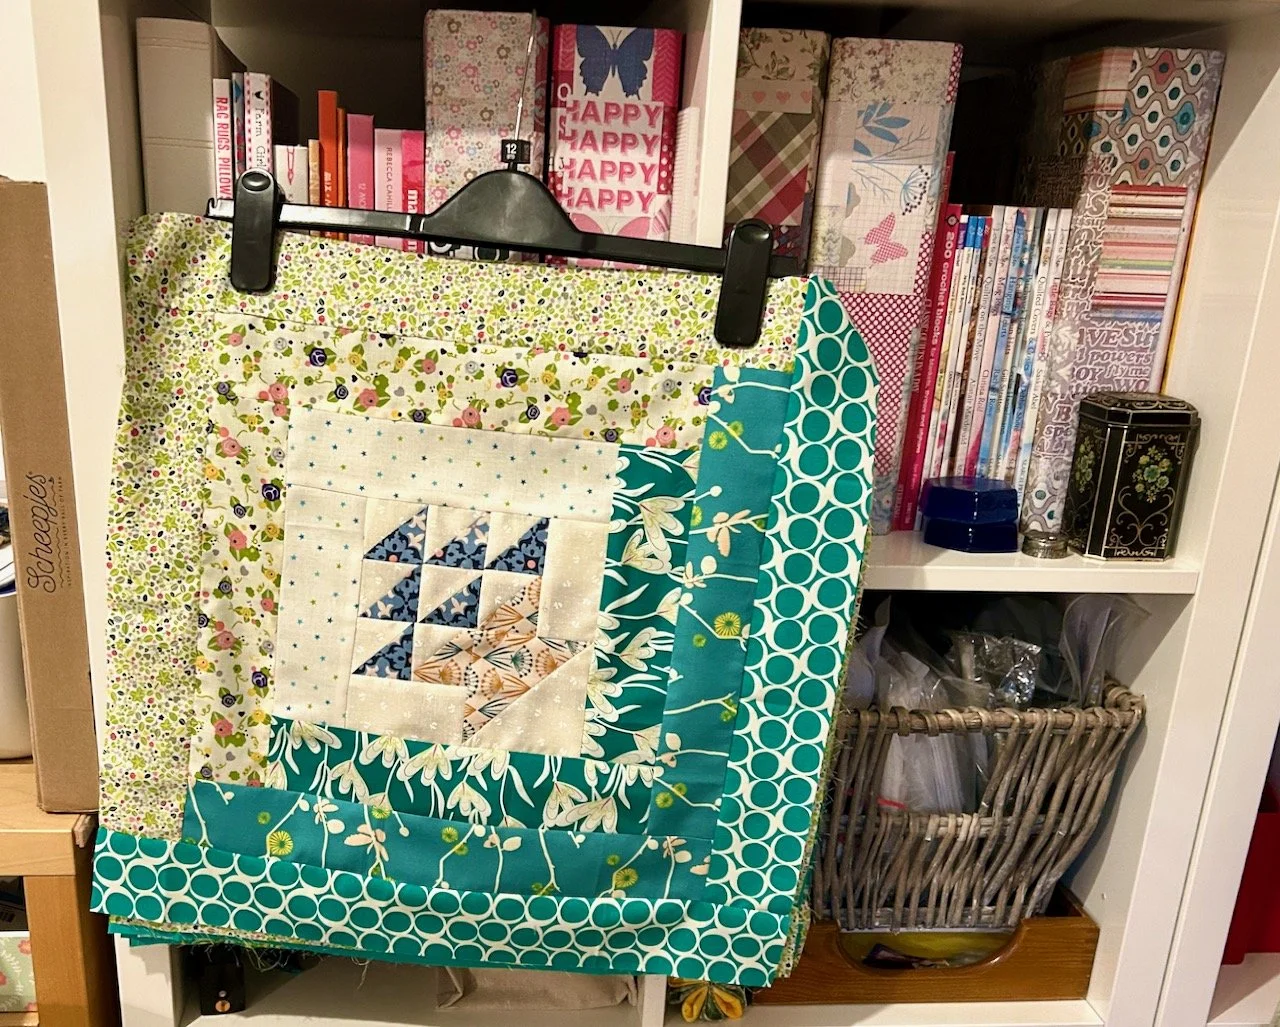
I loved the planting which was chosen for their hardiness and ability to withstand winter rains and summer drought conditions, and I love how densely it’s planted. That’s definitely something I could use and learn from, but I’m unsure about the plants dotted in between the pavers.

The foreground shows a brightly coloured mosaic table and chairs on a paved area, on the left is the gunnera shaped waterfall (just) with more trees which will screen the house when grown

I just don’t think they work on a practical level. I know that I’d be tripping over the plants, or kicking them, as I wandered up the path with my shopping etc - though of course that would be comedy gold for anyone watching!

Don’t get me wrong, as a show garden it looks great - and that table is definitely swoon worthy, but as a front garden this one doesn’t work for me. Which is fine, especially as I don’t actually have a front garden!

But the planting, that’s definitely something I can get onboard with.

* With thanks to Gardeners’ World for inviting me to Gardeners’ World Live, it was quite a show! I’ll be sharing more from my visit to this year’s show throughout the year - I hope you enjoy them as much as I did the show.

A Stitch in Time with The Quilters' Guild

One of the first galleries that we stumbled across and spent time looking around was hosted by The Quilters’ Guild who were displaying some amazing items from the Quilt Collection, featuring items from the domestic Homefront, to commemorate the 80th anniversary of the end of the Second World War.

The items were displayed in chronological order starting on the eve of War with a range of items made during the 1930s and my favourites, and which I’m including here, are the patchwork pieces which show the typical fabrics and prints of the day.

Clearly the outbreak of war saw dramatic domestic changes with everyday life geared towards making what precious resources were available last as long as possible, and with fabrics and clothing rationed. As the war progressed and bombing caused destruction to homes and possessions charities such as the Canadian Red Cross Society became vital and thousands of quilts were sent over to Britain from anonymous needlewomen abroad.

At the end of the war patchwork and quilting became less popular as the were often seen as ‘making do’ and with the new age of fashionable style in clothing and domestic interiors becoming available it’s easy to see why these traditional methods were considered old fashioned. Alongside this more women worked outside the home as the decade progressed and therefore had less time, skills and inclination to continue tradition, and that’s when the ready made shiny eiderdowns and candlewick bedspreads came into their own.

I can remember having my eiderdown as a child, and I definitely remember the candlewick bedspreads - in fact I can remember when duvets, or continental quilts as they were called then, became the rage, but I digress!

The quilts in this part of the show were amazing as pieces of needlework, and then even more amazing for the time in which they were made.

War, Peace and Needlework

The colourful mosaic patchwork quilt top below was made from 1 inch squares of printed fabric arranged in a ‘Trip around the world’ block design, and according to the notes alongside the quilt, it still has the thick card templates attached in the reverse.

SMALL SQUARES TOP, 1930-1939, MAKER UNKNOWN

Although the quilt has been neatly finished at the edges, it doesn’t have a backing. A closer look at the fabrics reveals some of the details of the fabrics used, which includes 1930s dress prints and furnishing fabrics.

SMALL SQUARES TOP, 1930-1939, MAKER UNKNOWN

This colourful log cabin patchwork was made during the 1930s and again uses dress fabrics and furnishing fabrics to create the light and dark tones for the log cabin block - and if the block looks vaguely familiar and you think you’ve seen here before, then it was probably my charity quilts which use log cabin borders that jogged your memory.

LOG CABIN COVERLET, 1930-1939, MAKER UNKNOWN

These log cabin blocks though were sewn by hand, joined together and the seams have been opened and flattened on the back, then the seam allowance has been sewn down with a herringbone stitch - so this quilt wasn’t going to come apart.

This next quilt is an example of mosaic patchwork which is complex and individual in style. The central circular medallion is thickly padded with a coarse open weave fabric on the reverse holding the wadding in place. It is thought that the maker originally intended to make a cushion but then extended it into a larger coverlet.

MOSAIC PATCHWORK, 1930s - 1940s, INA MACRAE

This was made by Ina MacRae who used materials from her scrap bag, recycled garments and remnants from the family’s haberdashery business. Ina never married, although she was engaged for a short time during the 1940s. The family story is that she broke off the engagement, and presumably lost enthusiasm for her patchwork project, leaving it unfinished with papers intact.

The quilt below is a Canadian Red Cross Society quilt and is made from alternate 16 patch squares and plain squares of orange floral print cotton, and was one of five given to Miss Alice Treeby’s family after she had returned from evacuation.

MISS TREEBY’S QUILT, 1939-1945, CANADIAN RED CROSS SOCIETY

FRIENDS WAR VICTIMS RELIEF QUILT, 1939-1945, MAKER UNKNOWN

This striking stars in square block quilt includes stars which are ‘crazy patchworked’ using various cotton print fabrics and bears the label of the Friends War Victims Relief Committee, an official arm of British Quakers set up to relieve civilian distress in times of war. The group has a long history dating back to 1870 and with five revivals, the last being in 1940, before its name was changed to the Friends Relief Service in 1941.

FRIENDS WAR VICTIMS RELIEF QUILT, 1939-1945, MAKER UNKNOWN

Crazy patchwork blocks feature again in this quilt - and that makes a lot of sense with materials hard to come by, but it could also indicate that it was made by a group of women in the Canadian Red Cross. Blocks were often made at home to standard sizes at home, then brought into the Red Cross premises to be joined together and finished off with materials supplied in bulk by the society.

V for VICTORY QUILT, 1939-1945, MADE BY CANADIAN RED CROSS SOCIETY

This one has been machine stitched, and uses ‘Patriotic Prints’ - look for the white V on the red/blue background - in the V there’s morse code printed ‘dot dot dot dash’. These prints were printed with various wartime themes and often endorsed by female celebrities to increase their popularity and made into clothing, and as we can see above incorporated into quilt tops.

This quilt was give to the donor’s mother-in-law who lived in West Croydon where her house was damaged 5 times during the bombing raids, and it was during that time at some point that she was given this quilt.

The whole exhibition was full of poignant stories, alongside the fantastic historical quilts, which made me look at our lives today and realise how very fortunate we are that such sacrifices were made for us. We all know of stories from the First and Second World Wars, but somehow seeing them through these quilts gave a perspective that is rarely seen.

If you enjoyed this post from my visit to the Festival of Quilts 2025 then please do check out my other posts from the show. Even though my mind was blown by the sheer volume of quilts on display, I’m pretty sure I’ll be going again!

My pie carrier prototype

Sometimes things unplanned happen, and just have to be acted upon. I mean, I never knew I needed let alone wanted a patchwork pie carrier, but when things collide at just the right time you just have to go with it.

Let me explain.

Scrolling Instagram a post from @suzyquilts for a quilted pie carrier caught my eye, I looked a little closer before thinking that I’d quite like one, and then how hard can it be. Which as we know is dangerous.

So I dived into my stash and emerged with a gloriousness of pink, butterflies and fruit.

From my stash, pinks, florals, butterflies and fruit fabrics

And at around the same time my love for flying geese was reawakened with the Cloud Nine block by Debbie Maddie in the Moda Blockhead emails which I’m subscribed to and rarely act upon. I was smitten, and realised I could combine my new yearning for a pie carrier with this Moda block, and then I really would be on cloud nine.

Assembling the block

Well this was the easy part as I had instructions (yes, I still hadn’t bought the pie carrier pattern), and after a morning sewing group session I was well on the way to finishing the Cloud Nine block.

It’s busy, but I thought that will hide any spills when it gets used - practical and honest! And mostly I’m happy with it - if I were to use these fabrics again I think I’d make some changes to the flying geese (outer row) block on the top left - there’s not quite enough contrast between the two fabrics I’ve used. But I decided to live it with and carry on - it’s only a pie carrier after all.

I also knew I’d need to add some borders to my square to give it a chance of being big enough, and it’s at this point that the patterns all went a bit crazy, but I was ok with that, as I said it’s a pie carrier and honestly it will get some use, but only occasionally.

Adding borders to the block - some with butterflies and a finishing with a calming pink floral fabric

I followed loosely Madam Sew’s pie carrier tutorial , adapting things such as the corner handle length, and decided to pin it together to see how it might work.

It's pinned together with handles and is holding up with an empty cake tin inside

Phew. It was looking as if it might work…

I also decided to ‘bag’ my square rather than sew the wadding to either the top or bottom fabric, and I’d remembered to add in and secure the corner loops before I connected the top, wadding and backing layers.

Turning it through to get the outside on the outside (not the inside)

I even remembered there were pins in evidence when I turned it through, which was something.

A pin securing the shorter loops in place

And it still looked like it might work (the longer ‘handle’ strap is still pinned on in this photo).

The main layers together - the handle's still pinned on though

Adding some detail

With my newfound Bernina BSR skills and keen to practice them at home relatively soon after my training day I decided to add some machine stitched detail to the central butterfly. Tracing the outline of the wings, body and markings freehand.

A close up of the central butterfly and machine sewn outline
The reverse of the butterfly - the stitching is easier to see

It’s easier to see where I went on the backing side - and I’m pleased with that, especially given it was the first time I tried it on my machine for real.

That only left the longer handle to attach, and with plenty of securing stitches that’s just what I did.

The finished prototype pie carrier

And it works, just. I’d forgotten to allow enough for a seam allowance so any pie in an 8 inch tin will get a bit of an airing. But carry pies it does - or rather it has already successfully carried a flourless chocolate cake. I think though this one will be better size for my small quiche dish, but that really doesn’t get taken out much!

So this one is really to test the process, and to have a bit of fun - but I’m planning to make another, larger and more practical one just as soon as I can decide what fabrics to use, or rather where to place the fabrics I’ve chosen.

Watch this space, and if you’re lucky I might even bring a pie (or something alternatively sweet) with my non-prototype pie carrier!