Enjoying the lights at Belton

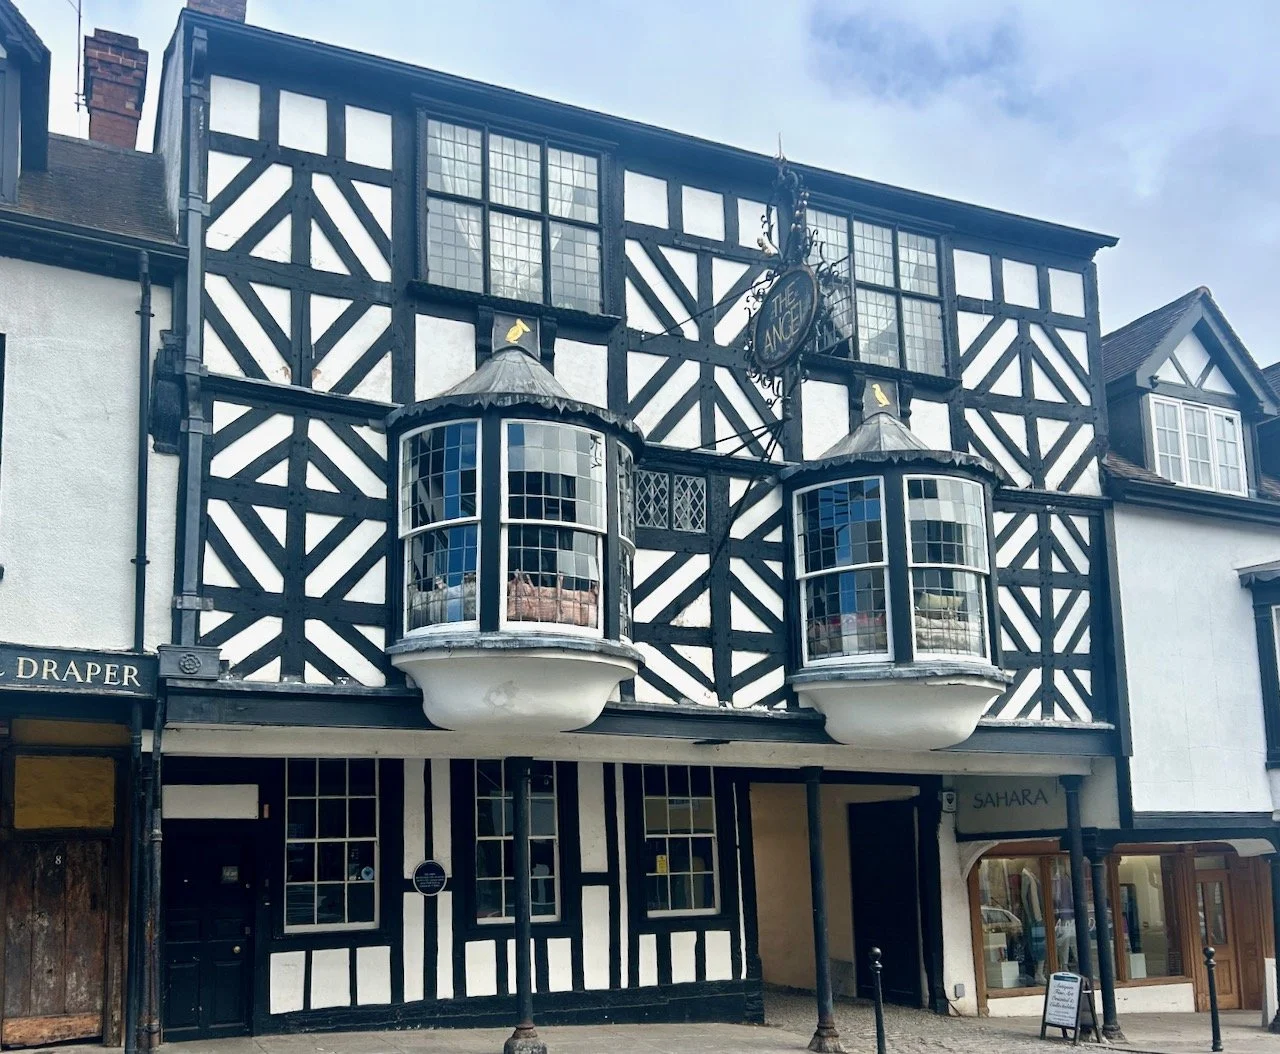
Belton House isn’t that far from us, about 30 minutes or so drive towards Grantham, and it’s one of the places we’d visit whenever we were close by, it’s a lovely place - and I love the Orangery there - but somehow we hadn’t managed to get over there now that we actually lived closer - isn’t that always the way?!

In fact our last visit to Belton was a pretty special one, after viewing our house again and agreeing with the developers to proceed, we stopped at Belton on our way home. We wanted some time to reflect on the decision we’d just made, and wanted to do that in a beautiful space in the open air rather than in traffic on the A1.

Crazy I know.

But reflect we did and less than two months later we moved in to our new house, and we hadn’t been back to Belton since. So having seen their Christmas lights advertised we booked tickets for one of the off peak entries (the prices are crazy, even with free parking for National Trust members), but anyway, it was worth it - and a good way to mark our first Christmas out of London.

Once we’d found the way in - ahem, there were plenty of signs to get you close and to all the fairground rides, but the way in was less obvious to us, though I’m not sure why as it’s quite often the way we’d go into the garden anyway - clearly we were dazzled by the lights!

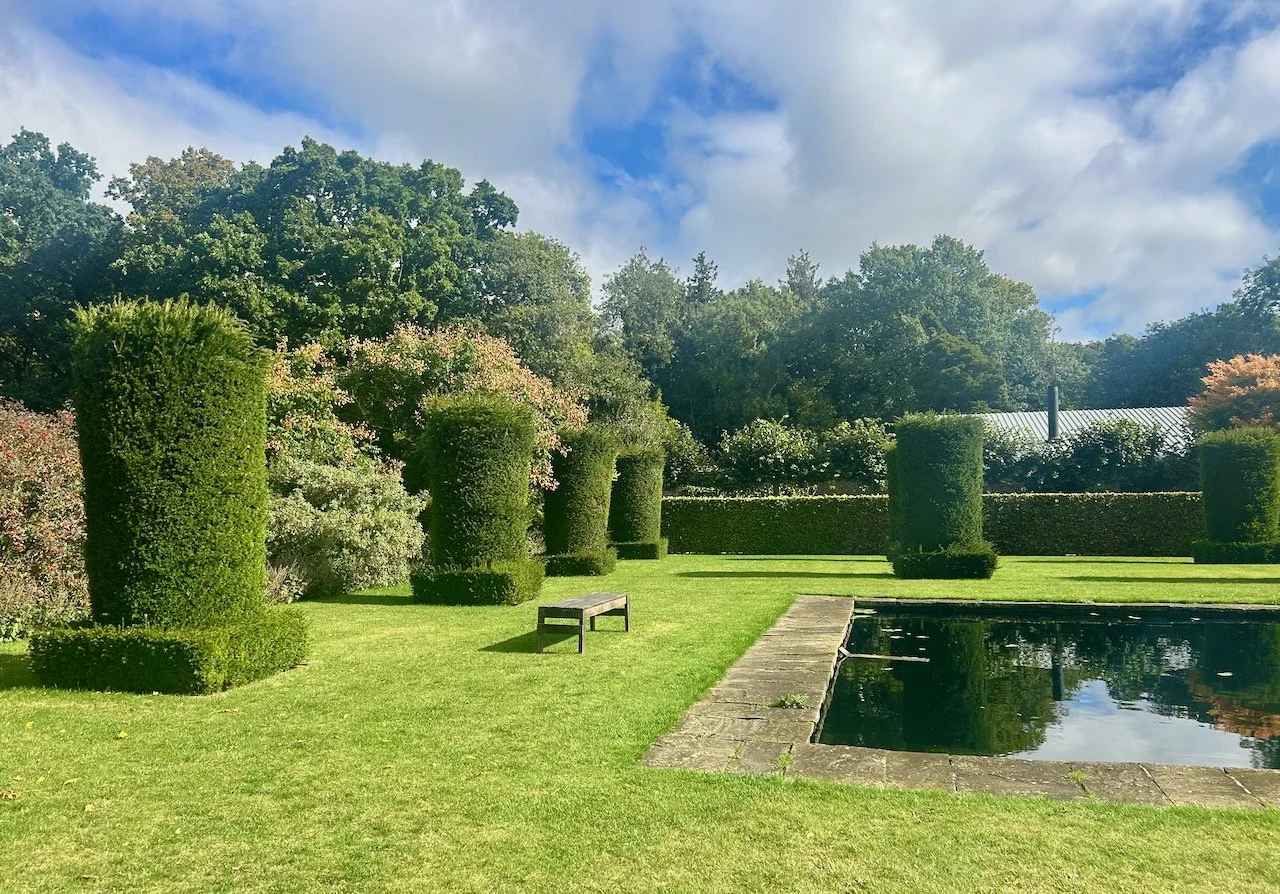
As you’d expect there was a planned route around the garden, which meandered along paths and took us further through the gardens/ parkland than we’d before. Next time we’re there we’ll be checking those areas out in the daylight! There were plenty of people there, but it didn’t feel overly crowded. There was a mulled wine and refreshments stop part of the way round, it was understandably busier there, but we didn’t stop and found it easy to get past those that had.

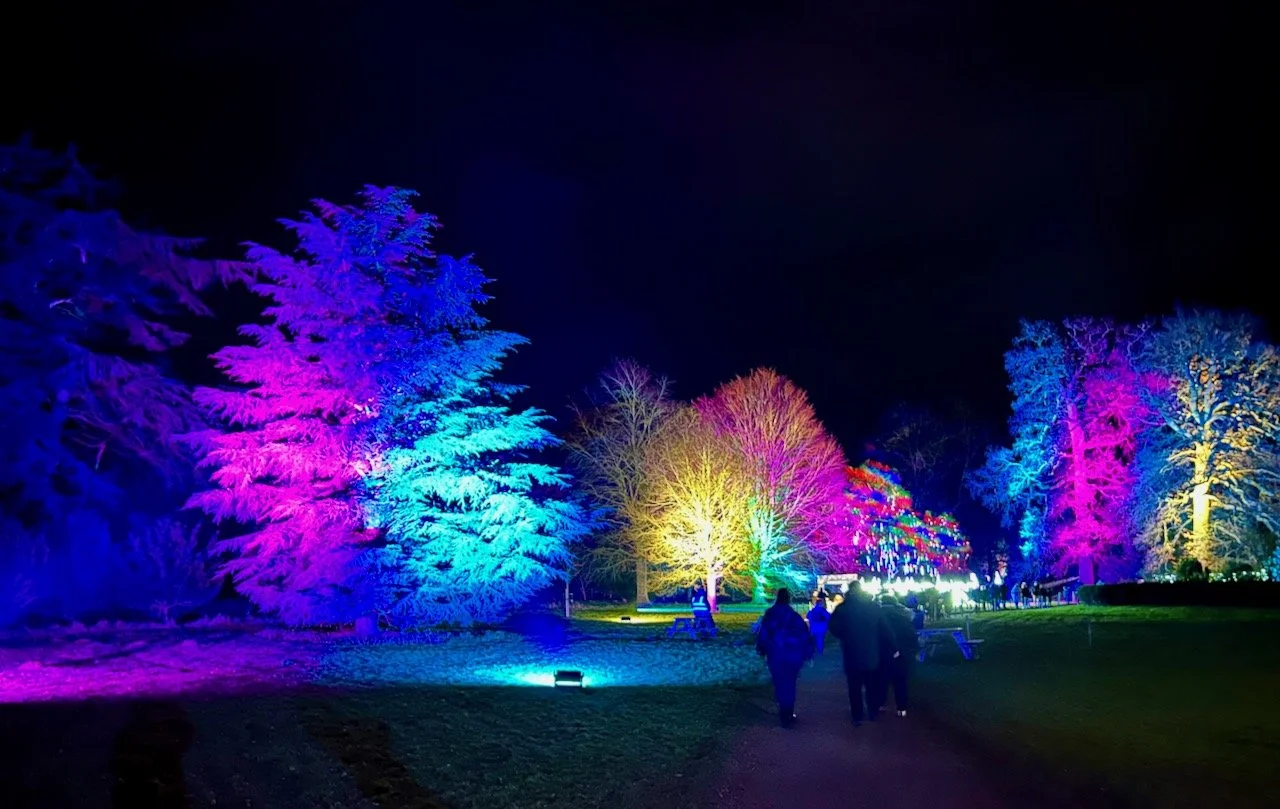
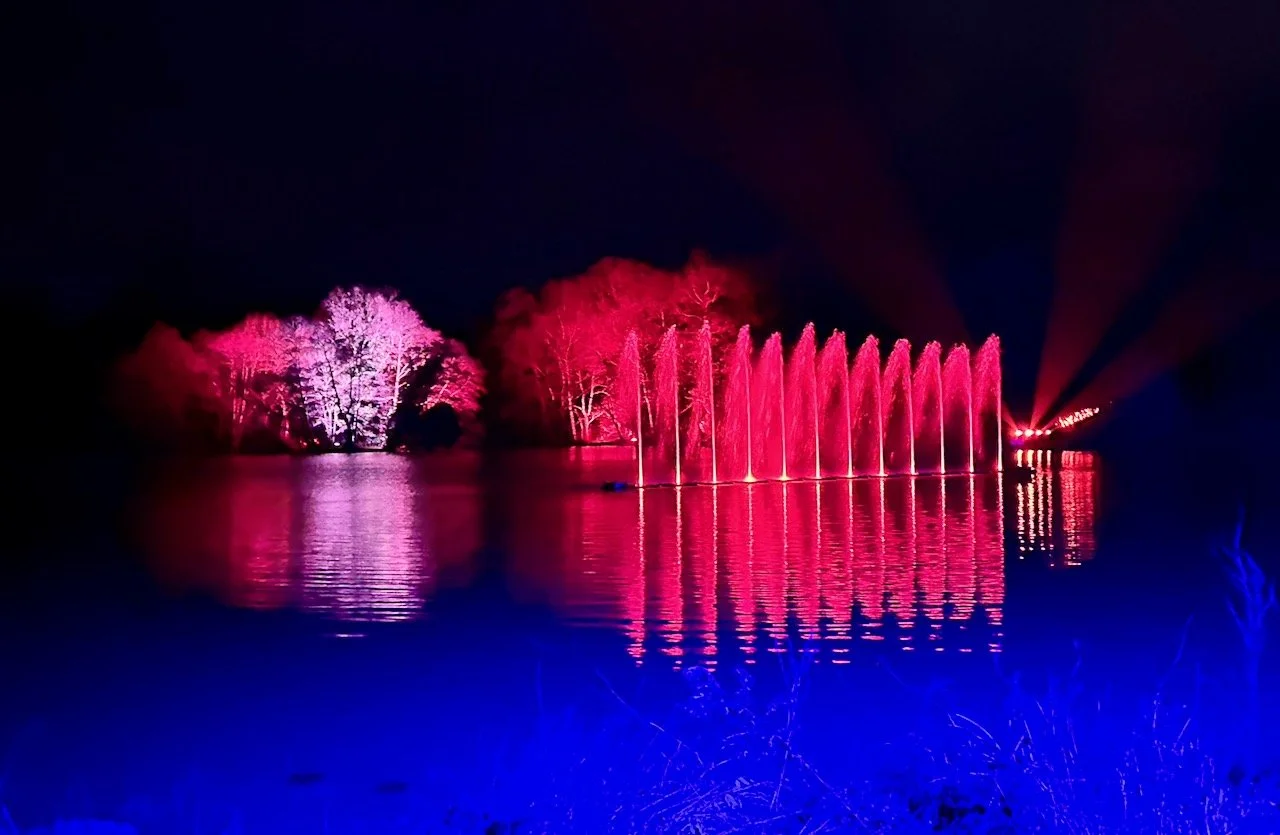
The lights were pretty spectacular, I think they had been refreshed and revamped for this year - and those on the lake were probably the most striking. But there was plenty to see, with something for everyone.

Tall orange and yellow illumninations circling a central pond with smaller lights on its edge, in the background a large tree lit up with blue lights
Walking through an archway of rainbow coloured gladioli-like flower illuminations

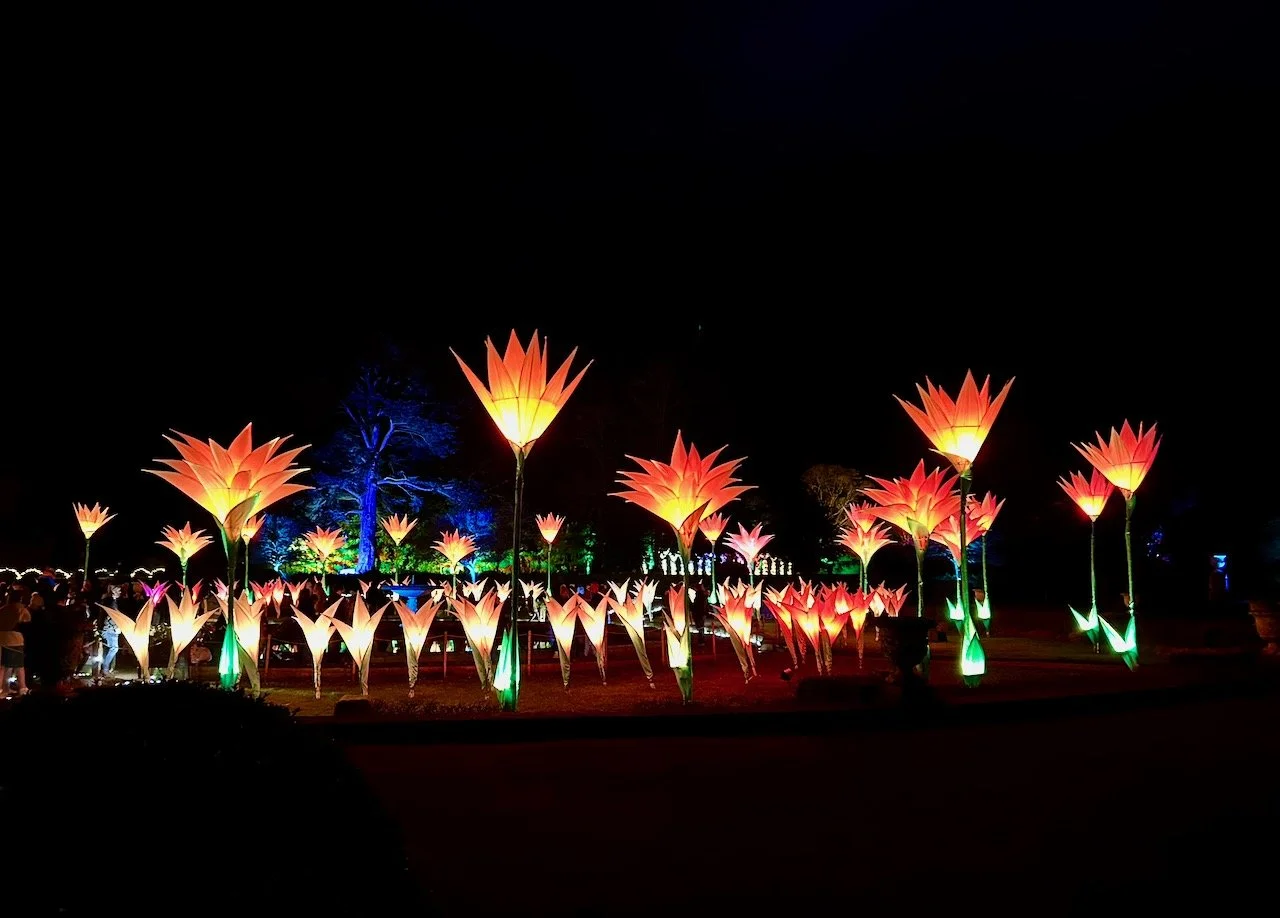
The bright colours of the flower-shaped lights really popped against the dark sky and I’m sure provided many Instagram-worthy locations. The next part of the garden focused more on lighting up the trees bringing a magical feel to them, and the walk through them.

Mature trees lit with pink, blue, yellow and green lights - in the distance is a rainbow tree
On the left a tree lit bright pink and blue/green, the word Belton in lights alongside it and the rainbow striped tree behind the illuminated letters

The display at the lake was probably the most spectacular, and the one which benefitted most from the music which accompanied it. I have many iterations of this photo in various colour schemes, but this is the most striking and one of my favourite photos from our visit.

Trees in the distance lit in reds and pinks, fountains on the lake lit in the same colours with the shrubbery in the foreground a vivid blue

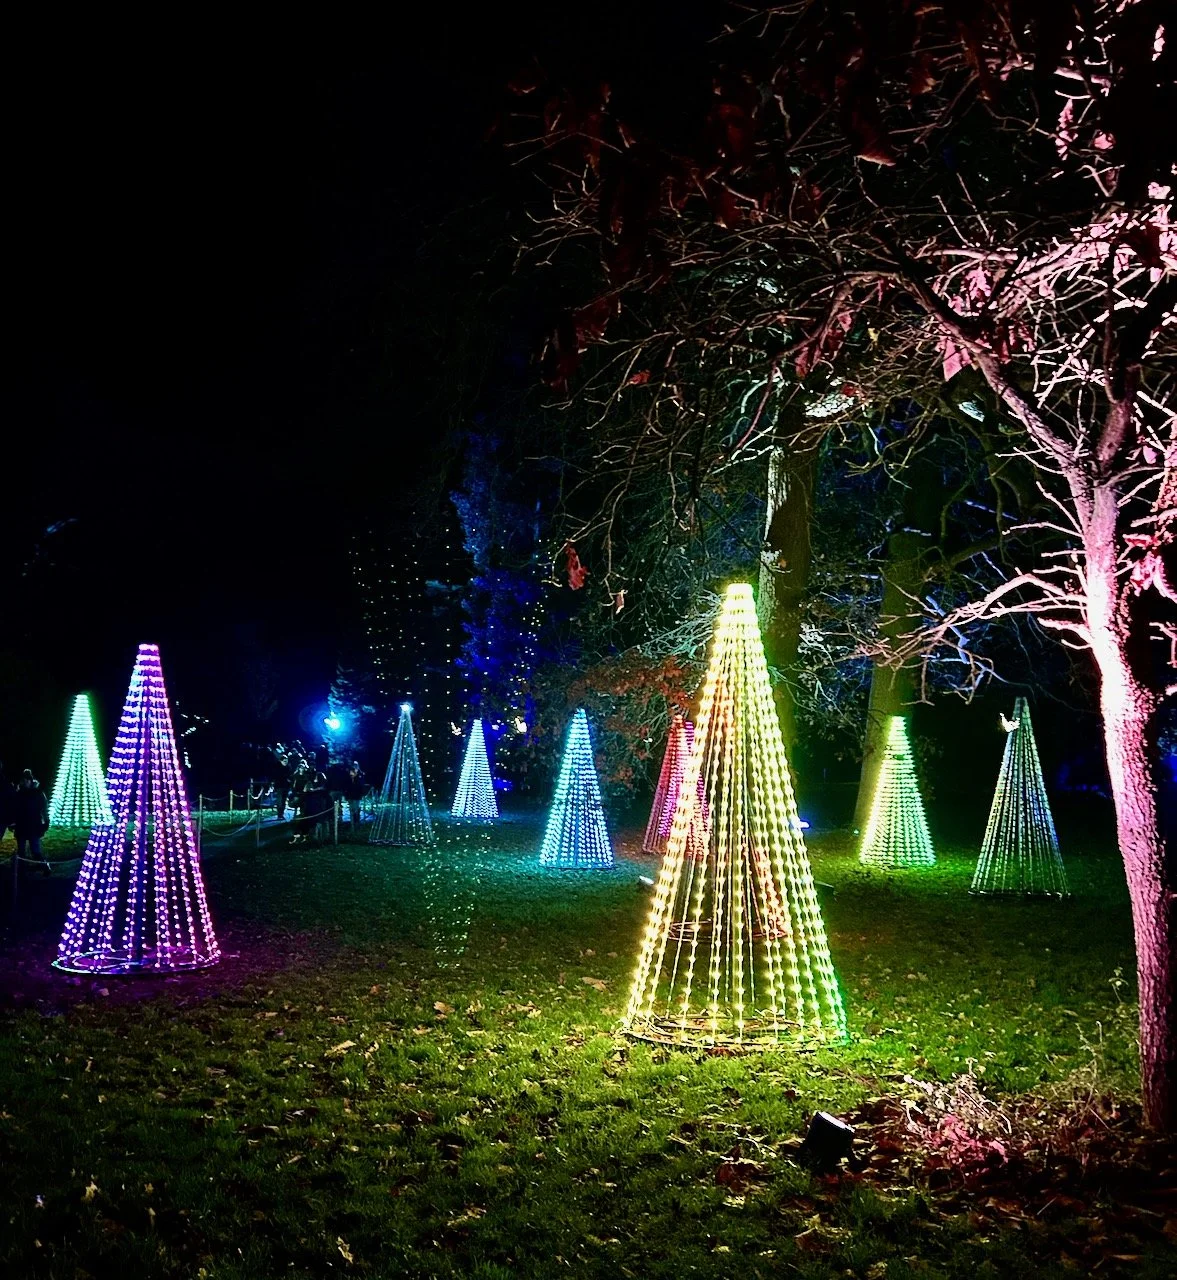
My favourite area when we visited was this quite simple triangular shaped tree section - the lights changed colour and was quite calming. They have a look of daleks about them, but what I didn’t realise until I edited my photos was that there’s an very subtle inverted tree amongst them - I think that makes me like them even more!

A rather large robin shimmering above the pedestrians

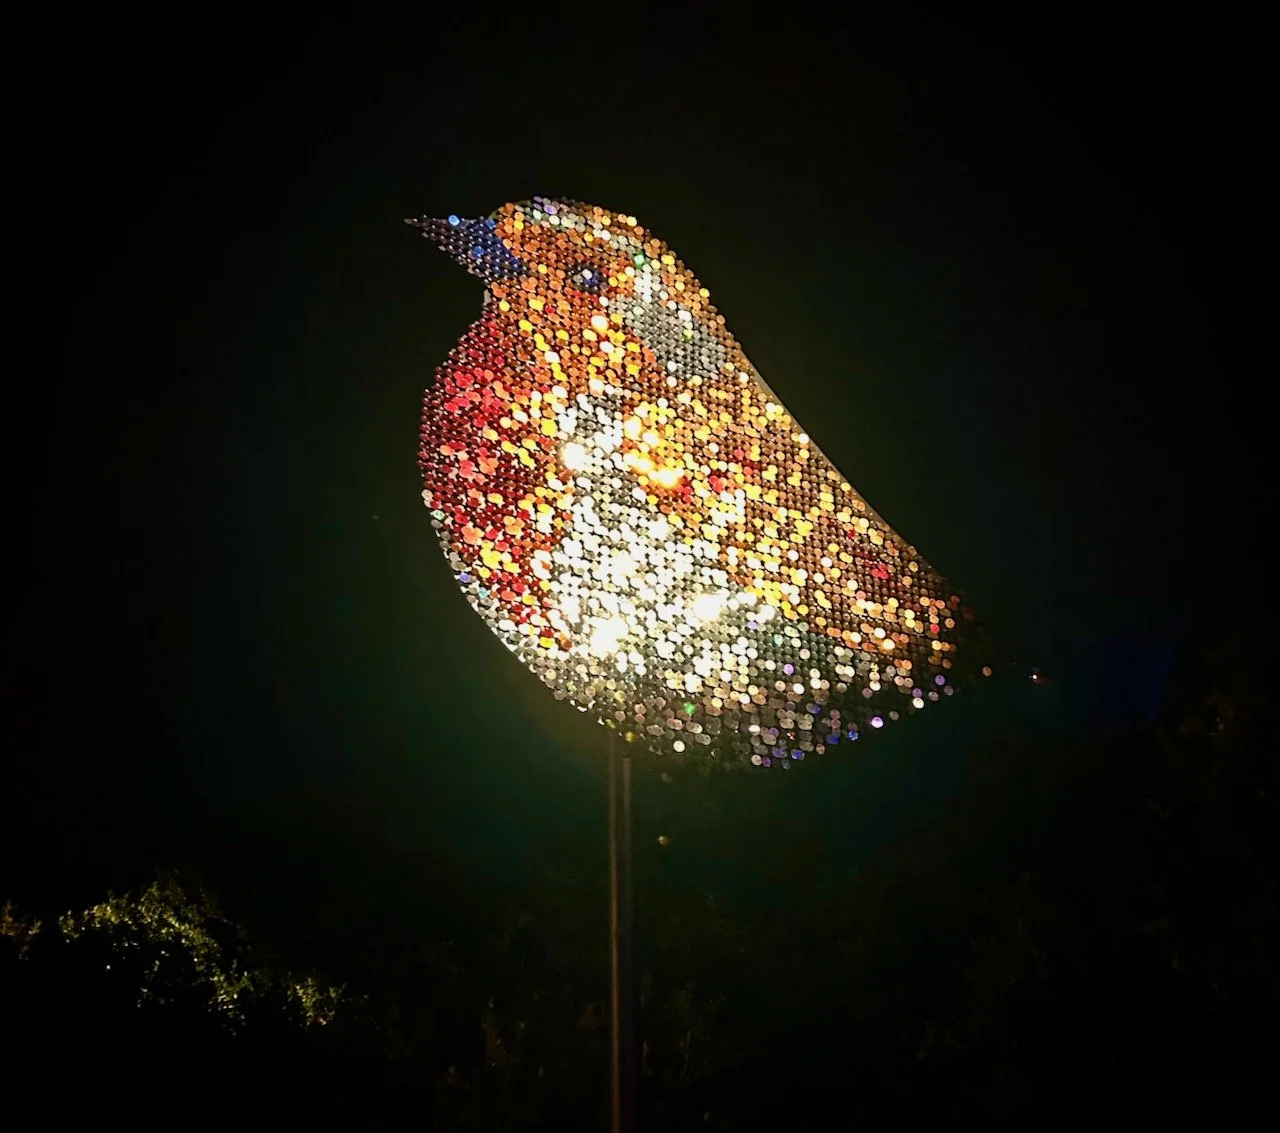
The other that I was particularly taken with were the robins - they were large - but it was their coloured shimmering metal discs that were impressive, like a large sequinned robin hovering above you!

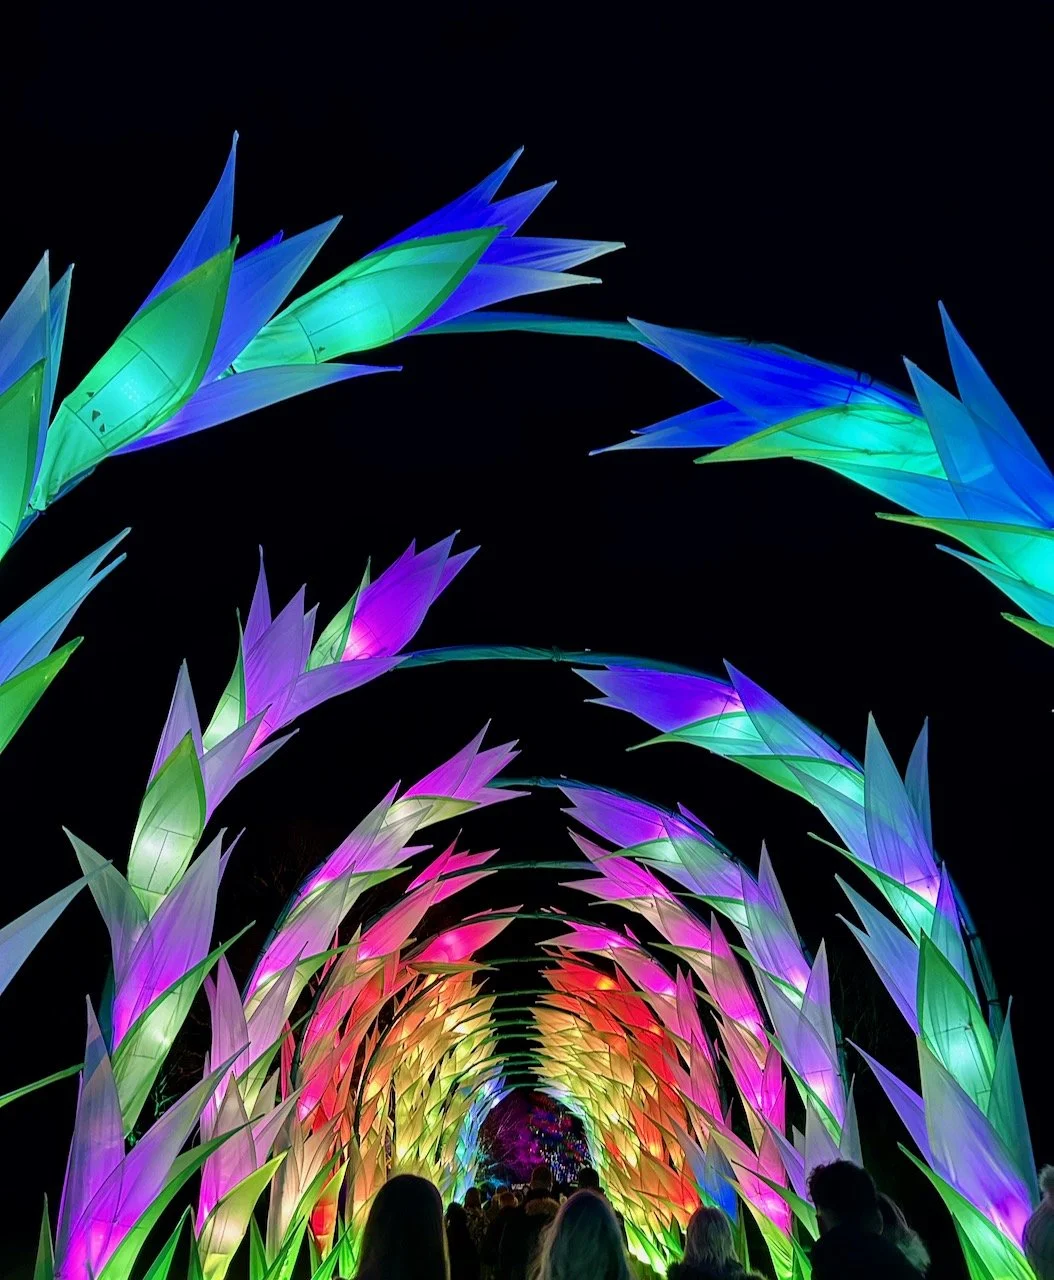
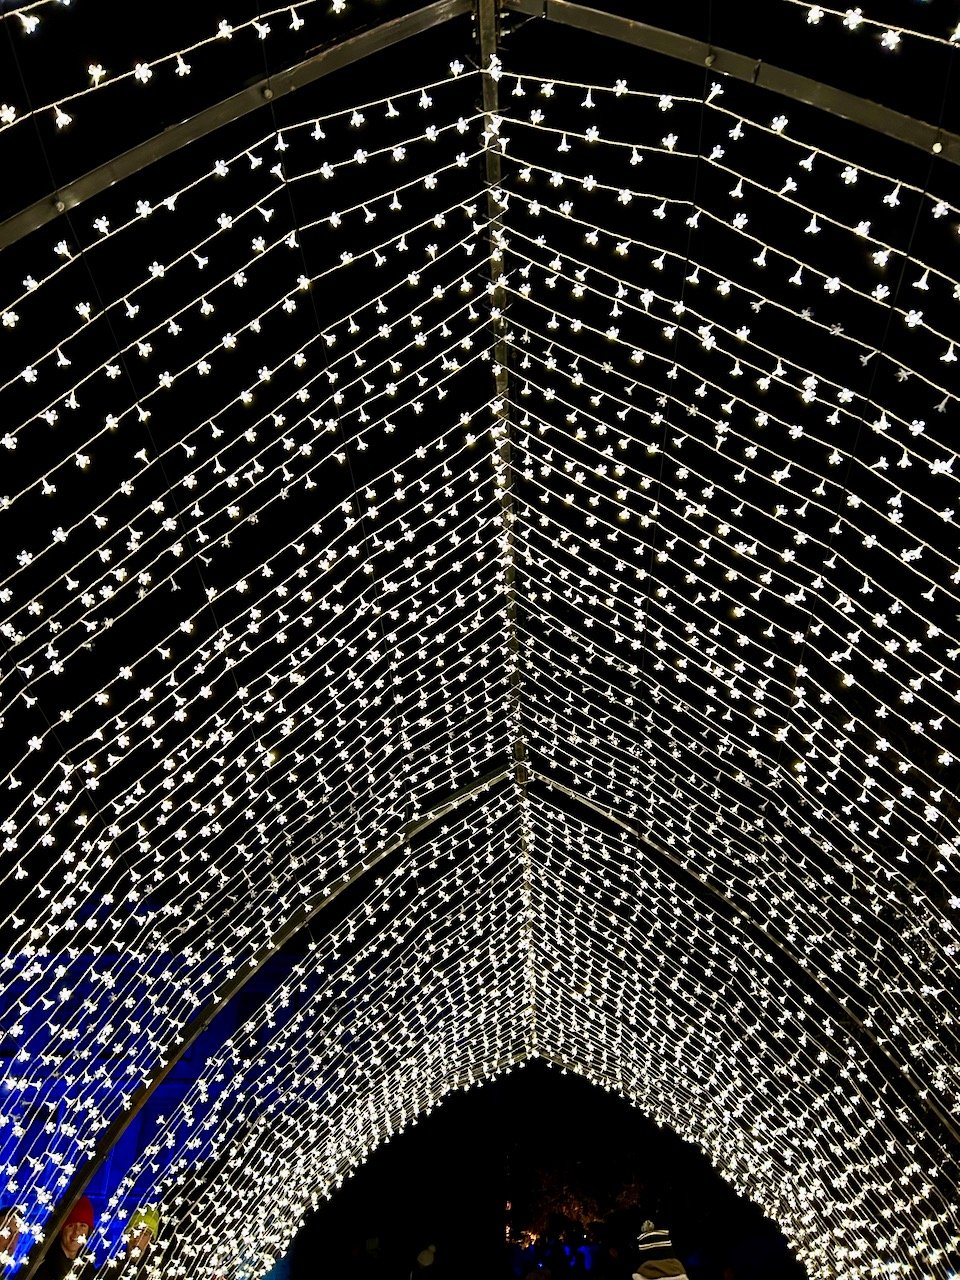
The last archway that you walked through as you headed out of the garden was also pretty spectacular, and proves that simple isn’t necessarily a bad thing, but can be equally as magical.

White fairy lights strung into an arch leads you towards the exit of the gardens and display, quite spectacularly

So it was good to get back to Belton, and it’ll be even better to get back again in daylight - as the car park changes they’ve made in the past six months look to have improved that no end. No more parking in a muddy field, and that has to be a good thing!

PostCommentLove

Repurposing my autumn wreath

17 October I went to a workshop to make my autumn wreath, and almost a month and a half later it was still looking pretty respectable, if not slightly weather worn, which given the weather we’ve had - rain, wind and snow - isn’t surprising! And with a new workshop, and wreath, booked in for the start of December its days were numbered.

My autumn wreath fading a little on our open door

And while the autumn wreath was fading, it wasn’t completely done - which was just as well as I had plans for it.

Back in 2016 I shared how I’d bleached some pine cones, and how my top tip was to start early - I think I took my own advice there as I’d not used them properly, so by my reckoning eight years is plenty early enough!!

This year was going to be their year

At least I hoped it was.

I brought in the autumn wreath as by now the weather was too chilly to do this outside, and was immediately grateful that I thought to put this on a towel and on paper. It was wet from the recent rain, which was no bad thing as keeping the moss wet helps. The towel soaked some of that up, and the white paper helped easily identify bugs crawling out of it.

The autumn wreath on my kitchen worktop, plus towel and paper, before trimming the most faded elements.

I snipped off the Chinese Lanterns and some of the more faded greenery and the berries which were past their best, but left as much as I could.

To check the viability of this primping project, I placed my bleached pine cones around the wreath to check I had enough to fill the gaps. I did. So with more optimism than skill I set about wiring them into place. I had thin wire so I think this was harder to use than the thicker short lengths of florist wire which could be more easily pushed through the moss, but I go there and all the pine cones were attached successfully.

It doesn’t look too bad laying down does it?

I knew the proof of the pudding, or at least my newly acquired wreath making skills, would come when I held it vertical - and thankfully none fell off, so I could move to the next phase of the project - putting it on display.

The primped autumn wreath with newly acquired pine cones attached to our gate

Not taking any chances with the wind gusts, I’ve tied this on in four places - top, bottom and both sides - and it’s stayed on the gate, so far. What’s more, the pine cones have also stayed attached to the wreath, so I’m calling that a win - and a pretty and sustainable one at that.

Though this will be its last stand, with the majority of it heading to the compost bin (actually our brown bin as we haven’t sorted new compost bins yet) in the New Year. I’ll be saving the pine cones, and if I can the metal ring, but you’re not surprised by that are you?

This is likely to be my last post before Christmas, so thank you again for continuing to read and support my blog. I hope you have a great time over Christmas celebrating and/or spending time with families or loved ones, and doing what’s important to you.

We’re looking forward to spending the Christmas period with family in our new home. I hope to share a post of my Christmas wreath before the New Year, so I’ll save wishing you a Happy New Year until then.

Fusing some Christmas trees

I seem to have a thing for Christmas trees for my handmade cards. I’m not sure why, but at least I’m consistent! This year my cards were totally inspired by The Sweet Stitches - do go and check out some of her reels on Instagram, they’re amazing.

I’m pleased with how my cards turned out, and while I started much earlier than normal as I was keen to get my cards posted as they were doubling up as change of address cards from our house move in the summer, I seem to be sharing them here much later!

Yes, with postage costs what they are I have no shame about doubling these up, even though they’re about half a year apart. As it was MOH’s eyebrows were raised when the post office teller gave the amount for twenty four second class stamps, which wasn’t too bad as we’d managed to hand deliver many of our change of address cards to friends on our recent London trip.

But anyway, back to the cards…

Four christmas tree shaped templates with scissors alongside them on the small white round table, the tree templates are on a blue circular coaster

I started with some templates, four for good measure. I think that’s why I keep coming back to trees, their shape is pleasing and like nature, there’s room for some variation each time, I’m not one for being rigorously contained - and that goes for trees too it seems!

I had scraps of fusible interfacing as well as plenty of scraps of material. I kept my palette pretty simple - reds and greens, and the snowflakes on my red Christmassy fabric was a bonus.

On the scraps of single sided fusible interfacing I drew on some Christmas tree shapes - for my test I tried different pens ranging from a Sharpie, to a regular biro to a pencil, and all worked perfectly fine. I mostly continued to use the biro as it was easier to use and was easily visible from the other side.

The fusible interfacing side up with the tree shapes drawn on, on my crafting mat
The reverse - and patterned side - of the image above, small snips of reds greens and snowflake material

I ironed on small scraps of fabric which I’d cut into random shapes. These were quite small, and that was on purpose as my templates were pretty small too. The trick here is not to overlay the fabrics too much (as they won’t stick) and not to get too stuck on (pun intended - sorry) covering every part, though seeing where fabric covered the template was useful.

The four colourful and multi coloured trees cut out - and a pile of trimmings alongside them on the craft mat

Cutting them out was more enjoyable than you might think. Seeing that pile of trimmings grow and the trees take shape was satisfying, and I was keen to check the size on my card blanks.

A single tree laid onto a brown craft card - trying for size!

It was simple, but it worked for me.

So the tree production started.

Every one different. Every one unique.

tree production - two rows of five trees and a row of four below on my craft room desk

If you looked at my Instagram inspiration then you’ll notice a very obvious difference. Mine don’t have the top stitching, well one does - I tried it and my shapes were too small and too intricate for my machine. So I need to work on that, or at least work out if free motion embroidery is an option for my machine!

Instead I added little diamante studs to the end of each branch and a star on top, which worked a treat.

Now I’d love to show you an image of a final card, but somehow in my keenness to get them to their recipients I don’t have one - not sure how I managed that, but take my word for it the sparkles definitely finished them perfectly.

I’ll be trying more of this technique next year I’m sure - my learning is to try bigger shapes and bigger scraps, and hopefully I’ll be better at photographing the end result!