The Garden Year: November 2023

Welcome to the last Garden Year of the year as realistically there’s little to post about over the winter months, and so this linky takes a break. Thanks to everyone who’s joined me throughout the year - enjoy the winter, let’s hope it’s kind.

Advice, inspiration and places to visit

“TheGardenYear

You are invited to the Inlinkz link party!

Click here to enter

Post Comment Love 27 - 29 October

Hello there, and welcome back to this week’s #PoCoLo - a friendly linky which I co-host with Suzanne, where you can link any blog post published in the last week, posts which are older will be removed from the linky. We know you’ll find some great posts to read, and maybe some new-to-you blogs too, so do pop over and visit some of the posts linked, comment and share some of that love. If you were here last week it was great to have you along, if you’re new here this week we’re pleased you’ve joined us.

I’ve another weather-related post this week, this time relating to Storm Babet which hit us last Friday. It was raining from very early on, and continued to rain the whole day depositing, as we later found out, a month’s worth of rain in a day. The River Trent had flood alerts and the next village along to us, which appears to be relatively used to flooding, flooded. The Riverside pub became very much its name, and its car park became river - but they appeared to be open again the next day. Following the weather, and the various updates became addictive, with it happening so close by, although we weren’t in the flood alert zone. The river peaked at around 2 metres 48, way above the top of its 1 metre 70 normal zone. Thankfully for everyone affected it’s back to 85 centimetres and normal, and the water has receded, though I expect it’s never quite that simple for those directly affected.

For us it meant a change in travel plans; we were due to travel south last Friday but didn’t. Seeing pictures of the A1 flooded made that decision for us and we delayed our journey until the following morning. When we drove alongside the fields just up the road from us, it was quite sobering to see the river flooded the fields and almost up to the road.

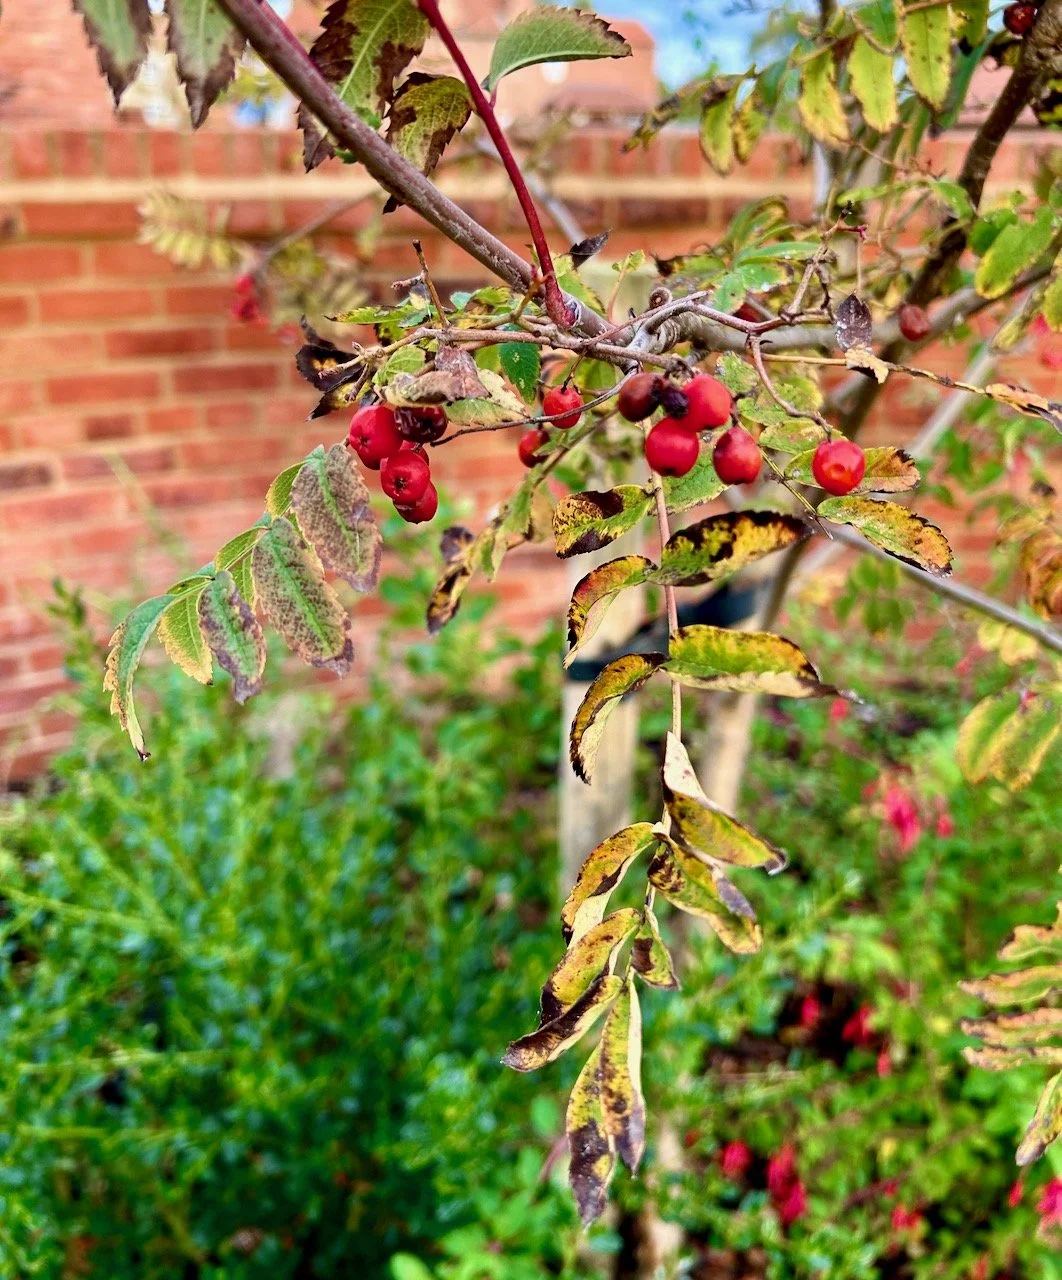
My picture this week is of our small Rowan tree, which is looking distinctly autumnal now.

autumn leaves and berries on our small rowan tree

You are invited to the Inlinkz link party!

Click here to enter

Embroidered sunflowers

Another craft post, I guess my craft room is paying dividends! Though in fairness these stick & stitch embroidery patches were a pre-move purchase from BlackbirdnBloom on Etsy. I bought them, along with some bee patches, to use to embroider over those annoying holes you get in some t-shirts, but what with everything going on I didn’t get around to doing anything more than popping them into my sewing box. I knew that I had enough embroidery threads in varying colours and even better, I knew where these where now that I’d unpacked in the new house.

They’re easy to use too, all I needed to do to get started was work out where I wanted the designs and what colours to use.

Two sunflower patches stuck on a navy blue t shirt - covering holes
Choosing colours - from many enbroidery threads wound around cardboard

And while sunflowers are traditionally yellow and brown, I opted for the card with the dusky pinks and pale yellows (I told you in my recent crochet post that they’re my go to colours!), and then quickly realised that my choice was also probably influenced by my top!

Deciding on a colour pallete of muted yellows and dusky pinks
My chosen colours *may* have been influenced by the top I'm wearing - yeap, the same colours

But anyway, the embroidery finally started.

Starting embroidering the petals with deep burgundys through to dusky pinks

As ever I decided to improvise, with the colours, the blending and pretty much everything else. I also got braver with this as I went along, likening the embroidery thread to colouring helped a lot, and I think the effort was worth it.

Making progress - three completed sunflowers - with the template sticky material around them

Once the embroidery covering the small annoying holes was complete, it was time to wash off the excess patch.

It was magic. Cold water and a very small amount of rubbing and the white surrounds easily disappeared.

Washing off the template material in cold water - starting to reveal the finished embroidery

I think the photos look much more dramatic when it’s wet!

Anyway, after trying my top on to admire my embroidery skills, I decided to add more embroidery, and not just to cover the holes. Before I could back out I stuck the design in place and got my needle out again, sewing more flowers up towards the neck, but off centre - I’ve a thing for things being a bit skew-whiff, to me it’s much more pleasing.

The t shirt laid out to show the embroidered sunflowers which have now migrated up the top (I liked them so much)

And I’m really pleased with the results, though less pleased with my attempts to photograph them. In fact the navy blue top wasn’t photographing at all well, so there was nothing else for it but a mirror selfie.

Me wearing the top- it was too hard to get a photo not wearing it - I've worn it out and no one asked if it was home made - result!

As you can see, it’s subtle but visible - and I think it looks like it’s meant to be there. I’ve worn this t-shirt out a few times now, including to a local sewing group here, and no one has asked if I made it. I’m hoping that’s because it looks good, rather than the other!

I’ve yet to start a t-shirt with the bees, but it’s on my list - and more importantly on my workbench, rather than shoved away. But it’s behind a project or two yet, but I’m pretty sure it won’t be long before I start…

PostCommentLove