Miniature makes

One of my aims for my sewing this year was to do more experimental and fun sewing, and also to sew some practical household items - it seems that I’ve managed some of both of those already without seemingly trying. While each of these have a practical purpose, they’re also a lot prettier than what I’d been using before.

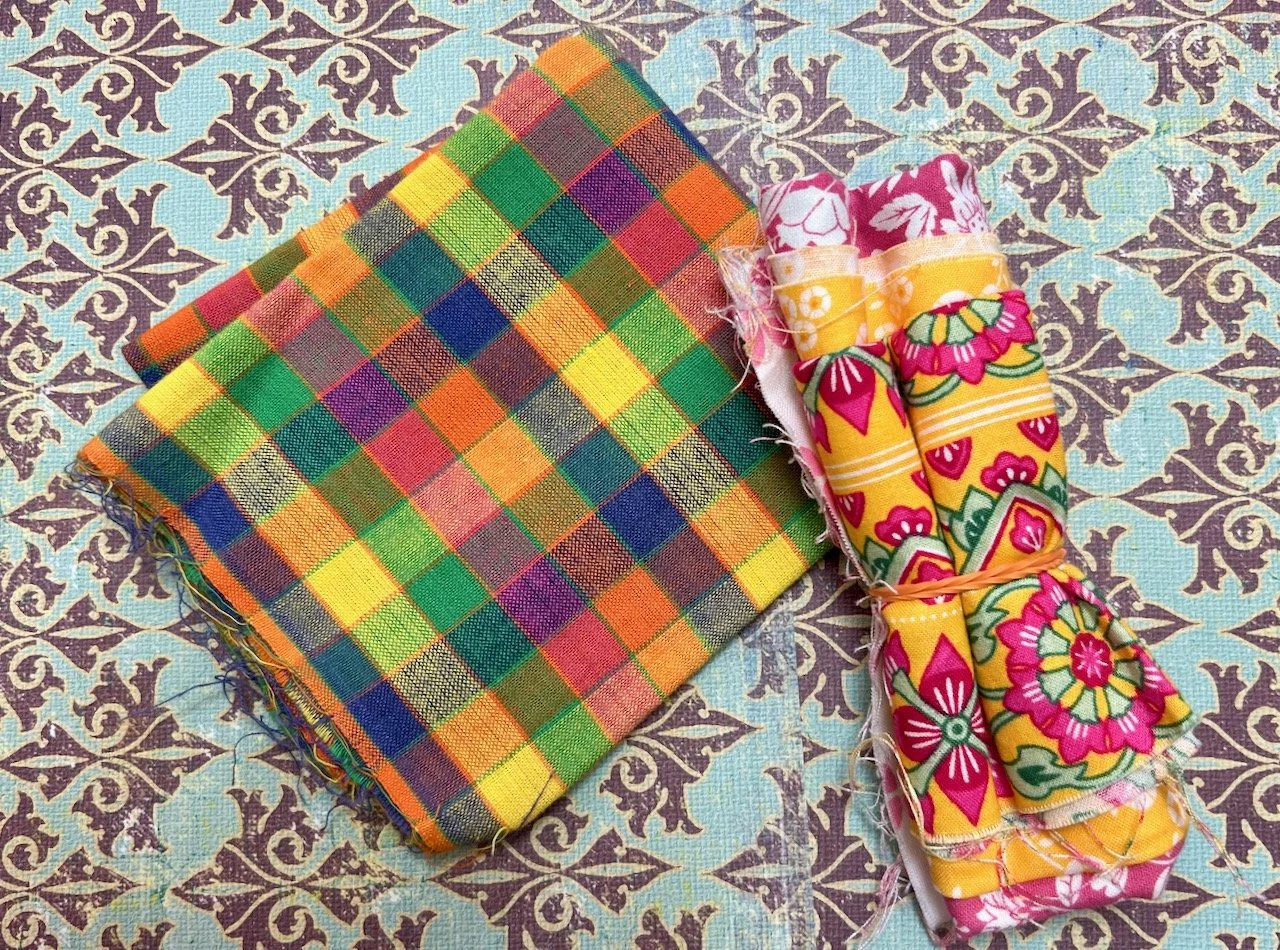
You know what I’m like with scraps and since I made the Scandinavian Star before Christmas, the offcuts of the two bright fabrics have been on the side in my craft room staring at me. Eventually I cracked and wondered what on earth could I do with the small pieces that were left.

It turns out quite a bit.

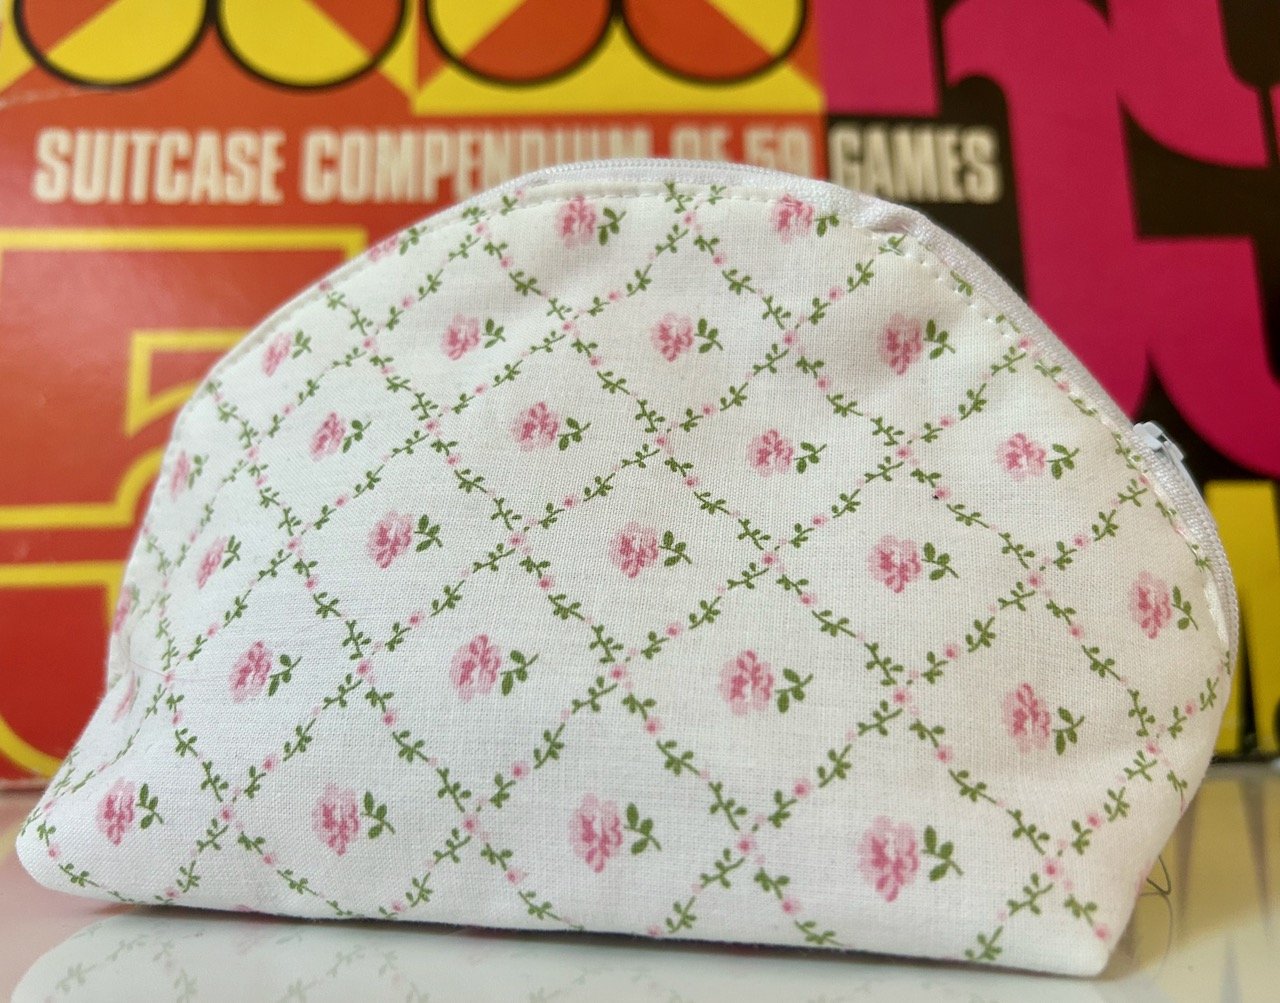
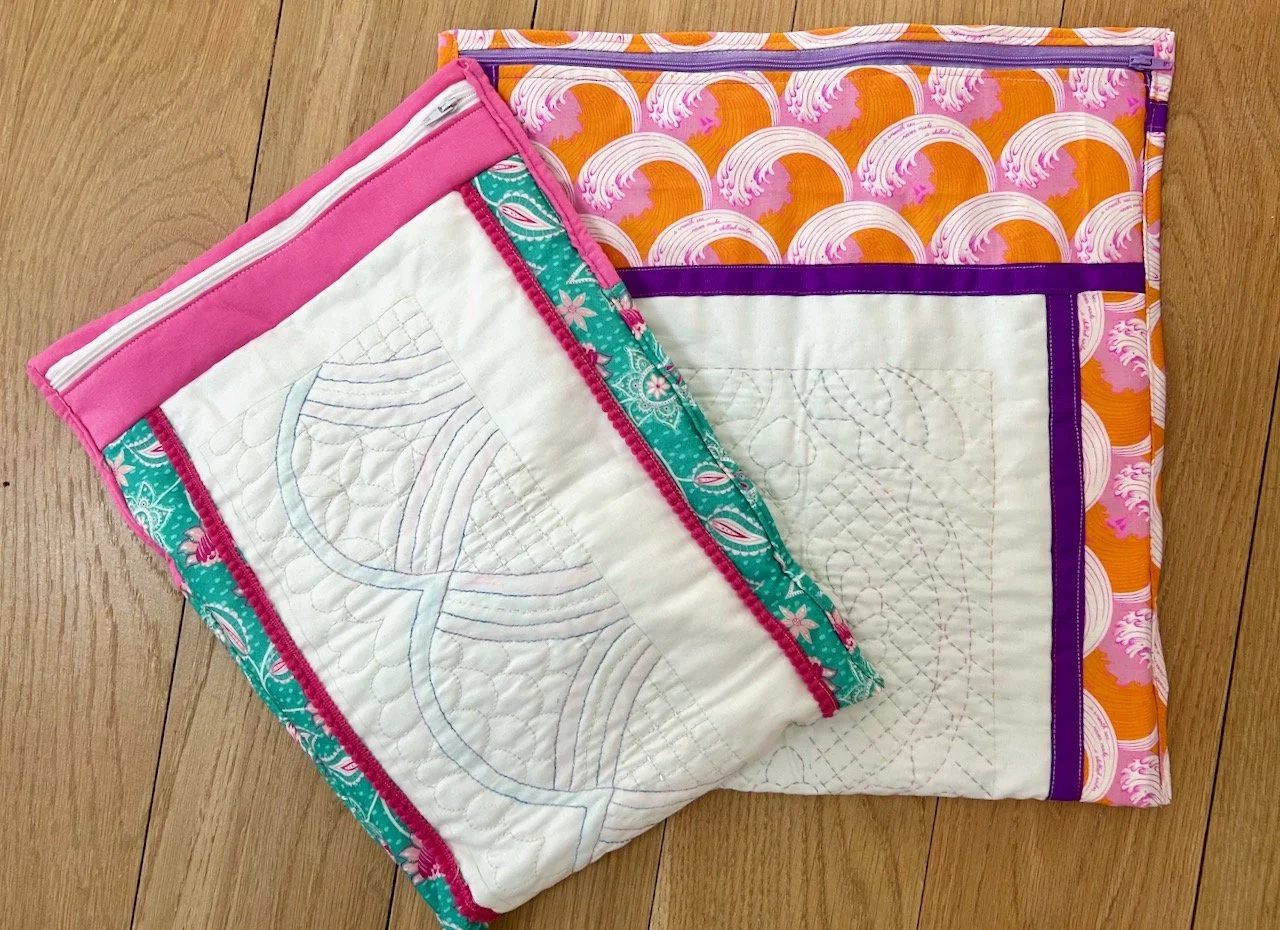
Pairing those small starched strips with some of the green leftover from the backing of the Essex Linen kisses picnic blanket, some blue shirting, and a bright pink zip I made myself a teeny tiny mat and a business card sized pouch.

A small pouch with a pink zip, two turquoise bound mats - and the teeny tiny mat

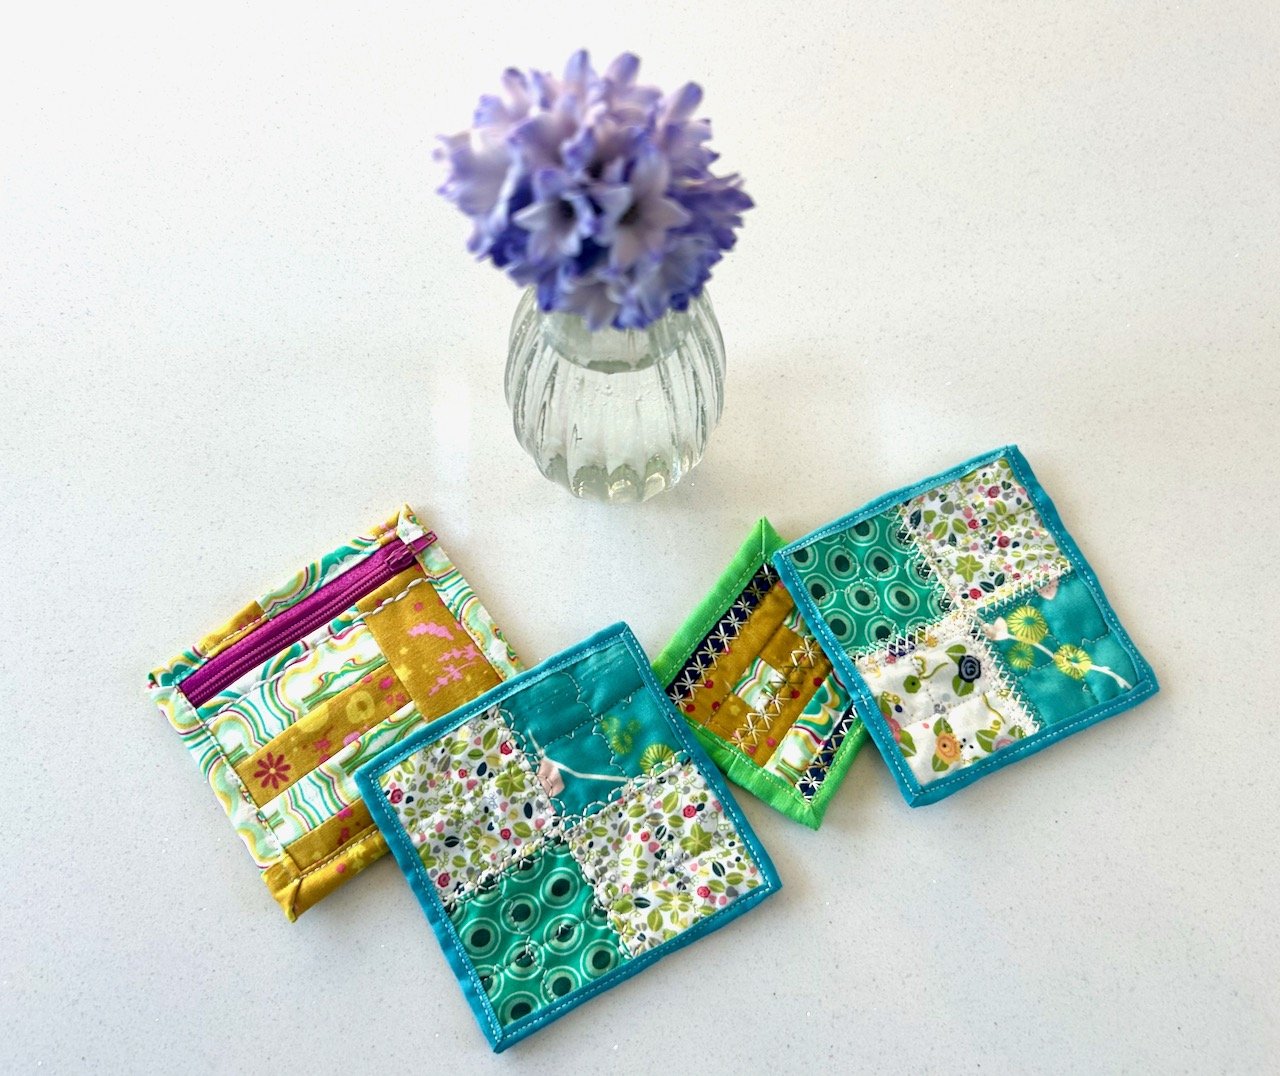
Asking why is a valid question. A pouch because, well pouches - and it is one of those smaller ones that I wanted to try. It’s already come in useful for holding my blog business cards for my day at this year’s Garden Press Event, and I think it’s longer term home will be to hold jewellery when I’m away from home.

The teeny tiny mat, which also gave me the opportunity to test out some decorative stitches on my machine, also has a practical purpose. It has replaced a very unglamorous, but functional, paper towel which I’d been using to make sure my turmeric massage oil didn’t stain what it shouldn’t (it never has, but you never know…)

I don’t even care (too much) if the turmeric does stain the teeny tiny mat, it’s pretty much turmeric coloured anyway!

The reverse of the mats and the pouch - with one of my hyacinths in a vase

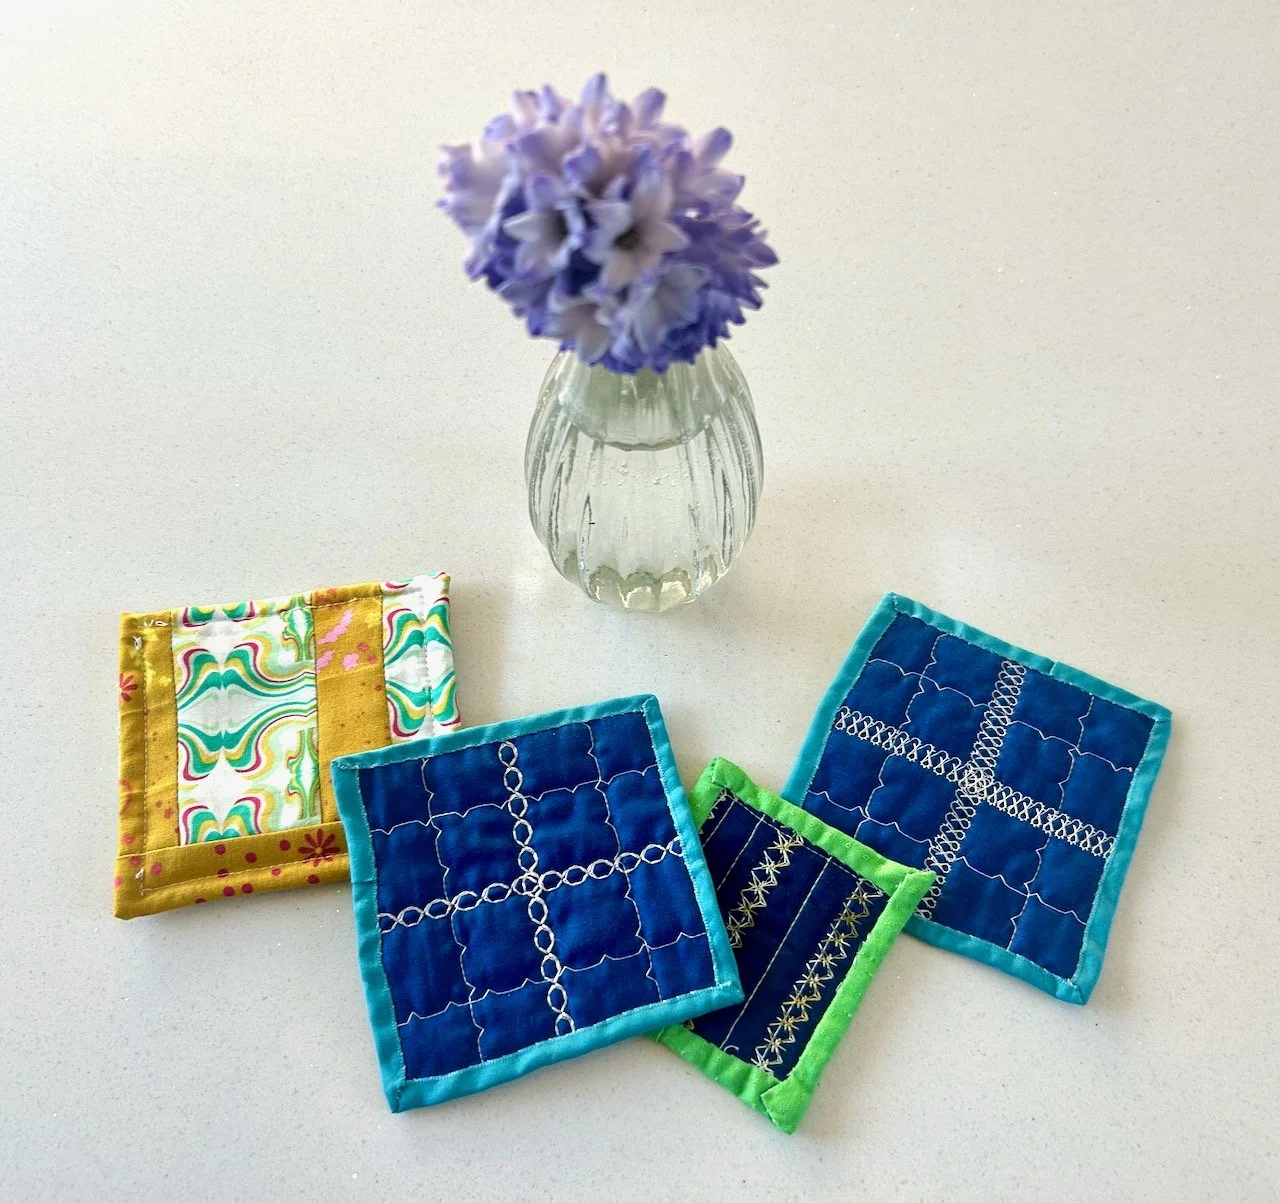
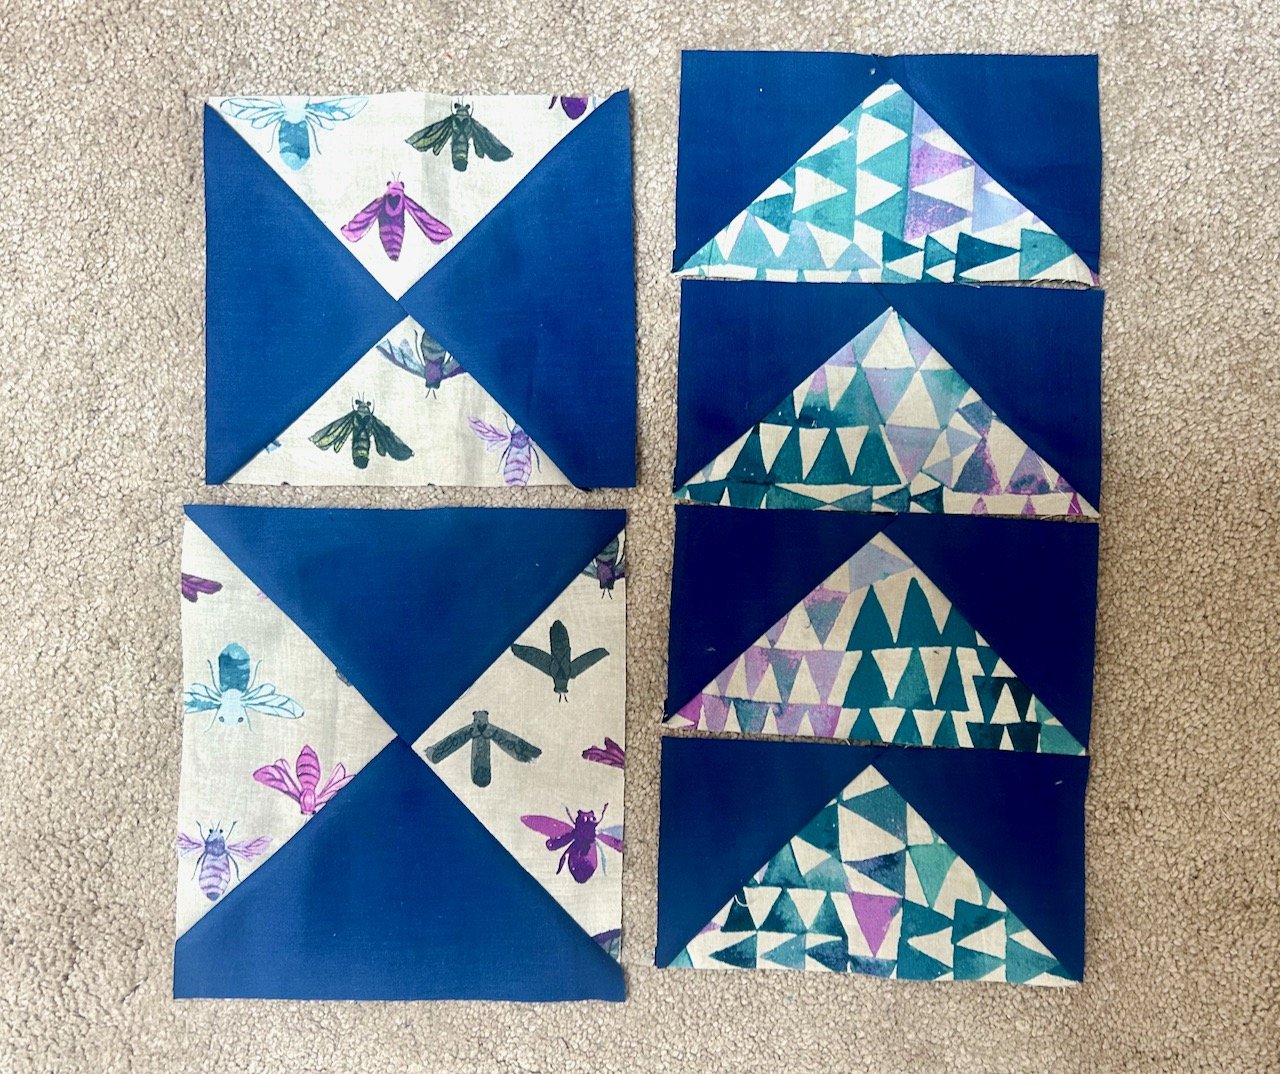
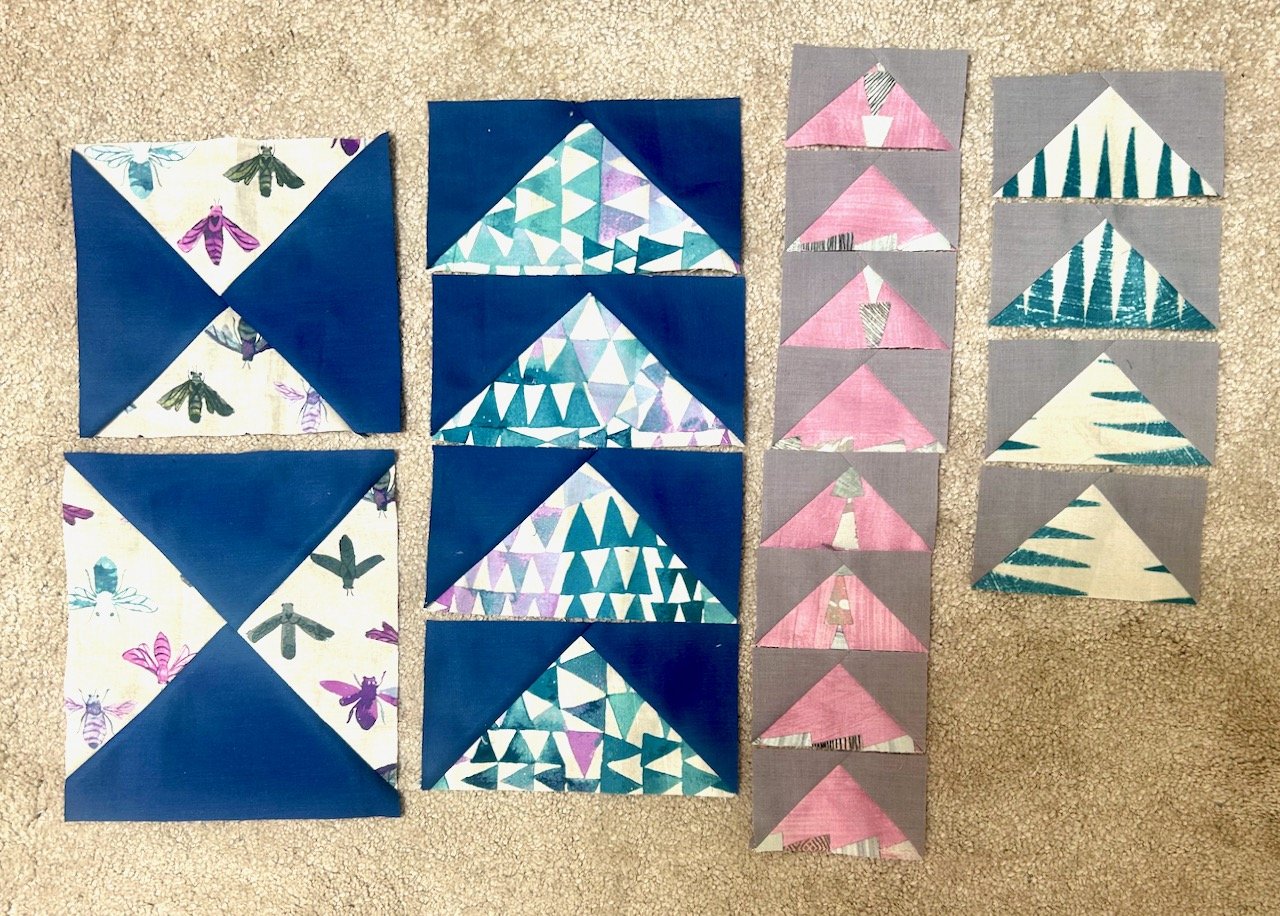
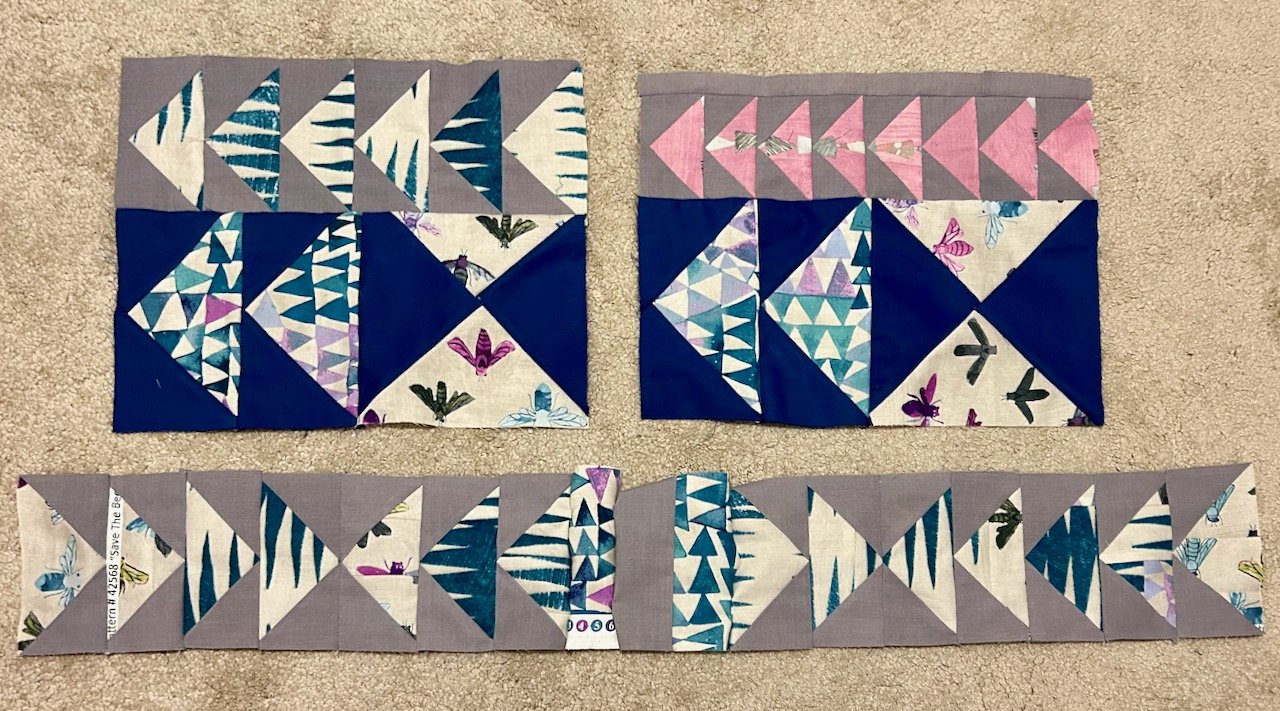
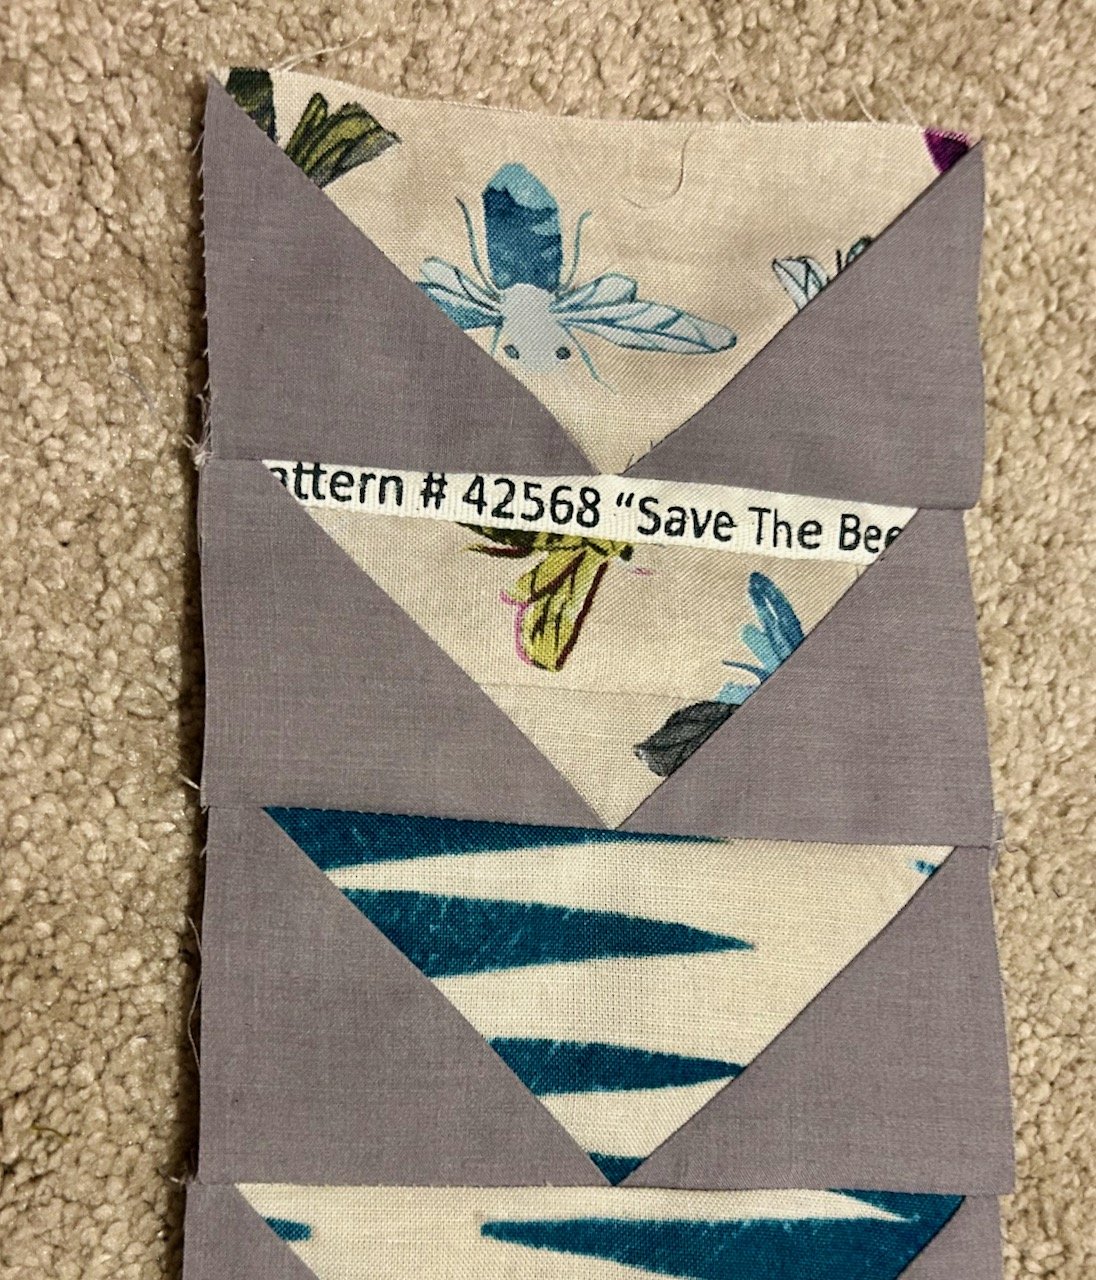
While I was at it I decided to knock up a couple of slightly larger 4 inch square mats to use in the kitchen to stop the oil bottles leaving an oily mark on the worktop. The turquoise edged mats can be washed, and are made from remnants from my Mystery Block of the Month quilt, so it’s nice to see those fabrics in a different setting.

Though I can see mats becoming a new obsession!

A small potted succulent on a paisley mat on a textured metal table
The simple paisley quilted mat on the textured metal table

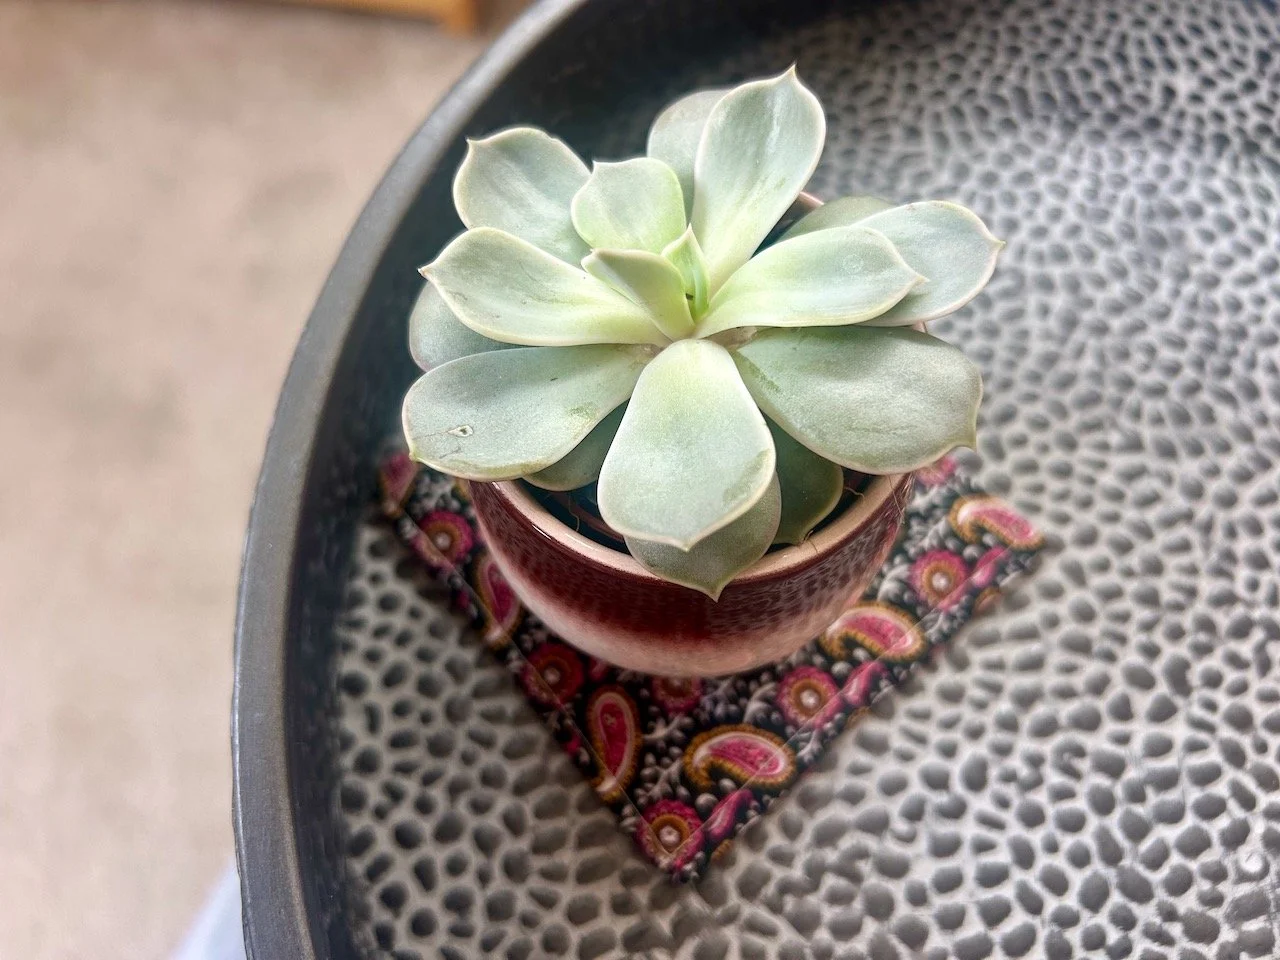
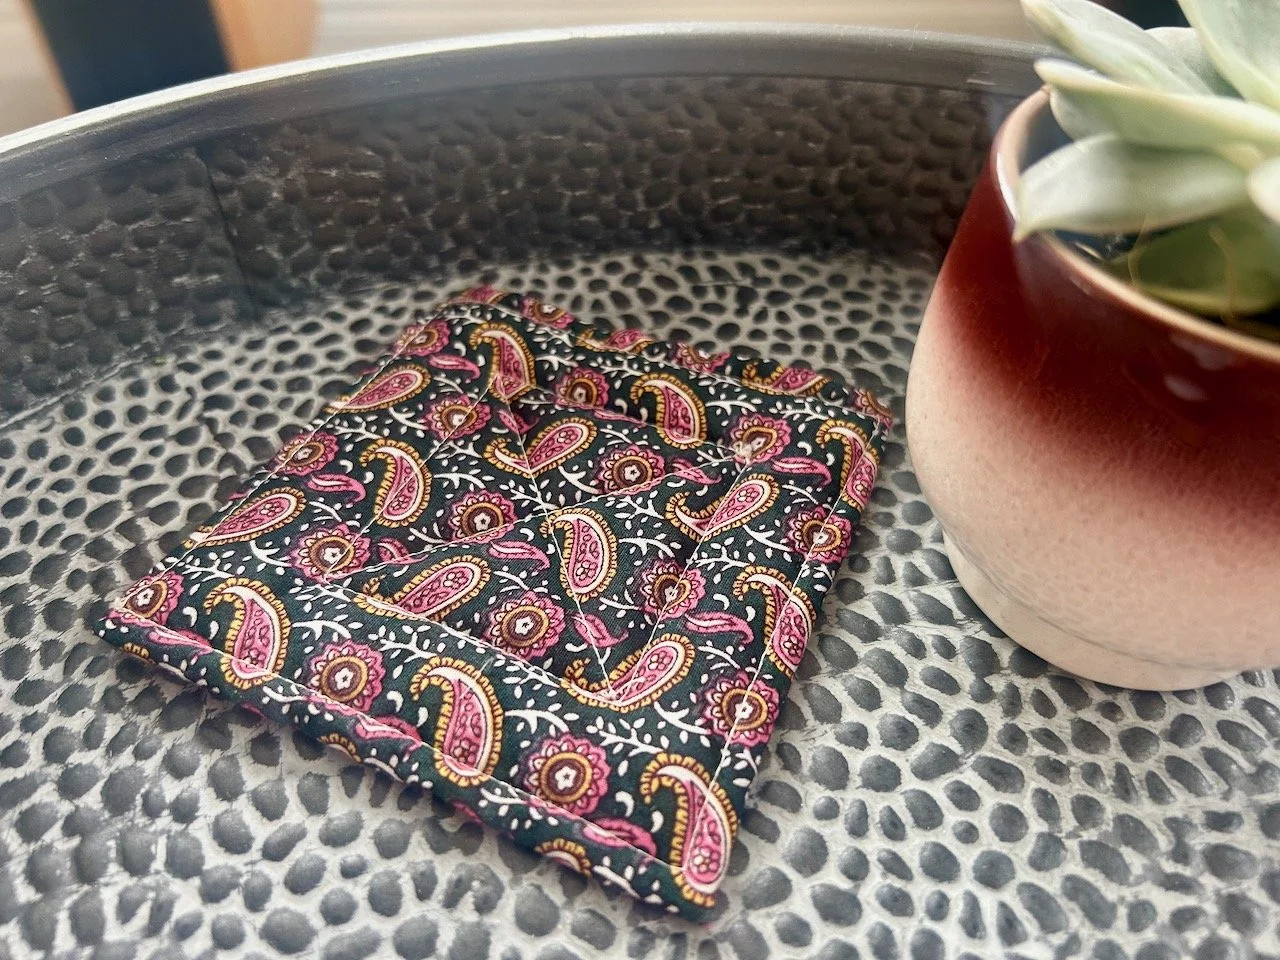
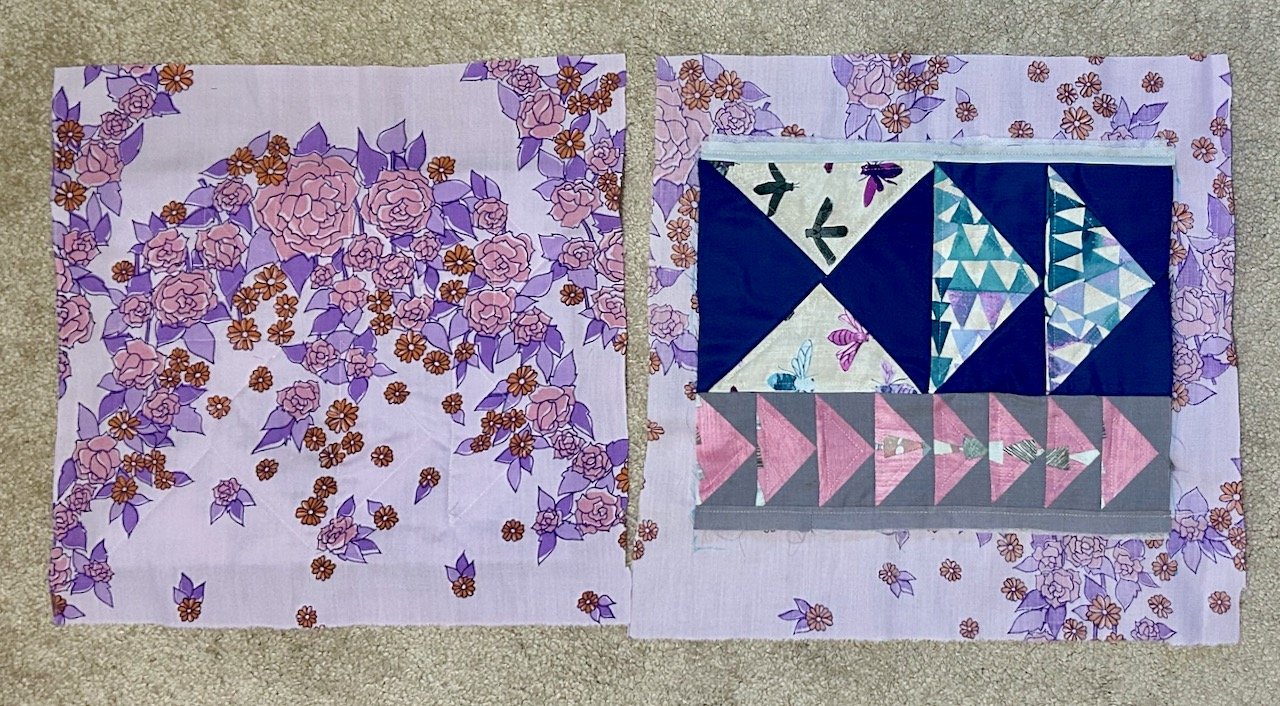
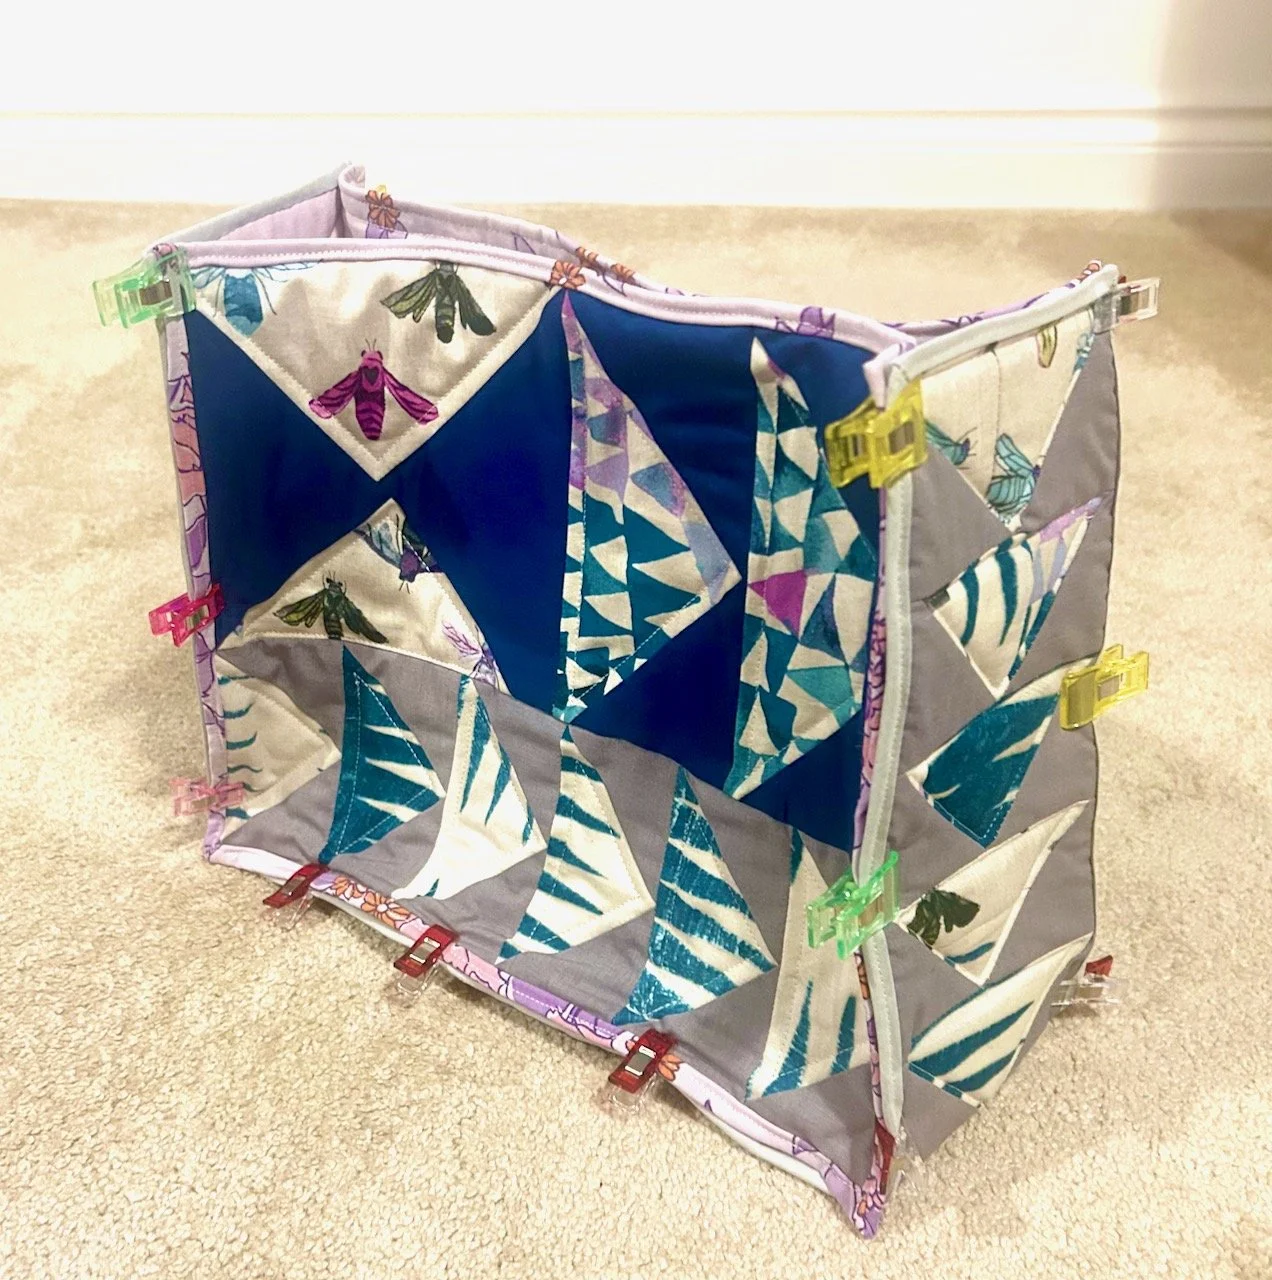
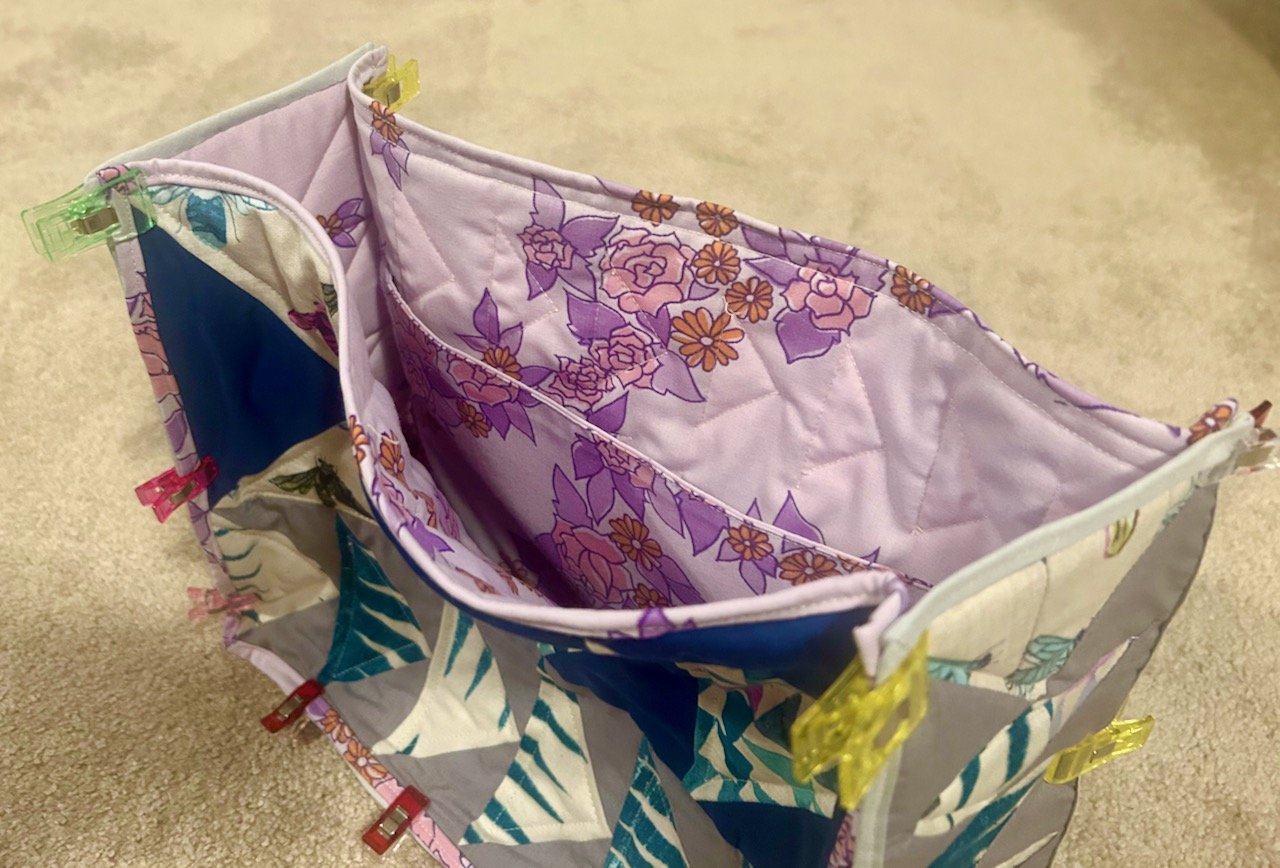
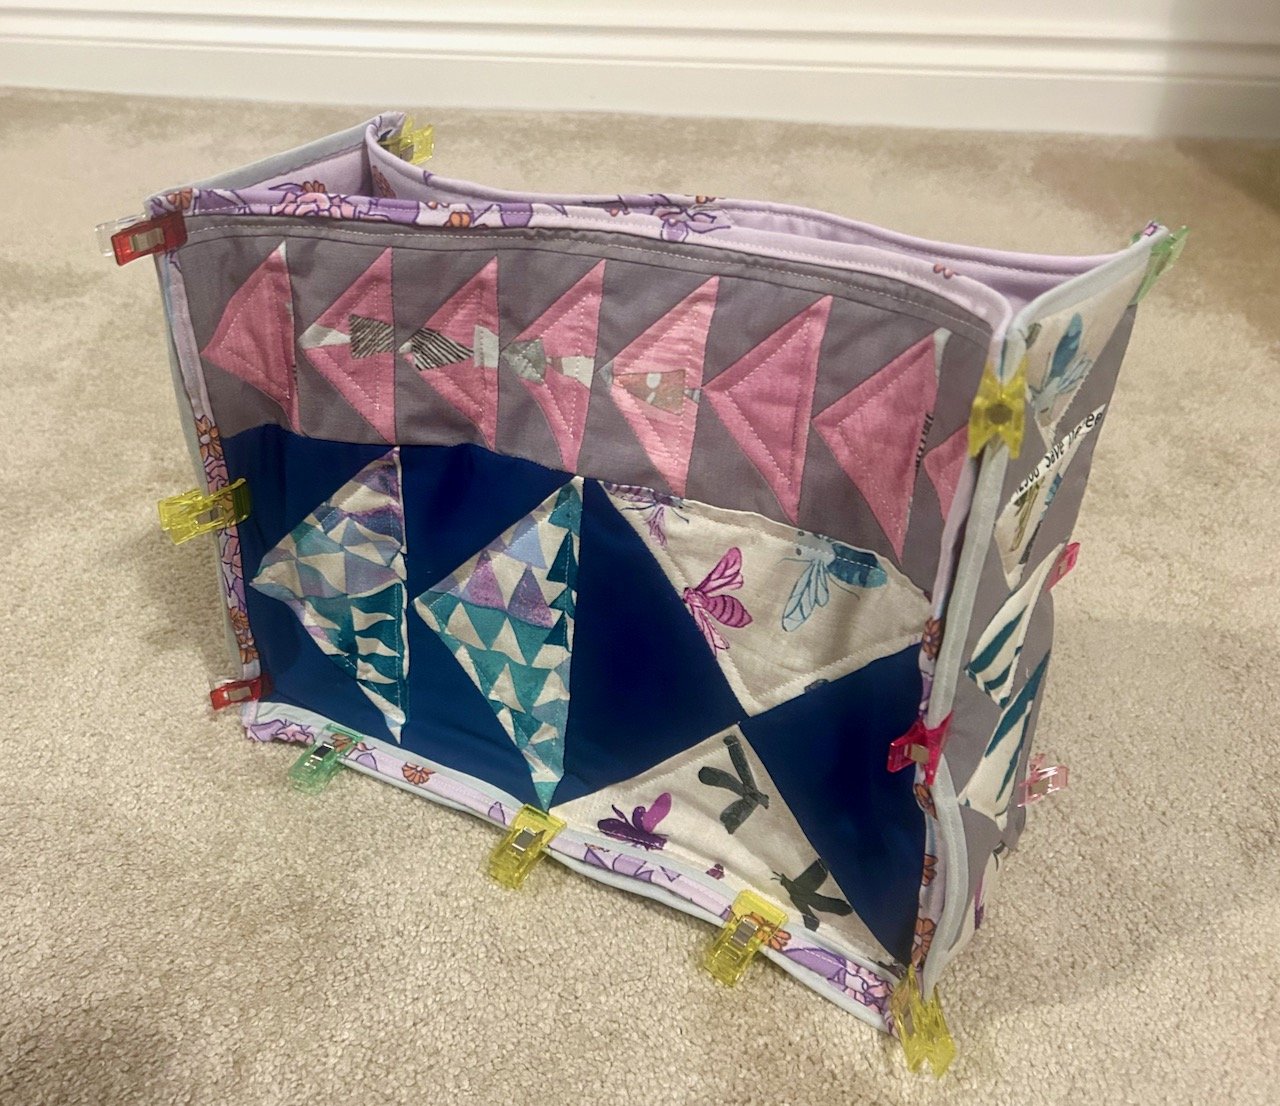
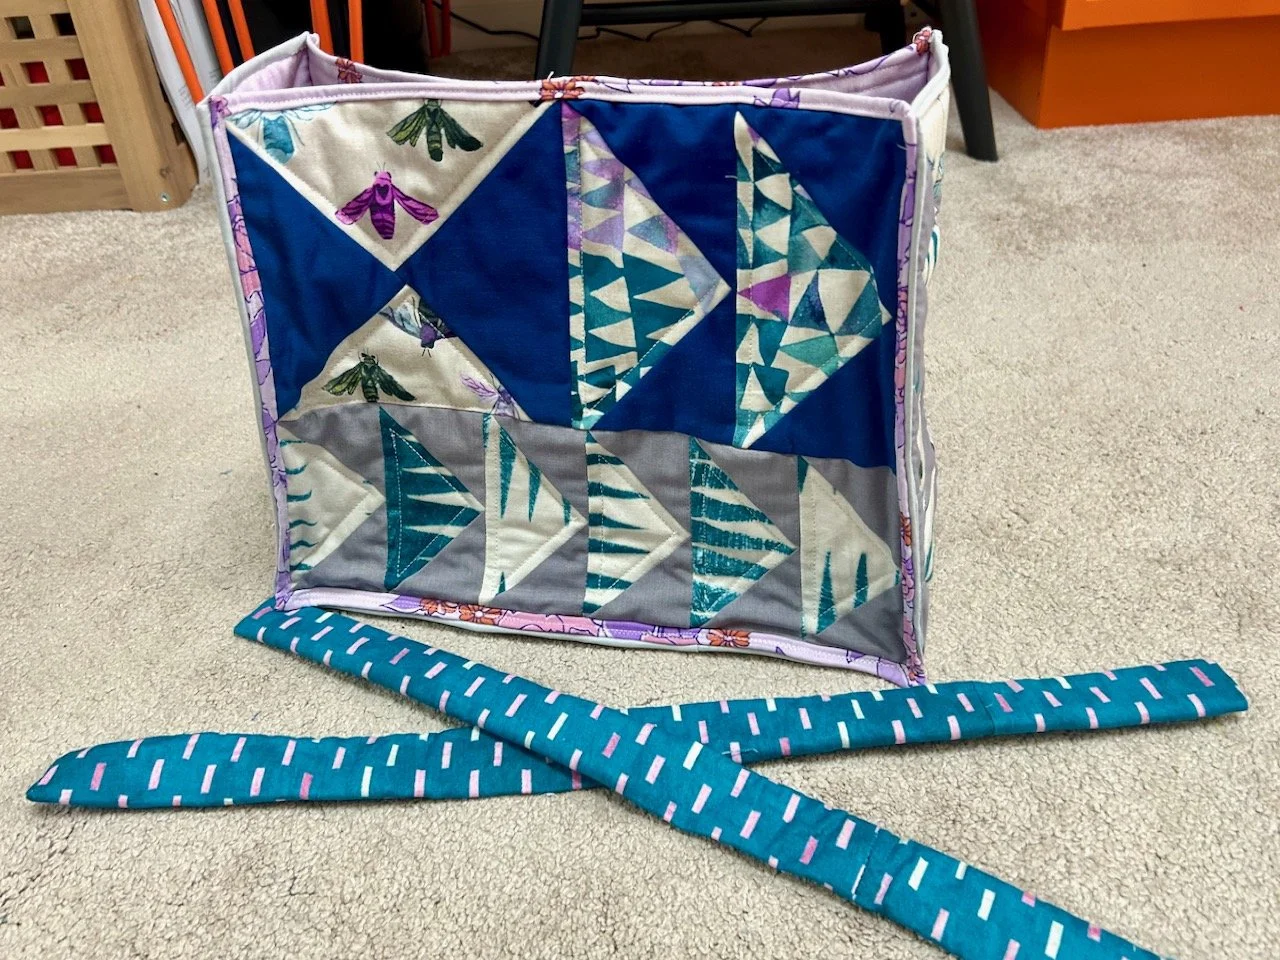
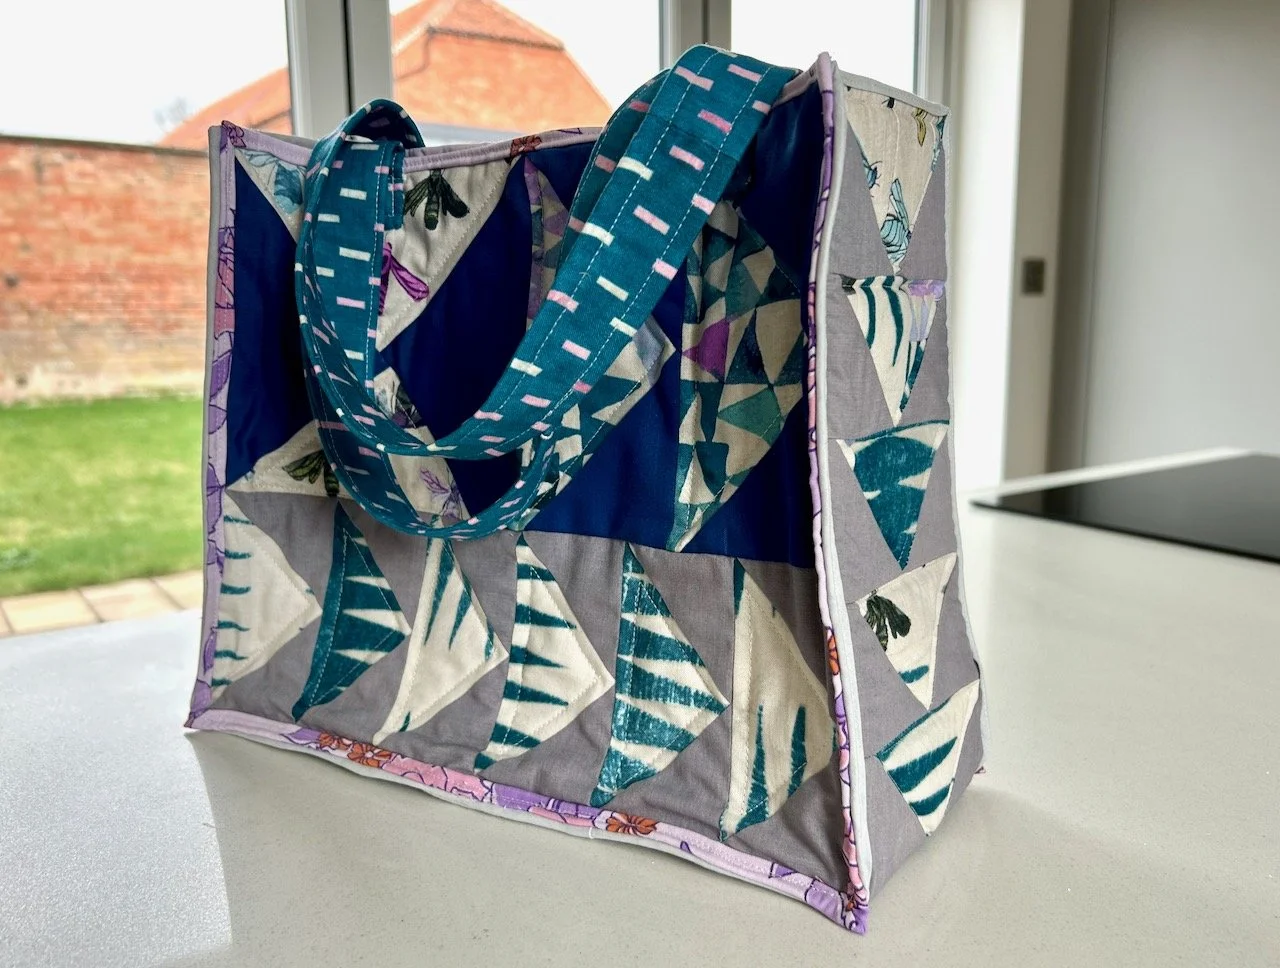
This one I made cutting some fabric from my stash while I was working out how to assemble my Flying Geese tote. I’d not sewn with soft and stable before. This one started out as a test for that and quickly morphed into another small mat, which is the perfect size to go under my newest small succulent.

And then there was a special request.

We often have a cup or whatever next to the kitchen sink, often soaking to remove the tea stains - and so having a mat that we can use there, that was smaller and better looking than the functional reusable kitchen towels I’d made from surplus quilt blocks and old towels would be a win.

A two cup by the sink mat made from grey patterned fabric with an enamel tumbler currently on the mat

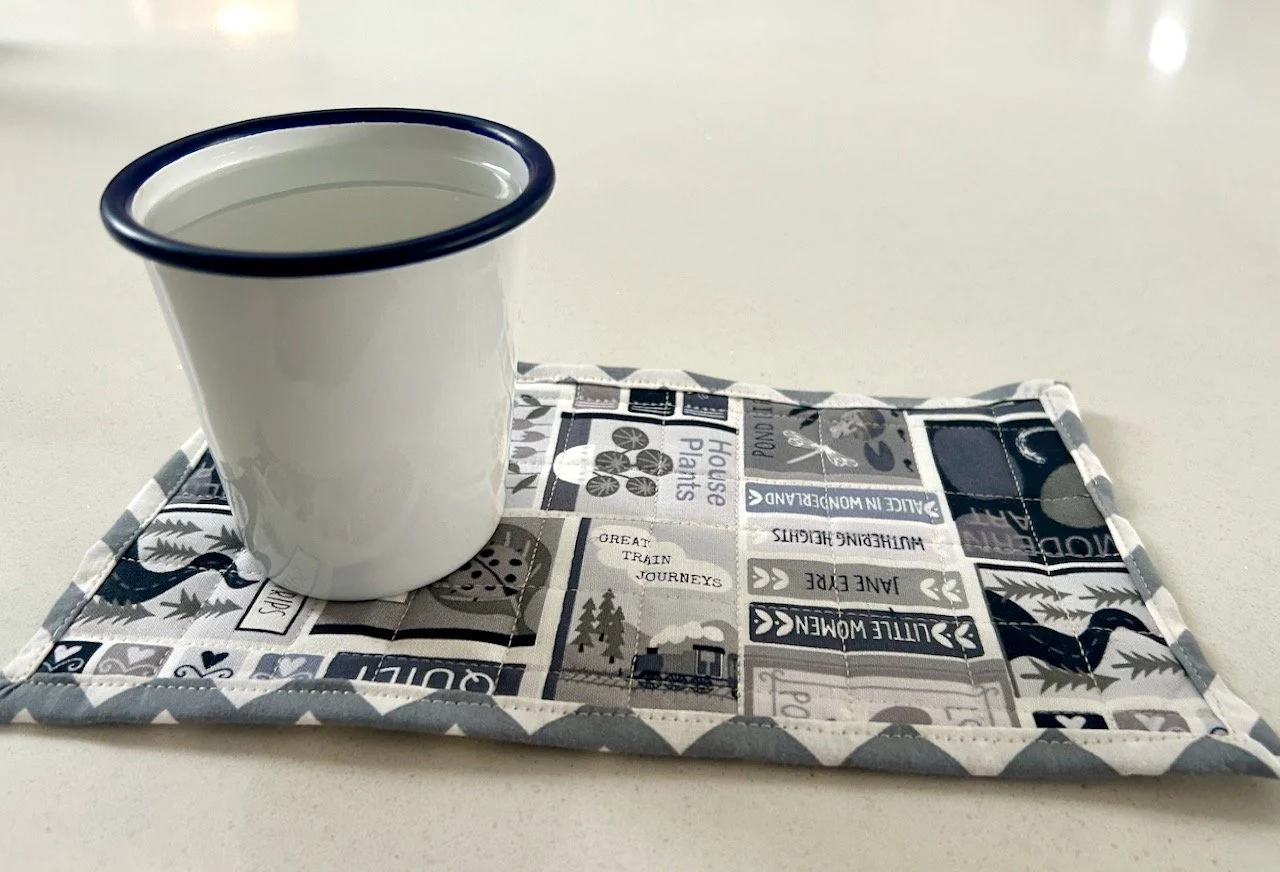
And it is a win. It’s been in use since it arrived by the sink, and is easy enough to wash or to store when we’re in a clear worktop mode!

Actually I’ve realised that I ticked off three things from my sewing list for this year: small pouches as well as the experimental/fun and practical household items - but I’m sure there’ll be more as the year goes on. They’re not really “once and done” goals are they?!

An impromptu Flying Geese tote

A couple of weekends ago I didn’t make it along to my patchwork group as planned - it’s a long story, but water in your heat pump isn’t a good thing as we discovered, and so our morning was a little disrupted trying to sort that out. It seems it was a morning for disruptions as there was also some confusion getting into the village hall for the patchwork group too, they did get in but I decided to stay home instead of arriving a fair bit later, and so I had my own ‘sew day’ - which was fabulous.

I’d already decided to test out my Flying Geese rulers to see if this method worked better for me, and I stuck with that. I’d made some Flying Geese way back for my first charity quilt, and while on the whole that method worked, it wasn’t foolproof and some of my geese had an extra piece of fabric at their point. As I’m planning to make a larger quilt full of these blocks I wanted to perfect my approach.

A first attempt, then progress

I’d pulled some fabrics from my stash which included the leftover fabric from the first vinyl fronted pouches I made and some plains: the blue from one of MOH’s old work shirts (and my Stars and Spots charity quilt) and the grey from an old duvet cover which I’ve used in multiple charity quilts already.

My first attempt wasn’t so good!

My first wonky attempt uncut, and the second more normal and successful flying geese attempt

I misinterpreted the instructions, and so I went again. This time with a lot more success, thankfully or else it would have been a long and frustrating day!

Wonky flying geese, and then three more usual sets of geese - all different sizes

And then I couldn’t stop. Geese of almost every size appeared alongside those first attempts, which I think have a certain charm, and which I was also keen to keep, and use somehow. Having accomplished my plan of successfully using my Flying Geese rulers, and sooner than I expected I needed a new plan before I became overrun with geese.

A new plan

I could have started on my long awaited Teal Flying Geese quilt, but I was keen to avoid abandoning my test geese. With a flash of inspiration I boldly decided to make a small tote bag, like you do.

All the geese sewn together to form three bag shaped pieces - trust me

With the layouts decided, and an extra strip here and there and a few more geese summonsed to the fray, I had a sort-of plan and some potential bag shaped pieces. At this point my sewing got even more experimental when I decided to sew strips of the fabric together to make patchwork effect geese (look at the two end geese on the long piece above to see how they worked).

I think my favourite one is where I’ve incorporated the selvedge with the fabric’s name, but also an important message re saving bees.

My favourite set of geese - this one has the selvedge showing with the fabric name -Save the Bees
The back piece of the bag - wonky geese and normal geese plus an extra strip to make it the same size as the front piece

Those wonky geese still make me smile!

And so does the very 1970s lilac material I chose for the bag’s lining. I’m sure we had duvet covers that were similar back then, most likely yellow, orange, blue and pink variants, but not lilac. This material I picked up at a stash sale became it reminded me of those long ago duvet covers, and it’s perfect for this project too.

Two oblong lining pieces in that bright 1970s print with the back panel on top of one piece

At this point I was just hoping that my very rough plan for assembling the bag would work. I’d used ‘soft and stable’ bag lining for the longest piece - I bought it for another project which I haven’t got to yet, but thankfully have enough for this as well - and leftover quilt wadding for the bag’s sides.

Using plenty of clips I proved my construction theory - the bag stands on its own thanks to the soft and stable, and the insert piece was the right size. I really do love it when a plan, and an impromptu one at that, comes together!

the three pieces quilted and bound, and clipped together to test the construction plan
A peek inside the clipped together bag at the lining and the inside pocket

I’d even thought to add an internal pocket, and impressed myself by not actually quilting it in place. Instead adding it after the quilting, hand sewing it in place. It’s a big pocket though and to avoid it gaping I added a popper, lilac on the inside and blue on the outside.

Yes, the construction works - time to get those clips removed

Two needles down

Having tested out quilting and sewing together scraps of the bag lining, I was ready to actually construct the bag. First piece joined successfully, the second piece less so.

Clunk. Broken needle.

After much searching I cleared the broken needle, including some that remained in the bag’s seams. I was ready to go again, with my new needle.

Clunk. Broken needle. Again.

This time I was back up and running much quicker, but decided to skip the bit that was giving me trouble, which was thankfully right at the bottom of the bag (I hand stitched the inch I skipped later), and then the second piece was joined and I had the body of my bag.

the bag sewn together plus two handles laid out in front of the bag (not attached)

New needles were ordered, and two straps were made. Instinctively I used interfacing on the bag’s straps before sewing them into tubes and turning them through, and I caught myself smiling when I realised how far I’d come since my bag making course. Back then I wouldn’t have thought to use interfacing, let alone know which to use or be able to identify fusible interfacing from the sew in type.

(FYI fusible interfacing has small bobbles or glue dots on one side, make sure that’s on your fabric, not your iron!)

Straps made, and thankfully both still the same length, they were attached to the body, and my bag was made. It took me longer than a day to complete, even allowing for dithering.

handles attached and the bag is finished
Another look inside at the lining and pocket - this time with added lilac popper

I’m really pleased with how it’s turned out, and while it’s not huge it’s perfect for what I wanted. And that ‘save the bees’ selvedge, well that worked out pretty well too.

Looking at the finished bag with the side panel also in view

With those ‘Flying Geese’ rulers mastered, there’s a very strong chance that my Teal Flying Geese quilt could be up next!

My non-quilt sewing plans for 2026

Last week for the second year in a row I shared my quilt plans for the year, and as having a focussed list worked well for me I’ve decided to take a similar approach for my non-quilt sewing, which isn’t that catchy a phrase is it, but I think it’s better than ‘other makes’ - I guess as I grow into this and settle into what it is, a better name may present itself.

So what’s on my list?

It’s long (no surprise there!) and varied and covers the expected pouches, plus some garments I’ve had on my mental list for a while, some things for around the house and a bag or two. But really, the opportunities are endless, as it seems, is my list…

1 Pouches

You knew these had to be on the list as I’ve not hidden my love for them. I’ve already made many and I will make more, but this year I want to make:

  • smaller pouches to hold jewellery, both for storage and when travelling,

  • more project bags, I have a lot of projects and ideas for projects which will benefit from being stored together,

  • new styles and shapes of pouches and

  • generally just more pouches!

2 A ‘take to’ sewing case

One of the things about going to my sewing and patchwork groups is the need to remember to take the right stuff, which sometimes I manage but quite often I don’t. So one of my specific makes for this year will be to make myself a ‘take to’ sewing case to hold the things I need, and for that to either have duplicates of items, or specific spaces for things so it’s easy to work out what I need to grab before I go.

I saw the kind of thing I was after in an email newsletter some time last year. I knew it was a project for me as not only did I print the pattern and buy the supplies I didn’t have (which have been patiently waiting for me to get started), but I also planned how I could customise it to work for me, that’s likely to include at least another pouch, and potentially a thread catcher too.

I have the perfect material, and even better it’s already in my stash - it came from India, and seemed to fall into my basket when I was buying some printing blocks, like these things do!

3 A bag or two, or more

While I’ve plenty of those now seemingly ubiquitous canvas tote bags, sometimes I want something just a bit nicer to carry with me, so tote bags are on my list for this year and no doubt in a variety of sizes.

Alongside the totes I’ve also a few more specific ideas on my mental list, these include:

  • storage bags for our garden cushions, though this could be a mammoth task as the number of cushions to store appears to be ever growing (plus I think I may need to make some more cushion covers as well),

  • that drawstring bag for my Essex Linen kisses colourwash picnic rug,

  • a better sized pie carrier,

  • something to store the jelly strainer and associated paraphernalia that’s prettier and more practical than the cardboard box it came in.

4 Experimental and sewing for fun

This comes from an observation from my sewing last year which was very structured and dominated by the ‘stretch’ project and mystery block of the month quilt, and also from a quilt show and stash sale I went to where permission was granted to ‘sew for fun’ and for there to be ‘no set rules.’ I’ve no real idea where this will take me by the year’s end, but initial thoughts include:

  • testing new blocks, processes and materials and hopefully making something with whatever I make - actually I’ve already been playing with this, so look out for a post hopefully later this week,

  • picking up again my ‘insect and gauze’ embroidery and finishing that - the name will become clear when I share more, I promise!

  • a slightly wacky idea for using my ‘leaders and Enders’* - though I’m sure this will be much later in the year, as I need to build up ‘stock’


    *these are the pieces of fabric I use to start off sewing when piecing patchwork, which just make sewing more continuous than having to cut the thread each time.

5 Patchwork design boards

These may not involve a whole lot of sewing, but they will help me layout my patchwork blocks so they can be moved more easily. I also think they should be easy to do, so I’m not sure why I haven’t done these yet - apart from the fact that I’ve managed to store what I need for these outside of my craft room, so I think it’s a case of out of sight, out of mind.

6 Some practical household items

I know, but I’m hoping these won’t be as dull as I’ve just made them sound - on this list is recovering a headboard and making a doorstop from sample fabric.

7 Wearables

Now this is a big one, and I’ve squeezed it into a single heading which may come back to bite me when I come around to my regular updates, or maybe it won’t - we’ll see.

It’s also lengthy, and while I did make a dress last year I haven’t made many clothes, as yet. I do however keep buying material for clothes as if I’m an exclusive fashion house, so the sewing needs to start.

On my list to make is:

  • more versions of the dress I’ve already made, so far I’ve fabric for two denim dresses and one corduroy one, so that’s likely to keep me busy alone. But on the plus side I’ve already made one, so hopefully that will speed things along once I get started, and I do enjoy wearing the one I’ve made.

  • some wide legged culottes - at least one pair, especially now I have an invisible zipper foot after a sourcing saga.

  • a summer-weight dressing gown for both me and MOH using saris. I have the saris, and I’ve even cut mine out, I just need to get brave and start sewing.

  • I’ve a sundress pattern I want to try, as well as a dress with a frill - plus a more structured linen fitted dress, for when my skills have advanced.

I’ve also got a longer term wish to make myself a quilted jacket, but my list is already long and time is short, so who knows how far I’ll get. I most likely won’t get anywhere near to finishing this list, but then again the accountability a list gives me could be just what I need - along with some sewing bravery - hopefully once I start I’ll build some momentum.

I hope you’ll hang around to see how I get on as I share progress (or lack of) throughout the year.