A new 'take to' sewing machine and more pouches

I mentioned back in July that I’d got myself a new ‘take to’ sewing machine, which may seem strange given that at the start of the year I’d treated myself to a new Bernina. But the Bernina is too heavy to move very often, so that rules it out to ‘take to’ twice monthly sewing group meetings, and any ad hoc workshops.

My plan had been to use my very old Toyota sewing machine for this, but thankfully I tried it before I took it anywhere. I knew its plastic was yellowed, and that it hadn’t been used in a very long while so I thought I’d re-familiarise myself with its controls and so on before taking it out.

Just as well I did, as it wasn’t happy about being neglected for so long.

It worked - and had recently been PAT tested - but it didn’t work at the same time. There was power, I could wind bobbins, but the actual sewing bit - nope. Just up and down, not up and down and along, which is what you need. So that scuppered that plan.

Given that I’m now au-fait with buying sewing machines - in truth I have found a good and trusted dealership - I thought I should invest in a ‘take to’ sewing machine. One that sews properly, doesn’t have all the bells and whistles, but does enough and is light enough to ‘take to’ sewing meetings and workshops. So off I went with a budget in mind.

Shock, horror. I was persuaded to spend less than my budget (which I’d already played down) by the dealership. And so I took that advice, and as I knew this one would be out and about I also bought a bag to carry it in while I was there. This new machine has now been to four sewing group meetings, it’s been to the Monday evening sessions and the Saturday morning ones (which I used to skip) and we’ve had a grand old time getting to know each other.

Getting to know my ‘take to’ Singer

I wanted to make some small and already known items to get to know my Singer, and as luck would have it I’d already run out of that stash of pouches I’d made the year before. I don’t know where they go exactly, though some have made it out of my sewing room into travel bags and others have found themselves full of sewing paraphernalia.

So it was time to make some more.

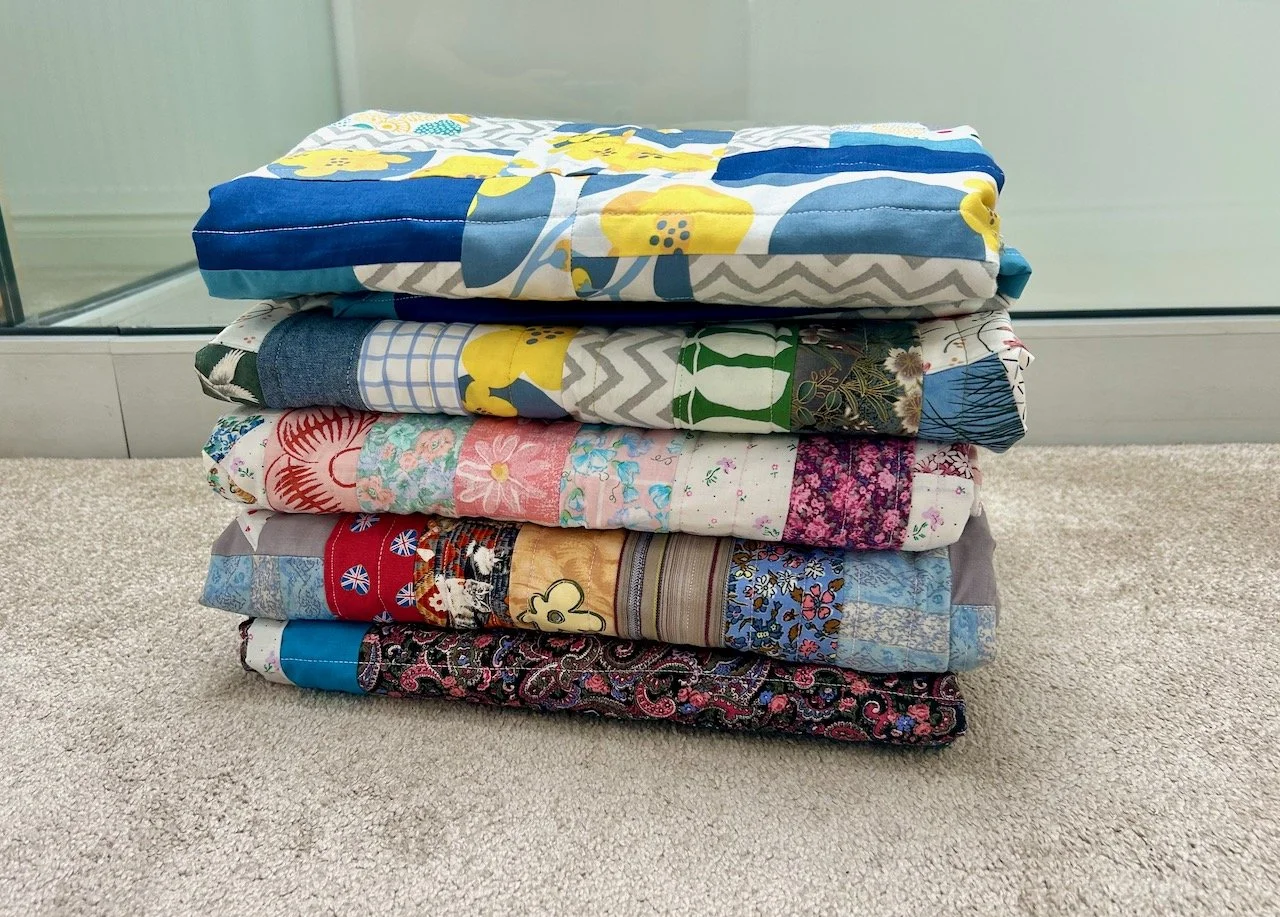
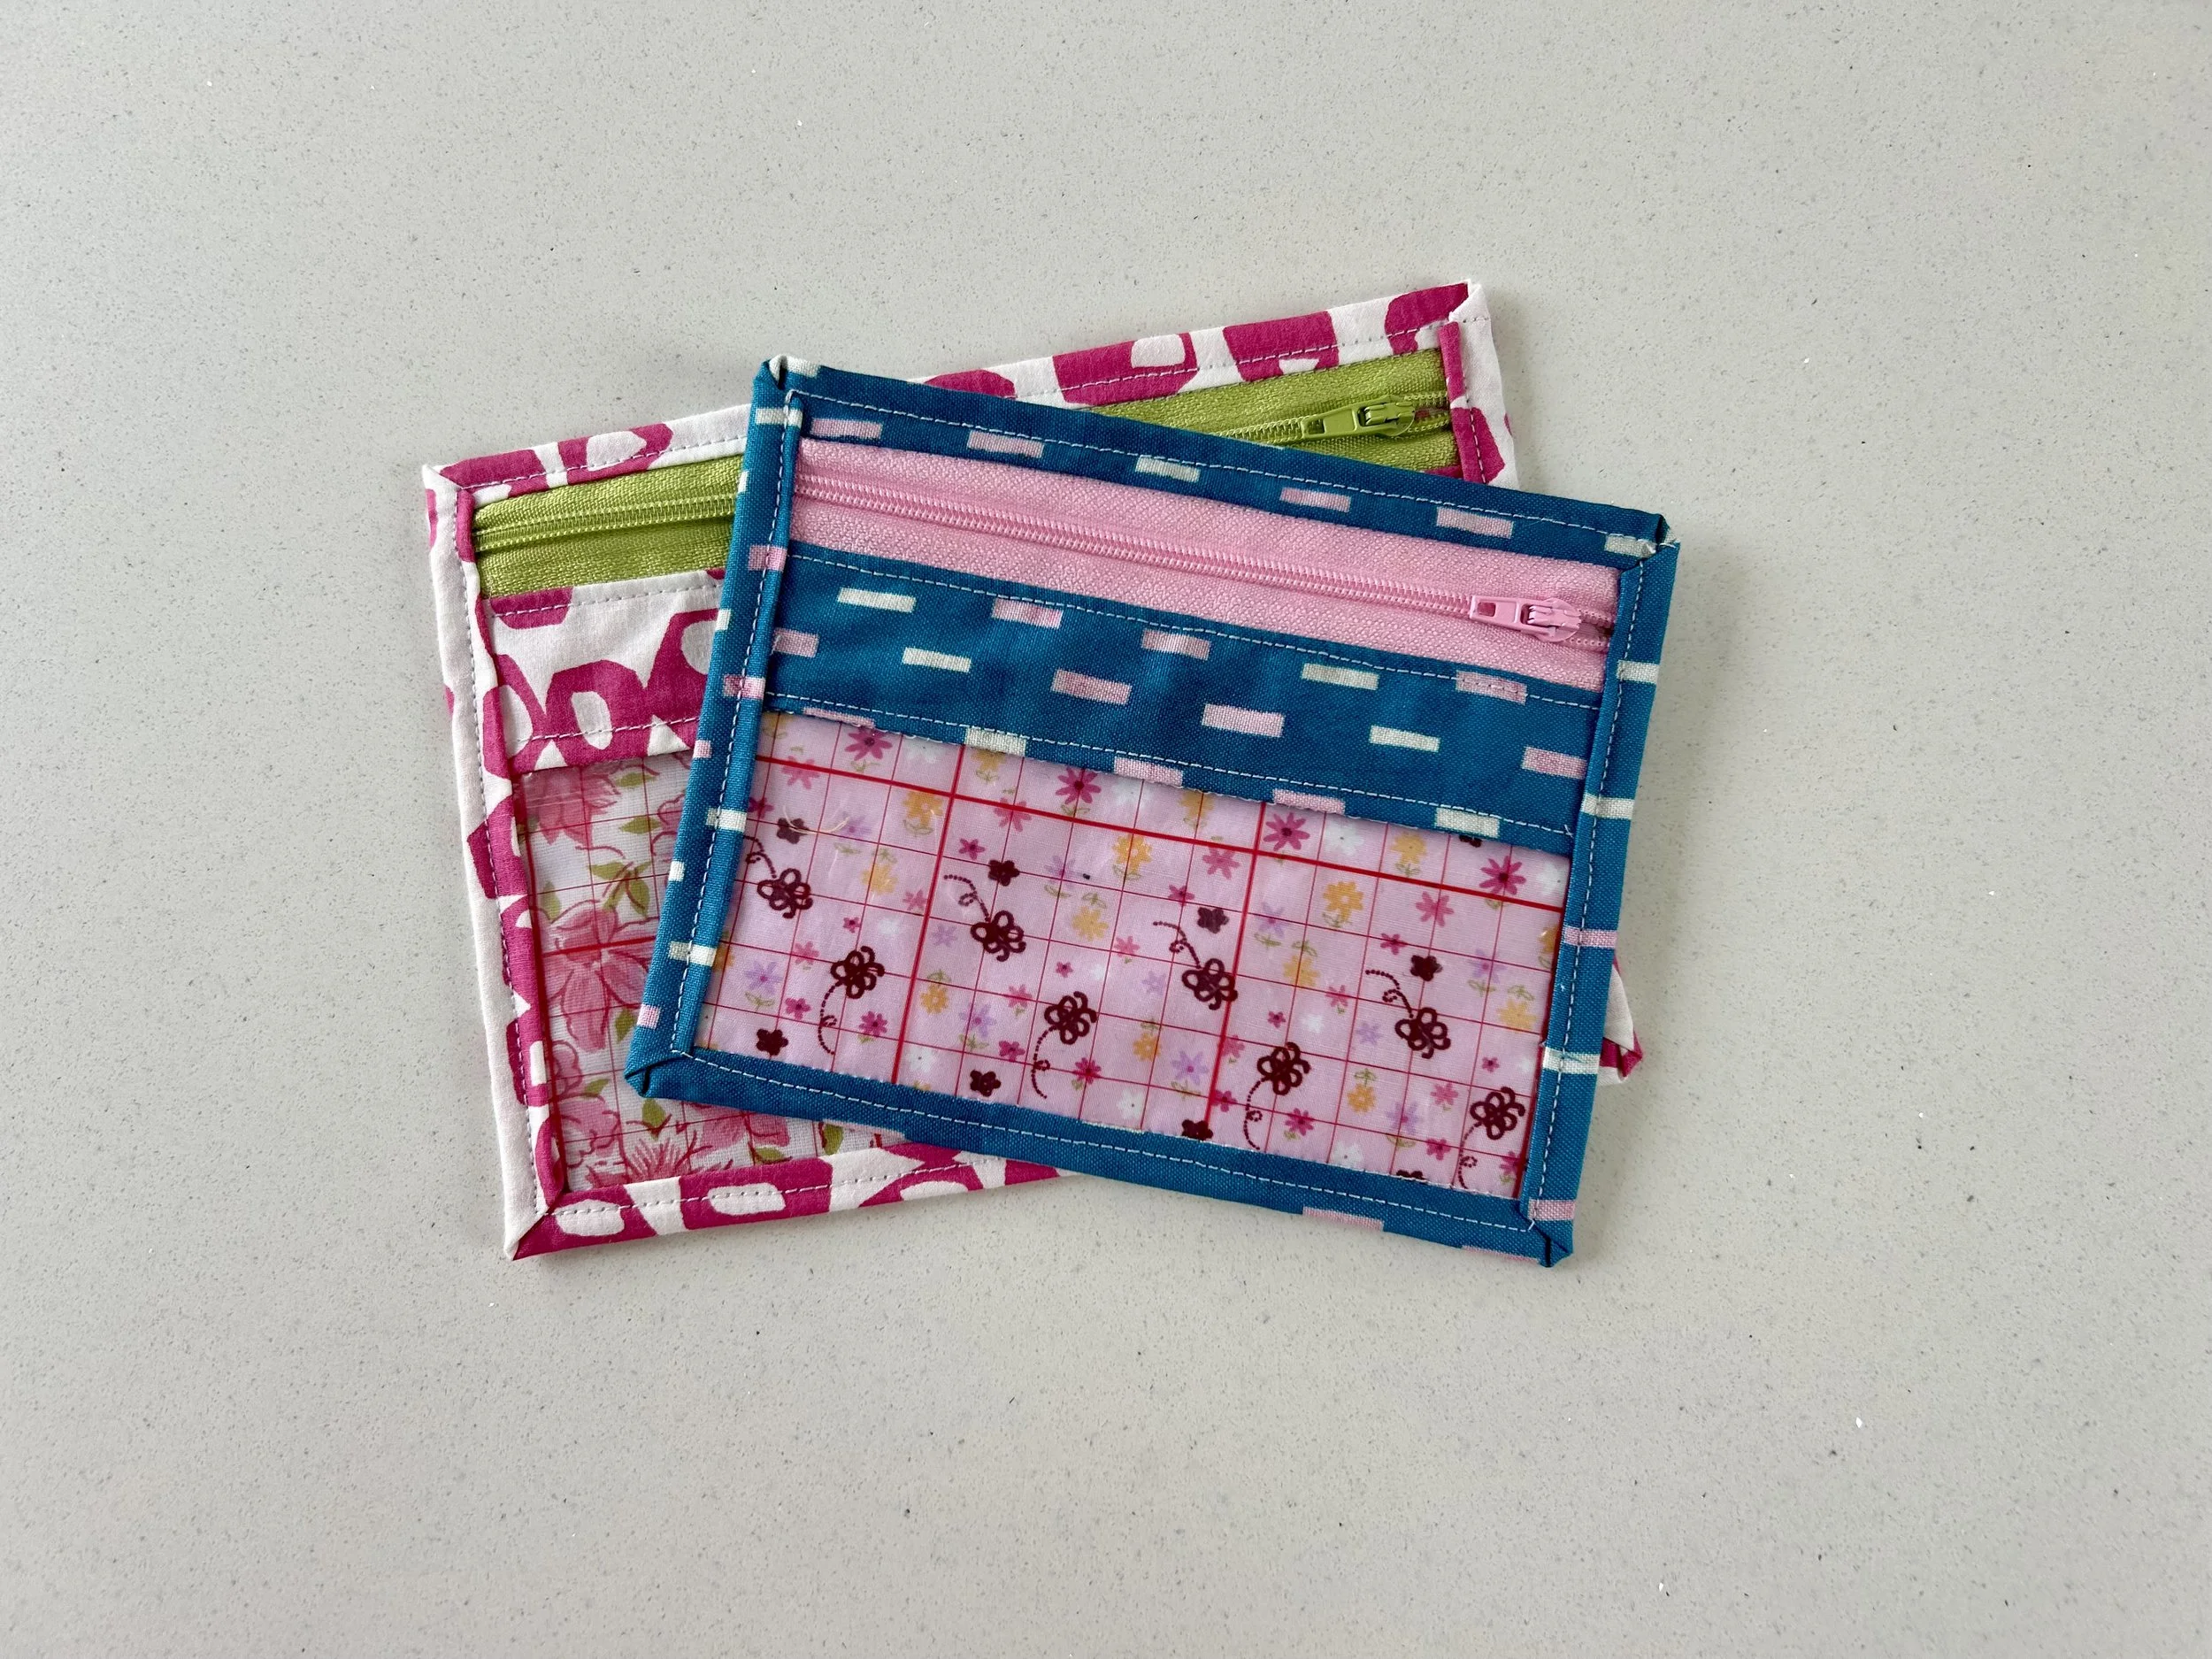
It’s taken about three sewing sessions to make my new pile of pouches, that’s alongside the chat, the tea and biscuits and time spent admiring other people’s projects, but let me show you my latest stack of window fronted pouches.

A pink and white patterned pouch with a lime green zip
On top is a blue and pink patterned pouch
On top is a teal and sunshine yellow pouch
Another yellow pouch, this one with orange skull patterned material behind the vinyl window
A small black pouch with blue 'bobble' flowers - contents in the pouch is a small cleaning brush, clips and an unpicker

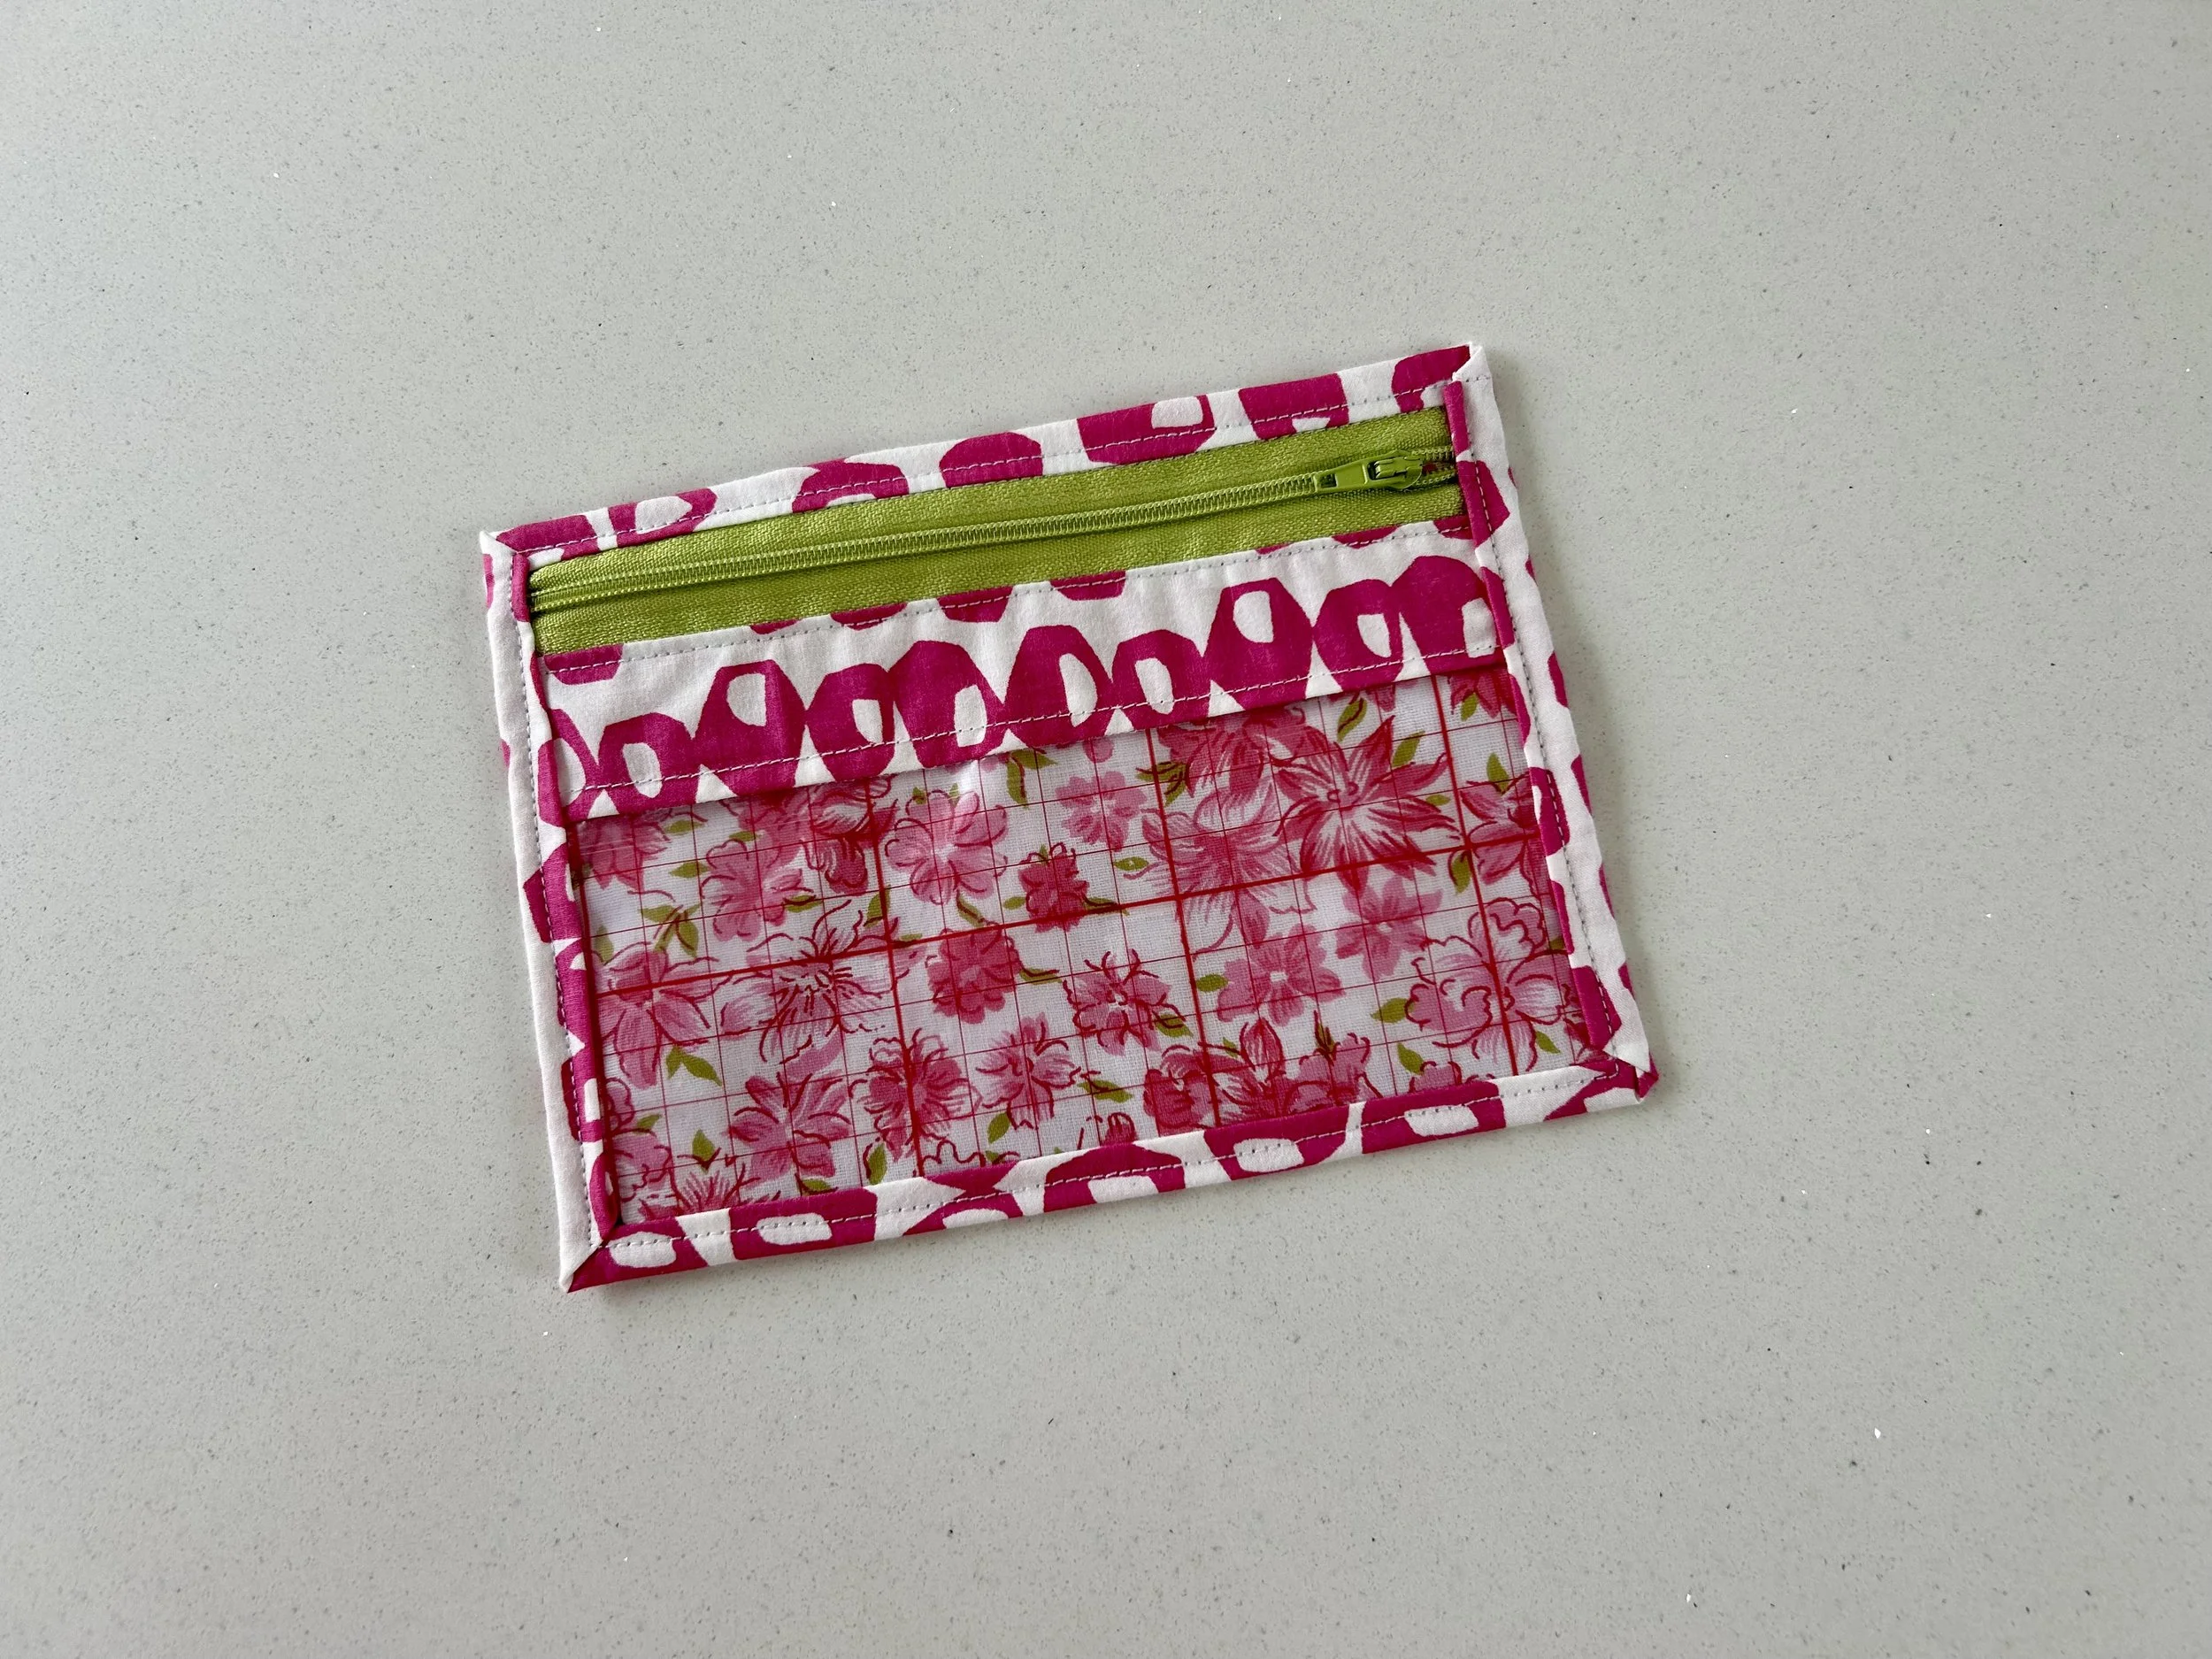
THIS ONE WAS IMMEDIATELY PUT TO USE TEMPORARILY

A longer blue pouch - gingham and flowers together with a pale blue zip
dressmaker's scissors on top of the long blue pouch

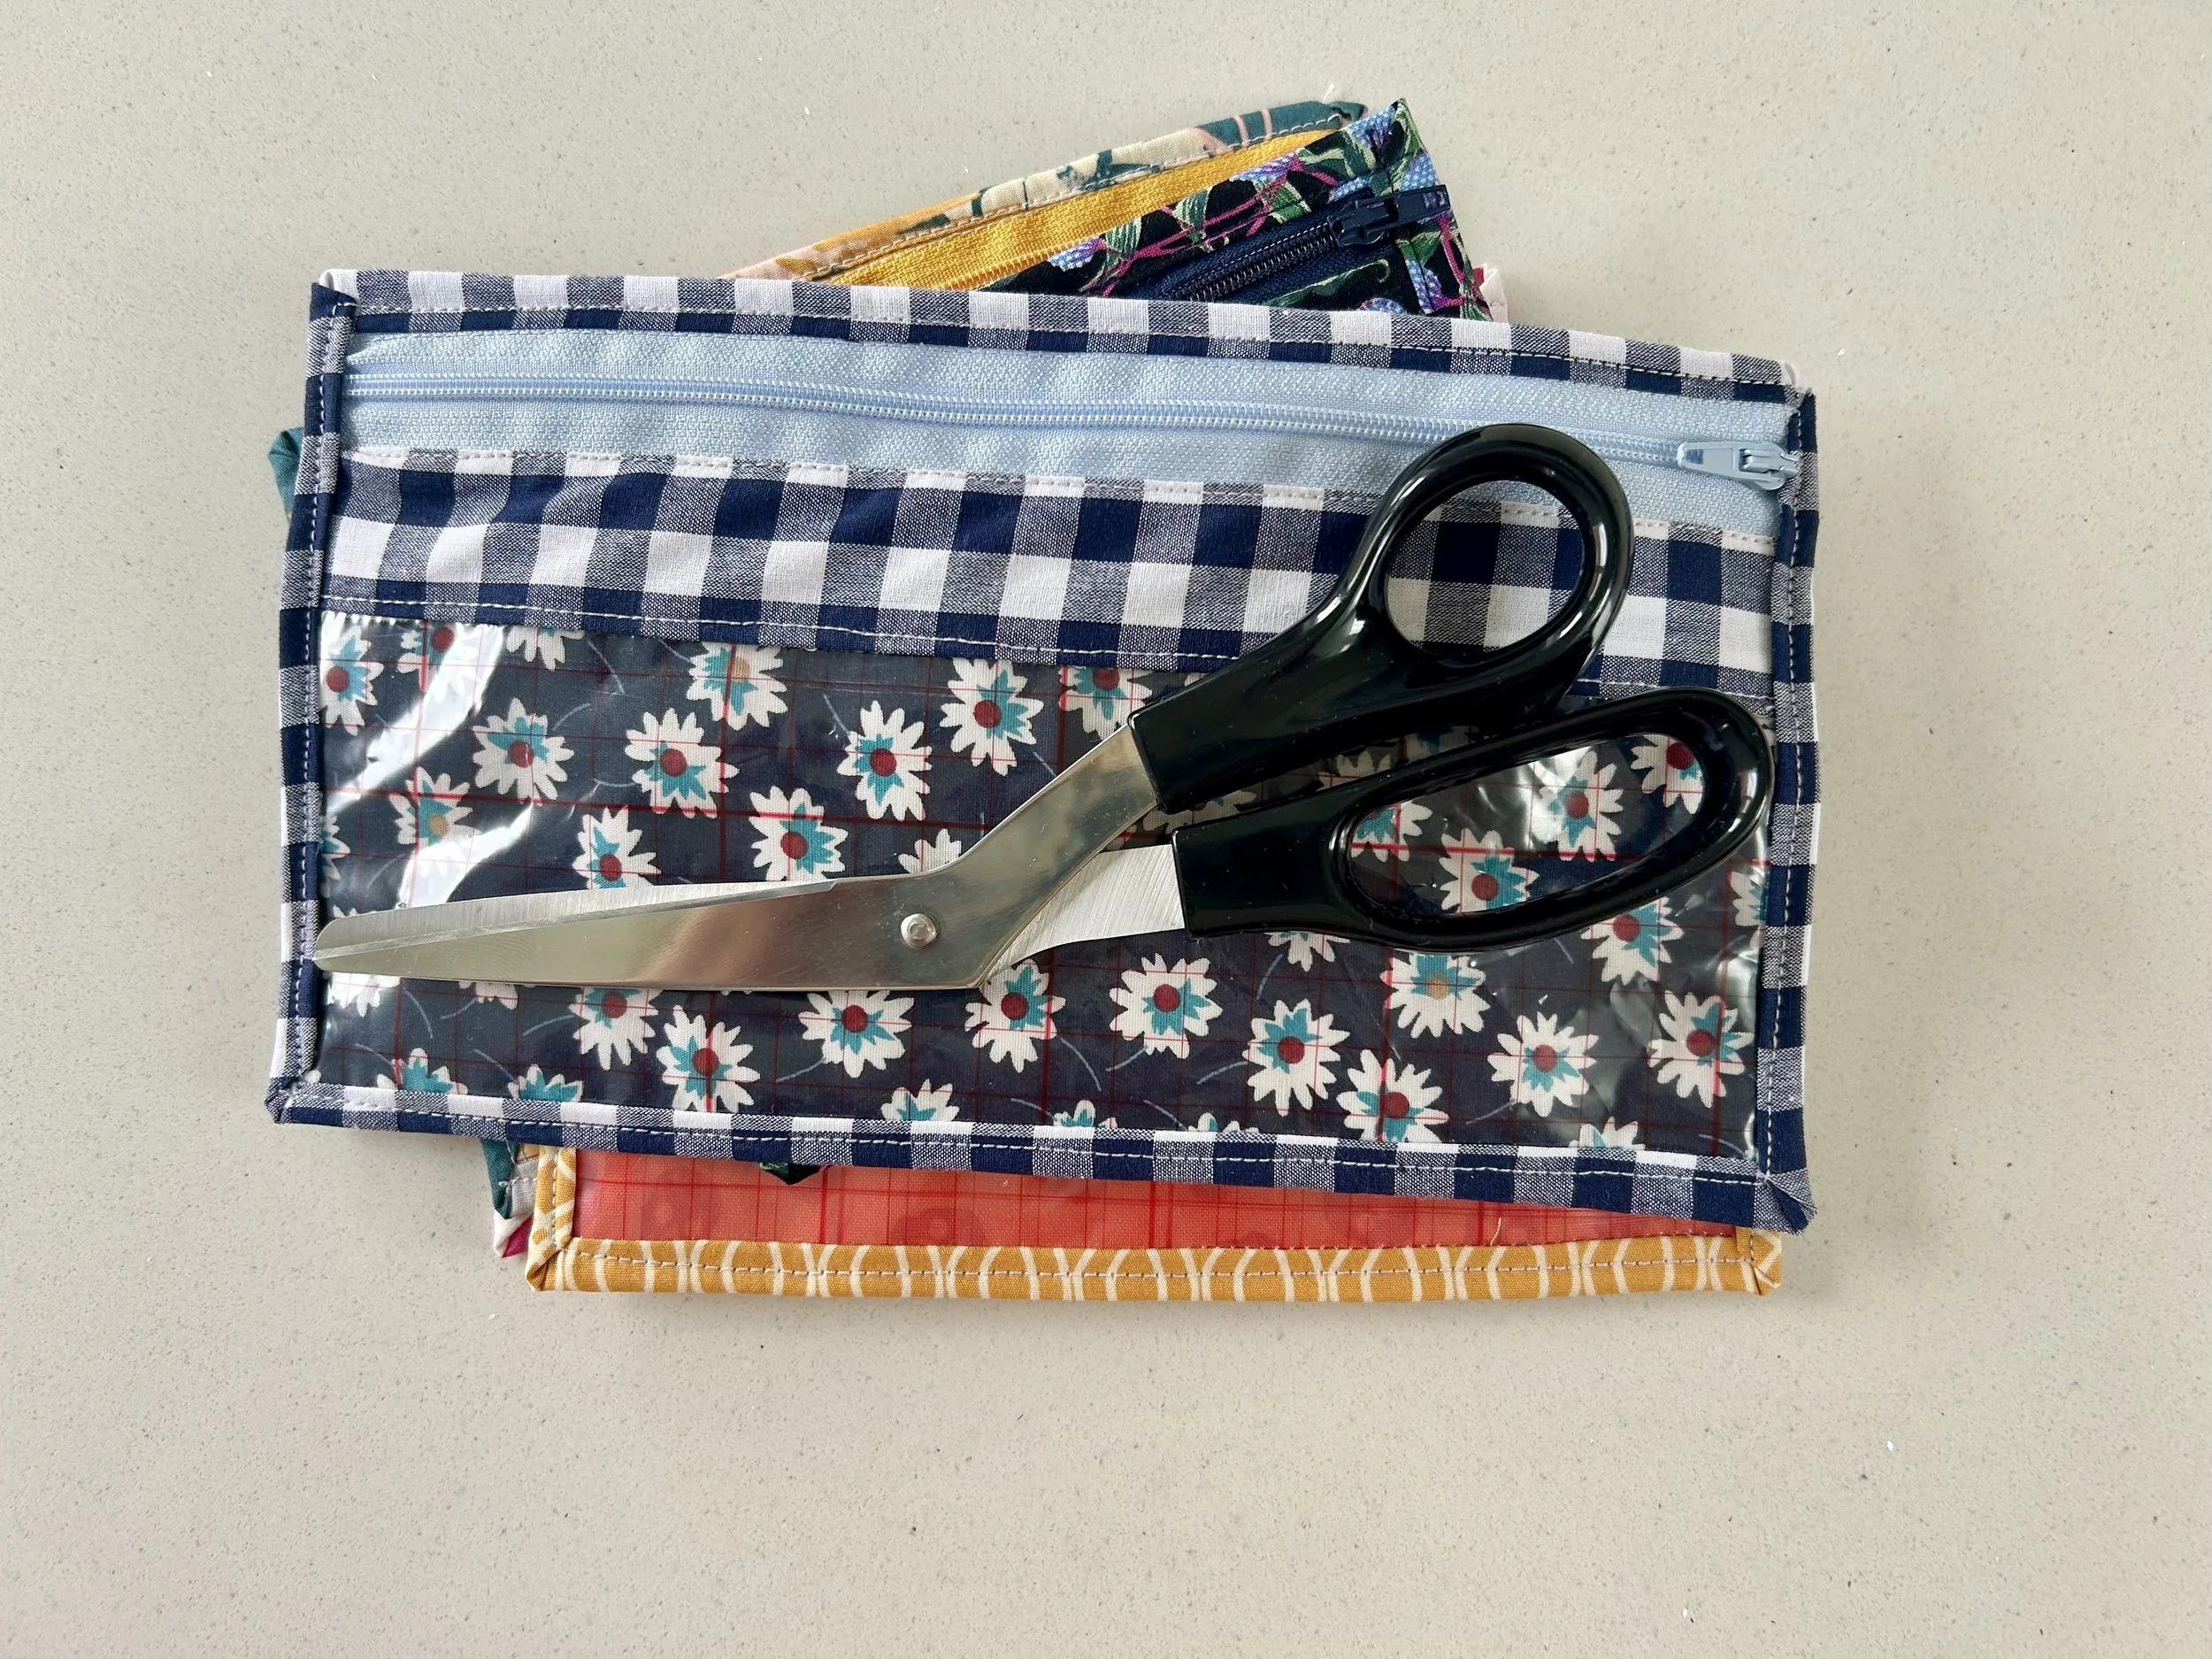
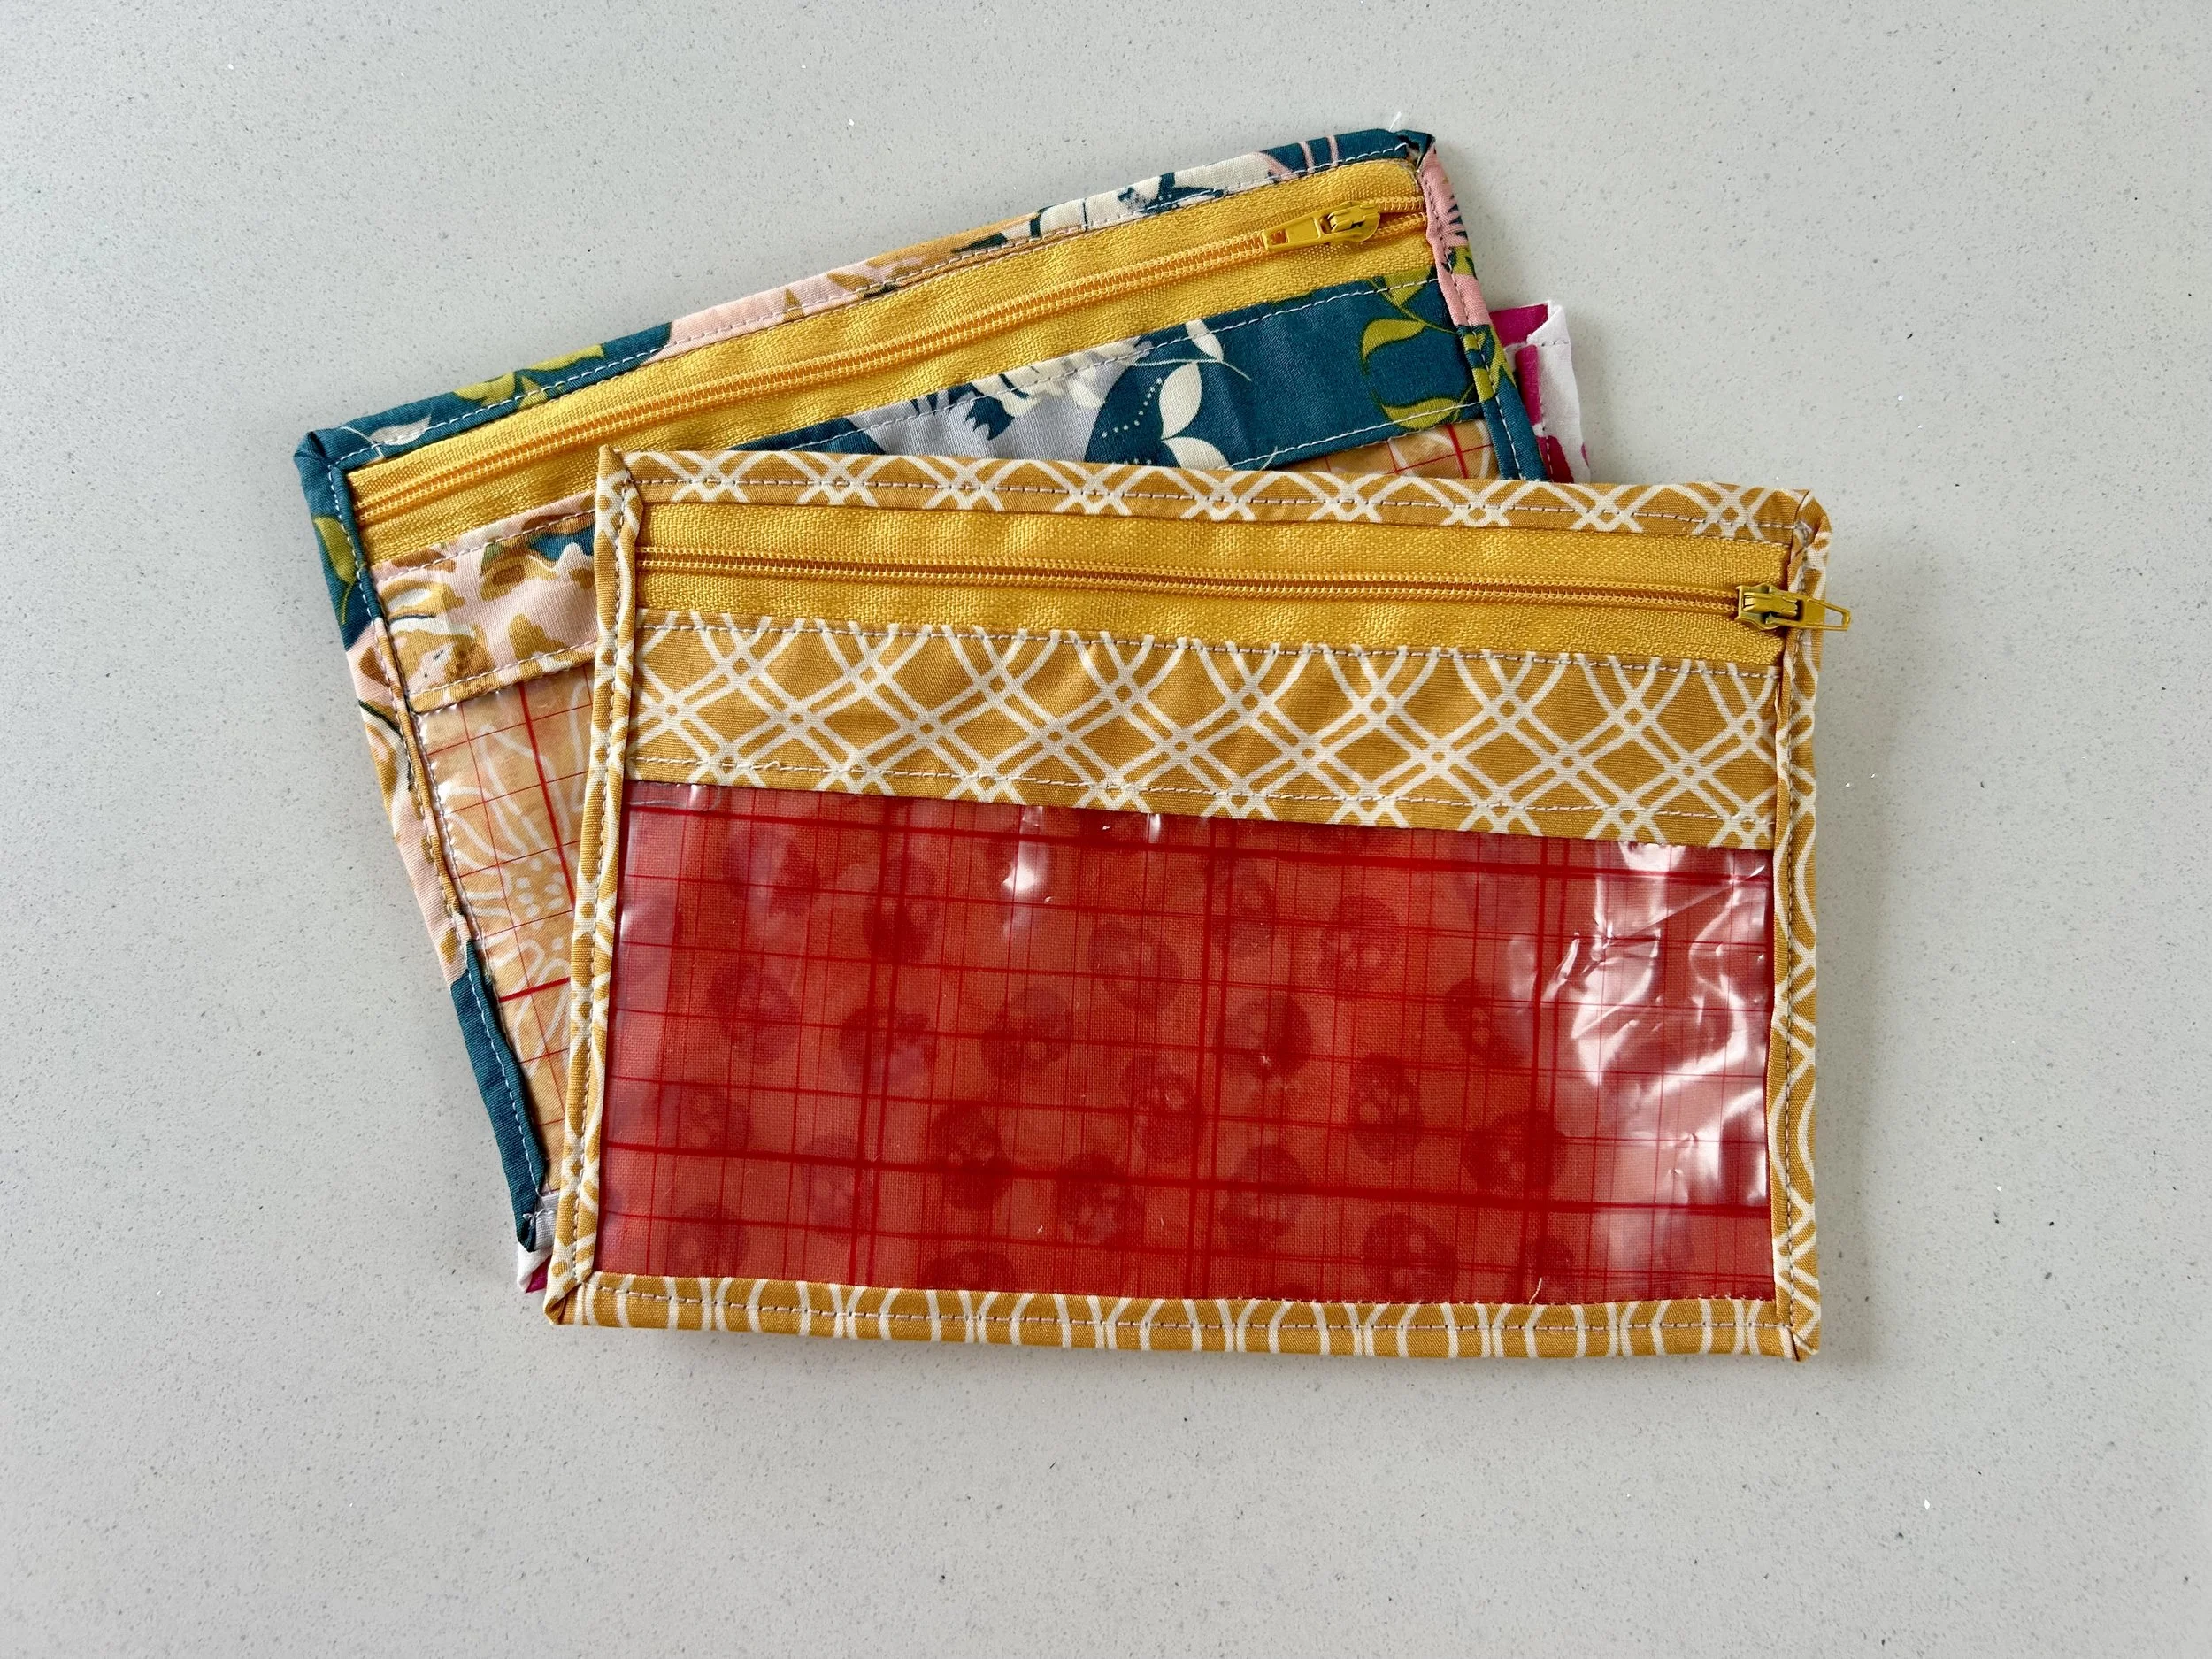
AND THIS ONE WAS MADE WITH A SPECIFIC PURPOSE IN MIND

A smaller pouch on top with bee fabric on the outside and bright yellow interior
A cerise inside with navy multi pattern 'firework' type blooms

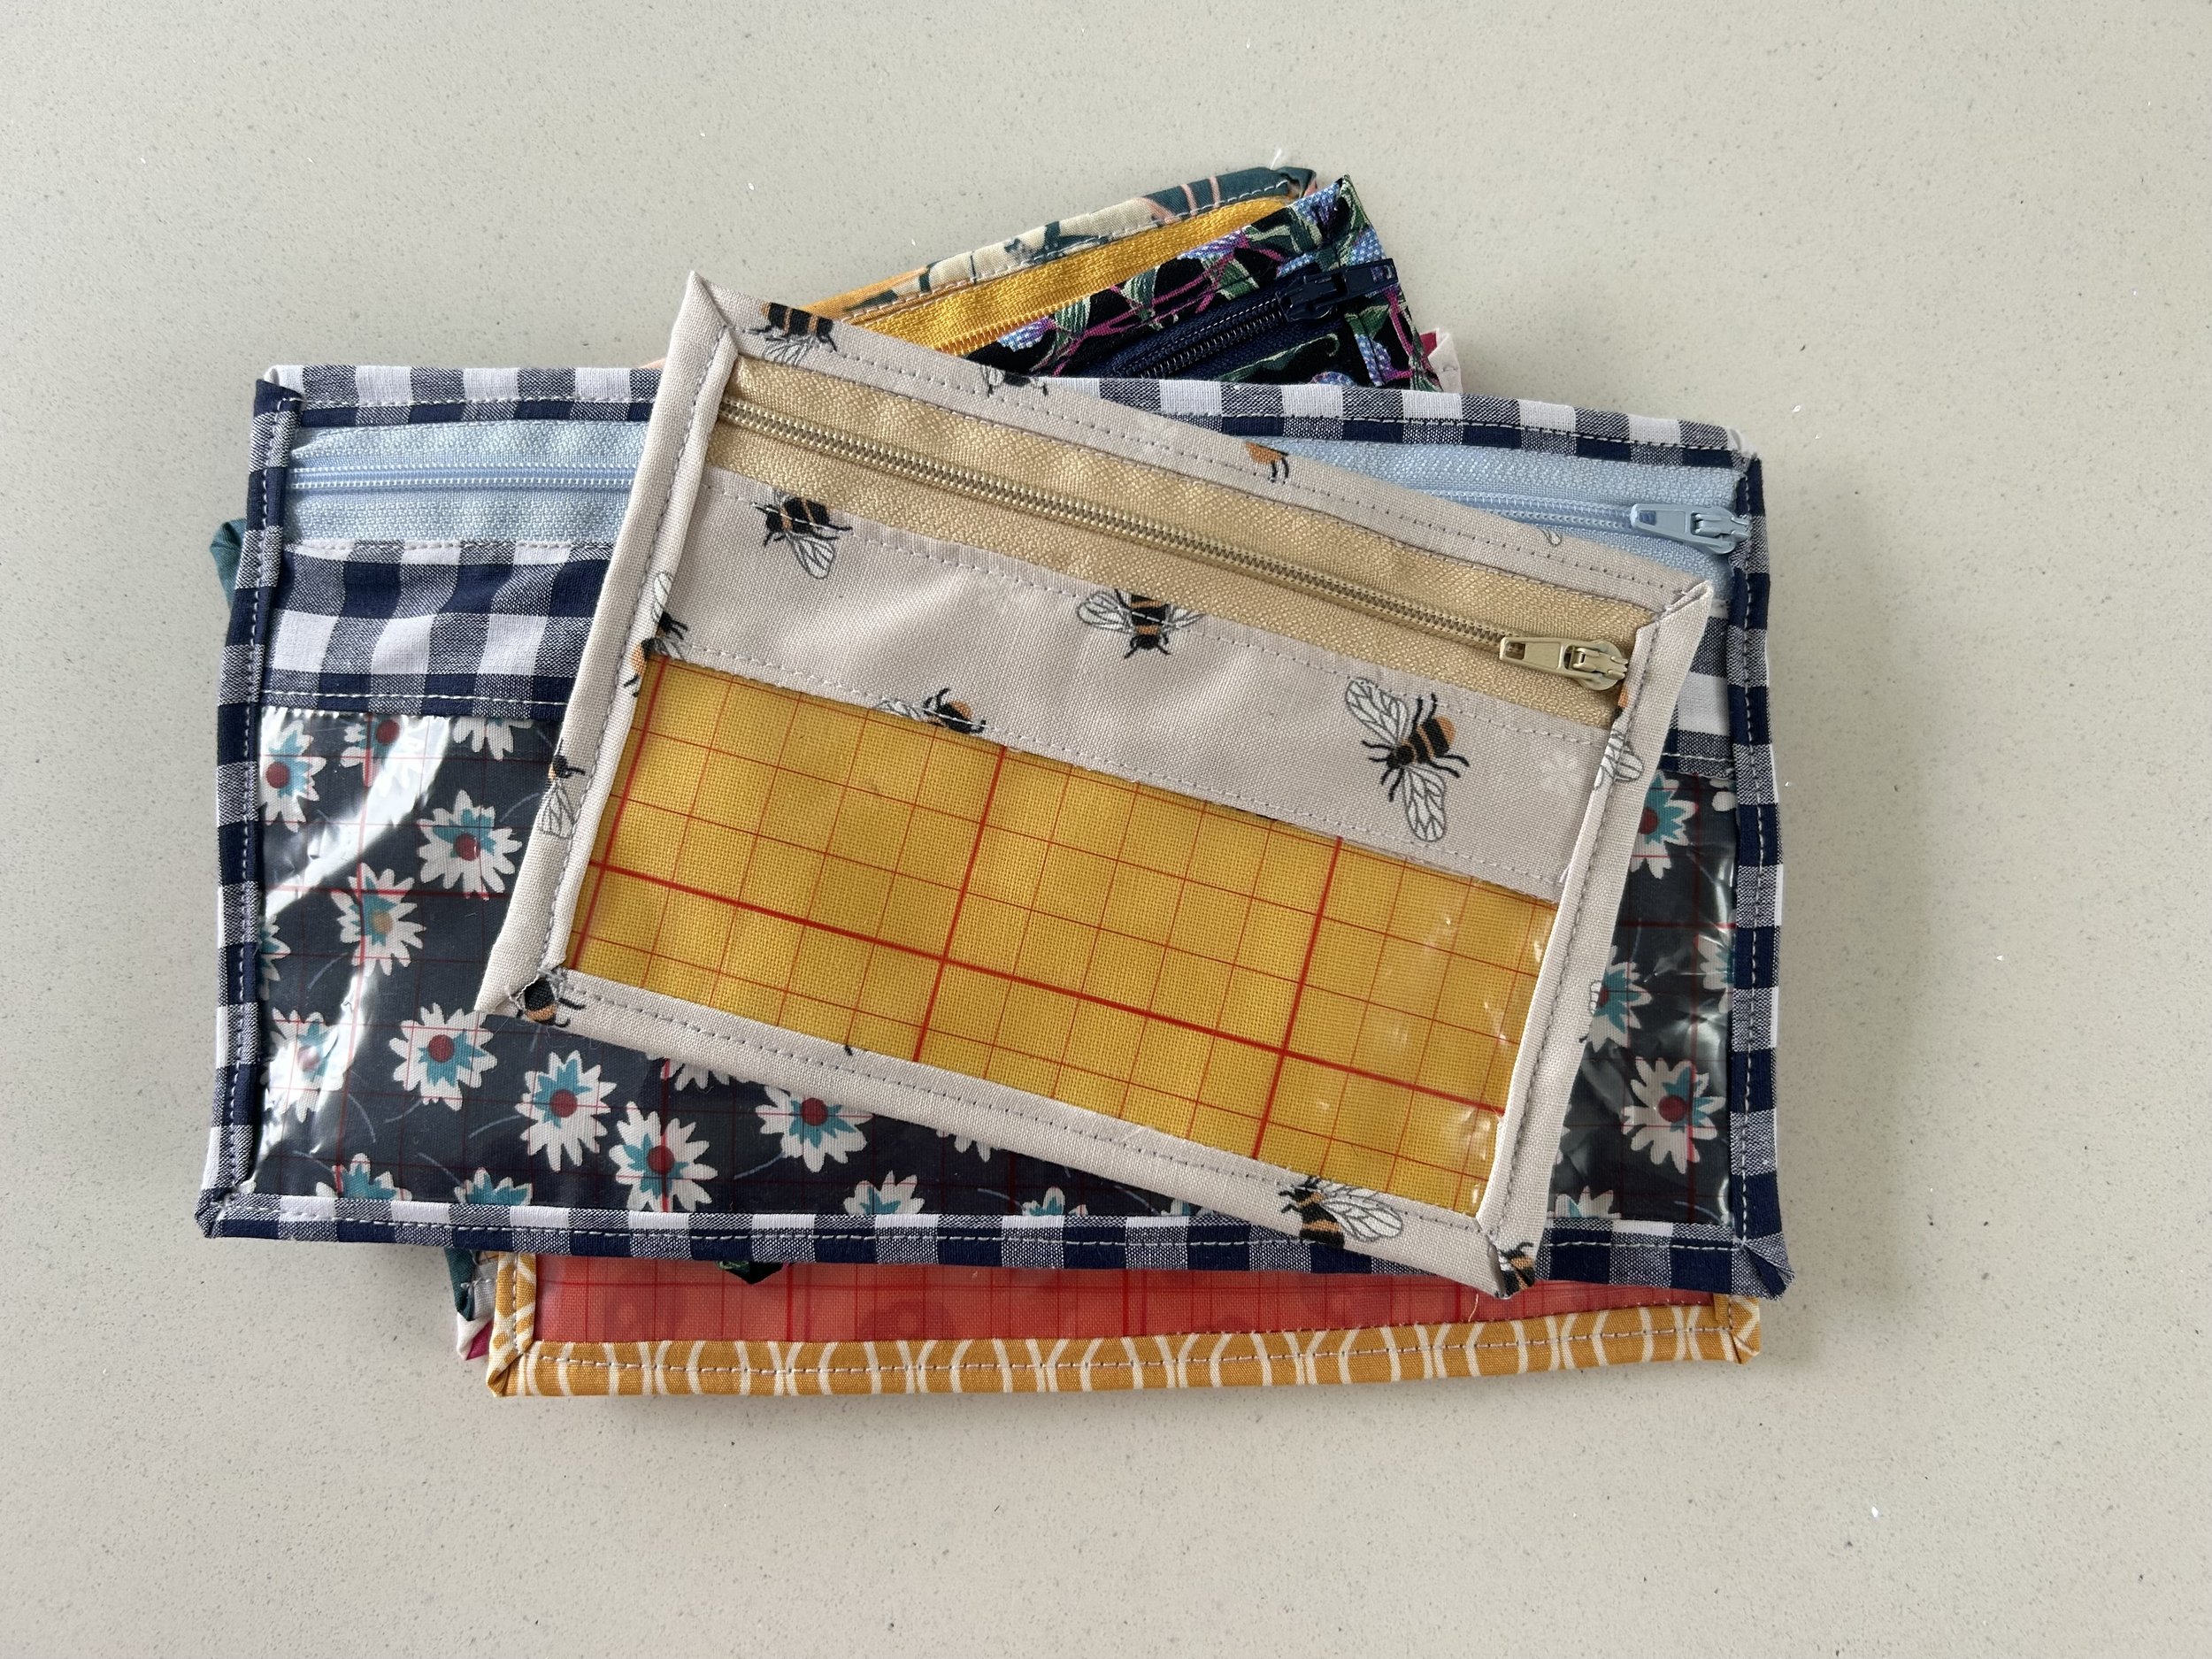
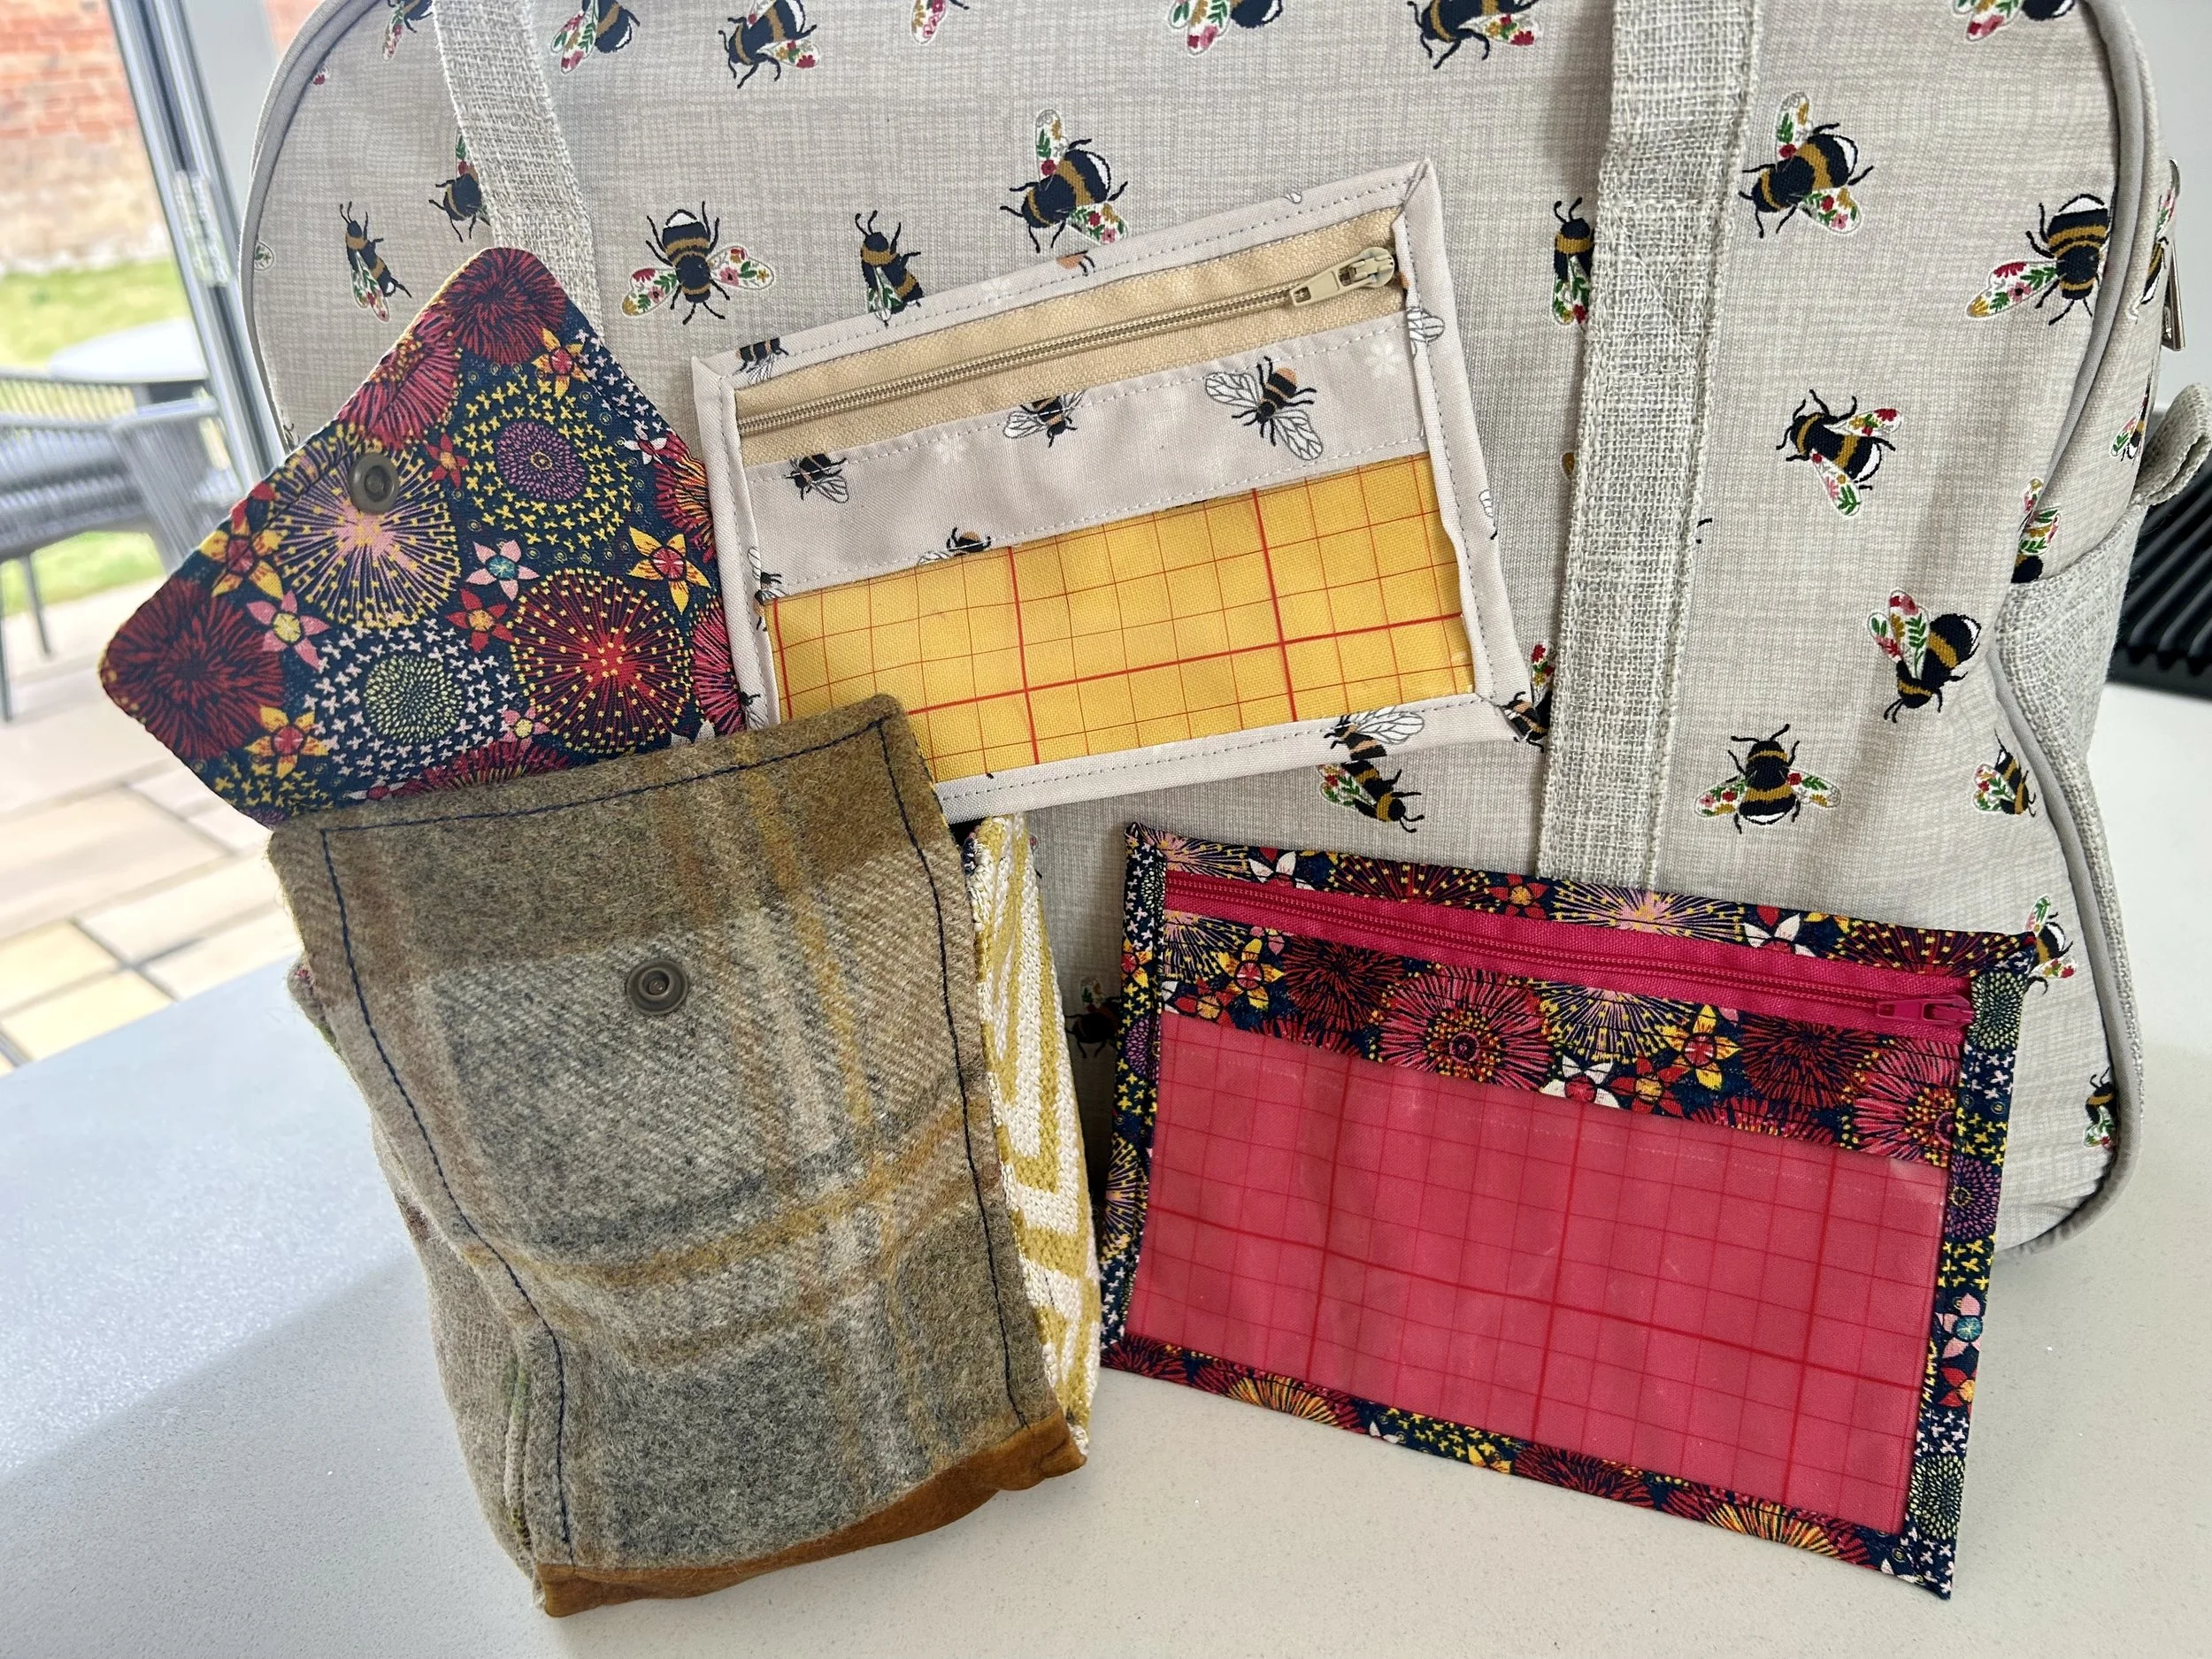
As well as making a new sized pouch for my scissors and rotary cutter, I made a couple to match my sewing machine bag and the velvet box pouch which I made for the foot pedal. With these I’ll look most coordinated when I venture out!

In the background the swing machine bag - a beige fabric with bees, three pouches in front - two vinyl windowed with the bee material and firework type bloom pouch.  Also is the velvet box pouch which has the firework type bloom lining on show

I’ve a couple more projects planned specifically for my ‘take to’ machine’s sewing bag - mainly so I don’t forget the essentials when I go (as I have already!) and I’ll share more of those when I actually make some progress. So far I’ve gathered the materials I need, and even eaten a tube of Pringles in preparation, but I need to find some time to plan it out properly before I start. And then hopefully there’ll be no stopping me!

I also need to look for my next ‘take to’ project, or decide if I have projects just for the ‘take to’ machine or move current projects between the two machines. I guess that will come with time, and may even depend on what I’m sewing and how far I’ve got, but it’s nothing insurmountable is it?

Birthday bunting, a year on

Last summer we celebrated my dad’s 90th birthday and to mark the occasion I made some bunting. I’d printed the individual flags much earlier in the year at the Indian Block Printing course at our local library. Even then I was clear that a traditional ‘happy birthday’ banner was a lot of work - and would need a fair amount of space to hang, and I wanted something smaller.

In the end I settled on five flags, spelling I am 90 - and both the embroidery and assembly were finished way ahead of our family celebration, which was a relief - and almost felt like it was planned.

A pile of printed and embroidered bunting - on top and I in a heart

Which of course it was, but isn’t it great when a plan comes together?

The I am 90 bunting hanging in my house

Earlier this summer dad had another birthday, and so I thought I better provide an update, but without access to the same Indian blocks it would have to be different, so I decided to make it very different.

I’d picked up a large bag of buttons at my Sewing Group’s stash sale (along with the Vogue pictures, which are currently being framed) and more amazingly was able to remember where I put them and so lay my hands on them easily.

I’d drawn a 1 on a plain piece of fabric, and marked out the edges of the triangle which would form the bunting, and then played around with how the buttons would fit into the figure.

Trying out buttons to fill the pencilled 1 shape

And once I was happy with that, I took a picture to remind myself of what I’d settled on, and set about sewing them on pretty much in the same position. It wasn’t exactly the same, but it was very close.

The last button - the tiny white one at the bottom right - didn’t seem to fit where I’d had it, as no doubt other buttons had moved slightly, and I toyed with the idea of leaving it off altogether. But in the end I added it close to where it should have been in my plan.

A 1 flag made from buttons sewn onto a triangle, which is edged with fancy stitching from my sewing machine

To hem and finish off the bunting I used a navy thread with a fancy stitch on my sewing machine - they look like Christmas lights to me, or ice creams in cones if you look at them the other way up.

Anyway, job done.

And that odd little button, well - it seems it was supposed to be there. Dad, who was half expecting an update to his birthday banner asked if I’d included that number of buttons on purpose. I hadn’t, but it turns out the number of buttons I’d used was the same number as dad’s birth date. I almost wish I’d thought of doing that myself, but seems that fate managed that all by itself.

How fortuitously weird, huh?

Nick Bailey's Plant-Based Garden

* I was invited to this year’s Gardeners’ World Live and provided with a pair of tickets to the show, therefore all my posts will be marked as 'Ad’ though as usual my views and opinions are very much my own.

I said in my highlights post from the show that I was looking forward to seeing how Nick Bailey would incorporate the #MakeAMetre matter initiative into his garden, and how successful it was and today I’m sharing some of the many pictures I took of the garden.

Dense prairie style planting in the foreground with the seating area in the background
Three instances of the dark roof shaped structure repeating through the garden among the raised beds

The garden features a cluster of Douglas fir buildings and structures in the style of a traditional homestead, and it was the repeating shapes of the frames that made the garden such a success for me. They brought height to the space and their bold charred wood certainly brought impact.

The narrow bricked path forming a 'central corridor' through the garden's planting, ponds and seating areas

The buildings included a Burnt-Out Barn with grape vines overhead and dining below, the Brassicarium for protection for edibles, and the Roofed Barn seating area (below) which overlooked the ponds and a meadow-matrix perennial grass planting. And if you look closely there’s patchwork throws over the chairs too.

The open but covered seating area with cosy chairs, patchwork throws and a game of chess
Lush green planting growing alongside one of the buildings softening its shape

Long term readers will know that I like a structured and ordered veg plot, but never have I heard of a Brassicarium, and I wish I had - isn’t it a great word?

The brassicarium complete with kale and cabbages
The vegetable raised beds but with some plants - such as a bronze fennel - growing in the path

I liked that the planting was at different levels, and even the raised beds varied in height which I think helped this garden feel more like an established garden. The other thing that was a nice touch was the plants that had ‘crept’ over their borders softening the paths.

Even the sage that seemingly had ‘escaped’ the show garden’s boundaries.

An escaped purple sage growing under the show garden's rope border

I was also a fan of the compost bins, though I’m not sure I’d have placed them this close to the dining area in a real life garden, but the open and stackable concept was good. So much so that I became a little obsessed with how they were built.

Two open compost bins made from squares of wood, with the dining area behind
Down at ground level looking at the construction of the compost bins

Looking closely and by poking a finger in the gap it seems they were simply stacked on top of each other. And that dark wood was newly charred as my grubby finger attested to!

They definitely gave me food for thought for my own garden, though they may be over engineered for what I need, but they do show that compost bins don’t need to be the ugly plastic daleks!

The view across the vegetable raised beds - from the compost bins

I loved this garden, and it wasn’t just the structures for me. The concept of one square metre, the dense planting, mixing edibles with flowers, the informality of it all made it a great space, and I hope it has a longer term home - it deserves it.

What do you think?

* With thanks to Gardeners’ World for inviting me to Gardeners’ World Live, it was quite a show! I’ll be sharing more from my visit to this year’s show throughout the year - I hope you enjoy them as much as I did the show.