Adding to my swirls

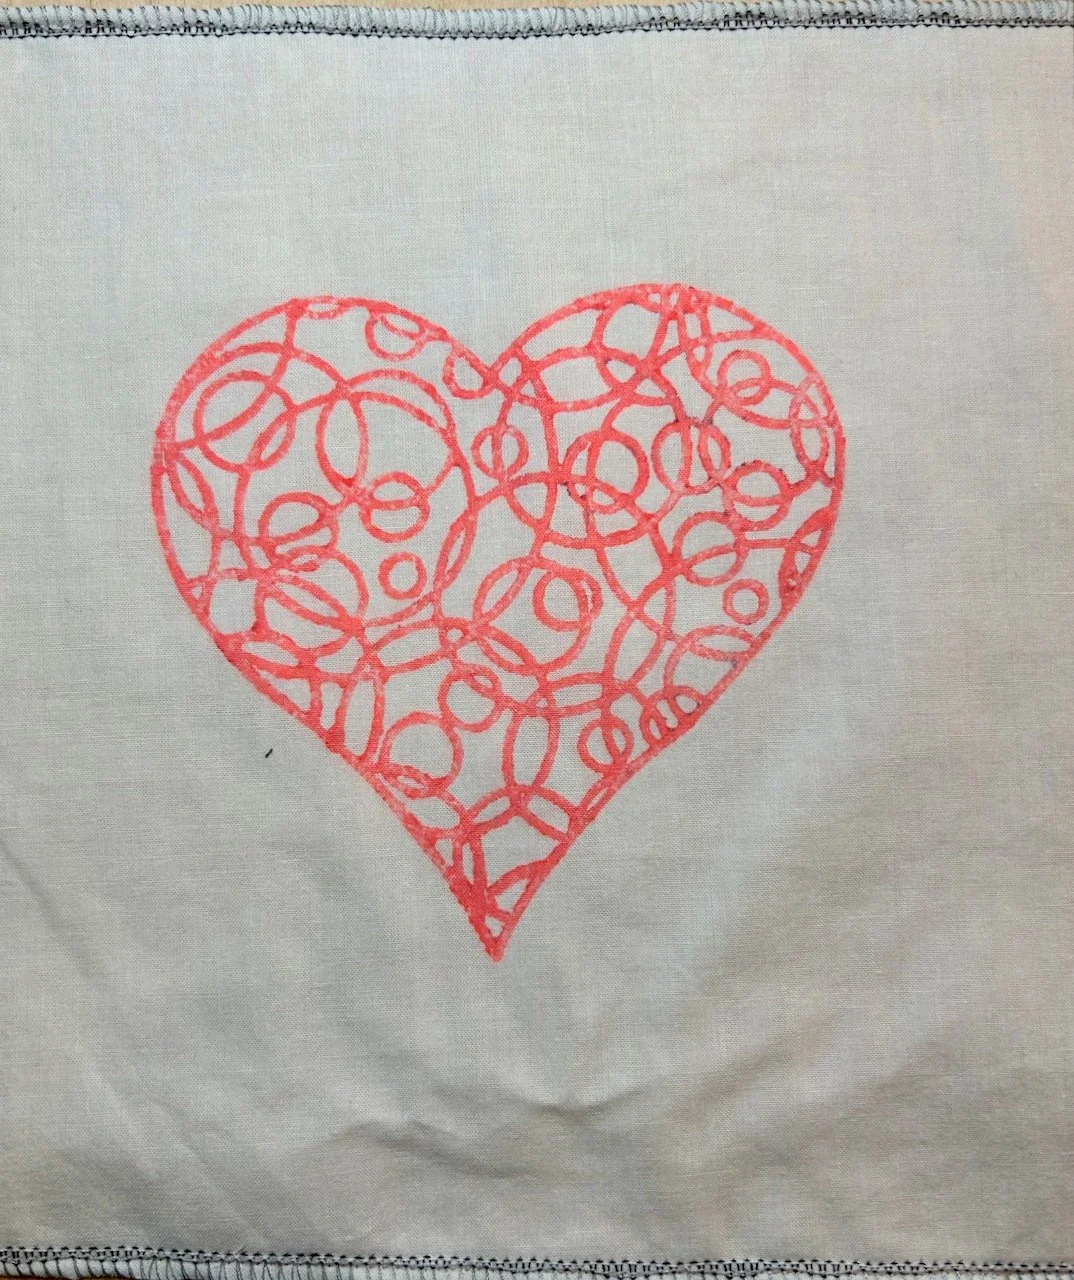
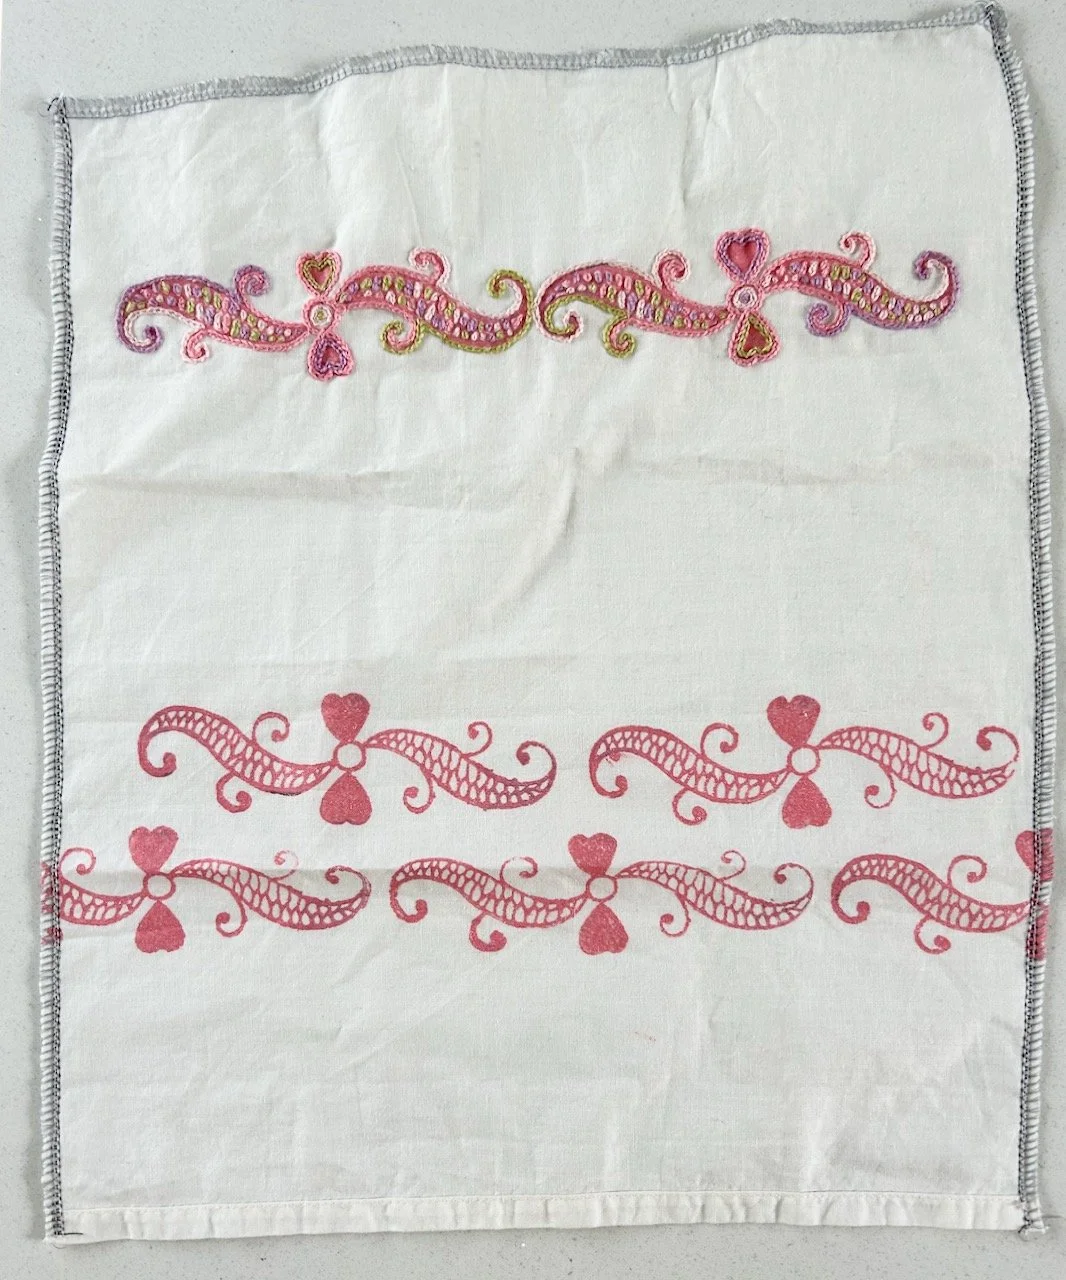
This Indian Block Printed piece has had quite an evolution; it was first printed back in 2024 at the adult learning course I took in Newark. Back then this is what it looked like, and it had plenty of potential.

Three rows of indian block printed swirl patterns, pink on a cream background

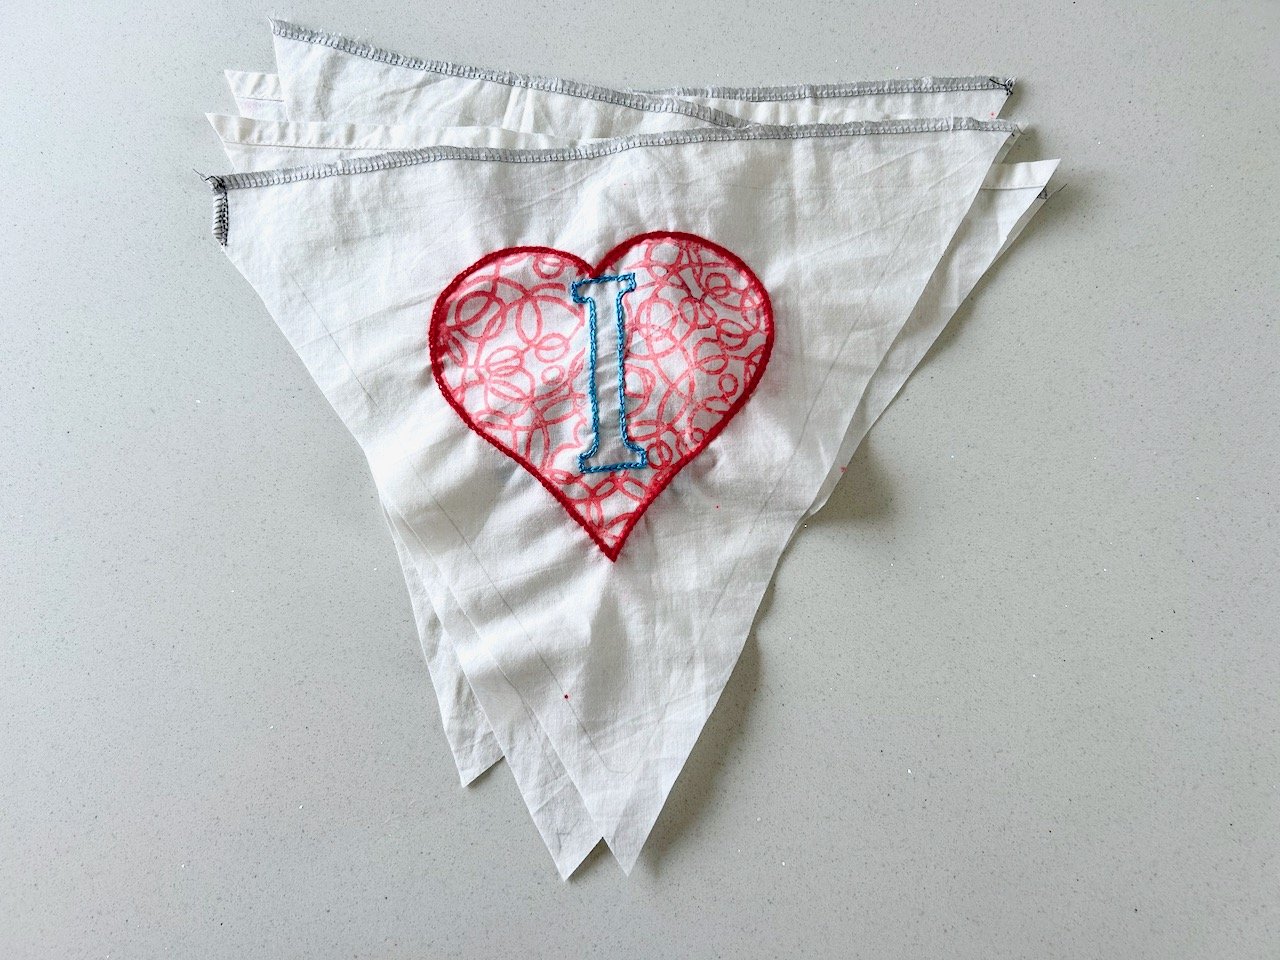
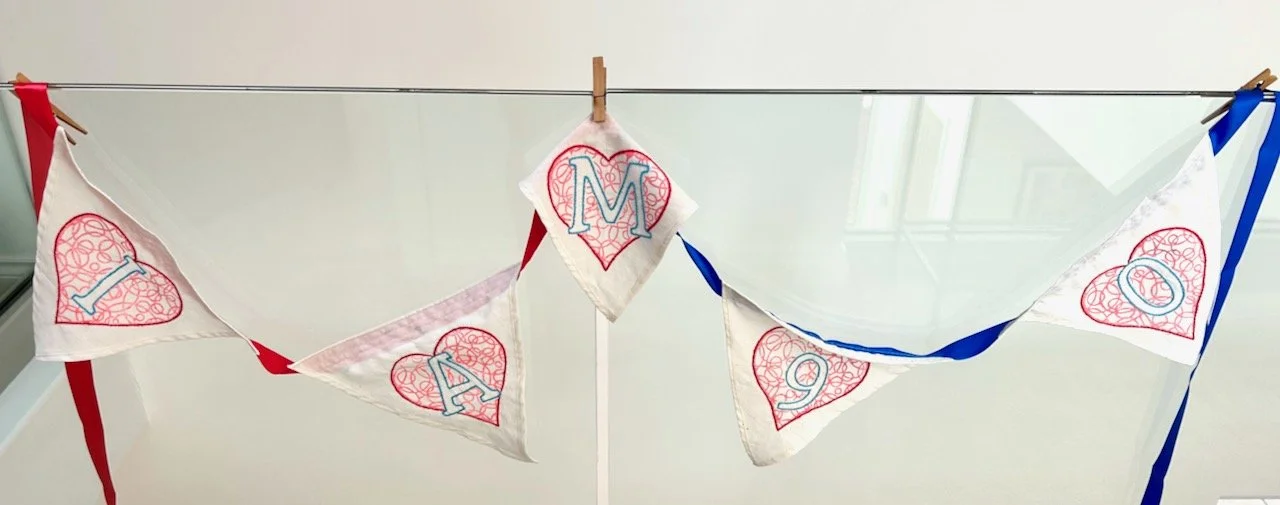
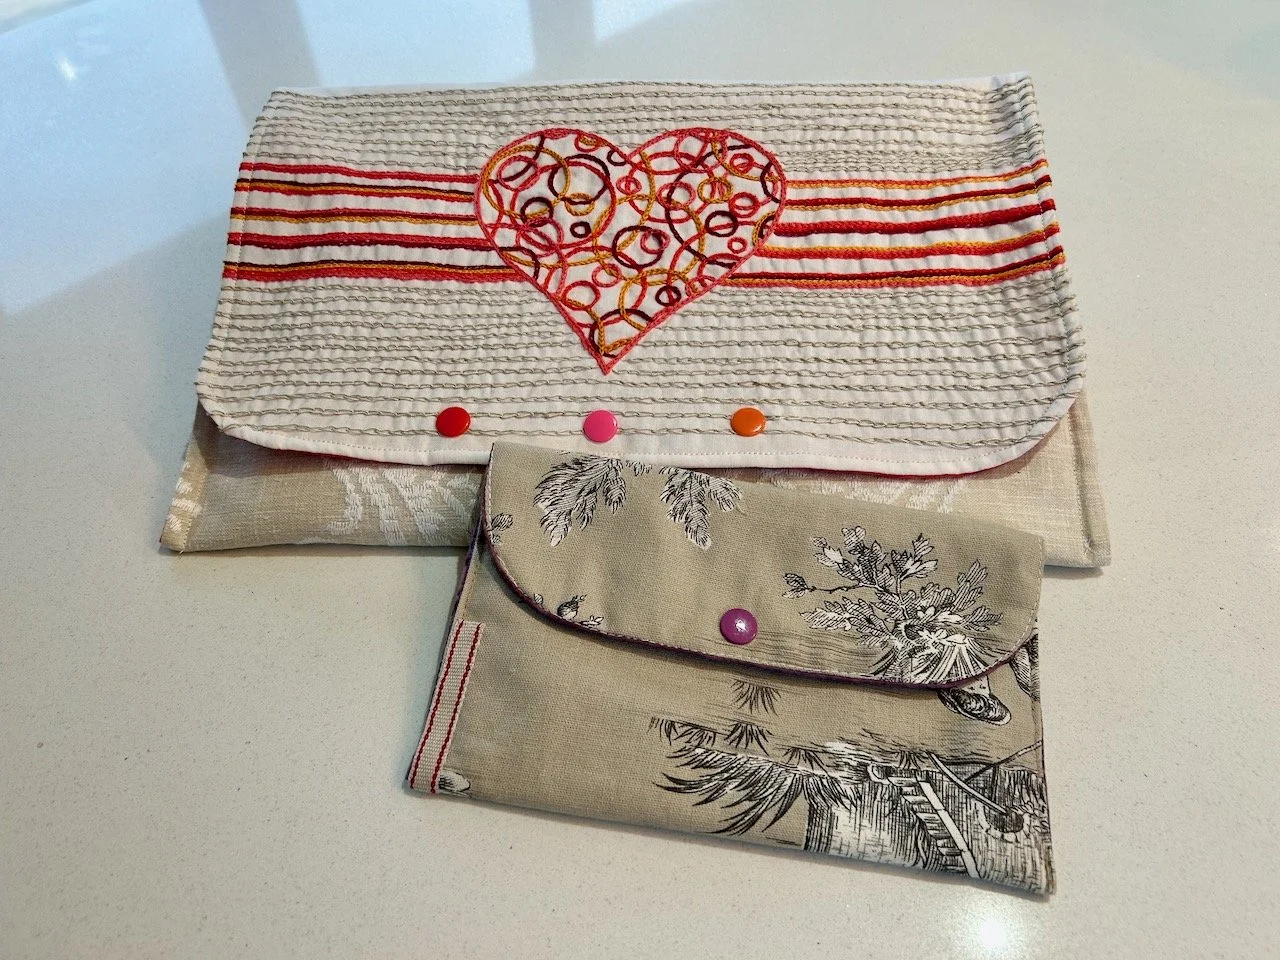
But with other projects on the go (many in fact) but especially my other Indian block printing embroidery ones, like the three leaves, the birthday bunting, the embroidered heart and the mandala for my popper pouch, this one got put to one side.

Until we headed off on our walking trip to the Gargano Peninsular. That’s what I love about embroidery - it fits into a small pouch, doesn’t need a lot of equipment and importantly when travelling pretty much stays the same size so you don’t need to find extra room in your case.

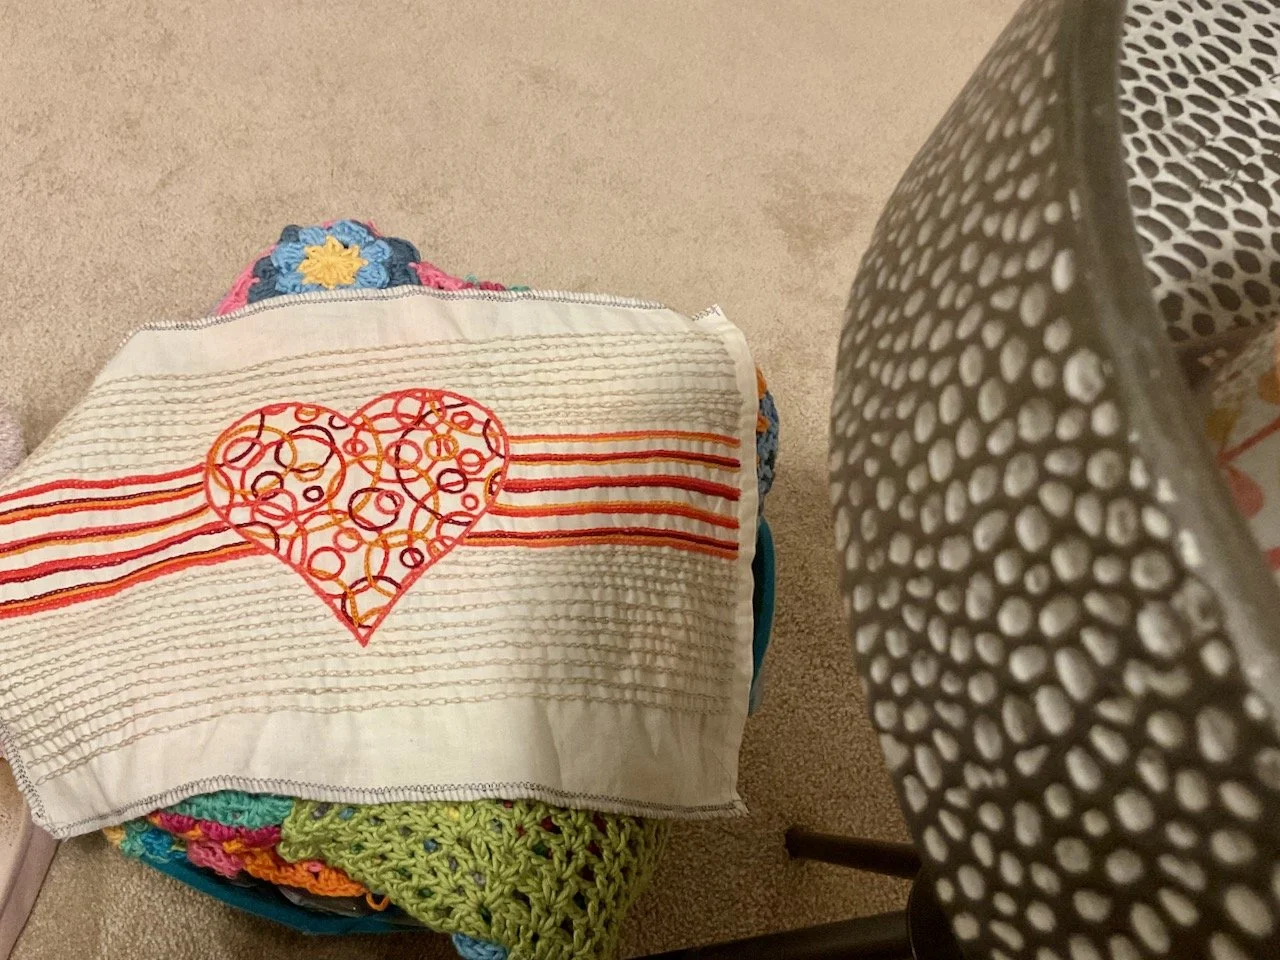
By the end of that just a bit longer than a week, it looked like this.

The top row of swirls is now embroidered in pale pinks, cream, lilac and pistachio.  The two bottom rows remain untouched

And that’s how it stayed for quite a while, though my plan was always to complete the second set of swirls in a bolder colour way. I thought I’d use each panel separately, but the more I worked on it the more I thought it could become one piece.

I’m not sure when exactly I picked it up again - that remains unphotographed and undocumented - but it was some time during 2025. I suspect it was my embroidery project for our trip to the US and Canada last spring, but I could be making that up entirely, though I find it hard to believe that I didn’t take any embroidery with me at all.

All three rows of swirls are now embroidered, the piece is on the spotty oilcloth ready for more printing

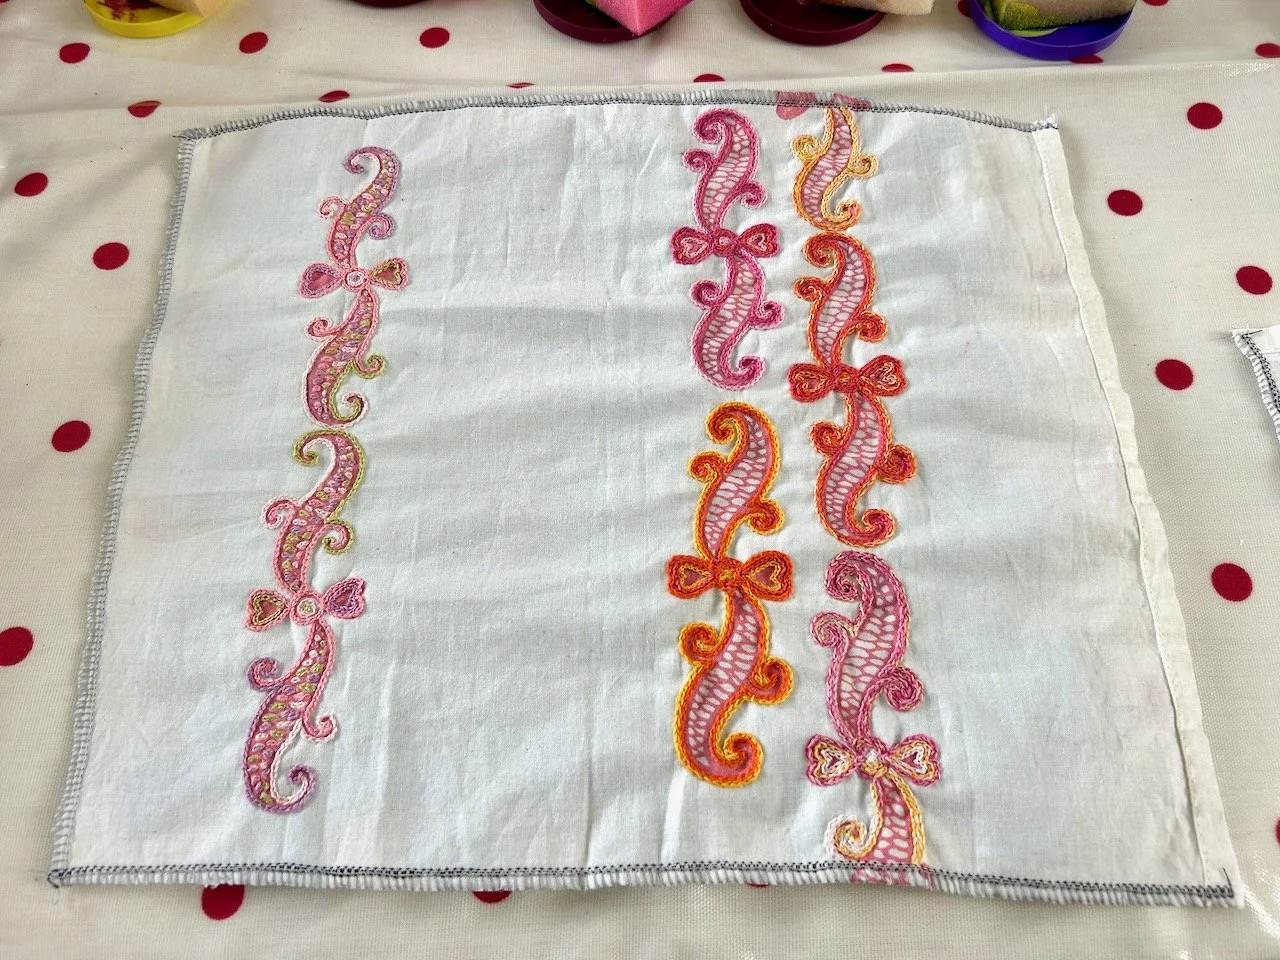
But the swirls were embroidered and looking good. Though for me to use them together as a single piece I wanted more, and hatched a plan to use my Indian printing blocks to zhuzh it up and fill in some of that white space.

Indian block printing at home

It was the first time I’d done any block printing since that course, and I was unsure how it’d work out - spoiler, it worked out fine and was just as much fun as I remembered. The spur for me to get my act together was to print my ‘sheep in Christmas jumpers’ Christmas cards, but I think dedicating a block of time (no pun intended) to printing works well

At an earlier stash sale I’d picked up a length of the spotty oilcloth to use as a worktop protector. I’d actually forgotten I’d had such foresight until I re-discovered it in my craft room reorganisation a month or so before, which was good as I’d been tempted to buy some more, but thankfully hadn’t.

My workspace: oilcloth on my kitchen worktop, a blue foam mat to use as my printing area.  Tools, paints and sponges on the edges and within arms reach

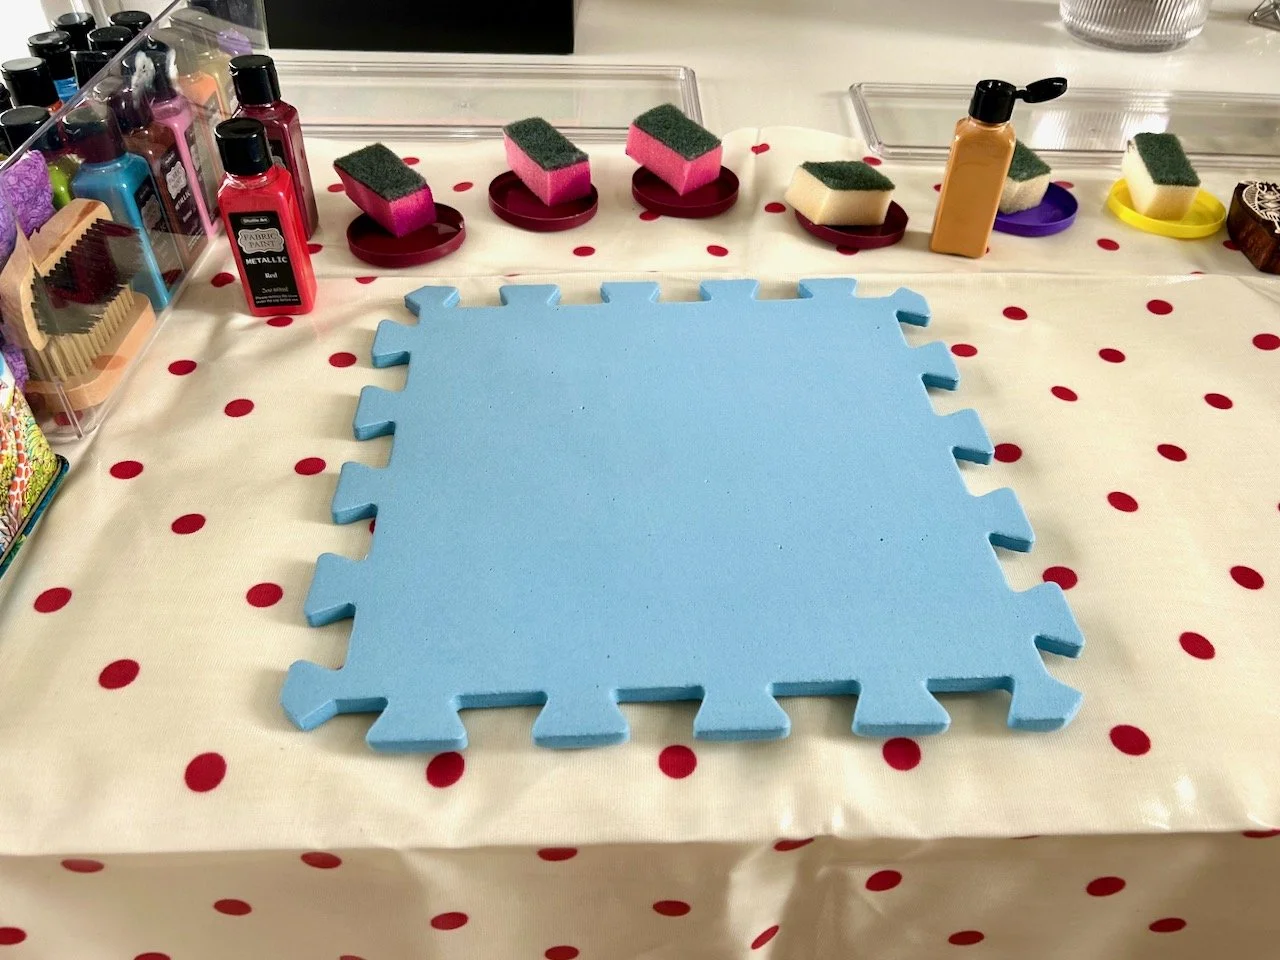
Through trial and error I found that the setup above worked for me, this included:

  • the spotty oilcloth to protect my kitchen island worktop

  • a foam rubber mat to use as my main work area (tip: you don’t need to buy often more pricey blocking mats specifically for crafts, the children’s toy area mats work just as well and are often cheaper)

  • My paints in use in front of me, using the plastic lids of instant coffee tubes and ice creams to hold the small dobs of paint and a cut up scourer to apply the paint to the block (both the lids and the scourers can be washed and reused many times).

And so I was off, but of course I needed to avoid printing over my already embroidered areas - so I tore a scrap of paper and lightly taped it over my embroidery before printing.

Using torn paper to mask my already completed embroidery before printing flower shapes in the blank spaces

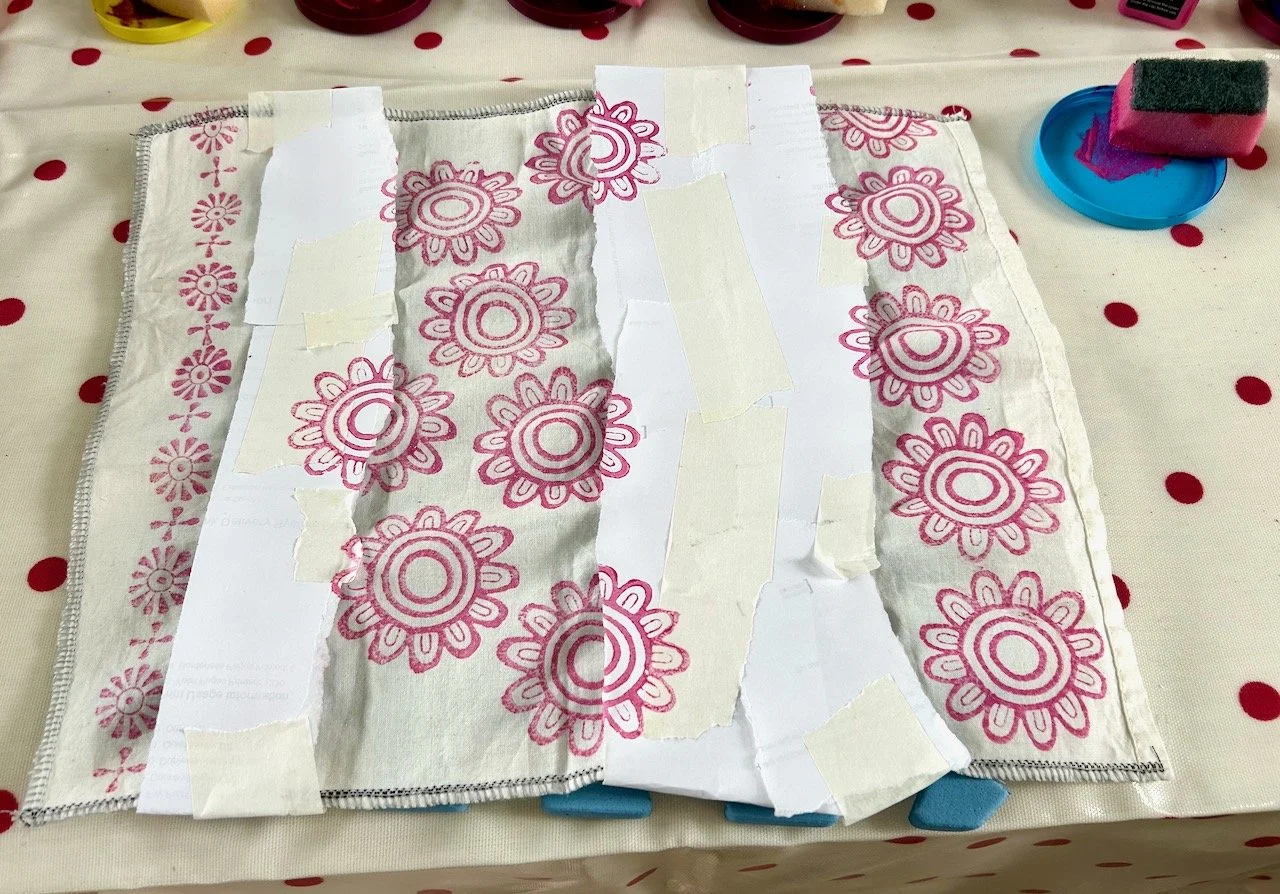
The mask worked well and my once plainer piece was just what I had in mind.

The new printed flowers with the paper masking removed

Though as I was embroidering I realised in some places I’d been over cautious, and so I drew the lines I wanted in place.

A close up of the flowers during embroidery

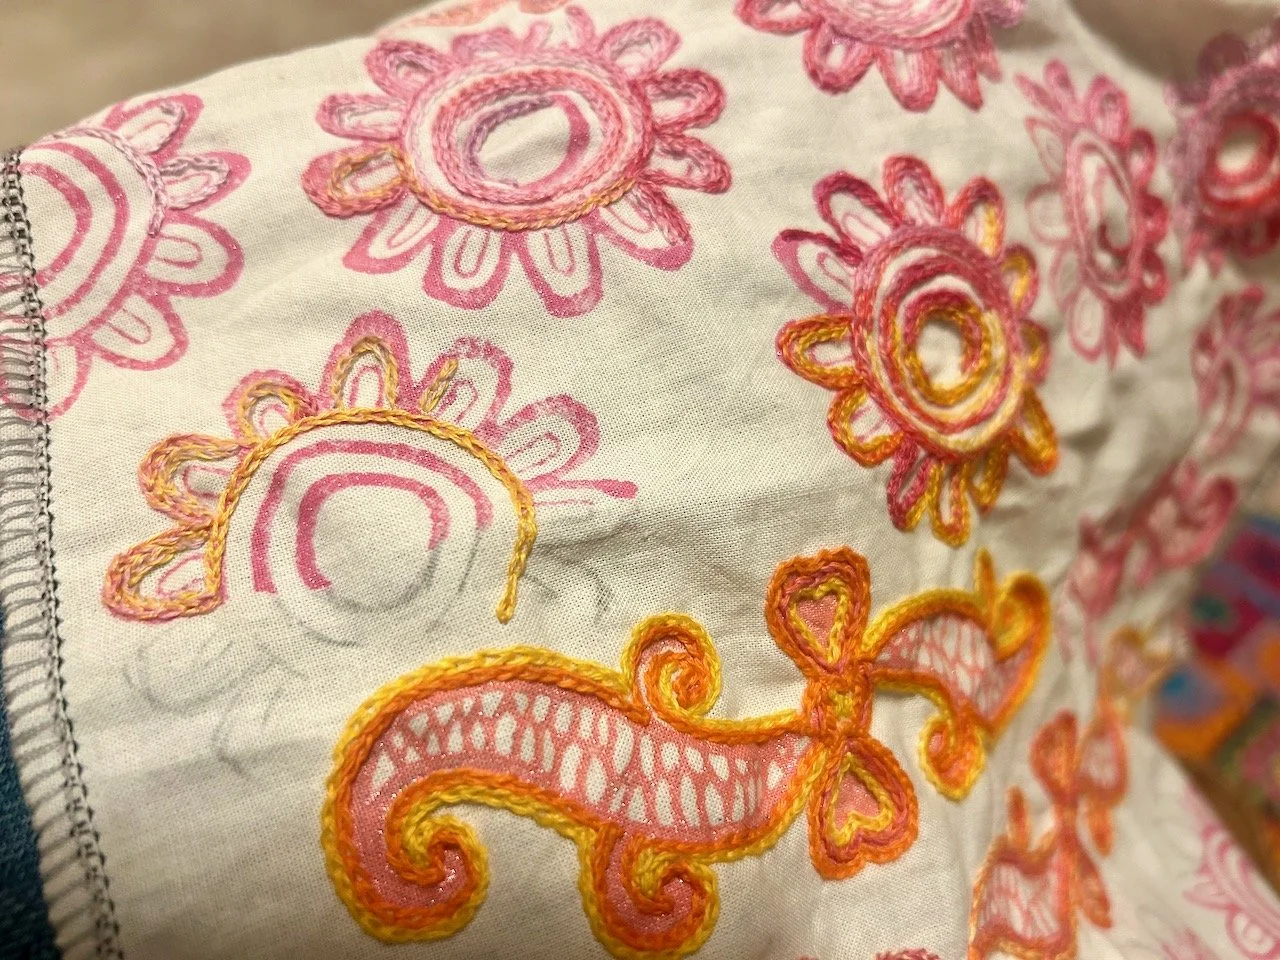
My plan was to start with pale pinks, graduating through hotter pinks and into the oranges below the double layered swirl.

I could have used variegated thread, but I didn’t. Instead I pulled a selection of lilacs, pinks, oranges and yellows and cut the embroidery floss to the same length choosing either two threads the same, or similar to use for that section as I went.

The finished piece lighter pinks at the top graduating to brighter pinks and then oranges at the bottom

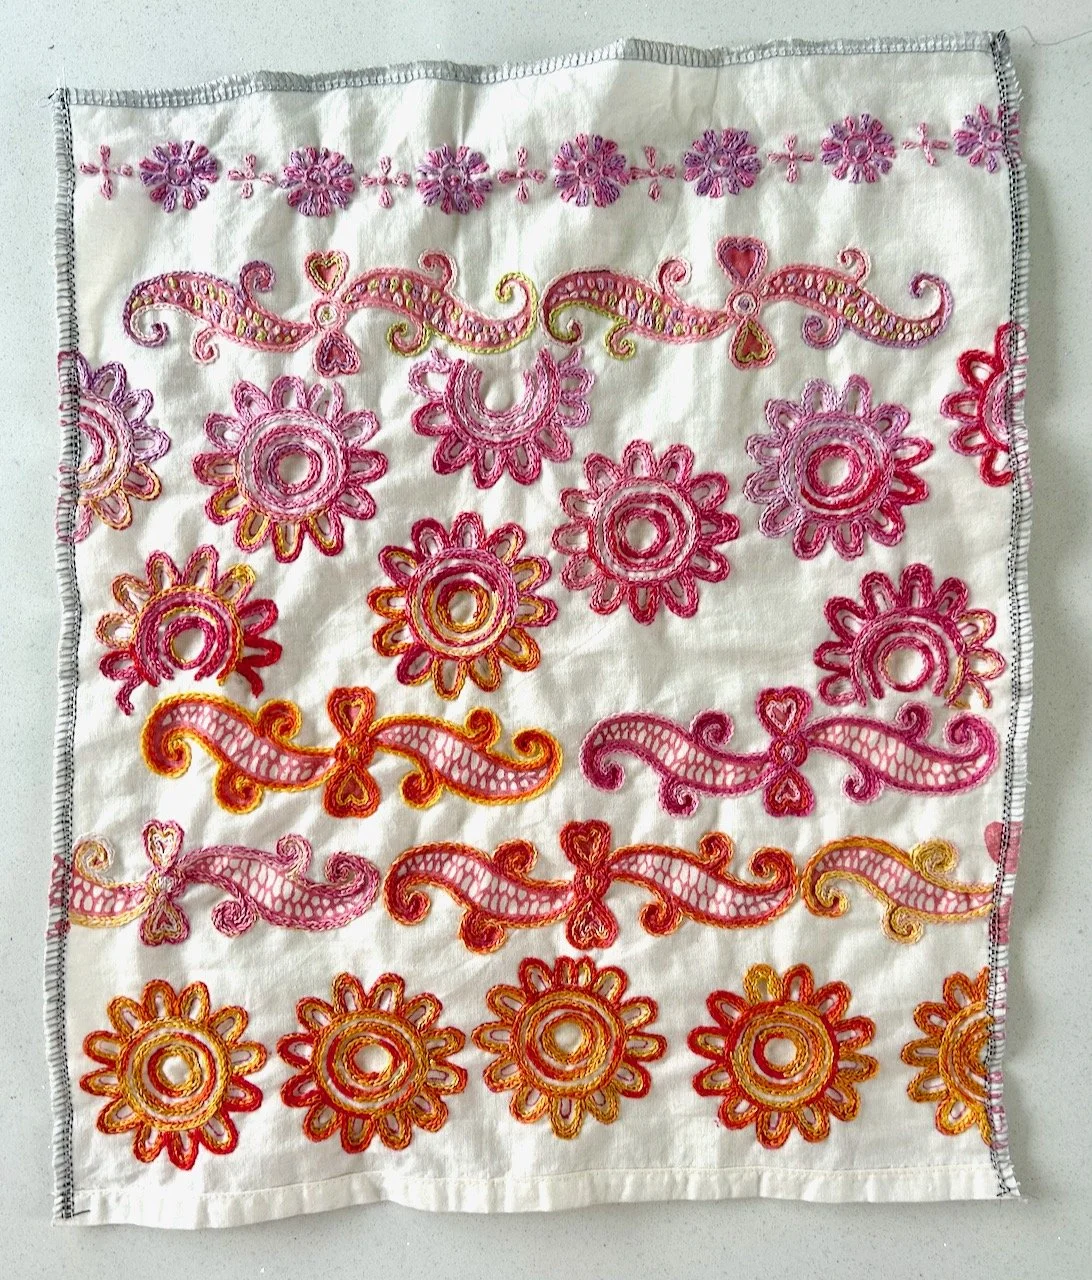
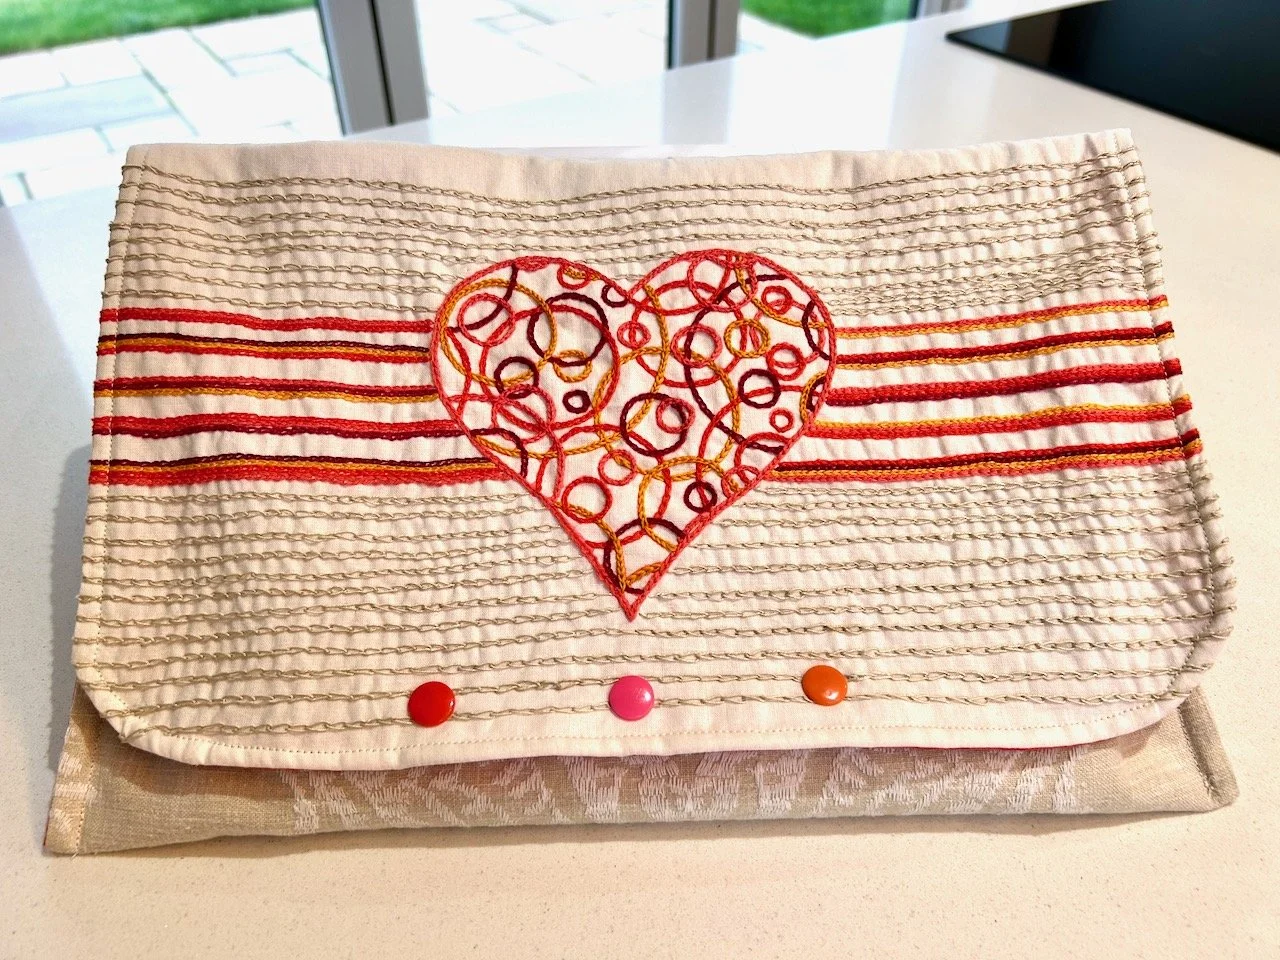
Other than that I had no real plan, and I’m super pleased with how it turned out.

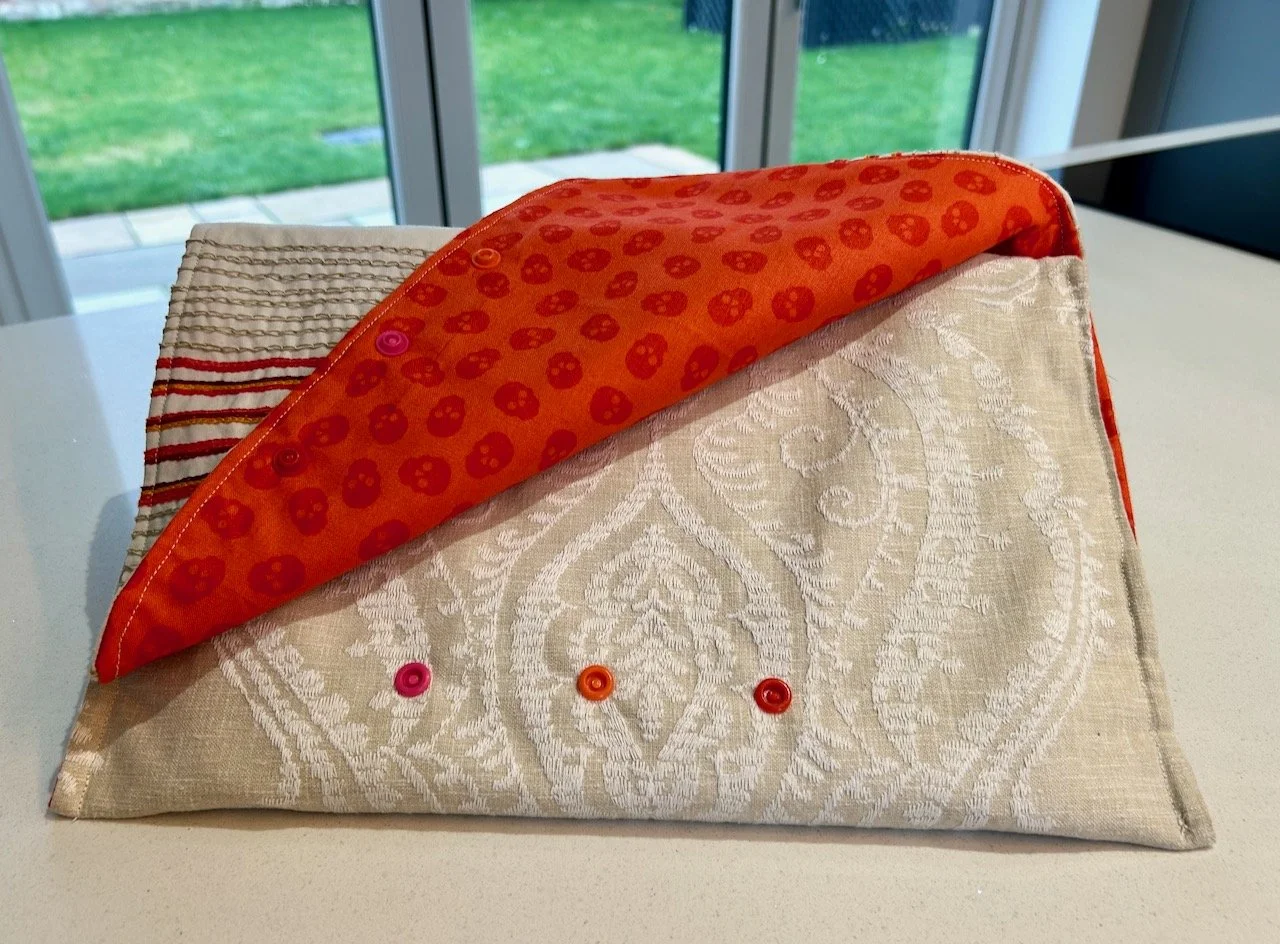
It’s already looking different to that last photo, but I’ll save how it turned out - and in a surprise to no one, it’s a pouch - for another post.

Birthday bunting, a year on

Last summer we celebrated my dad’s 90th birthday and to mark the occasion I made some bunting. I’d printed the individual flags much earlier in the year at the Indian Block Printing course at our local library. Even then I was clear that a traditional ‘happy birthday’ banner was a lot of work - and would need a fair amount of space to hang, and I wanted something smaller.

In the end I settled on five flags, spelling I am 90 - and both the embroidery and assembly were finished way ahead of our family celebration, which was a relief - and almost felt like it was planned.

A pile of printed and embroidered bunting - on top and I in a heart

Which of course it was, but isn’t it great when a plan comes together?

The I am 90 bunting hanging in my house

Earlier this summer dad had another birthday, and so I thought I better provide an update, but without access to the same Indian blocks it would have to be different, so I decided to make it very different.

I’d picked up a large bag of buttons at my Sewing Group’s stash sale (along with the Vogue pictures, which are currently being framed) and more amazingly was able to remember where I put them and so lay my hands on them easily.

I’d drawn a 1 on a plain piece of fabric, and marked out the edges of the triangle which would form the bunting, and then played around with how the buttons would fit into the figure.

Trying out buttons to fill the pencilled 1 shape

And once I was happy with that, I took a picture to remind myself of what I’d settled on, and set about sewing them on pretty much in the same position. It wasn’t exactly the same, but it was very close.

The last button - the tiny white one at the bottom right - didn’t seem to fit where I’d had it, as no doubt other buttons had moved slightly, and I toyed with the idea of leaving it off altogether. But in the end I added it close to where it should have been in my plan.

A 1 flag made from buttons sewn onto a triangle, which is edged with fancy stitching from my sewing machine

To hem and finish off the bunting I used a navy thread with a fancy stitch on my sewing machine - they look like Christmas lights to me, or ice creams in cones if you look at them the other way up.

Anyway, job done.

And that odd little button, well - it seems it was supposed to be there. Dad, who was half expecting an update to his birthday banner asked if I’d included that number of buttons on purpose. I hadn’t, but it turns out the number of buttons I’d used was the same number as dad’s birth date. I almost wish I’d thought of doing that myself, but seems that fate managed that all by itself.

How fortuitously weird, huh?

An embroidered heart

There was only one pouch in my pouch love series to share on Valentines Day wasn’t there? And from a simple printed heart it’s blossomed into a large and very beautiful pouch.

It’s hard to believe that this is how it started - a test print for some bunting I made to celebrate my dad’s 90th birthday last year. The bunting was simply embroidered but I wanted to explore the interlocking circles this time round.

Unusually I don’t have any photos of it ‘in progress’ and I’m not really sure why - it definitely came with me on our trip to Glasgow last September and has been on the train to London too. After outlining the heart and before exploring the inner circles, I added several coloured stripes across the fabric, which reminded me of a 1970s/80s tracksuit.

And then I braved the circles trying not to have two of the same colours next to each other, which just about works. Embroidering the circles with my beloved chain stitch was incredibly mindful and relaxing. Once the main emblem and its stripes were complete, I still felt that it needed more, and at the back of my mind I remembered a cream/beige embellished fabric which I picked up at a WI stash sale, which might work with this.

I knew I wanted to make this one into a pouch, and so finding the fabric to go alongside this in my stash was a complete win. That fabric I had in mind absolutely worked, and also encouraged me to add several rows of cream chain stitch stripes above and below the heart to tie it all together.

And this is how it ended:

What’s even better is the lining was also in my stash - and while dark orange skulls on an orange background might not have been the natural choice on paper, once I saw the colours together there was no other choice for me. To finish it off, of course I needed poppers, and as the fold over flap was relatively large, it needed more than one - and so unable to choose between pink, orange and red, I had one of each!

If my embroidered heart pouch reminded you of one I’d already made - you’re not wrong, it’s a much larger version of the baroque lady version which was the first one I made at the bag making sewing course.

I’m loving them both, and I’m pretty sure there’s plenty more pouches to come!