


When Clare from Maybush Studio got in touch about getting involved with a project using Chalk Paint Spray I couldn't tell you how keen I was. I've been wary about using chalk paint because I thought it couldn't be as good as everyone says and I was tempted to see how it worked as a spray.
I also had the perfect project in mind.
I've had this sewing stool for many years and for a while now it's been relegated to our conservatory and was one of the things I planned to get rid of in my 2016 items in 2016. But I knew it'd be perfect for this so it was promptly promoted to My Next Project!
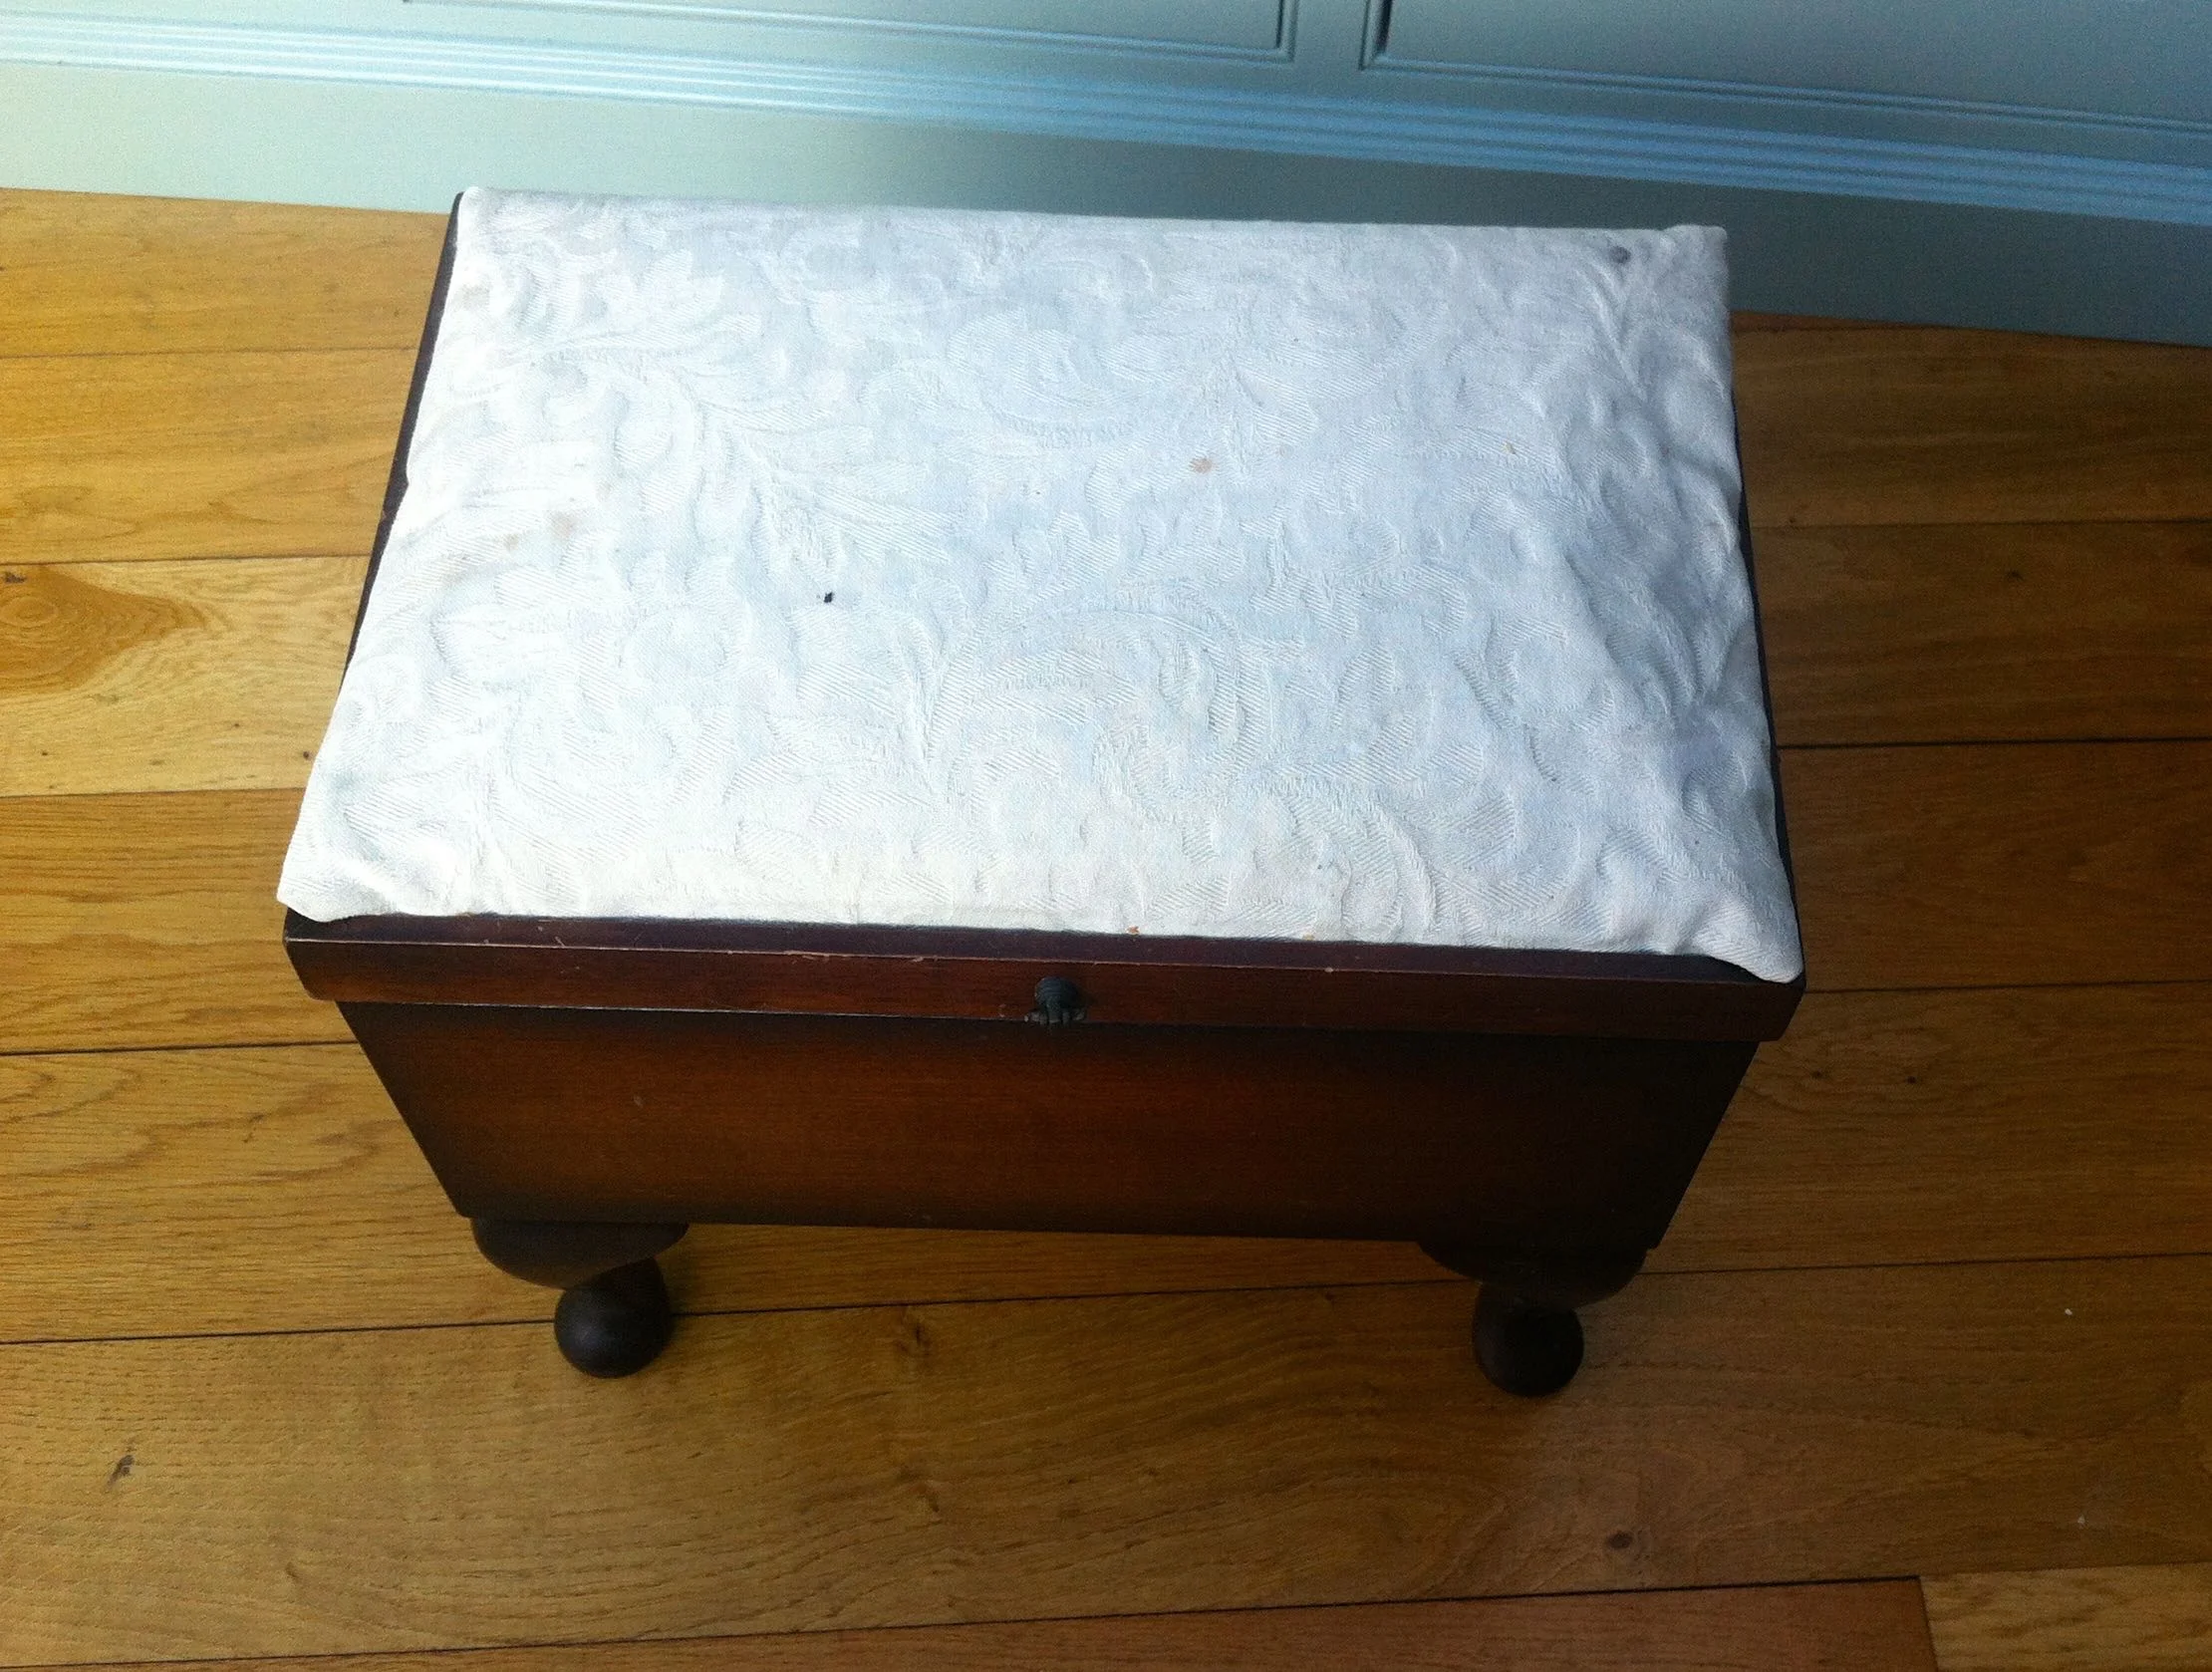
BEFORE
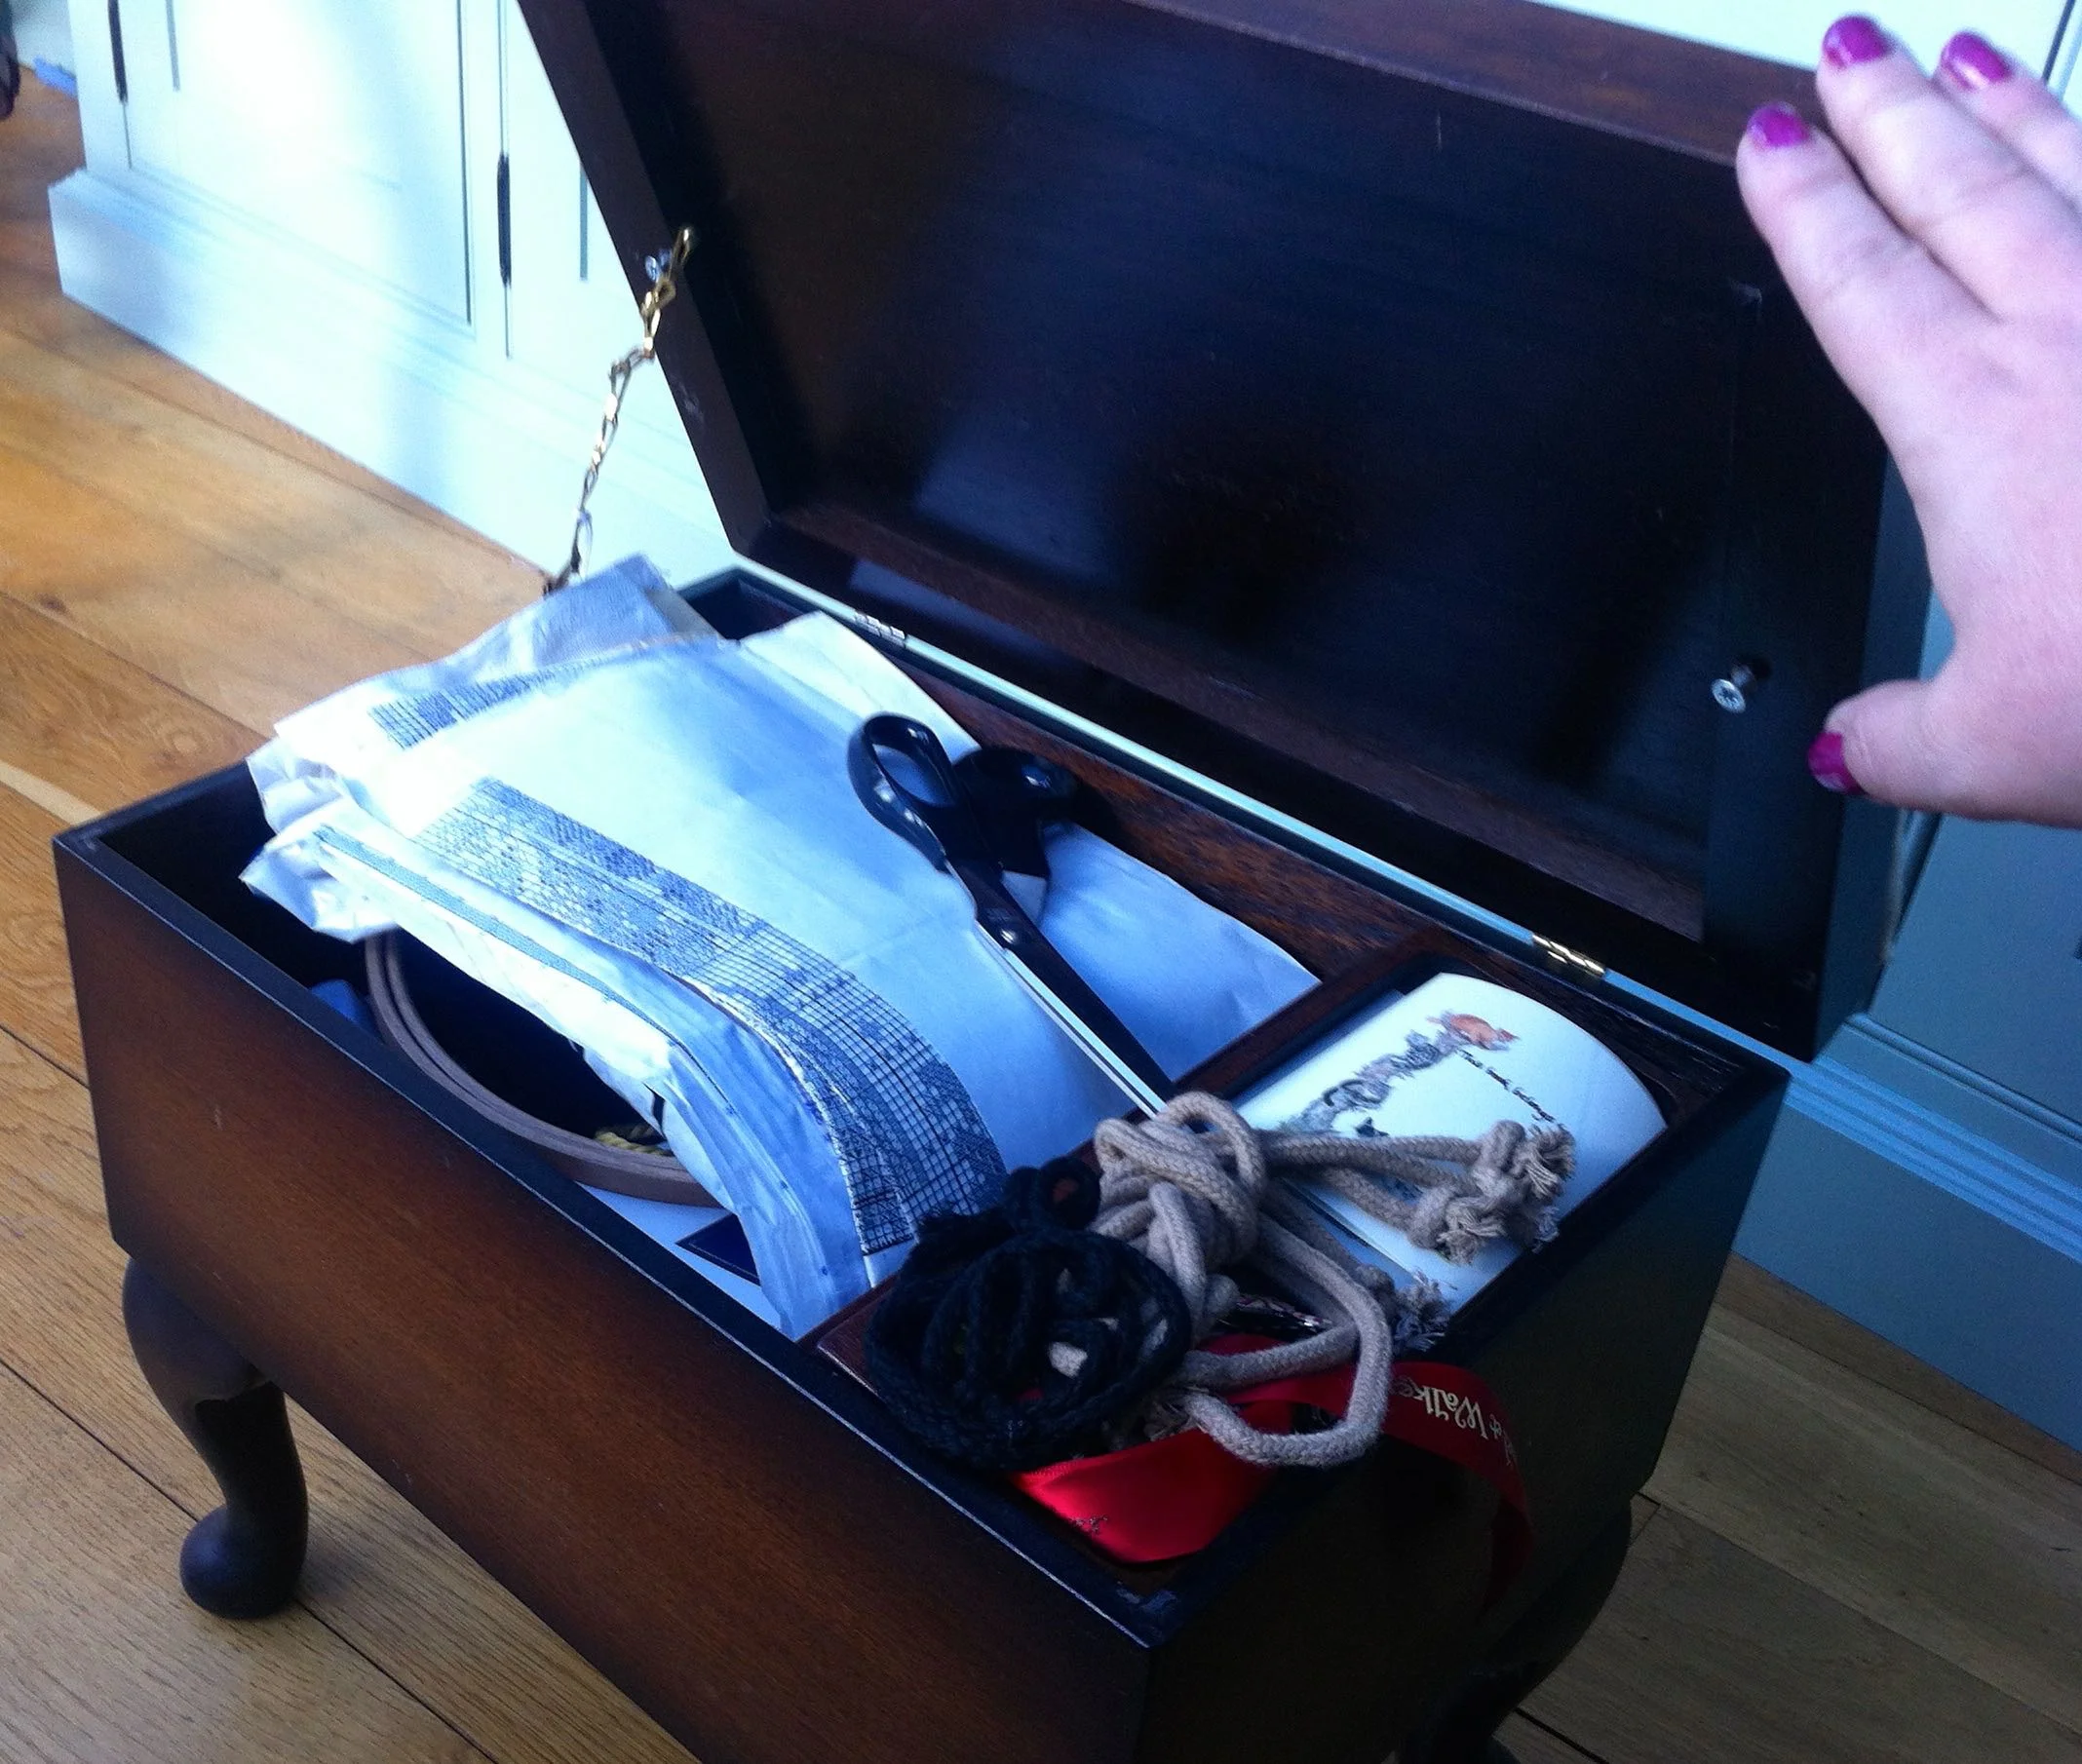
AND FULL OF STUFF...
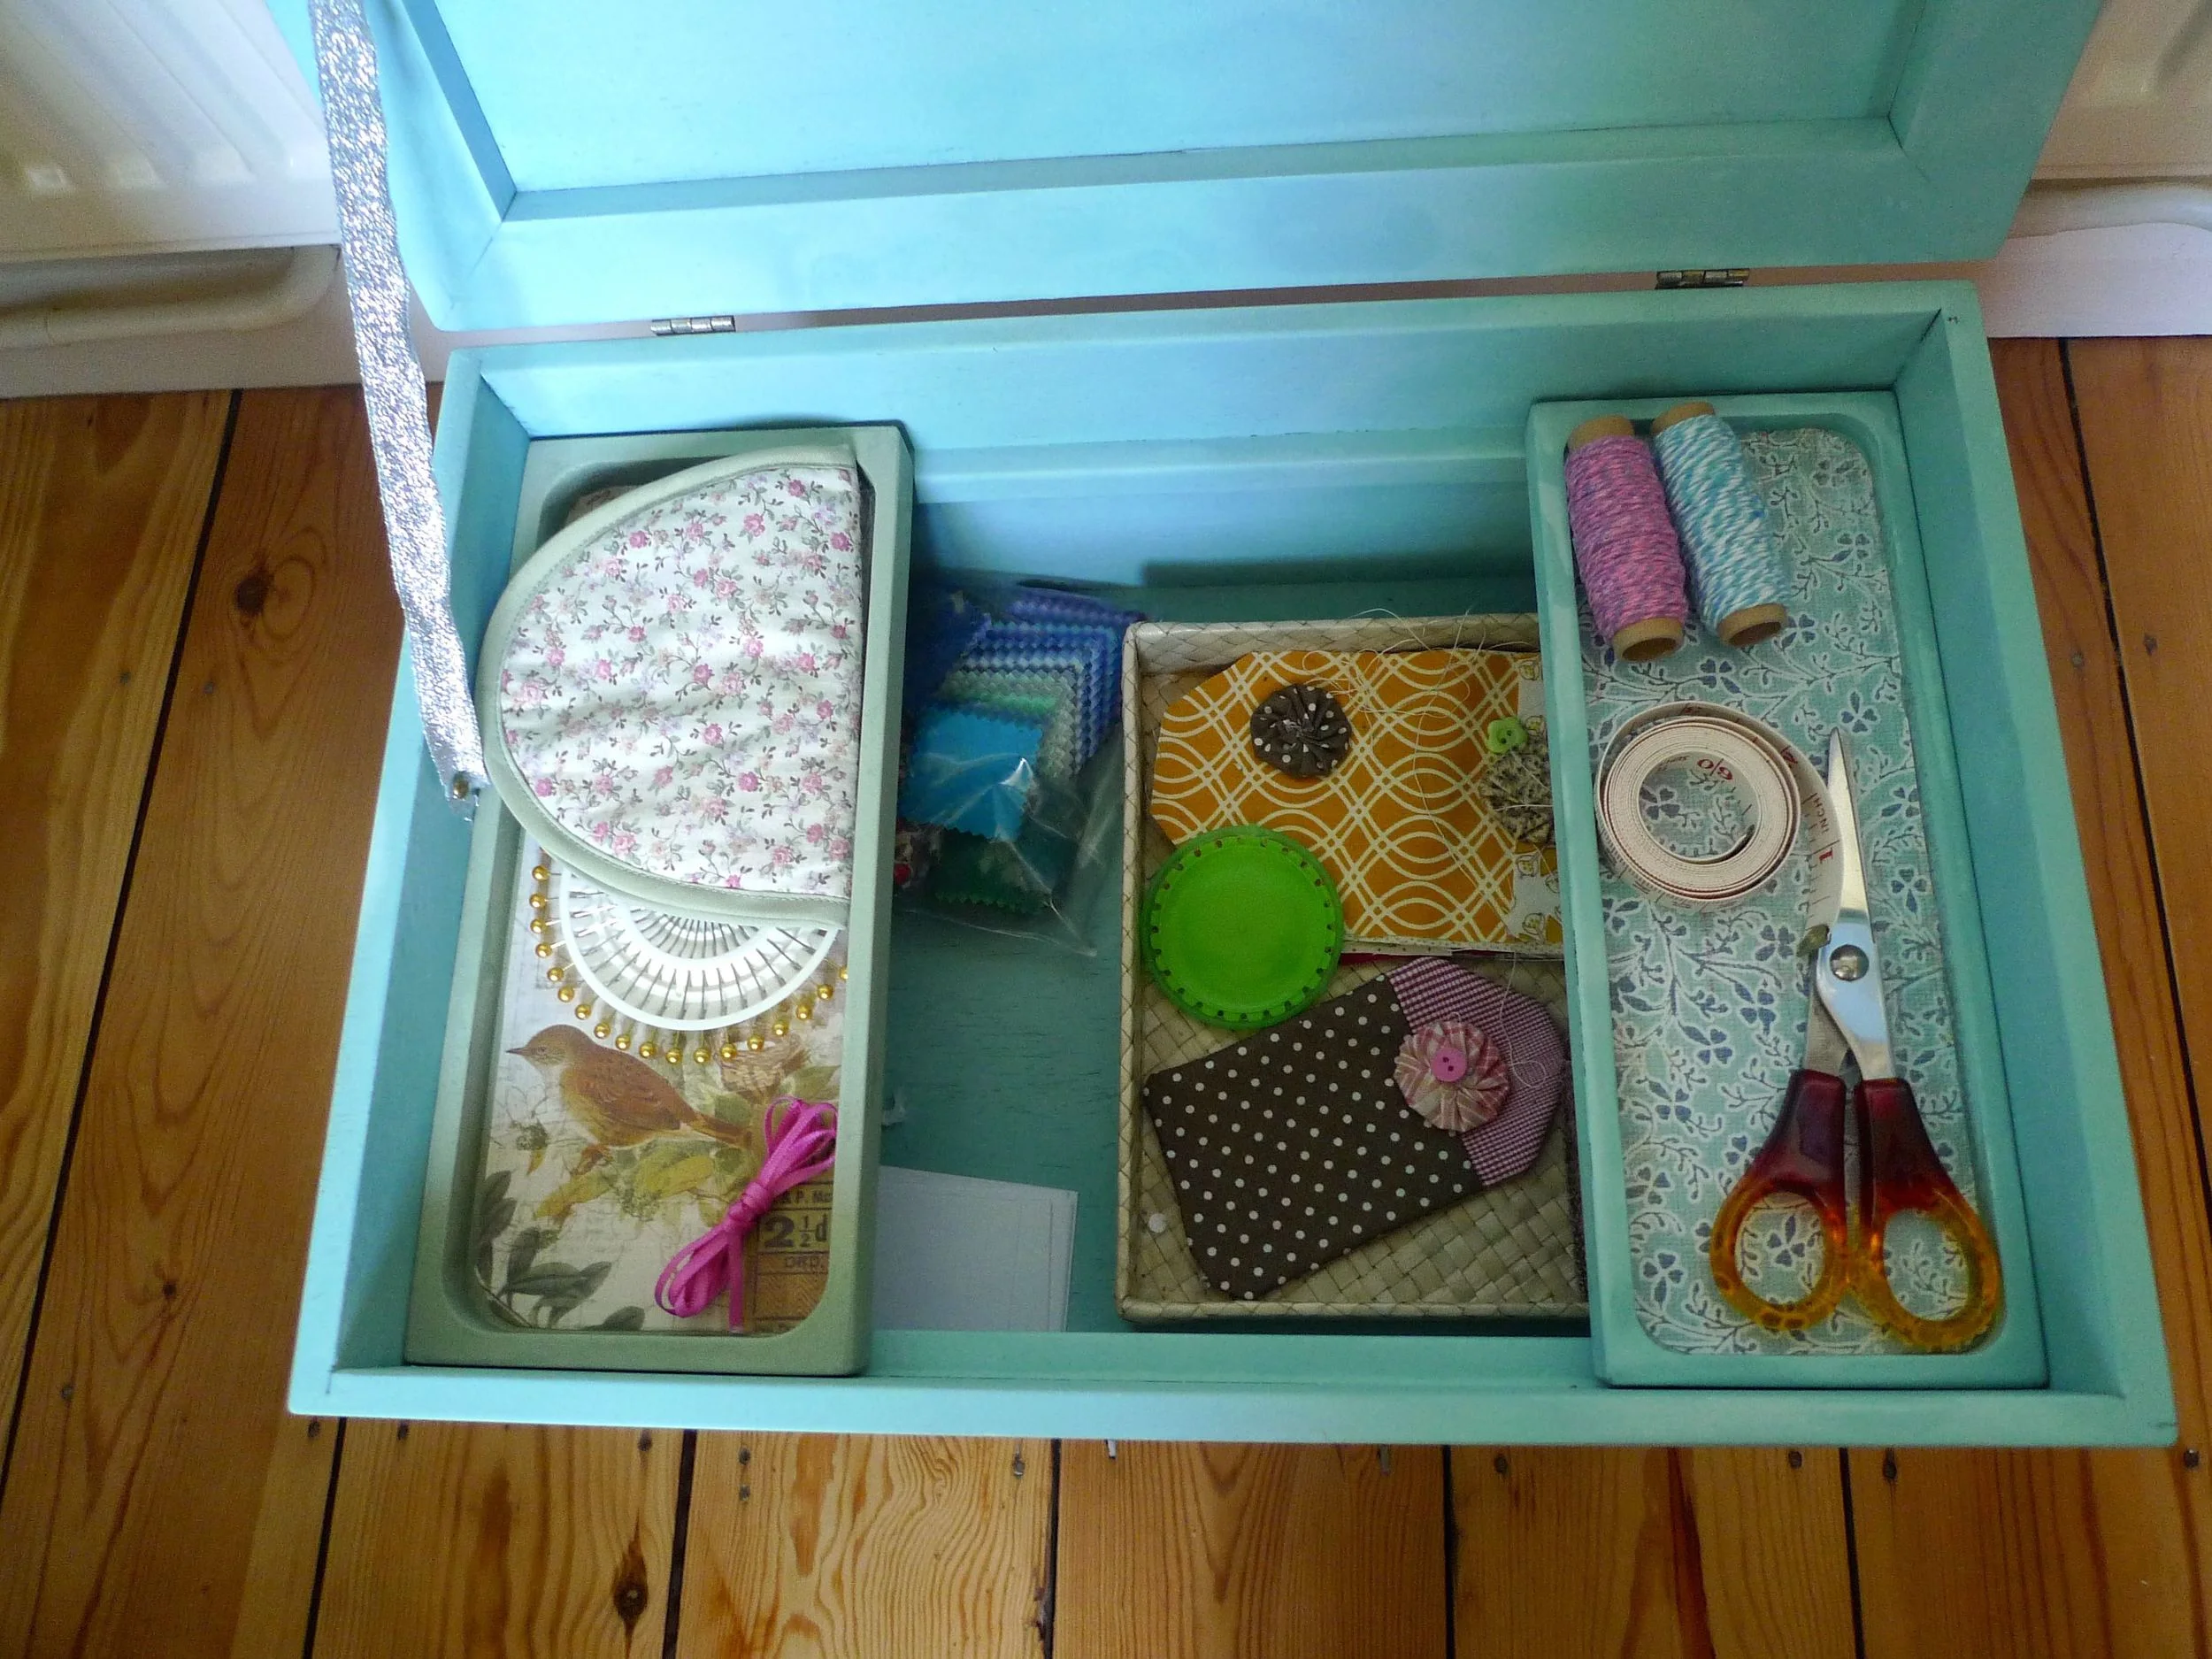
First though I had to empty it. It was stuffed full of stuff - most of it craft-related but also randomly a runner for the table. I wondered where that had gone...
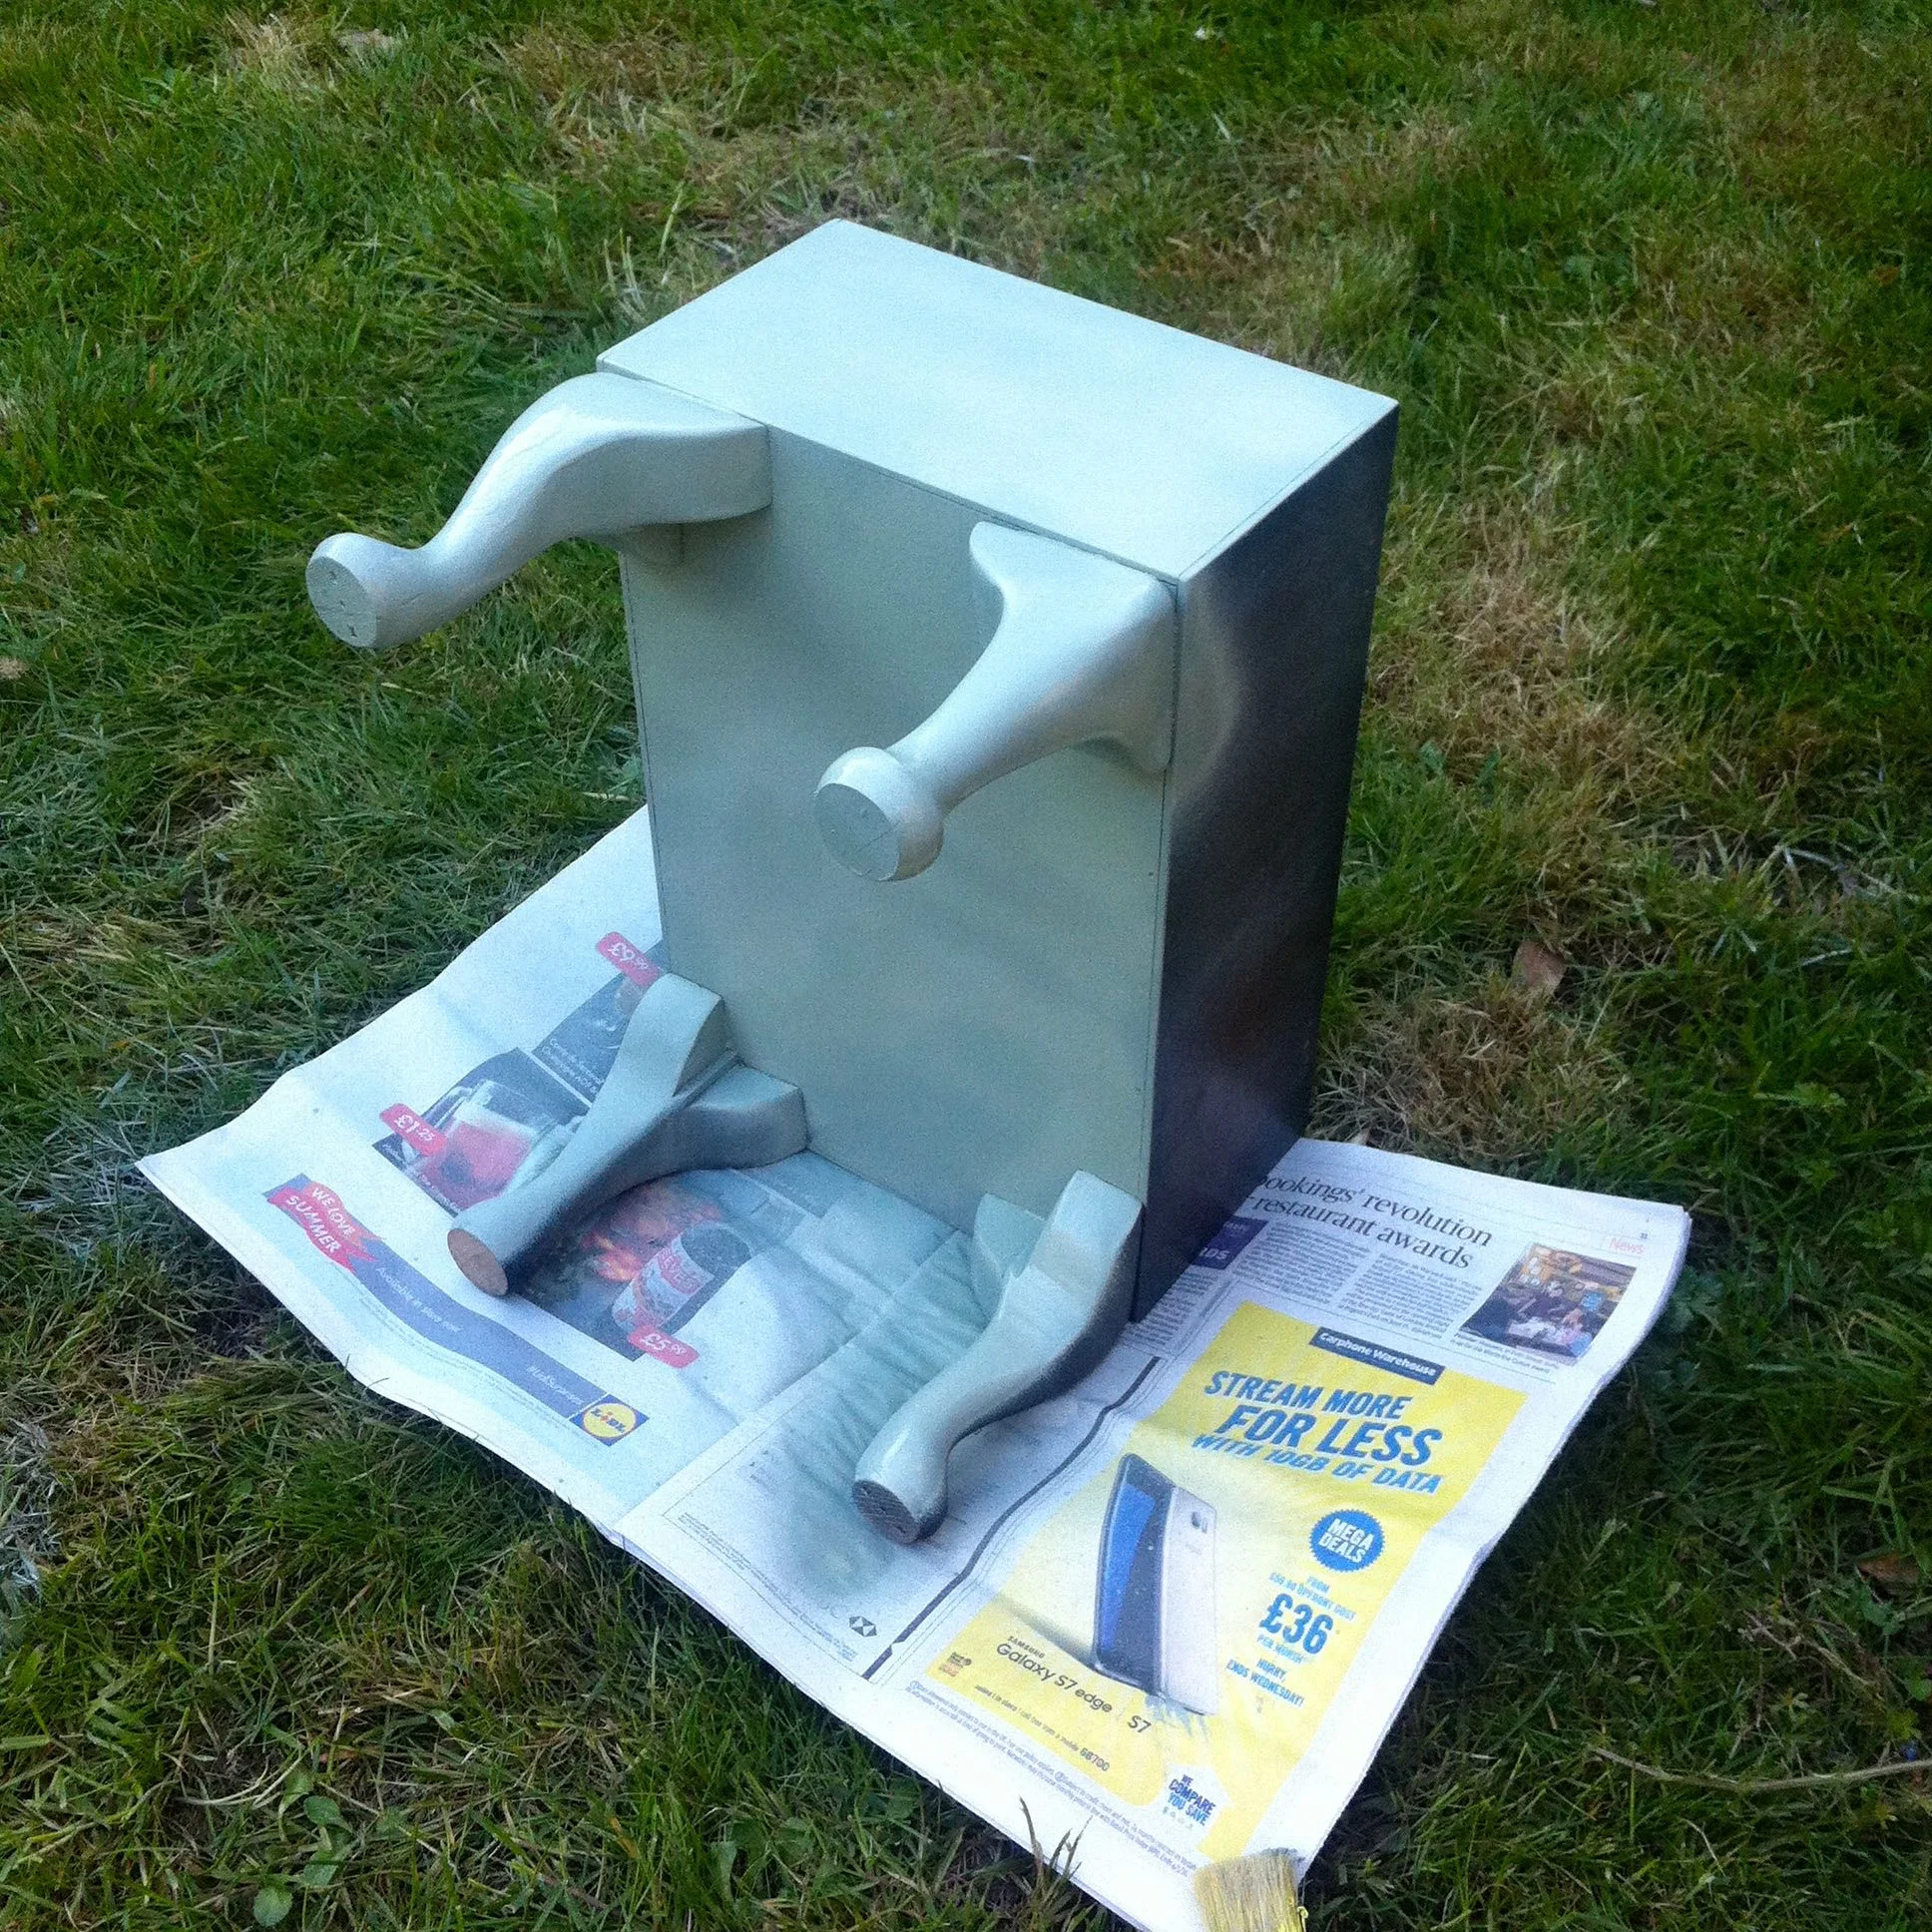
With it emptied I dismantled it, removing the cushion pad, its cover, the hinges and other ironmongery.
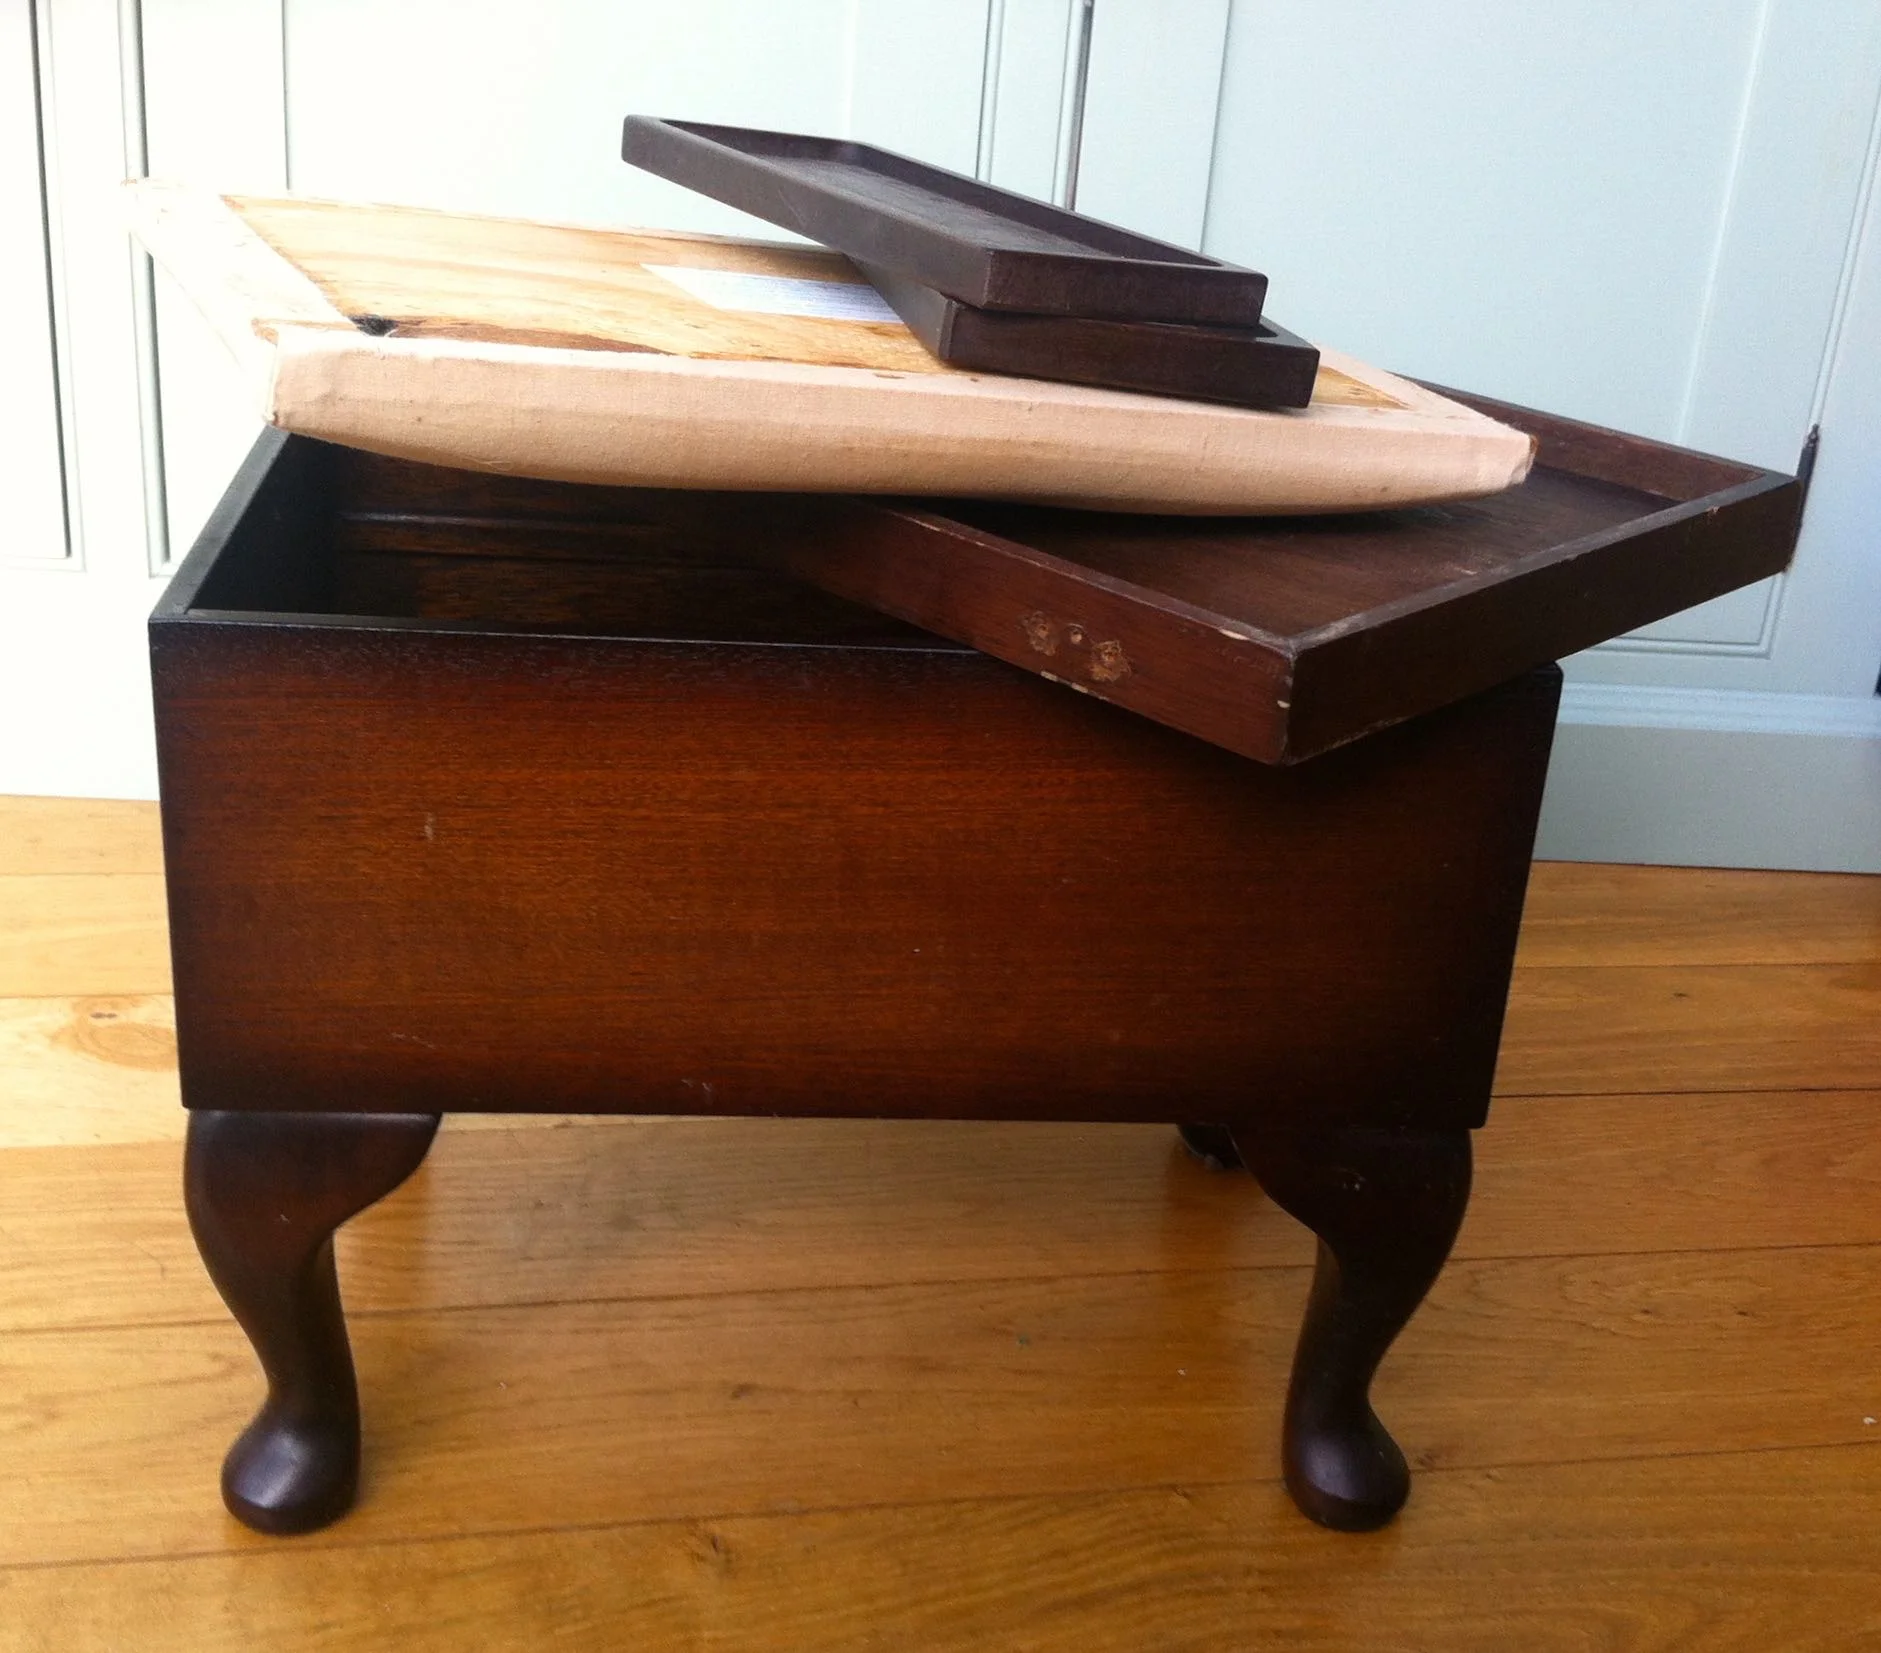
DISMANTLED!
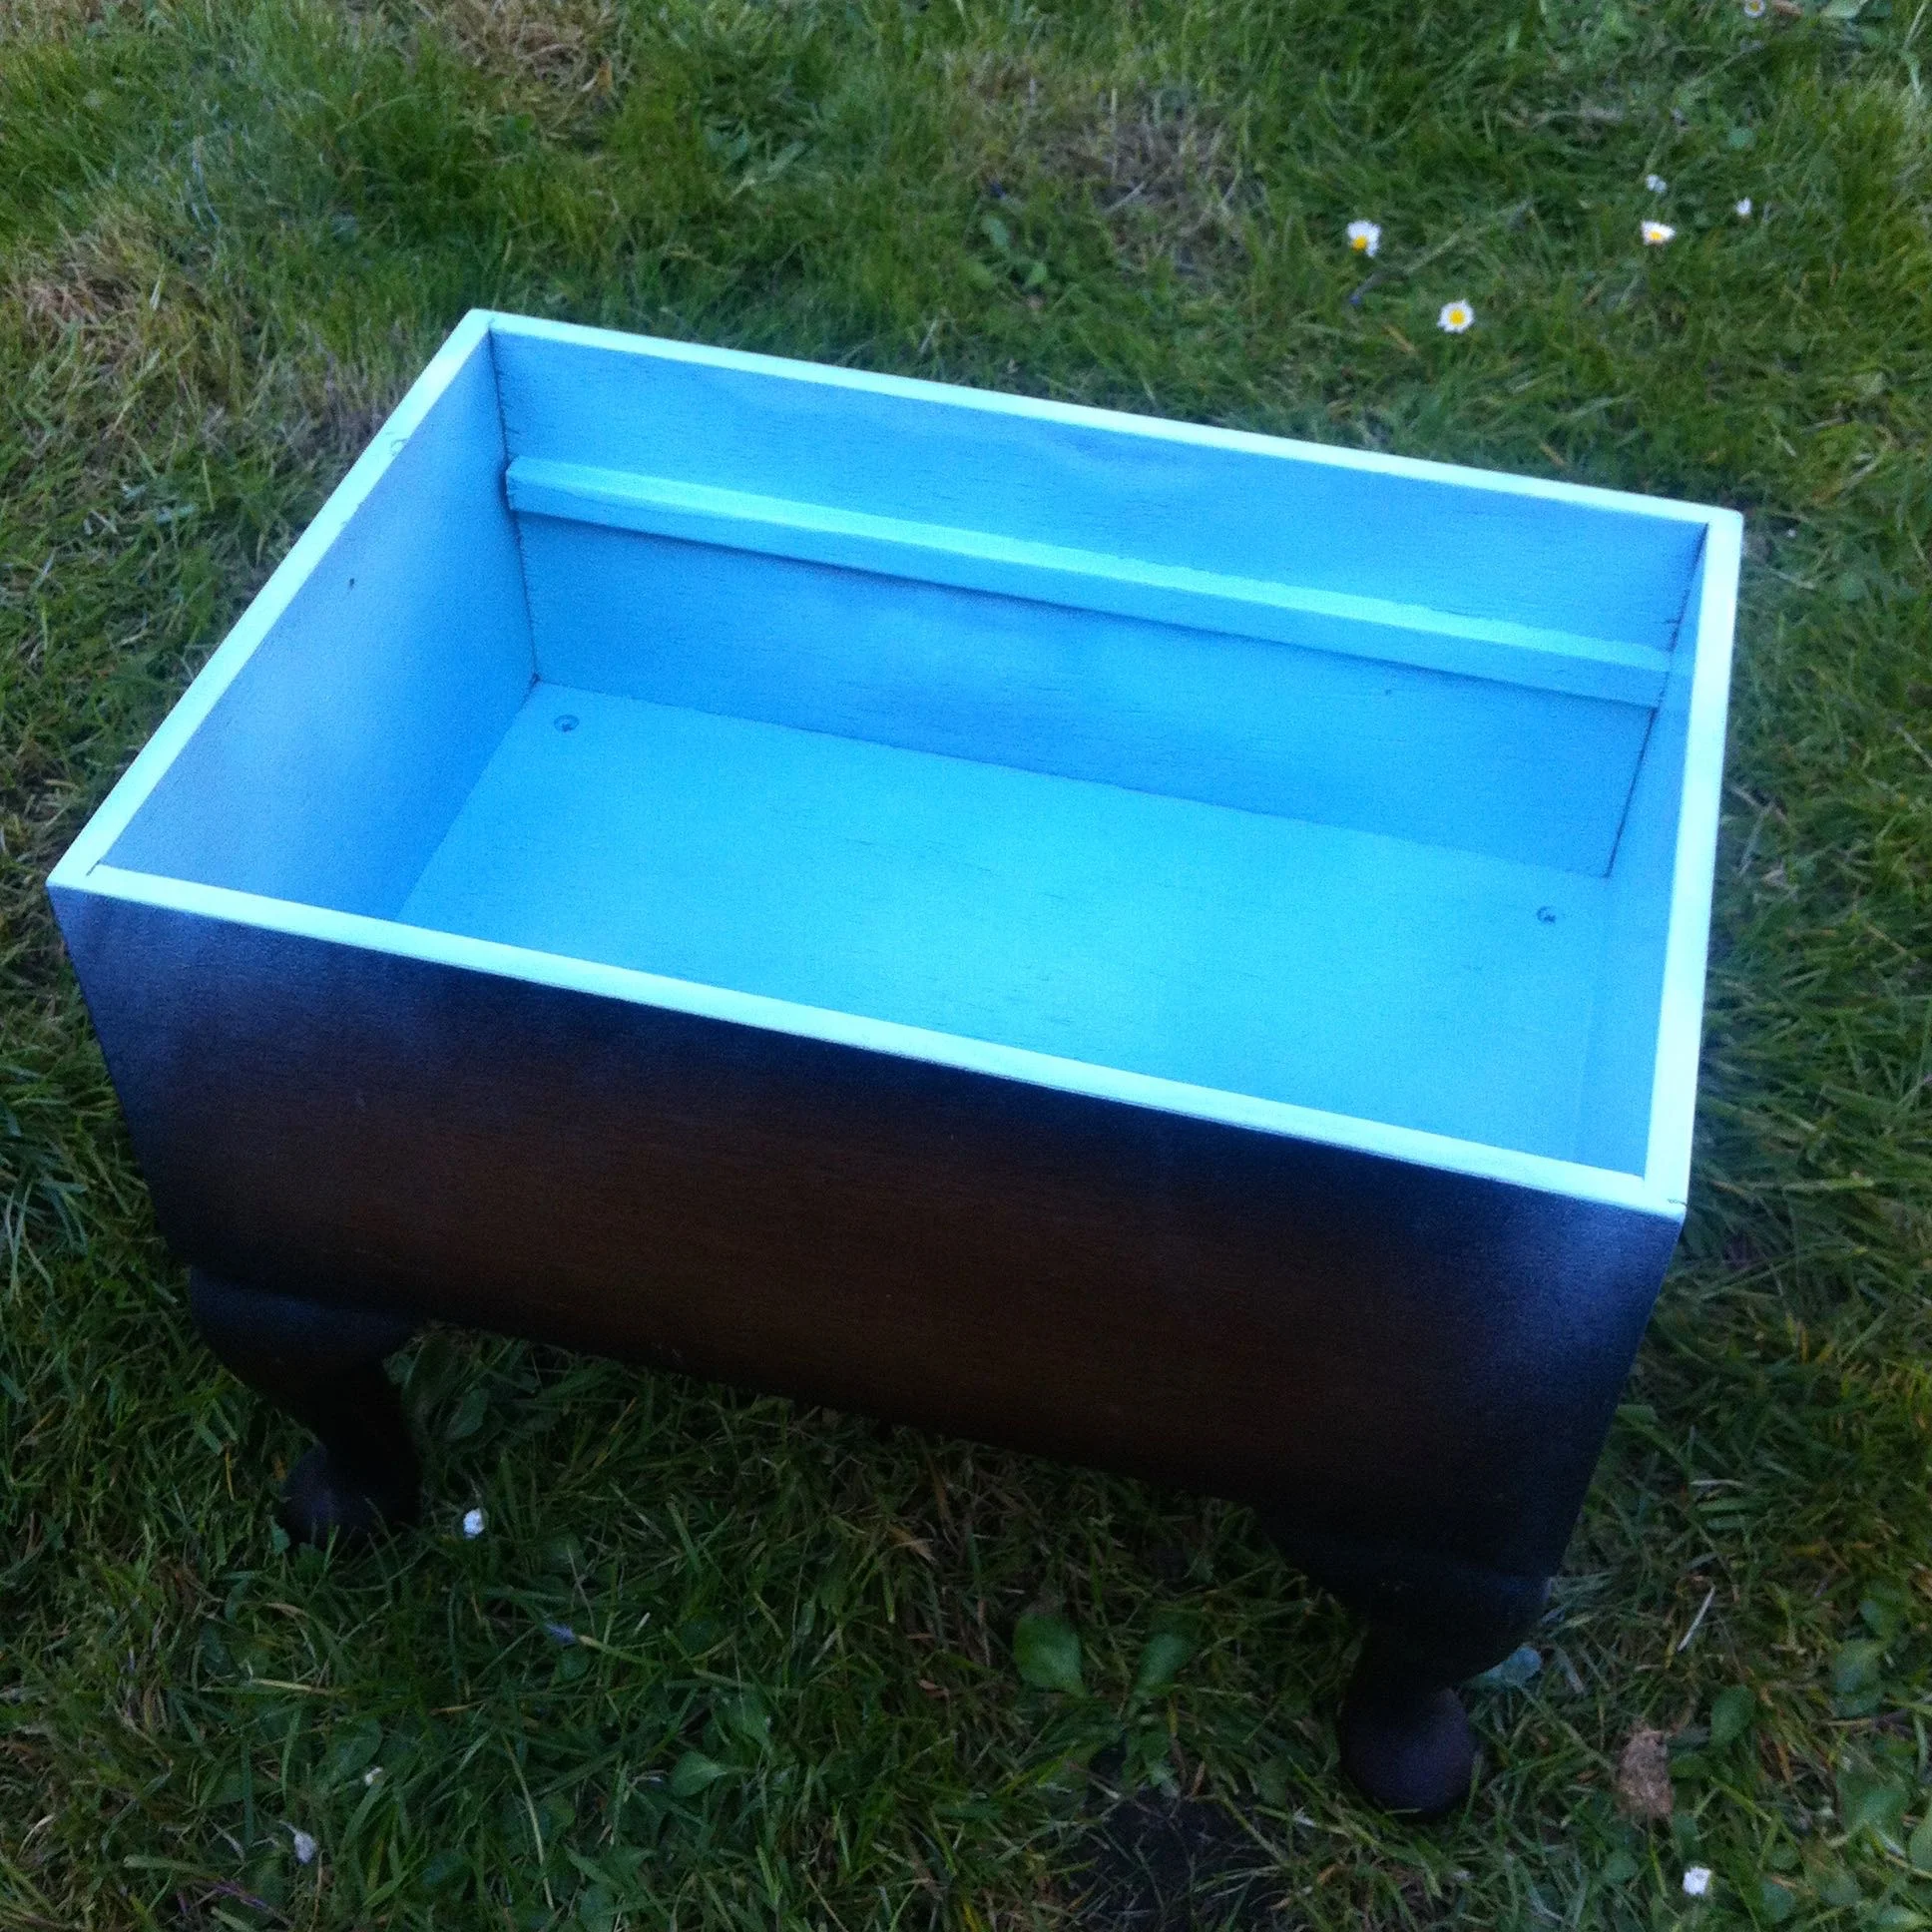
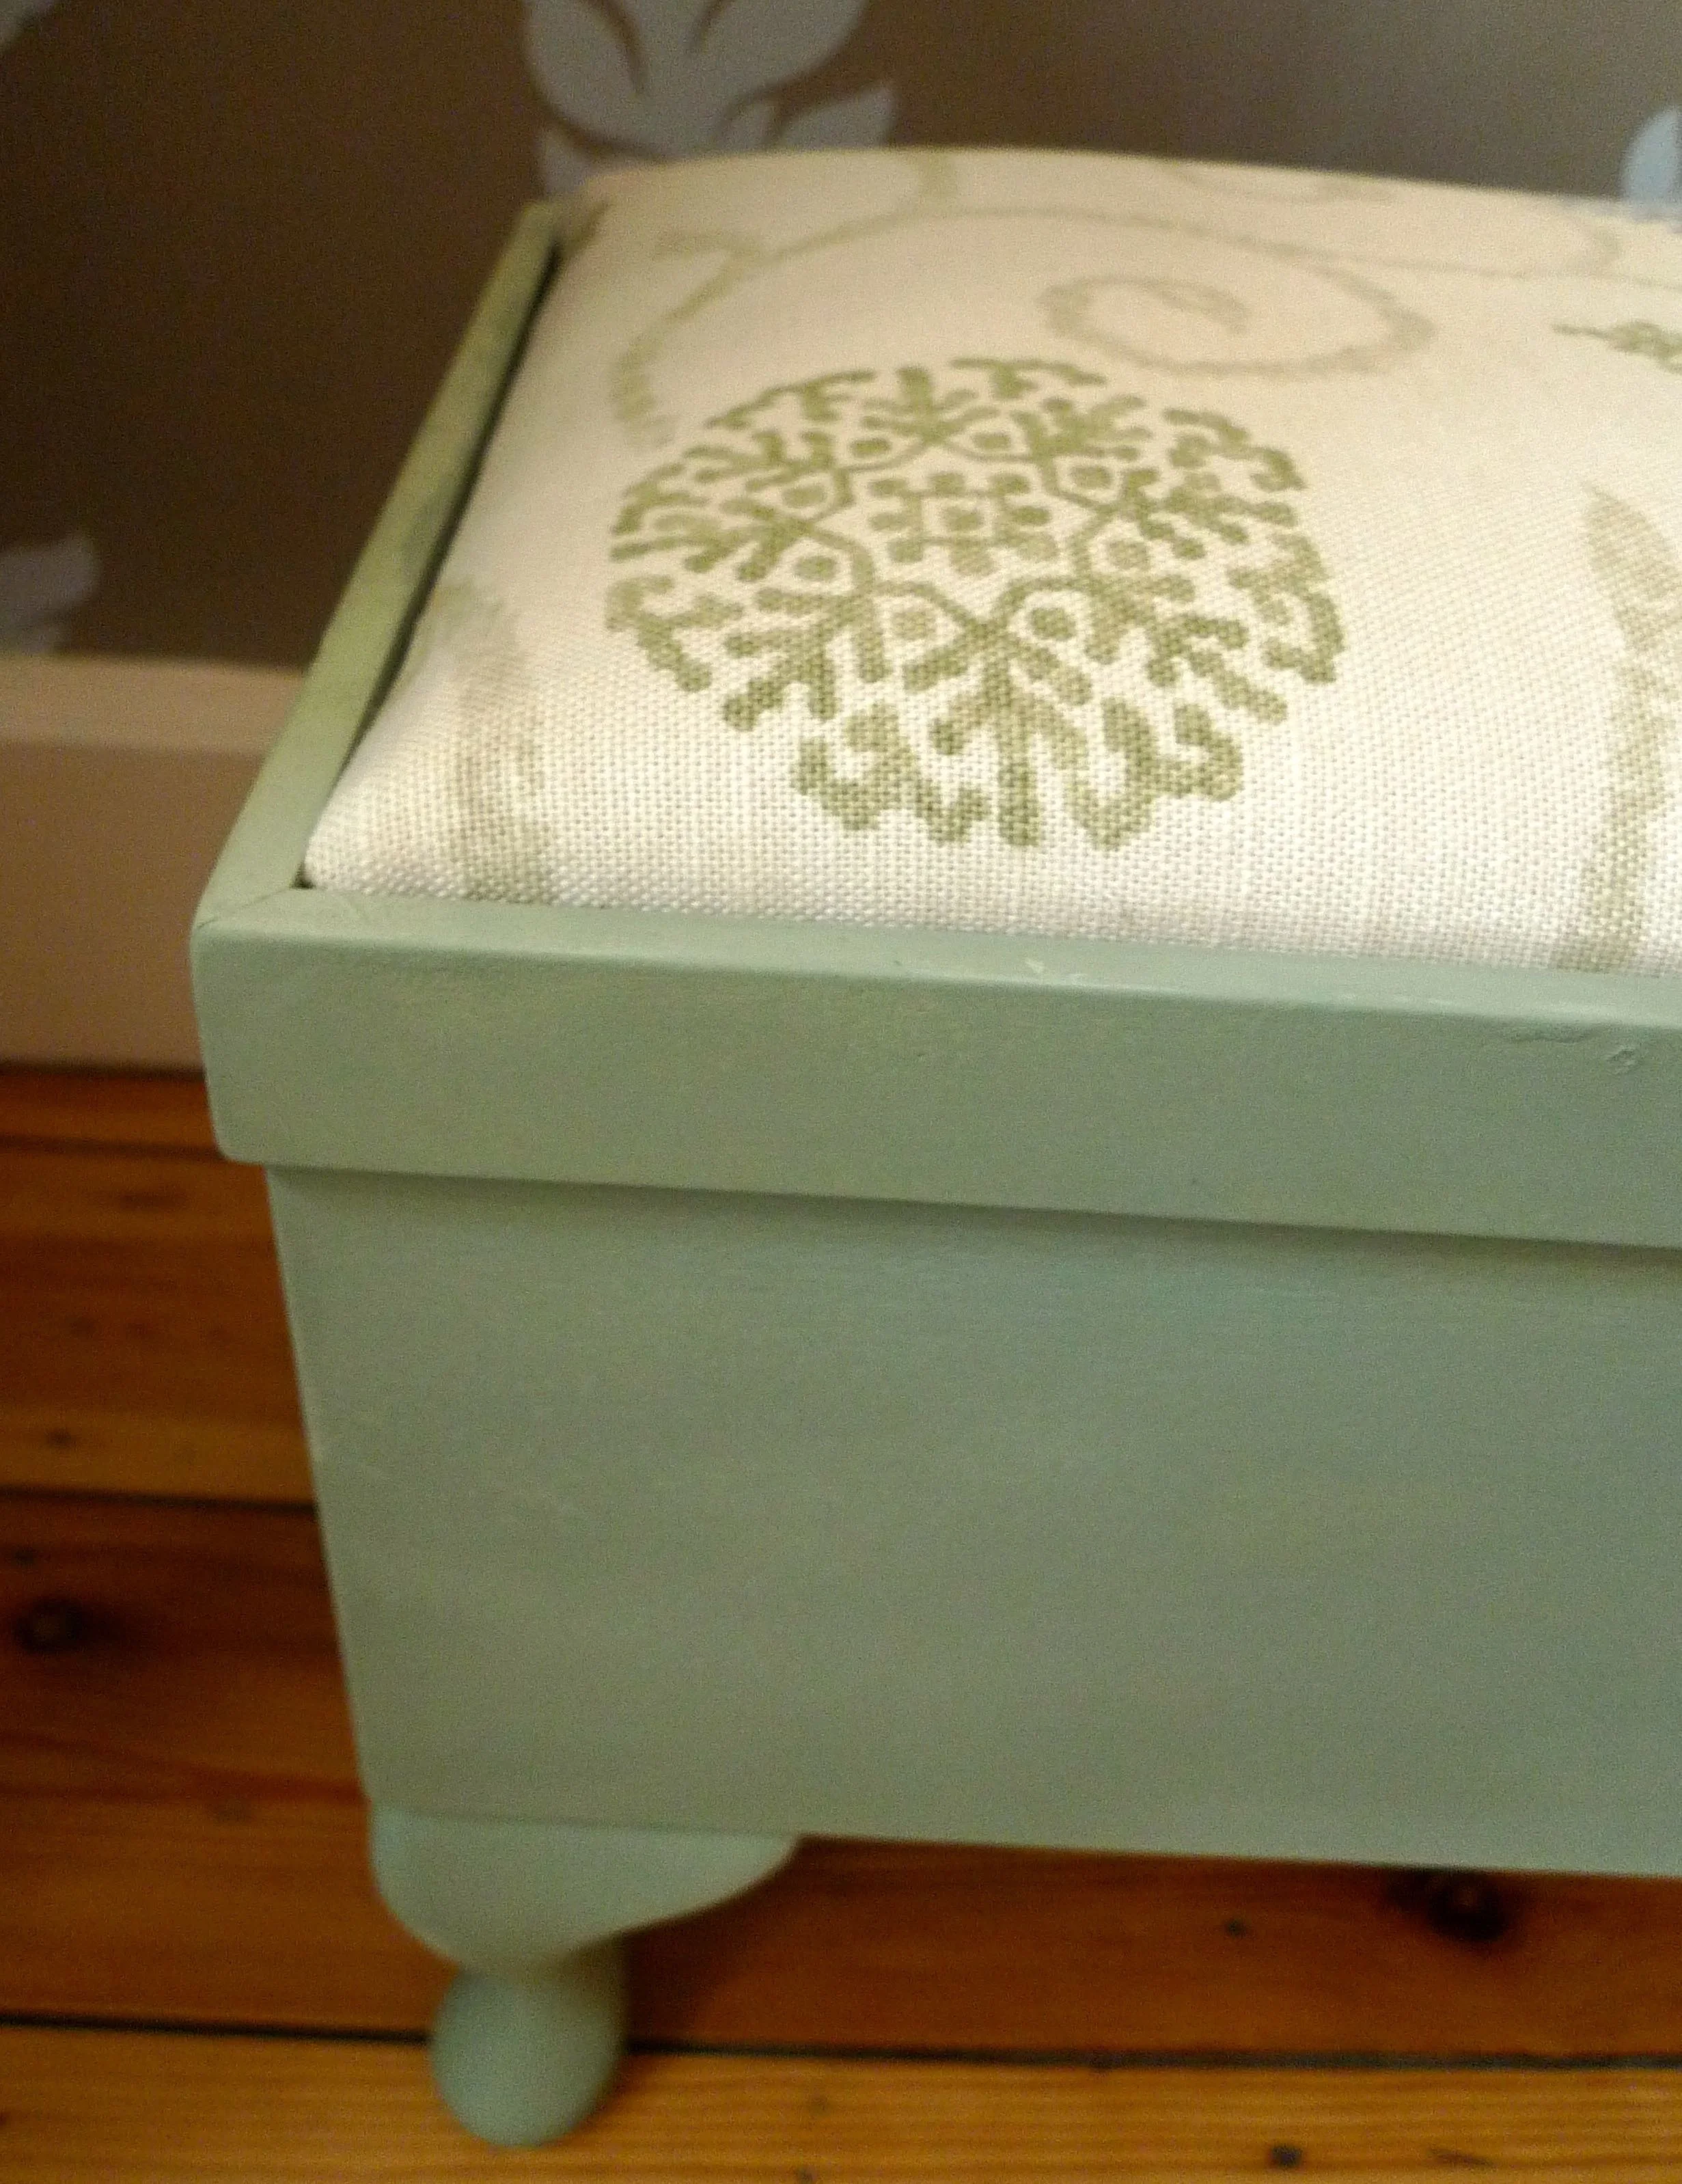
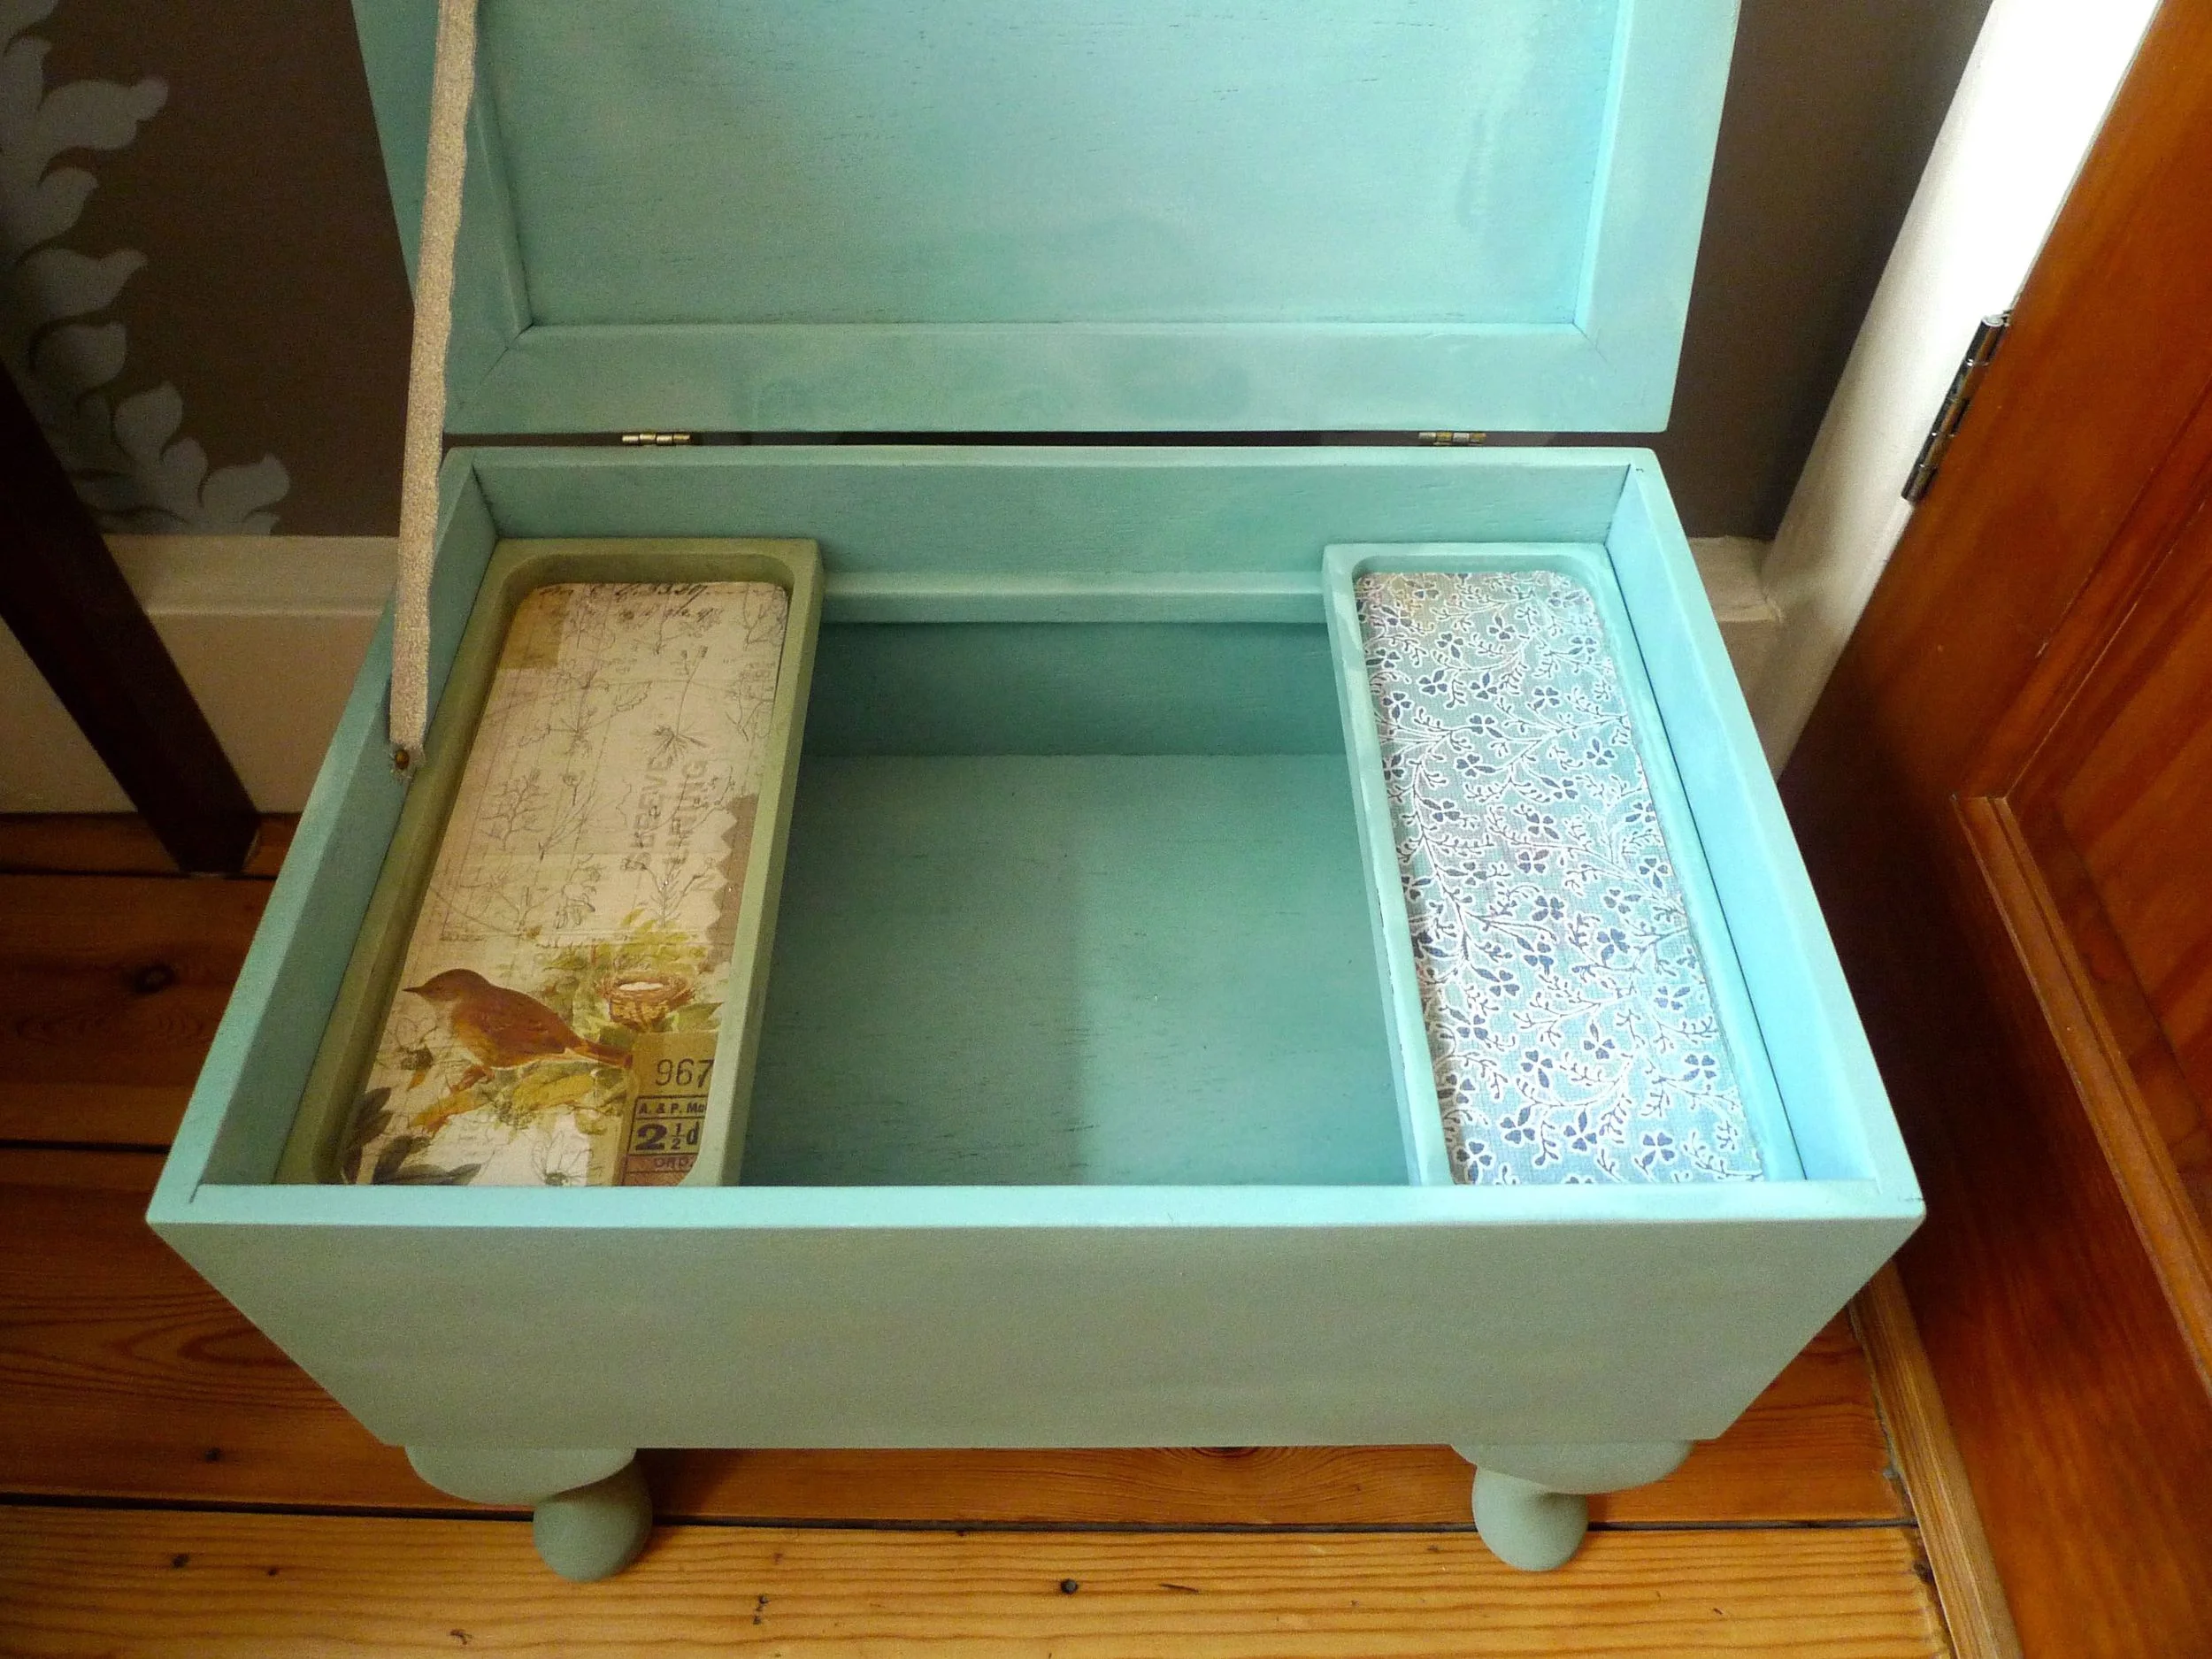
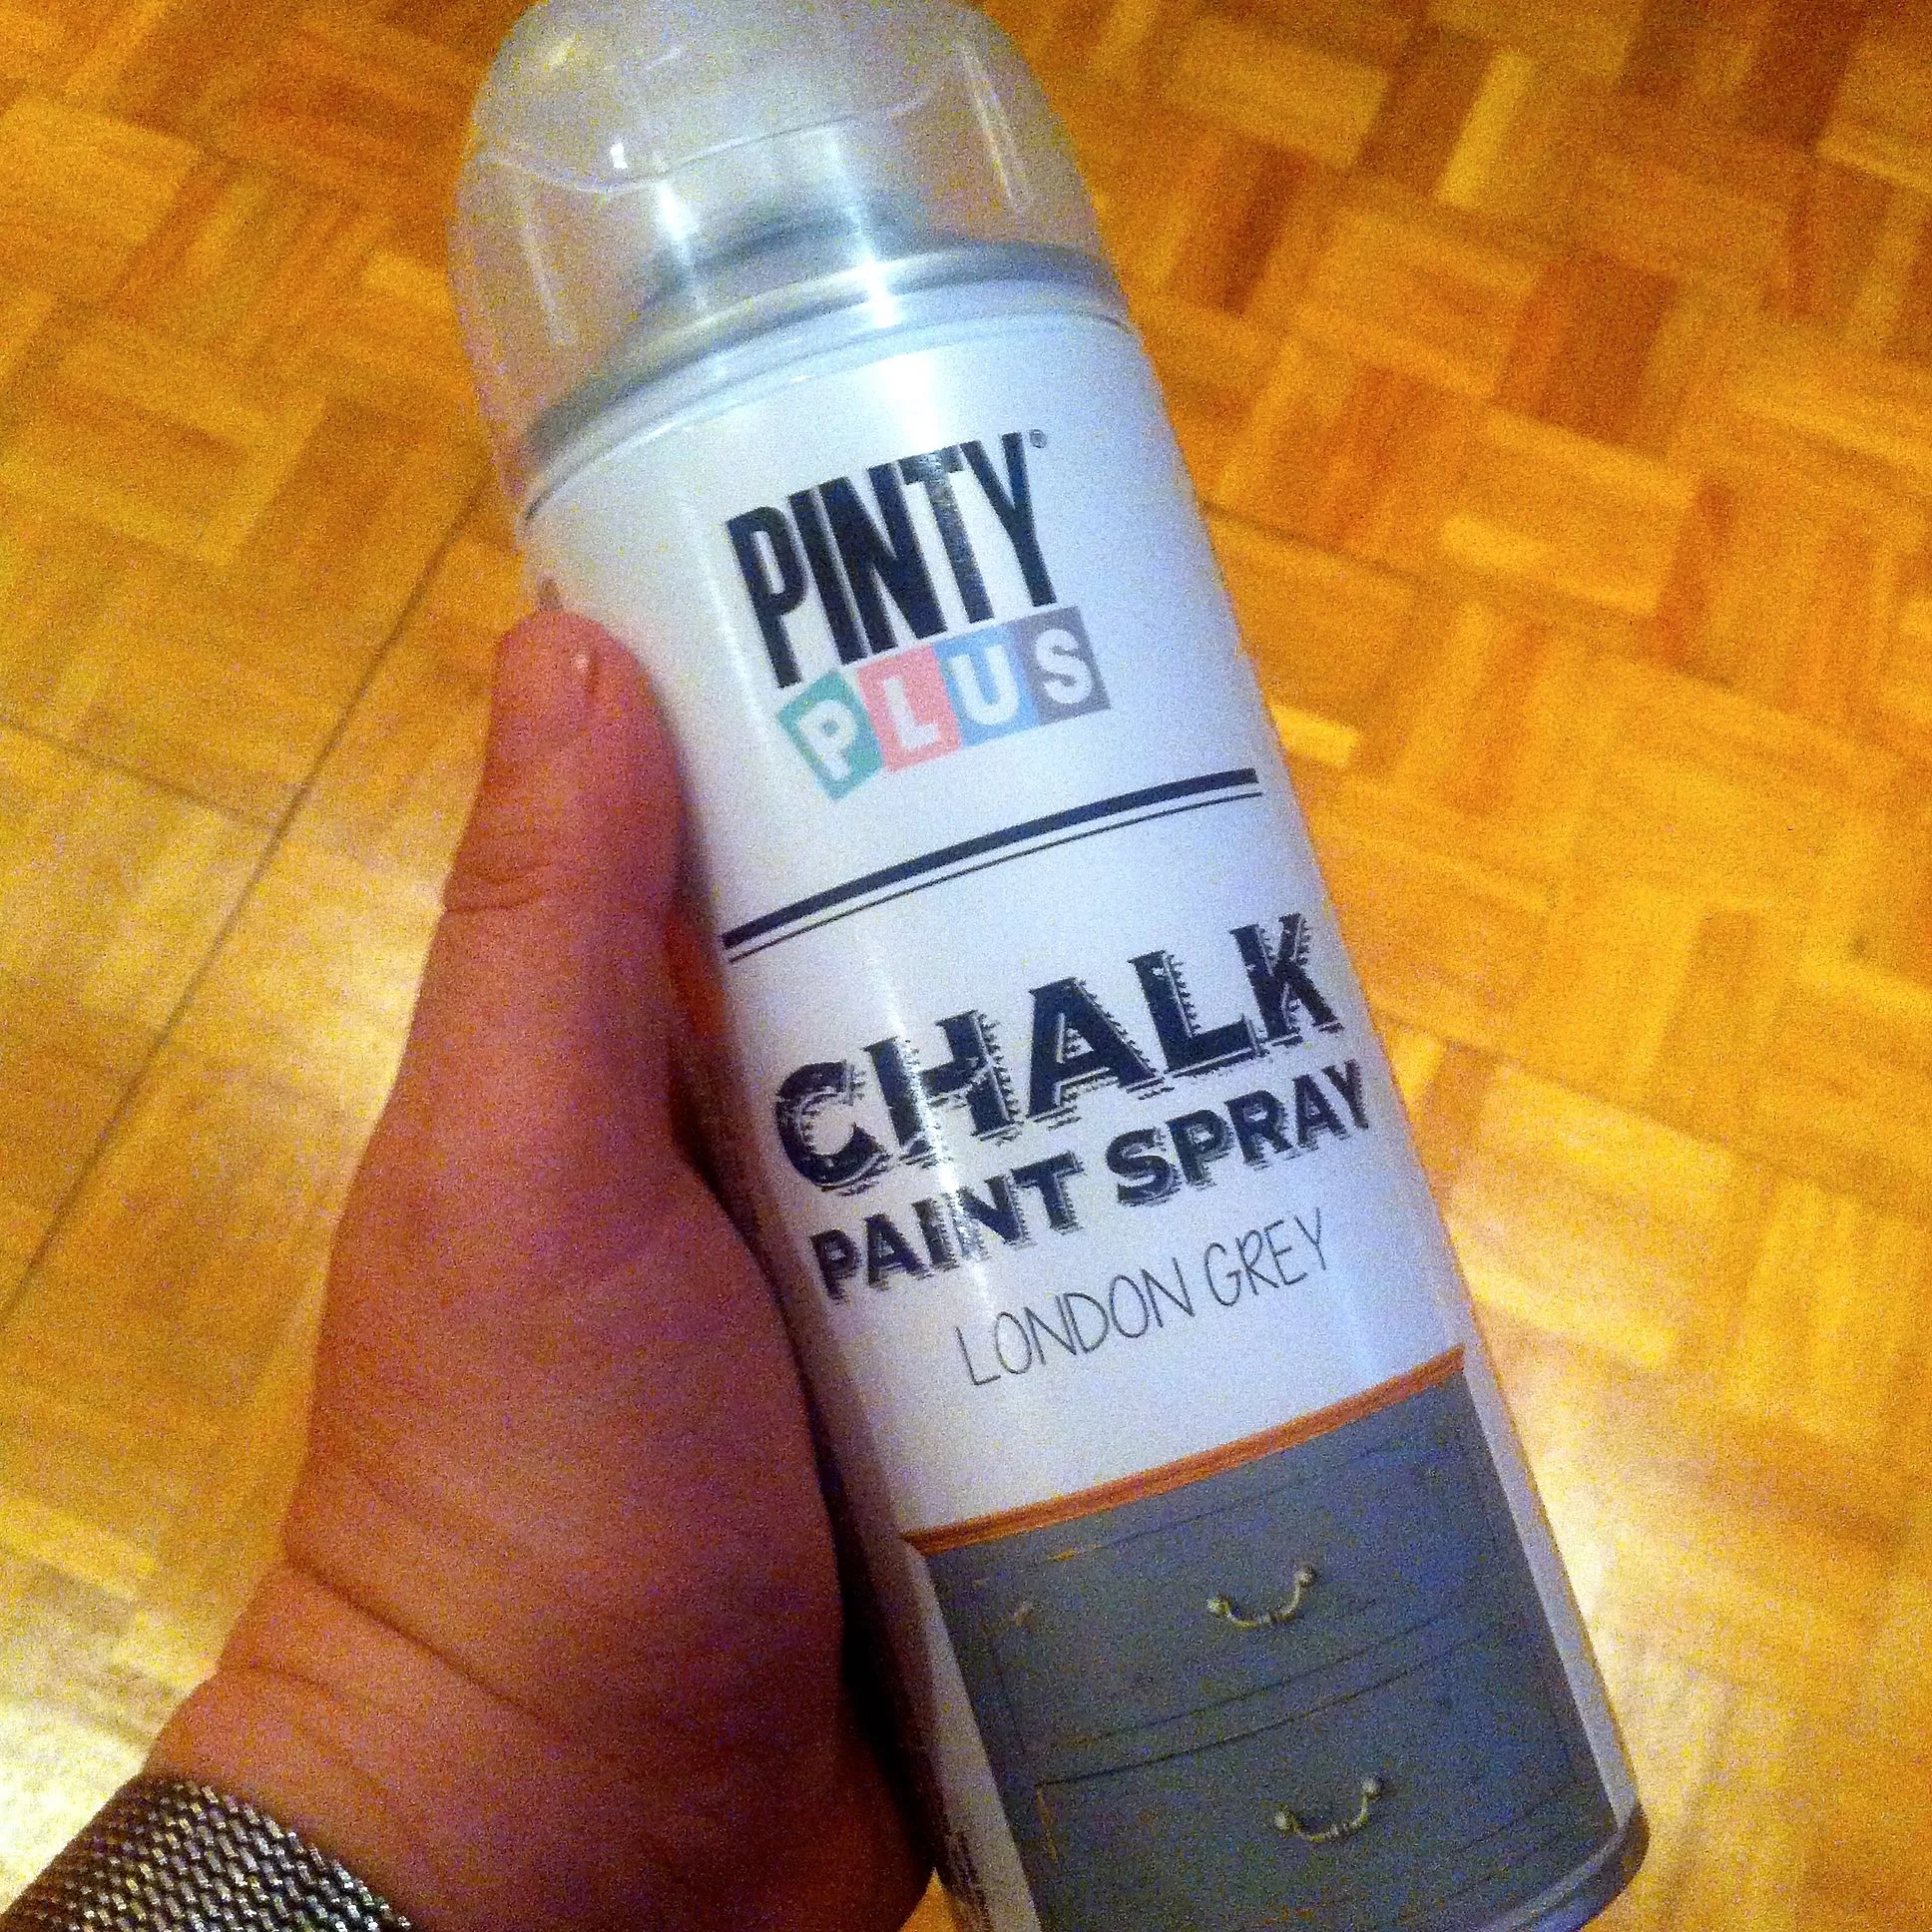
I was keen to get started and I was also keen to see how the colours I'd chosen would turn out. I chose London Grey for the outside, and that is as I hoped a greeny-grey. For the inside I wanted something brighter and contrasting, so chose Light Turquoise.
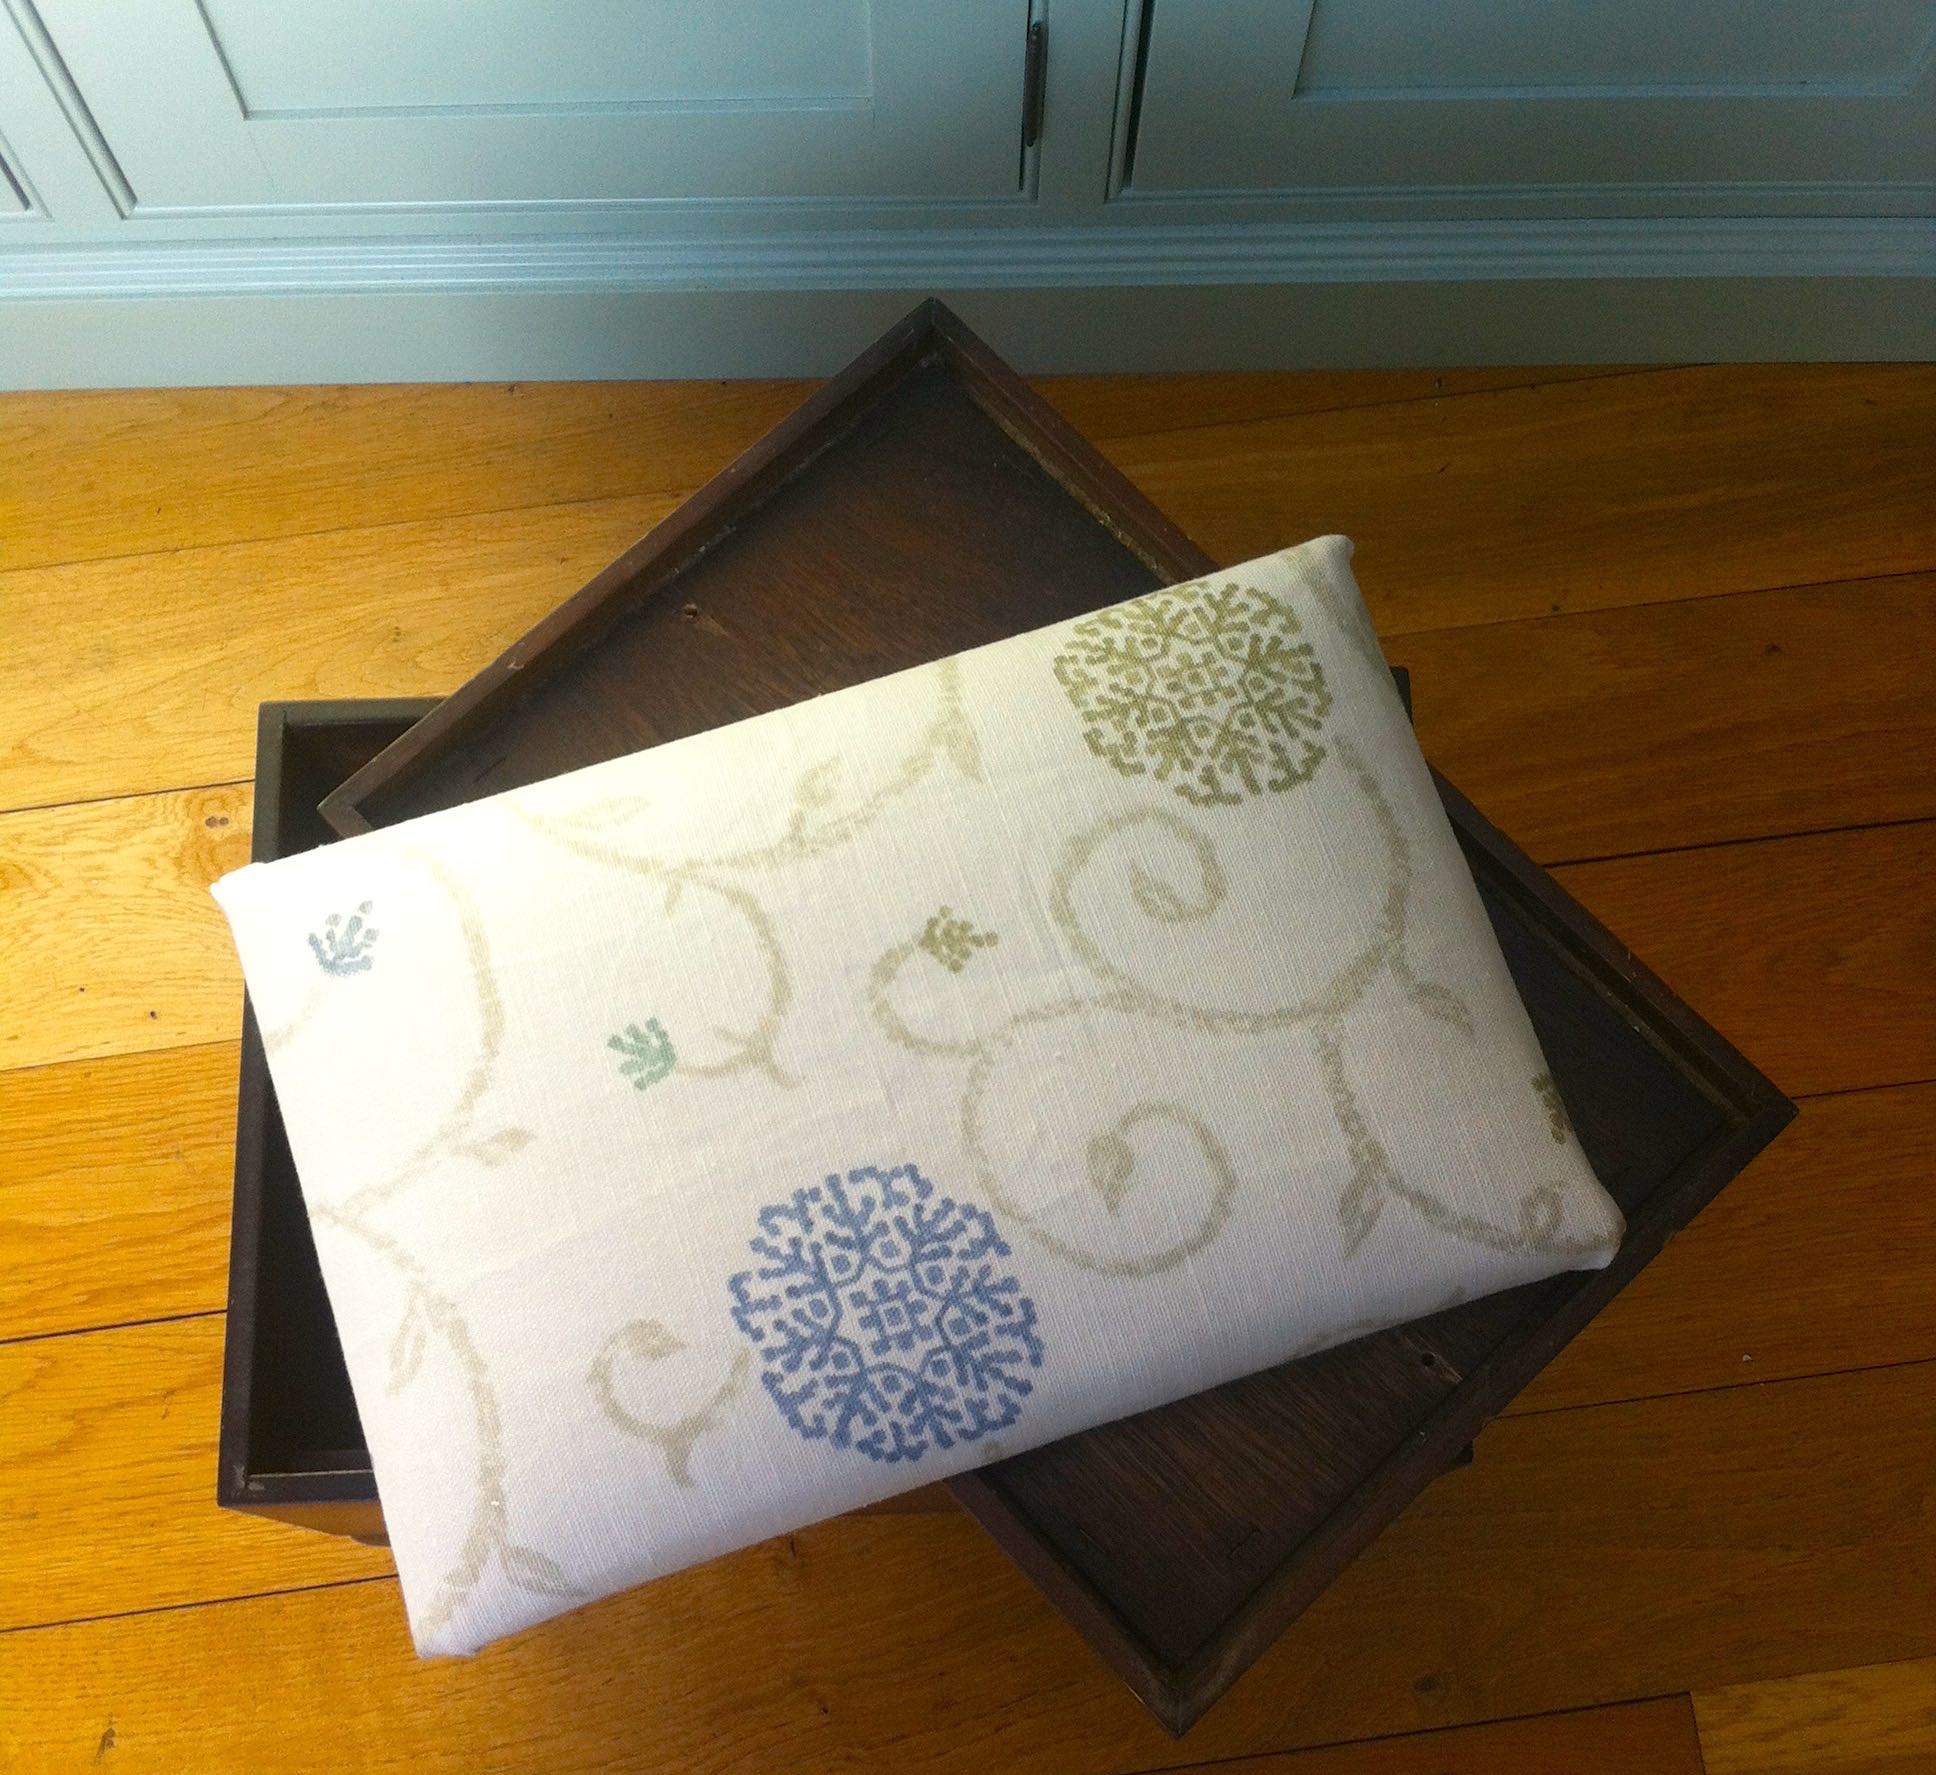
I started small and sprayed the two removable trays, one in each colour.
It was really easy to do, and I couldn't help but start spraying some more. It was easily touch-dry within twenty minutes.
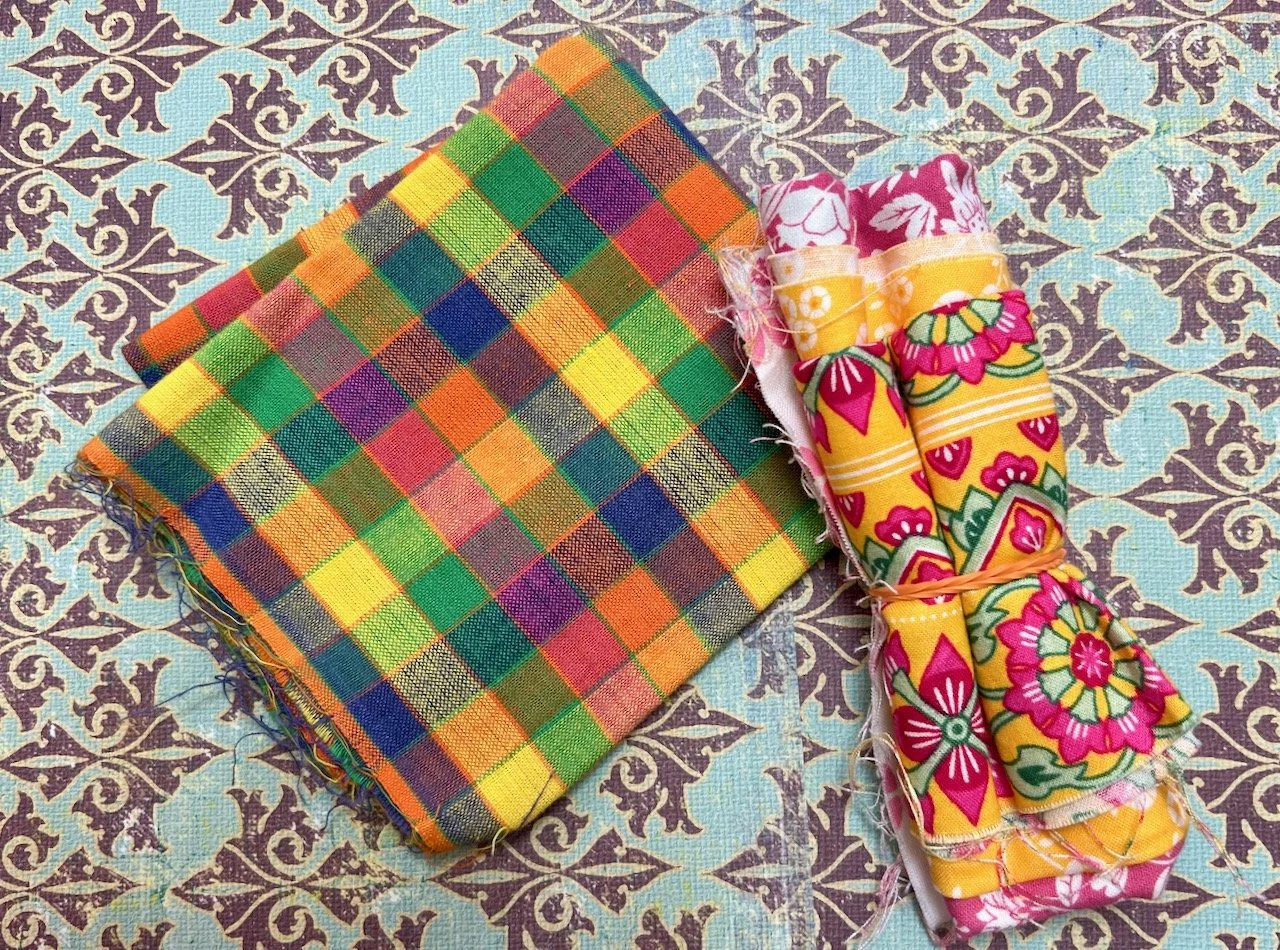
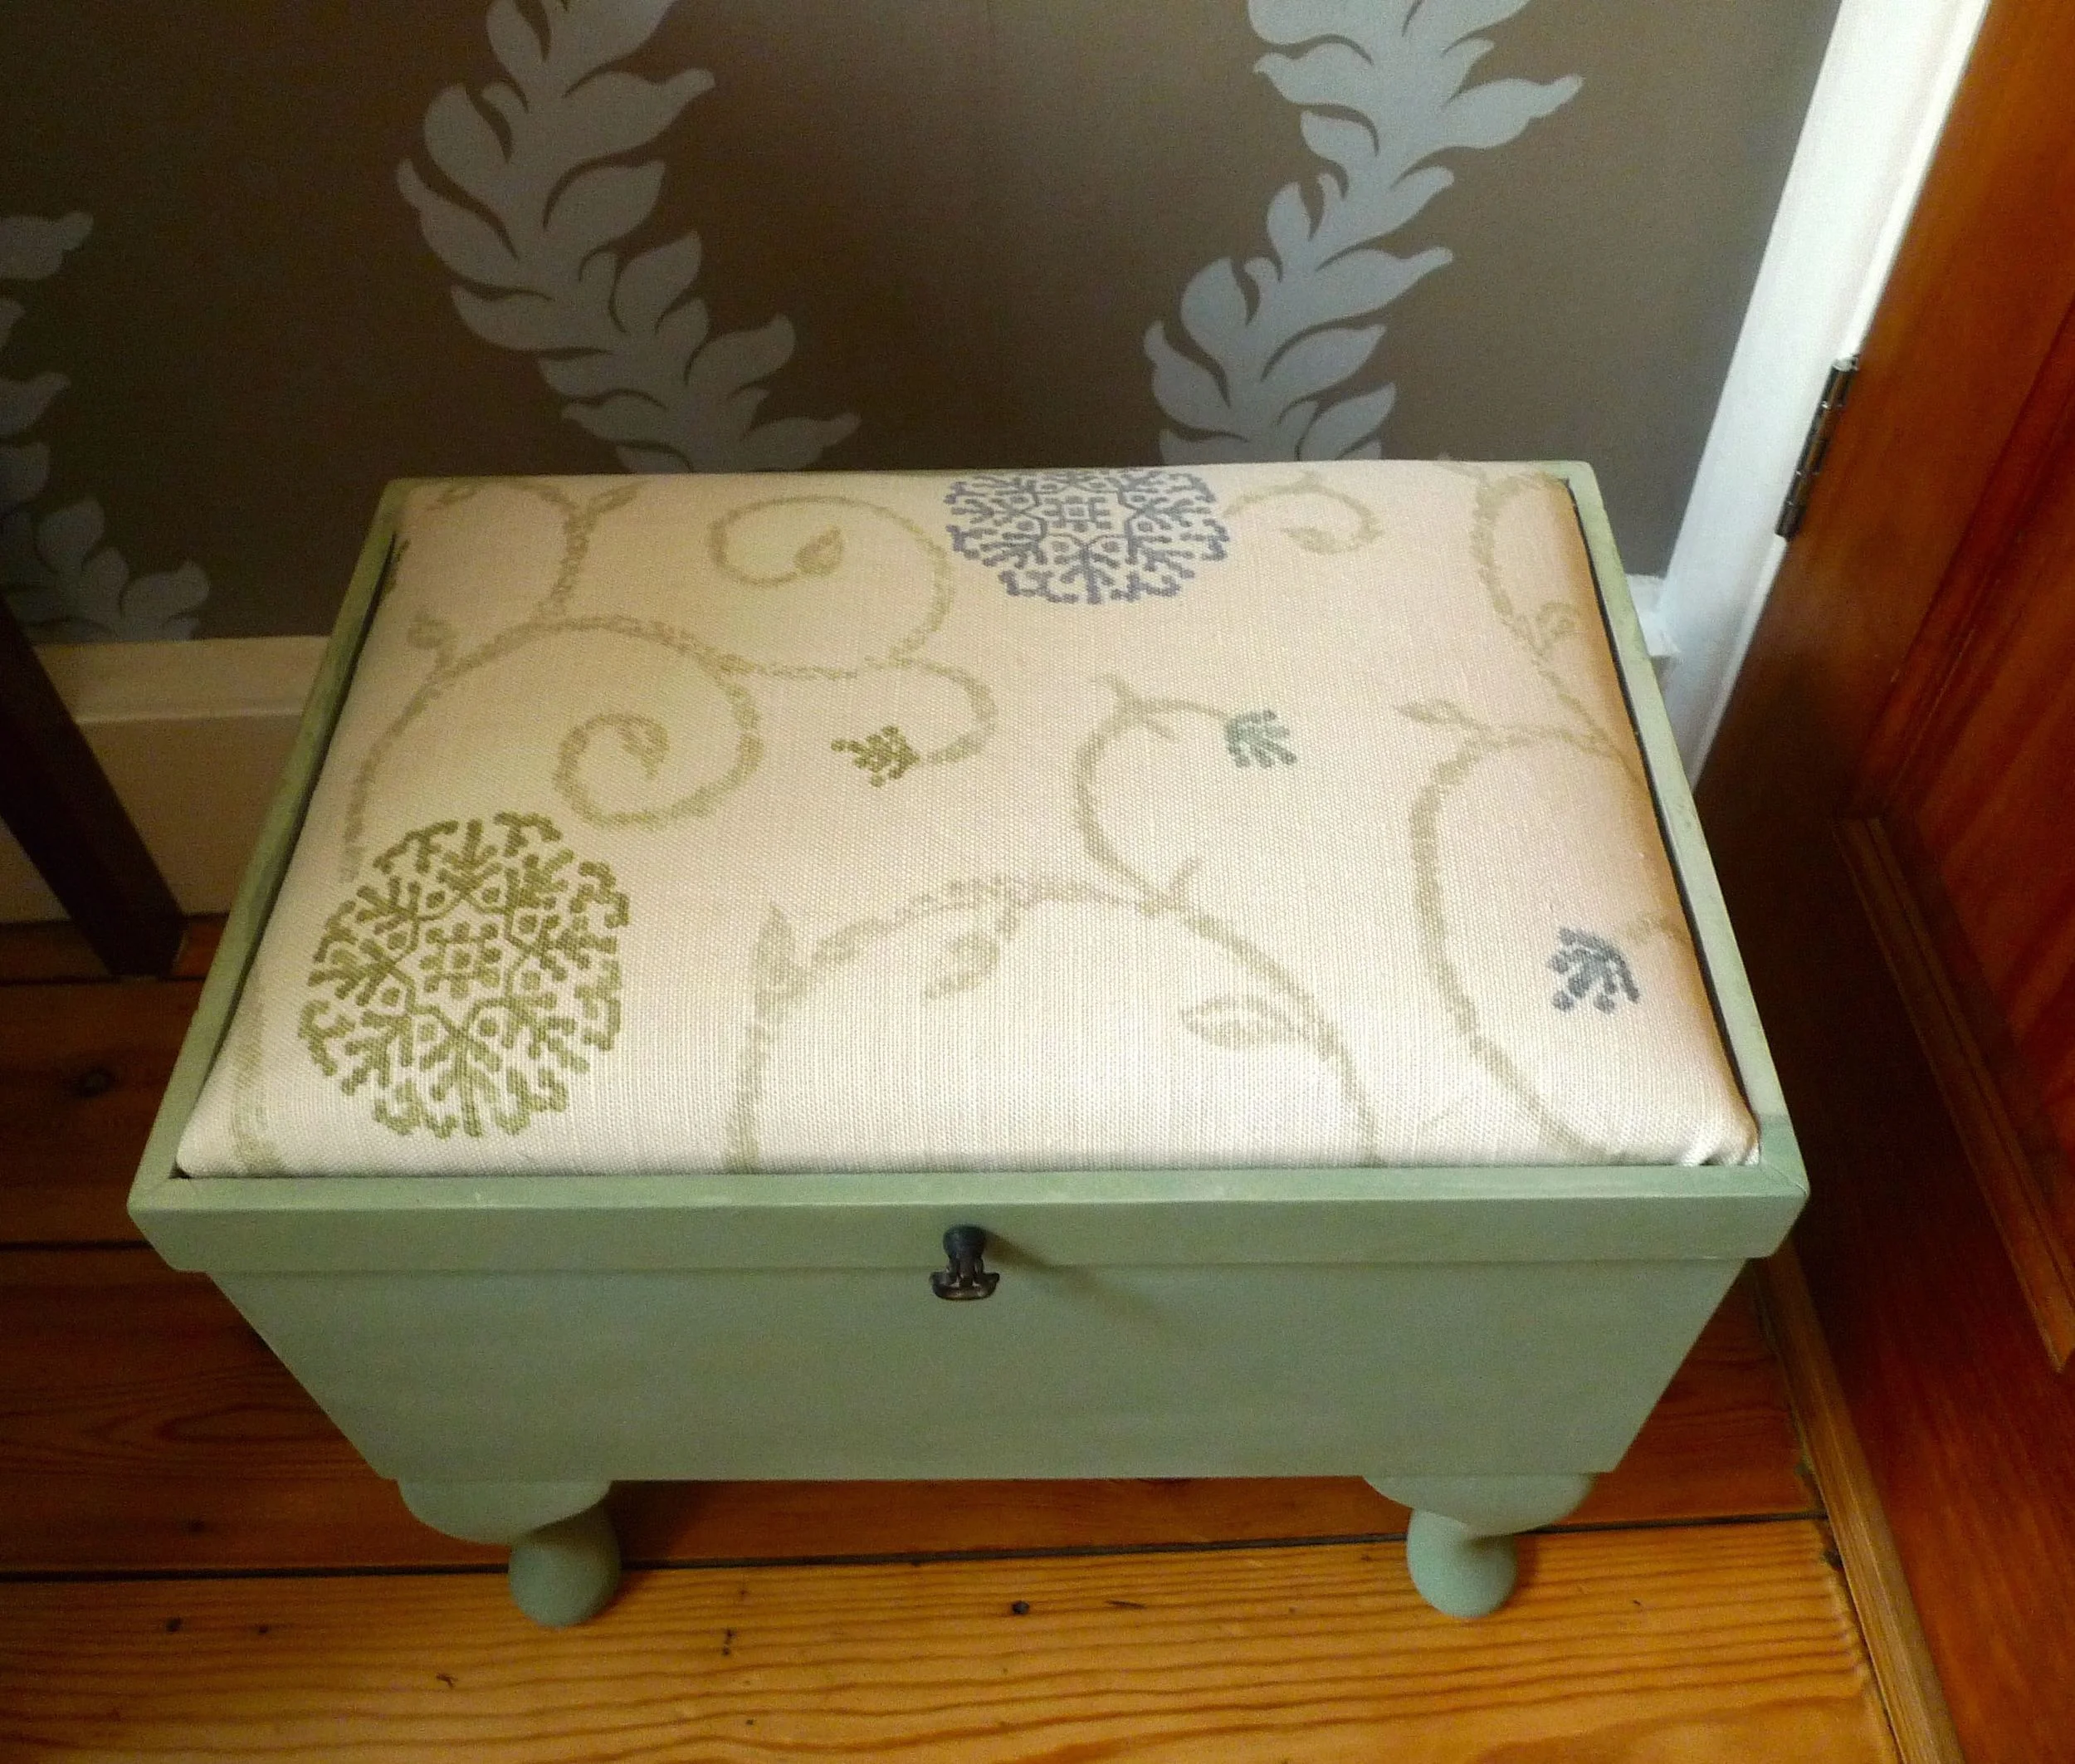
While I was waiting those first twenty minutes I recovered the top cushion. I had in my mind that I'd use a floral fabric for the top, something Cath Kidstone-esque, but when I saw the colours I changed my plan. You see the colours were very similar to the colours we've used throughout our house; the London Grey is very similar to Farrow & Ball's Old White and the Light Turquoise like their Teresa's Green.
So I knew that the leftover material I had from our spare bedroom curtains would be perfect. And isn't it?
I sprayed the inside first, and then because it was so easy and just a little bit addictive I quite quickly started on the outside. I sprayed the edges where the colours met freehand, which despite my tremor worked out well.
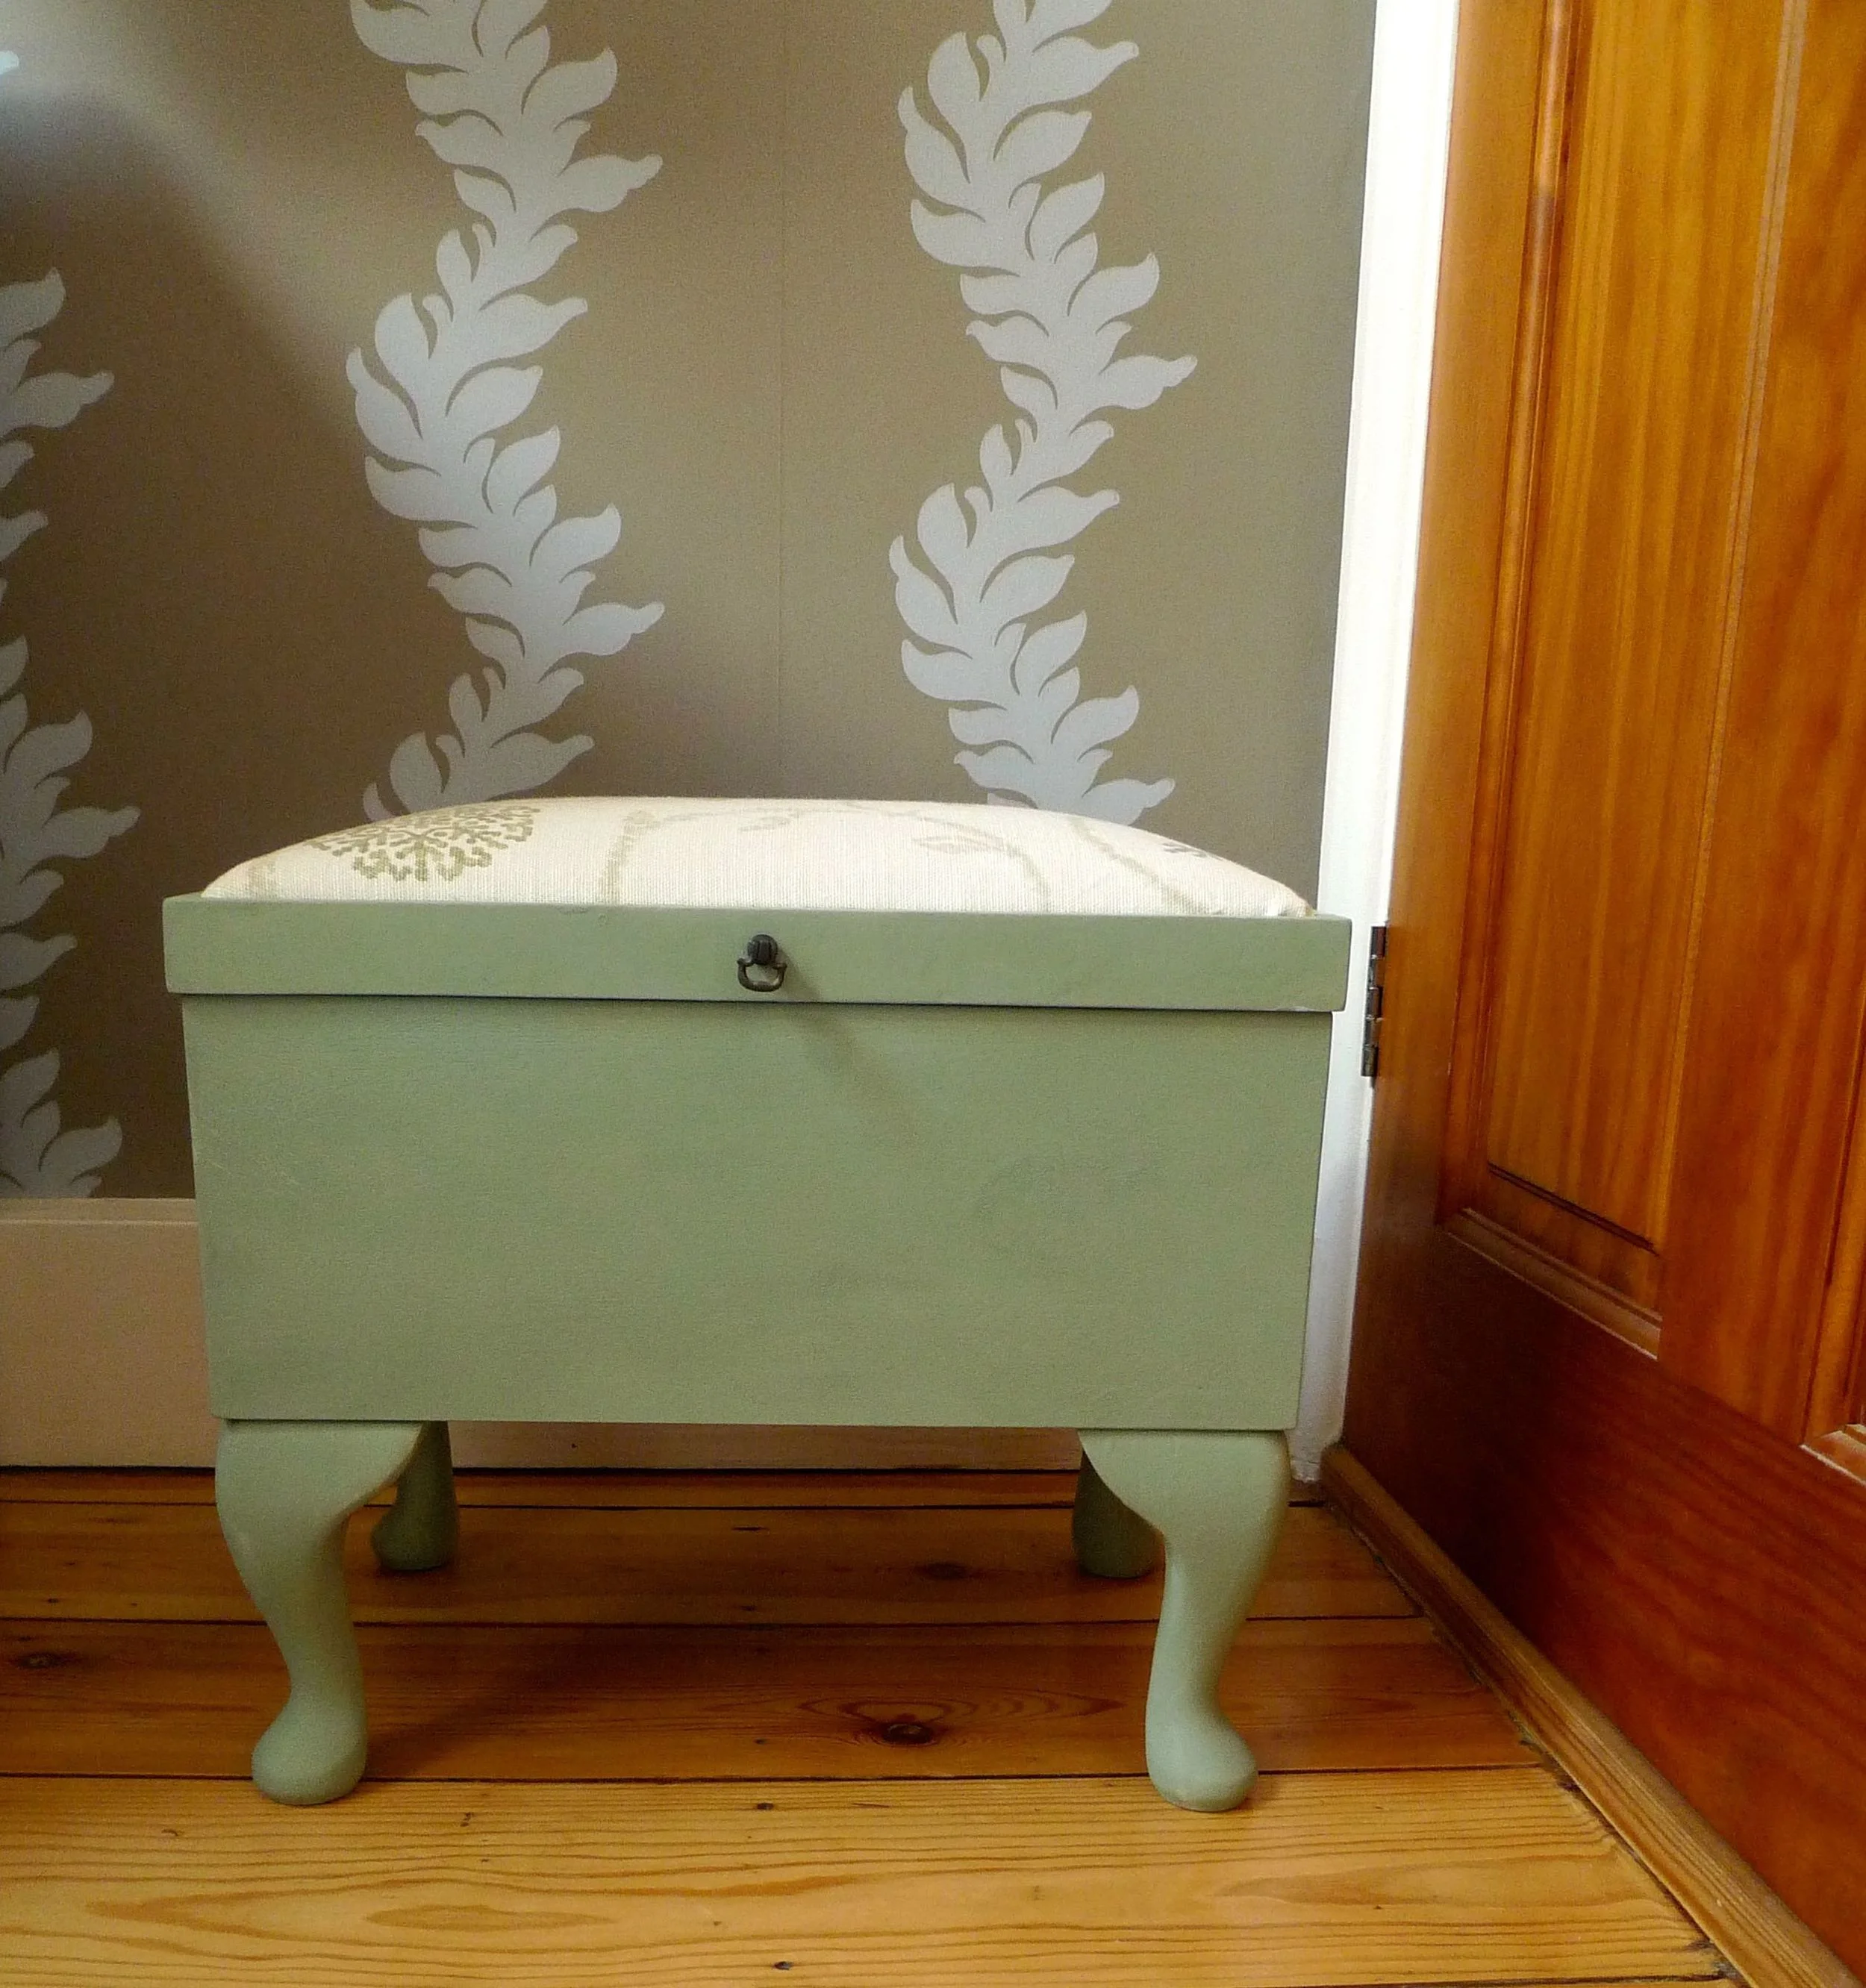
The hardest part in this project has been waiting the twenty minutes for the paint to dry so I could spray some more! But I managed to curb my enthusiasm and take this (relatively) slowly. I'd given each surface two coats and left it to dry thoroughly overnight before reassembling the stool.
I think it's turned out really well. I was in two minds whether to apply a finishing spray or not. So far I haven't because I'm pleased with the velvety finish I currently have - I think I'll test run that on a spare piece of wood so I know how it'll turn out.
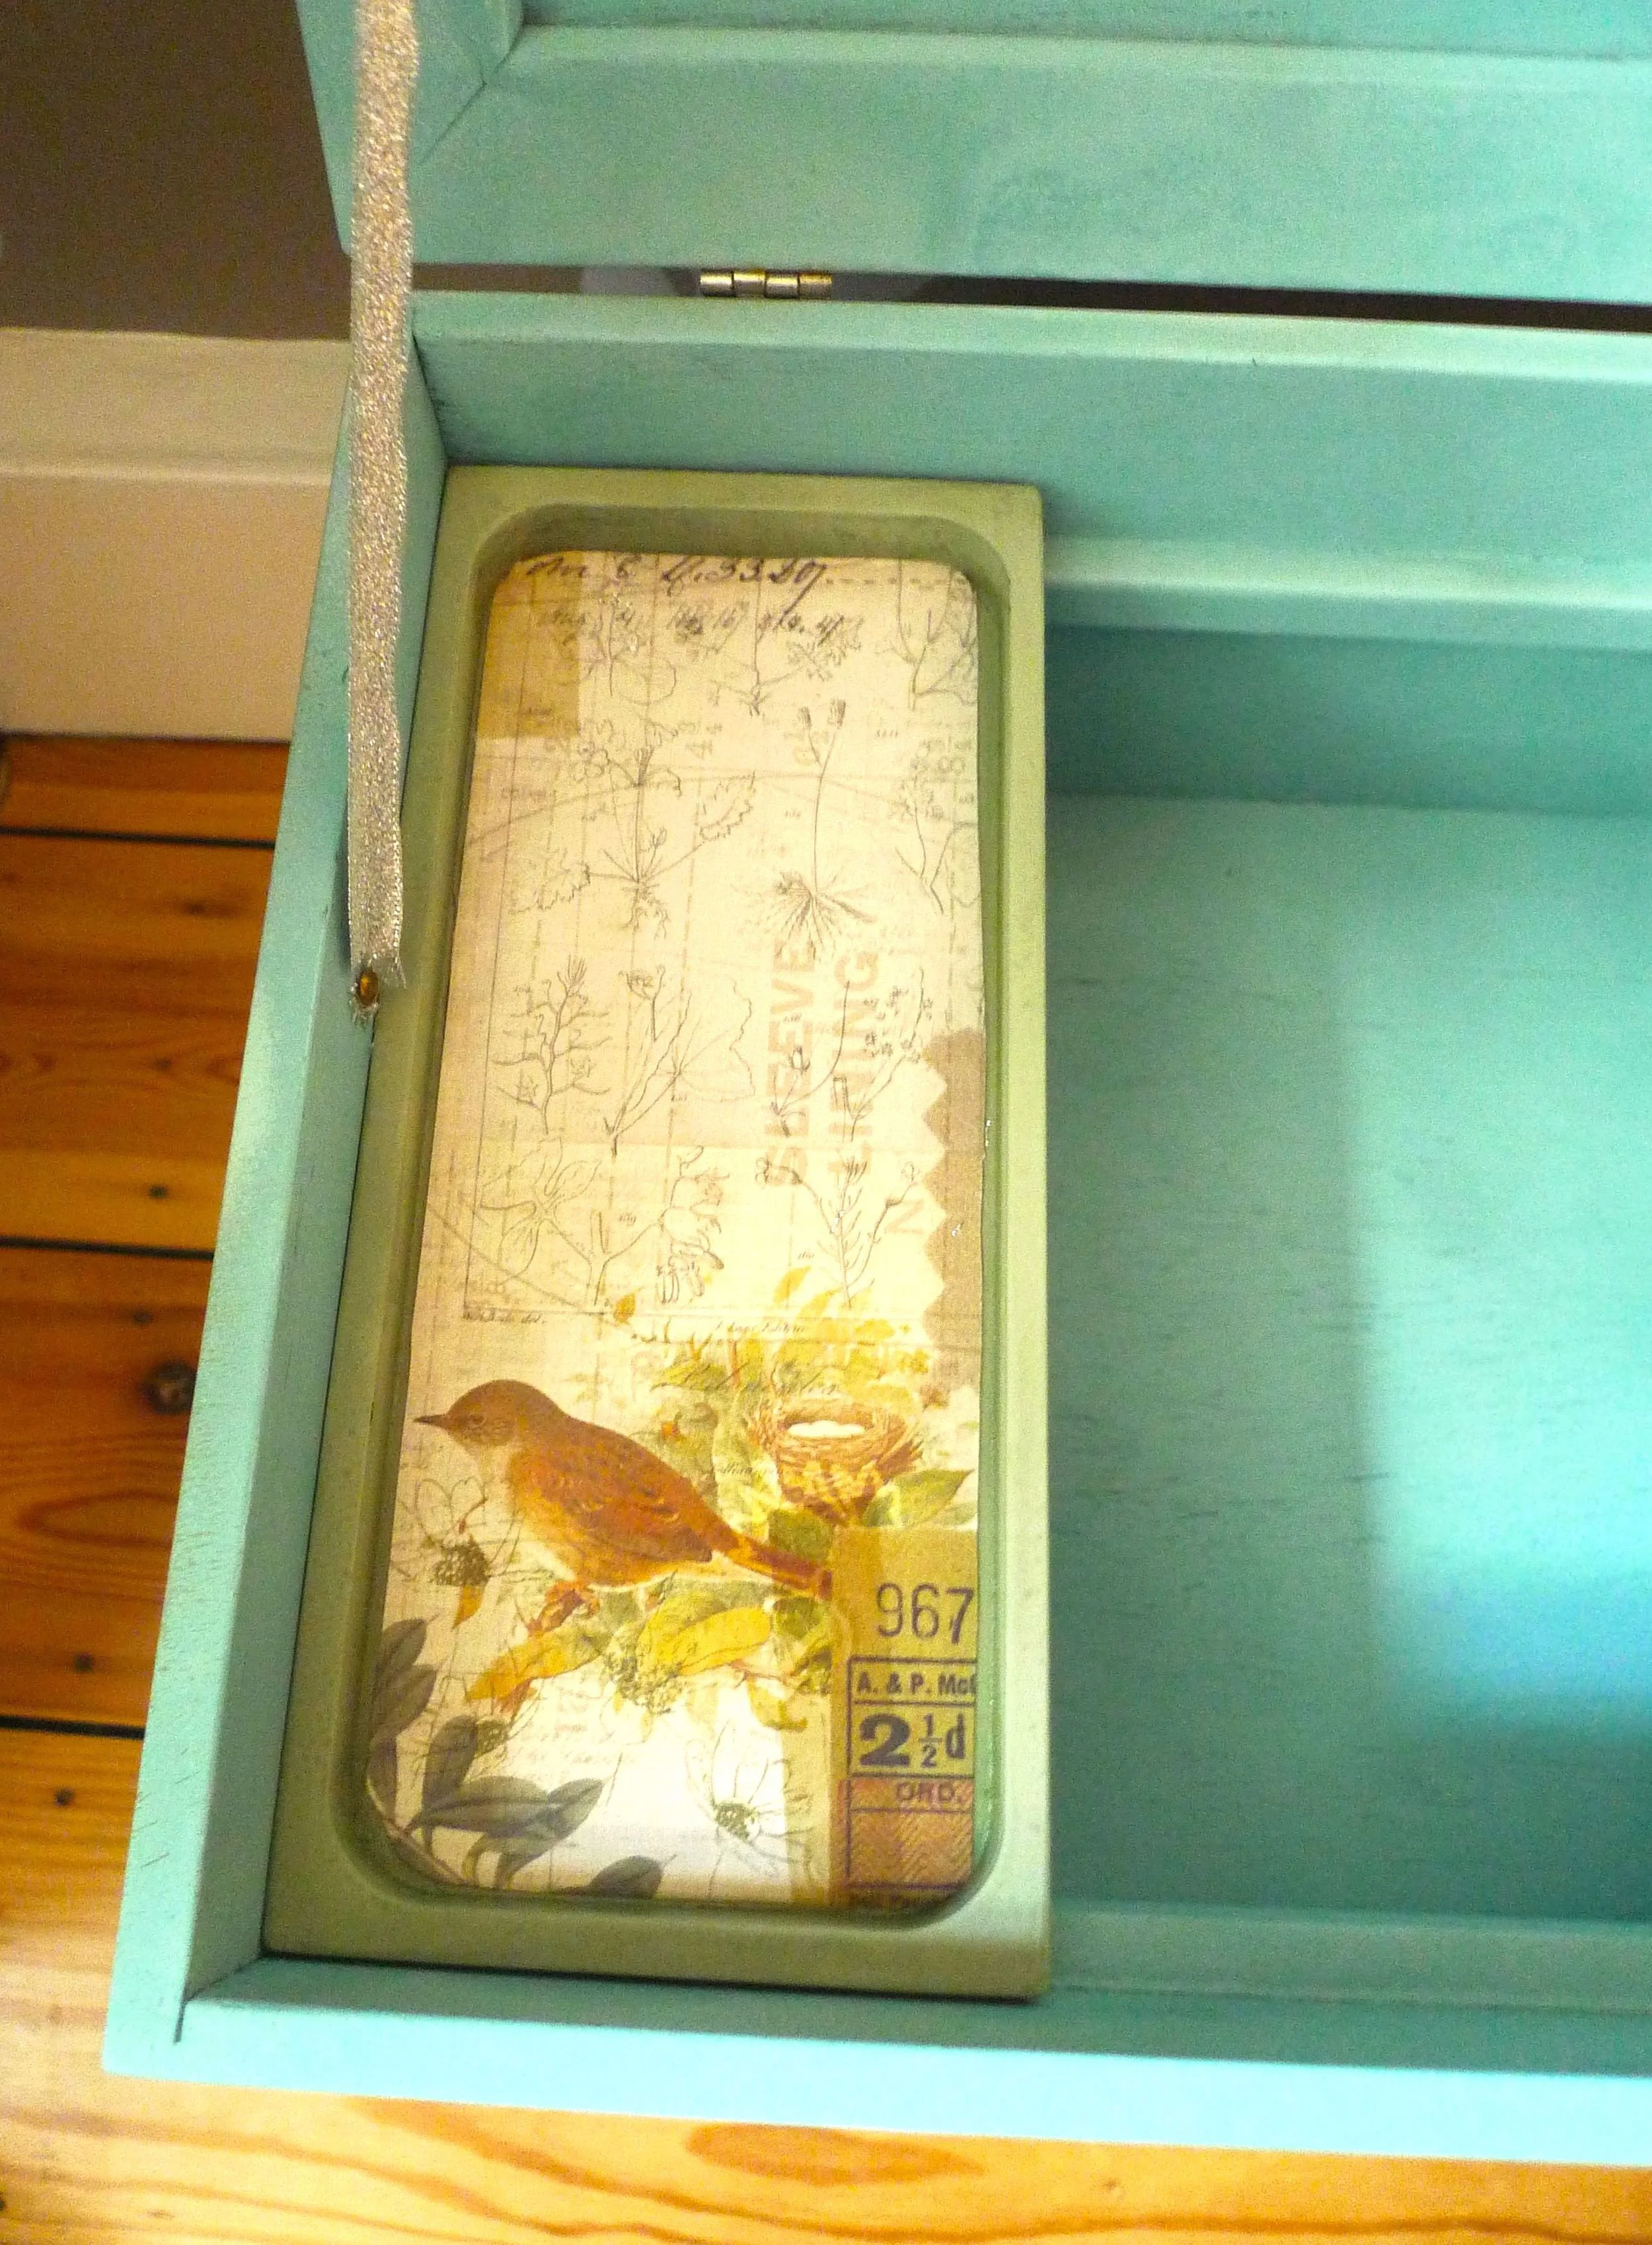
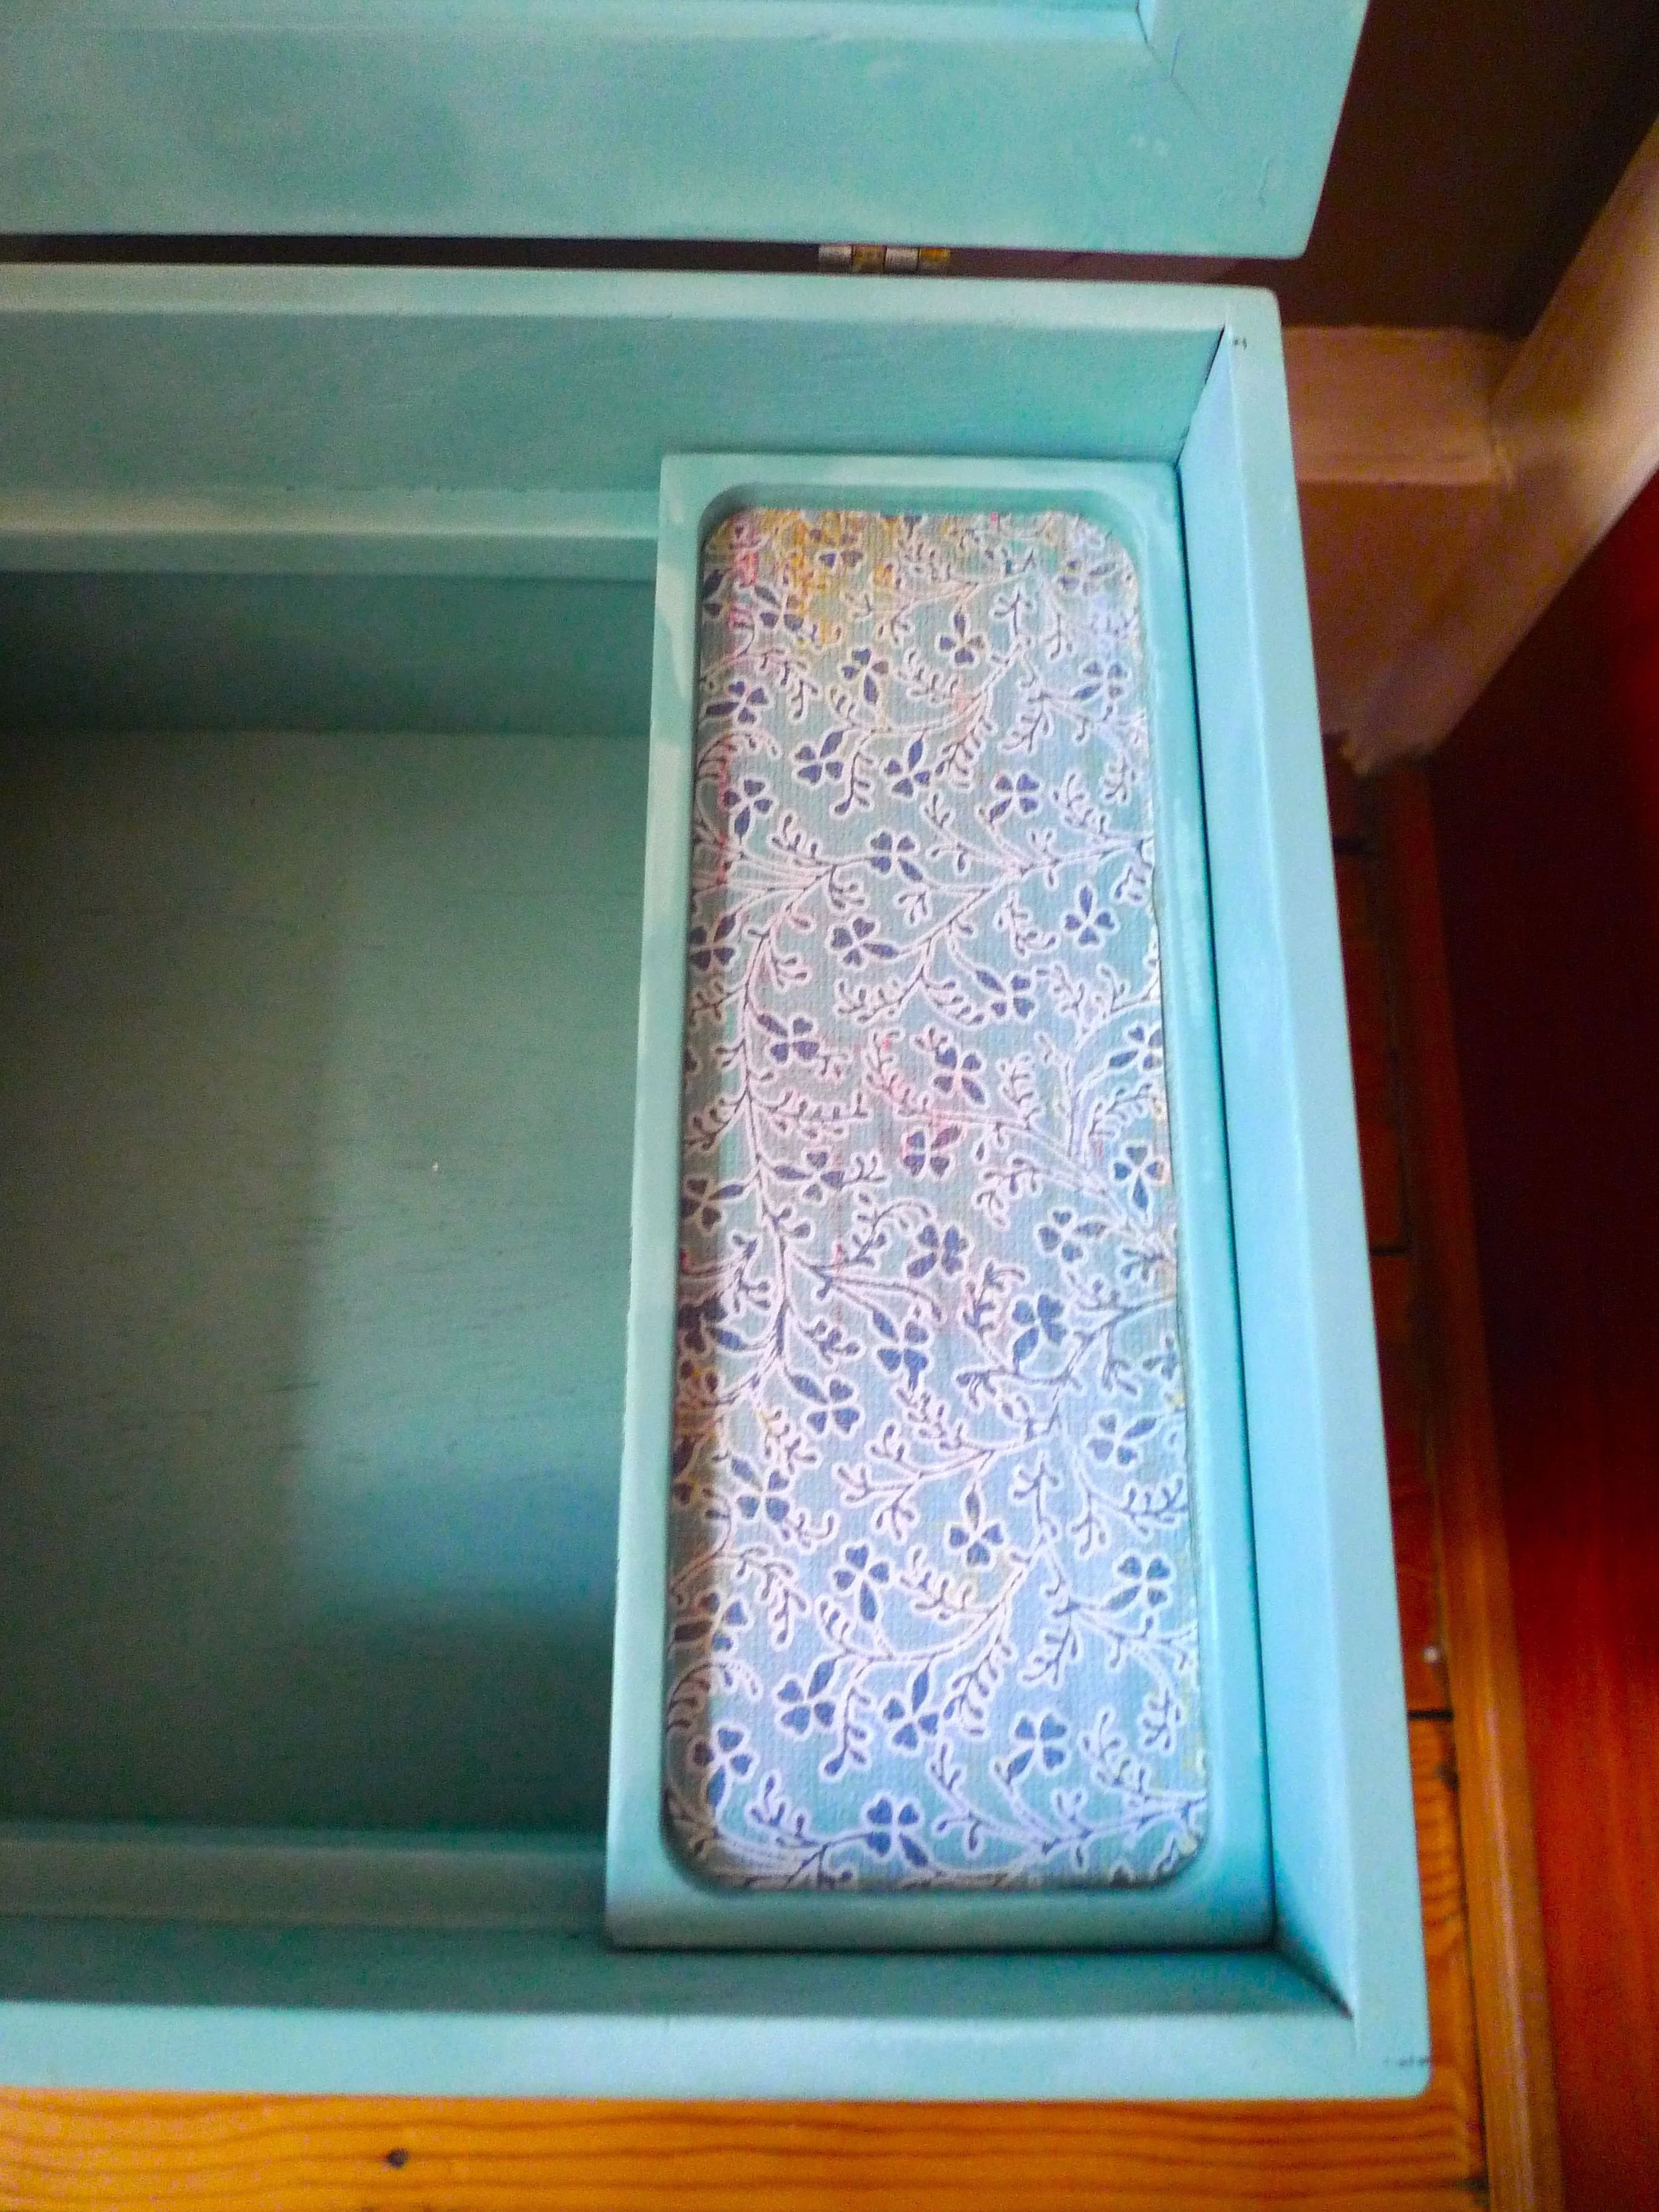
I decided to add some scrapbook paper into the removable trays to give them some extra character, and I think these look great. I simply used PVA Craft Glue to stick the paper to the trays.
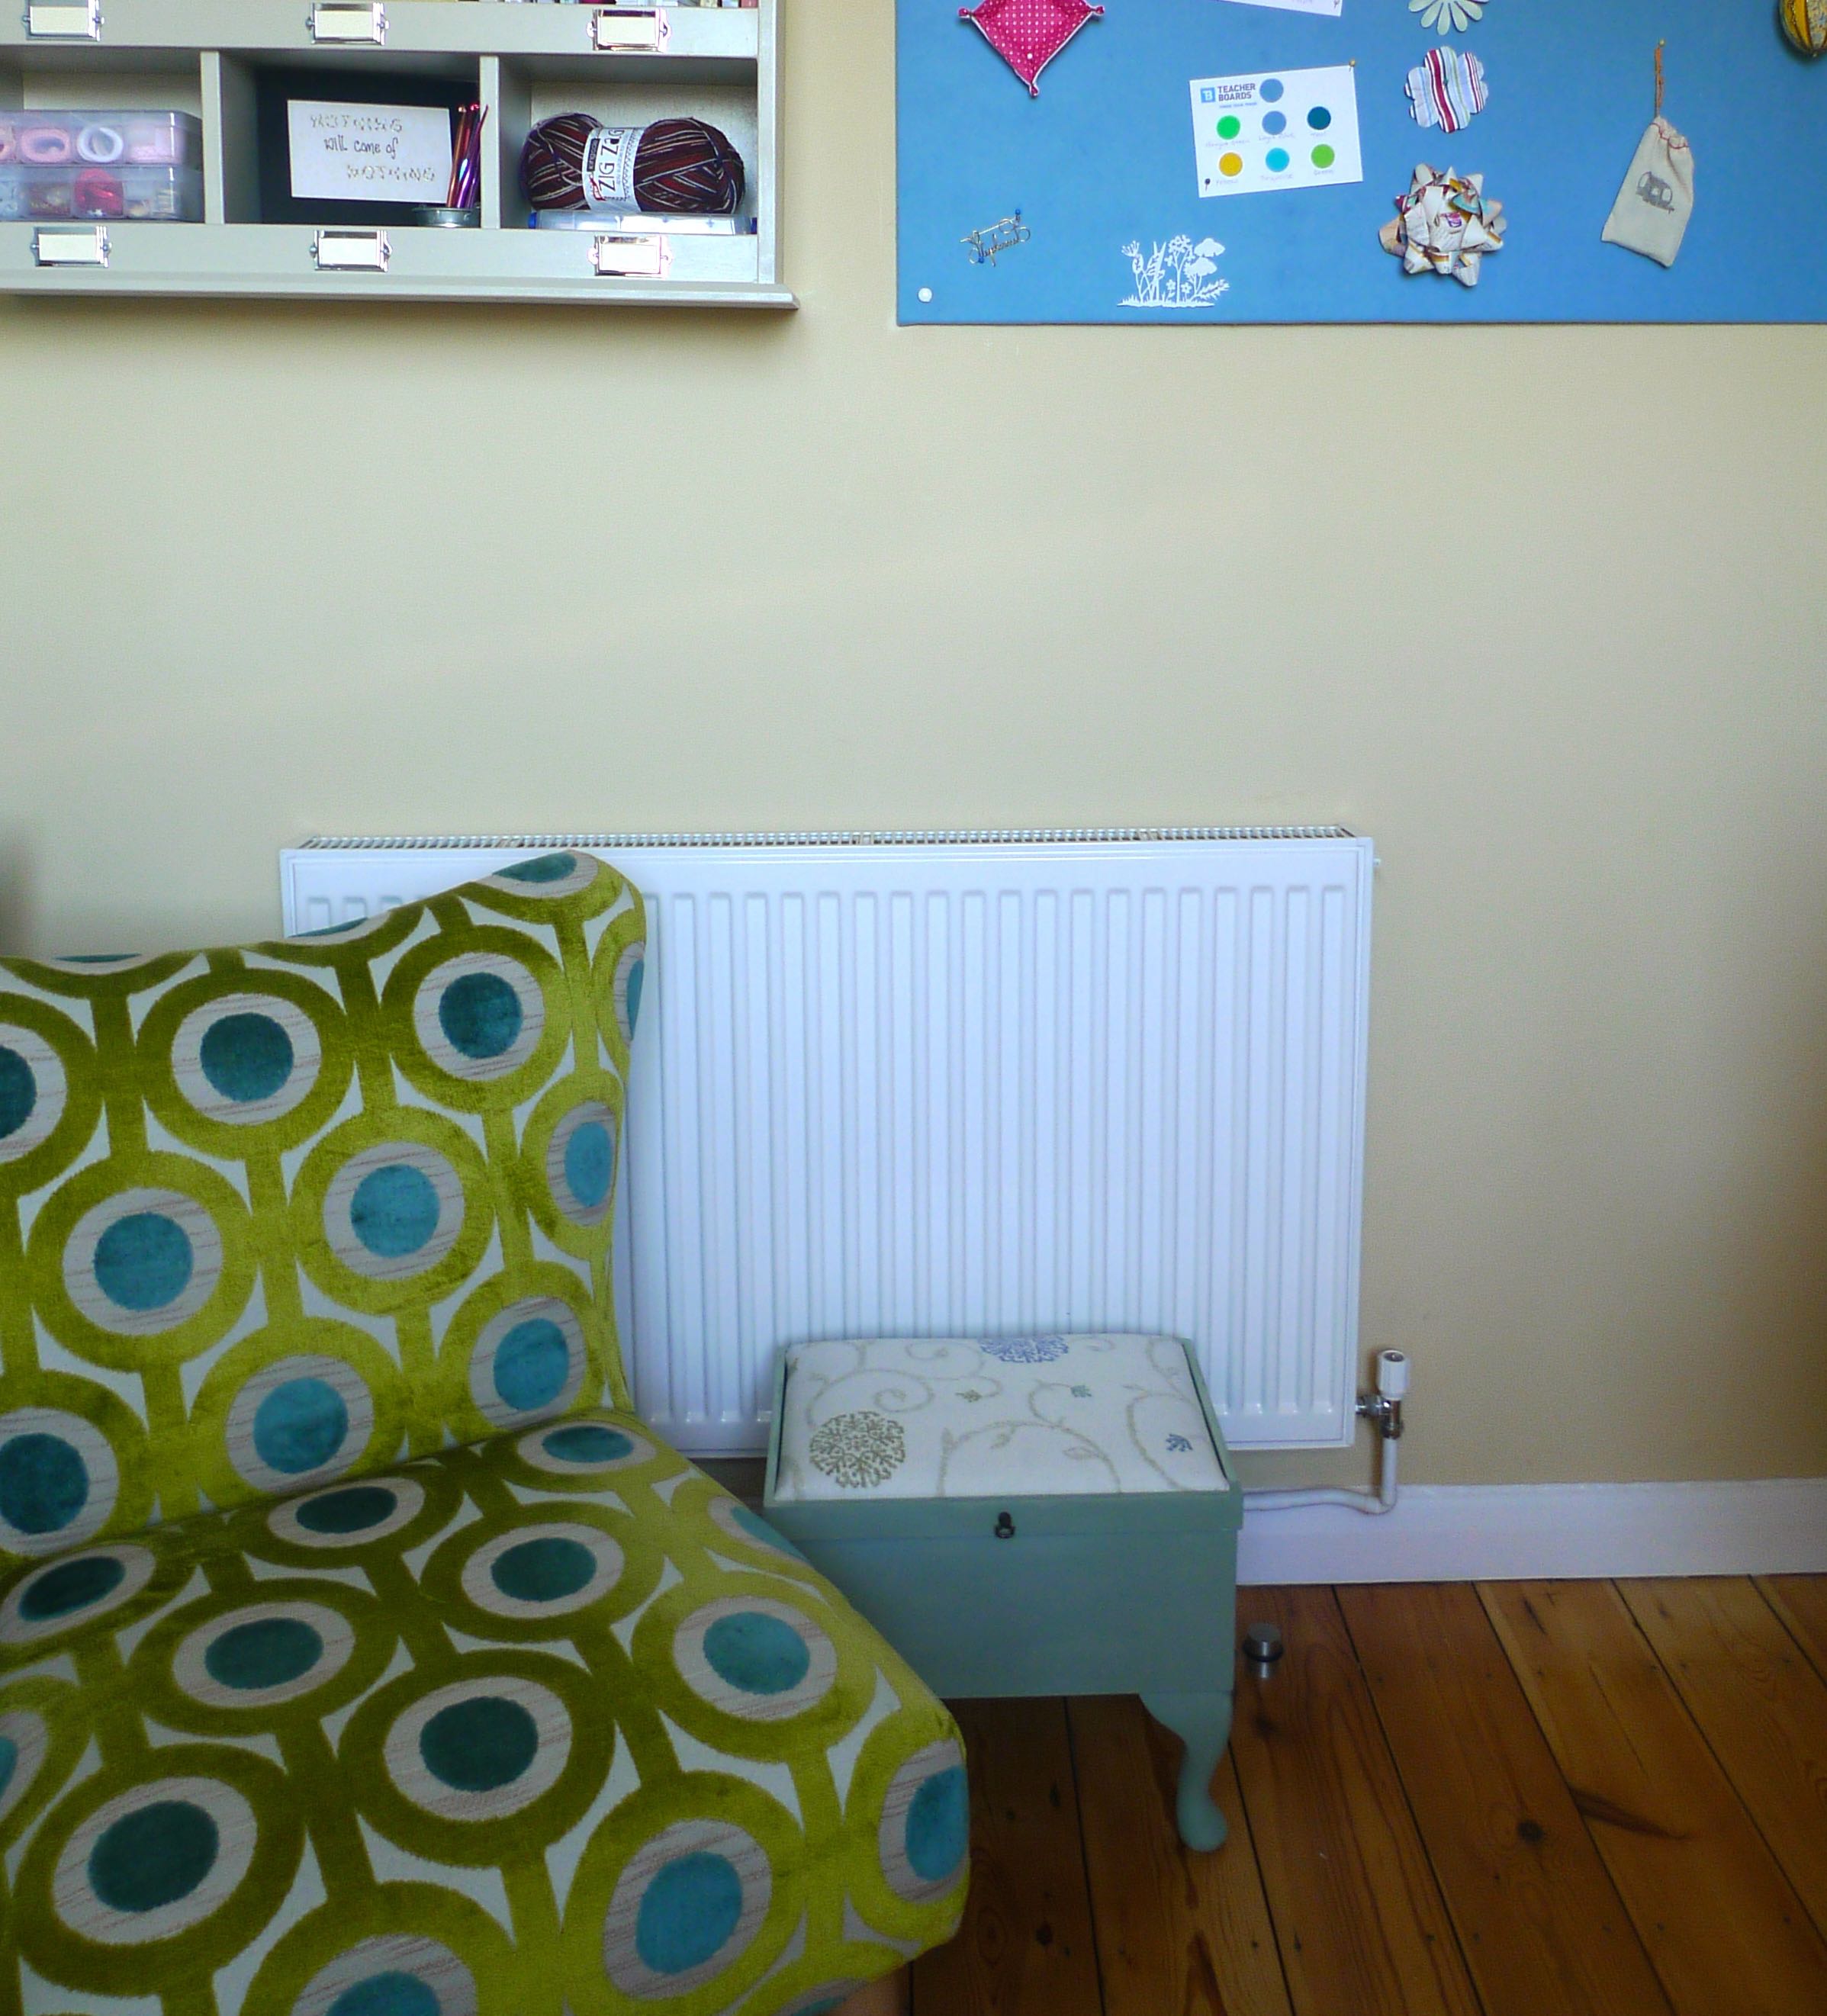
And now the contents looks much tidier too. I'm sure that won't last, but I'm loving how it turned out and how it fits into my craft-room-cum-study. I've now the perfect sewing corner!
The only downside I've found with this product is that now I want to find even more projects to revamp and upcycle!
I've even challenged MOH to help me find my next project - the paint can be used on many surfaces including wood, canvas, metal, plastic, cardboard and glass.
What I used
1 x London Grey Pinty Plus Chalk Paint Spray
1 x Light Turquoise Pinty Plus Chalk Paint Spray
I found coverage to be good. I gave each surface of my sewing stool two coats of paint and while the London Grey can is emptier, I didn't use it completely.
While I cleaned the surfaces I didn't sand them down before painting. I hoped that everything I'd read about chalk paint covering any surface would be true - and it was.
I have another smaller project which I still need to complete - and one I'll share here too - and while this is a small project I'm confident I'll have plenty left for that.
This is a collaborative post with Novasol Spray who provided me with the materials for this project, but all words and opinions are my own.
A stationery stash
This month I've cracked and had a bit of stationery shop. I'd like to say it was in honour of National Stationery Week but it took place a couple of weeks ago. I discovered that not that far away from the office is one of those out of town shopping places which has a TK Maxx on. And as I'd heard they did some good stationery one lunchtime I headed off.
I wasn't disappointed, I left with two notebooks and a notepad because as we all know, you can never have too many!
Here's the cover of the first notebook:
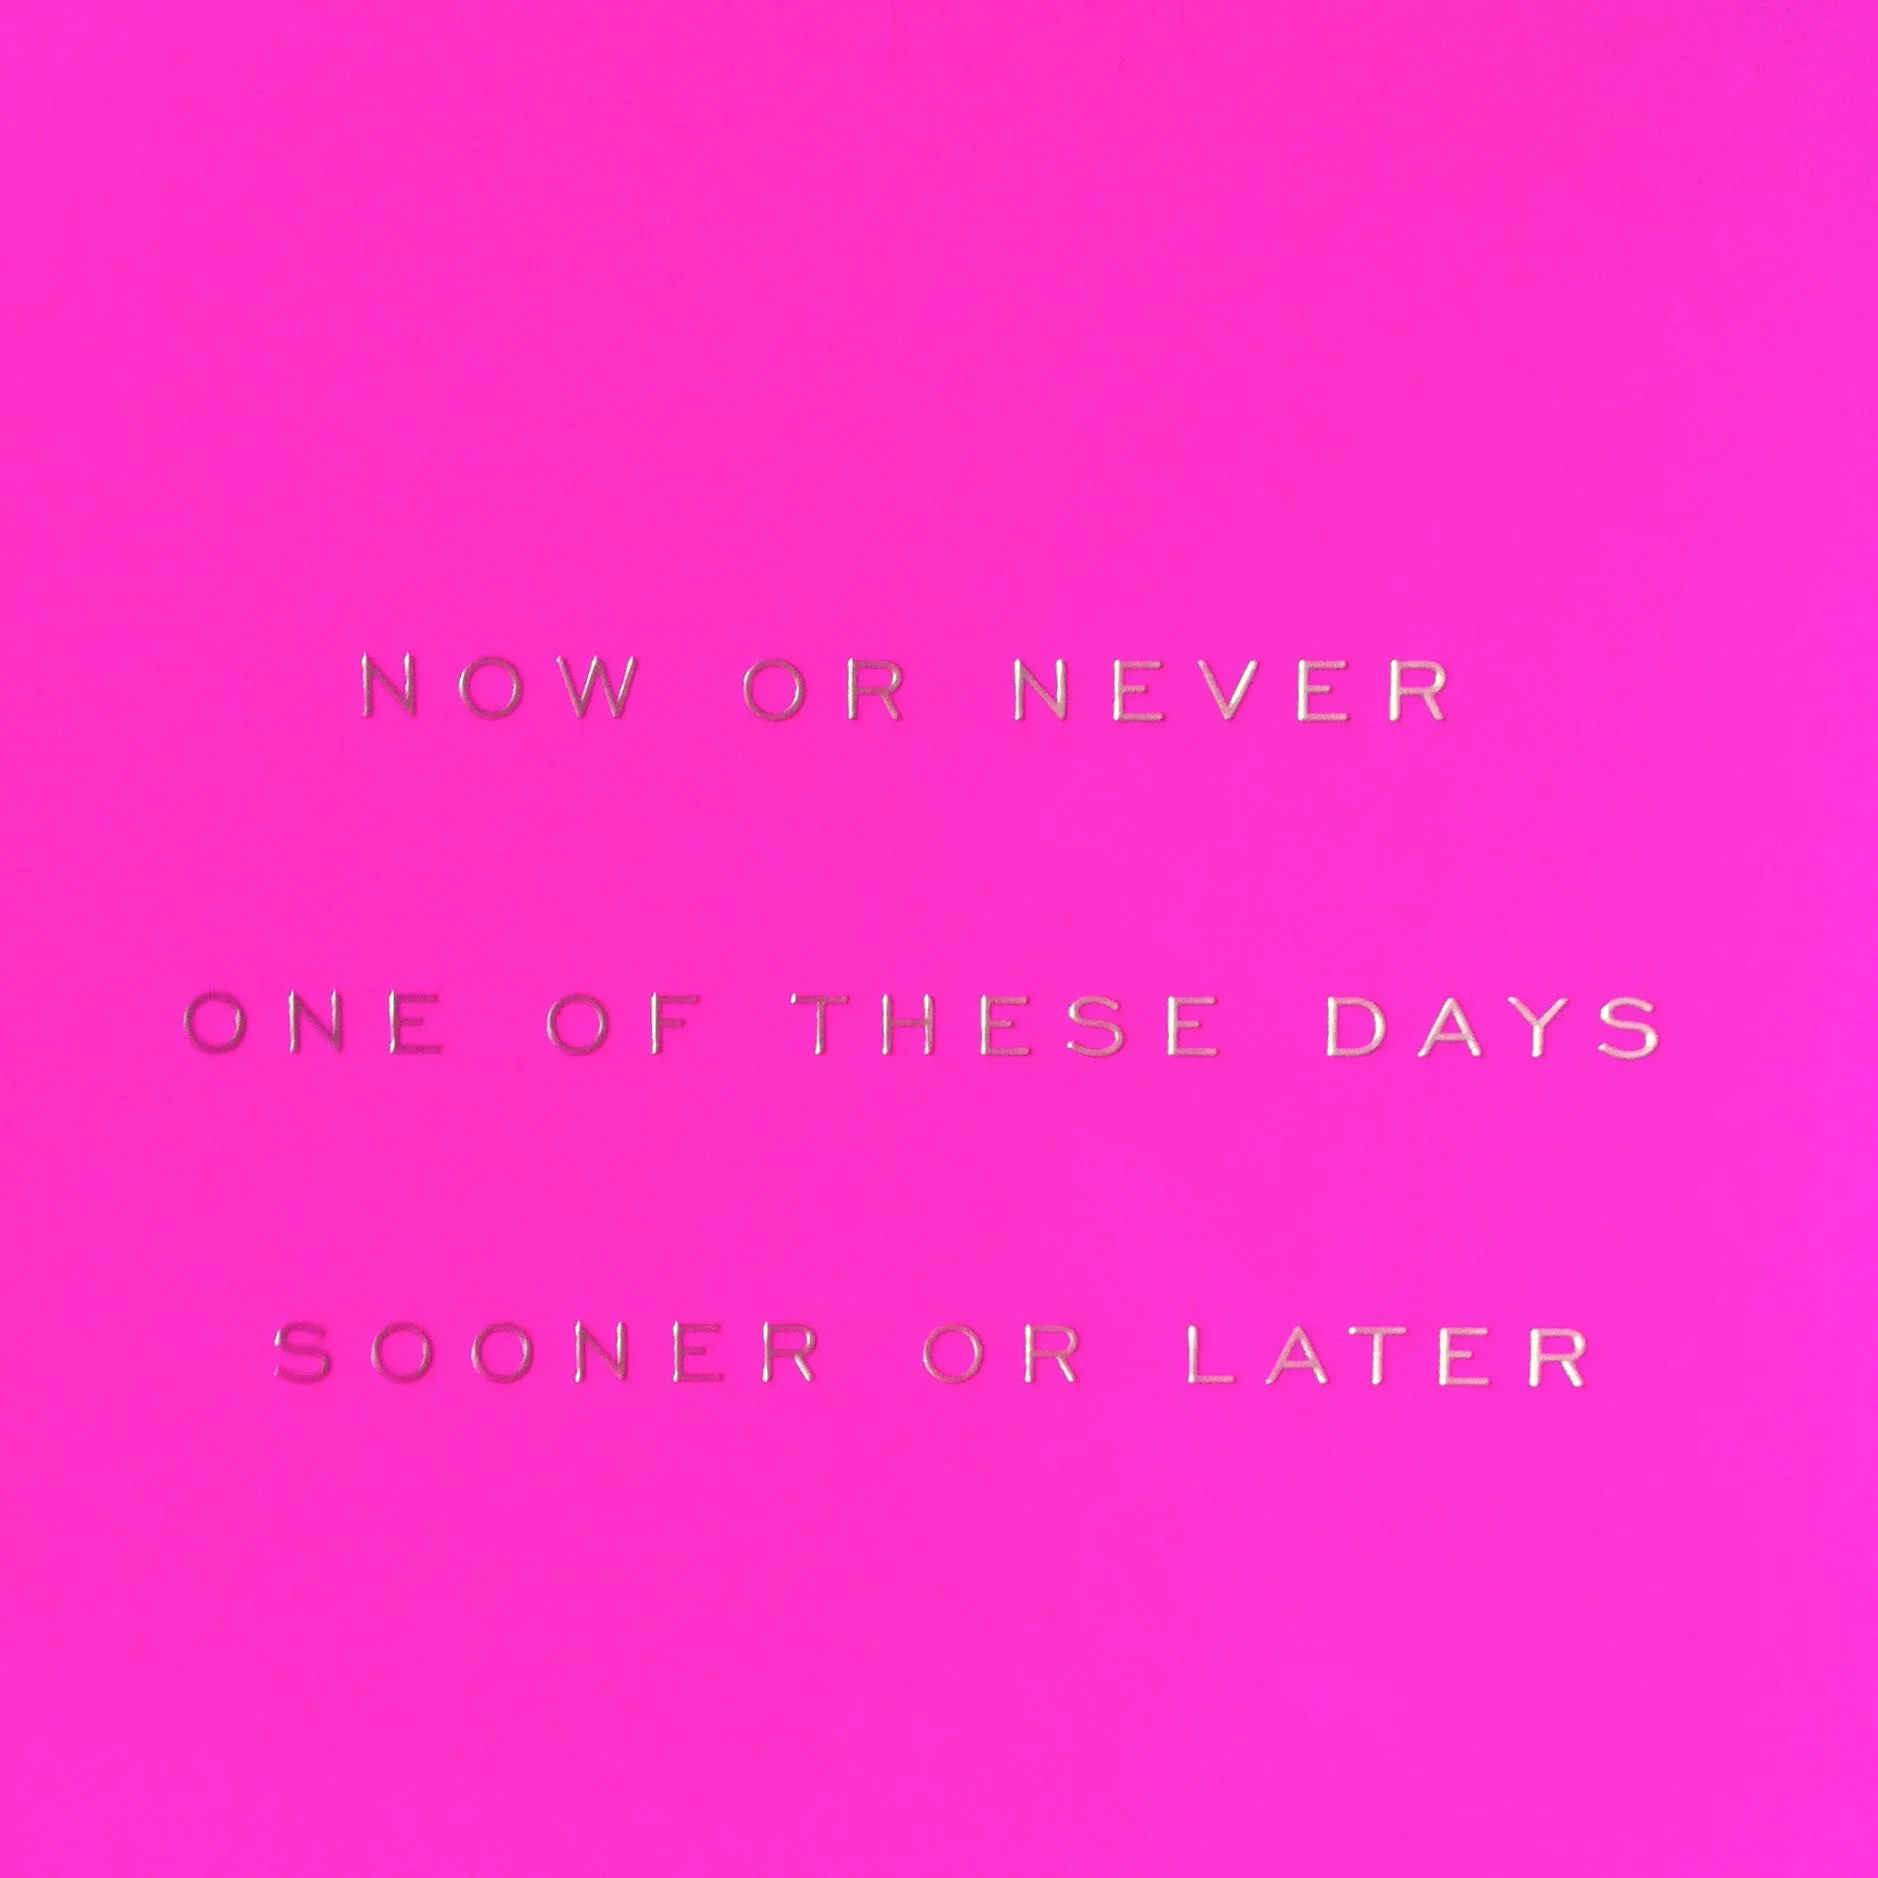
NOW OR NEVER
ONE OF THESE DAYS
SOONER OR LATER
Yes, I'm sure they're all things I say to myself at times!
The lined pages are edged with bright colours, and I really don't think it'll be too long before this notebook comes into action.
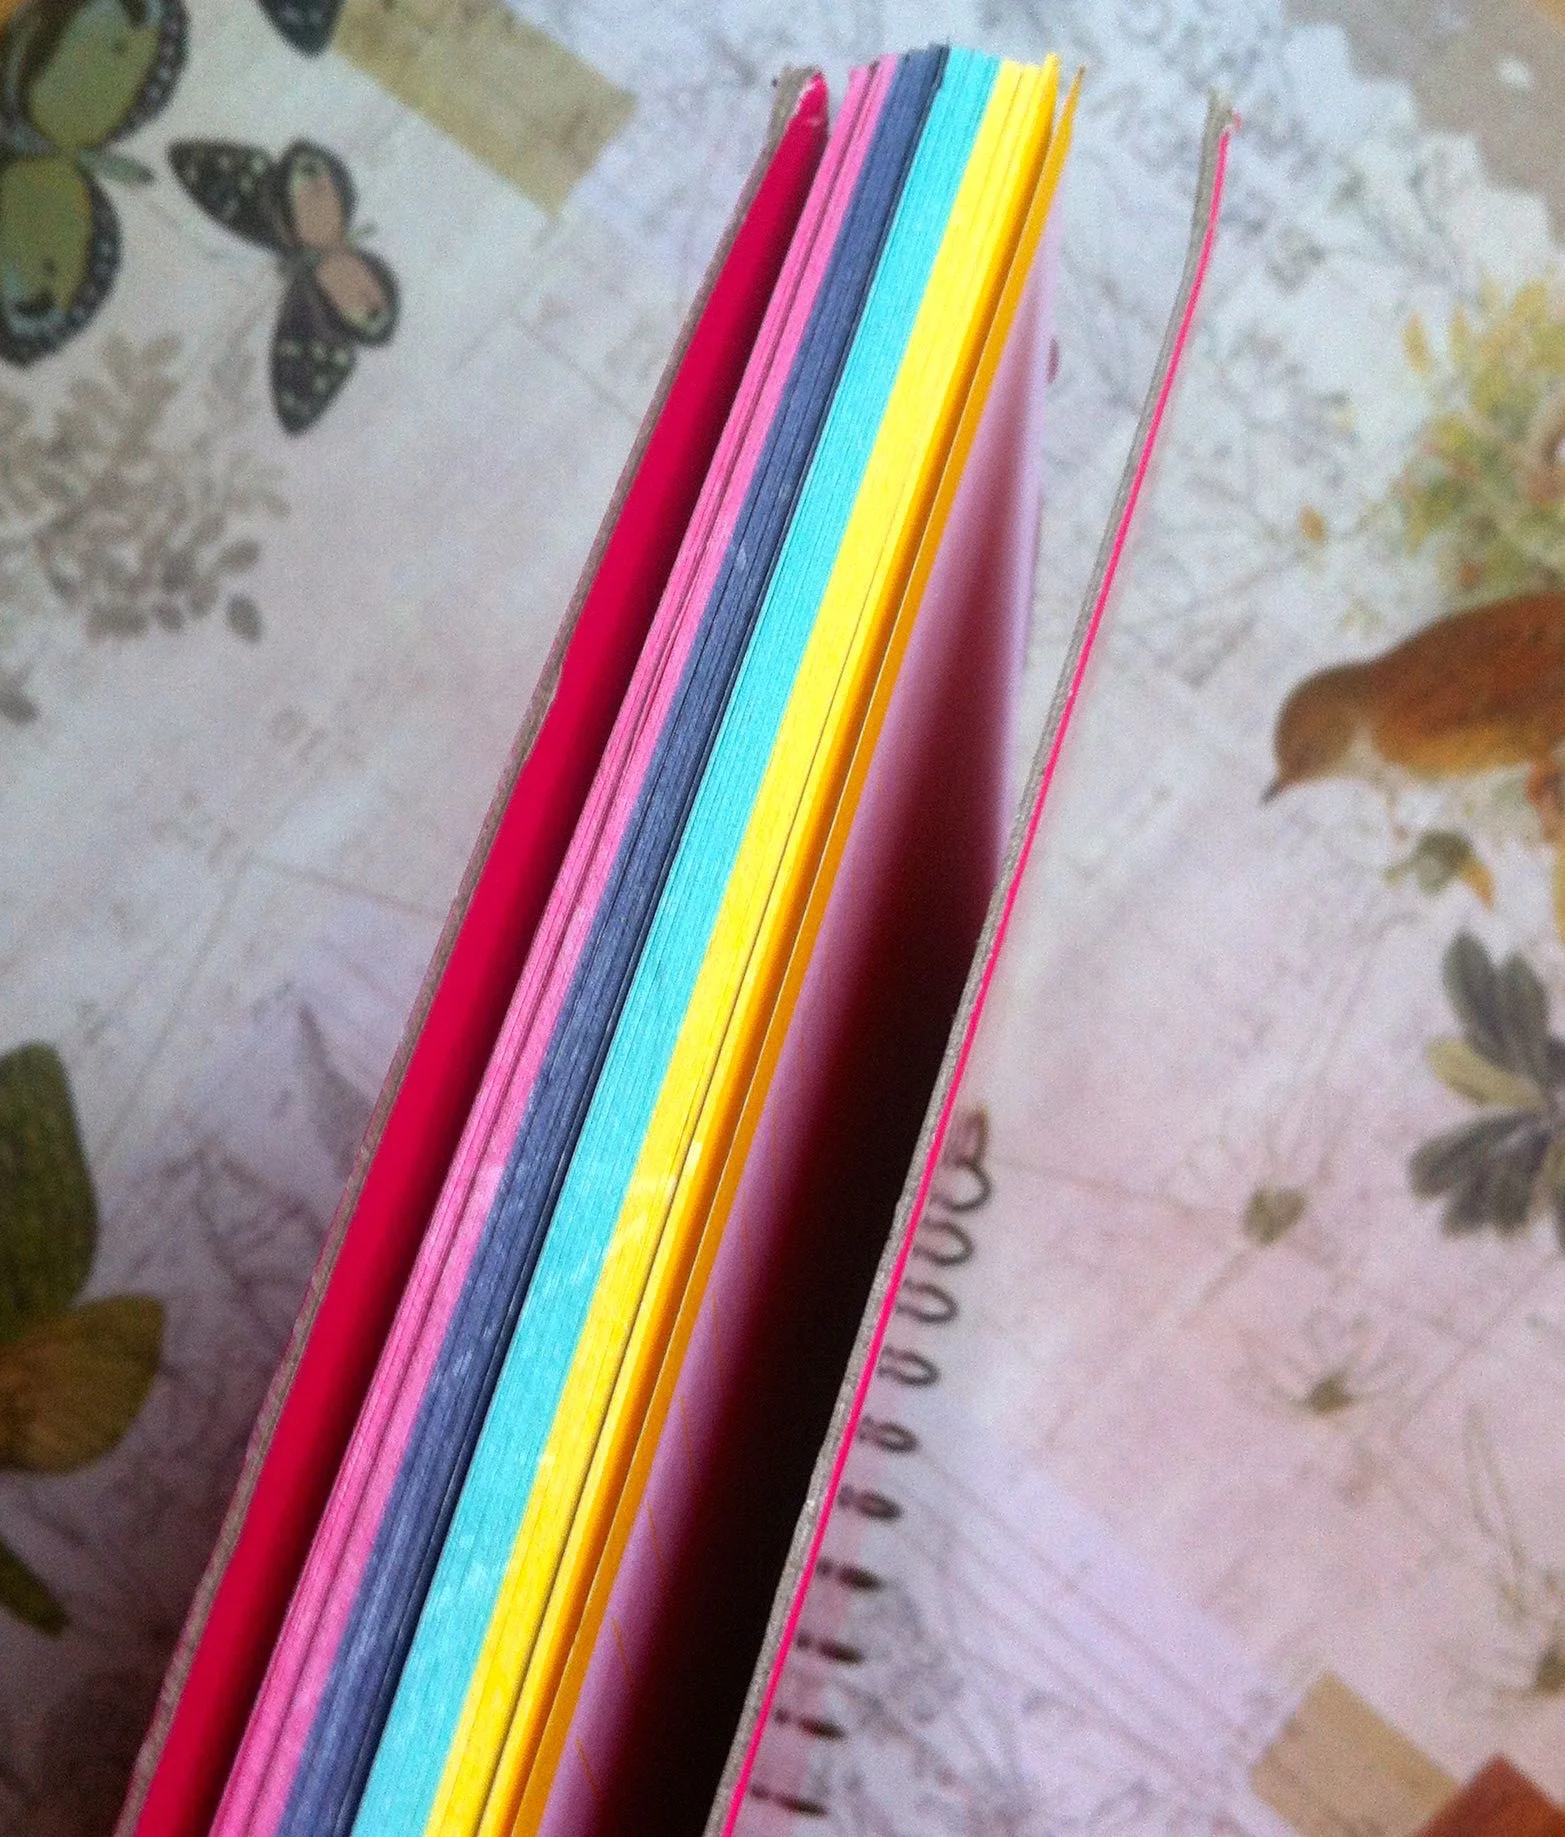
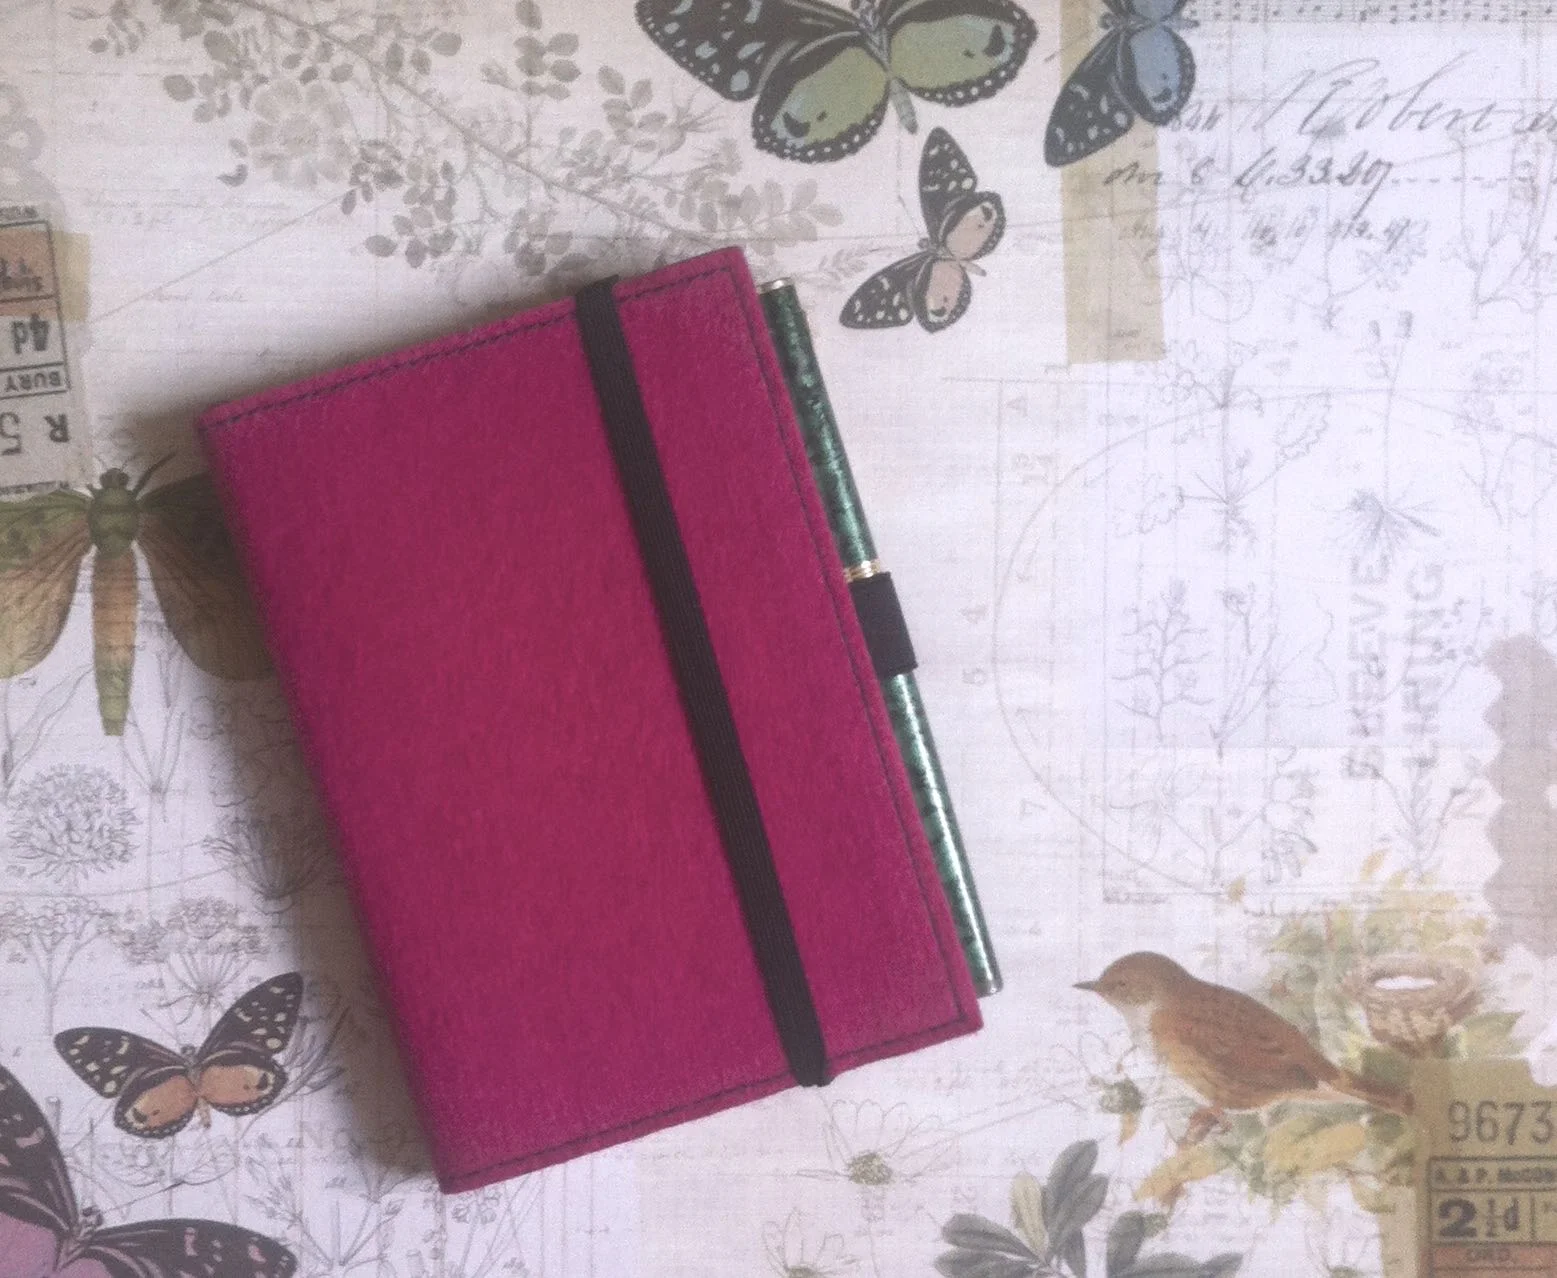
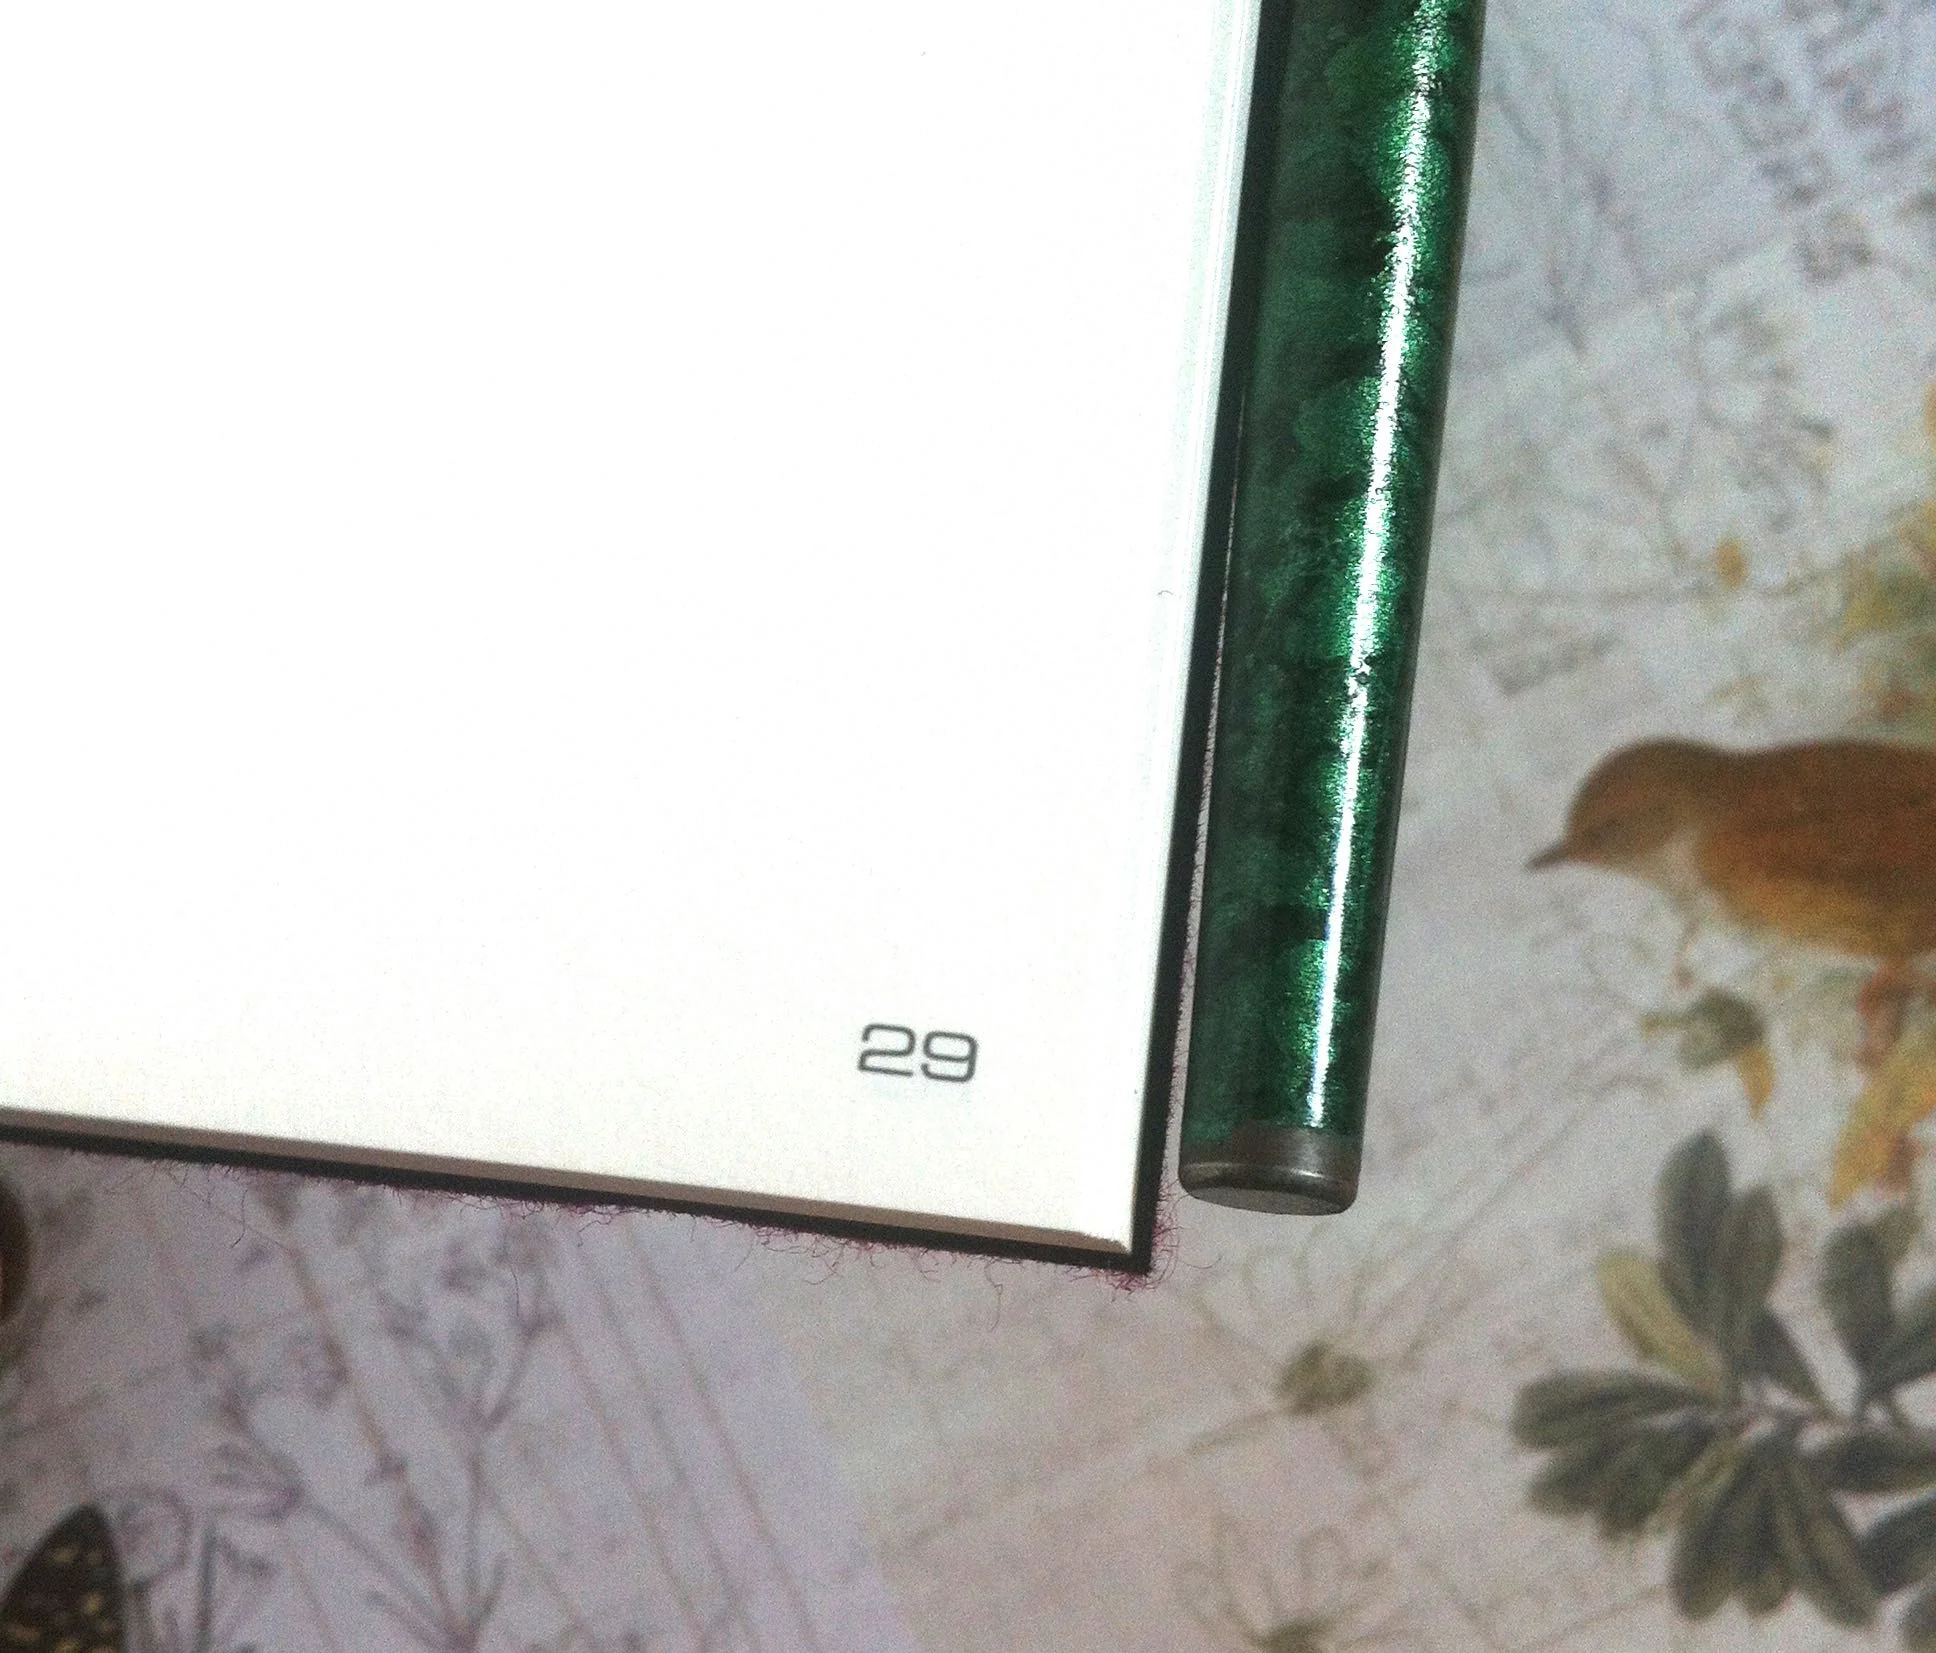
The second notebook - another pink, although I think this is more raspberry - has a felt cover, somewhere for a pen and plain numbered pages. It was just too good to leave on the shelf.
My last notepad was something altogether more practical and something that's already been put to good use, because I do like a good list. The only thing is that with it being so big I'm enticed to add more to my list than we can do! I've got around that, I think, by having different lists on the go for different things.
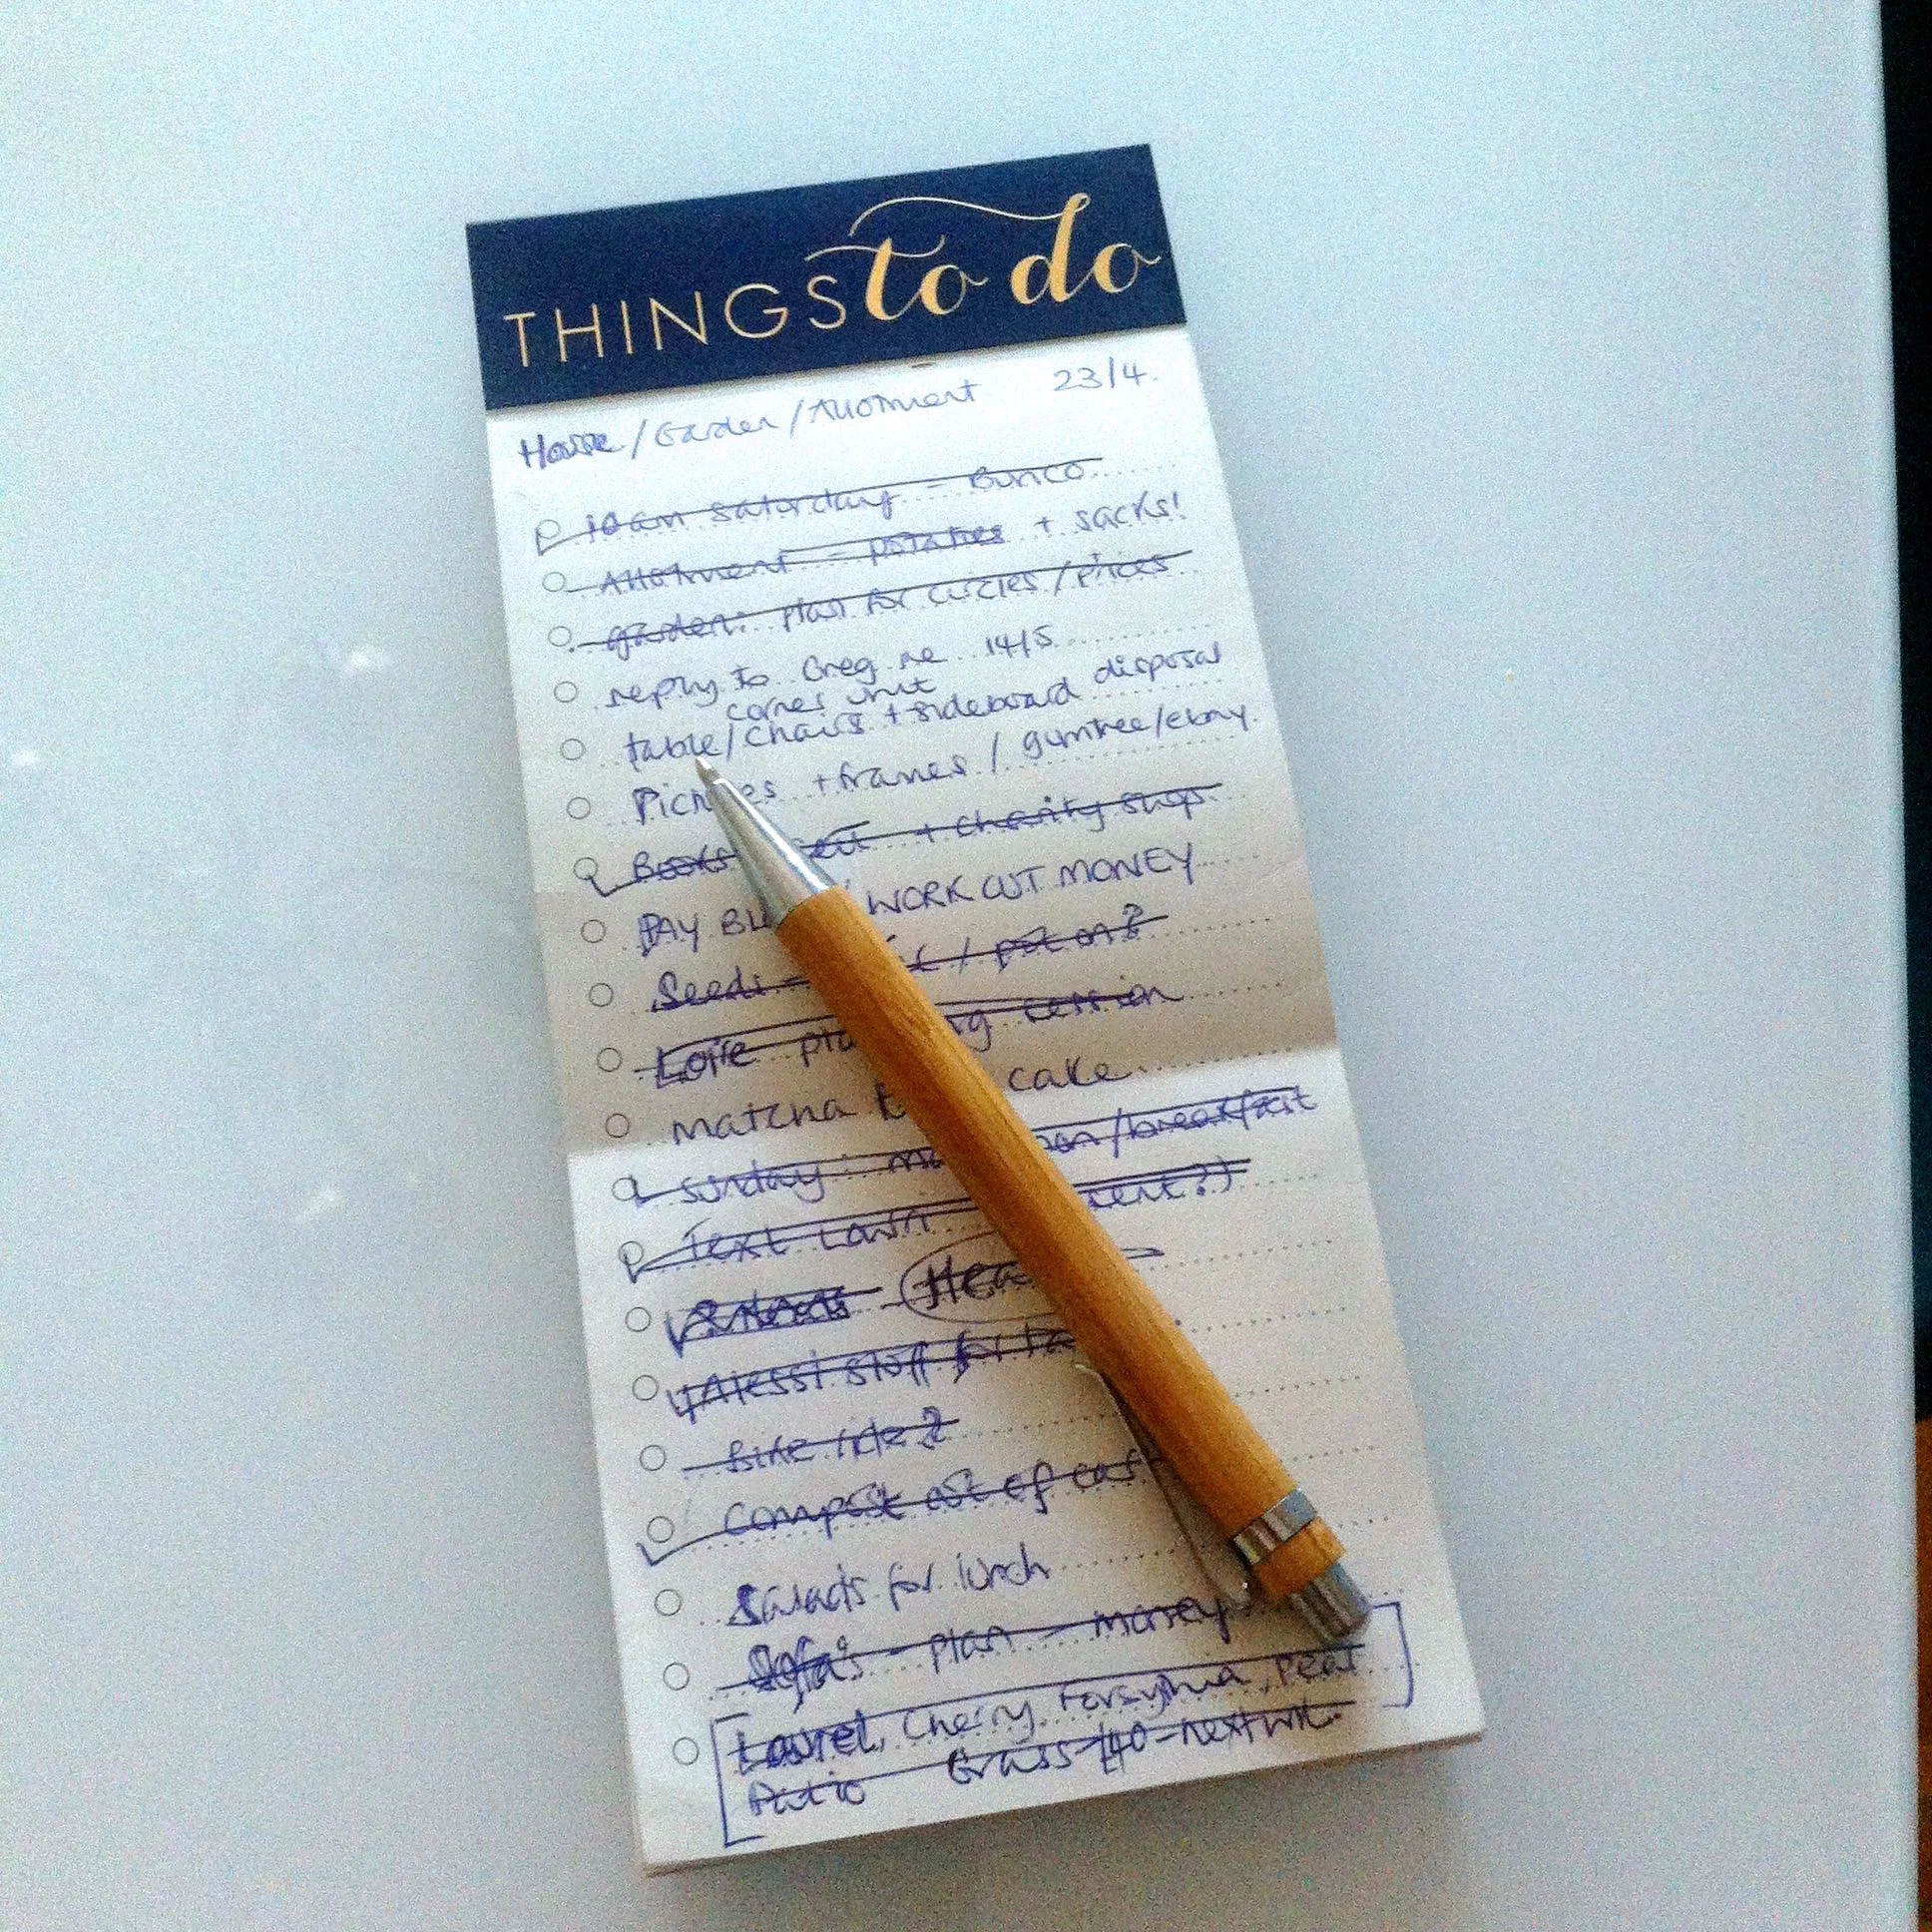
So far I've gone one for house things, one for the garden, one for the allotment, one for planning our next trip and another for blog tasks. That should keep me going for a bit!
What paper have you had in your life this month?
Love This #67: Scandi inspired wallpapers
I've been browsing through the Murals Wallpapers site and I've found myself attracted to a range of Scandi inspired, tree filled wallpapers in their Forest Wallpaper section. It's not my usual style, but I can't help but feel captivated by the wallpapers and I think any of the wallpapers I'm showcasing in this post would enhance whichever wall you chose them for.
I'm storing the first two away for a future home office, just imagine how inspiring it would be to faced with these views.
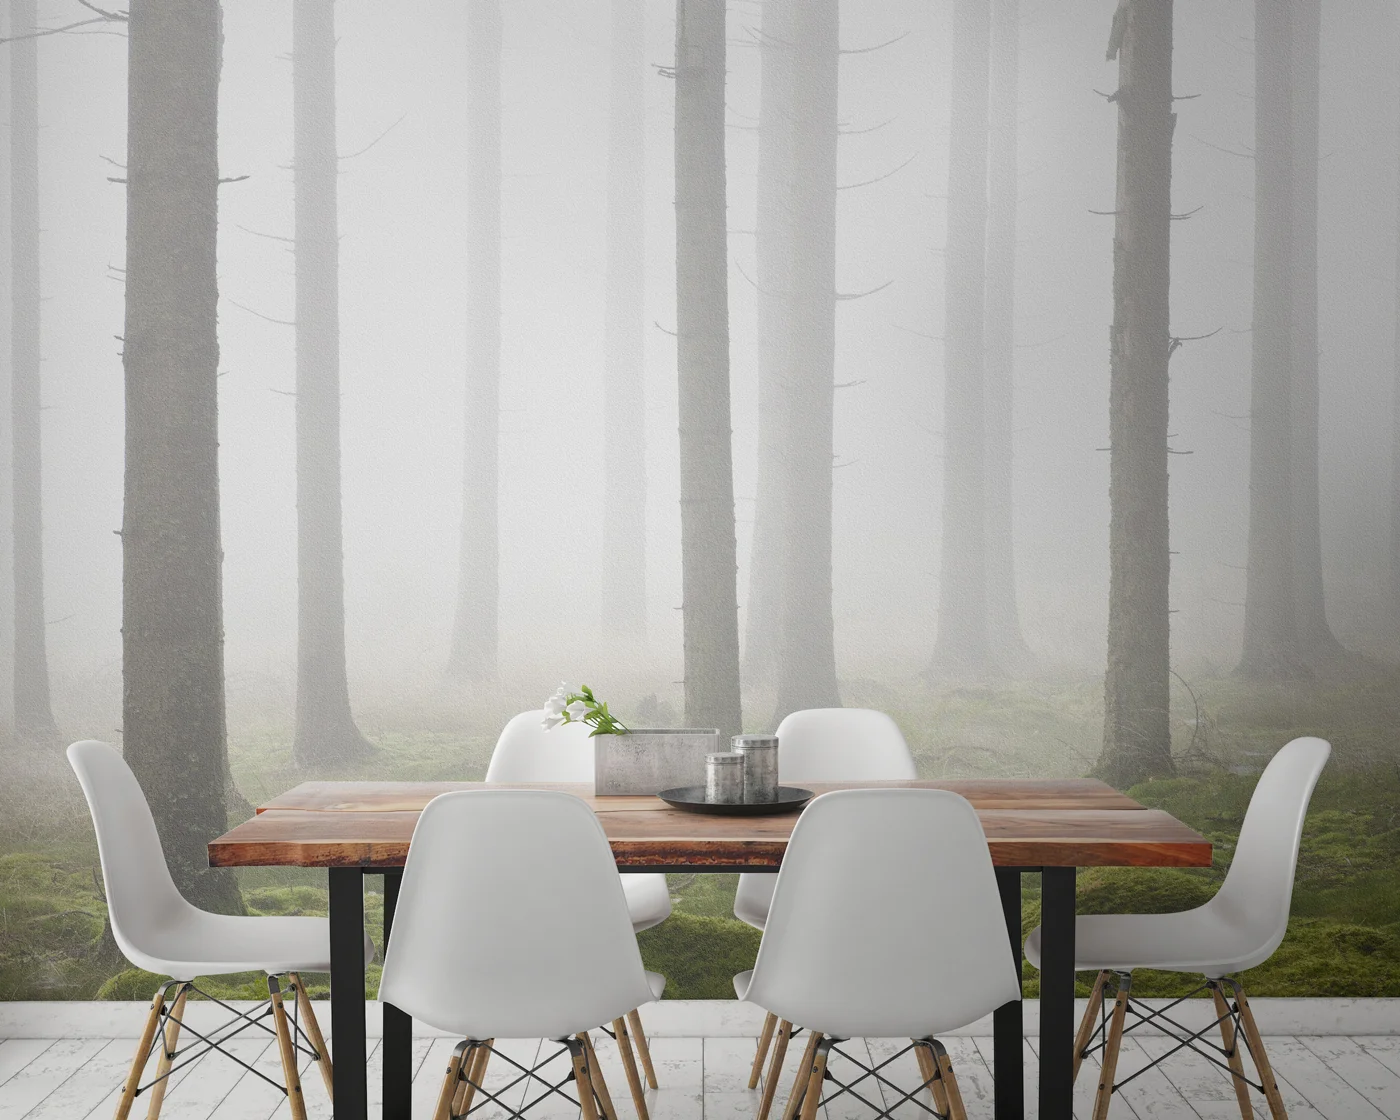
LONELY TREES
Picture Credit: Murals Wallpaper
I did wonder if it was the chairs that attracted me to the photo above - and while they might have drawn my attention as they are the same design as the chairs I've recently had delivered - I think it's the misty woodland view too. And because your eyes naturally search the landscape to establish just how much you can see, just as you would if it were for real.
THROUGH THE CLOUDS
Picture Credit: Murals Wallpaper
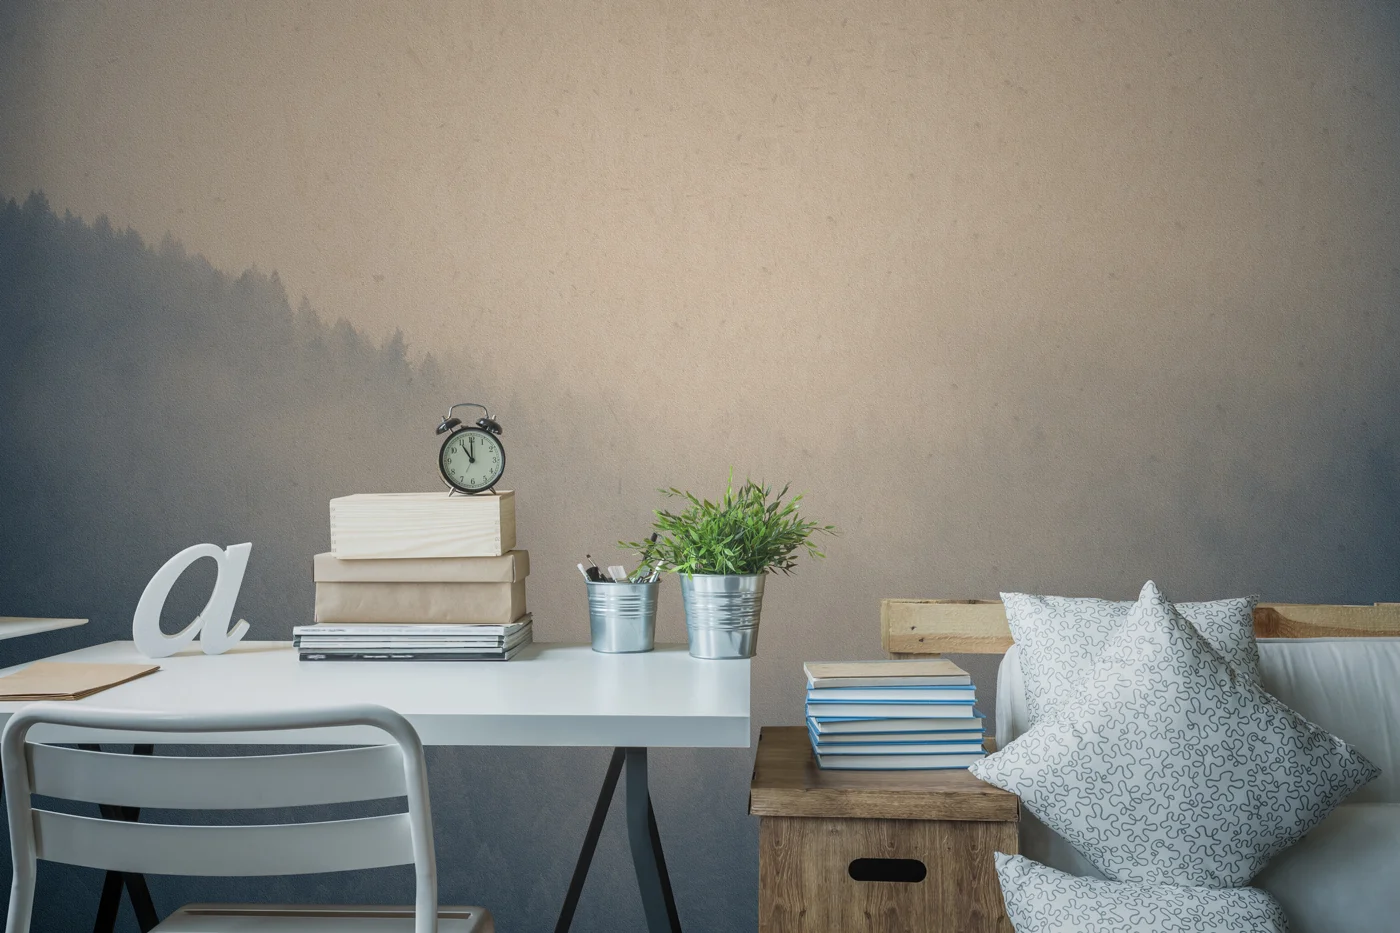
So what makes these fit the trademark Scandinavian design?
Each of these wallpapers fit the calm and muted neutral colours which we often see in the Scandi style. The rooms they're shown in have light or white wooden floors and the furniture is a mix of sleek and simple styled furniture mixed with wooden pieces, or in the case of the picture below an upcycled pallet desk.
Add all of that together and you've got classic Scandi style. It really is a winner.

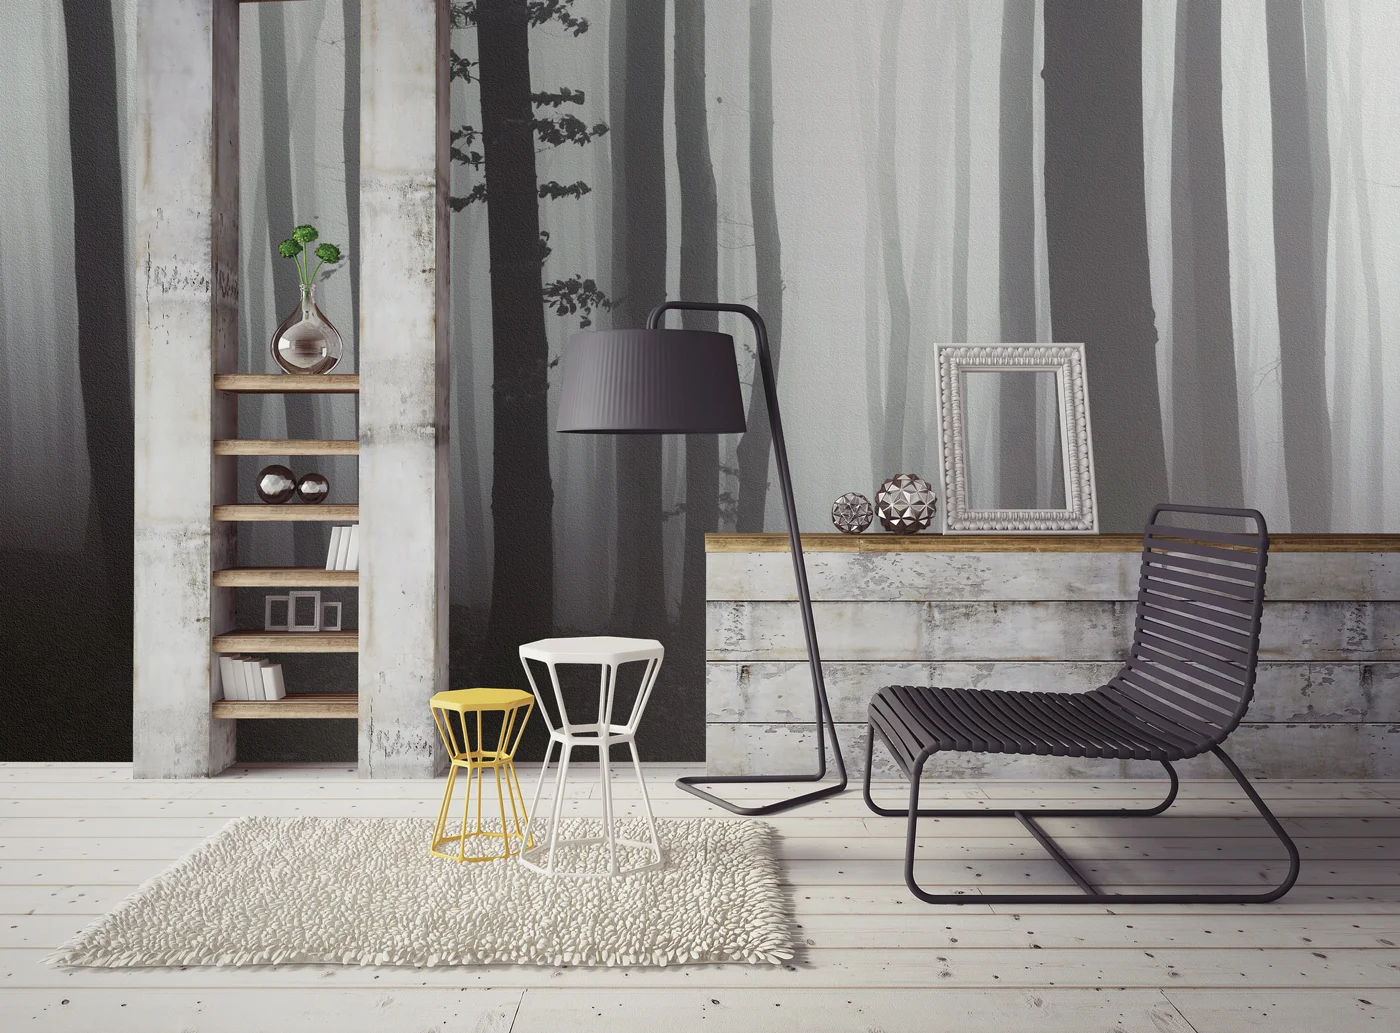
WHITE FOREST
Picture Credit: Murals Wallpaper
I also need that S for my desk. Well, if I used my desk regularly enough that is - but let's gloss over that. And with that little yellow table in the shot below, I couldn't not include it could I?
BEYOND THE FOREST
Picture Credit: Murals Wallpaper
Is this a style you'd include in your home?
I've been pinning wallpapers lately too, so follow me on Pinterest to see more of the wallpapers that catch my eye.
* This is a collaborative post but all views are my own.