Making my mystery block of the month: April

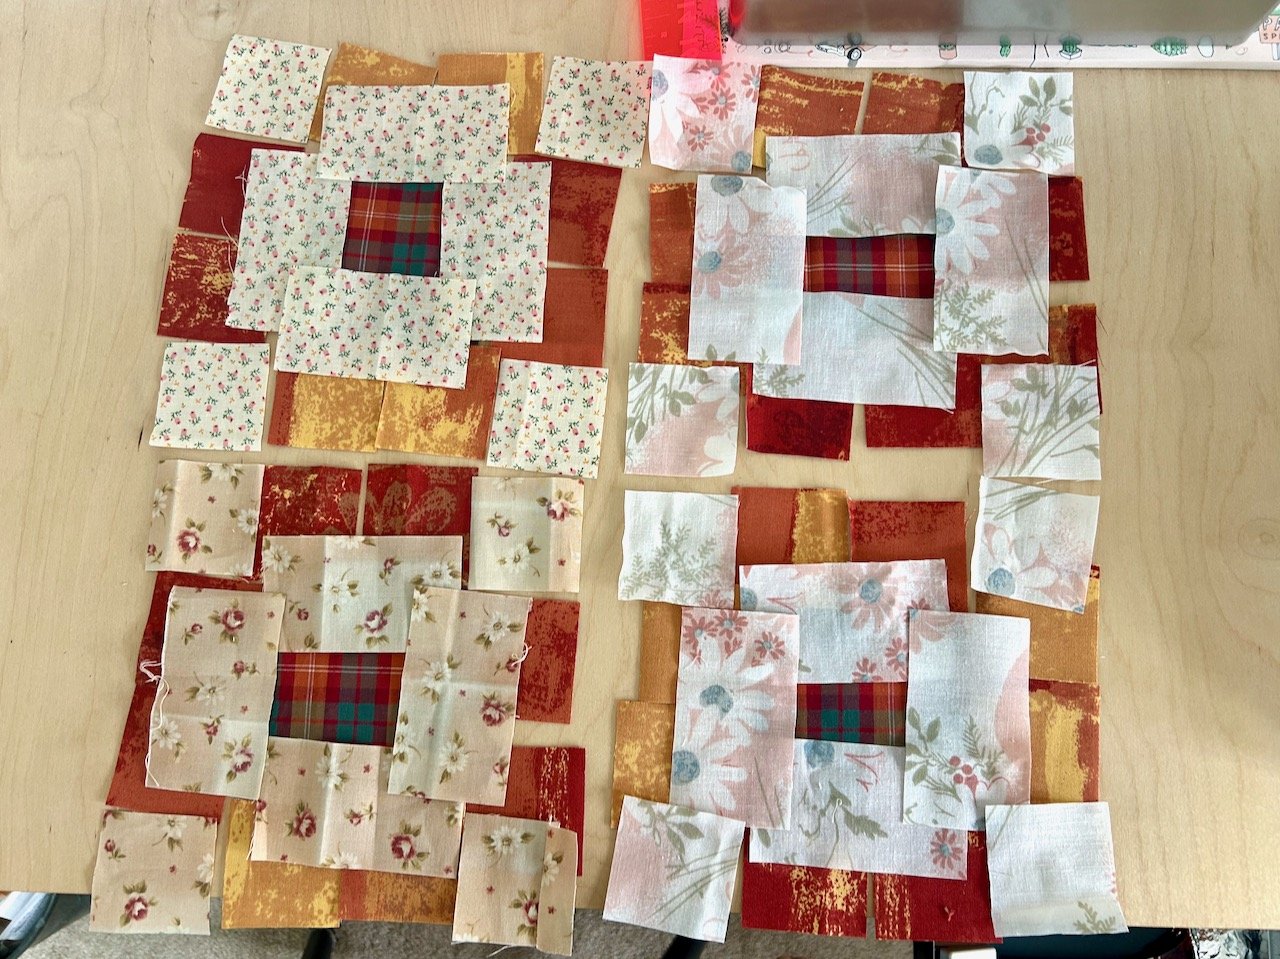
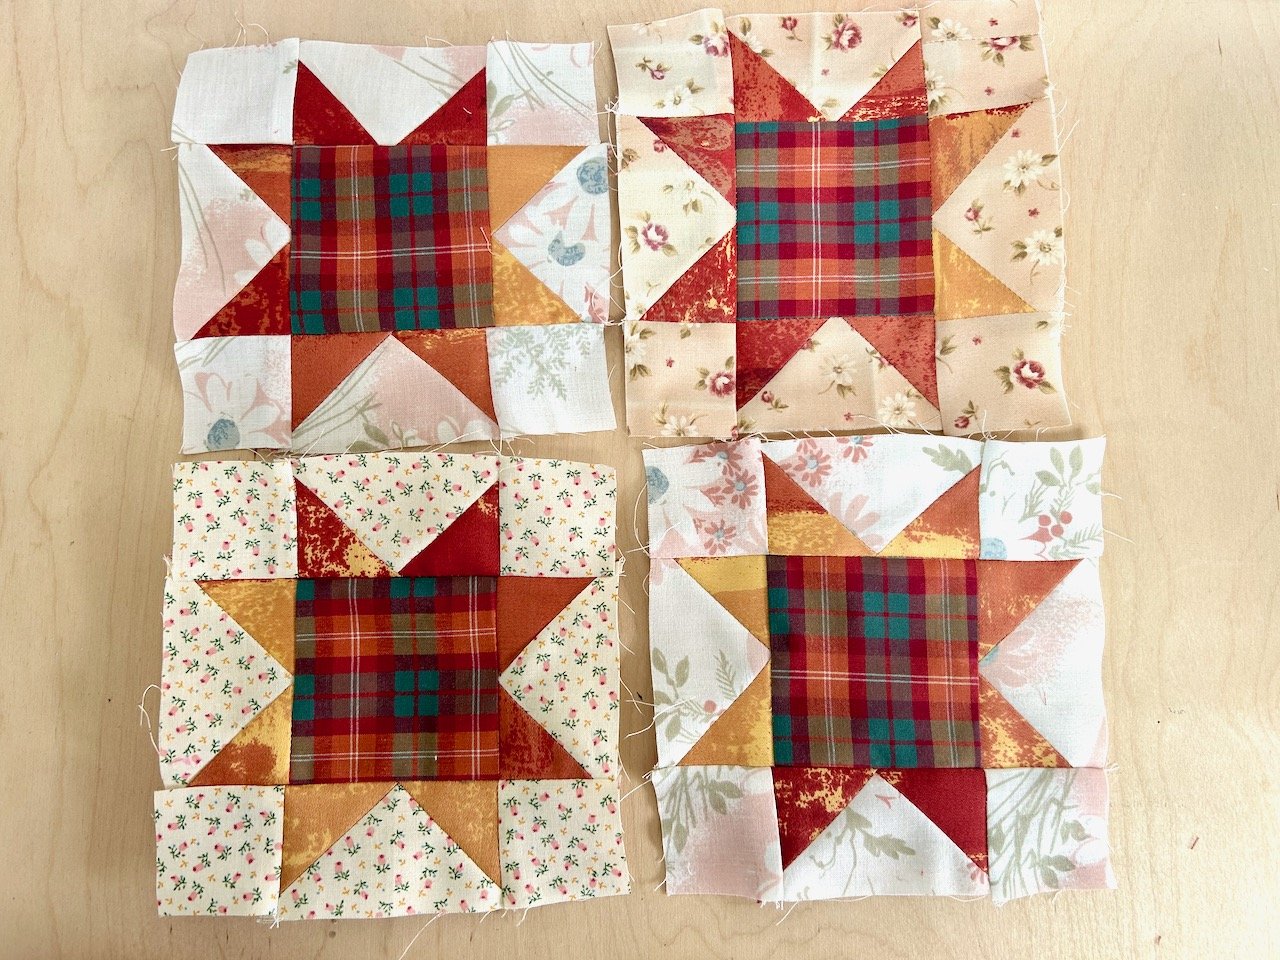
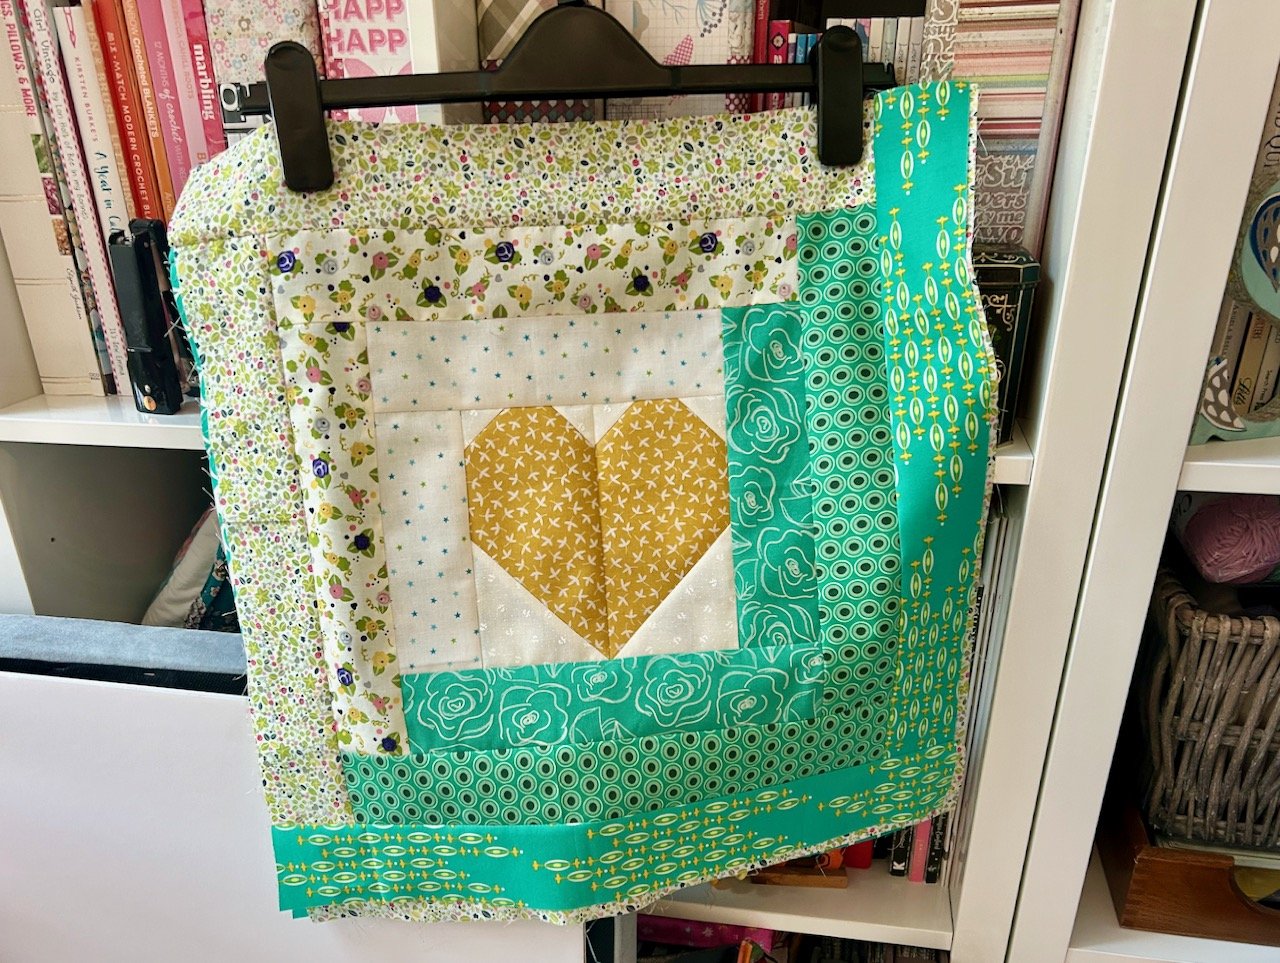
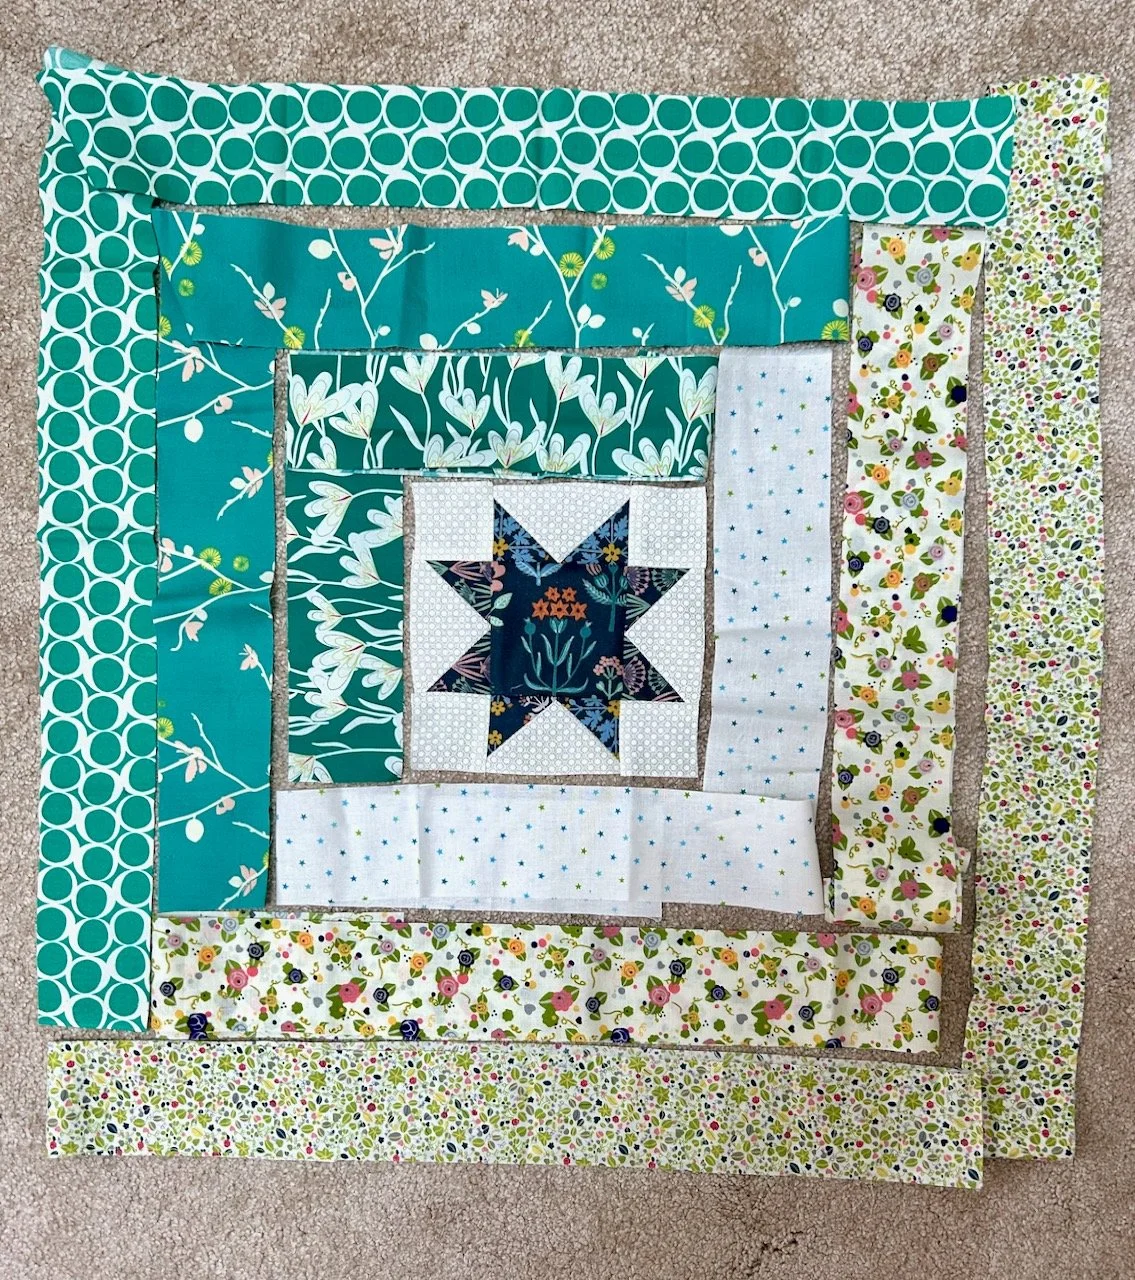
You’ll have seen that I plan to complete Sherri’s mystery block a month quilt and yesterday I shared the test blocks which I made into my sixth charity quilt, today I’m sharing the friendship star block I made for my own quilt.

I had a feeling that this month would be another star block, after all there’d been the cute houses, the vintage star and then the heart last month - and I wasn’t wrong, was I? So I suspect that the alternate months will also be stars, and so I formulated another plan, in that I’d use the navy materials for all the stars using these blocks to ‘punctuate’ my quilts.

I don’t know if I’m right, but I do know that next month’s block isn’t a star, so I’ve a fifty-fifty chance when the next block is released at the start of June, haven’t I?

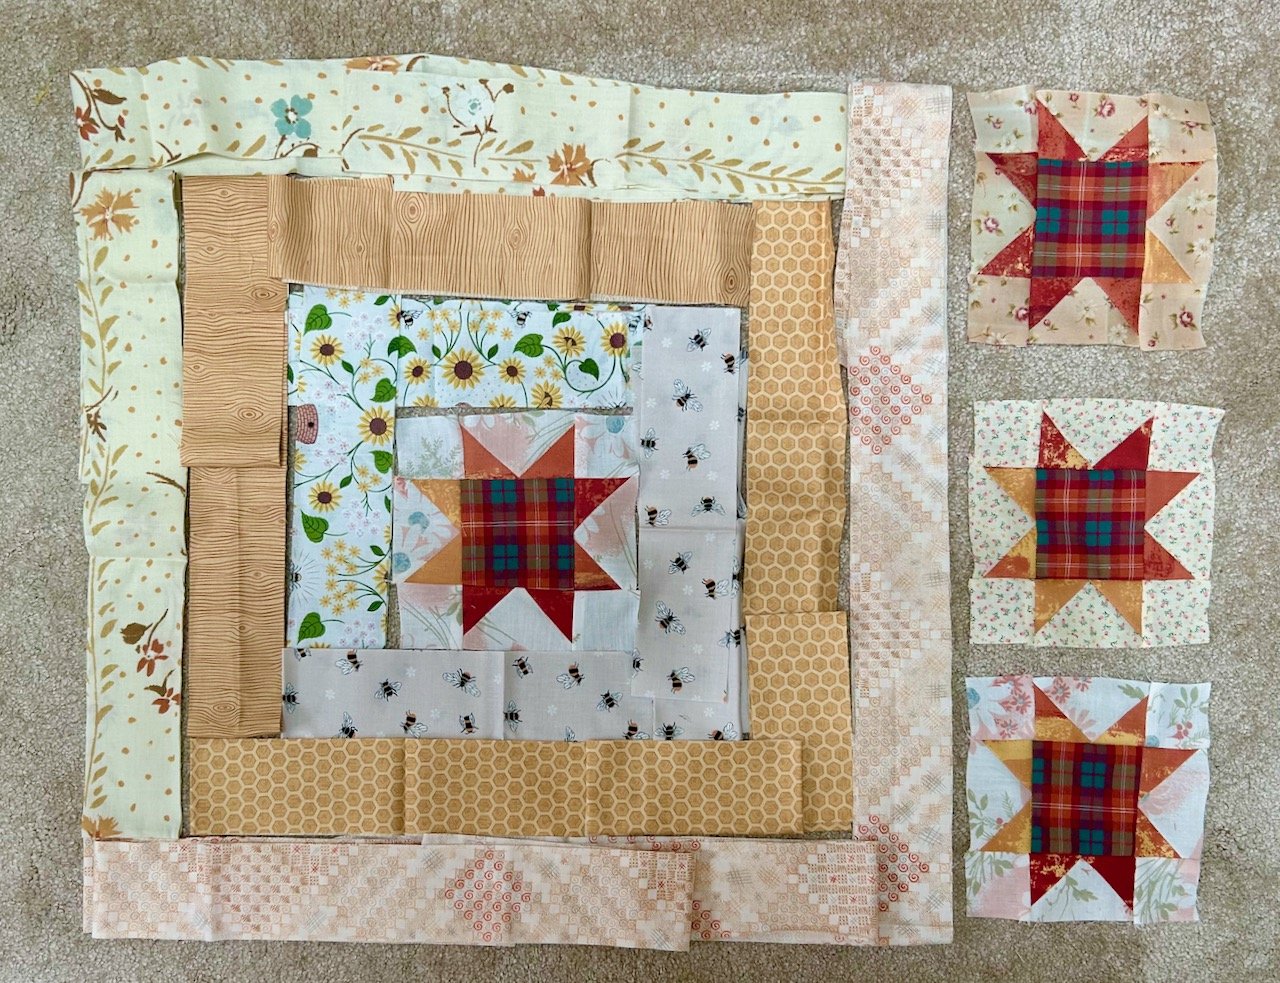
Anyway, with navy chosen and with my test blocks completed more easily than I expected, I was ready to get going. In fact so much so, that I only stopped to take a picture once it was completely assembled.

I’m about to blow my own trumpet here, but I was really pleased with how the points lined up with the centre square of the star, and I was keeping most things crossed to see how the outer points worked out when I added the outer borders.

Back to the original border fabrics

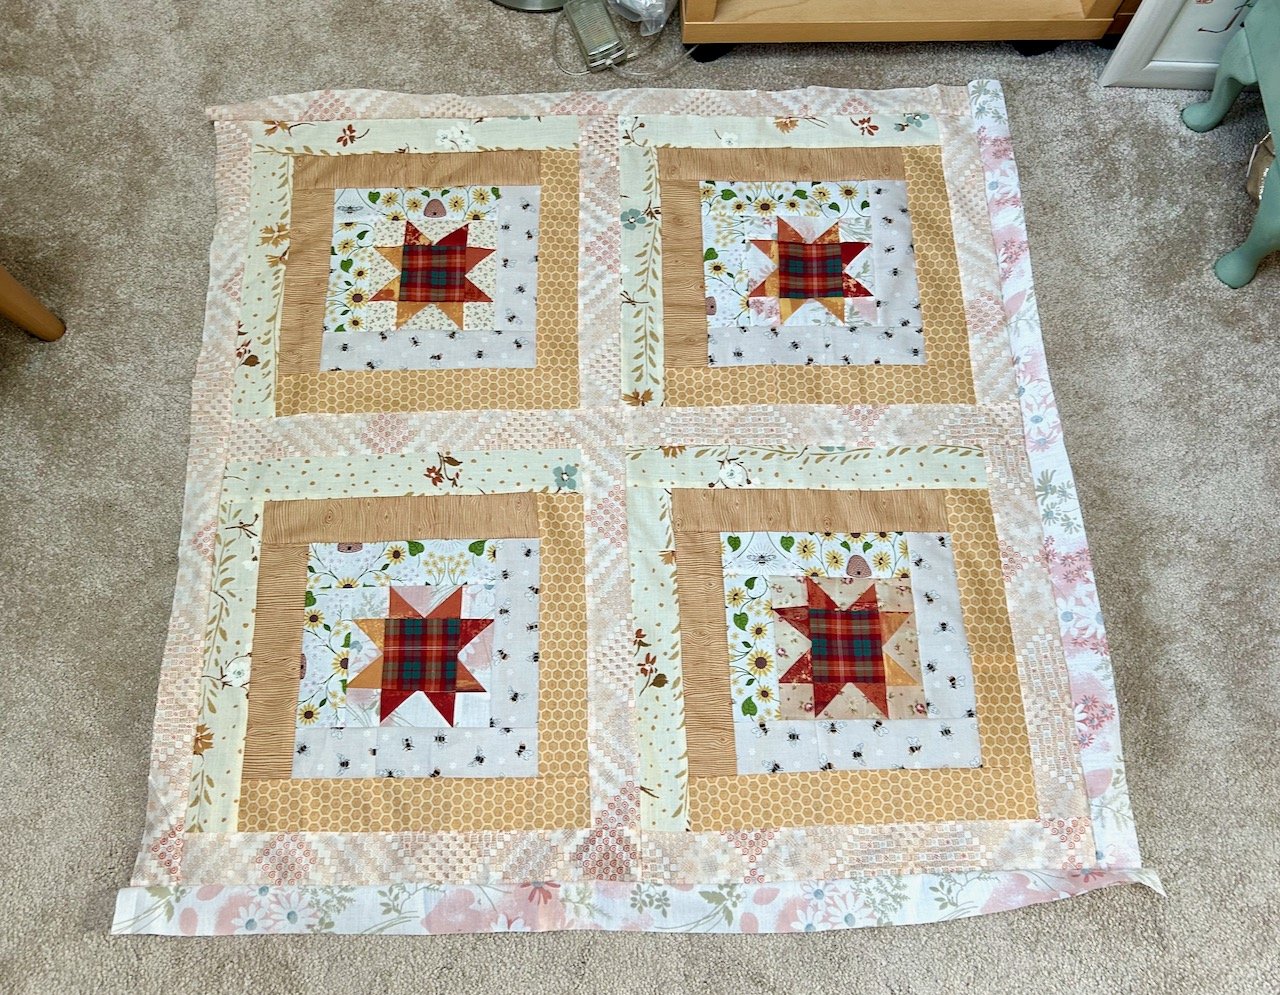
Last month I spent some time pondering whether or not to introduce new green fabrics into the borders, even drawing myself a scribbled plan. And that helped, a lot. It meant that this month I knew that this block was the first block on my second row of the finished quilt, and so the borders needed to be the original greens.

Though I did need to lay them out and double check that before attaching them.

Happy with that, and they were soon attached.

The completed friendship star block with green borders on the left/top and the paler patterned borders on the bottom/right

And look, I kept all the points too. I’m super happy with how this one turned out, points and all - though I’m sure this is more by luck than judgement, but also because the more I sew I seem to gain in competence and confidence.

Join me next month to see how I get on with the next mystery block, and check out my previous posts for my mystery block quilt or the charity quilts made from the test blocks.

The Friendly Bee

I’ve made another quilt as part of my quilting ‘stretch’ project this time using the February block from Sherri at A Quilting Life’s mystery block a month. As I said then I don’t know if I’ll manage to make a quilt a month, but I won’t really know unless I try…

When I saw this one was another star I questioned my commitment to my challenge, and also my sewing ability. But, it wasn’t as bad as I thought it would be, so phew.

My sixth charity quilt

As I said above, I wasn’t really looking forward to tackling another star block - the February vintage star block had many small pieces, which made me question why I cut up pieces of fabric to sew them back together again! Which is a fair point, when you look at it like that, but in for a penny, in for a pound and all that.

My original intention was to pull ‘yellow’ fabrics from my stash, as I thought this might lift my mood - but as you can see they ended up more beige than I expected.

Well not entirely beige, there’s some gold and rust colours in there too. The fabrics for this quilt included some more of the old orange curtains and of the duvet cover I used as backing last month, some checked material which I used back in January for the cute little houses, two vintage pillowcases and some new-to-me fat quarters bought for a much reduced price at my sewing group’s recent stash sale, plus some ‘wood effect’ material which dare I say it, I wasn’t in love with and some much smaller scraps which I used as the background on two of the blocks.

But actually it wasn’t anywhere near as daunting as I thought it might be once I started. Now isn’t there a life lesson in there?!

The blocks surprised me and came together relatively quickly.

I find it easier to lay all the elements of the blocks out in their approximate location - this means I don’t either over, or under cut the pieces I need, and it gives me a look at how the blocks might work.

I think the colours work well together - I needed to add the pink flowered background (used on the two blocks on the right) as I didn’t have enough of the fabric used for the blocks on the left, but the colours tone.

And with a bit more sewing I had four friendship star blocks.

Introducing the bees

You’re probably wondering why I’ve named this quilt the Friendly Bee, well the border fabrics should help explain that.

Laying out the border fabric - with two bee fabrics - to see how they work together

As you can see both of the materials bordering the Friendship star have bees, hence the Friendly Bee name.

The ‘wood effect’ fabric actually works well in this quilt, and tones nicely with the honeycomb fabric used alongside it. The two outer borders are the vintage pillowcases, and as they’re the material I had the most of they were obvious choices for the longer borders.

With the blocks attached I added the outer border, this time using two different fabrics - and I think this works, I wasn’t keen on having two of the same pattern together, so by using the pink flowered material again here I’ve avoided that.

Finishing the quilt

Last month I opted to quilt the Four pink hearts and a hug quilt with diagonal lines, and it worked well. My plan is to try that again, so that’s what I’m part-way through doing for this one too. Yes, this quilt isn’t finished but it’s pretty close - I’ll update this post when it’s actually finished.

I knew that some months it would likely be harder to fit in making a quilt around everything else that life has to offer, that’s why I’ve called it my ‘stretch’ project. I’ll let you know if a few weeks how it turned out.

You can see my other quilts which I’ve made to donate to Project Linus - a charity whose mission is to provide love, a sense of security, warmth and comfort to children, who are sick, disabled, disadvantaged or distressed through the donation of new, homemade, washable quilts and blankets, including those that are part of this ‘stretch’ project in earlier posts. I’m aiming to publish an update on my progress in the last week of each month for the remainder of 2025.

Eat the City

* I was invited to the press preview of Gardeners’ World Live and provided with a pair of tickets to visit the show, therefore all my posts will be marked as 'Ad’ though as usual my views and opinions are very much my own.

I’m sure it’s no surprise by now but gardens that feature edibles and flowers together always get my vote, and when the garden’s also called ‘Eat the City’ then it’s also got my attention. This garden, designed by Phoebe Walsh-Gamgee is inspired by the urban environment and puts into practice the edible-ornamental approach along with companion planting to create a beautiful space for both the community and the wildlife.

I did like the central feature which spiralled through the garden providing a focal point and a place for planting - and the succulents growing vertically out of one of the spaces between the planks was a nice touch. It was also good to speak to the designer, who had clearly been working hard to get the garden together. Saying that I liked how some of the succulents had escaped raised a bit of a panic as they weren’t supposed to be falling out - oops. But as I said only she knew that, and not even the judges who were due imminently would know for sure, but I did leave her to fix it. I can’t imagine the stress of putting such a garden together, and to be honest, I’m not sure I ever want to try that.

The show notes included something quite profound, but also so very true:

A neighbourhood, a city, a community, and a garden share the same habits - they must grow. You cannot build a neighbourhood any more than you can build a tree; you can only create the right conditions, plant the seed, care for it and wait.

Isn’t it a great little garden?

This is the last show garden that I’m planning to share from the 2024 show, it won’t be long before this year’s show opens and I for one can’t wait.

* With thanks to Gardeners’ World for inviting me to Gardeners’ World Live, it was just as good as I expected! I’ve shared more from my visit to the show - I hope you enjoy it as much as I have, this is the last garden I’m sharing from the 2024 show - it’s not long now until this year’s show, and I’m looking for to seeing what’s in store this year.