Making my mystery block of the month: January

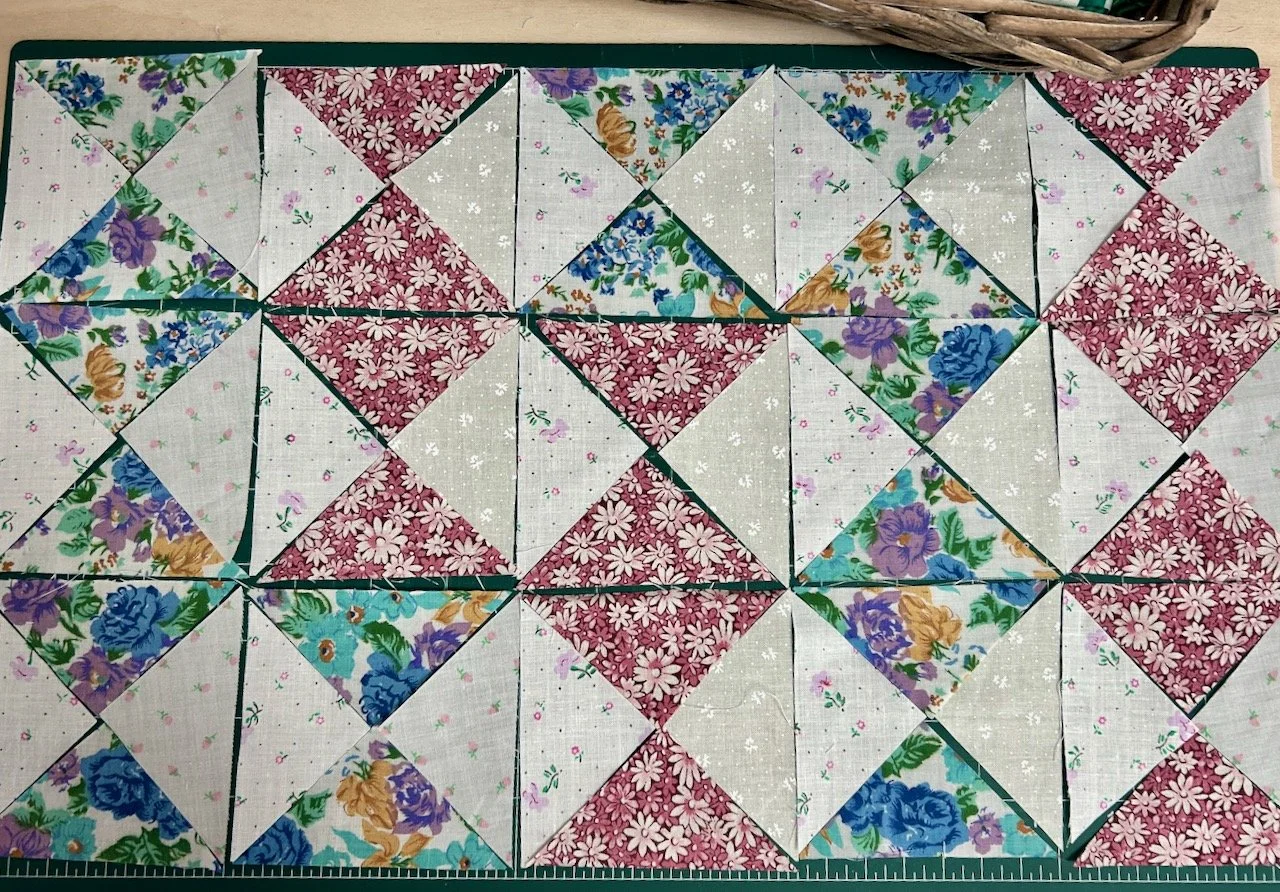
You’ll have seen that I plan to complete Sherri’s mystery block a month quilt and yesterday I shared the test blocks which I made into my third Project Linus quilt, well today I’m sharing the log cabin block I made for my own quilt.

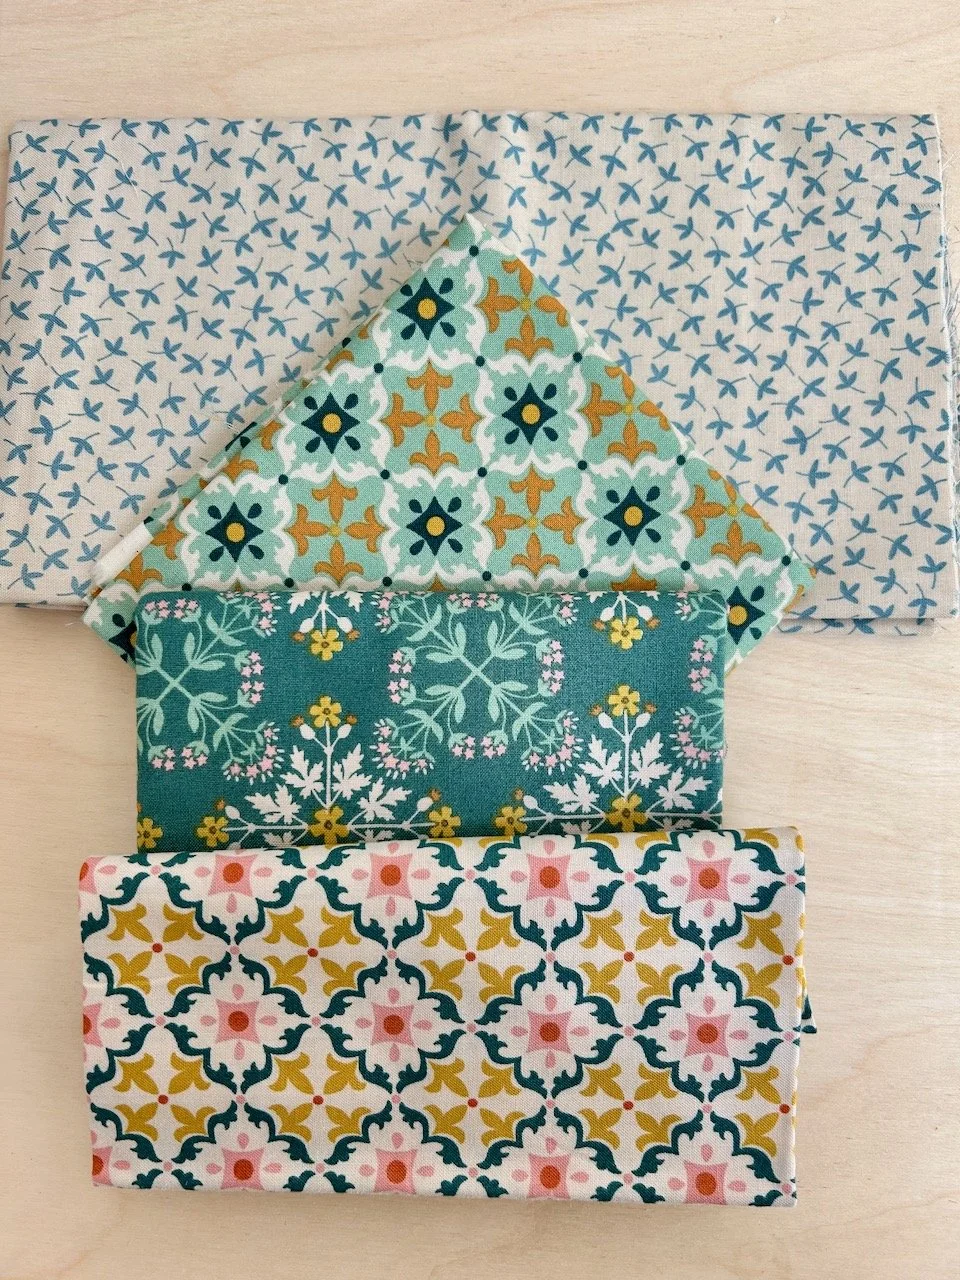
So while I knew that I’d use the Lewis and Irene fabric bundle which I picked up at the Newark Quilt Show in January for the block’s centres, I didn’t know what to use for the borders. I wanted something quite bold for one of the colour ways, as our house is predominantly white, and although I like that I’m also keen to add colour through accessories and furnishings.

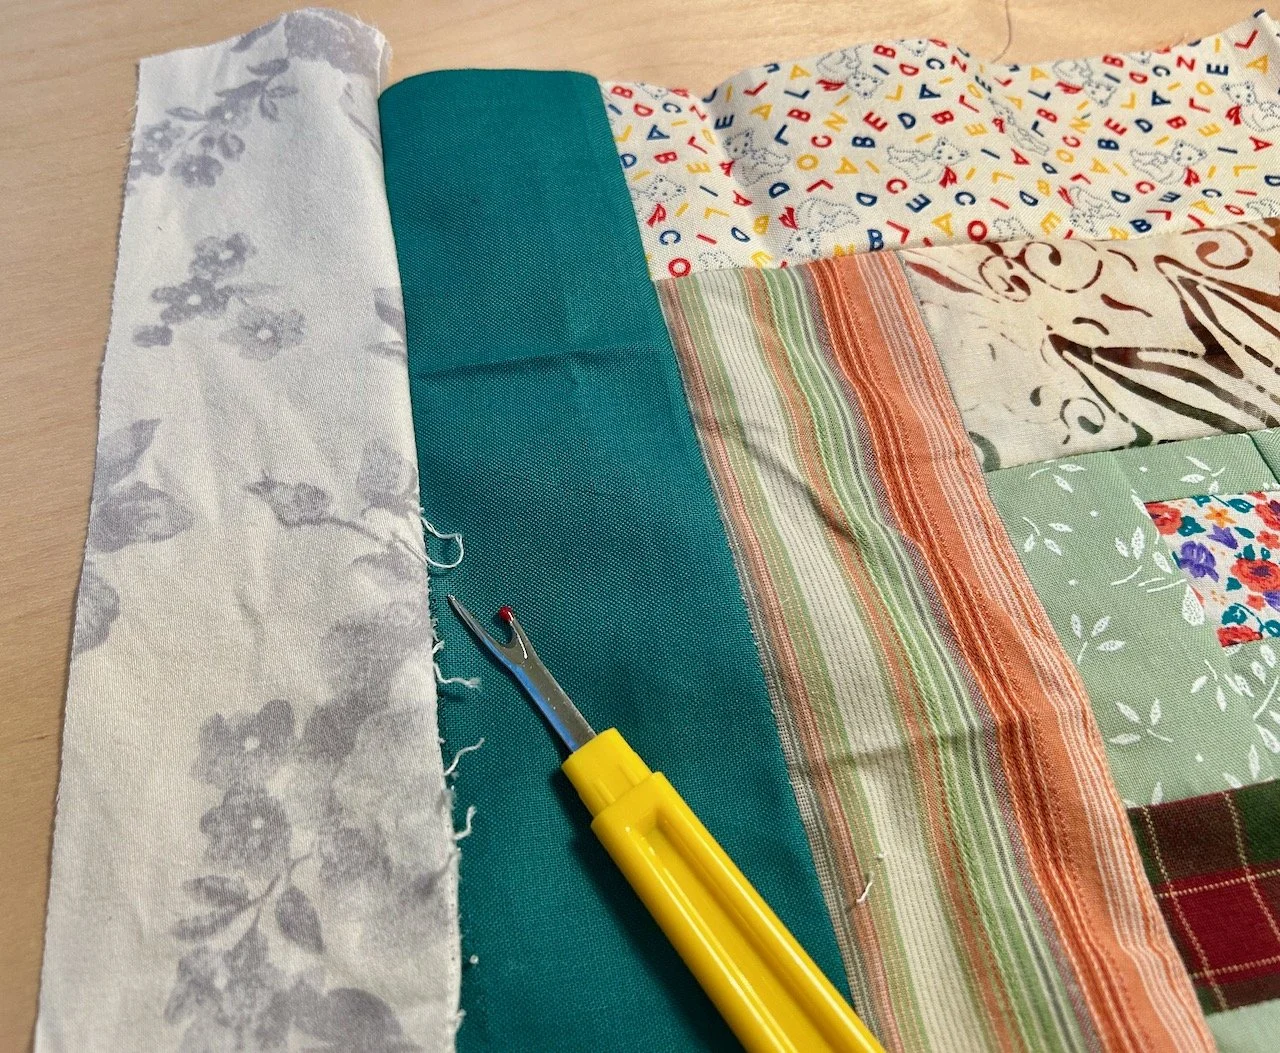
But it was the borders that made me think twice, and more than twice really. I ummed and ahhed about whether I should add them as I go along, or wait until the final block is completed later in the year. The pluses for delaying meant it would give me longer to decide which fabric to use and I could be sure I had enough of that; but the downsides were that there would be a lot of quilt still to complete at the end of the year, and the chances of that happening could be low. But I might not have enough material to use the same on the borders throughout, though I remembered that it really didn’t matter so much on the quilt I’d just completed - but you see my dilemma.

In the end I just got sewing, and hoped I’d work it out along the way!

Sewing the central block

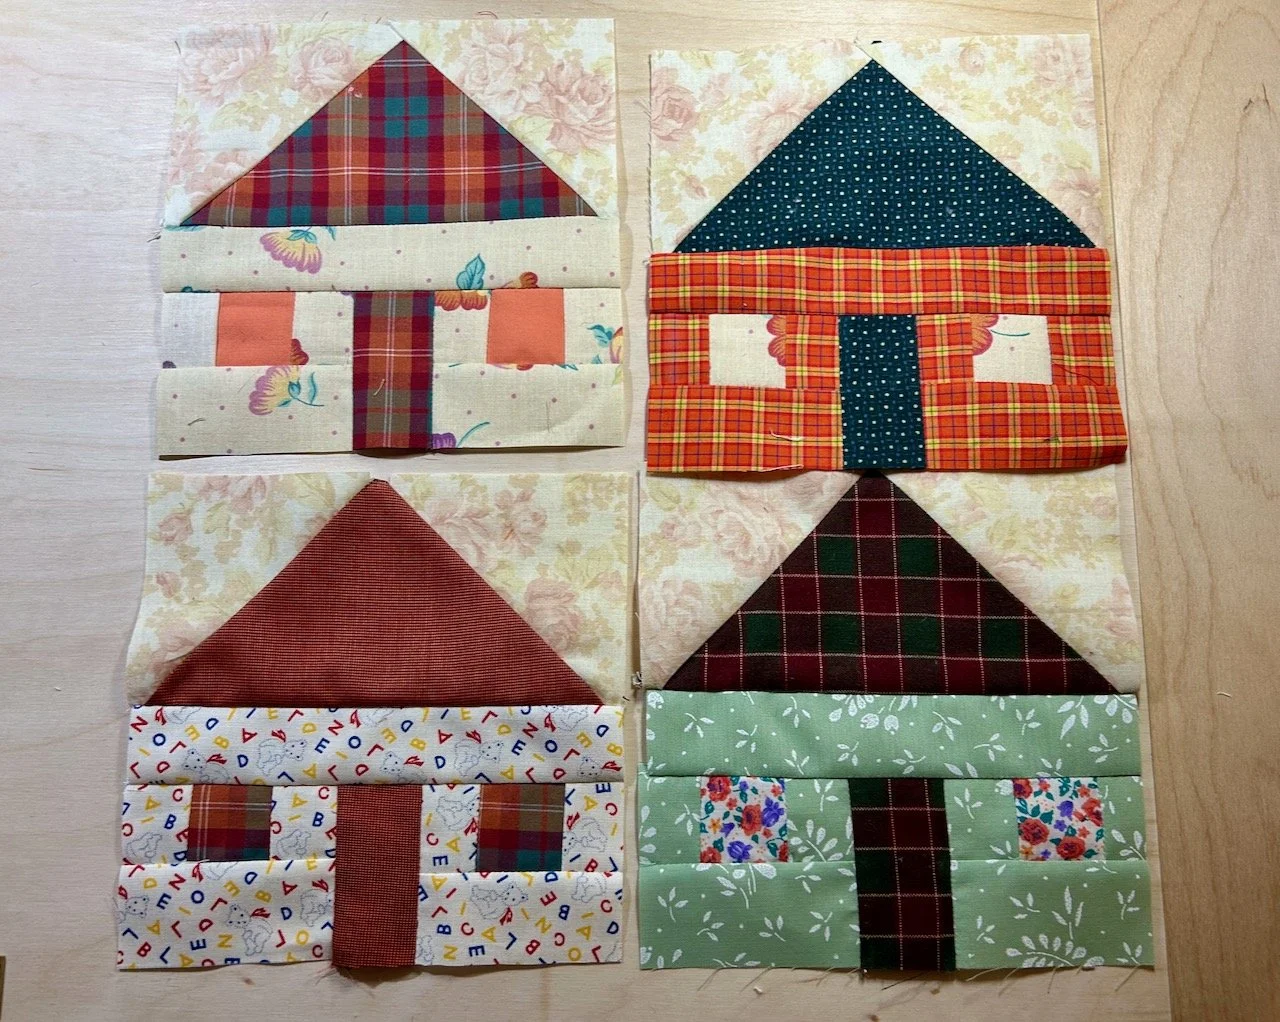
Having completed the test blocks I felt pretty confident to try the block for my own quilt; as well as learning how not to cut off the point of the roof, I also learnt that I preferred the darker border colours on the bottom half of the block, and the lighter ones on the top. Perhaps for this block because they were representative of the ground and the sky respectively - who knows.

I’ve also worked out recently that pulling the fabrics together for a quilt is one of the most enjoyable aspects for me, but while I thought these were busy, I thought they would probably work.

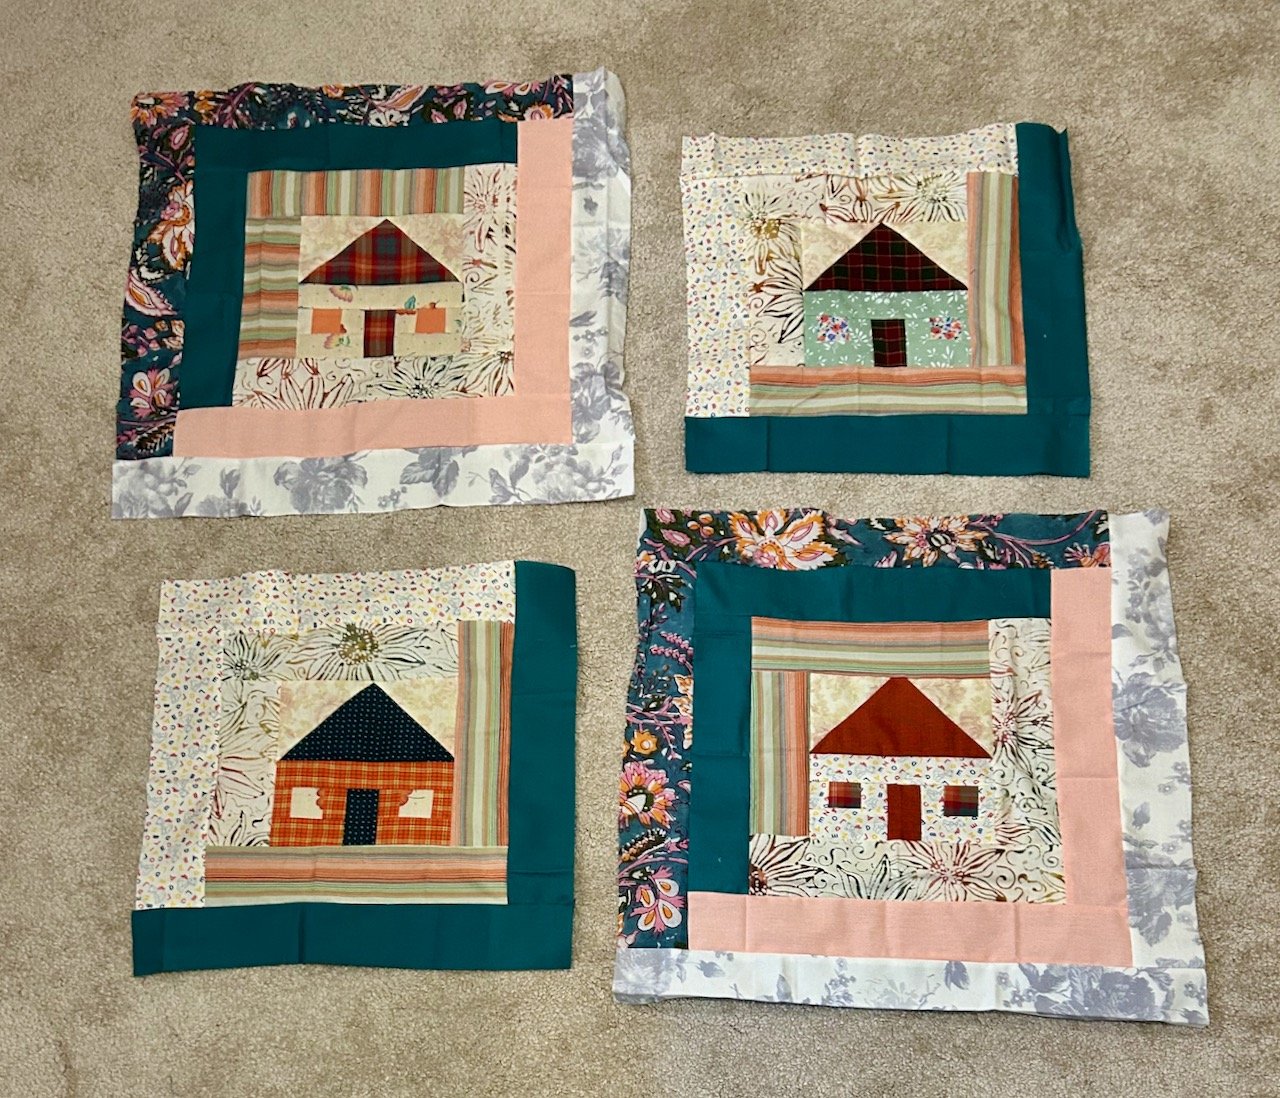
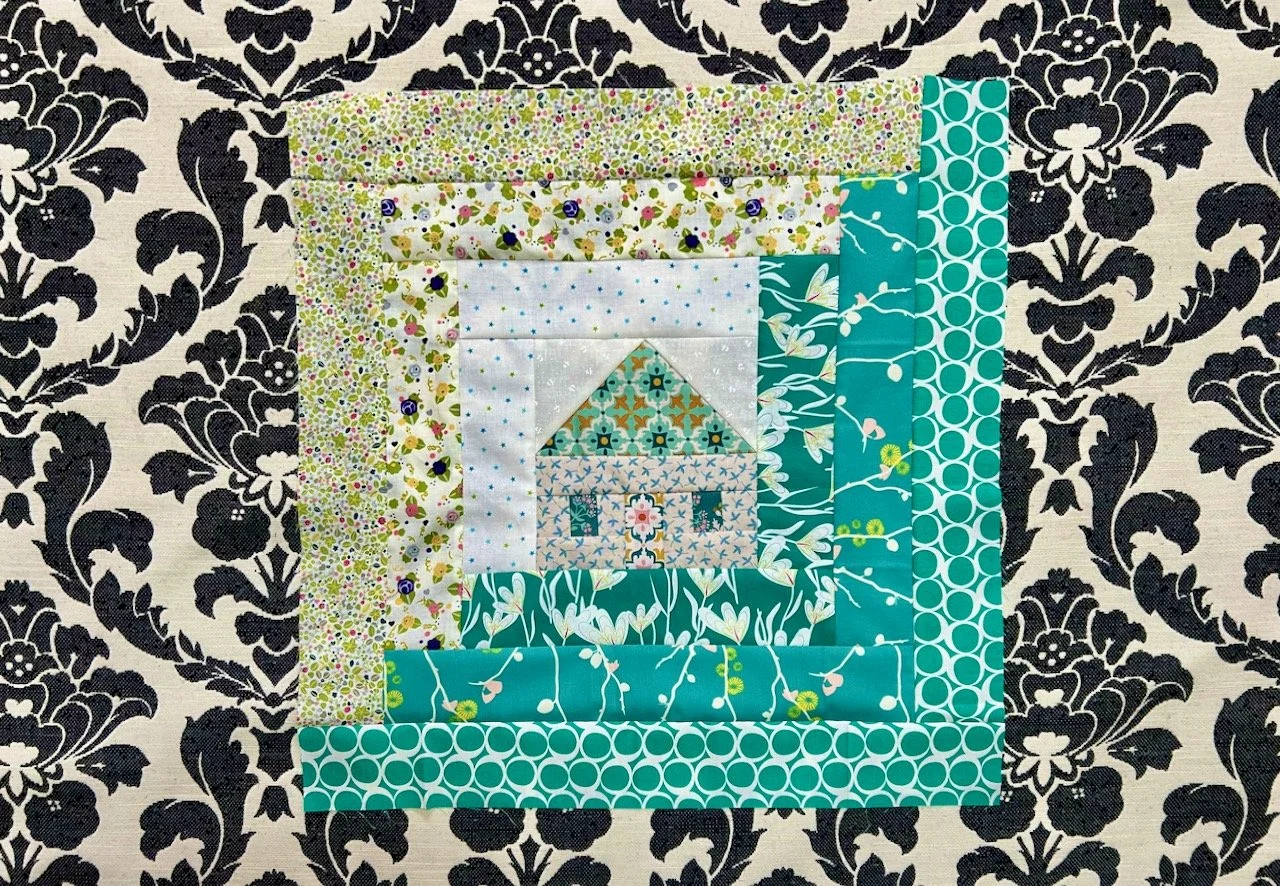
But with the block sewn, I was less sure. The more I looked at it the more I was less sure - and nor did that help my borders dilemma. When looking at it again with fresh eyes, and realising the thing that pleased me most about the sewn block (on the left in the picture below) was the placement of the door handle, I realised it was time to try again.

However perfect and completely unintentional the door handle placement was!

The sewn block using the fabrics laid out, and an alternative layout of fabrics

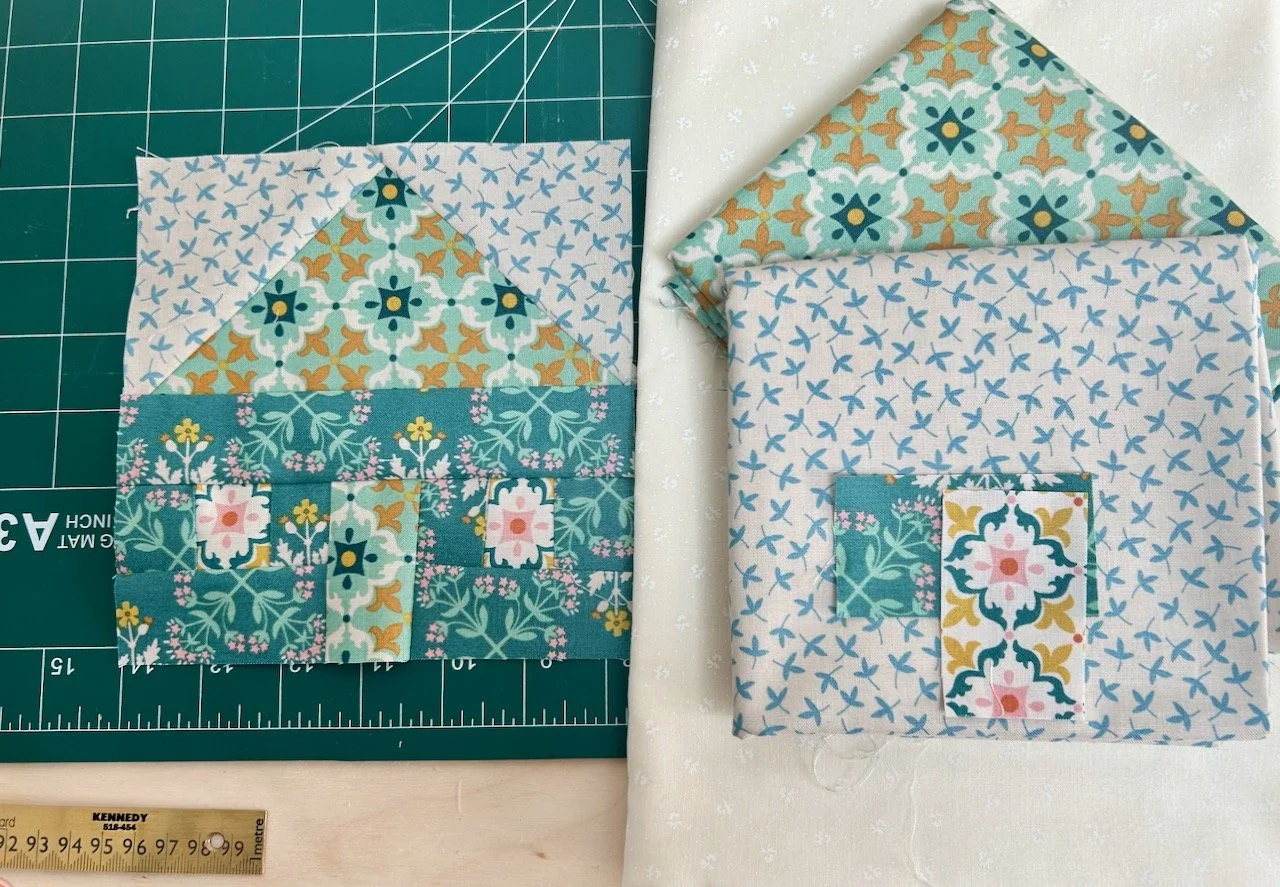
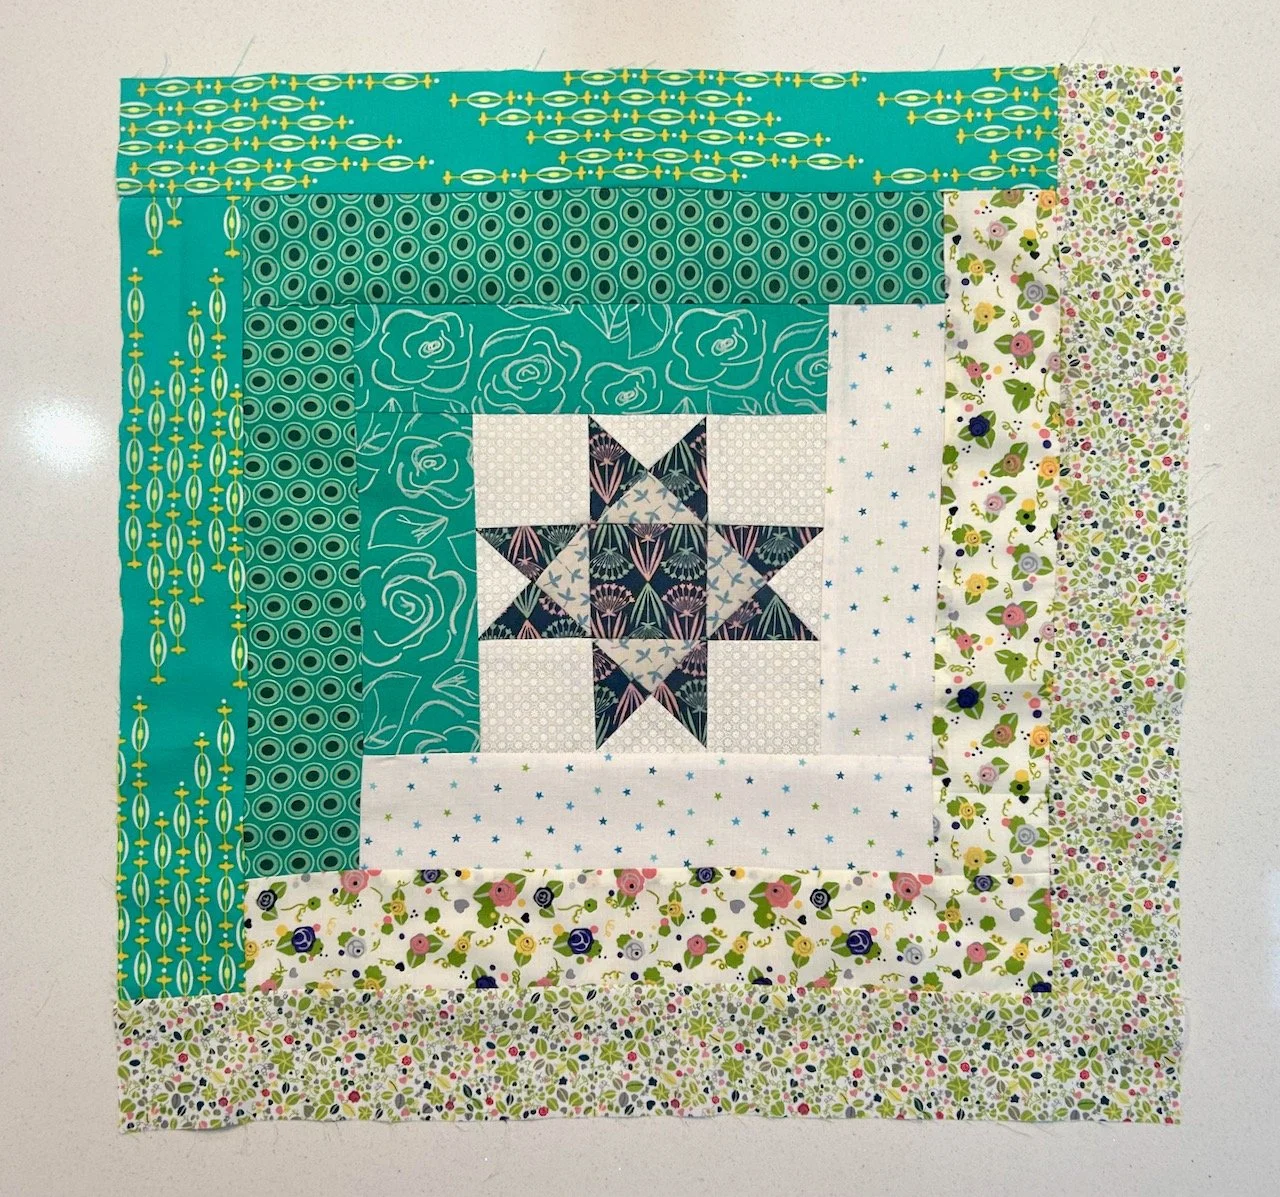
And so I tried a second combination of fabrics - one that’s much less busy, and introduces a plainer element for the sky. This worked so much better, even though this time the door has no handle.

Happier with my block it was time to deal with the dilemma.

Adding borders, or not?

I tried many combinations before I made my decision, but as you can see I’ve added borders.

My main concern was not having enough fabric and ending up with a quilt that looks as if it was of two halves. But in the end I’ve made peace with myself and have mitigated this as far as I can. I’ve bought an extra metre of both of the outer light borders, ideally I’d have bought a metre of the pale background star border too, but I was only able to get half a metre of that. So the lights will be my constant, or that’s the plan anyway.

For the darks - or the bold jade green borders, the material is much older and hunting down similar quantities wasn’t going to happen, but I do have other toning fabrics which were all part of the same set. I think they came from either a magazine subscription or a competition win, but I have ten or so of similarly coloured AGF fabrics which I’ll use interchangeably. The colour will be the constant rather than the pattern for this border, and I’m pretty sure it will work.

And so, on went the borders.

My completed january block

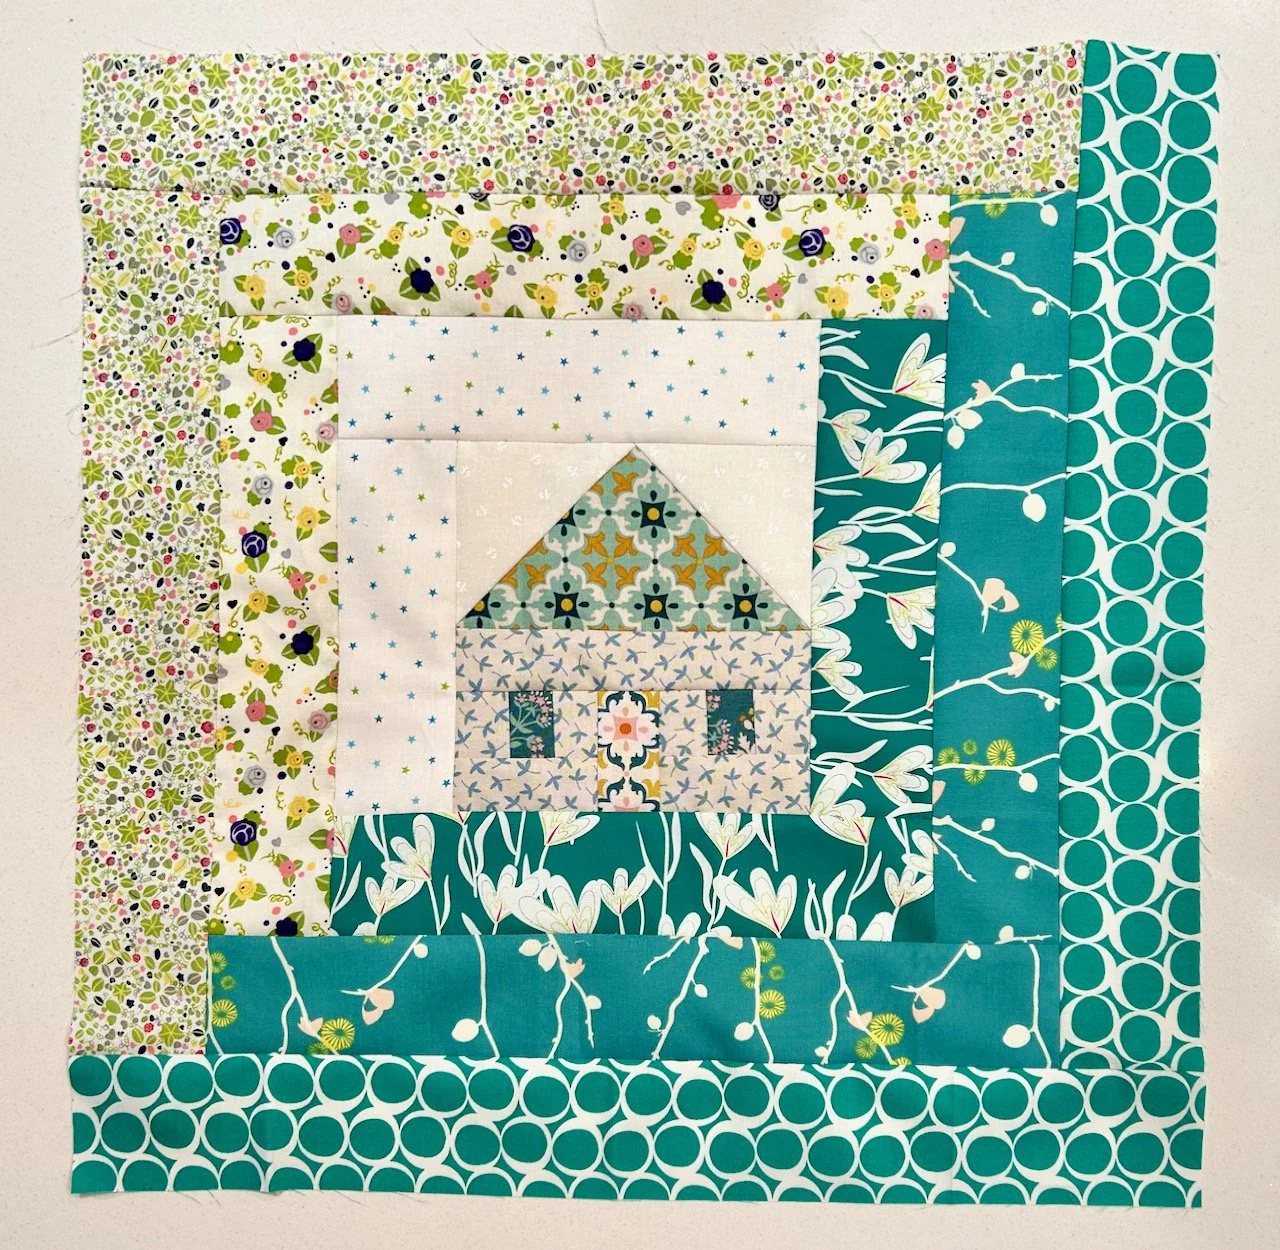
I’m really pleased with how it turned out, and I know it’s bold - but that’s also by design as my working theory is that this will be a quilt for our spare bedroom which will have a rather ornate headboard (well it will once I’ve recovered it!).

So it needed to be bold to get the attention I’m sure it will warrant once its complete.

Join me next month to see how I get on with the next mystery block, and check out my posts which contain charity quilts made from the test blocks.

A log cabin log cabin quilt

In my recent post where I shared my quilt plans for the year I mentioned my ‘stretch’ project to complete a quilt from the test blocks from Sherri at A Quilting Life’s mystery block a month quilt. And in fairness the January block was super cute and helped the idea to form. As I said I don’t know if I’ll manage it, but then again I won’t know unless I try will I…

My third donation quilt

I’ve named this one the log cabin log cabin quilt - a simple play on words that never fails to make me smile - with a little house in the middle there really was no other name for it. For non-quilters the pattern surrounding the central house is known as a log cabin block, traditionally with half using dark fabrics and the other half using light fabrics. Even from the start, when I pulled these orange and green fabrics from my stash it made me smile.

The benefits of doing test blocks was immediately apparent, as I lost the roof point in my first block (the alphabet house, bottom left in the image above), but I worked out what I’d done wrong and corrected that for the other three blocks. So for that alone it was worth doing - and knowing how to avoid that particular mishap in my own block of the month.

I started adding the log cabin borders, which when complete means the blocks measure 18 inches, and while there’s just four blocks they are a similar size to the previous quilts I’m donating. I needed to stop and reconsider my options as I’d miscalculated how much of the plain peach material I’d need, and how much I had. Which long story short, wasn’t enough for the remaining two blocks.

I thought about purchasing a small amount of a similar coloured fabric for continuity, but this went against my plan to use materials from my stash - and as you can see, I opted to use more of the alphabet fabric in its place. And then I needed to stop again, as I happily added the white and grey flowery fabric to the dark section instead of the light borders.

Some unpicking was required!

But I was soon back on track and ready to join the blocks and add the borders - you’d never know I’d run out of peach would you?

The four completed blocks laid out on the carpet

Around this time I took delivery of my new sewing machine, so this quilt was put to one side while I got used to that - but now it’s finished, and finished using my new machine - and I couldn’t be happier.

The finished quilt - with the bottom corner folded over to show the backing fabric

Some of the fabrics in this quilt I’ve had for a long time, and some are pre-loved fabrics from old clothes and even old curtains - but I’m glad they worked so well together and have this new lease of life. I’ve used the orange squared fabric (which was old curtains - you may recognise it as I also made myself a bag using this material last summer)

The completed quilt draped over my kitchen sofa

You can see my other quilts which I’ve made to donate to Project Linus - a charity whose mission is to provide love, a sense of security, warmth and comfort to children, who are sick, disabled, disadvantaged or distressed through the donation of new, homemade, washable quilts and blankets, including those that are part of this ‘stretch’ project in earlier posts. I’m aiming to publish an update on my progress in the last week of each month for the remainder of 2025.

Plates, paperweights and trays

As I had a day in London last week - I was invited to the Garden Press Event in Islington - I thought I would make the most of the time and pop along to Liberty in the West End, quickly hopping on the tube to reappear in a part of London that is probably more well known, and well visited than Islington.

I’d seen some enamelware that I was keen to buy, and even more keen to avoid the £9 postage fees for, so when I saw that Liberty was a stockist well, it was meant to be wasn’t it? It’s been a while since my last visit, and it’s always an interesting place to window shop. Sadly the enamelware didn’t happen, and I was a tad disappointed by the range they had which was shoved in a corner and took up a whole two shelves. Sigh. I still want the small tray and the small sauce dish, so have ordered online and only winced a little at the high postage costs for three very tiny items.

Yes, I could have trawled around any number of shops in the West End and beyond, but I’m really not that much into shopping. But while I was in Liberty, I did have a mooch around before hitting the fabric and haberdashery departments!

Sidetracked by the lobster and cat’s eyes

I have no need for any paperweights or glass tray-plate-things, but I couldn’t help but admire them and how they were displayed on a simple wooden table. The glass tray-plate-things remind me of those that as growing up older relatives or neighbours would have on their sideboards filled with boiled sweets, or next to their bed for their jewellery. I’m sure there’s a million and one other uses for them, but that’s where my memories took me.

I’m still not sure if I like the tabby cat paperweight or not, I think it’s the tongue for me. Maybe it’s because there were two - double trouble - that I’m not sure. The lobster was a lot less disturbing, and I daren’t look at the price, though I’m sure without looking it was “too much”.

Next I was drawn to a brightly coloured table mat of a hare with what looks like artichokes for ears, yes really.

And that led to the trays

In fact it led to many trays - all of them with drinks emblazoned on. Not all alcoholic - there was tea and coffee too, but for some reason I don’t have photos of those. My next stop after my Liberty mooch was the pub, so perhaps that was it.

Fun aren’t they?

Though again they’re not cheap, starting from £40 and upwards. So if you want a fun boozy or non-boozy tray Liberty could be the place for you - some are available on their website if you’re really keen. And if you want to pop the lobster plate in your basket for me that’d be appreciated, though you’ll have to go in person as thankfully that’s not on their site.

Still feeling slightly miffed about the enamelware, but less so having raised a smile at these trays, I decided to head up to the fabric and haberdashery, that was more successful - though with all the colourful fabrics on show, I think I am probably the only person to leave with two grey patterns, but I’m still sticking to my brief for the extended floral fancy quilt.

I think I took even more photos in those departments, so I’ll share those separately - but before I go an only in Liberty. In their remnants basket there was a bargain silk 1.3 metre remnant for £175. I didn’t leave with that either (it wasn’t grey) but that did make me smile!