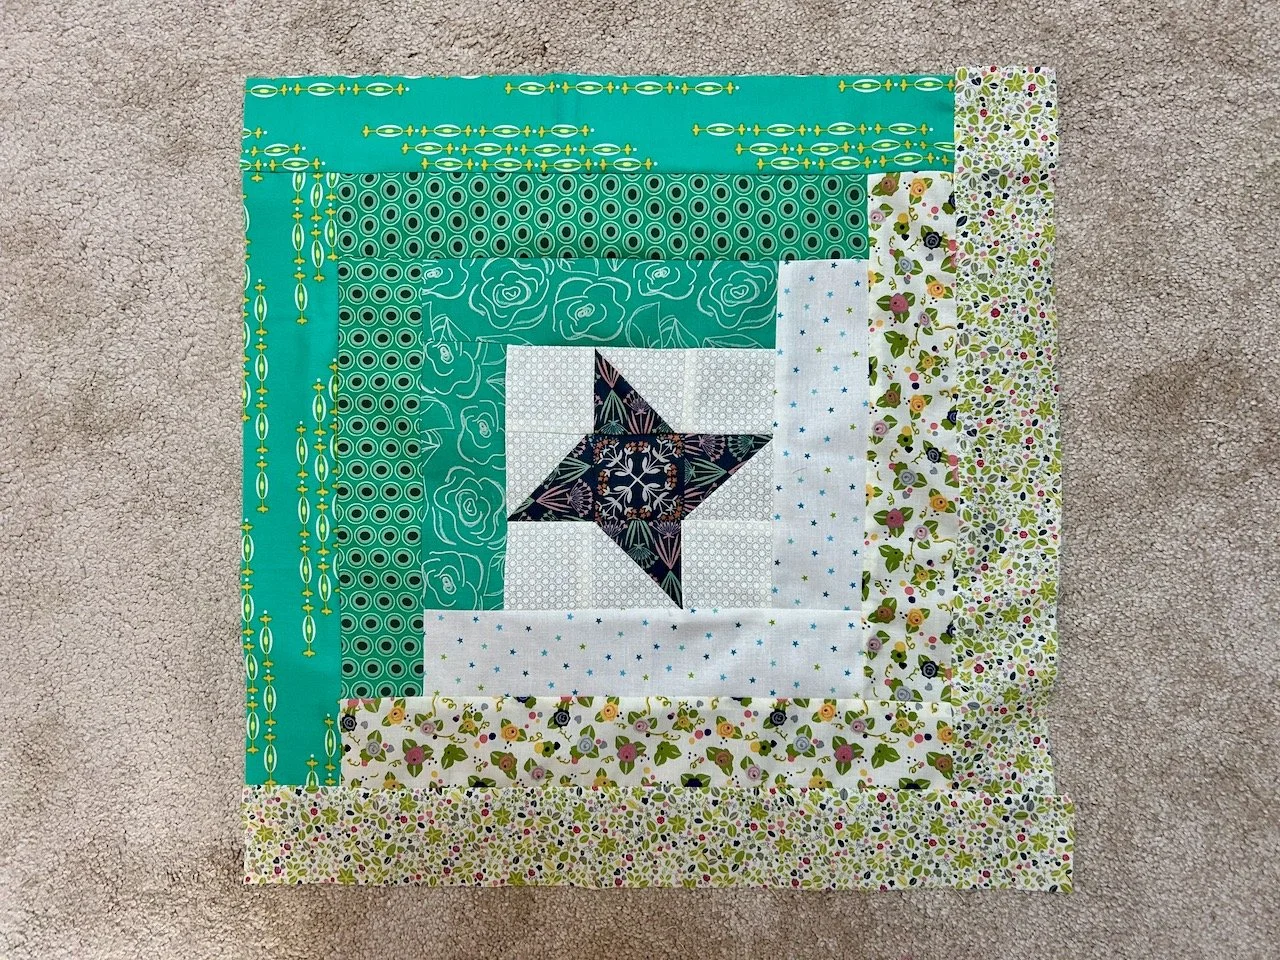


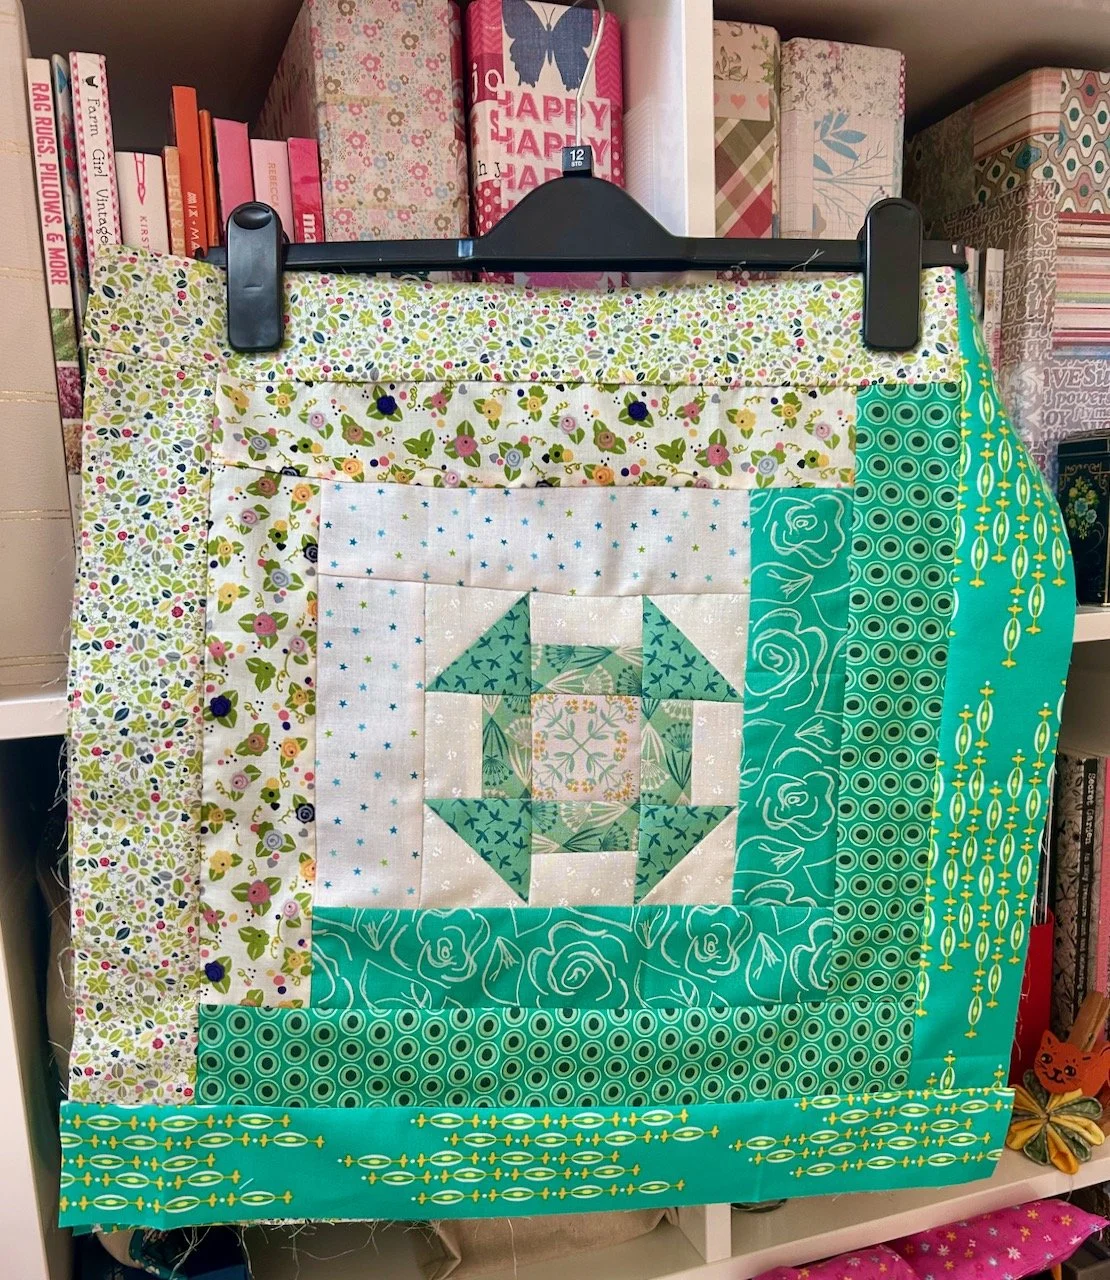


You’ll have seen that I plan to complete Sherri’s mystery block a month quilt and in my last post I shared the test blocks which I made into my ninth charity quilt, today I’m sharing the centre block I made for my own quilt.
I’m still behind where I thought I would be on this, but - life - and I’m ok with that.
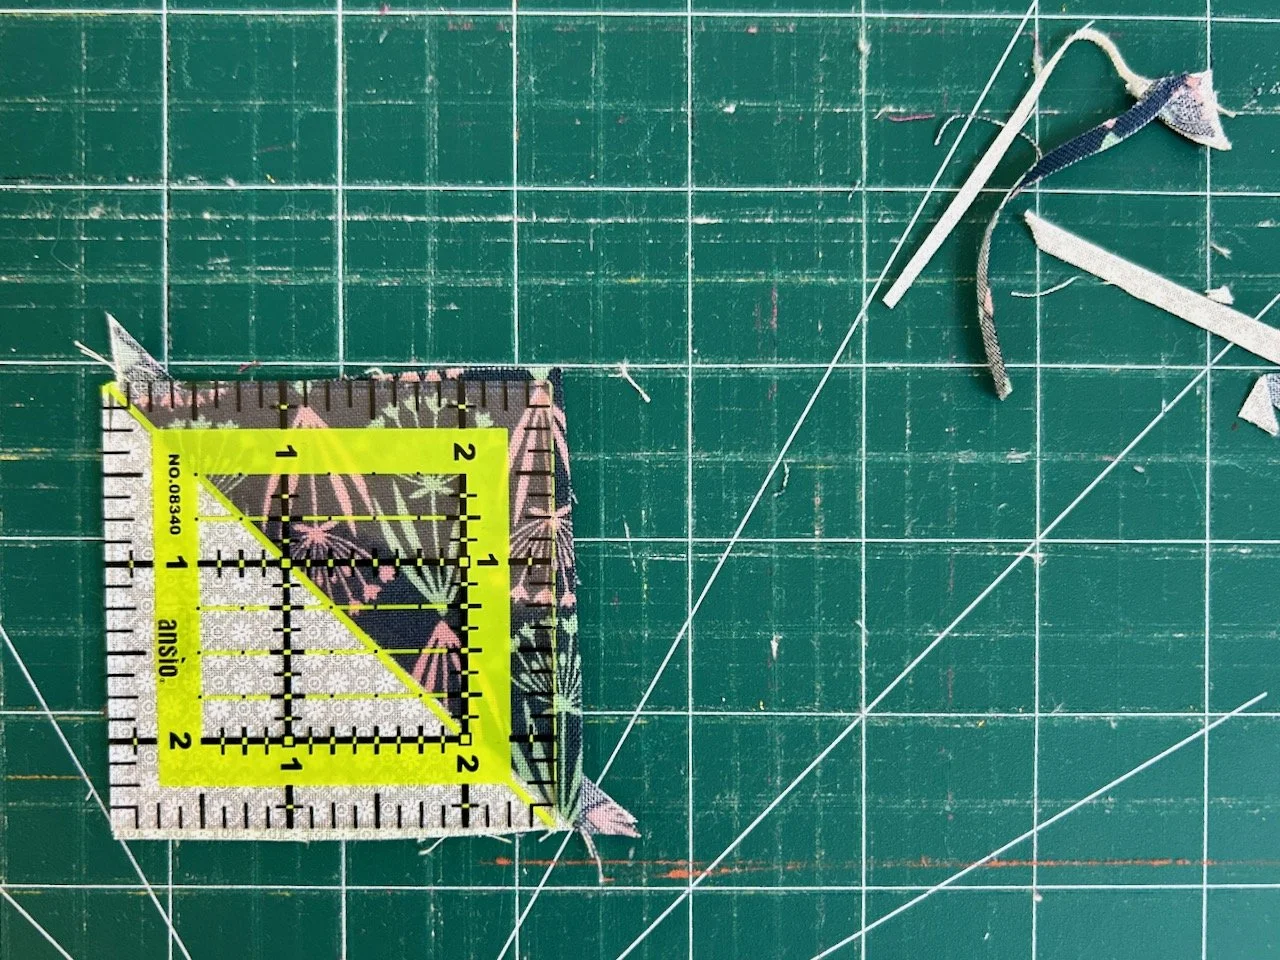
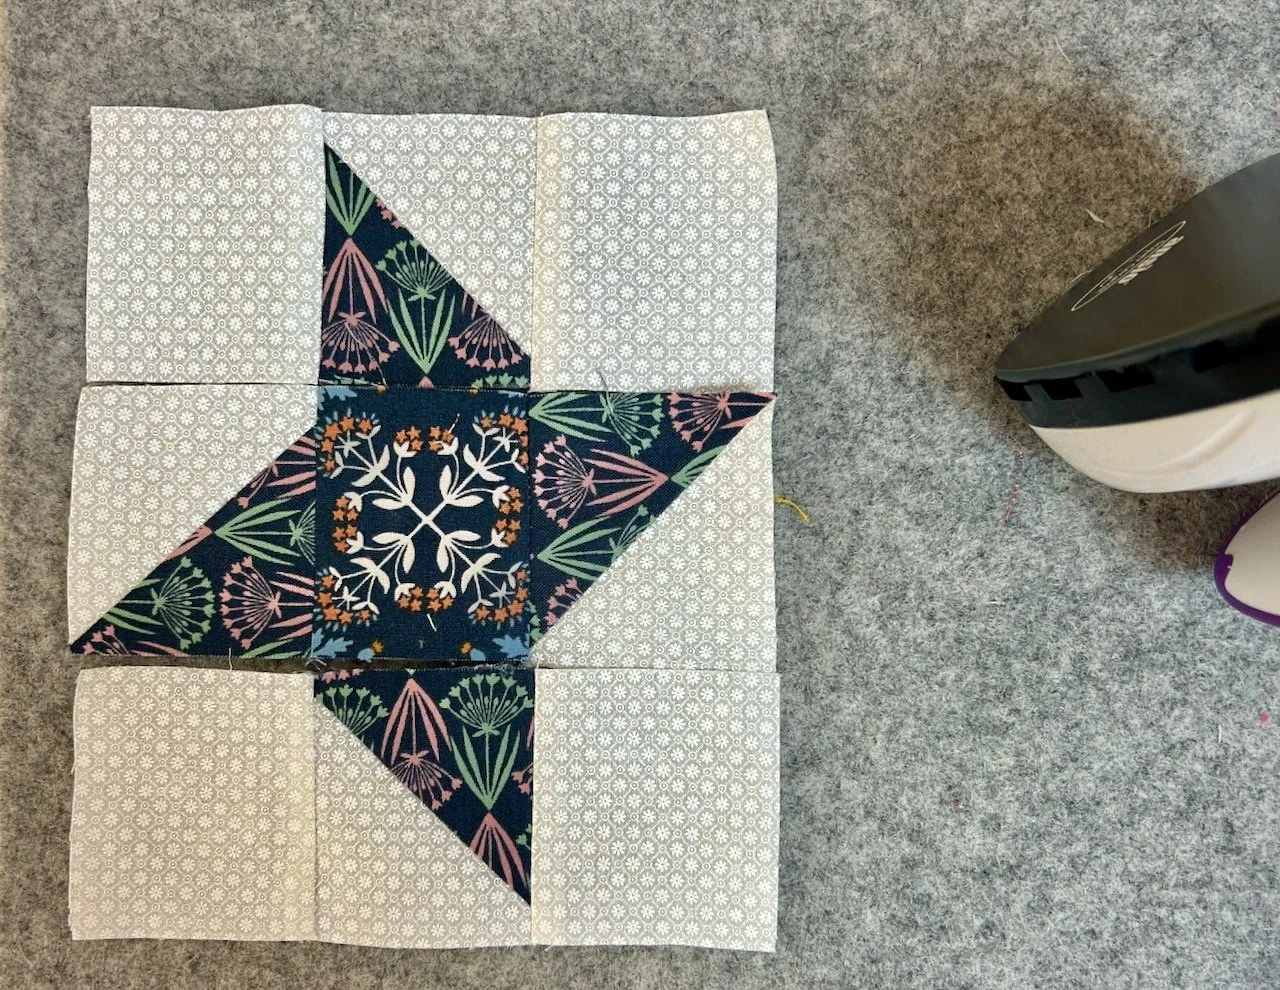
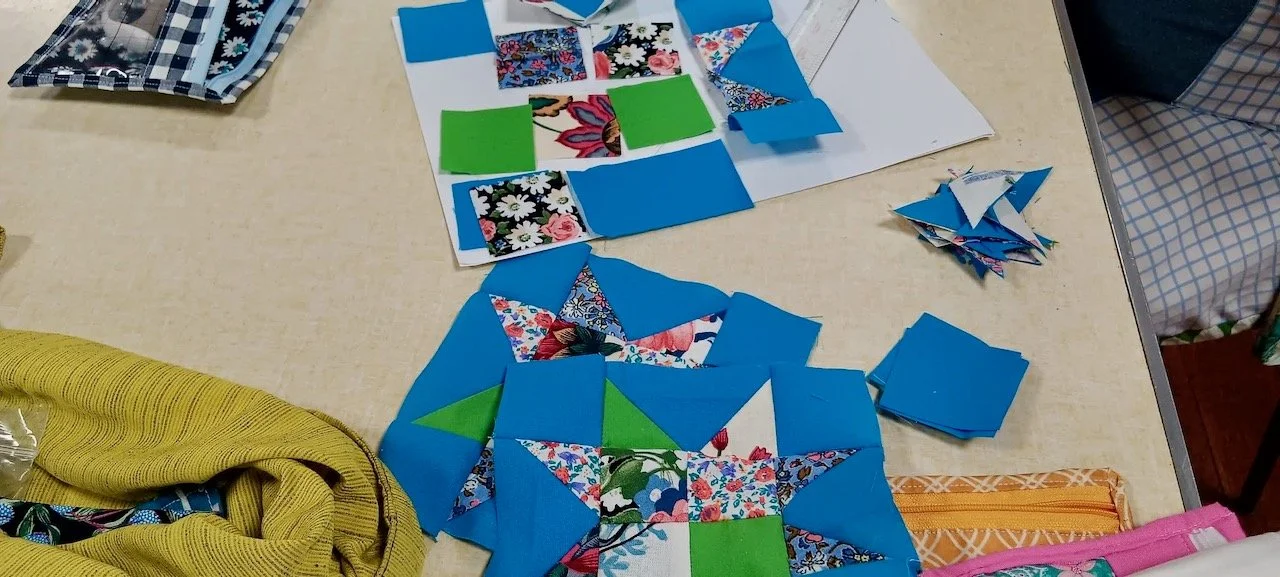
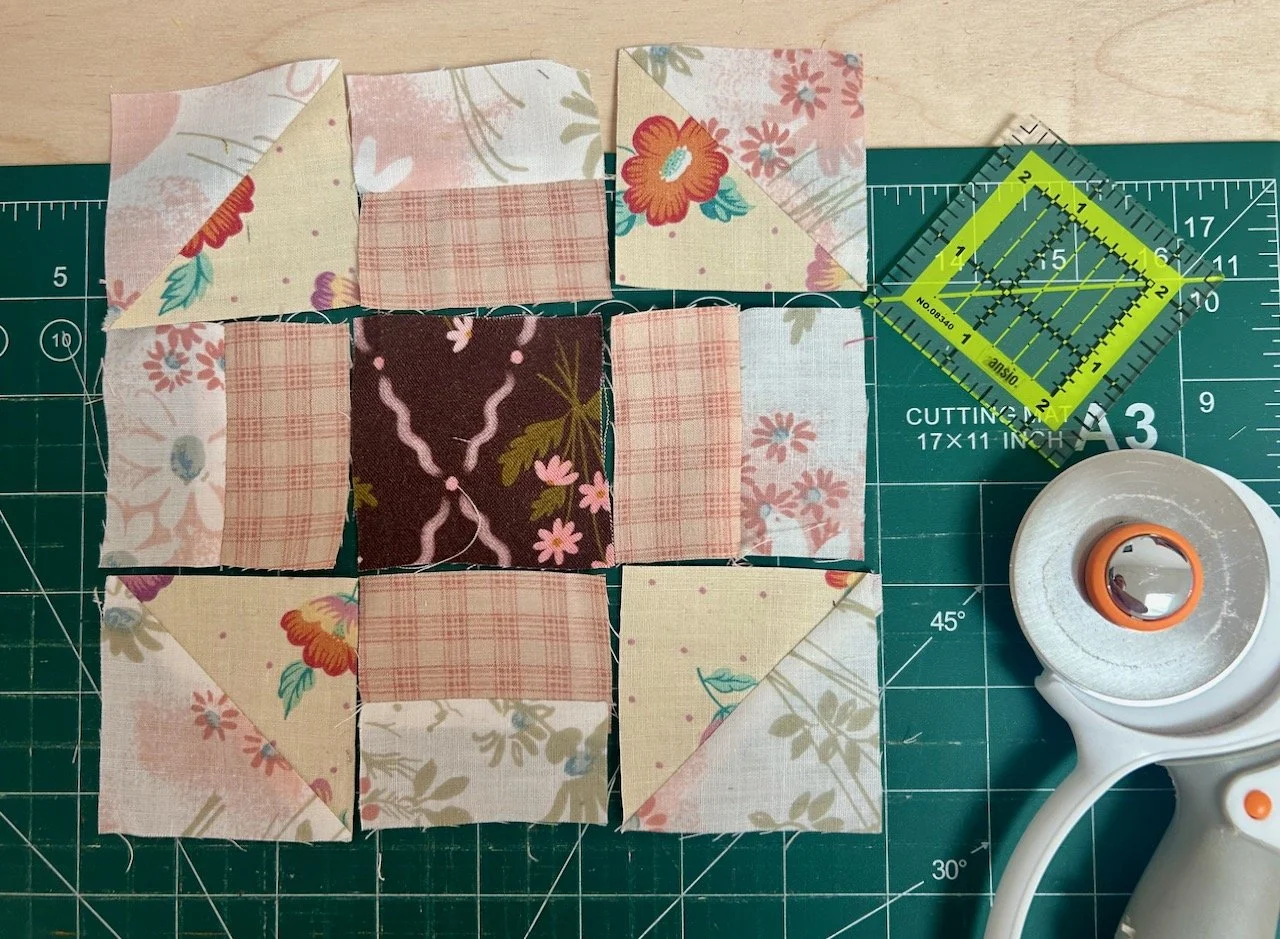
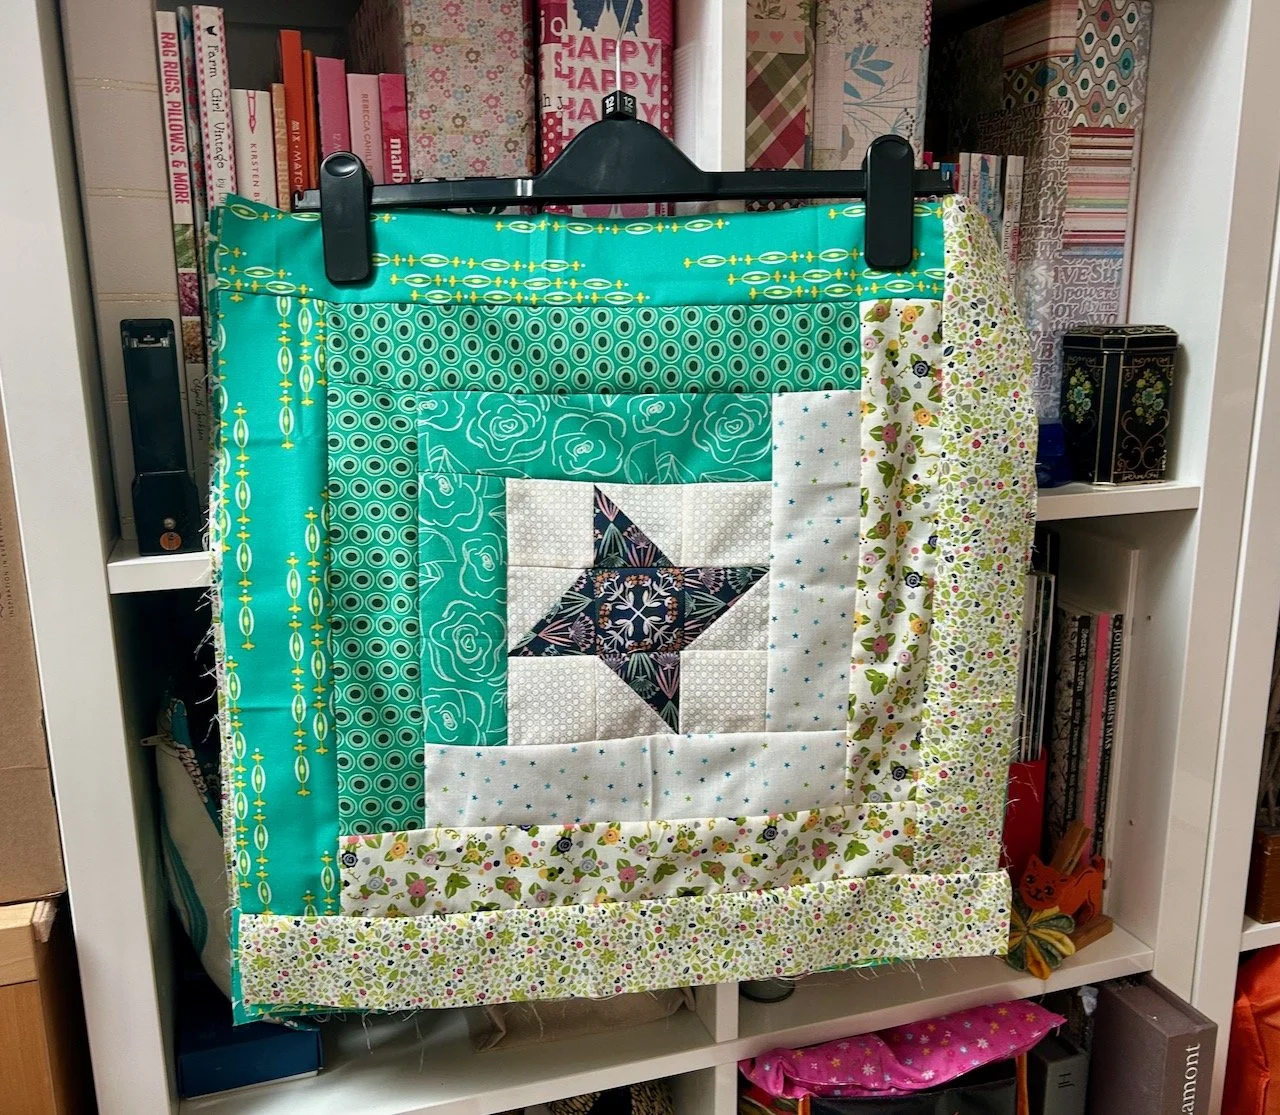
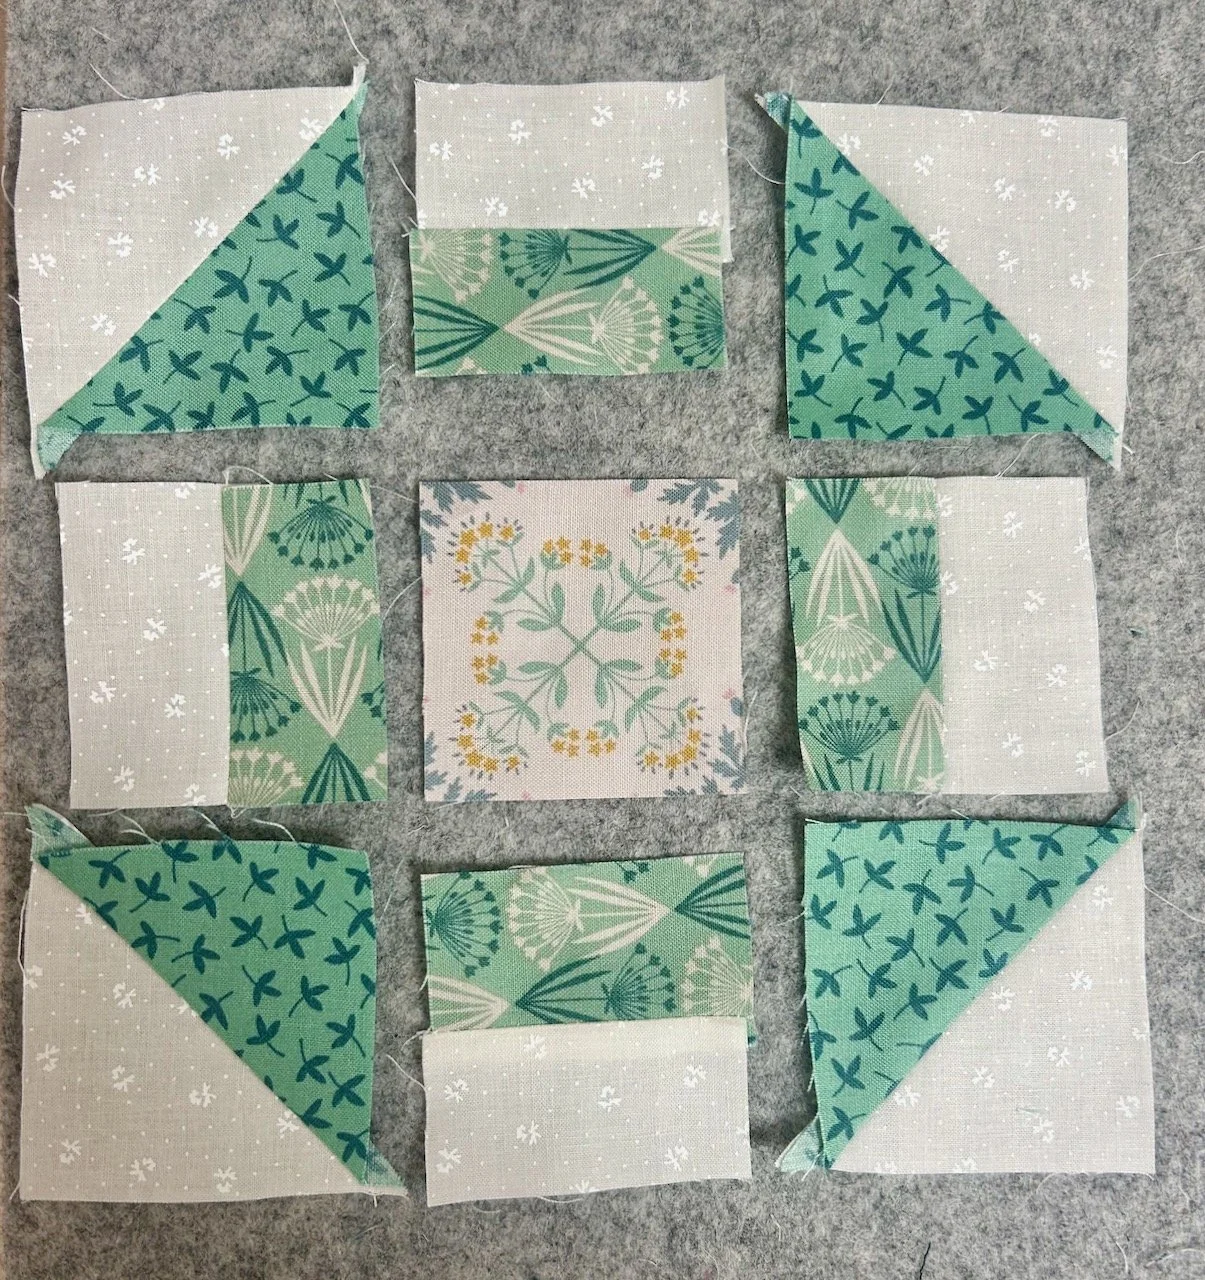
This month’s block is a churn dash, and it’s my first. There were definitely some lessons in the four test blocks I shared yesterday. I much prefer the corner triangles to be dark, and for the central square to be light, and so I kept that in mind when selecting the fabrics.
It’s not a ‘star’ month so I had some freedom to choose which colours I wanted to use this month, and the rules by the way are ones that I’ve set myself to bring some more uniformity to my finished quilt - not that I know what that will look like at this point!
But anyway. I went with green.
When I’m sewing these blocks I’m constantly checking the layout, and which of the green borders I should use - as well as which sides they need to be on. That hand drawn, scribbled plan has been so, so useful for the latter.
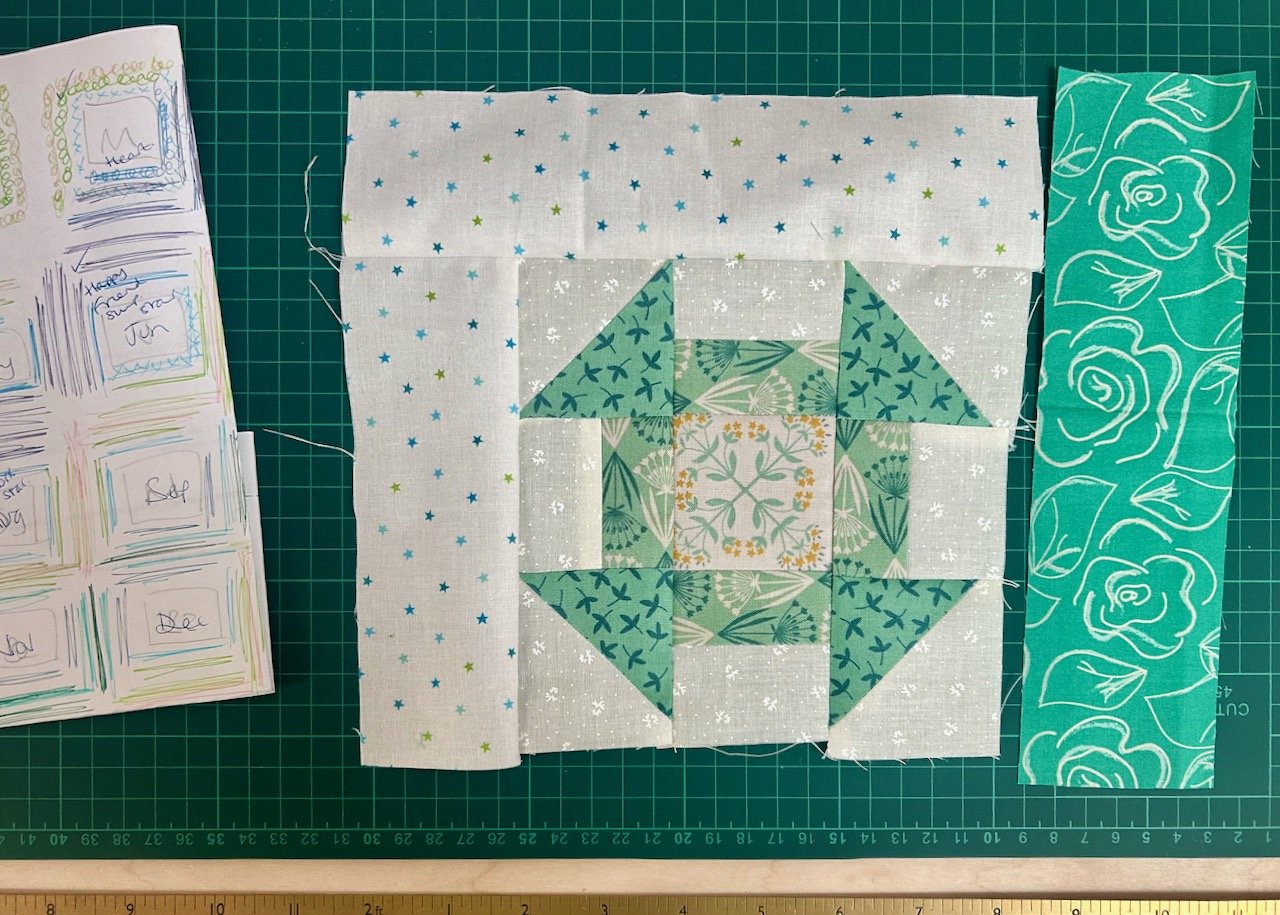
I didn’t quite get the motif in the centre spot on, but I think that was possibly down to my cutting rather than my sewing. And in the scheme of the whole quilt, I’m not sure it’ll be noticeable.
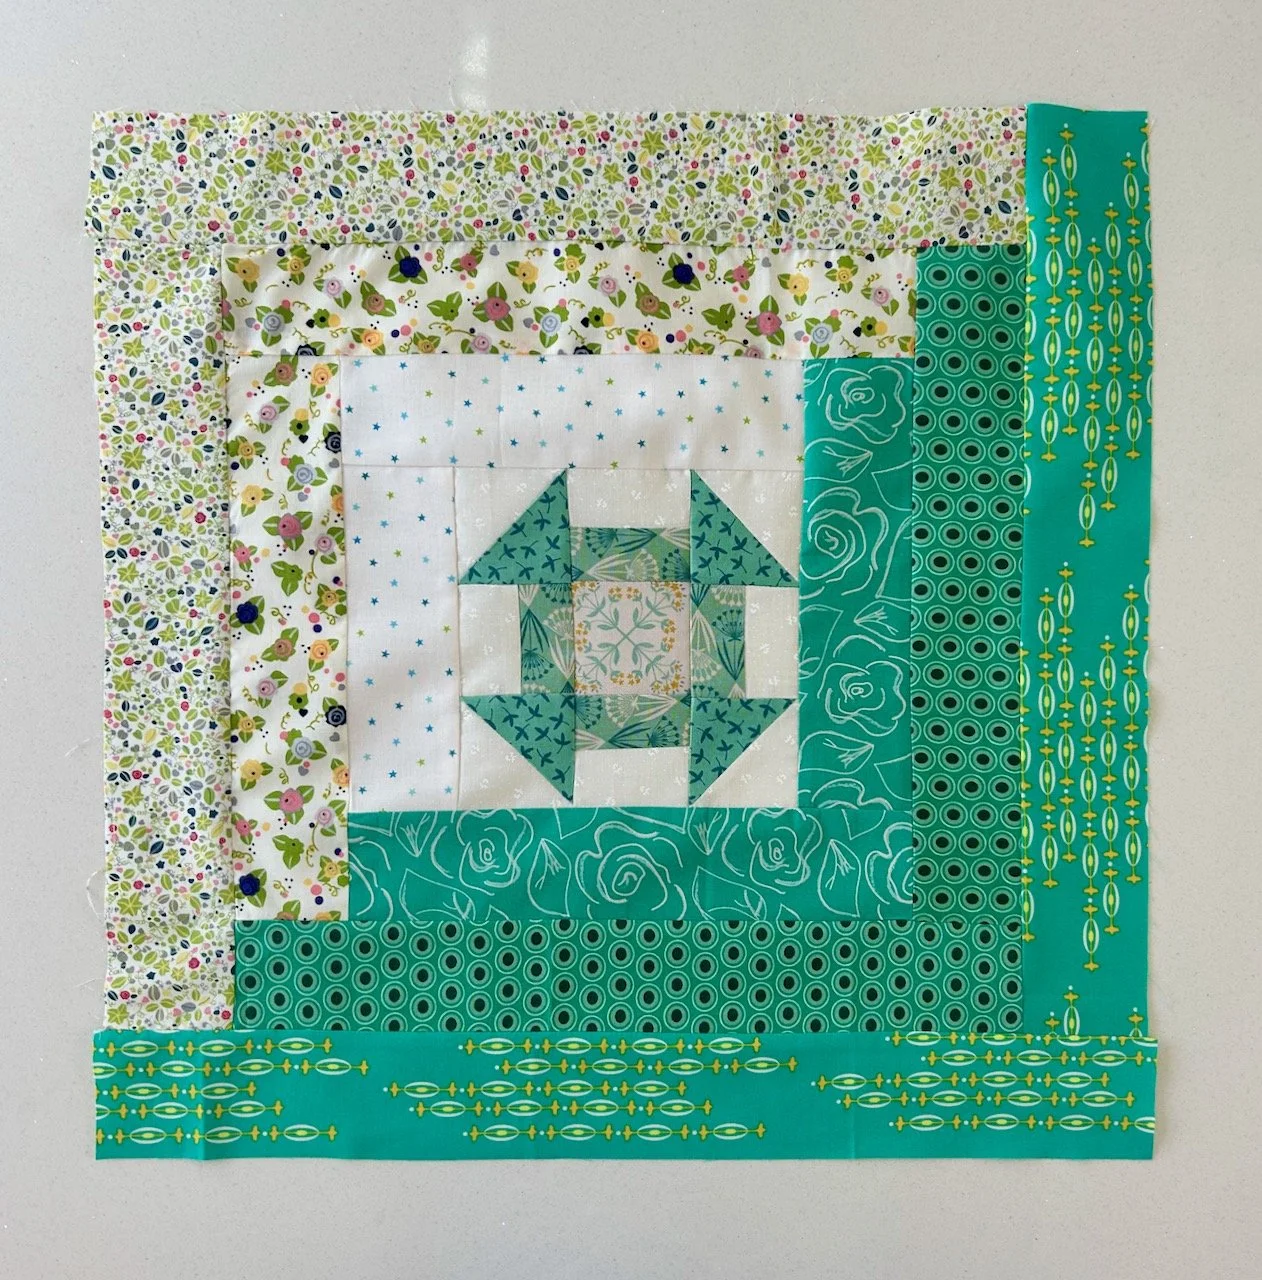
But with the borders added, the photos taken and now the blog post shared this one is hanging in my craft room along with the six blocks that have come before.
I’m getting quite used to seeing them hanging on my bookcase, hopefully once all the blocks are made and sewn together I’ll get used to seeing it on a bed instead. Still a while to go yet, and I’m saving sharing the ‘quick peek at all the blocks together’ for a month or two more yet.
Next month it’s back to stars, so I know I’ll be using navy blue fabrics. I’m not sure yet though if I’ll need to add in some other colours to make the design work, so I’ll leave it there for now.