Bringing the bling to Zumba

I haven’t shared any pouches for a while, but don’t worry they’re still around - and the pouch love wait is over! Though today’s pouch is one that I’ve embellished rather than made myself.

At the start of 2024 one of our neighbours started a Zumba class in the next village, and so I’ve found myself heading along most Thursdays never having zumba-ed before - and quite honestly, I’m still not sure I’m technically doing it right, but it’s good fun and it’s a great group of people.

At Christmas our Zumba-leading neighbour held a fuddle for the group to celebrate our first year, which was a really thoughtful thing to do, and I think has helped cement the relationships that were already forming. We all insisted on helping cater the evening, as you would, and for a while our Zumba chat was the list of who was bringing what - and most importantly not to forget your slippers on the actual evening.

Now that’s my type of party!

Or fuddle. Not even knowing what a fuddle was, I’ve now been to two as my Sewing Group had one too. It’s a term I’d not come across before, and if you haven’t either, this is Wikipedia’s definition:

(UK, dialect, Derbyshire, Nottinghamshire, Bedfordshire) A party or picnic where attendees bring food and wine; a kind of potluck.

But anyway, at the fuddle we all left with a Zumba pouch - imagine my joy, wearing slippers to a party and bringing a pouch home!

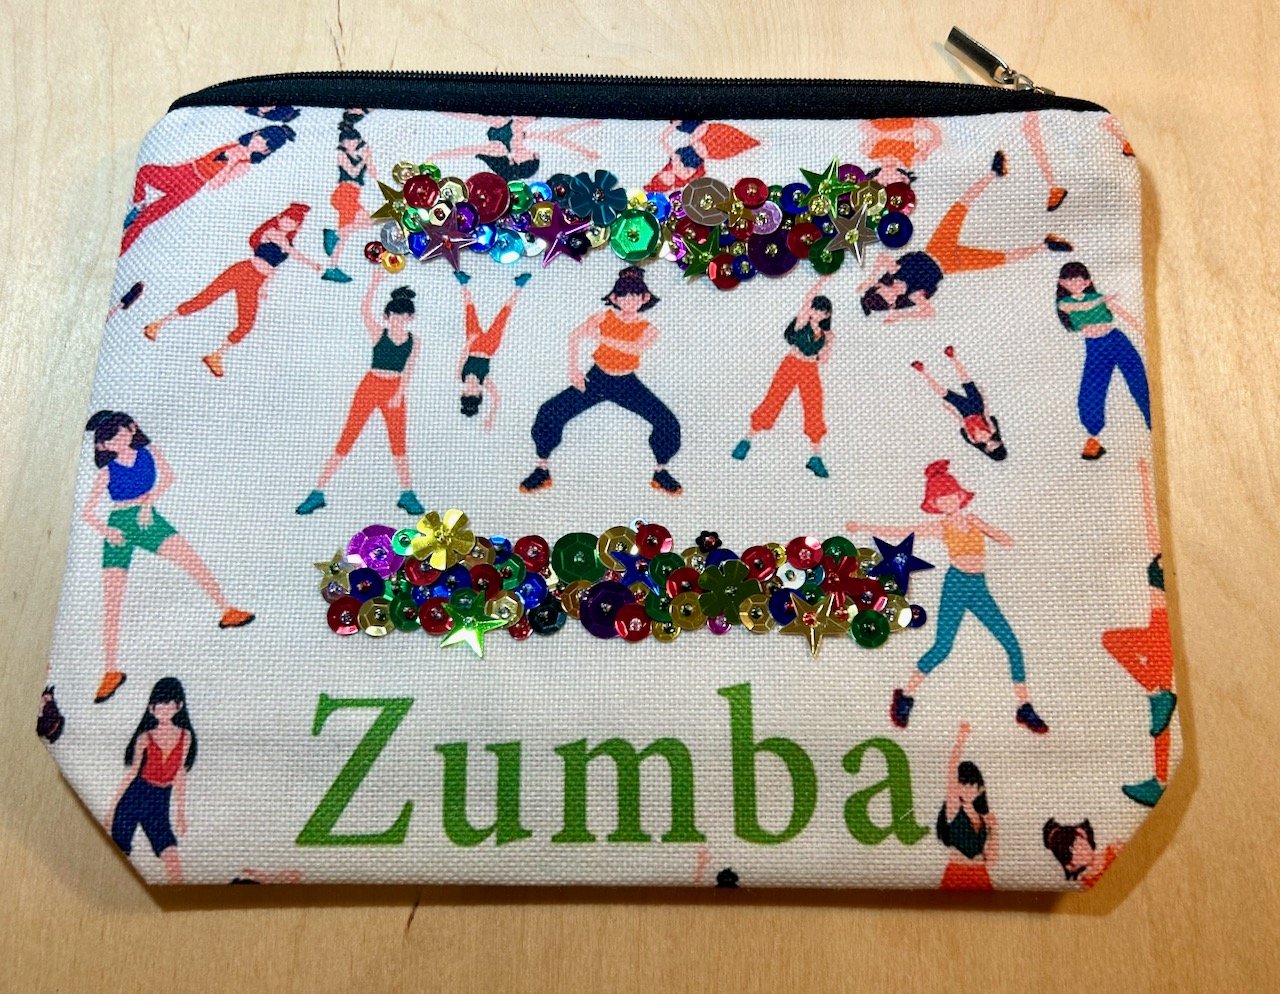
Embellishing my Zumba pouch

Obviously with twenty or so of these pouches now in the wild in my local area there was a high chance that some would make it to a Zumba class near me every week, and with them all looking the same that might not be the best move. So I decided some kind of customisation was required - and while I could have simply written my name inside, I decided to go bigger than that.

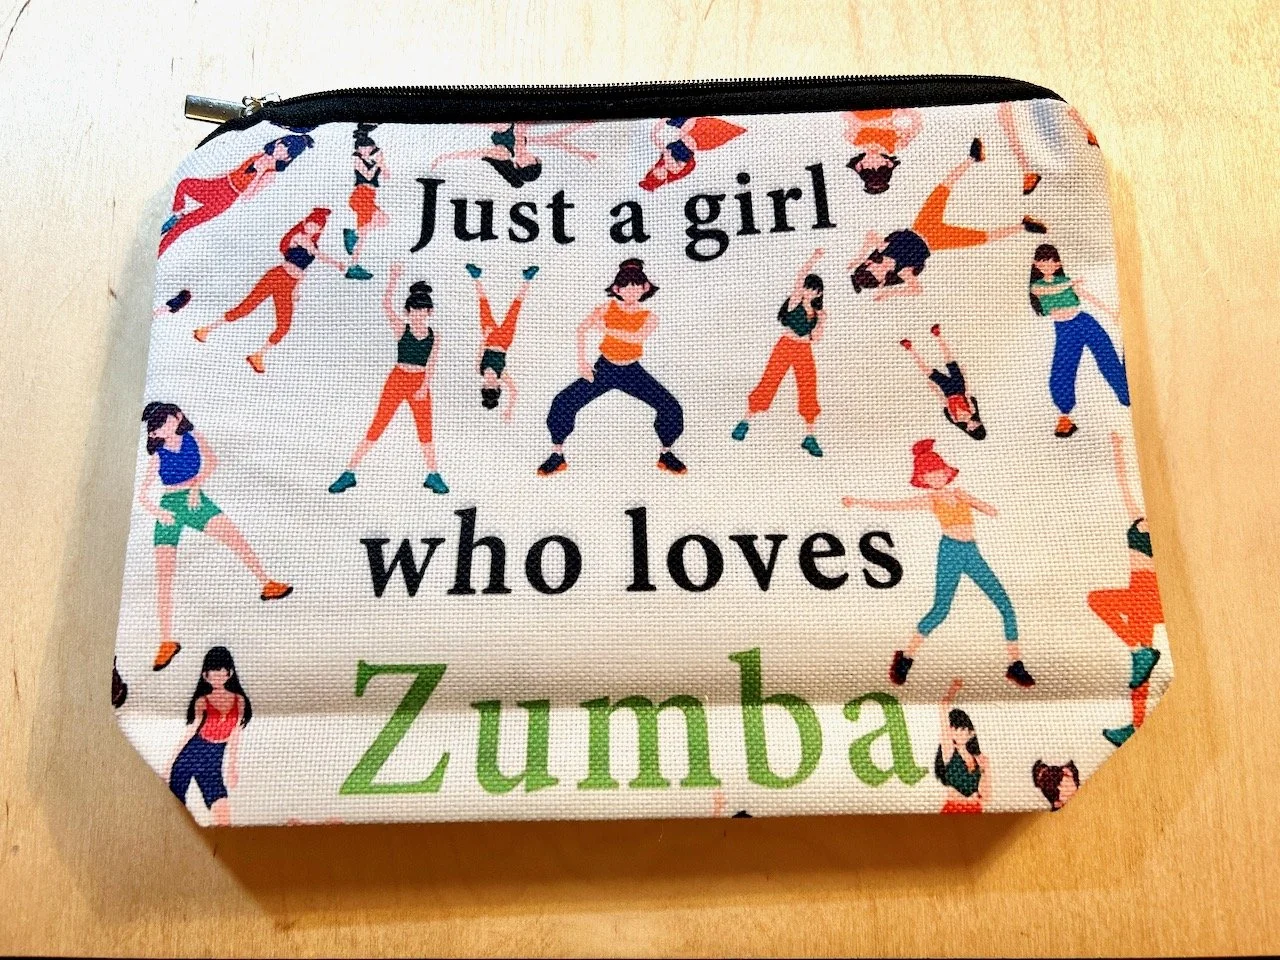
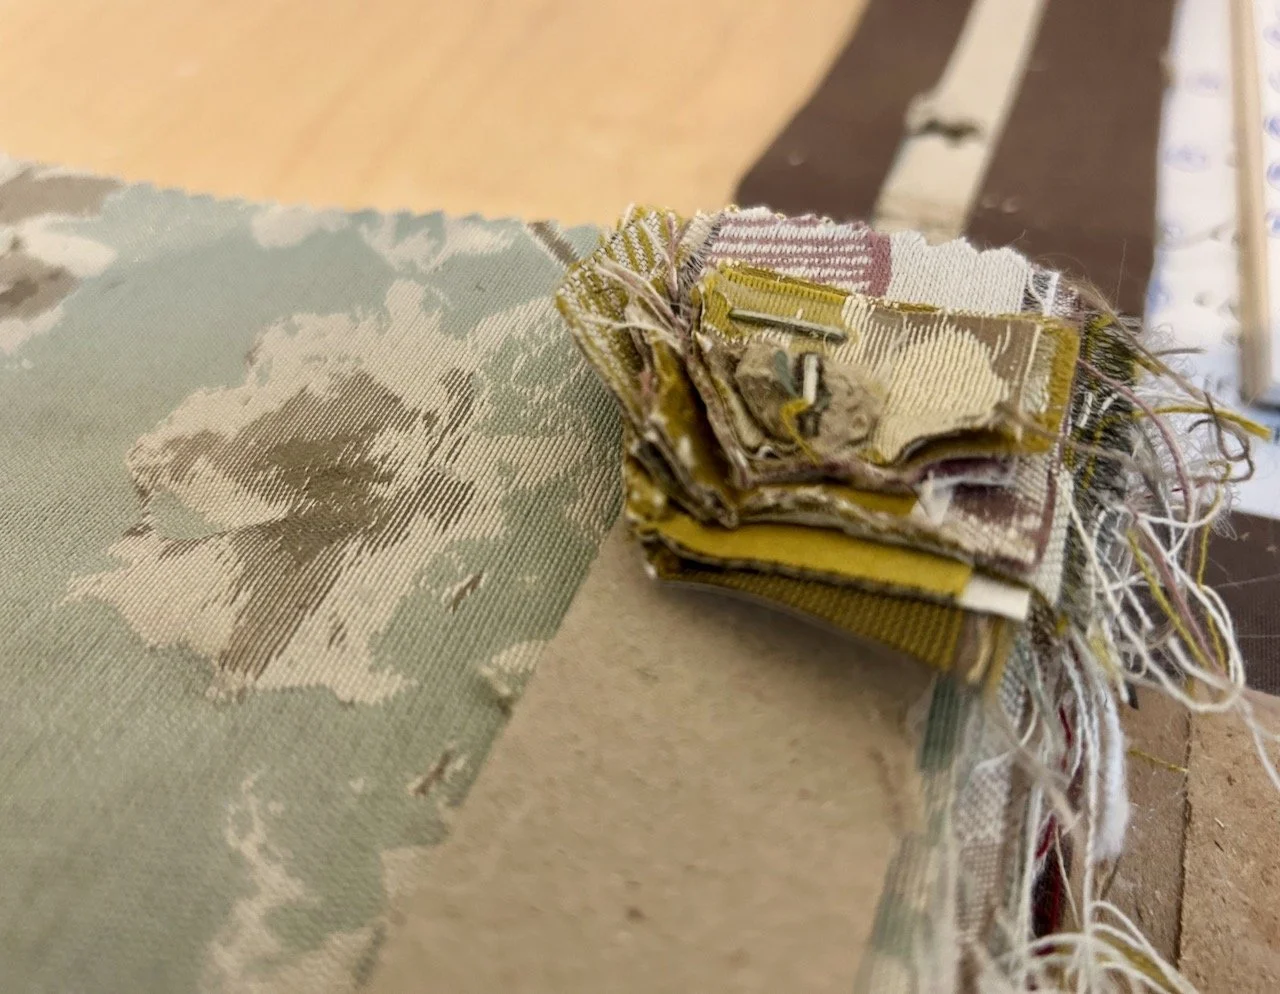
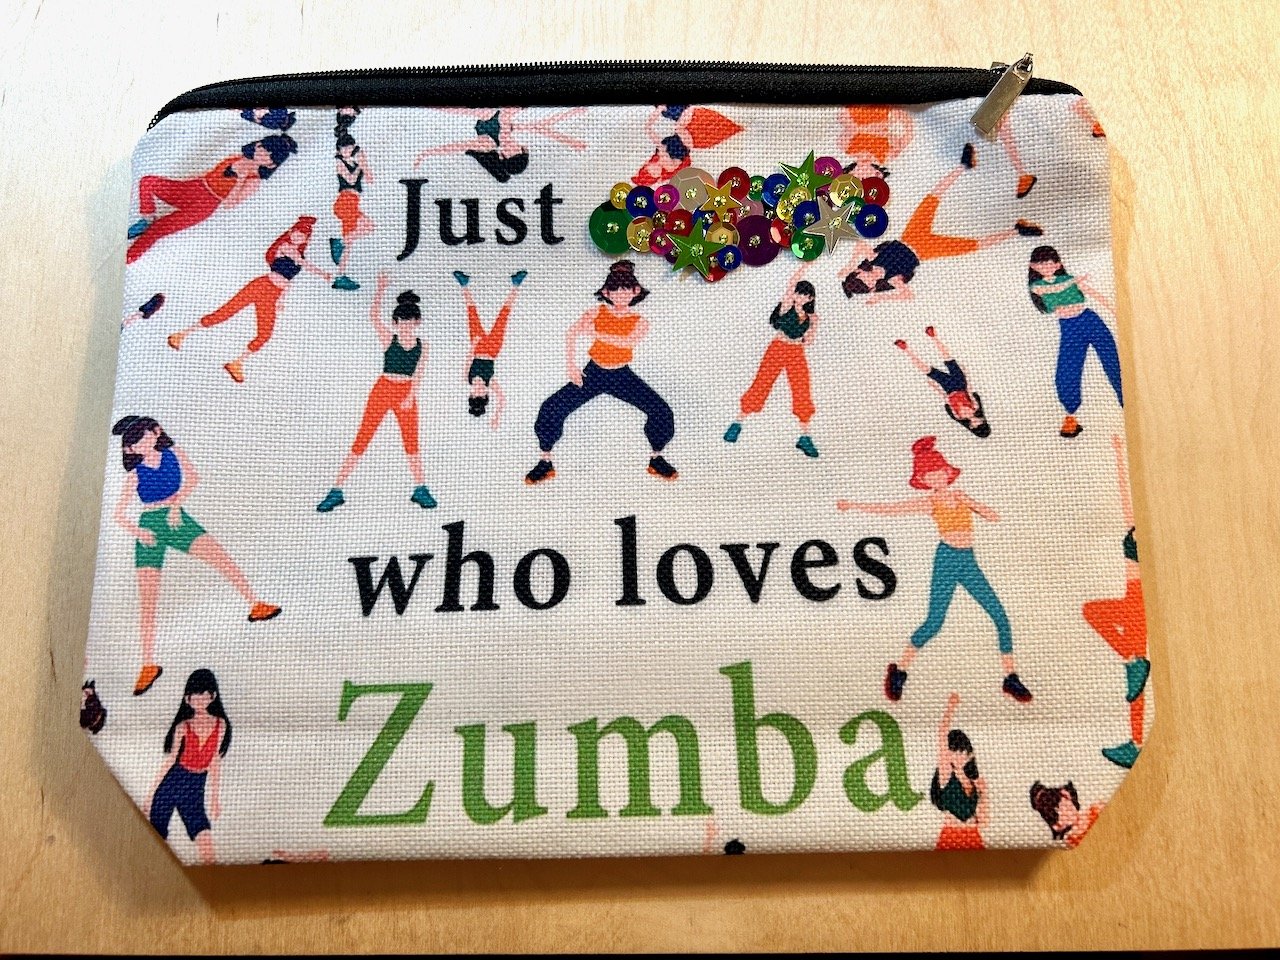
I also wanted to cover some of the text as that wasn’t for me. I know it’s fairly inoffensive, and more descriptive but I knew I’d be happier with just having the Zumba on my pouch - I can’t explain why. And I knew I had some sequins hanging around, like you do - and so I thought I’d put the mismatch of those together in ‘disco-type bands’ above and below the main zumba-ing figures.

This gave me the opportunity to test out my sequin applying skills, as well as my ability to thread teeny tiny needles - small enough to go through those tiny beads!

More sequins added, covering the top line of text (was previously 'just a girl')

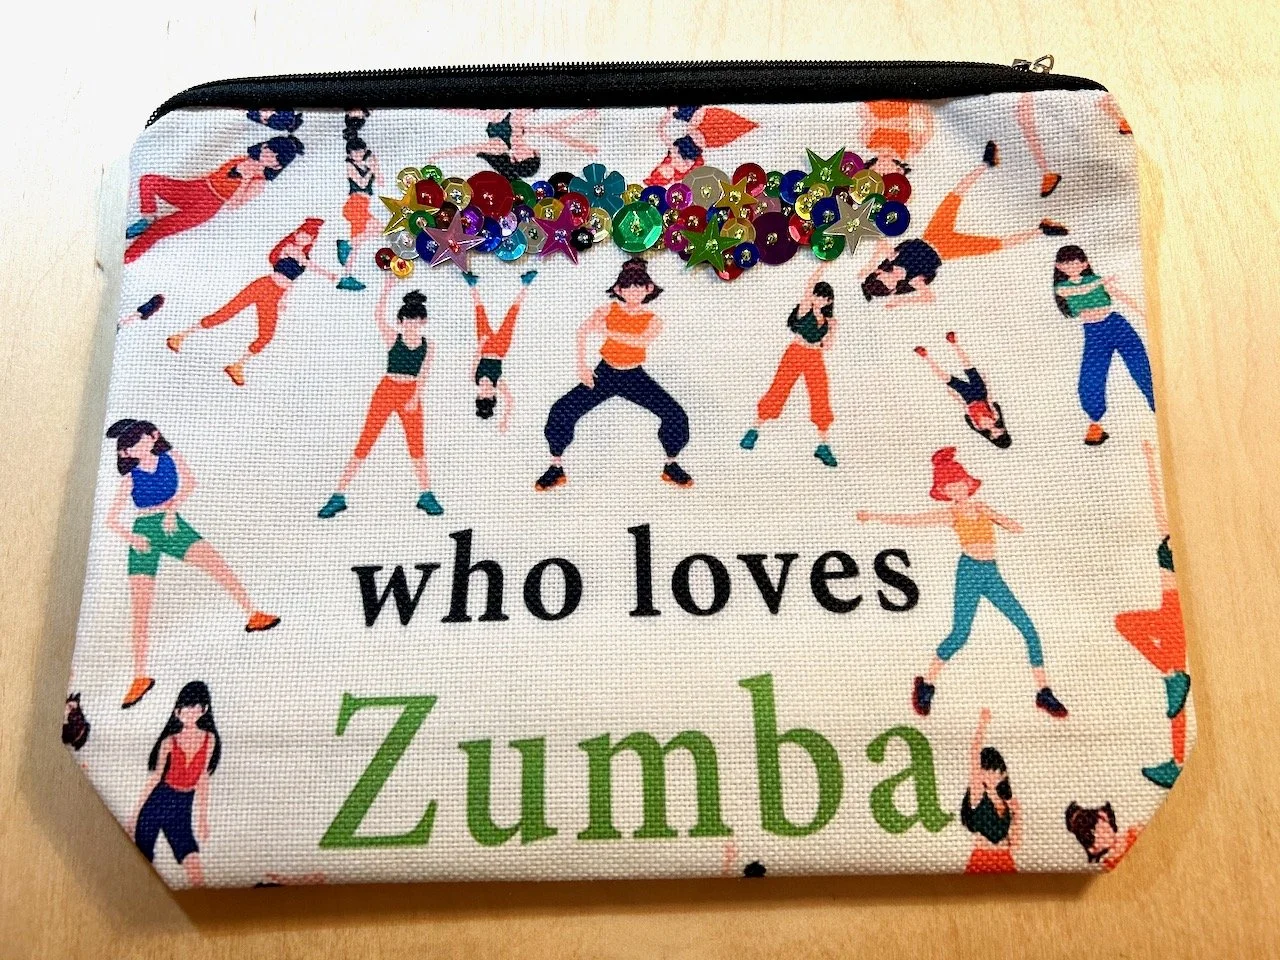
And actually it was quite a soothing thing to do. Before long I had two sparkly borders, which makes me smile - and then I remembered I had to do the other side too!

The completed pouch - sequins in two bands covering the text but around the zumba figures

So now I have a bling inspired Zumba pouch, which definitely stands out from the others - and that’s mainly how I bring the bling to Zumba - my ‘moves’ mostly still need quite a bit of work, but really I don’t care too much about that!

Getting to know my new Bernina

I’d been thinking about buying a new sewing machine on and off for a few months, and in January I bit the bullet and went for a test drive of two machines on my hit list. Unknowingly I’d chosen the same brand of machine that both my mum and SIL have, so I’m in good company!

I was between two models, one in the 4 series and one in the 5 series - with the price of the 4 series being my preference until I saw them in action. The 4 series looked small, and smaller than I’d imagined and while the BSR (Bernina Stitch Regulator) could be added as an accessory, it was included like it was with the 5 series model. Truthfully, I knew I’d probably never get that as an add on so if I was interested (or intrigued) by that then I knew it made more sense for me to opt for the slightly larger and pricier 5 series model.

I was definitely glad I went to my local stockist (in a new to me part of Nottingham) to see them both in action though, and didn’t just buy online - and if you’re thinking of buying or replacing your sewing machine, I’d recommend you go along and see them in person too.

My new machine arrived at the end of January and I spent time unpacking it and noting everything that was in the box, not always sure what it was or what it was for at that point. But over the next few days I spent some time familiarising myself with the basics, and a little bit more, feeling immensely proud I’d managed to write (part of) my name using it - my name is long, and by the third letter I was keen to move on to try something else, so implemented a short name, often adopted by my young nieces, which I’ve not used for many years!

Trying some appliqué

After trying several stitches I was keen to try more, and so with my floral fancy project in mind I thought I should try some appliqué. I’d saved the larger off cuts from the workshop with good reason, so it turned out. As I dug through them I realised I could quickly knock up some test backing the same thickness as my floral fancy.

With some tweaking I settled on this design, peeling off the Bondaweb and ironing them into place before adding a stitch outline. For this I didn’t change the foot, and with hindsight I should have - but you live and learn, and that’s what this was all about.

There are elements of this that I’m really pleased with, and there are also some learning points, such as it would have been better to iron the petals and centres on as separate layers as that would have allowed me to follow the lines independently, especially on the orange flower on the right. And I also realised once I’d finished that the design looked better inverted - who knew.

I was pretty sure that I had some material that matched both the colour of the flowers and the lighter background - and it wasn’t long before an idea formed, and yes that idea was a pouch. At this point though I had no idea what the question was, but I knew I needed this pouch (well wanted, rather than needed!).

And so, I made a new pouch - this one’s already in my jewellery box holding a rather large and chunky piece of costume jewellery which up until now was in a bit of bubble wrap. This, even though the velvet ribbon is a bit ruched, is a much better solution.

Trying some quilting

I was also very much aware that my Log Cabin Log Cabin quilt was waiting in the wings to be finished, but I didn’t want to dive into finishing that and quilting it without being more confident with my new machine. So I started another test piece, this time to try out some quilting.

For this I changed to the quilting foot, and added the extended table top - and tested using the inbuilt walking foot, and without. I’d pulled an almost 8 inch square from a lucky dip purchase from a while back. It’s the kind of selection that you can use some - and I’ve used some in the binding of quilts, and some that you really don’t care for. This blue and green square with a white daisy was in between - there’s absolutely nothing offensive about it, but I had no idea what I’d do with it. Until now.

I frankebatted some wadding together, added another square on the bottom for the backing and set about freeform initially using the basting stitch to keep the layers in place - I found this a bit of a faff on this sized project, goodness knows what it’d be like on a much larger quilt, though I’m prepared to be proven wrong!

I tried with the walking foot and without and the differences are apparent, and as you can see below at one point I went a bit left field with a diagonal line. I also decided to try out my Hera marker (a piece of plastic which with a ruler you can ‘mark’ indents into the fabric) and so that’s why I ended up with more gridlines, as I’d particularly liked quilts at the recent Newark Quilt Show quilted that way.

When it was finished I wondered what I could do with it, as I was keen to do something with it rather than it just hang around my craft room. After a day or so I knew what it could be and so added some toning ribbon as binding (yes, I had this too - I bought it while checking out the haberdashery department in Yorkshire Traders in Newark!).

And the sizing worked - so this test project is now a pan protector for our new griddle pan. How lucky was that? The wok lives on top of the griddle pan in the cupboard, and as they’re both new I was keen to give them both some protection.

So I have two new unintentional projects, and I got to try out more features on my new Bernina than I would have, at the same time.

Since then as you know I’ve finished both the Log Cabin Log Cabin quilt and my January mystery block of the month block and I’ve started the test blocks for the next quilt - but more on those another day!

Making my mystery block of the month: January

You’ll have seen that I plan to complete Sherri’s mystery block a month quilt and yesterday I shared the test blocks which I made into my third Project Linus quilt, well today I’m sharing the log cabin block I made for my own quilt.

So while I knew that I’d use the Lewis and Irene fabric bundle which I picked up at the Newark Quilt Show in January for the block’s centres, I didn’t know what to use for the borders. I wanted something quite bold for one of the colour ways, as our house is predominantly white, and although I like that I’m also keen to add colour through accessories and furnishings.

But it was the borders that made me think twice, and more than twice really. I ummed and ahhed about whether I should add them as I go along, or wait until the final block is completed later in the year. The pluses for delaying meant it would give me longer to decide which fabric to use and I could be sure I had enough of that; but the downsides were that there would be a lot of quilt still to complete at the end of the year, and the chances of that happening could be low. But I might not have enough material to use the same on the borders throughout, though I remembered that it really didn’t matter so much on the quilt I’d just completed - but you see my dilemma.

In the end I just got sewing, and hoped I’d work it out along the way!

Sewing the central block

Having completed the test blocks I felt pretty confident to try the block for my own quilt; as well as learning how not to cut off the point of the roof, I also learnt that I preferred the darker border colours on the bottom half of the block, and the lighter ones on the top. Perhaps for this block because they were representative of the ground and the sky respectively - who knows.

I’ve also worked out recently that pulling the fabrics together for a quilt is one of the most enjoyable aspects for me, but while I thought these were busy, I thought they would probably work.

But with the block sewn, I was less sure. The more I looked at it the more I was less sure - and nor did that help my borders dilemma. When looking at it again with fresh eyes, and realising the thing that pleased me most about the sewn block (on the left in the picture below) was the placement of the door handle, I realised it was time to try again.

However perfect and completely unintentional the door handle placement was!

The sewn block using the fabrics laid out, and an alternative layout of fabrics

And so I tried a second combination of fabrics - one that’s much less busy, and introduces a plainer element for the sky. This worked so much better, even though this time the door has no handle.

Happier with my block it was time to deal with the dilemma.

Adding borders, or not?

I tried many combinations before I made my decision, but as you can see I’ve added borders.

My main concern was not having enough fabric and ending up with a quilt that looks as if it was of two halves. But in the end I’ve made peace with myself and have mitigated this as far as I can. I’ve bought an extra metre of both of the outer light borders, ideally I’d have bought a metre of the pale background star border too, but I was only able to get half a metre of that. So the lights will be my constant, or that’s the plan anyway.

For the darks - or the bold jade green borders, the material is much older and hunting down similar quantities wasn’t going to happen, but I do have other toning fabrics which were all part of the same set. I think they came from either a magazine subscription or a competition win, but I have ten or so of similarly coloured AGF fabrics which I’ll use interchangeably. The colour will be the constant rather than the pattern for this border, and I’m pretty sure it will work.

And so, on went the borders.

My completed january block

I’m really pleased with how it turned out, and I know it’s bold - but that’s also by design as my working theory is that this will be a quilt for our spare bedroom which will have a rather ornate headboard (well it will once I’ve recovered it!).

So it needed to be bold to get the attention I’m sure it will warrant once its complete.

Join me next month to see how I get on with the next mystery block, and check out my posts which contain charity quilts made from the test blocks.