The Chef's Table by Adam Frost

* I was invited to the press preview of Gardeners’ World Live and provided with a pair of tickets to visit the show, therefore all my posts will be marked as 'Ad’ though as usual my views and opinions are very much my own.

This is absolutely my kind of garden, and I’ve realised while writing this post that it brought about the same excitement as when we visited Hunte’s Garden in Barbados - which is an odd comparison I know, but bear with me. This garden is full of herbs, flowers and vegetables rather than the tropical plants in Barbados, but it is jam packed full of them just the same. The dense planting really appeals to me, as does growing herbs, veggies and flowers together - though I guess that’s really not that new an idea, but Adam Frost’s garden does it particularly well.

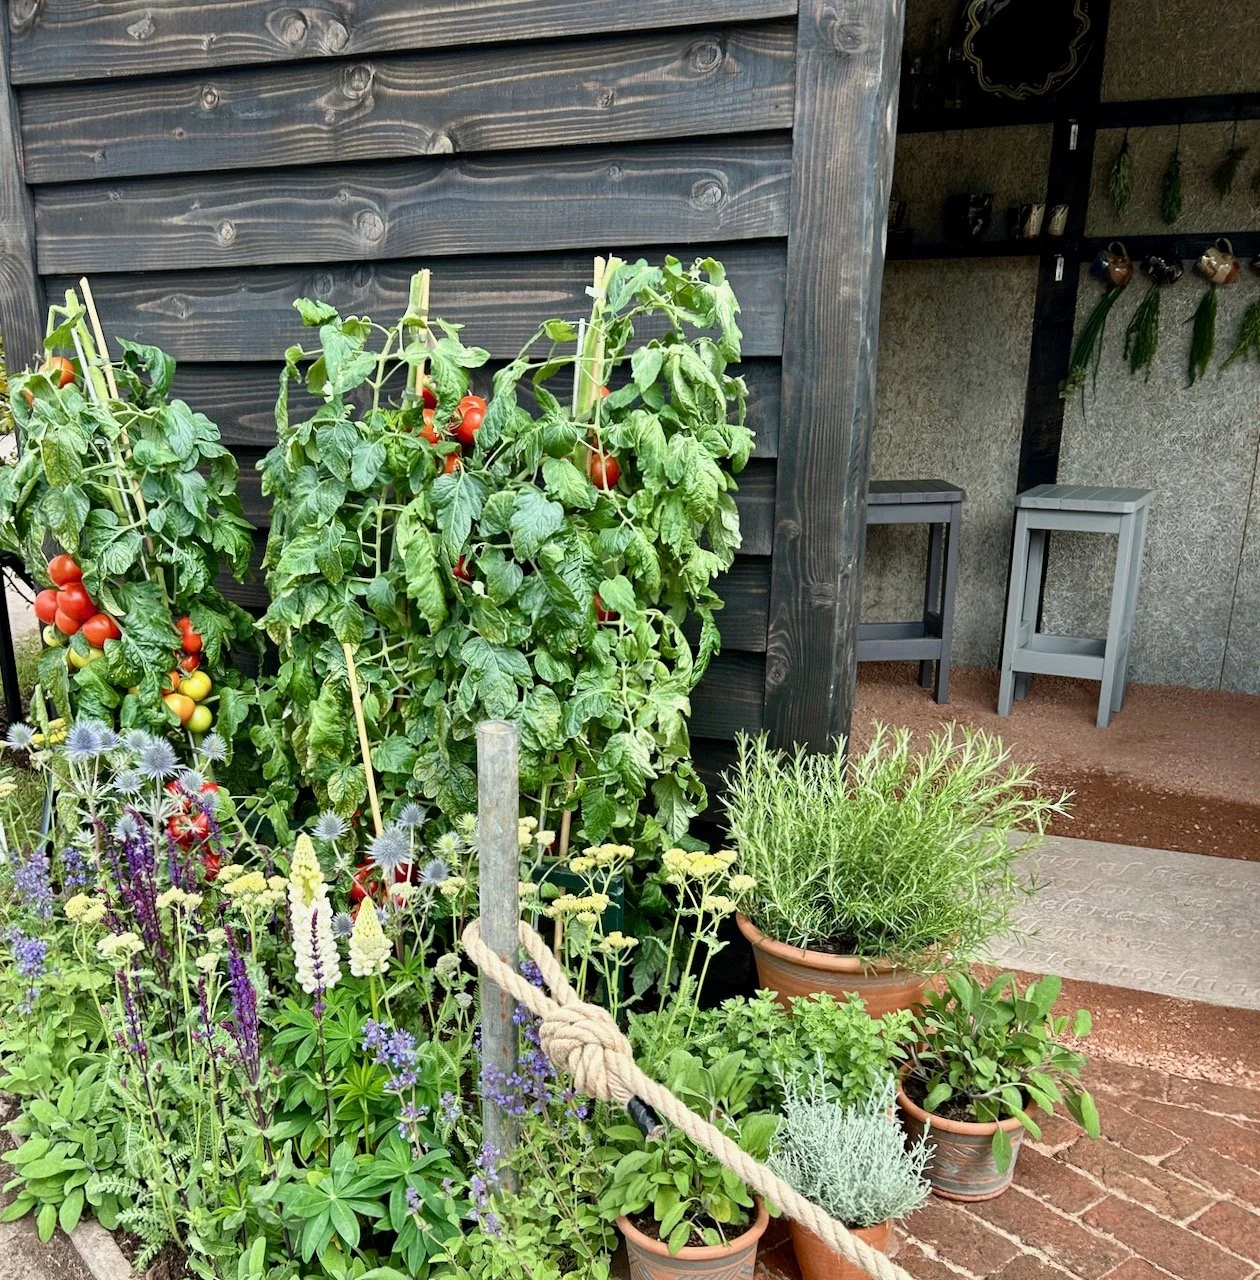
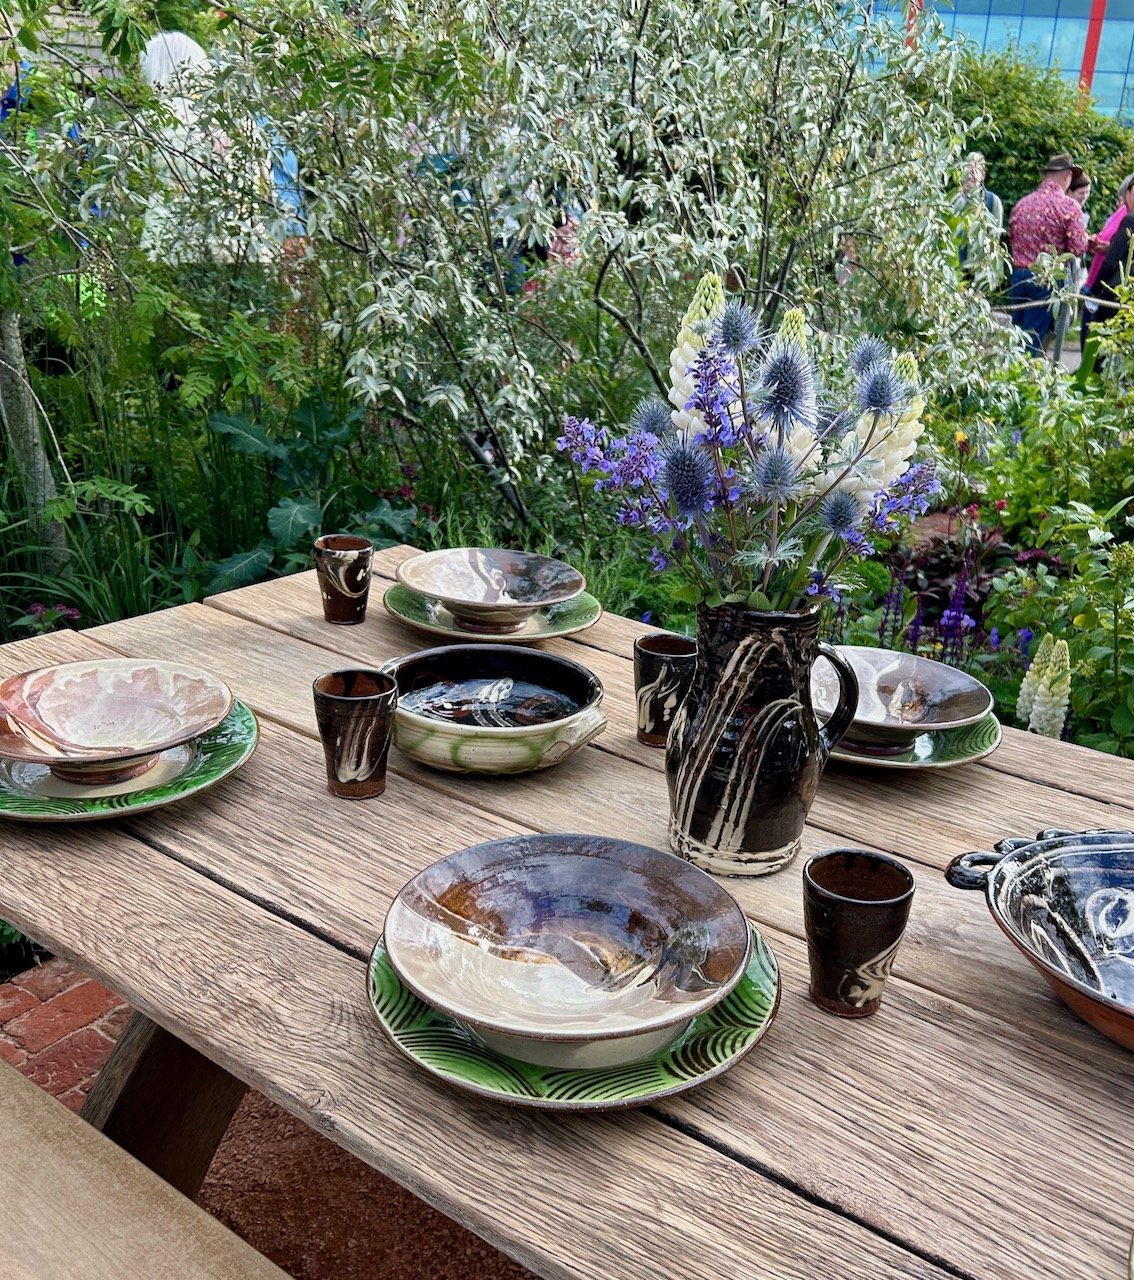
Adam’s Show Garden is overflowing with edibles growing in a naturalised setting, and provides plenty of ideas for how you can integrate edibles into your own garden. The outdoor cooking-dining area is rustic, perhaps a bit too rustic for my tastes, but I’m pretty sure that I’ll be using this garden as inspiration for my own in the years to come.

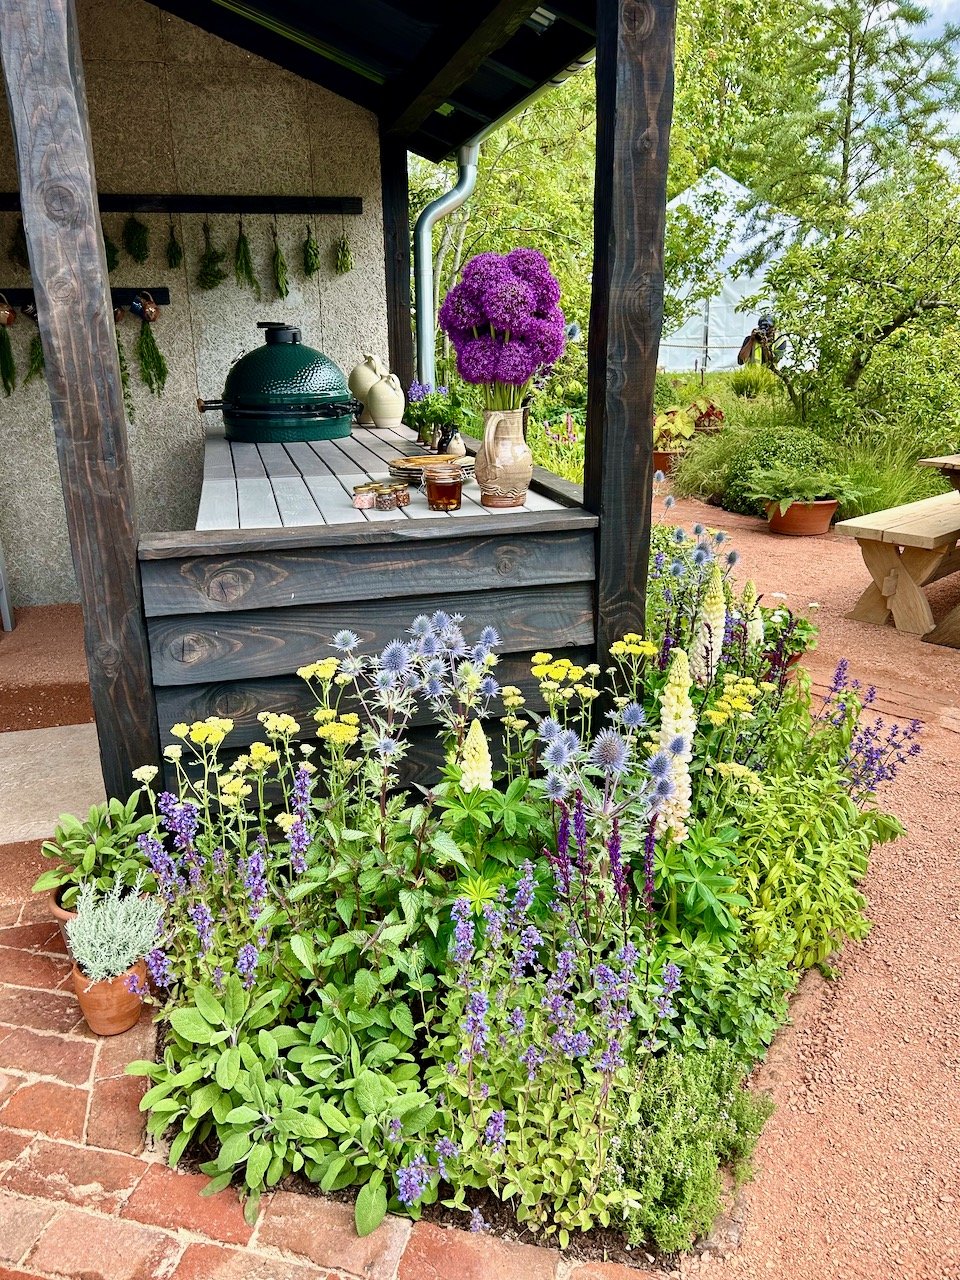
The kitchen was put to good use at the show though as Adam welcomed chefs such as James Martin, Michel Roux, Glynn Purnell and Si King into the garden and kitchen at various times over the course of the show. We didn’t catch any of these - James Martin was up on the day we were at the show, but I did have quite a random encounter with Adam himself.

The press invitation is to view the gardens before they open to the public, and takes place the afternoon beforehand and ends with the presentation of the awards - so it’s a fab thing to be invited too. We’d seen a lot of the gardens, and I’d even managed to photograph many of them and so we made our way into the marquee having a look around that, enjoying the peace and quiet which is completely different to show days, when moving around the marquee can be more of a shuffle.

Adam walked past us, still very much in garden prep mode - I’m sure there’s much more than you think to making a show garden look this good, and so not wanting to be an annoying member of the public, as we crossed I just said hello. Being the type of guy he is - very down to earth - he stopped said hello and how are you doing. Fine thanks, and we were past each other, nothing more required. Though, well I’d quite like him to come and design my garden at some point!

He is I’ve decided, from this encounter and from his TV appearances and the chat he did at the awards presentation, a very nice man indeed. I almost said a very nice guy (and he is) but stopped myself as that sounds very Trumpian, and that’s the last thing I want to be, or to ordain someone with!

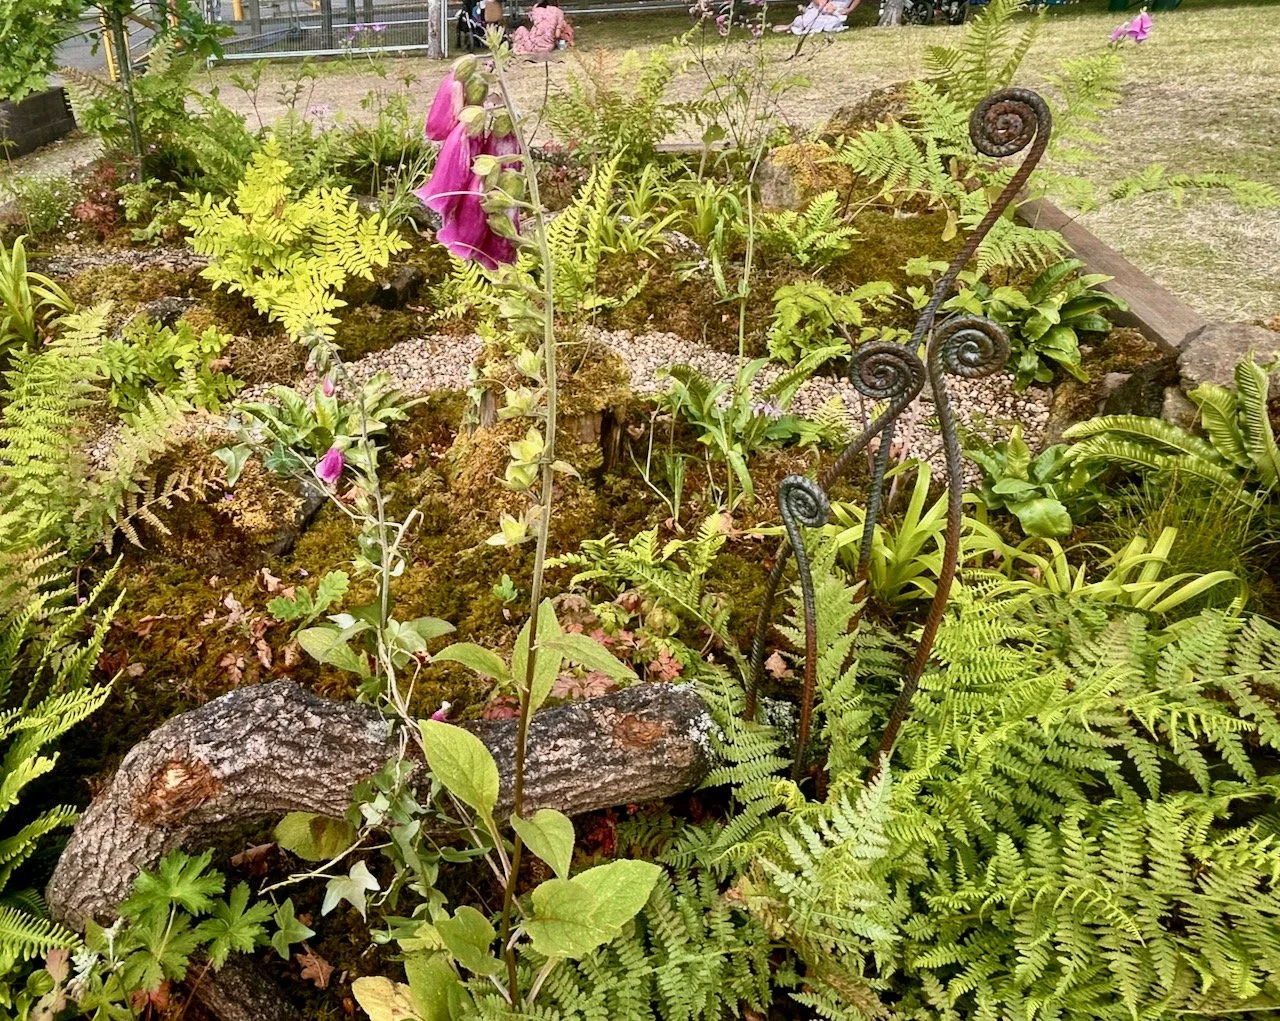
The show garden had a welcoming rustic feel at its entrance, but as you moved through the garden there was also an orchard and the illusion of water - which I think from a hazy memory is the cream path intersecting the beds in the photo above. I’ll admit that water, or even the illusion of water in a garden isn’t something I’m fussed with in a garden - I know it’d be relaxing, that is until whatever the water feature was needed cleaning, so it’s a no from me.

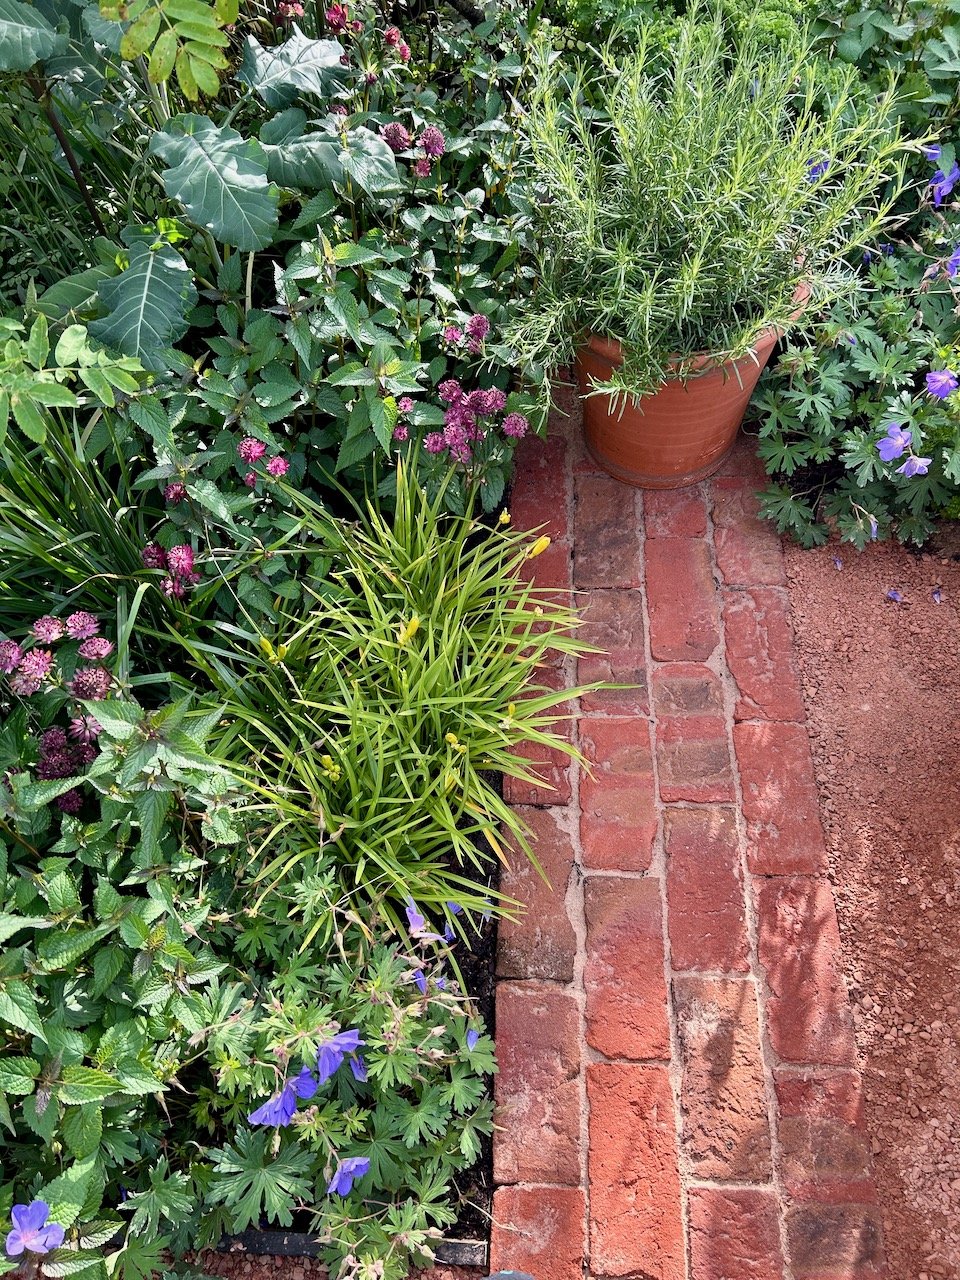
What was unusual - and gives food for thought in my own garden is the changing paths - there’s the gravel edged with bricks and a wooden boardwalk, both of which have very different textures and textures are so important aren’t they?

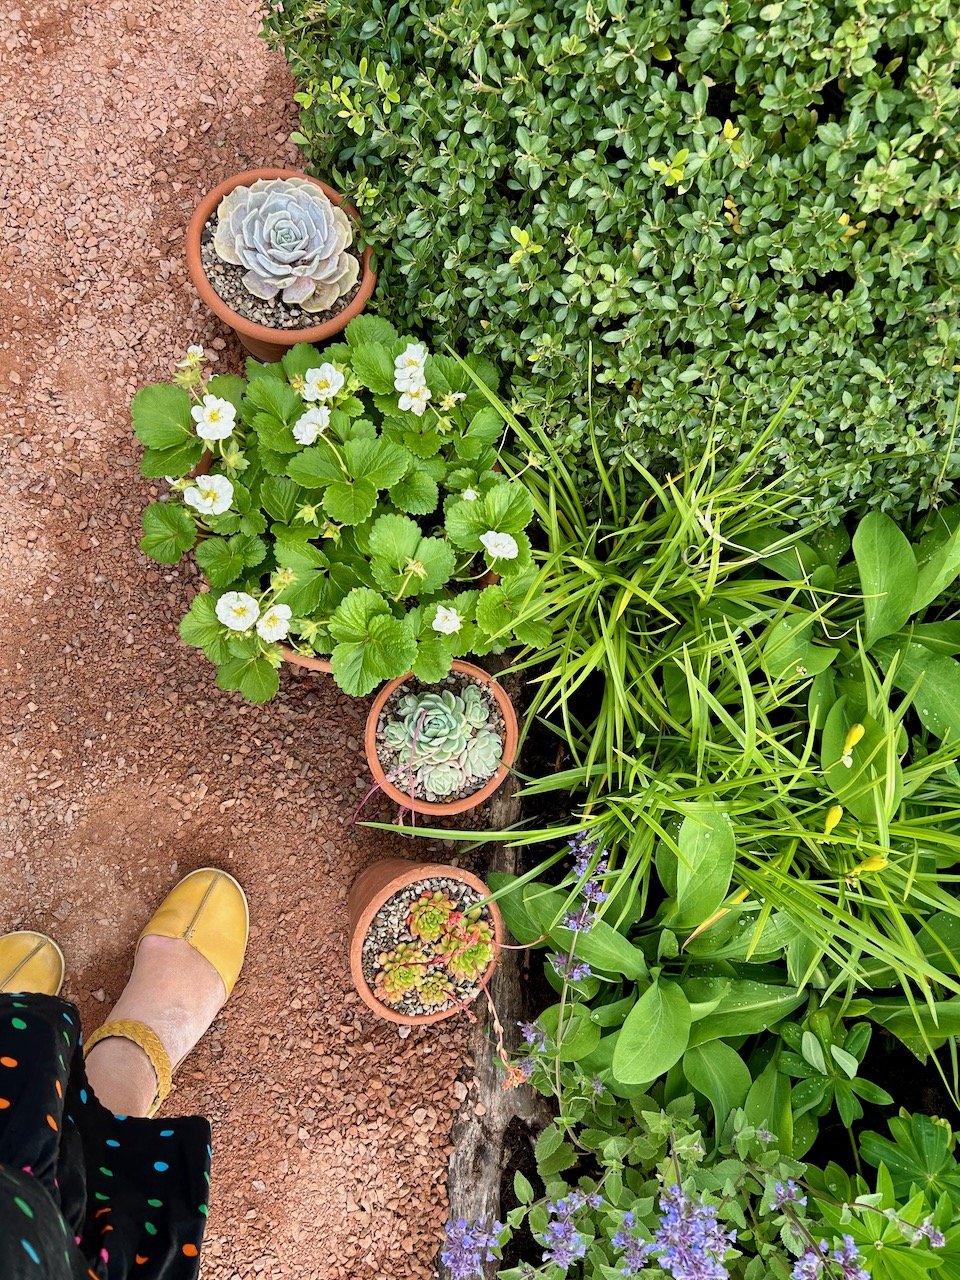
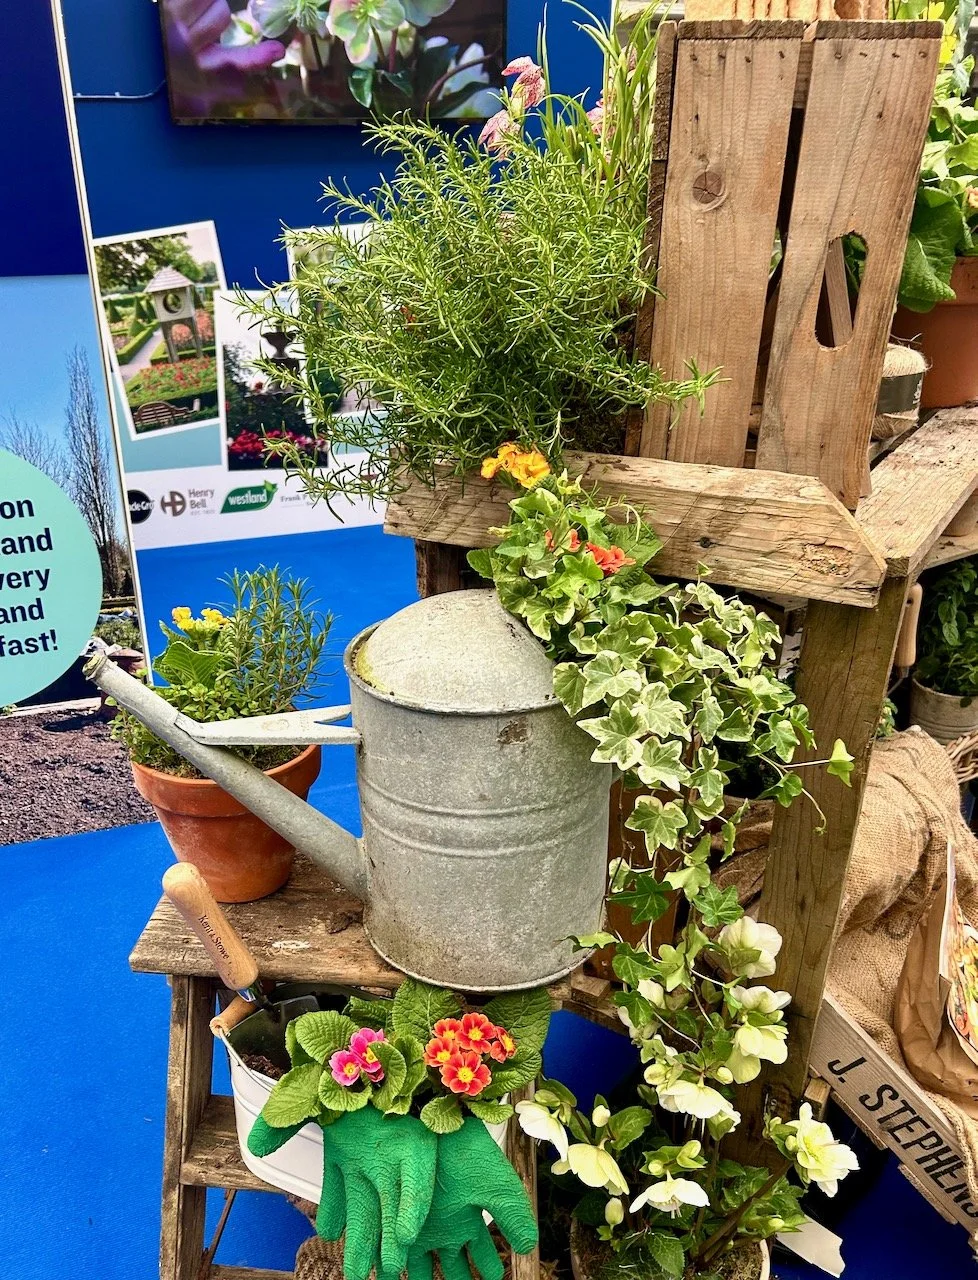
I also liked the small groups of pots at points in the path - and I’m sure these pots of succulents influenced me to buy my own succulents the very next day, and which I’ve added to since then too.

The combination of rosemary, geranium and mints - as well as my favourite astrantia - was a heady mix, though I’m not sure I’d plant mint in a border like this - it spreads and spreads, and turns up everywhere. My mint will be staying firmly in a pot I’m afraid.

I had to include this shot, looking down on the thyme, rosemary and santolini with the sun on them - I can almost smell them from here. These are all plants I will have in my garden, the santolini is currently the only one I’m missing though.

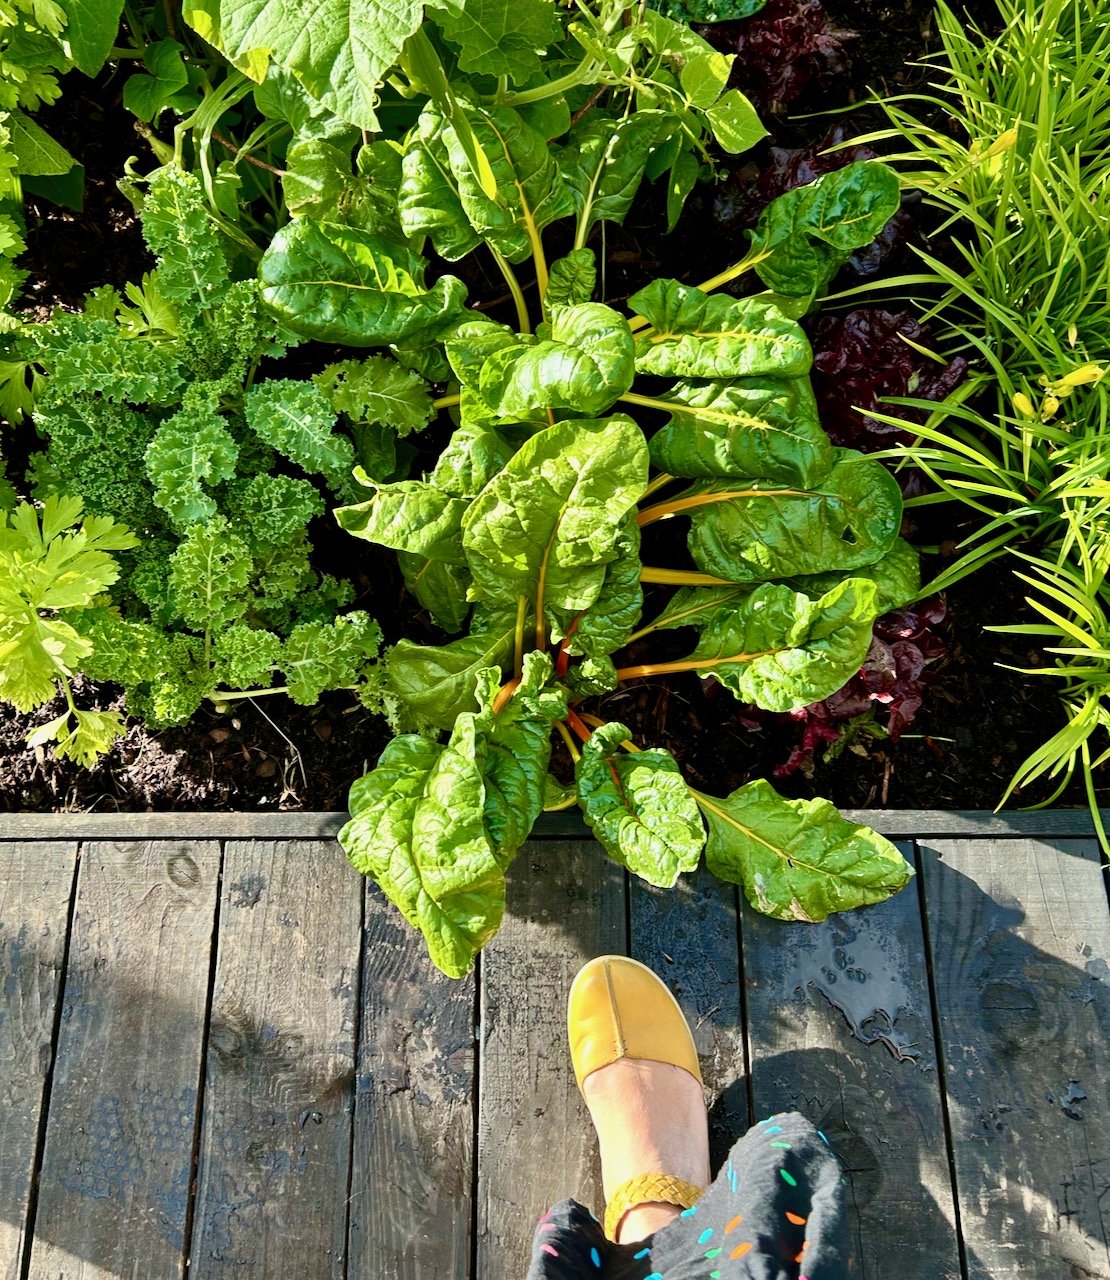
Growing vegetables among other plants and making them look good is a skill, and a skill I want to have. The vegetables here - cavolo nero (above) and yellow chard and kale (below) again have texture and bring a colour to the space too.

I was all for heading back to the picnic dining table to see what was cooking, but alas I wasn’t quite brave enough to sit down - and stage a sit in, plus we had a hotel to get to!

* With thanks to Gardeners’ World for inviting me to Gardeners’ World Live, it was just as good as I expected! I’ll be sharing more from my visit to the show - I hope you enjoy it as much as I do.

Making my mystery block of the month: January

You’ll have seen that I plan to complete Sherri’s mystery block a month quilt and yesterday I shared the test blocks which I made into my third Project Linus quilt, well today I’m sharing the log cabin block I made for my own quilt.

So while I knew that I’d use the Lewis and Irene fabric bundle which I picked up at the Newark Quilt Show in January for the block’s centres, I didn’t know what to use for the borders. I wanted something quite bold for one of the colour ways, as our house is predominantly white, and although I like that I’m also keen to add colour through accessories and furnishings.

But it was the borders that made me think twice, and more than twice really. I ummed and ahhed about whether I should add them as I go along, or wait until the final block is completed later in the year. The pluses for delaying meant it would give me longer to decide which fabric to use and I could be sure I had enough of that; but the downsides were that there would be a lot of quilt still to complete at the end of the year, and the chances of that happening could be low. But I might not have enough material to use the same on the borders throughout, though I remembered that it really didn’t matter so much on the quilt I’d just completed - but you see my dilemma.

In the end I just got sewing, and hoped I’d work it out along the way!

Sewing the central block

Having completed the test blocks I felt pretty confident to try the block for my own quilt; as well as learning how not to cut off the point of the roof, I also learnt that I preferred the darker border colours on the bottom half of the block, and the lighter ones on the top. Perhaps for this block because they were representative of the ground and the sky respectively - who knows.

I’ve also worked out recently that pulling the fabrics together for a quilt is one of the most enjoyable aspects for me, but while I thought these were busy, I thought they would probably work.

But with the block sewn, I was less sure. The more I looked at it the more I was less sure - and nor did that help my borders dilemma. When looking at it again with fresh eyes, and realising the thing that pleased me most about the sewn block (on the left in the picture below) was the placement of the door handle, I realised it was time to try again.

However perfect and completely unintentional the door handle placement was!

The sewn block using the fabrics laid out, and an alternative layout of fabrics

And so I tried a second combination of fabrics - one that’s much less busy, and introduces a plainer element for the sky. This worked so much better, even though this time the door has no handle.

Happier with my block it was time to deal with the dilemma.

Adding borders, or not?

I tried many combinations before I made my decision, but as you can see I’ve added borders.

My main concern was not having enough fabric and ending up with a quilt that looks as if it was of two halves. But in the end I’ve made peace with myself and have mitigated this as far as I can. I’ve bought an extra metre of both of the outer light borders, ideally I’d have bought a metre of the pale background star border too, but I was only able to get half a metre of that. So the lights will be my constant, or that’s the plan anyway.

For the darks - or the bold jade green borders, the material is much older and hunting down similar quantities wasn’t going to happen, but I do have other toning fabrics which were all part of the same set. I think they came from either a magazine subscription or a competition win, but I have ten or so of similarly coloured AGF fabrics which I’ll use interchangeably. The colour will be the constant rather than the pattern for this border, and I’m pretty sure it will work.

And so, on went the borders.

My completed january block

I’m really pleased with how it turned out, and I know it’s bold - but that’s also by design as my working theory is that this will be a quilt for our spare bedroom which will have a rather ornate headboard (well it will once I’ve recovered it!).

So it needed to be bold to get the attention I’m sure it will warrant once its complete.

Join me next month to see how I get on with the next mystery block, and check out my posts which contain charity quilts made from the test blocks.

A log cabin log cabin quilt

In my recent post where I shared my quilt plans for the year I mentioned my ‘stretch’ project to complete a quilt from the test blocks from Sherri at A Quilting Life’s mystery block a month quilt. And in fairness the January block was super cute and helped the idea to form. As I said I don’t know if I’ll manage it, but then again I won’t know unless I try will I…

My third donation quilt

I’ve named this one the log cabin log cabin quilt - a simple play on words that never fails to make me smile - with a little house in the middle there really was no other name for it. For non-quilters the pattern surrounding the central house is known as a log cabin block, traditionally with half using dark fabrics and the other half using light fabrics. Even from the start, when I pulled these orange and green fabrics from my stash it made me smile.

The benefits of doing test blocks was immediately apparent, as I lost the roof point in my first block (the alphabet house, bottom left in the image above), but I worked out what I’d done wrong and corrected that for the other three blocks. So for that alone it was worth doing - and knowing how to avoid that particular mishap in my own block of the month.

I started adding the log cabin borders, which when complete means the blocks measure 18 inches, and while there’s just four blocks they are a similar size to the previous quilts I’m donating. I needed to stop and reconsider my options as I’d miscalculated how much of the plain peach material I’d need, and how much I had. Which long story short, wasn’t enough for the remaining two blocks.

I thought about purchasing a small amount of a similar coloured fabric for continuity, but this went against my plan to use materials from my stash - and as you can see, I opted to use more of the alphabet fabric in its place. And then I needed to stop again, as I happily added the white and grey flowery fabric to the dark section instead of the light borders.

Some unpicking was required!

But I was soon back on track and ready to join the blocks and add the borders - you’d never know I’d run out of peach would you?

The four completed blocks laid out on the carpet

Around this time I took delivery of my new sewing machine, so this quilt was put to one side while I got used to that - but now it’s finished, and finished using my new machine - and I couldn’t be happier.

The finished quilt - with the bottom corner folded over to show the backing fabric

Some of the fabrics in this quilt I’ve had for a long time, and some are pre-loved fabrics from old clothes and even old curtains - but I’m glad they worked so well together and have this new lease of life. I’ve used the orange squared fabric (which was old curtains - you may recognise it as I also made myself a bag using this material last summer)

The completed quilt draped over my kitchen sofa

You can see my other quilts which I’ve made to donate to Project Linus - a charity whose mission is to provide love, a sense of security, warmth and comfort to children, who are sick, disabled, disadvantaged or distressed through the donation of new, homemade, washable quilts and blankets, including those that are part of this ‘stretch’ project in earlier posts. I’m aiming to publish an update on my progress in the last week of each month for the remainder of 2025.