Other makes of 2025

I quite enjoyed recapping my Quilts of 2025, so I thought I’d do the same with my other (sewing) makes of the year. You’ll not be surprised to learn that there’s a lot of pouches - my love for them continues, and I think there’ll be plenty more this year too.

But I did make more than pouches, there’s even been a dress and a pie-carrier, and plenty of embroidery thrown in. Many of the things I’ve made have had previous lives - as t-shirts, dresses and even covering a headboard. Seriously. There’s been small fabric samples too, and I’ve even used materials cut out from the larger books, and I’ve already found a use for the sample books I picked up at the Harrogate show in November.

I’m hoping that in 2026 I’ll have even more ‘other makes’ but first let’s look back at my 2025 makes.

Here’s what I’ve made in 2025

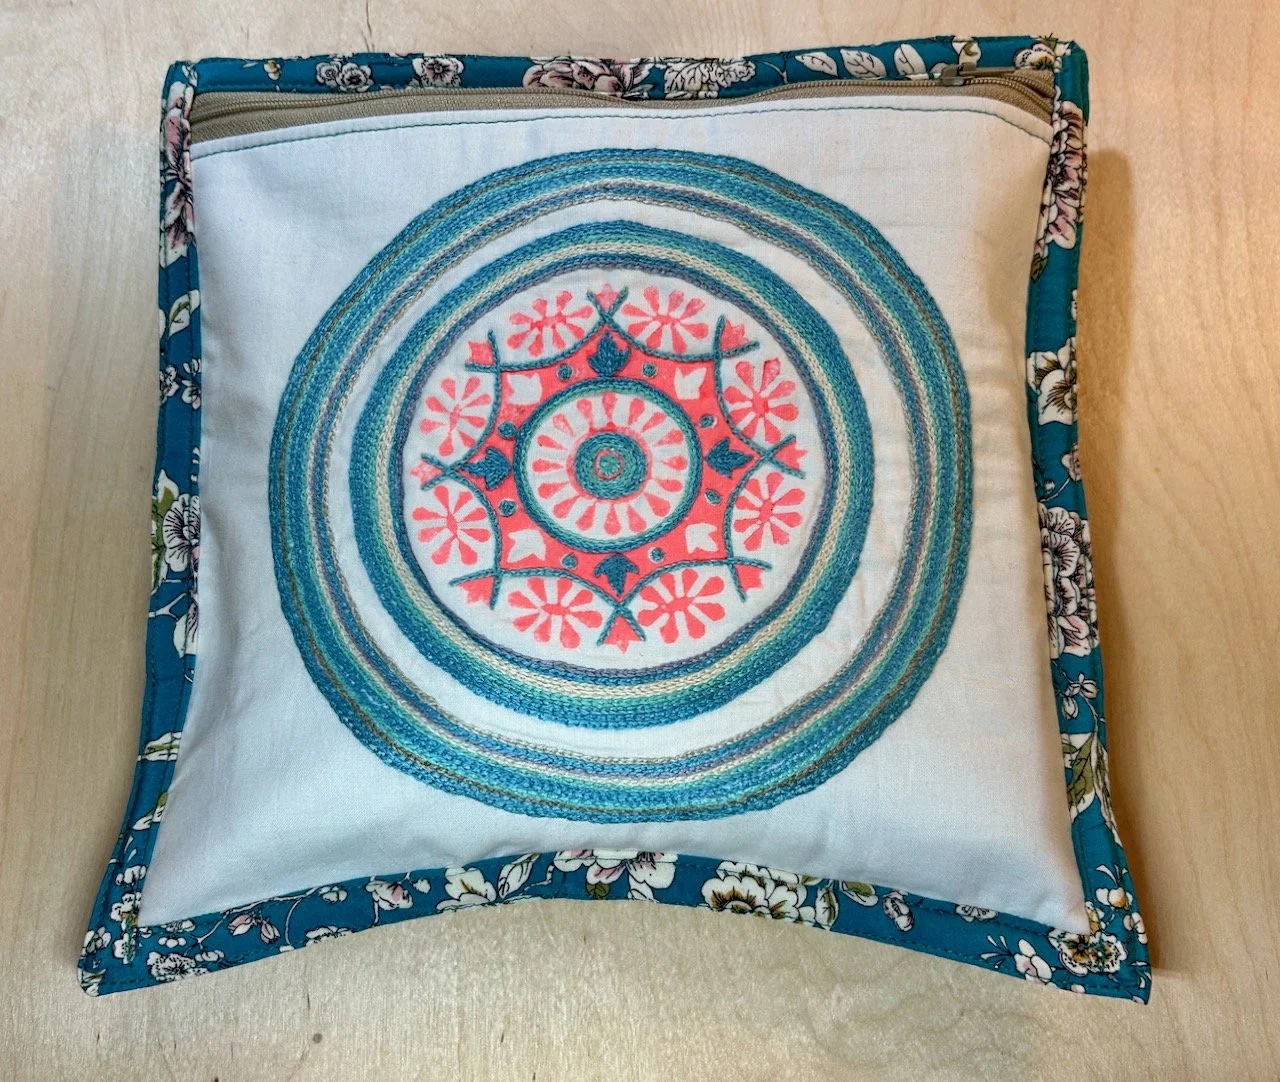
In January I completed my mandala pouch which continues to be home for my poppers, and all the tools associated with that. I also found time to add some sparkles to my zumba pouch (I’m still missing that class which stopped in the summer - sad face!) and knocked myself up a quick felt pencil case for some of the supplies I needed to take along to a workshop.

In February there were more pouches, obviously and I made an appliquéd velvet pouch and a impromptu saucepan saver as I discovered how to use my new sewing machine. And then making use of a block left over from the Noughts and Crosses quilt, I made myself the ‘all the patterns’ project bag.

Then it seemed I had an ‘other makes’ rest for a few months, as it wasn’t until June that I completed my next make - and that was a big one for me, it was my dress.

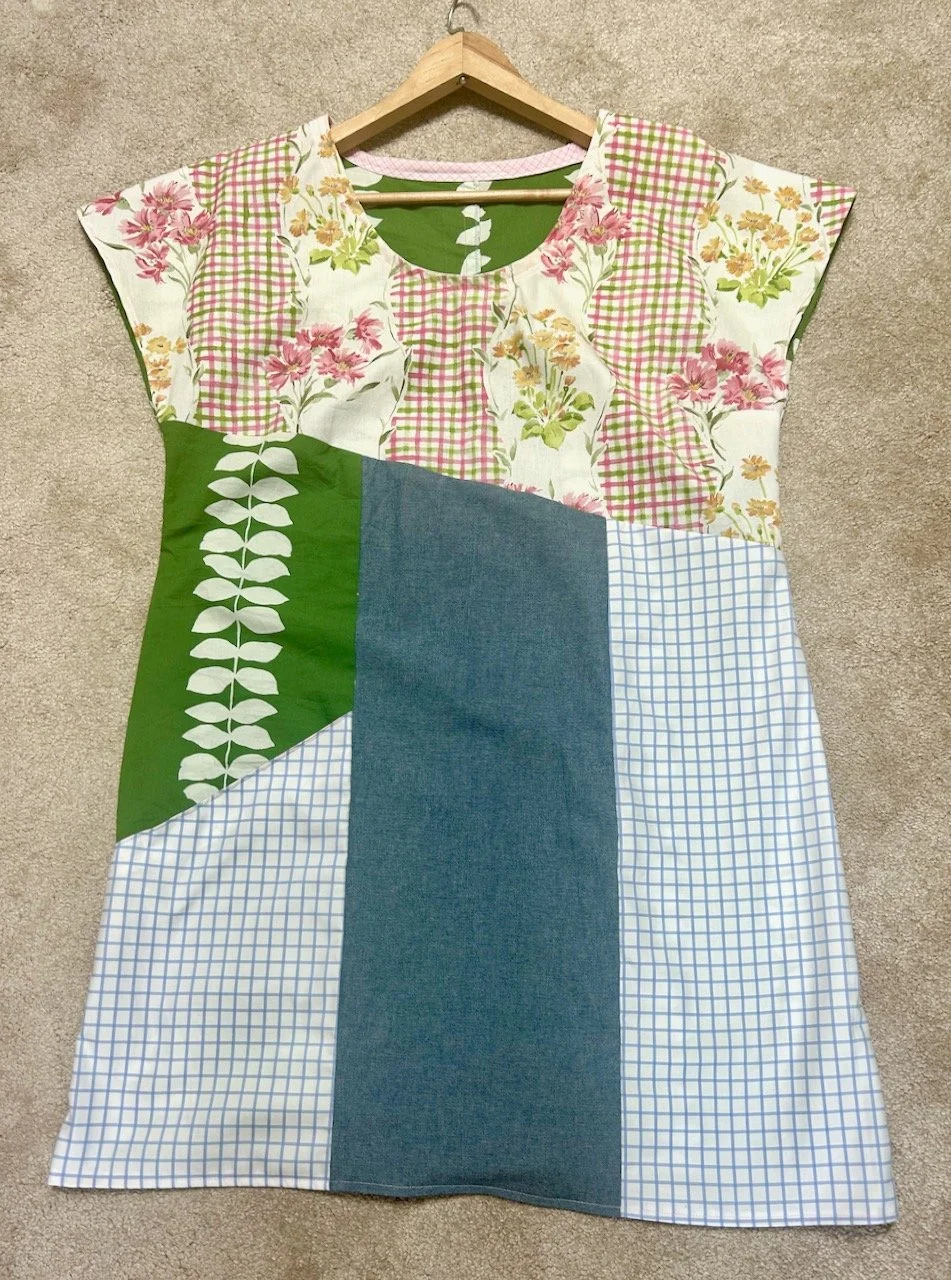
Let’s gloss over the fact that I’d bought some material (still not used) to make this dress back in 2023 though! This was the toile, or test run of the pattern, which if it didn’t work then I’d never have to wear, and I wouldn’t have spoiled my lovely bought fabric either. But as it turned out I have worn this dress, quite a lot in fact, and it continues to bring compliments which is also nice.

Even better it still hasn’t fallen apart. But I’ve not yet made it in the original material, nor some of the other material I’ve bought since either. Maybe 2026 is the year…

In July I was making things up again and created a really useful velvet box pouch from various fabric samples I’d collected over the years. This one’s purpose is to keep the foot pedal of my ‘take to’ machine safe during journeys, and to stop it banging against my second new sewing machine of the year.

The end of the month saw me create an incremental update for dad’s birthday bunting - I hadn’t worked out how to attach it to the original banner, but then again I also reckoned that really wasn’t my problem!

In August, inspired by the workshop I attended at the Festival of Quilts I stitched two kantha inspired landscape scenes, including one with a hare for the bedside tables in our spare rooms.

Though clearly by now I was experiencing some pouch withdrawal symptoms - but don’t worry another eight were to be completed by the end of August, and I jest but they were the perfect project to get used to my ‘take to’ sewing machine, and well, pouches are always useful. I don’t know where they go, but the pile soon disappears!

Actually I made another project bag as well in August, but I haven’t shared that one here yet so when I do - I’ve another one on the go as part of the ‘set’ - I’ll add a link in here.

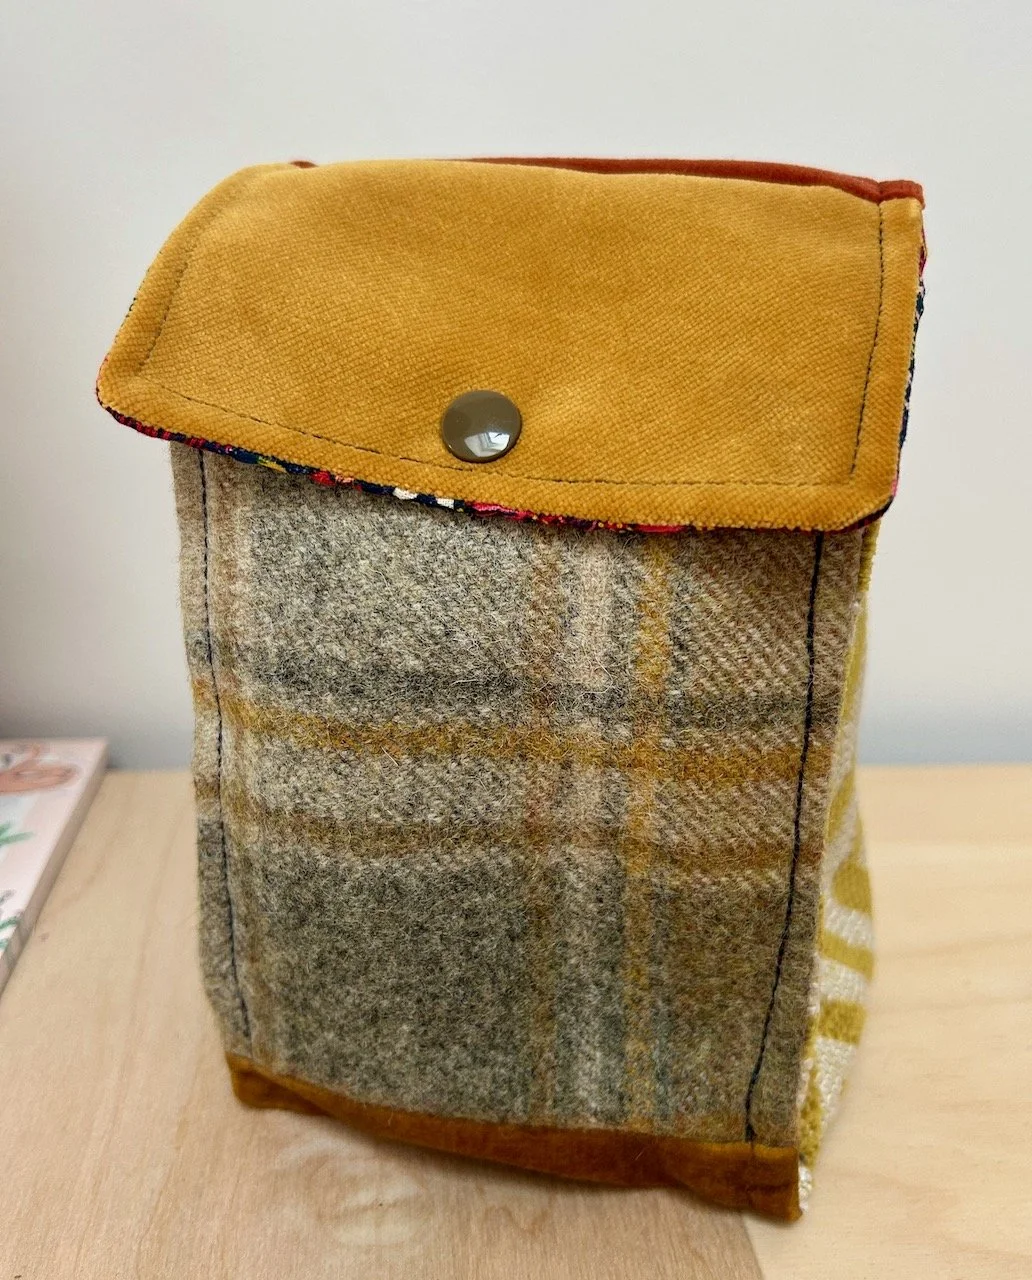
In September I was clearly busy finishing quilts, so it wasn’t until October that I became obsessed with and made myself a small pie carrier, and while it’s a bit smaller than I’d like it’s still useful. I still need to make myself a slightly larger, less prototype version, so that should be along this year too at some point.

In October I also had a bout of repurposing old clothes into, yes you’ve guessed it, more pouches and project bags - and this is definitely something that will continue this year.

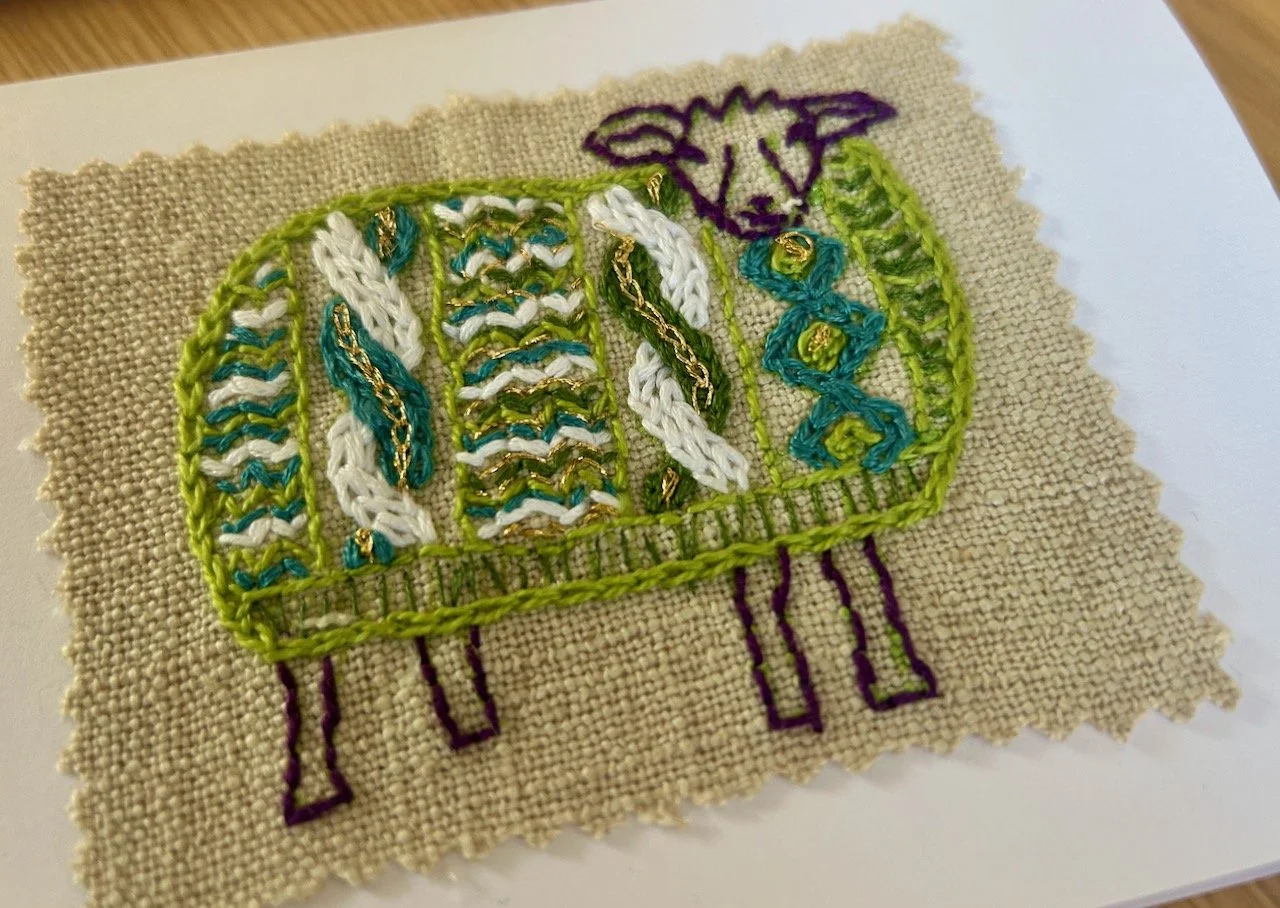
I ended the year with some more Christmassy items - a Scandinavian folded fabric star which tested my ability to follow instructions, and several ‘sheep in Christmas jumper’ Christmas cards, as you do.

And of course, some more pouches - this time as presents, so add three pouches and a further project bag to my year’s ‘other’ makes. Not a bad year at all, and I’m hoping that 2026 is even more prolific - with maybe even a new style of pouch too, who knows?!

Making my mystery block of the month: February

You’ll have seen that I plan to complete Sherri’s mystery block a month quilt and earlier this week I shared the test blocks which I made into my fourth charity quilt, and today I’m sharing the vintage star block I made for my own quilt.

I’ve chosen the three fabrics with navy backgrounds for my block, and a more densely patterned pale background fabric. Thankfully I remembered my learnings from the test blocks, despite my hesitation to get going with my own block.

I wasn’t sure how this one would go, as I shared in the earlier post that matching the seams on my test blocks had been, well variable. And it’s a great block, but I didn’t find it as enjoyable to make this one, but - spoiler alert - it turned out pretty well and I think it’s probably the best version I’ve done.

Phew. And isn’t that often the way?!

Adding the borders

For this block I’ve used the same fabrics for my borders as for my January block, but I’ve reversed their placement so when the quilt is assembled the greens are together. I suspect that I might need to make some adjustments to the planned layout at some point so that my quilt is wider than it’s long, as I already know that I want to use this on a double bed. It may mean that I make extra blocks at the end of the year, but there’s plenty of time to work that out.

Doesn’t it look great?

I’m really pleased with how it turned out, and like the patterned star against the light background.

And I was even more pleased when I placed it alongside January’s block of the month. I think that when it’s done the quilt is going to be pretty special.

Join me next month to see how I get on with the next mystery block, and check out my posts which contain charity quilts made from the test blocks.

Book Review: The Ultimate Sewing Machine Mastery by Katie Matthews

* I was sent a copy of The Ultimate Sewing Machine Mastery book by Katie Matthews for the purposes of this review - as usual my views and opinions are very much my own.

Like many people I don’t often think about the mechanics of my sewing machine until I absolutely need to, and by that I mean when something’s gone wrong. Then I dig out the manuals and scratch my head a bit, or sometimes a lot and set about trying to solve whatever’s gone wrong. But actually that’s potentially not the most efficient way is it? If I had a greater understanding of my machine in the first place then perhaps I’d spot an issue early on, and I’m pretty sure I’d get more out of my machine than I do now.

That’s what this book - The Ultimate Sewing Machine Mastery by Katie Matthews - has highlighted for me, and as such having read it it will be kept close to my machine and I’m sure become an essential part of my kit. As much as my pincushion, scrap fabric and scissors, and dare I say it the stitch unpicker - though truth is I keep that close to hand to fend off stitching woes, as I know as soon as I put that away again, I’ll need it and probably won’t remember where I’ve put it.

The book takes a comprehensive look at every aspect of sewing machines - from the evolution of the domestic sewing machine, including that the Science Museum in London displays the first model taken from drawings by Thomas Saint in 1790, and how one Isaac Singer (now there’s a familiar name) patented a machine with a foot treadle for powering the needle in 1851, through to the anatomy of a sewing machine and the all important troubleshooting.

So whether or not you want to learn about your take up lever, tension discs or your stitch selector then it’s worth getting your hands on a copy of this easy to read and informative book. Katie is a sewing machine engineer and owner of K&B Sewing Machines in Hampshire and uses the knowledge and experience gained from helping customers, and her technical insight to “share the joy that comes from a well maintained sewing machine.”

And in case you’re wondering your take up lever helps feed the thread and maintain tension while a stitch forms and is at the top of the front of the machine directly above the needle; your tension dial can be along the top or on the right hand side of your machine and loosens or tightens the upper thread tension and your stitch selector is where you can open up a whole new world of fun, but more on that later.

It’s not just a book for beginners either, as I said at the start of this post not many of us learn the technical side of our machines - we just get on and start sewing, but there’s a lot to be said for knowing what sounds right for your machine. I would class myself as a ‘handy’ sewer - neither beginner, nor experienced. I know my way around a machine, and have used one on and off for a good number of years, I rarely use patterns and if I do I tend to veer off if and when I get an opportunity - though I need to get better at following patterns more closely as I’ve a stack of wearables building up that I really should get started with. For quilts I think there’s more scope to go off piste, for clothes less so - or at least until I’m more experienced at those.

But anyway I was surprised to read that when I’ve finished a sewing session I should leave the needle at its highest point - I checked my machine, it wasn’t - it is now - and was reminded that I should cover my machine to protect it. I rarely do this either, but I should get into the habit as it is a sensible thing to do.

Needles, Thread and Bobbins

There’s whole chapters on needles, thread and bobbins and bobbin cases - all of which are essential, but with the potential for so much to go wrong, and of course go right! And that’s before you even get to the chapter on Tension.

The Needles chapter includes demystifying needle sizes and types, and a tip to test if you’re using the right needle size for your thread, as well as answering the question on how frequently you should change your needle - and it’s more often than you do, I bet!

The Thread chapter explains how to choose the appropriate thread for your sewing machine, how to store it and recommends buying the best thread you can afford, while avoiding old threads as well as threading the machine and the purposes of spool caps and their correct use.

Did you know that if your bobbin is incorrectly wound or unevenly filled that it may cause you to have irregular stitches and tension problems? Katie explains why it’s crucial to use the correct bobbin in your machine - and most importantly the wrong bobbin could damage your machine and that could be frustrating, and costly.

Getting more confident with the Presser Foot Types

This is something that’s on my hit list for this year - I’m quite happy to sew in straight(ish) lines, and to even use the decorative stitches on my machine (I haven’t forgotten I promised more on this later!) but I’m less sure about using different feet. Since I went on the overlocker workshop recently I am more confident in changing the plate on my overlocker (that was a requirement for the fancier rolled and lettuce hems), but I could do with being better changing the feet on my sewing machine.

Though I was partly reassured and partly horrified to read that I’m not alone - approximately 70 percent of people don’t know how to use the specialised presser feet for zips and buttonholes, which I’m pleased to be reassured simplifies these otherwise tricky tasks - it’s definitely time to get braver and take the plunge, rather than continue to choose patterns without zips!

Stitches, straight and otherwise

An explanation of how a stitch is formed and the straight stitch might seem the obvious place to start, but many of us take the former for granted and rely on the latter, sometimes veering into a triple straight stitch or even a zigzag. But our sewing machines can do so much more, even the basic ones - and unless we ‘play and learn’ we’ll never get outside of our comfort zone, and it’s really worth doing, and doing more if you do some already.

I know that I’m a practical learner so I got more comfortable using decorative stitches by attending a workshop to create a rustic barn. The majority of this was done not on my machine but one provided at the class, but I finished the applique and added more detail to the barn door using my machine at home. This project provided the perfect opportunity to test out in a playful way, but learning and building confidence at the same time.

A rustic hessian barn shape on cream backing fabric.  The barn is decorated with appliqued 'windows' and uses decorative stitches to create the barn door and other panelling/decorative touches on the barn

I still love how this turned out, and at the time I was looking for something useful to turn this into - in the end I settled on a cover for my sewing machine but didn’t do too much about that, though the reminder to cover my machine when I’m done may just re-ignite that idea - watch this space!

And mini-projects too

The book also includes a couple of mini-projects, I’m more keen on the one to make a stitch book than the one to reuse thread scraps - which is a surprise really as I like to reuse as much as I can, even pondering what size scrap is too small to keep (still undecided btw), but reusing thread scraps may be a step too far, even for me.

However I agree with Katie that the felt stitch book is a good way to familiarise yourself with the stitches on your machine, and to do it in a way that will be a useful reference for the future - and pretty too. It’s simple really take some plain felt (or material) and sew every stitch your machine has on a separate row - use a single colour, or multiple colours, a rainbow or tones of your favourite colour. Then once you have your pages, sew them along with the cover into your own unique stitch book.

In summary

I got a lot out of this book, and hope to get a lot more out of it going forward. Reading about this from Katie’s view with her experience from the ‘other side of the machine’ it made a lot of sense - a well maintained sewing machine will bring more consistent results and less frustrations, and much more.

I mean, we make sure other machines, such as our cars and domestic heating systems, are looked after and serviced and so it makes sense to do the same for our sewing machine too. Even if that means introducing our own regular cleaning routine, which goes beyond ‘fuffing’ out the fluff when we see it, if our budgets can’t always extend to a regular full service, though I’m sure most sewing machine engineers would advocate a full service wherever you can.

Certainly food for thought, and some new habits for me to adopt.

* With thanks to Katie and her team for providing me a copy of this book for the purposes of this review.

PostCommentLove