Crafting a New Narrative at Belton House

The Belton Estate is one of the nearest National Trust properties to us, and it’s one we’ve visited a few times - even before we moved up here. The orangery is a favourite of mine, and on the times we’ve visited recently it hasn’t been open, but it was open when we visited last week on the Spring Equinox, but you’ll have to wait for an updated post on that as today I’m going to share more about a new exhibition that’s on in the house.

I first went in the house in the summer of 2021 and as with most things the post-Covid reawakening meant that only a limited number of rooms were available to view, something that I’d forgotten [about our visit] until I read it on my own post! This time though there was much more to see, and the post-Covid timing of my previous visit also explains why I didn’t remember any of the upstairs - I hadn’t been there before!

The exhibition - Artistic Journeys: Crafting a New Narrative - includes previously unseen items from the collection. which will be on display until at least until the house is redressed for Christmas, with exhibits changing regularly. The four artists are:

  • Elizabeth Cust (1776 - 1858) a skill oil painter inspired by ‘Old Masters’ to create her own.

  • Sophia Cust (1811 - 1882) who documented interior and exterior views of Belton using her favourite medium of watercolours.

  • Marian Alford (1817 - 1888) a skilled textile designer and artist who co-founded the Royal School of Needlework.

  • Nina Cust (1867 - 1955) a sculptor and poet, whose sculptures were displayed at the Royal Academy and who has published many works of poetry and fiction.

I’m not much of an oil painting fan I’m afraid, and have realised as I’ve been going through my photos, that I have none to share of Elizabeth’s work, and my photos of Nina’s work aren’t good enough to include either - so if you’re here for those, sorry - this isn’t the post for you.

Let’s start with Marian

Marian Alford’s connection to Belton was through her marriage to Viscount Alford, the eldest son of the first Earl Brownlow, and it was in 1984 that Lord Brownlow gave the house to the National Trust.

But Marian’s story took place many years before that. She was instrumental in bringing recognition to embroidery as an art form, and brought recognition to needlework as a respected form of employment for women in all social classes, raising the status of both at at time when seamstresses still worked in apalling conditions.

In 1872 she was one of the three founders of the School of Art Needlework and helped establish the school as a place for formal art education and training, which I think is all the more remarkable as she herself never received an art education, but who developed into a skilled artist and designer.

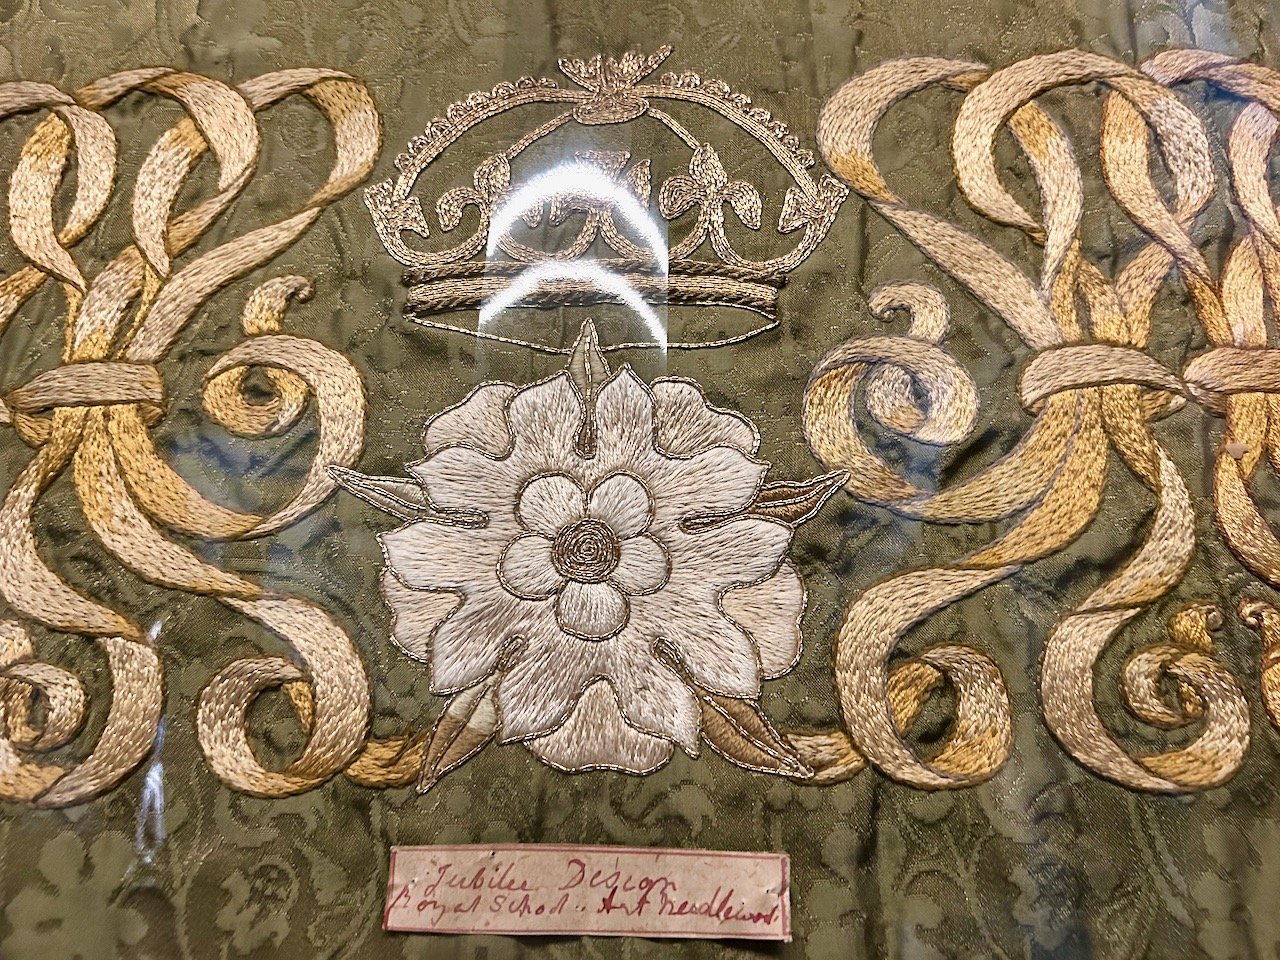
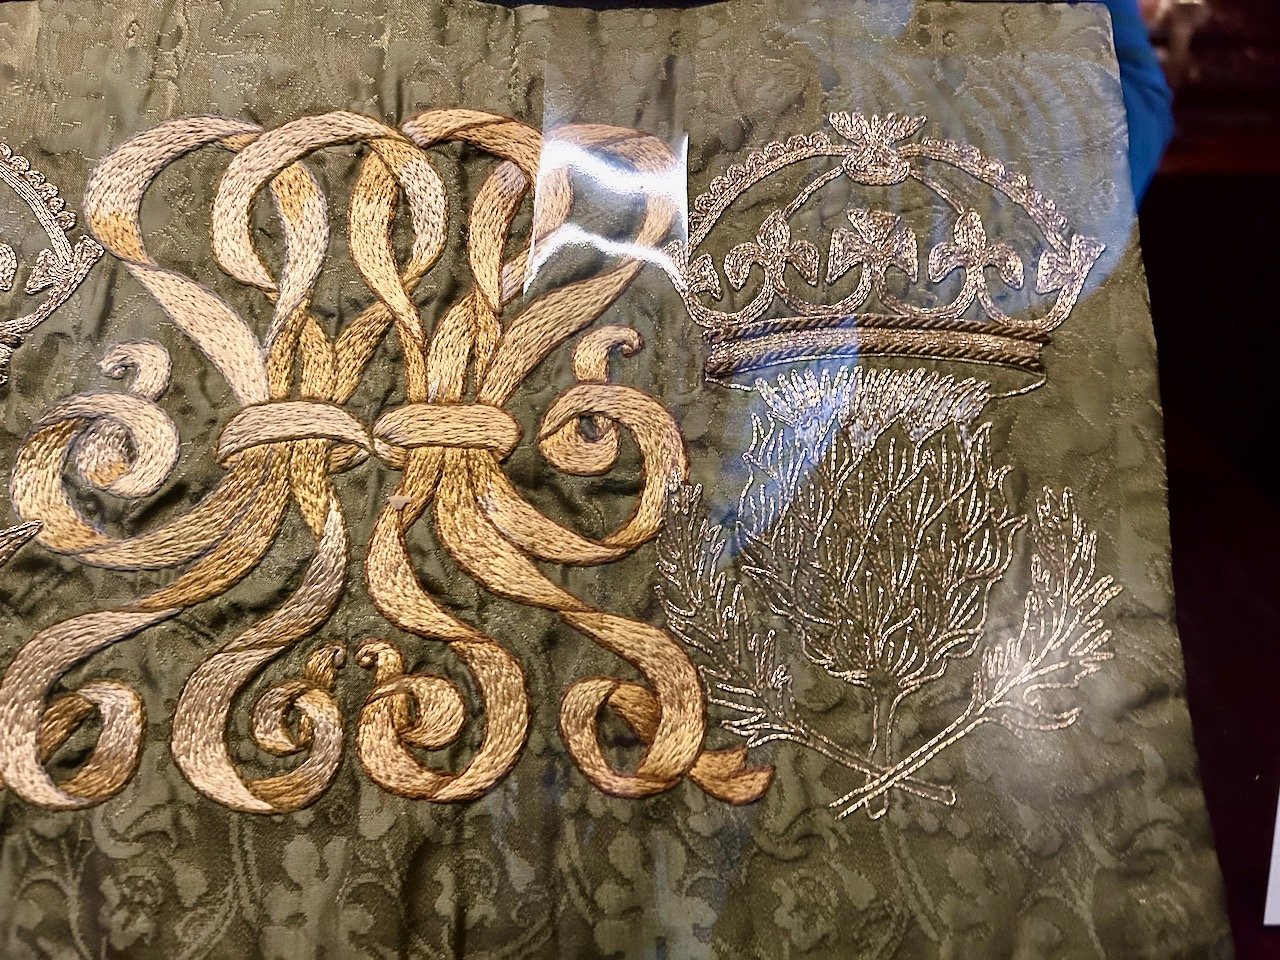
The embroidery below, along with the sketched pattern. was behind glass (hence the glare) as you entered the upstairs library. The detail of the stitches was amazing, and my favourite part was the thistle on the right hand end.

Downstairs in the Tapestry room there were more examples of her designs this time crafted by Belton volunteers, though as some patterns were incomplete these are creative interpretations of the designs, and no less stunning for that. The original hand-drawn and painted designs are now very fragile having been stored in folios for many years, and sadly can no longer be unfolded without causing damage.

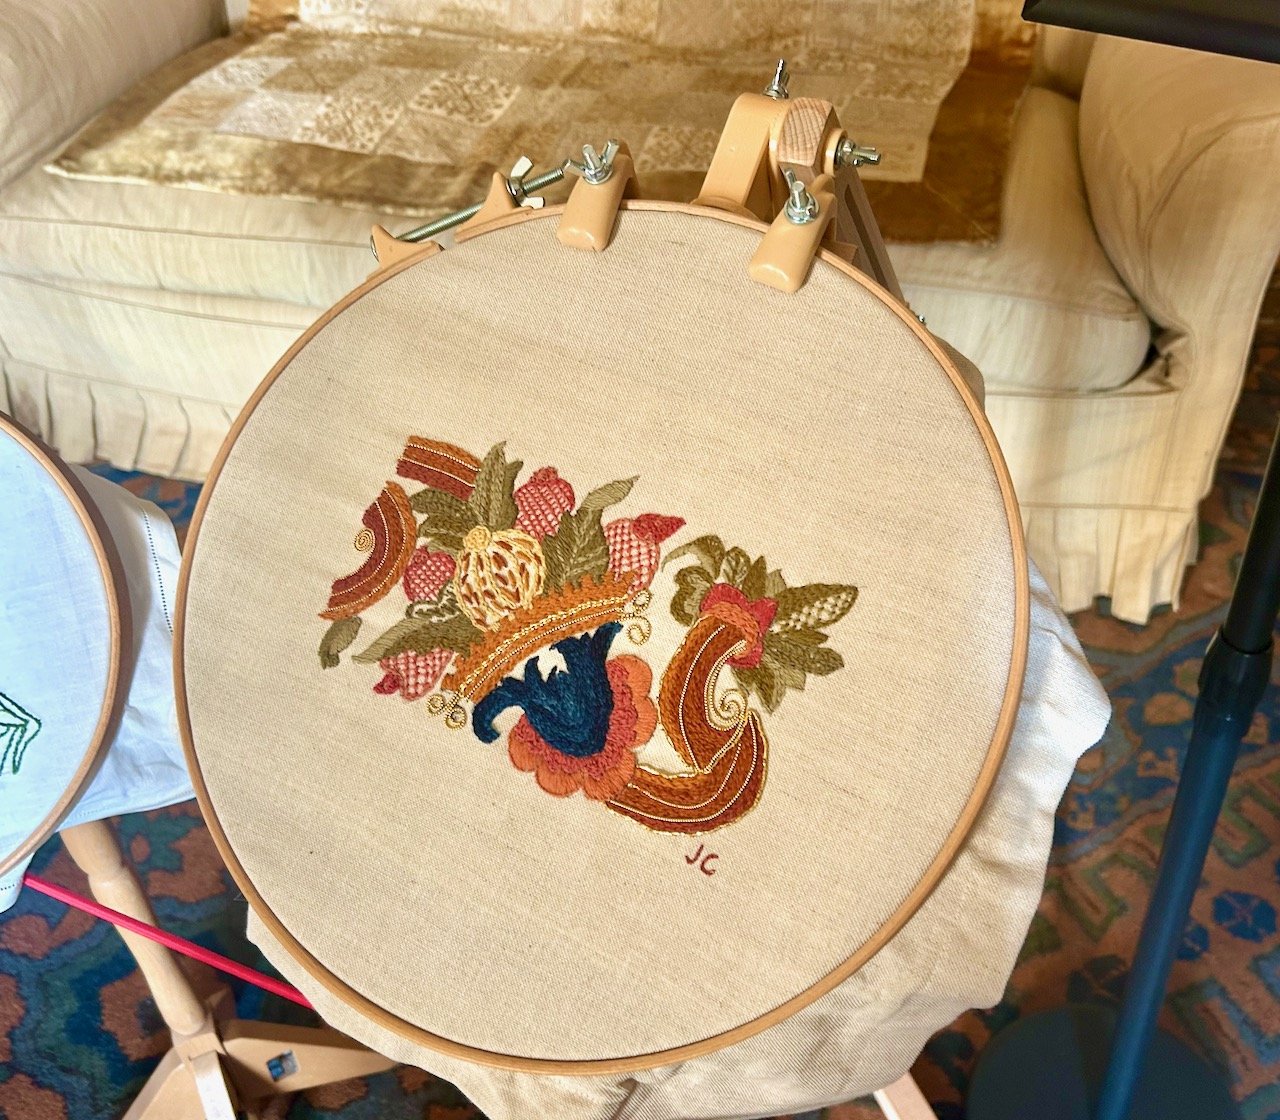
Behind the embroidery hoops draped over a sofa was the most amazing throw - I wish I had more info on this, but I don’t and if it was there I missed it. But look at the detail - this one was carefully behind the ropes, but it’d be great to see this one slightly closer up. And I’d also like a pattern of the designs in the hoops above please!

Sophia’s watercolours

Sophia left Belton when she married, but often returned to her family home and during these visits she created a large collection of watercolours showing the house and gardens, many of which survive today. I particularly liked the three posters on display in the Breakfast room, which had previously been used as an ante-library (when the library was also downstairs) and then when the library moved upstairs a small dining room.

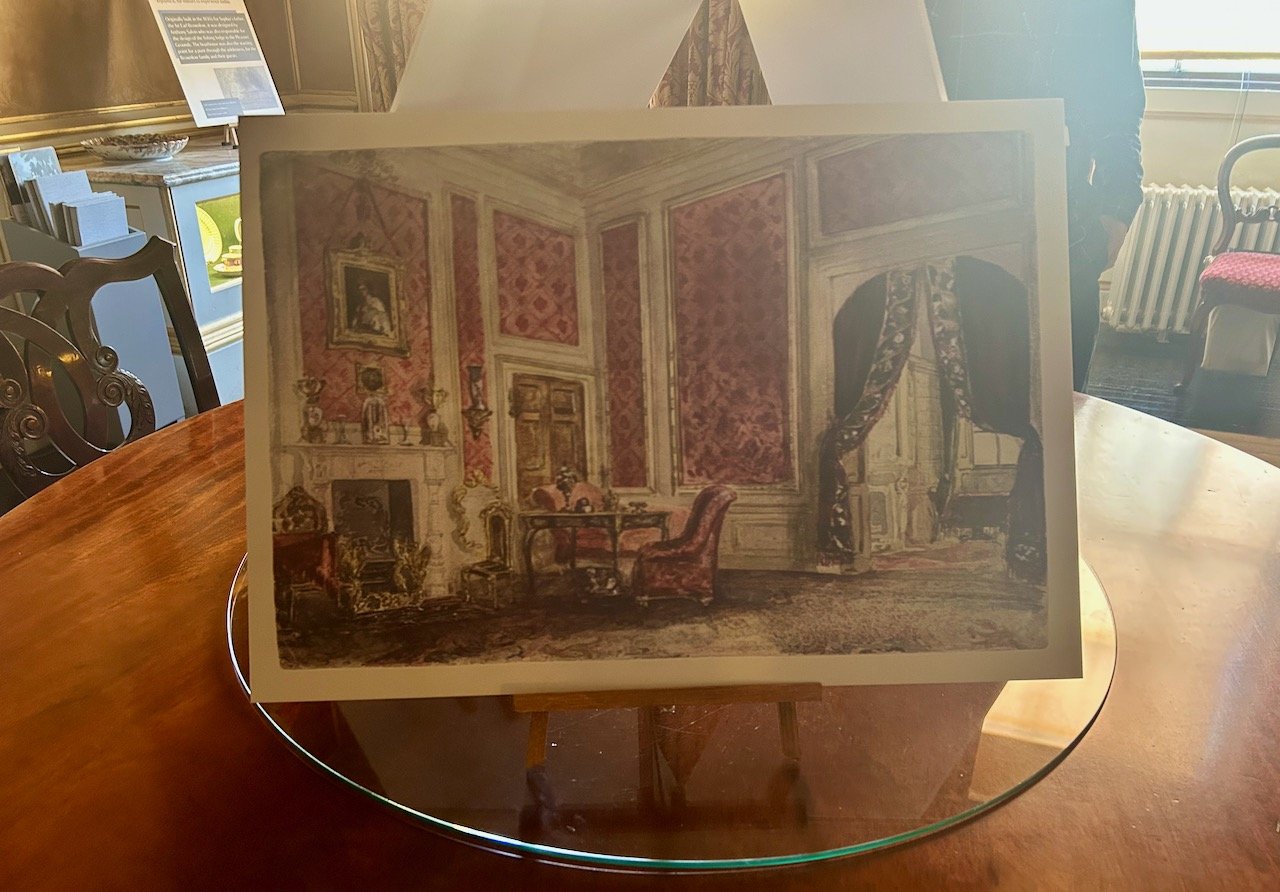
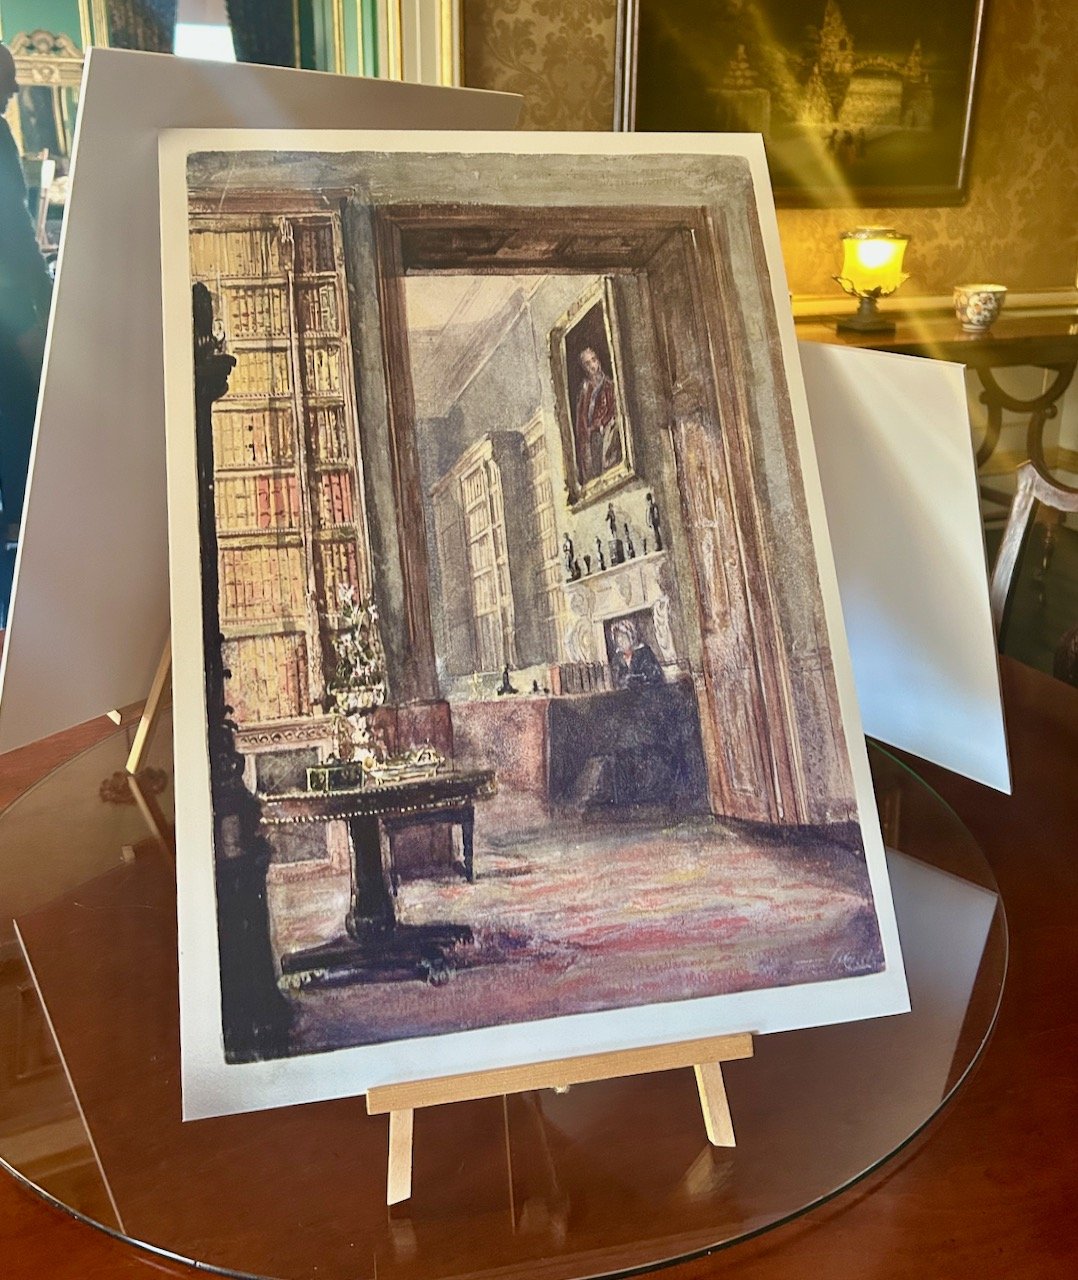
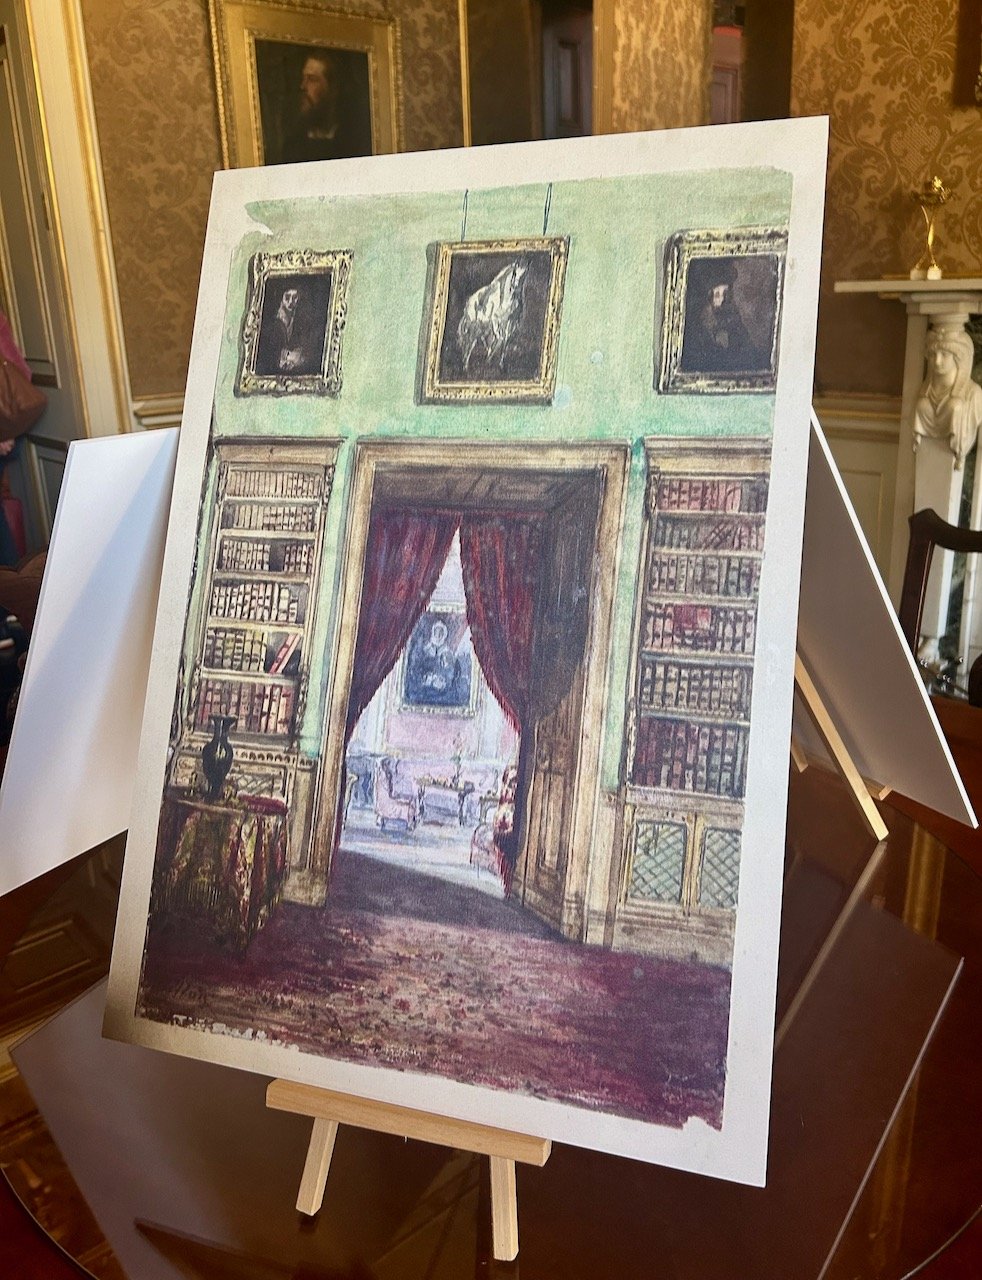
Her watercolours show how Belton looked in the mid 1800s, and is now a valuable resource for the conservation work in the property; they also show how the interior evolved over time with the placement of furniture, textiles and other objects in the rooms. So very much the photos of the day.

Another of her watercolours gave details of Belton’s boathouse which otherwise might have remained a mystery, and her detailed depiction made it possible to reinstate the boathouse, which was originally built in the 1830s. Amazing.

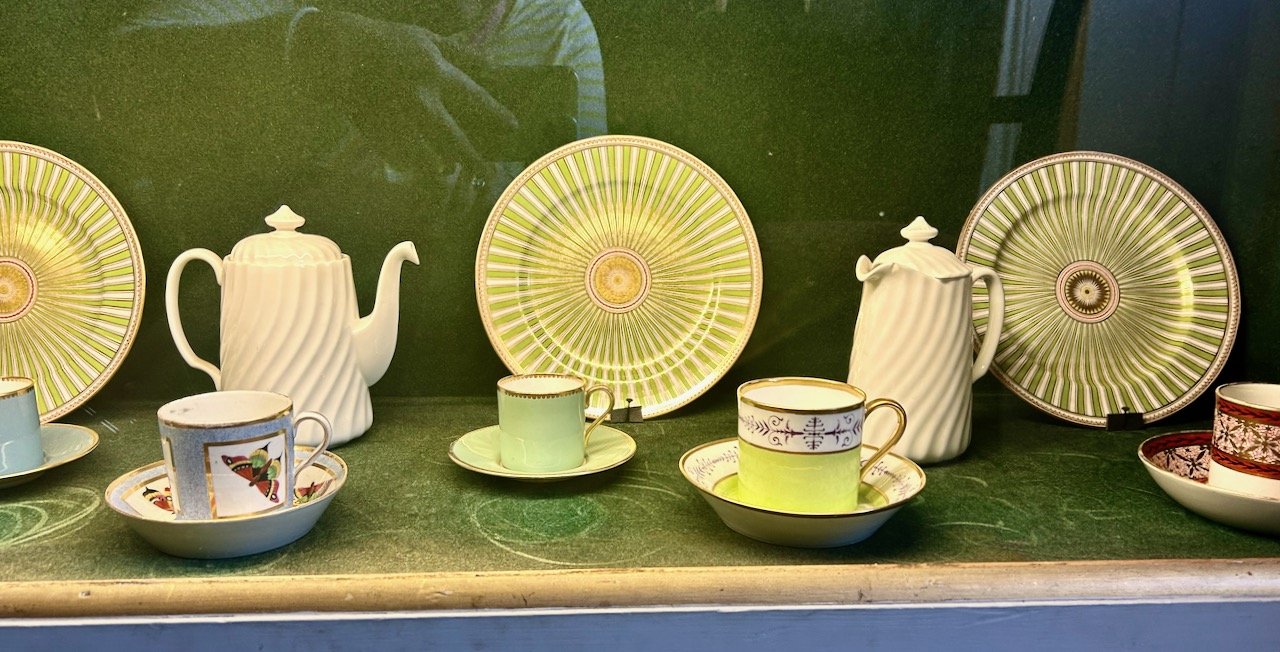
I was also quite taken with the breakfast crockery in the display case, which if you look closely enough at my reflection, you’ll see that I also managed unwittingly to match with my white and lime green striped top!

Two final pieces

Just before we left the house there were two final pieces that caught my eye. The first is this coloured enamel painting on copper, with an iron and silver Art Nouveau frame by the renowned Arts and Crafts enamellist Alexander Fisher of Nina Cust. It dates from 1898 and shows Nina wearing a gold and pink robe holding a cape, and it’s thought that this piece further acknowledged her status as an artist.
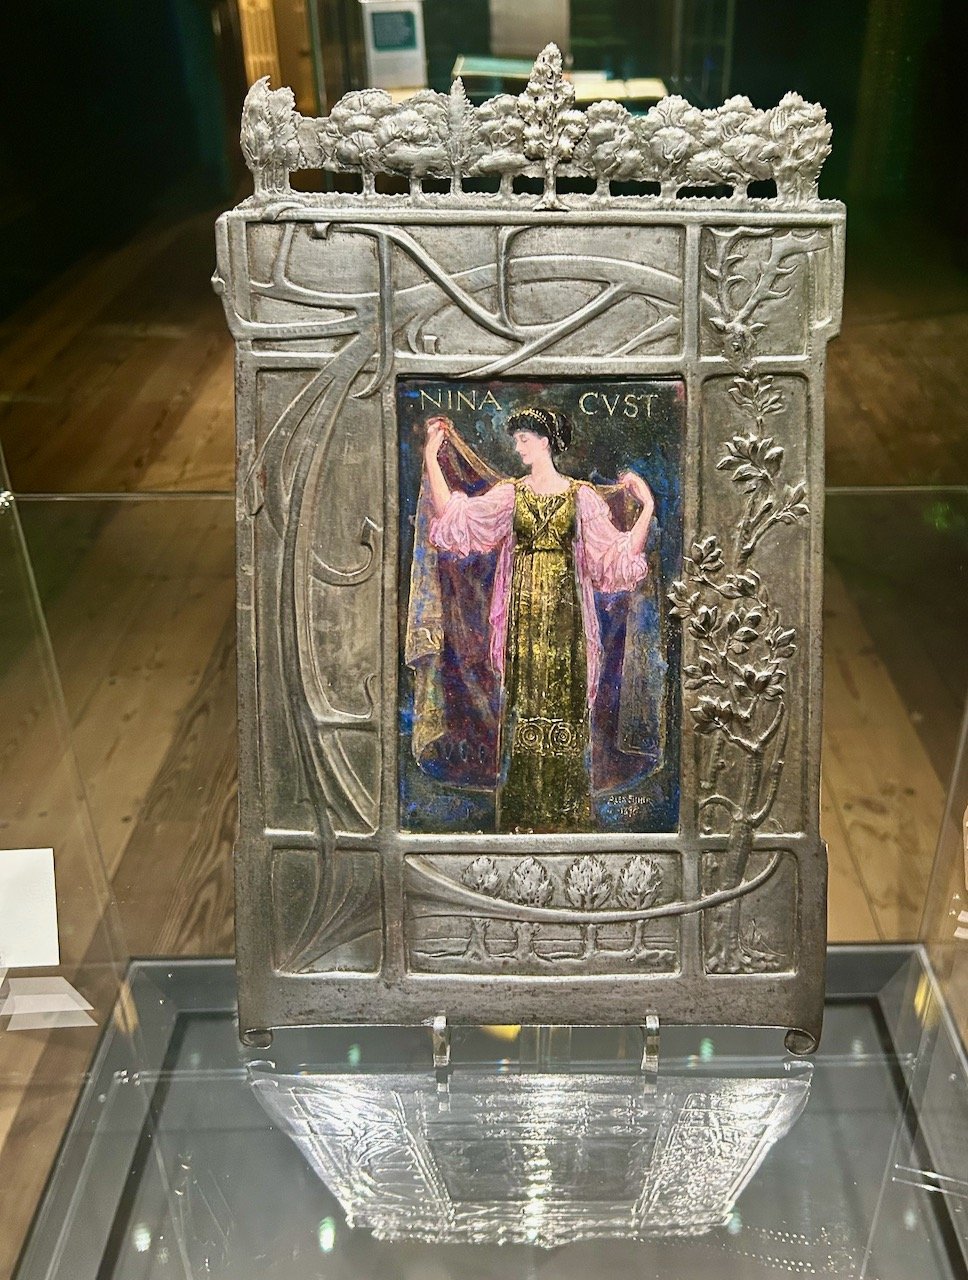
Isn’t it exquisite?

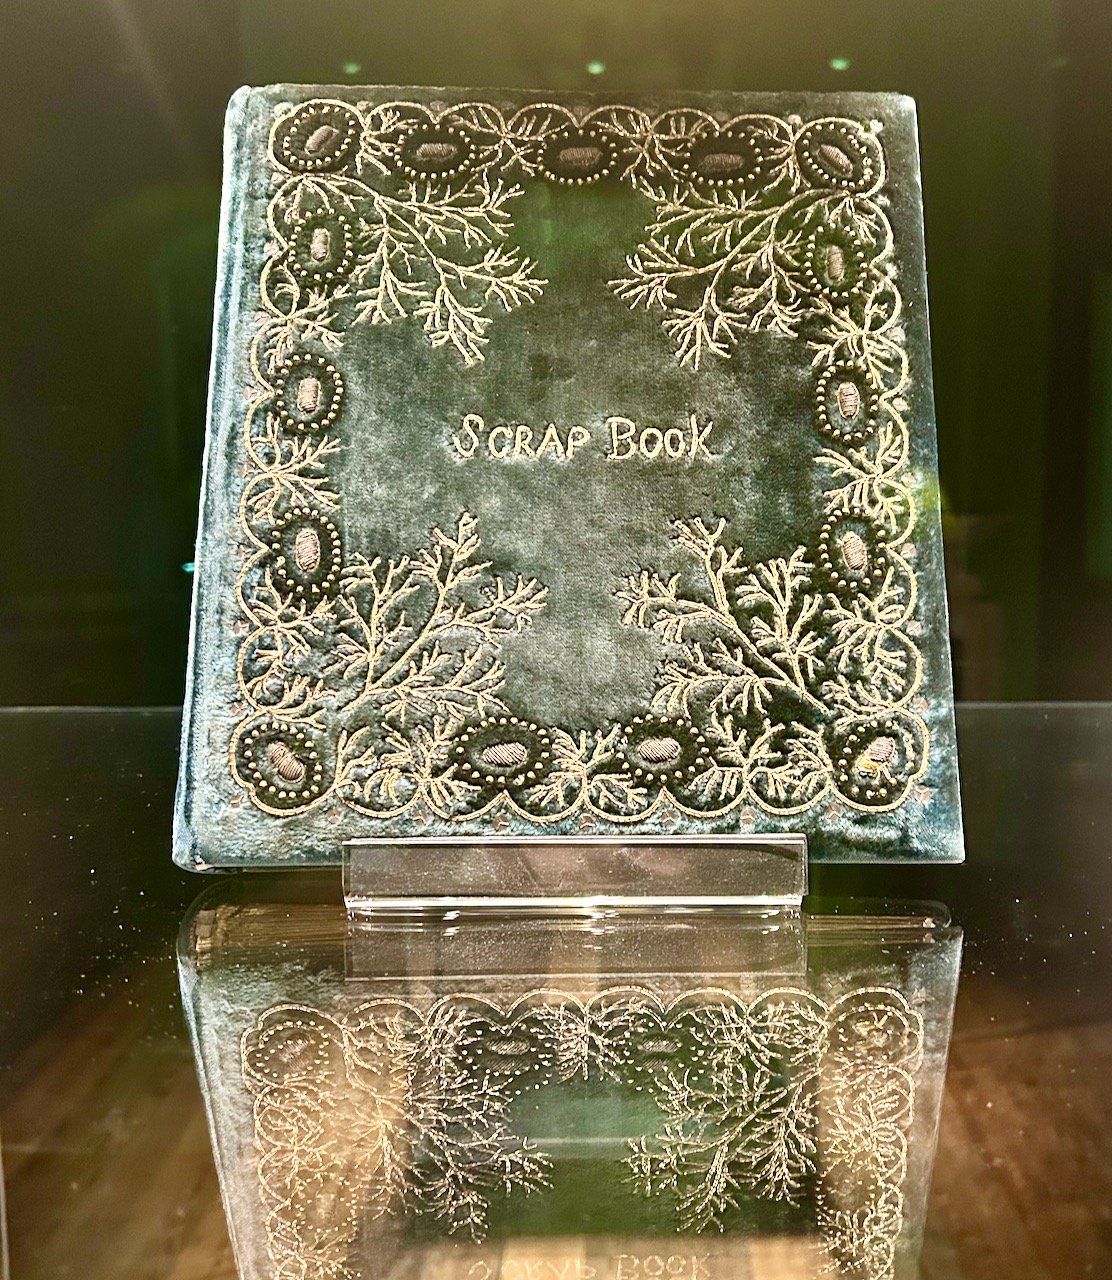
The second was this scrapbook - and quite honestly a scrapbook like I’ve not seen before. This was presented to Marian in 1886 as a Christmas gift from the School of Art Needlework. It’s covered in green velvet and embroidered with a gold, metal thread.

Both the house and the exhibition are worth seeing, so do go along if you’re close by or if you’re passing. As I said earlier it will be on for a while yet, and though the exhibits may change the ethos will remain. I’m looking forward to popping back and seeing how it changes, and seeing more detail on the things I’m sure I missed.

And I’ve still more to share, later this week look out for another visit to the Orangery, which now appears to be referred to at the Conservatory - and I think there’ll be another post to come on the ‘bedrooms at Belton’ and there’s some stunners there too!

Finishing my new hexi sewing machine mat

It’s been a while since I shared how I’d fallen for some of Tula Pink’s bright designs, but since then there’s been a fair bit of activity and I’ve even finished both of my intended makes; one fully, and the other the sewing element is complete, but I’ve still to find the right kind of day to get my paintbrush out.

Today I’m sharing the fully completed project, which wasn’t even a twinkle in my eye back at the start. I enjoyed the whole English Paper Piecing process so much that once I’d finished the top for my sewing box, I wanted to carry on.

And so I did, and the result is a gorgeously bright mat to go under my sewing machine. Not that I really need a mat, but it will prevent any marking on the surface and I’ve got used to having my sewing machine on a mat. I’d been using an old and worn out cutting mat, and that helps me move the sewing machine back and forth on the desk when it’s not in use.

But it wasn’t very pretty. The finished mat is way prettier, and I’m really pleased with how it turned out.

The finished mat edged in raspberry bias binding on my desk, complete with sewing machine

An organic plan

I didn’t have an exact plan when I started, other than to create a mat for my sewing machine. I knew I wanted it roughly the same size as the old and worn cutting mat I’d been using, but I hadn’t really worked out - at the start anyway - how I was going to finish it, if I was going to quilt it (or how), and what the backing would be.

I knew I probably had some batting somewhere, so that was covered and I knew I wasn’t keen on having the hexagonal shapes on the edges, so I was always going to square those off somehow.

But when I started, finishing this mostly hand sewn project seemed a long way off.

Yes mostly hand sewn.

All of the piecing and quilting on the colourful front is done by hand. The binding was added with two rows of machine stitching on the front, and attached to the back by hand sewing slip stitches all the way round.

The back though is mostly machine sewn, the strips pieced by machine and also quilted by machine. And you know what, that’s perfectly ok.

Starting out

Back in January I needed to crack on with assembling enough hexies, and deciding on a layout - and the layout was probably the hardest part!

Testing a layout - in curved stripes in graduating colours

In my head I thought I’d create a colour graduating design, which would look both slick and chic. But try as I might, it didn’t feel right - and so I abandoned the layout above, and adopted a more random placement design. Switching individual pieces around to get a layout that I was happy with - don’t get me wrong, there was lots of switching, trying to get the different patterns evenly spaced.

A random placement design of hexies - much more colourful!
Testing the random layout in grayscale to check for overall colour distribution

Once I’d decided on my layout - and taking a picture so I didn’t forget it, I did the clever design trick of looking at the photo in grayscale to ensure that the lights and darks were also relatively evenly spaced.

And then I numbered every single hexi with its row and position so that sewing them together could be relatively mindless. With rows for each stack dotted around my craft room, at times it felt like I’d never reach the end.

Each pile of hexies representing a single vertical row in the random layout

Front assembled, now for the back

But gradually the individual hexagons were attached into rows, and the rows sewn together in order to create the front of my mat. I decided to fill in the gaps on the top and the bottom, but to leave the smaller gaps on the sides.

And I settled on the backing fabric too. I wanted something equally colourful, but something that would come together much more quickly, and nor did it need to be quite so labour intensive.

Front and back - top is the random layout front, bottom is strips of fabric from a 'grab bag' machine sewn together

In the end I settled on some of the less Christmassy fabrics that I’d picked up at the Newark Quilt Show at the start of the year. All of the fabrics were part of a ‘grab bag’ and a lucky dip. Part of their attraction for me was their selvedges, so I was keen to keep these on show.

The striped finished back with a strip design, quilted in straight lines

I’d slightly misjudged the size making it longer than it needed to be, but not as wide - so with my organic plan and solutions brain mode, I added part of what I’d cut off the bottom onto the side - which you can see on the left above - and that makes me smile.

Hand quilting the front

With the back complete - sewn together, and machine quilted - I could no longer procrastinate about how to finish off the front. At one local sewing group evening one of the ladies asked me if I was going to hand quilt my piece - I laughingly said no, I’m not a glutton for punishment.

A closer look at part of the hexies on the front with hand quilting - running stitch on most, chain stitch on some

However, it turned out that I am - as it needed some kind of quilting, and I thought machine quilting this side would lose some of its charm. I started out with a plan to chain stitch individual hexies to form an oblong shape, and I completed the inner oblong. But realistically, it took way longer than I wanted it to take and it didn’t look as good as I thought it would. I wasn’t unpicking it though.

So instead I changed tack, and added a small running stitch around the remaining hexies using the same embroidery thread.

Adding the binding and elastic

As I neared the end of the hand quilting I was thinking of how to finish this project - by chance I saw a haberdashery company online showcasing their widest bias bindings, and I was hooked. I did a rough calculation of how much I’d need, then added a bit more for good measure and waited for it to arrive.

I hadn’t thought about thread, but thought I’d probably have something. Turned out that I did, and in exactly the same colour - what are the chances? I’d picked up a bag of part-used overlocker threads in a recent WI sale in Newark - attracted by some of the colours, thinking I’d use them at some point without knowing that would be quite soon!

By now both the back and front were pinned together and so I pinned and re-pinned the binding to the front of my mat, mitring the corners as neatly as I could, adding extra pins to keep them in place before I slowly (at times) whizzed round with a couple of rounds of machine stitching.

Bias binding and a mitred corner with two rows of machine sewing attaching it to the front of the mat

With a stroke of luck the mitred corners behaved and stayed in place on both the front and the back. For the back I added some glitzy pink elastic (left over from mask making during the pandemic) across the corners and then pinned the back in place before slip stitching it and completing my mat. The elastic means I can slip the corners of the old and worn out cutting mat through these and get the benefit of its solidity, but the prettiness of my new mat. Not something I originally planned for, but a useful addition.

The rear side of the mat with elastic across the corner and hand stitched binding

Definitely a project to take on the go

For now my English Paper Piecing (EPP) projects have come to an end, but it’s something I’ve really enjoyed - and it’s something that is easily portable. The mini oblong pouch below - which is no more than 15cm long - carried everything I needed easily, that includes needle and thread, small scissors, a thimble, a thread catcher and approximately four rows of my hexi top. That’s where the row and positional numbering came in handy too - that’s definitely a top tip, write these on the back of the cardboard - mine took the format 6.1, 6.2 etc for row 6 position 1, position 2 and so on. Absolutely invaluable, unless of course you are creating a truly random design.

A selection of hexies secured with elastic bands, a mini pouch, needle thread, scissors and a thimble

So my new sewing mat looks good, is functional and is in place in my craft room. Now I need a day to paint my sewing box charcoal - I have the paint already. I need a day that’s not too hot, not too cold and one where I haven’t already committed to other things! Then I’ll share the other half of my EPP Tula Pink creation - don’t hold your breath!!

PostCommentLove

It's a rainbow wrap!

It’s been a while since I shared my rainbow squares on here, 2020 in fact, so quite a while! But I recently rediscovered them, and thought that it probably wouldn’t take me too much effort to finish this project off, and if I got my skates on I could take it on my travels next month.

After this post I shared a layout post on Instagram, convinced that I’d nailed the layout and I’d ‘pinned’ it together with stitch markers to save me having to remember what I’d decided on, which was helpful.

THE ORIGINAL LAYOUT

But the more I looked at this layout, the less convinced I was. And then I realised that with a simple switch I could have a different look - and well, there was no harm in trying was there, if I disliked it I could switch it back again as it’s not like I had attached them permanently.

And so I took the yellow and green ‘ends’ and switched them into the middle:

switching colours - now blues and purples at the top, to greens, yellows and ending on pinks

For me this layout just popped, and just this small change made me feel instantly better about the whole thing - and more importantly, it made me want to finish it. Isn’t colour a strange thing?

Anyway to finish it I needed to permanently attach the squares to each other, I’d initially thought I’d do that sewing them together rather than by joining as per the vintage pattern and crocheting. But now that I’d come to actually join them, the sewing together option was a non-starter; I didn’t have leftover wool in each colour and I’d lose some of the laciness, so it was back to the quite sparse instructions in the vintage pattern, and working out a new plan.

That new plan involved a new purchase

I thought about a white or a silver, but neither grabbed me when I tried those colours alongside my rainbow squares, so I checked out my usual online wool shops and got lucky. This ‘skyfall’ colourway from The Wool Kitchen is a perfect match to the original wool which came as part of the mini-skein club by Vicki Brown Designs.

The new grey & multi colour flecked addition laid in the middle of the yellow and green squares

With a bit more head scratching, lots more ‘pinned’ stitch markers and a bit of trial and error I worked it out, and quite quickly the short lengths and then the longer lengths were attached to each other.

My rainbow squares attached to each other with a light grey chain stitch

ATTACHED!

A CLOSER LOOK AT THE JOIN

It already looks so much better than I could have imagined - and there’s a real chance I may just finish it soon too. I just need to add a row of double crochet around the edge and finish with a row of picot stitches - the pattern for this is just as sparse, but I’m confident it’s within my grasp.