


It’s been a while since I shared how I’d fallen for some of Tula Pink’s bright designs, but since then there’s been a fair bit of activity and I’ve even finished both of my intended makes; one fully, and the other the sewing element is complete, but I’ve still to find the right kind of day to get my paintbrush out.
Today I’m sharing the fully completed project, which wasn’t even a twinkle in my eye back at the start. I enjoyed the whole English Paper Piecing process so much that once I’d finished the top for my sewing box, I wanted to carry on.
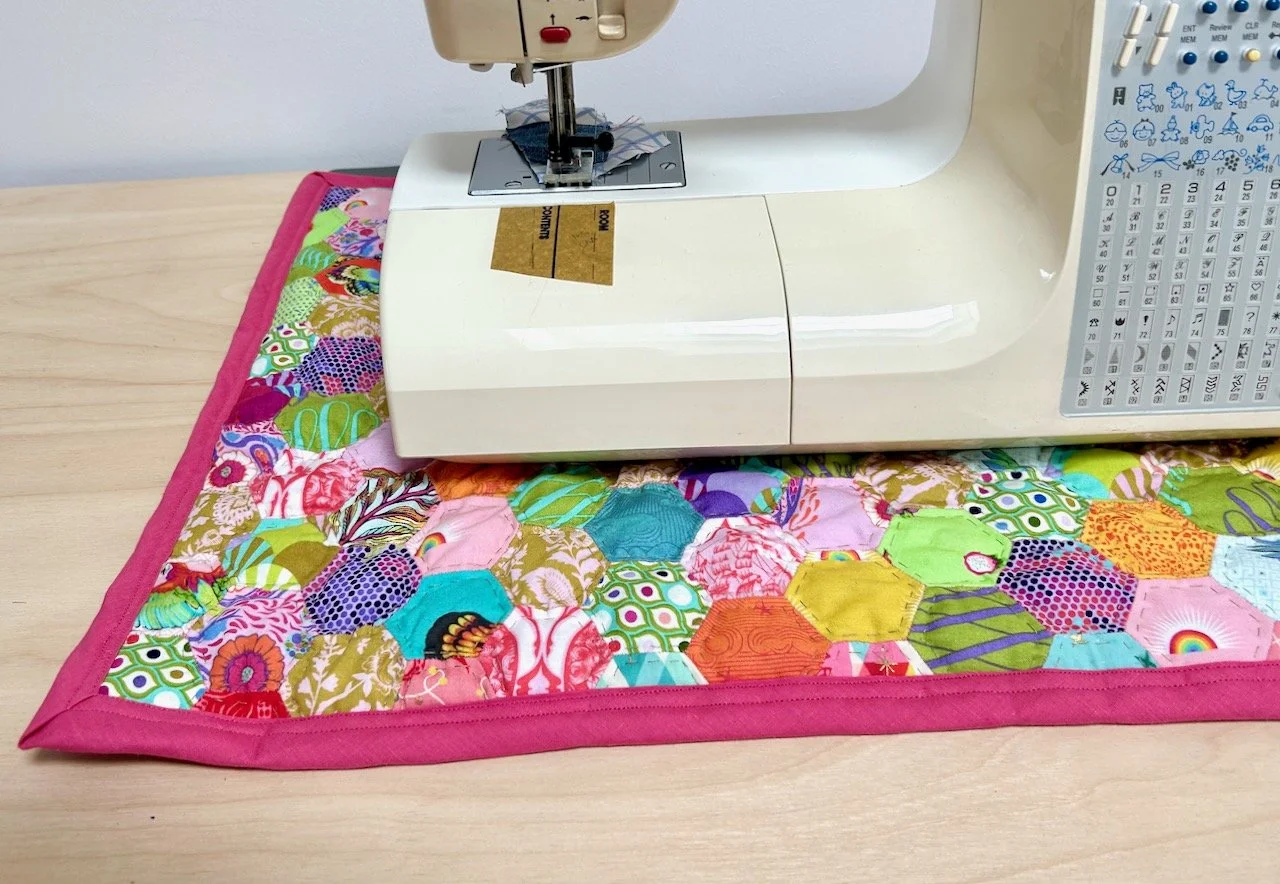
And so I did, and the result is a gorgeously bright mat to go under my sewing machine. Not that I really need a mat, but it will prevent any marking on the surface and I’ve got used to having my sewing machine on a mat. I’d been using an old and worn out cutting mat, and that helps me move the sewing machine back and forth on the desk when it’s not in use.
But it wasn’t very pretty. The finished mat is way prettier, and I’m really pleased with how it turned out.
An organic plan
I didn’t have an exact plan when I started, other than to create a mat for my sewing machine. I knew I wanted it roughly the same size as the old and worn cutting mat I’d been using, but I hadn’t really worked out - at the start anyway - how I was going to finish it, if I was going to quilt it (or how), and what the backing would be.
I knew I probably had some batting somewhere, so that was covered and I knew I wasn’t keen on having the hexagonal shapes on the edges, so I was always going to square those off somehow.
But when I started, finishing this mostly hand sewn project seemed a long way off.
Yes mostly hand sewn.
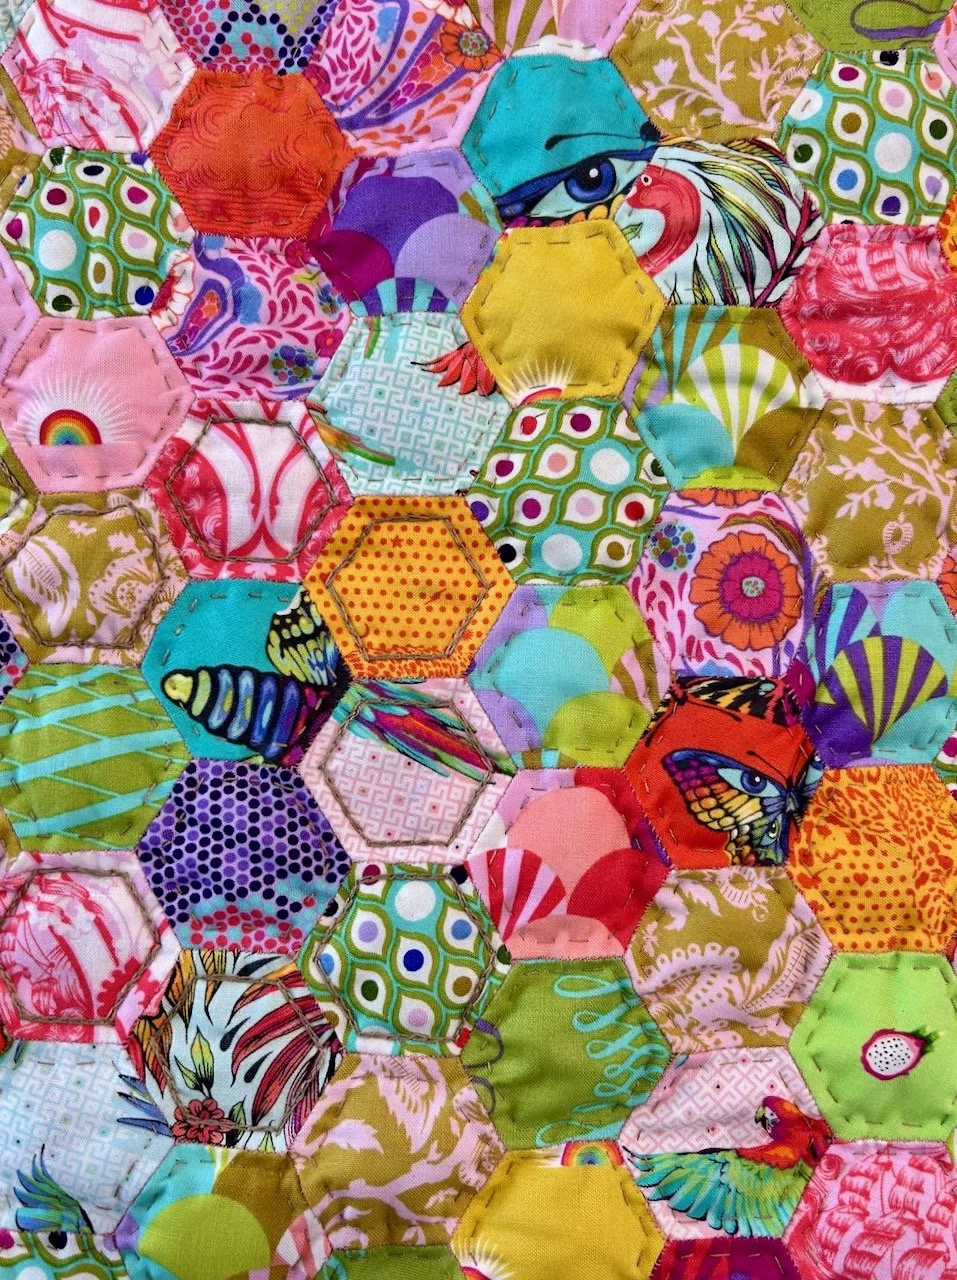
All of the piecing and quilting on the colourful front is done by hand. The binding was added with two rows of machine stitching on the front, and attached to the back by hand sewing slip stitches all the way round.
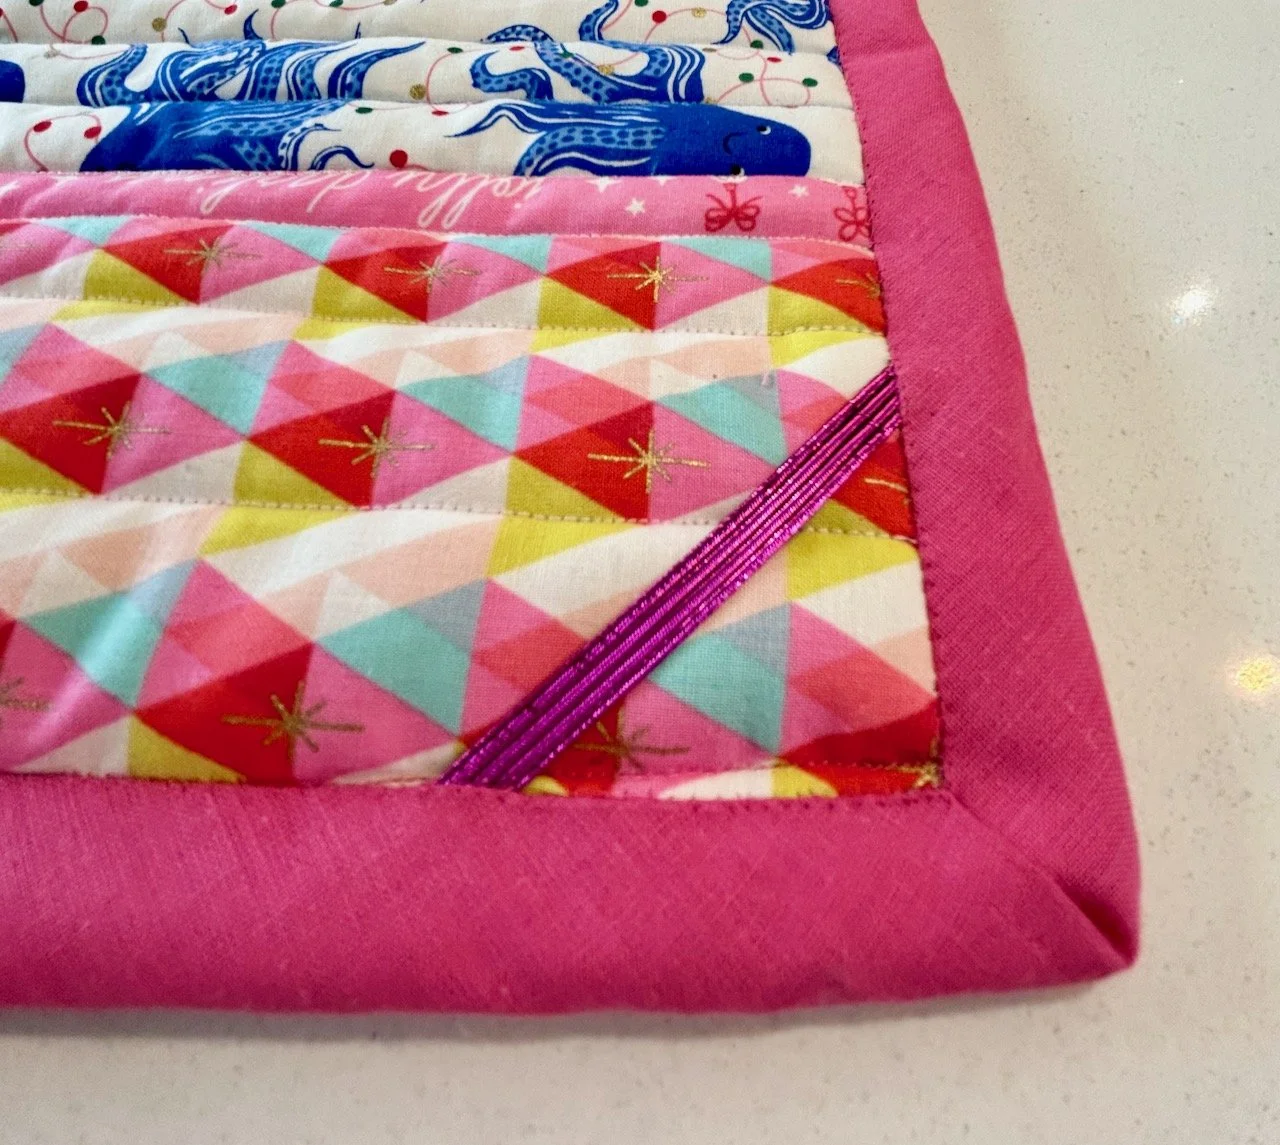
The back though is mostly machine sewn, the strips pieced by machine and also quilted by machine. And you know what, that’s perfectly ok.
Starting out
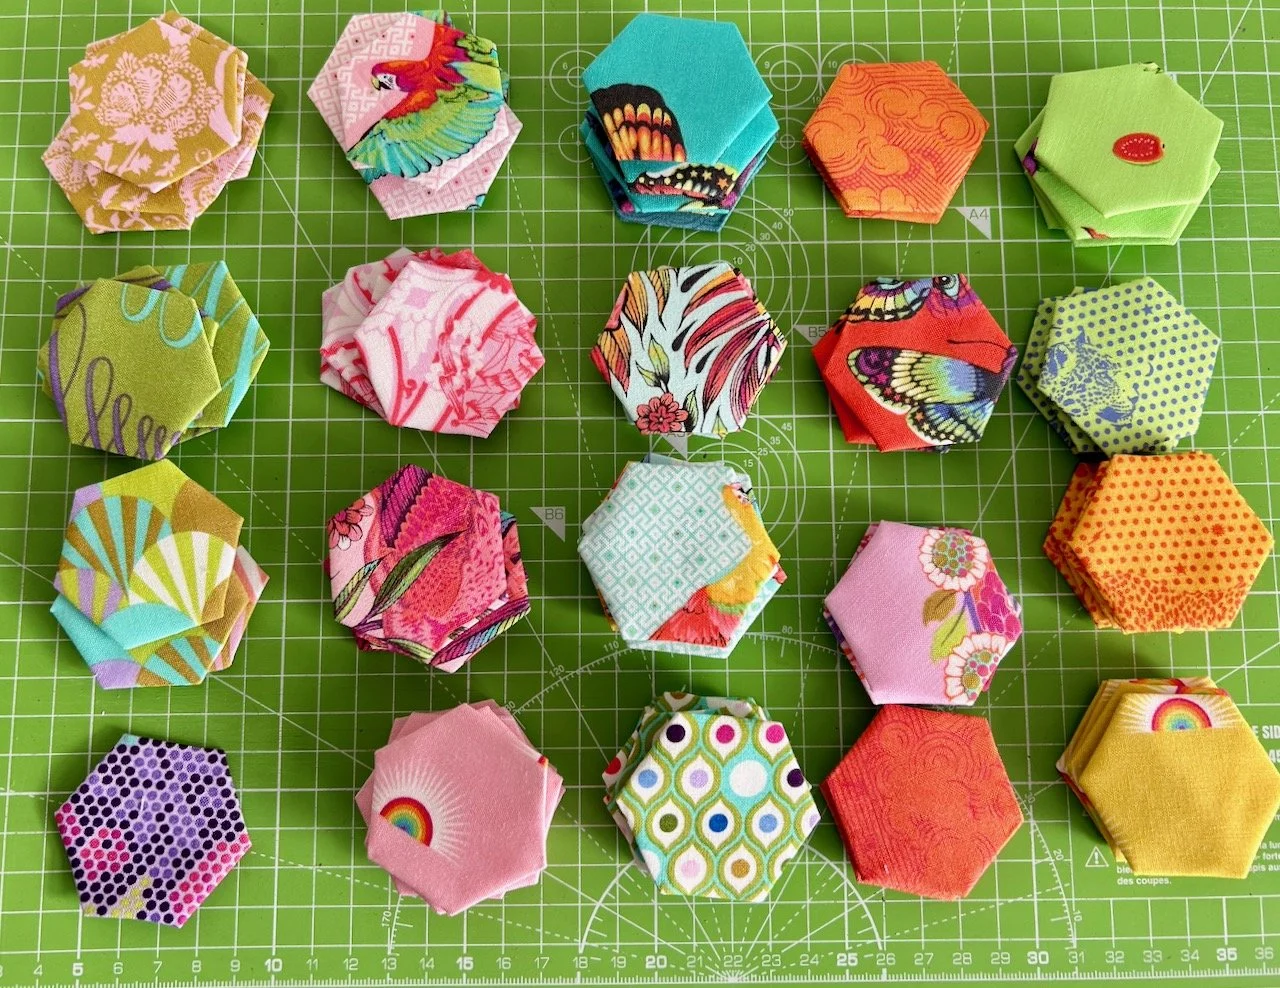
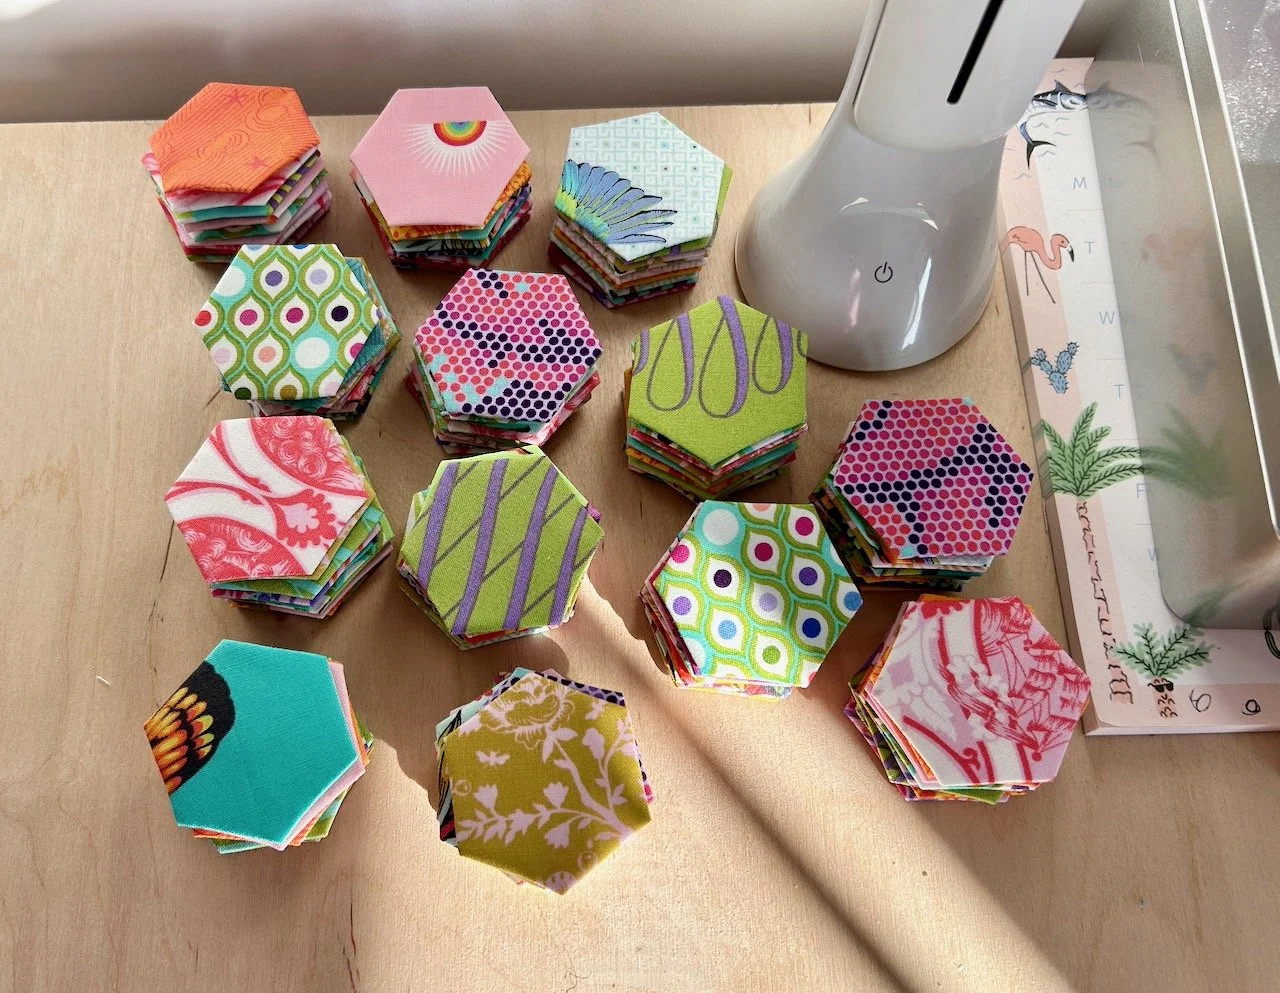
Back in January I needed to crack on with assembling enough hexies, and deciding on a layout - and the layout was probably the hardest part!
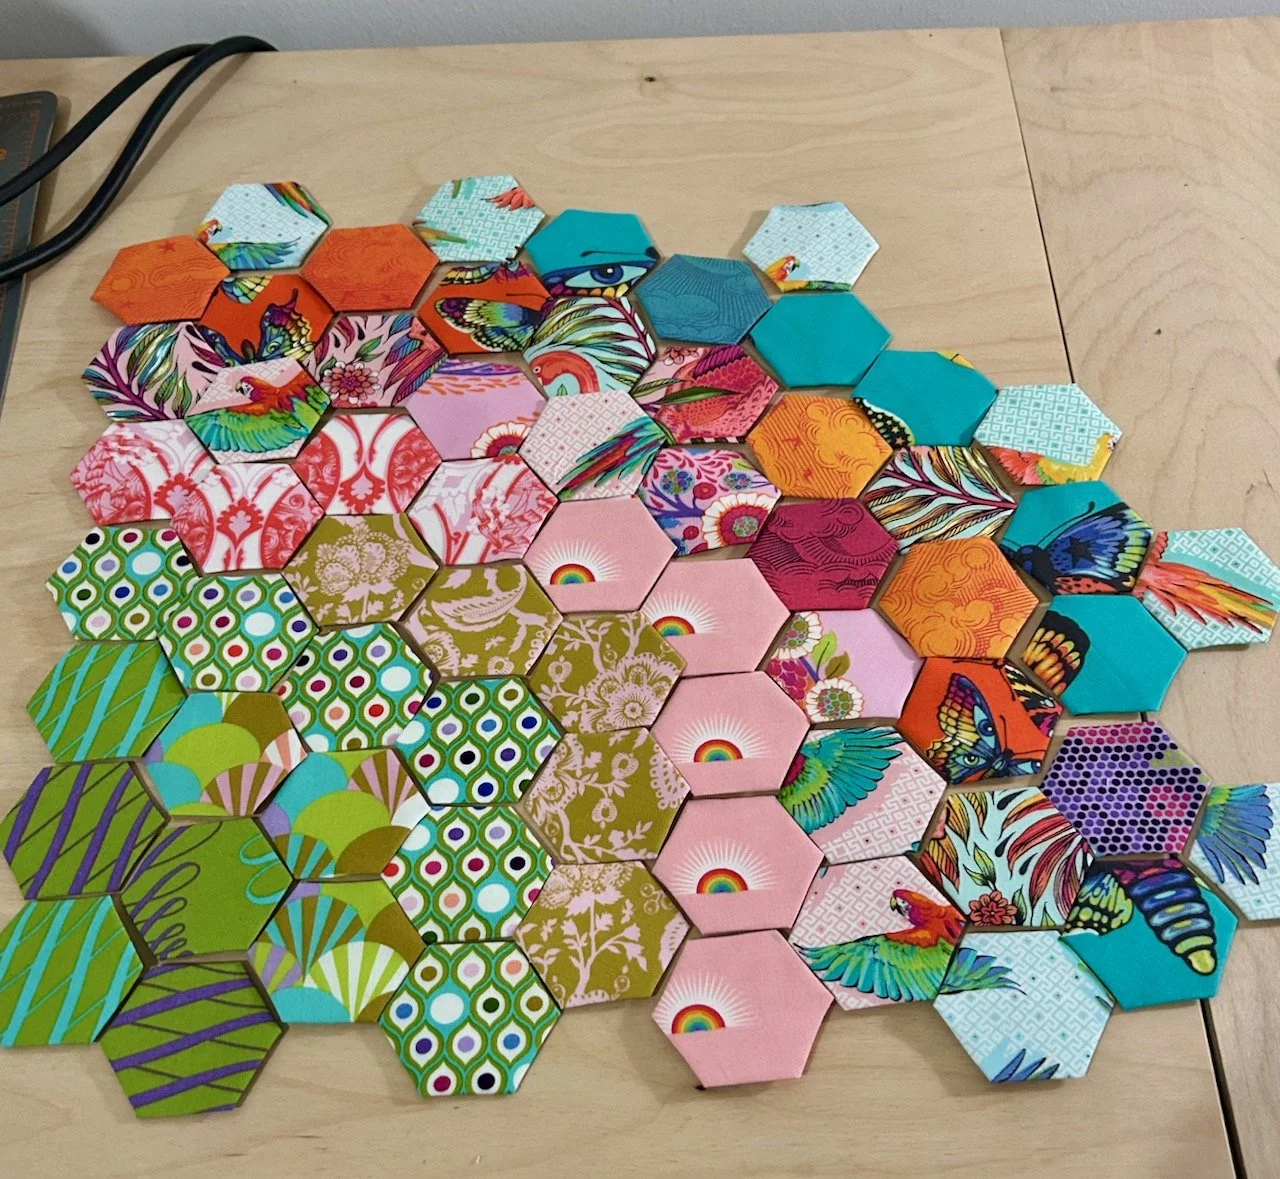
In my head I thought I’d create a colour graduating design, which would look both slick and chic. But try as I might, it didn’t feel right - and so I abandoned the layout above, and adopted a more random placement design. Switching individual pieces around to get a layout that I was happy with - don’t get me wrong, there was lots of switching, trying to get the different patterns evenly spaced.
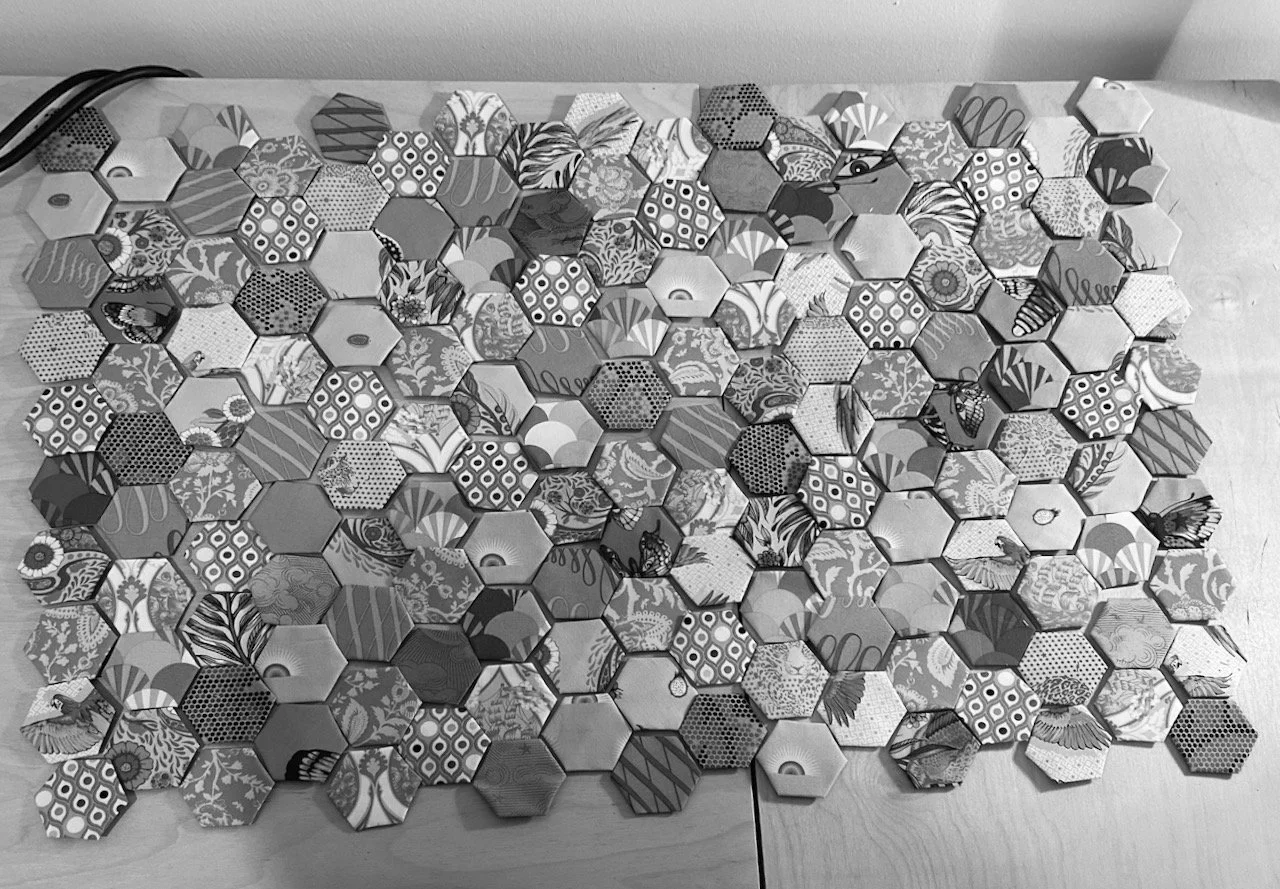
Once I’d decided on my layout - and taking a picture so I didn’t forget it, I did the clever design trick of looking at the photo in grayscale to ensure that the lights and darks were also relatively evenly spaced.
And then I numbered every single hexi with its row and position so that sewing them together could be relatively mindless. With rows for each stack dotted around my craft room, at times it felt like I’d never reach the end.
Front assembled, now for the back
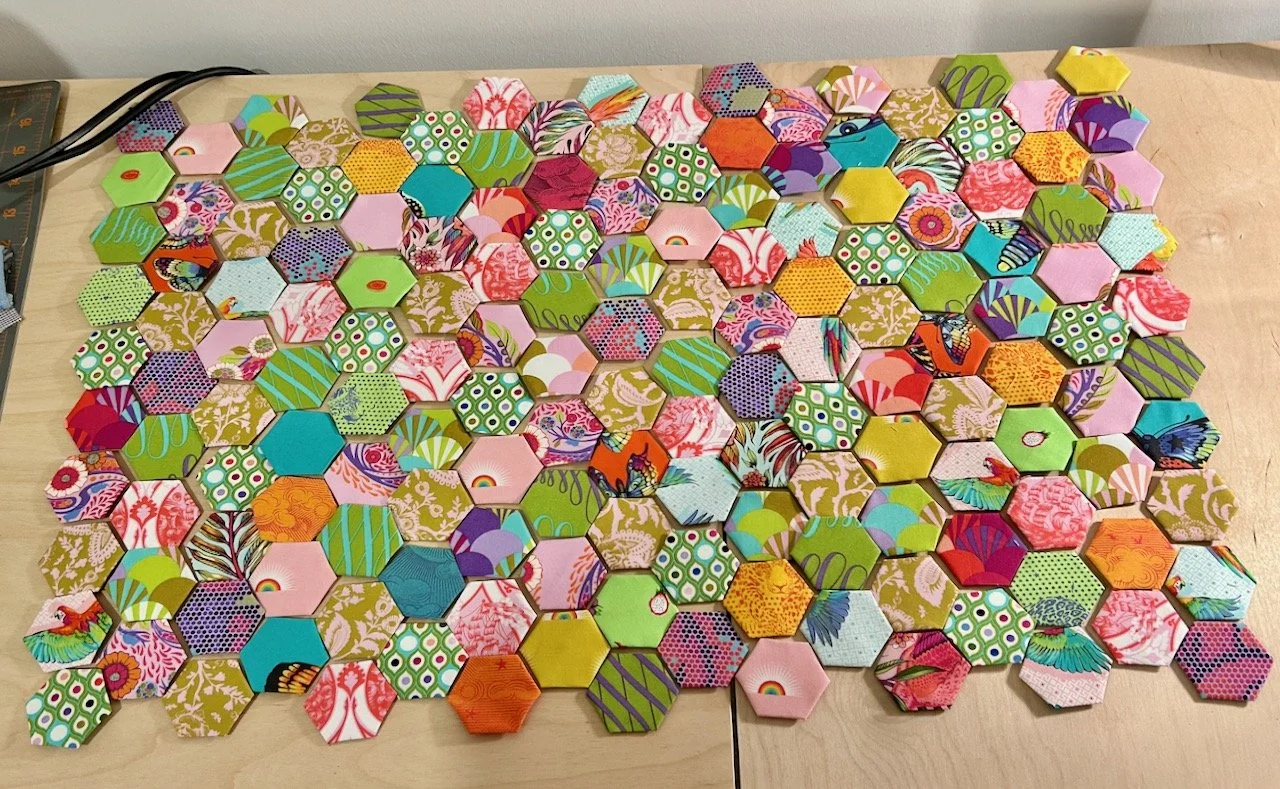
But gradually the individual hexagons were attached into rows, and the rows sewn together in order to create the front of my mat. I decided to fill in the gaps on the top and the bottom, but to leave the smaller gaps on the sides.
And I settled on the backing fabric too. I wanted something equally colourful, but something that would come together much more quickly, and nor did it need to be quite so labour intensive.
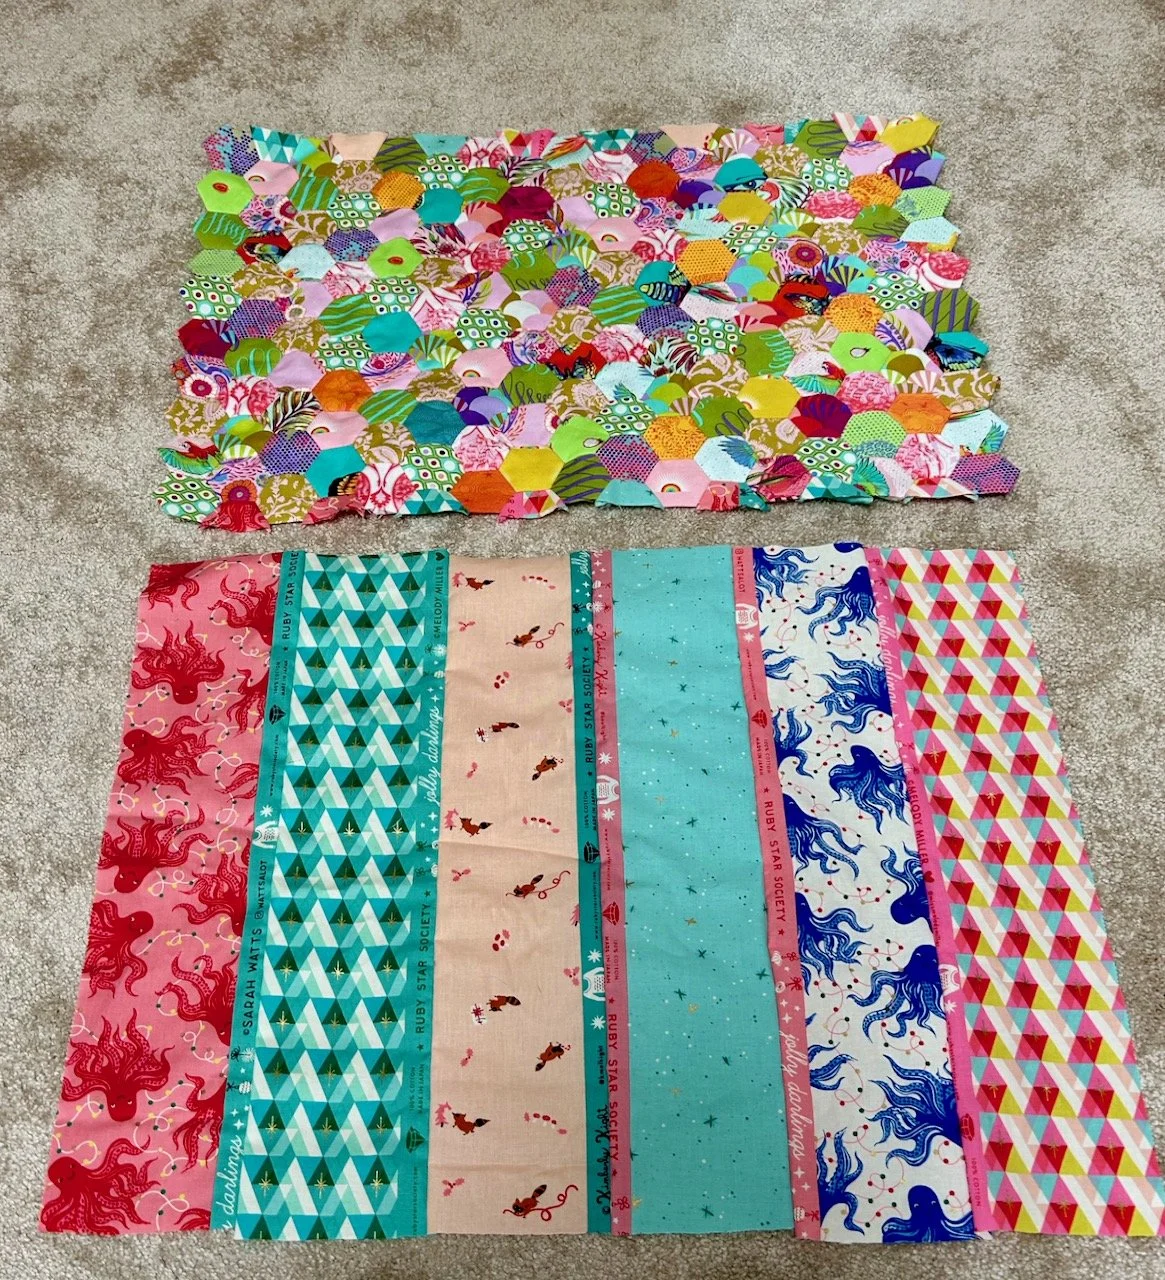
In the end I settled on some of the less Christmassy fabrics that I’d picked up at the Newark Quilt Show at the start of the year. All of the fabrics were part of a ‘grab bag’ and a lucky dip. Part of their attraction for me was their selvedges, so I was keen to keep these on show.
I’d slightly misjudged the size making it longer than it needed to be, but not as wide - so with my organic plan and solutions brain mode, I added part of what I’d cut off the bottom onto the side - which you can see on the left above - and that makes me smile.
Hand quilting the front
With the back complete - sewn together, and machine quilted - I could no longer procrastinate about how to finish off the front. At one local sewing group evening one of the ladies asked me if I was going to hand quilt my piece - I laughingly said no, I’m not a glutton for punishment.
However, it turned out that I am - as it needed some kind of quilting, and I thought machine quilting this side would lose some of its charm. I started out with a plan to chain stitch individual hexies to form an oblong shape, and I completed the inner oblong. But realistically, it took way longer than I wanted it to take and it didn’t look as good as I thought it would. I wasn’t unpicking it though.
So instead I changed tack, and added a small running stitch around the remaining hexies using the same embroidery thread.
Adding the binding and elastic
As I neared the end of the hand quilting I was thinking of how to finish this project - by chance I saw a haberdashery company online showcasing their widest bias bindings, and I was hooked. I did a rough calculation of how much I’d need, then added a bit more for good measure and waited for it to arrive.
I hadn’t thought about thread, but thought I’d probably have something. Turned out that I did, and in exactly the same colour - what are the chances? I’d picked up a bag of part-used overlocker threads in a recent WI sale in Newark - attracted by some of the colours, thinking I’d use them at some point without knowing that would be quite soon!

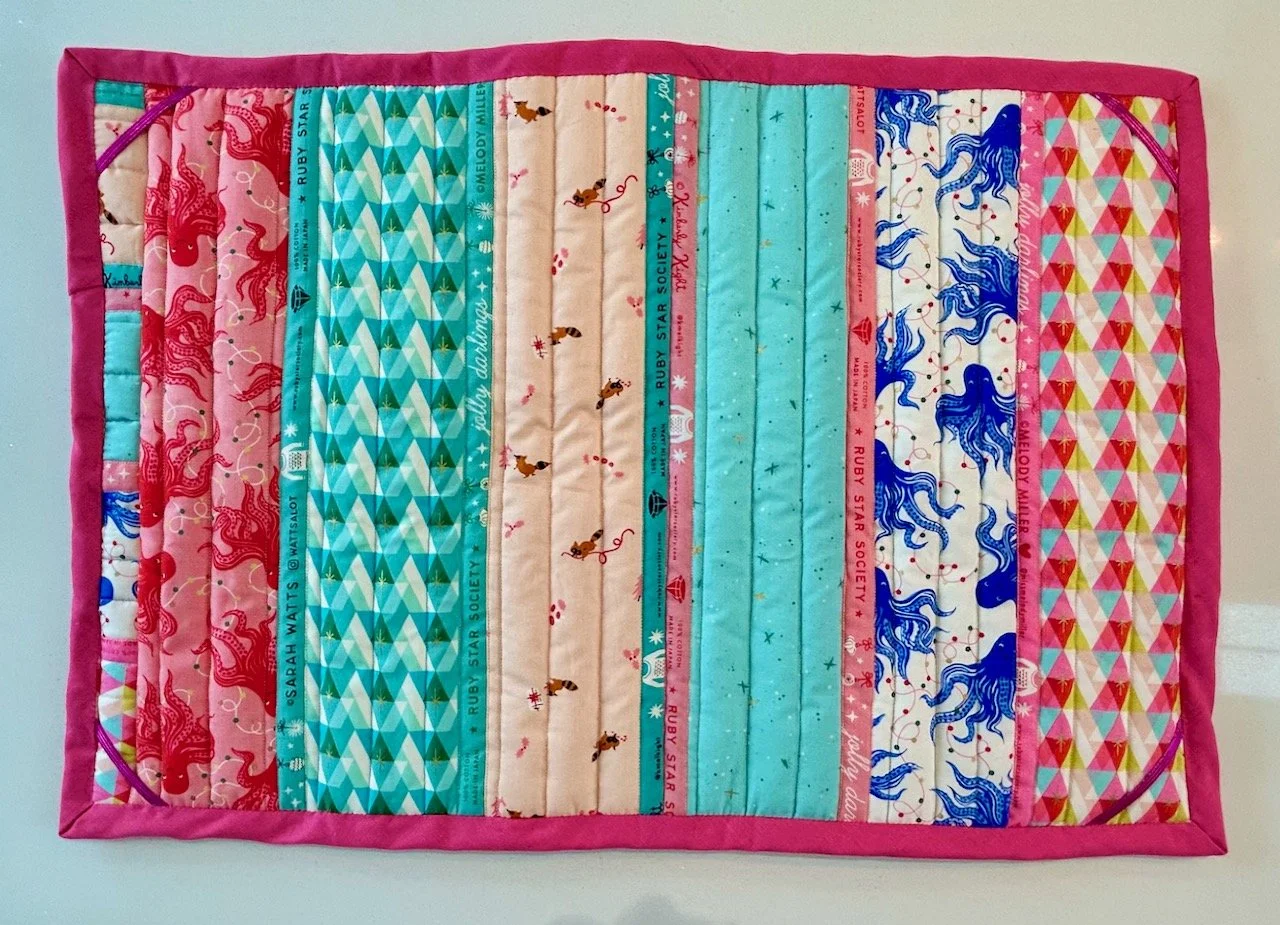
By now both the back and front were pinned together and so I pinned and re-pinned the binding to the front of my mat, mitring the corners as neatly as I could, adding extra pins to keep them in place before I slowly (at times) whizzed round with a couple of rounds of machine stitching.
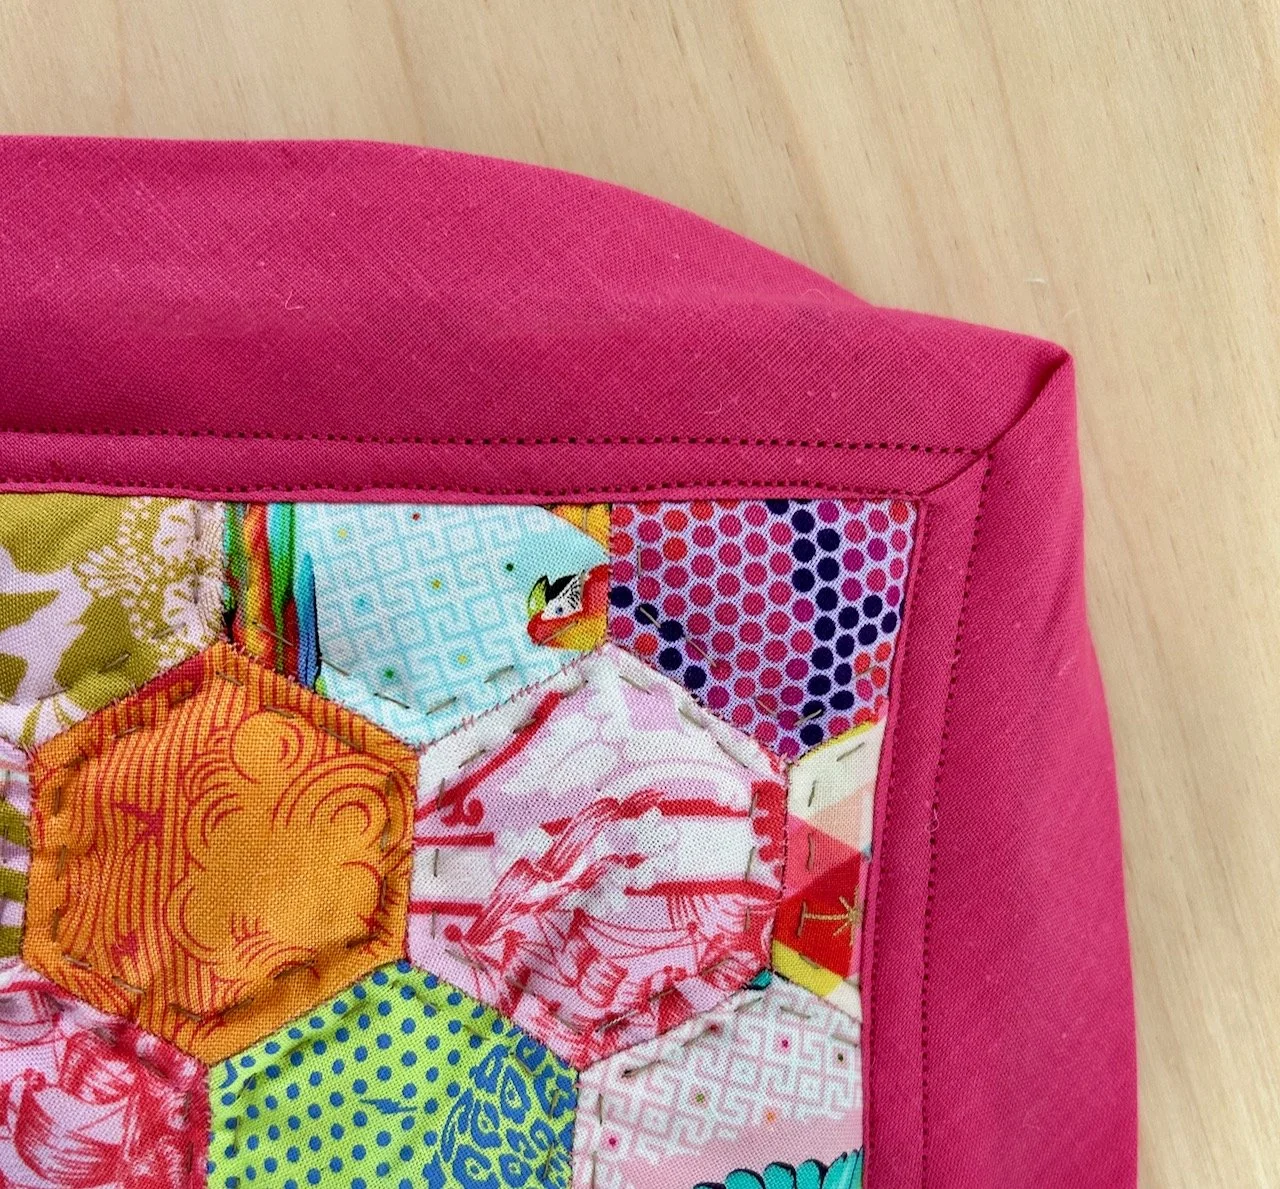
With a stroke of luck the mitred corners behaved and stayed in place on both the front and the back. For the back I added some glitzy pink elastic (left over from mask making during the pandemic) across the corners and then pinned the back in place before slip stitching it and completing my mat. The elastic means I can slip the corners of the old and worn out cutting mat through these and get the benefit of its solidity, but the prettiness of my new mat. Not something I originally planned for, but a useful addition.
Definitely a project to take on the go
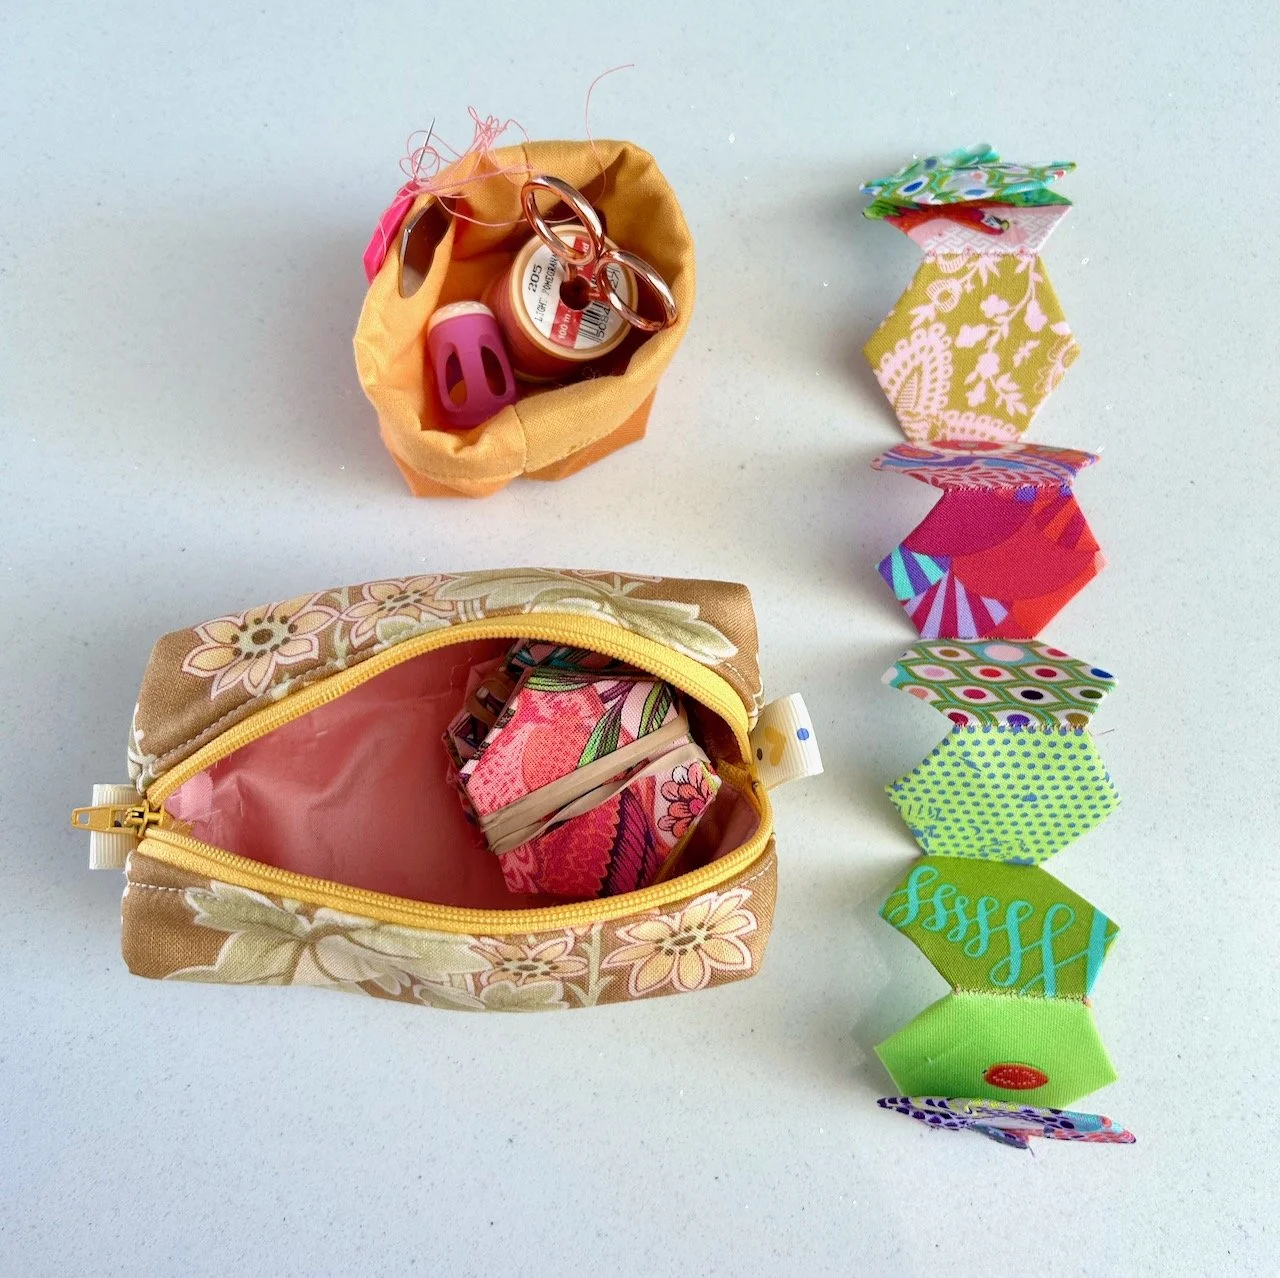
For now my English Paper Piecing (EPP) projects have come to an end, but it’s something I’ve really enjoyed - and it’s something that is easily portable. The mini oblong pouch below - which is no more than 15cm long - carried everything I needed easily, that includes needle and thread, small scissors, a thimble, a thread catcher and approximately four rows of my hexi top. That’s where the row and positional numbering came in handy too - that’s definitely a top tip, write these on the back of the cardboard - mine took the format 6.1, 6.2 etc for row 6 position 1, position 2 and so on. Absolutely invaluable, unless of course you are creating a truly random design.
So my new sewing mat looks good, is functional and is in place in my craft room. Now I need a day to paint my sewing box charcoal - I have the paint already. I need a day that’s not too hot, not too cold and one where I haven’t already committed to other things! Then I’ll share the other half of my EPP Tula Pink creation - don’t hold your breath!!
