Open Studios and some new cards

I spotted that this weekend some artists in a village close to us were holding an Open Studios weekend, and so waking to mist and rain on Saturday we headed over to see what there was to see.

The event in Long Bennington was split over two properties and our first stop was at the home of Roger and Carole Lee, both retired artists; him a sculptor and her a fashion designer, but both collectors. As we stepped into their home both MOH and I were wowed, it was full of the most amazing items - and by full, I mean full, though later when talking to Carole it was clear that she was still collecting and so there would be plenty more space for what’s to come.

Both the lives of Carole and her husband were (and are) fascinating, and I am sure they were both big players in the fashion scene in the sixties, making items full of awe for themselves and high profile clients, and with plenty of stories to tell. Carole showed some of the photos, and some of her dresses were on display among the many items - it was a truly wonderful place, and they have featured in Channel 4’s Millionaire Hoarders programme (still currently available), which is definitely worth a watch.

It was great to meet them and to hear the stories from their lives, and to get a glimpse into their wondrous home. We also met local artist Vanessa Stone who was displaying some of her work in the conservatory.

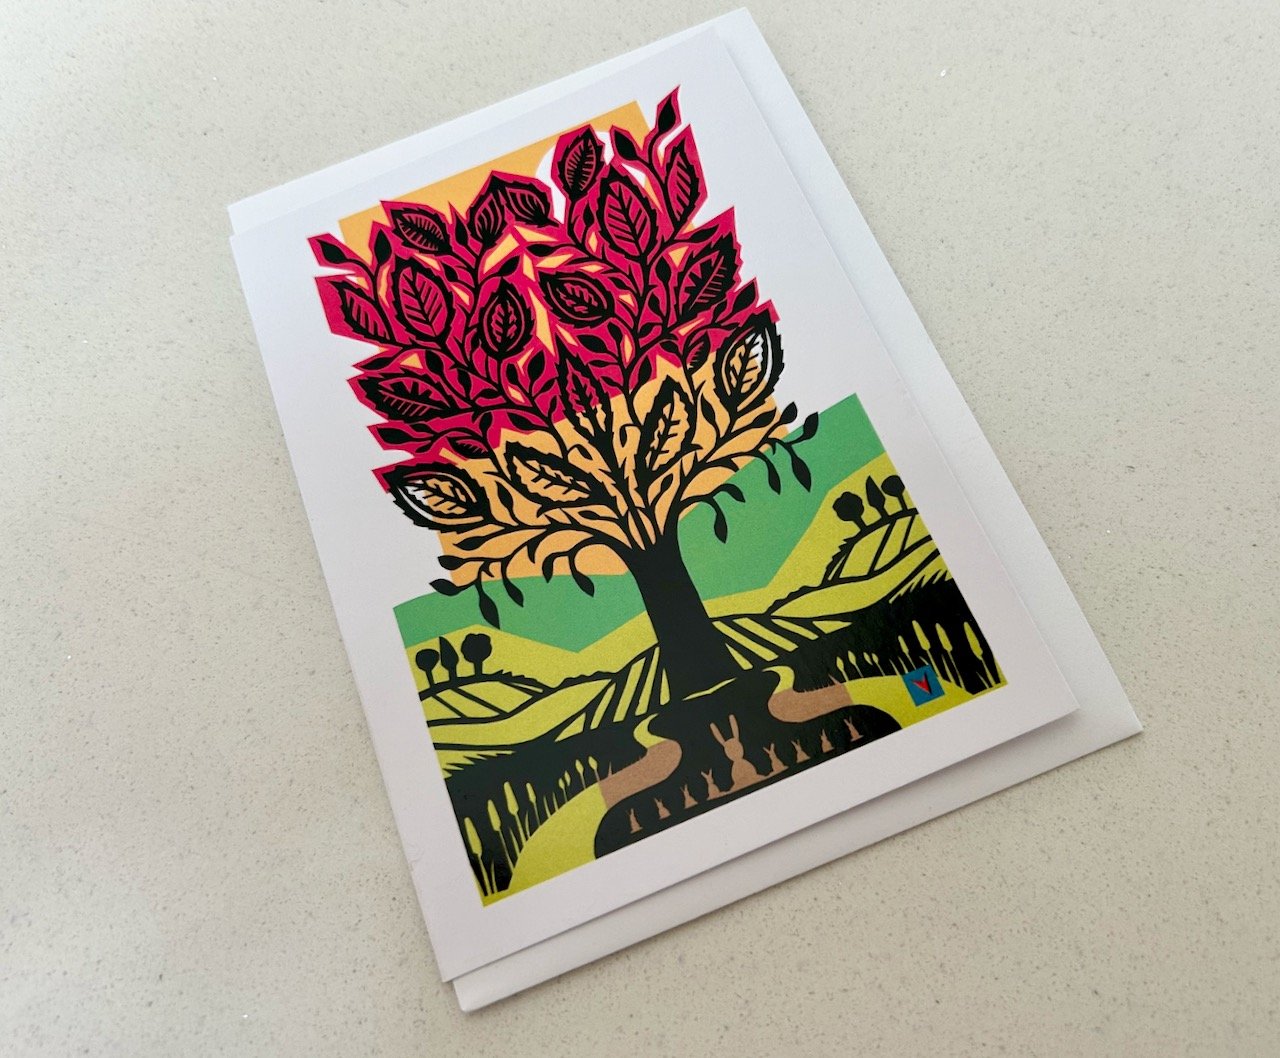
My eye was immediately drawn to the cards, and well it was a done deal really, I was always going to leave with some wasn’t I, because you never know when you’re going to need the right card, do you?

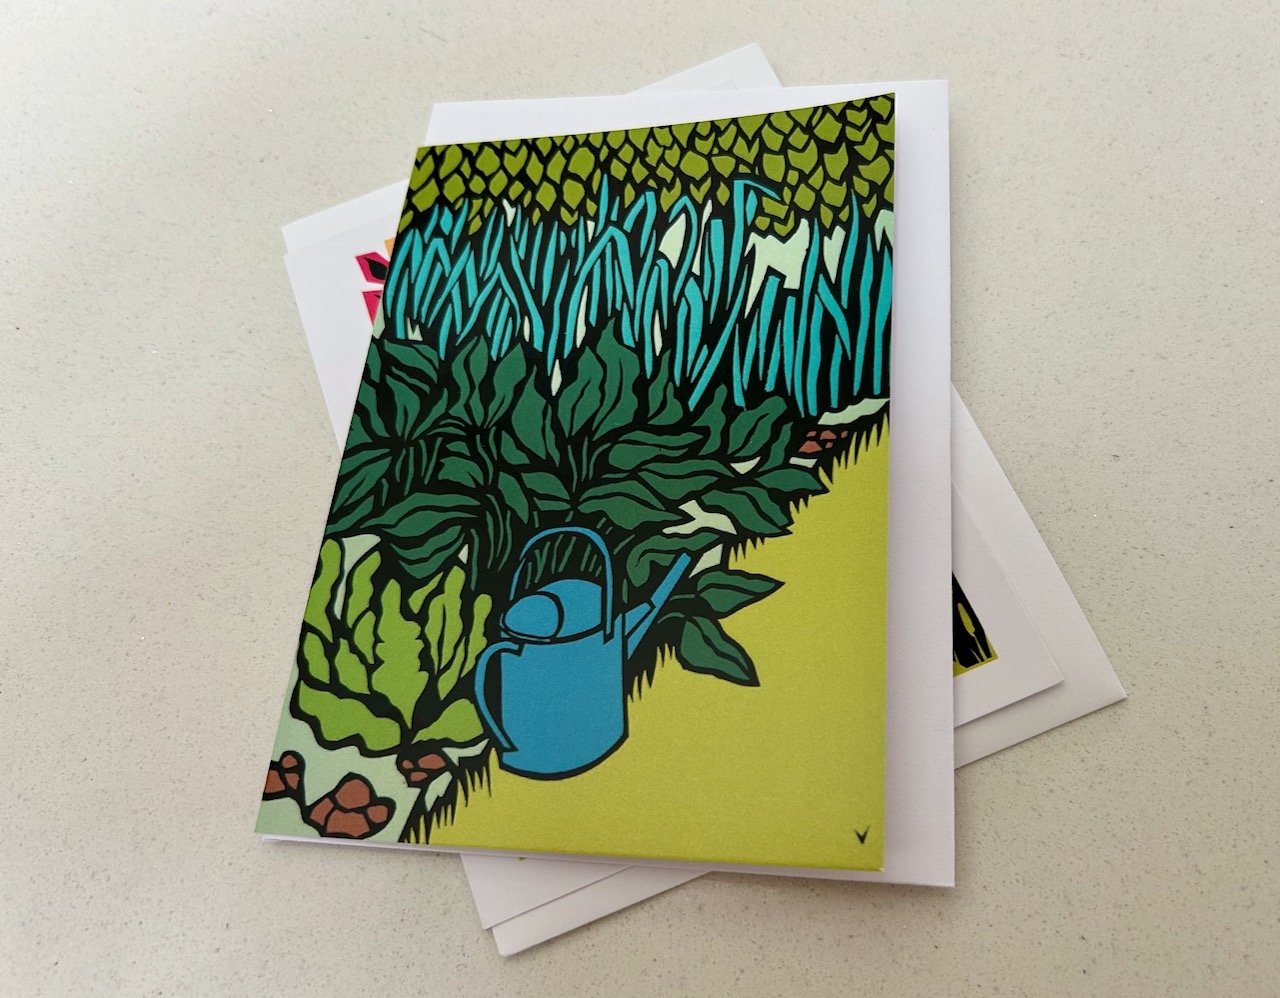
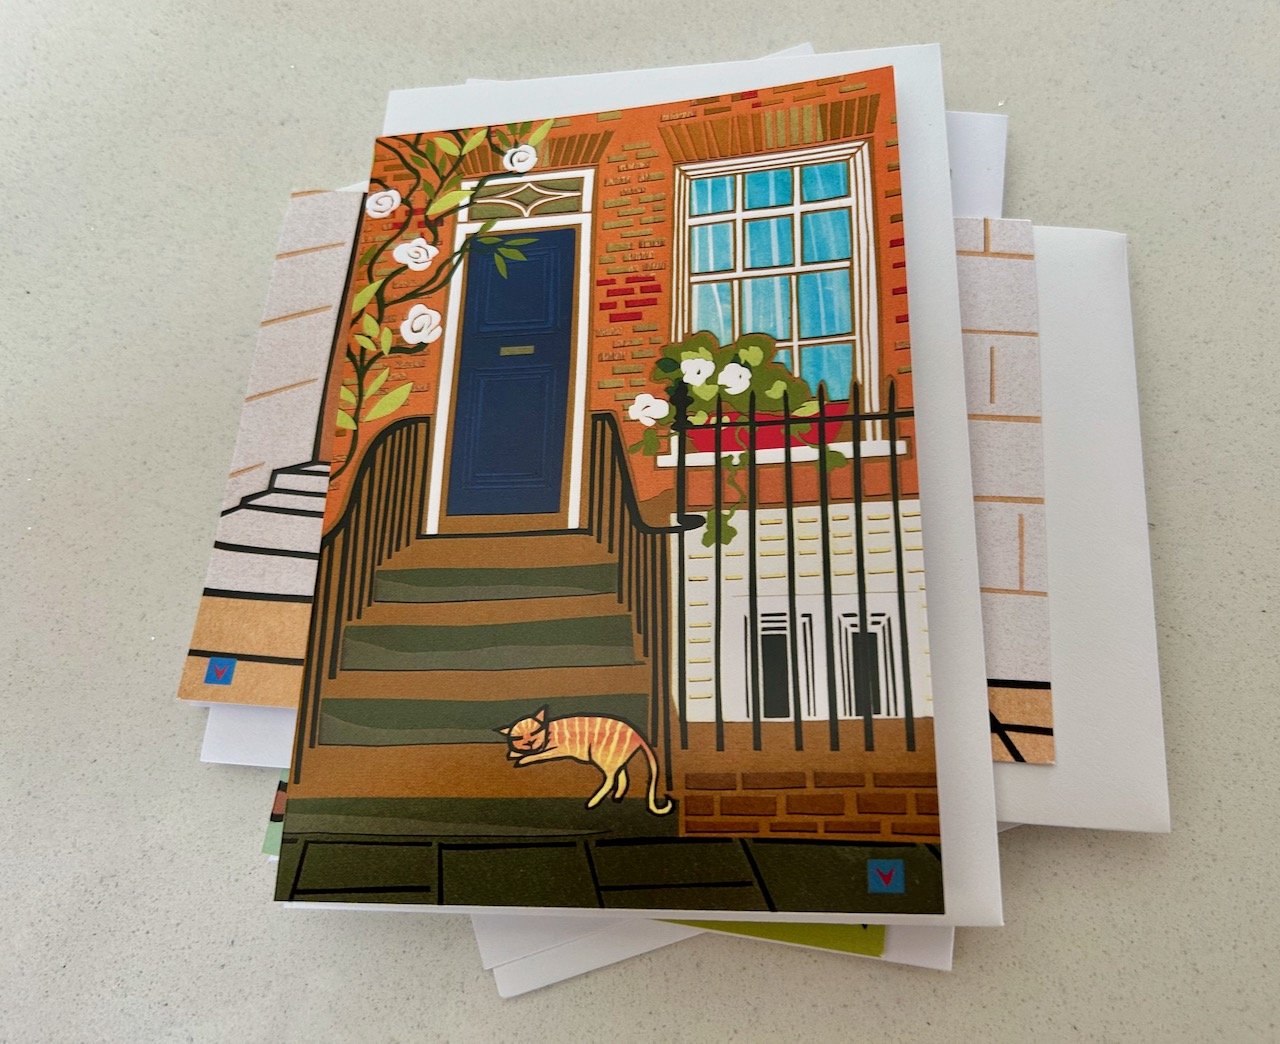
Five cards by Vanessa Stone

It was great to meet with Vanessa too, her art is “all about capturing a time and a place” which she does by making ‘richly colourful cut paper collages and had printed textiles’ of the English landscape, nature and architecture in her local surroundings. She layers paper and cuts them to reveal her design, and to me they have a wholesome and everyday feel to them which is fantastic.

THE BRAMBLE TREE

THE VEGETABLE PATCH AND THE WATERING CAN

BICYCLE AND THE BASKET AND THE FLOWER

THE MARMALADE CAT ON THE DOORSTEP

THE GOLDEN WHEATFIELDS

Aren’t they great?

Each one has detailing that I love, and I’ve a feeling that I may not be parting with the bike one anytime soon!

Our next stop was at the second of the two Open Studios, and I’ll share more of our visit there in my next post.

Repurposing a cycling top

Over the winter MOH spent some time creating a workout space in the garage, as let’s face it not many of us put our cars in there these days and there’s no longer a gym or such like on our doorstep. There’s still space for all our junk (though there’s getting less and less of that as we continue to sort through our moving boxes), the usual paraphernalia and my greenhouse station, so all’s good.

We’ve spent the summer using the space and it’s been really good to have - I already know we’ll appreciate it even more in the winter months - but it is kind of, well functional. There’s some finishing touches that I want to add and I’m hoping to get to more of those soon.

We’ve also finally had our large inbuilt wardrobes kitted out so we can make the most of the space we have (more on those another day!) and so we’ve been sorting through our clothes; some have headed to the charity shop and others are for sale on eBay and Vinted (with many more to list!) and some I’ve kept to reuse. One of MOH’s first cycling tops was in the reuse pile, along with one of his now holey Superdry t-shirts.

In our workout space we knew that storage was going to be key, and we’ve hooks of all shapes and sizes to add to the walls (when we decide where things need to go) but sometimes you just want to shove stuff out of sight don’t you? And away from the spiders (or as much as we can, anyway).

And so the idea for a drawstring bag was born.

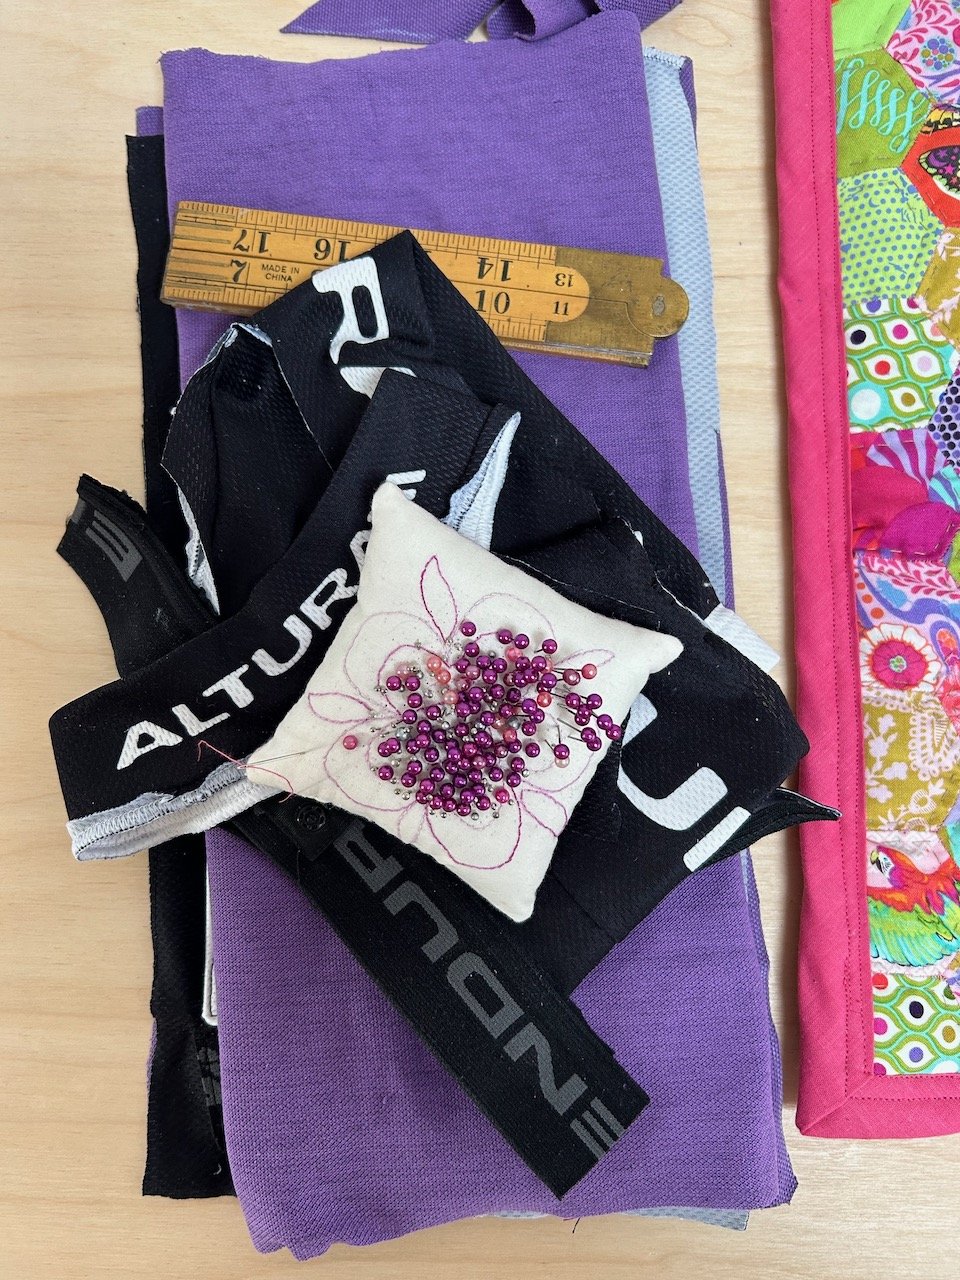
A pile of fabrics from a cycling top, and old t-shirt and elastic from the top of some old cycling shorts ready to be repurposed

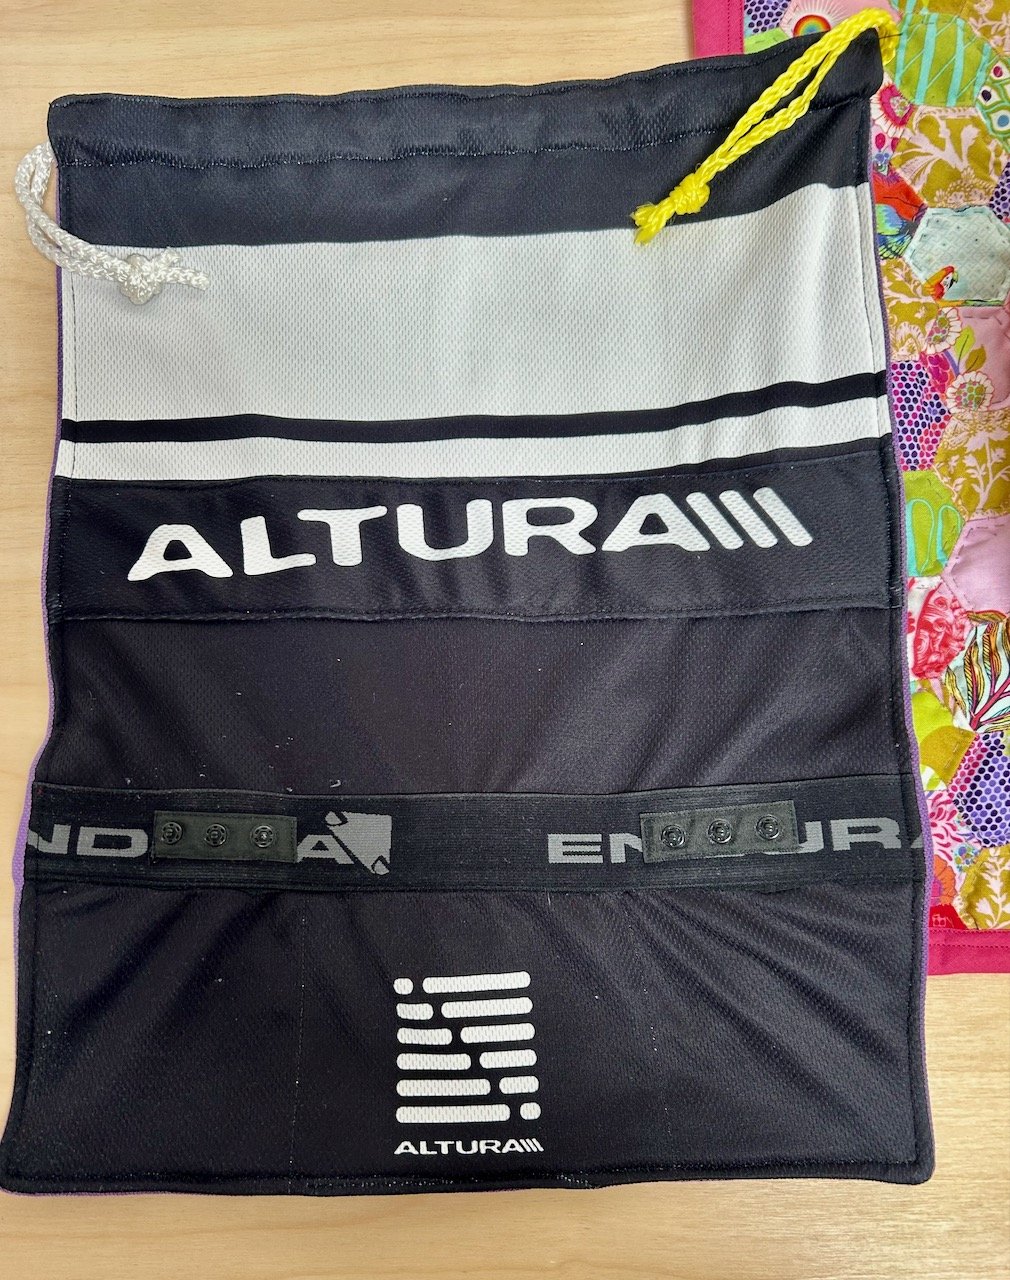
Having looked for an easy tutorial on YouTube I set about creating the front and backs using the purple t-shirt as lining. I wanted to keep the cycling top details, so cut off the Altura logos from the parts I wasn’t using and supplemented these with the elastic waistband of some cycling shorts which were heading for the bin.

Rather than start by sewing the bag together, my first job was to piece the logos and elastic to add detail to the front and back of the bag, which I’d used the main body of the cycling top for. It was only then that I could actually make the bag, and it turned out pretty well.

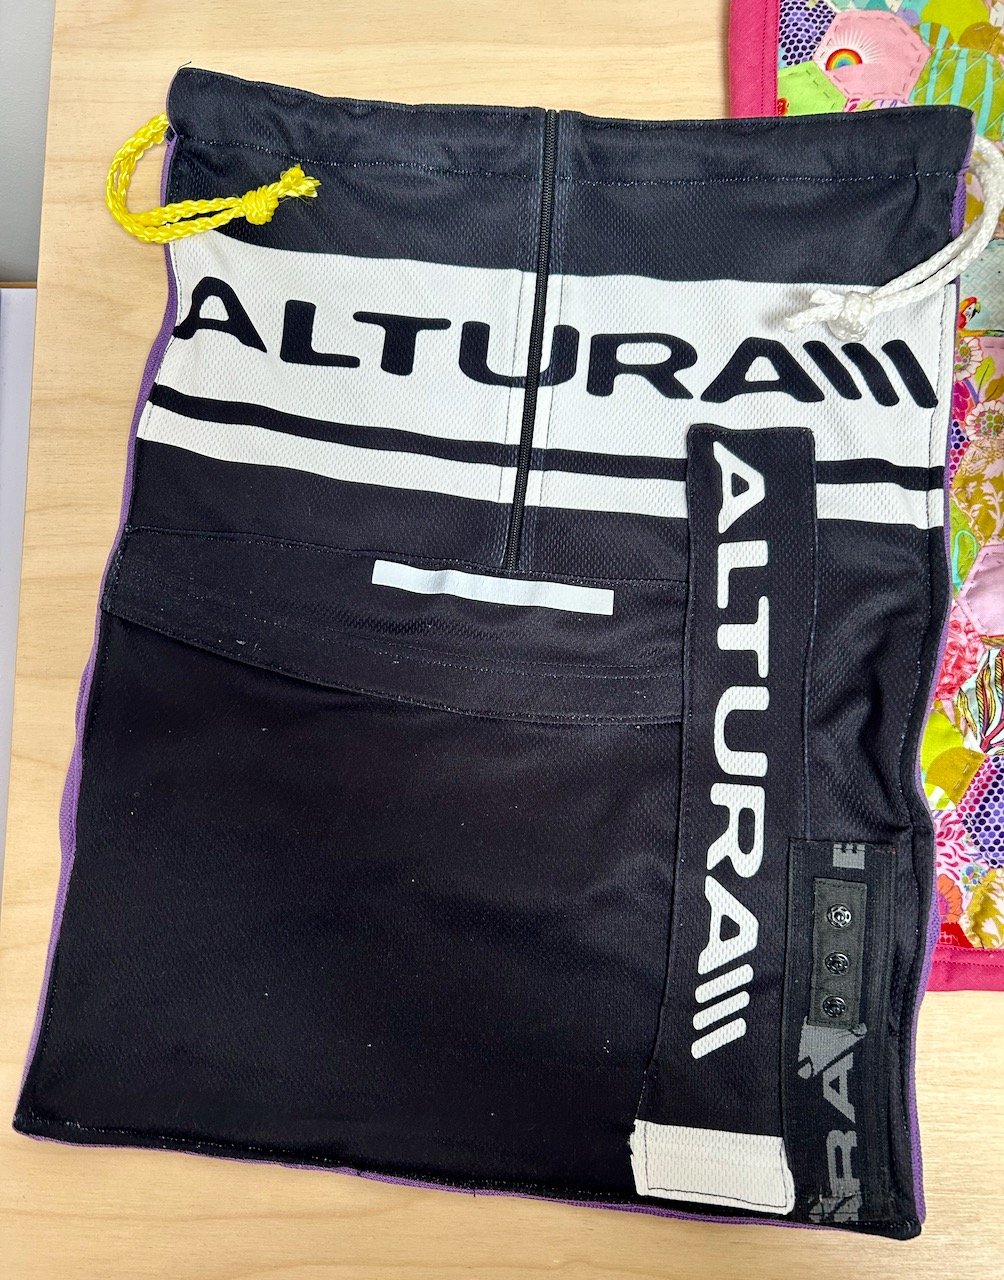
The front of the repurposed cycling top bag, complete with additional logos and reflective strips

THE FRONT, COMPLETE WITH THE CYCLING TOP ZIP IN ITS ORIGINAL PLACE

I kept it simple and kept the zip from the front of the cycling top, though at one point my sewing machine grumbled about that. The front has an additional logo (at right angles) and some of the elastic with poppers on the front, as well as the curved lower edge of the back, complete with the reflective strip.

The back, which is the back of the cycling top has another logo added across the back, and thinking ahead to spider-proof this (you can never be too careful) on this side the waist of the cycling shorts was used to seal the pockets.

THE BACK OF THE BAG USES THE BACK OF THE CYCLING TOP WITH ADDITIONAL LOGOS ADDED AND ELASTIC TRIM SEALING THE POCKETS

AND THE BACK, THE THREE REAR POCKETS HAVE BEEN SEALED WITH THE ELASTIC TRIM

The yellow and white cord I’d kept from carrier bags - you know the duffle bag type - which were no longer used (and in fact had already been recycled long before we moved).

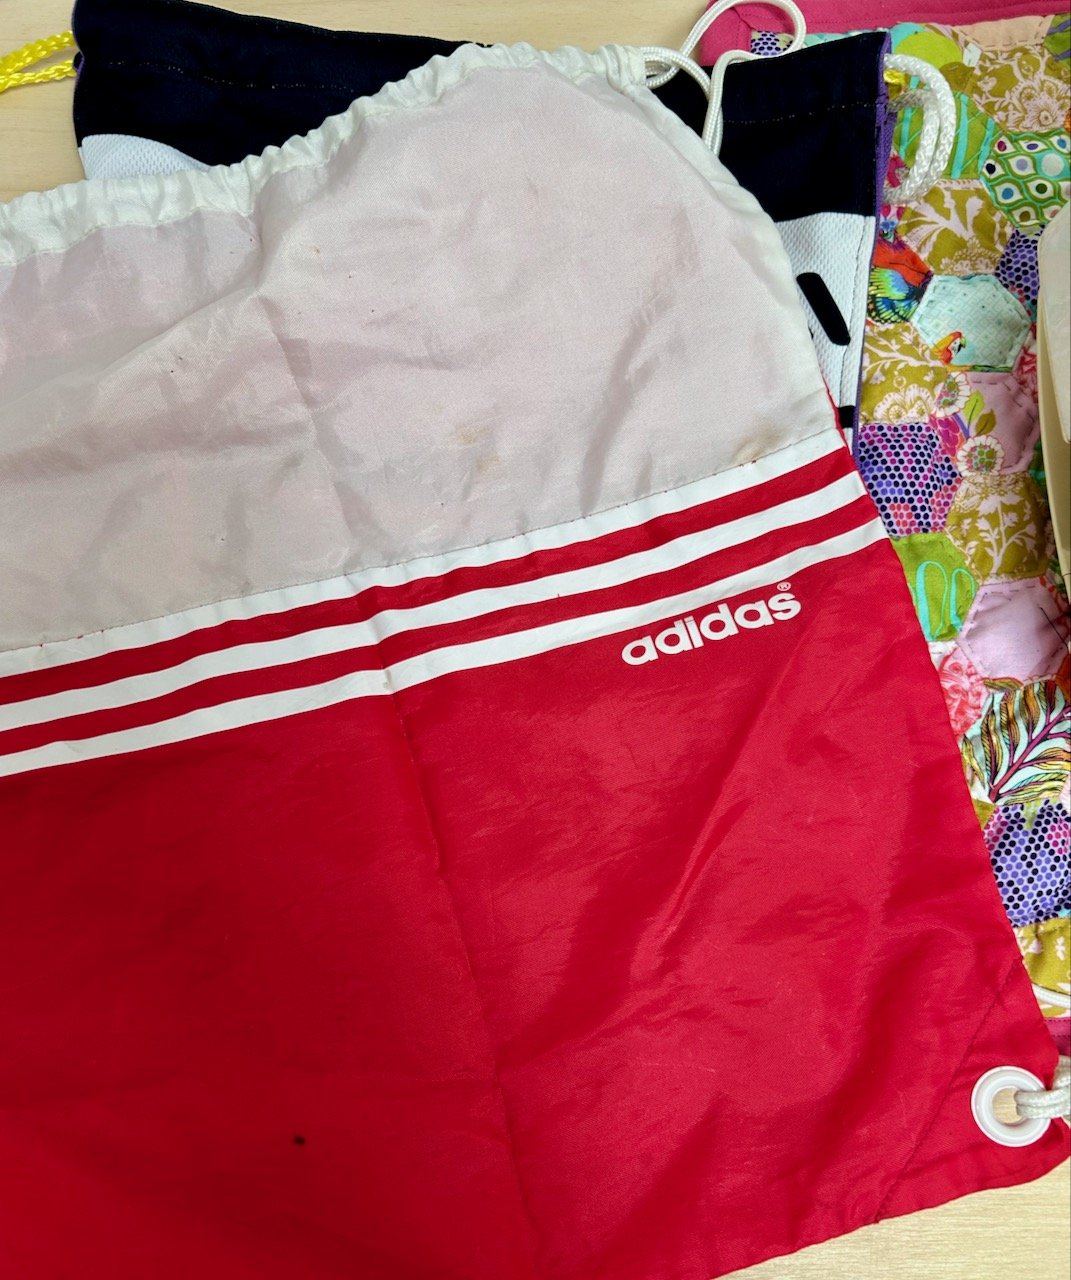
I’d planned to make myself a bag along the same lines, but was undecided about which of my netball kits to use. In the end I found my Adidas gym bag which I used to take to netball matches - I know this because it still had the eight safety pins pinned into in for pinning on those velcro bibs to non-velcro-ed tops - something I’d completely forgotten about!

A pink and white adidas drawstring rucksack from my netballing days

So I’m reusing this one as a starting point, though I’ve a feeling that turning old sports kit into drawstring bags could become a bit of thing - and I’m not sad about that at all!

PostCommentLove

Dyeing my own yarn

And doesn’t that sound grand?

Well technically I did, and it was easier than I expected, but it was at a workshop I booked on, and so I had a fair bit of help and lots of guidance. To be honest dyeing wool isn’t something I was brave enough to try for the first time at home, and in reality I don’t think it’ll be something I’ll do at home in the future either, but it was great to try it out and to get a greater understanding of the process. Clearly dyeing one or two skeins, is way easier and much less effort than doing anything even remotely ‘in bulk’ and so my hat goes off to the small businesses where dyeing wool is their thing, they are truly amazing.

I’d seen on Instagram stories that the wool shop in Nottingham where holding workshops, and had one coming up that piqued my interest, and so that’s how I came to dye my own yarn. I spent a couple of hours in their workshop room chatting to the shop’s new owner, while MOH ran a few errands and enjoyed a solo coffee.

Unusually for me I actually had a plan for what I wanted to do with my newly dyed yarn; I’d seen a short sleeved jumper in a knitting magazine a week or so before which had caught my eye. It’s knitted in the round and it has a decorative slip stitch pattern with a multicoloured yarn - I think there’s was named hydrangea and the main colour of the jumper was a delicate pastel green. But as I’m never one for following the colours in patterns, that didn’t faze me, nor did attempting anything in the round.

I have another knitting project on the go, which has been put aside for the summer, so the actual knitting part shouldn’t cause me any issues either. Before I learnt to crochet, I was a knitter - and I’ve knitted many complex patterns in the past, though sadly I have none of these picture jumpers today. Oh how I wish I did!

But anyway, having a plan made a lot of sense as there were a lot of colours to choose from. I decided to go with colours I wear frequently - so pinks, greens, yellows and oranges, though I skipped the orange at the final moment.

The workshop included three 20g skeins and one 100g skeins, so I opted for the multi-coloured versions of the smaller skeins and a plainer - but not completely plain/solid colour - for the larger skein.

Two smaller skeins with pink and green dyes applied

The smaller skeins were up first and they’d been soaking in a water and white vinegar solution to prepare them for taking up the dye, so placed on clingfilm and armed with my squeezy ‘ketchup’ bottles of dye I dabbed and dotted colour randomly along their lengths. I used four colours on the natural coloured yarn, two pinks and two greens.

Happy with the dye I dabbed and squirted on, the clingfilm was wrapped up and my skeins were off to the microwave to cook, and set the dye - who knew - while I set about putting a lot of mustard dye on the larger skein.

the same skeins, but almost dry
the larger, and plainer, mustard skein - almost dry

While I wanted it plainer, I didn’t want the mustard skein to be a uniform colour - that seemed a big ask for a first time dyer to be honest, and so I’m pleased with the variations that came out, and even the small area which has an element of darker green.

I think if anyone really wants a very precise colour, then it’s likely that this process isn’t for them and they should stick to large manufactured wool where they aim to deliver a standard colour for each and every ball of wool.

Final drying took place with the skeins hung over the clothes horse in our plant room

The skeins were wound and tied when they were mostly dry, but they needed to finish drying at home. I set them up over the clothes horse in our plant room, which is a lovely warm small room I use to dry my washing. It’s worth putting an old towel or some newspaper underneath as the water has to go somewhere, and gravity can take over.

And so I ended up with some pretty colourful skeins of yarn, and I’m more than happy with that.

My finished skeins - a multicoloured pink and green version and a plainer (but not solid colour) mustard

I realised though that I needed twice the amount of mustard yarn, I could have added an extra large skein to my workshop had I given it more thought in advance but I hadn’t, and in the back of my mind I was sure I had a mustard skein of yarn at home, which I probably should use before buying even more yarn…

Thing is though when I checked, it was the wrong colour mustard - a more brown pigment, still lovely but not a good match for this newer mustard. Then I saw another skein (yes I have a few) which was a better match for the mustard, but is more colourful than perhaps I’d like for this project.

My dyed skiens - multicoloured and mustard - alongside a third larger skein I already had

But the tone is right, and so now I’m convincing myself that I can use these together. I think I can, but as I’m not starting just yet I’ve a little while longer to muse over this.

I think the plan will be to start with the third skein (on the right above) and then switch to the plainer mustard, using the multi-coloured skeins as planned for the decorative pattern. Well, I think that’s the plan, for now anyway!

PostCommentLove