A rip too far...

Finding a good pair of jeans is a tricky business, I’m sure you know what I mean. But when you find a style that you like, and the fit is comfortable and also flattering it’s like gold dust. I found such a style relatively recently (Marks & Spencer, Harper Cigarette if you were wondering) and I bought a couple of pairs, liking them so much I went to buy some more and there were none to be seen. Panic. They have since come back on the site - at a new price (of course) - and I’ve purchased another pair which I’m equally happy with.

One of the original pairs I bought came complete with wear and tear, turn ups and a ripped knee. Over time the rip on the knee grew, not helped by my foot looking for shortcuts when putting them on. It grew too much for me, and so I decided to tackle it, and after a quick repair, I think it’s worked well - and I think I prefer the rip this way.

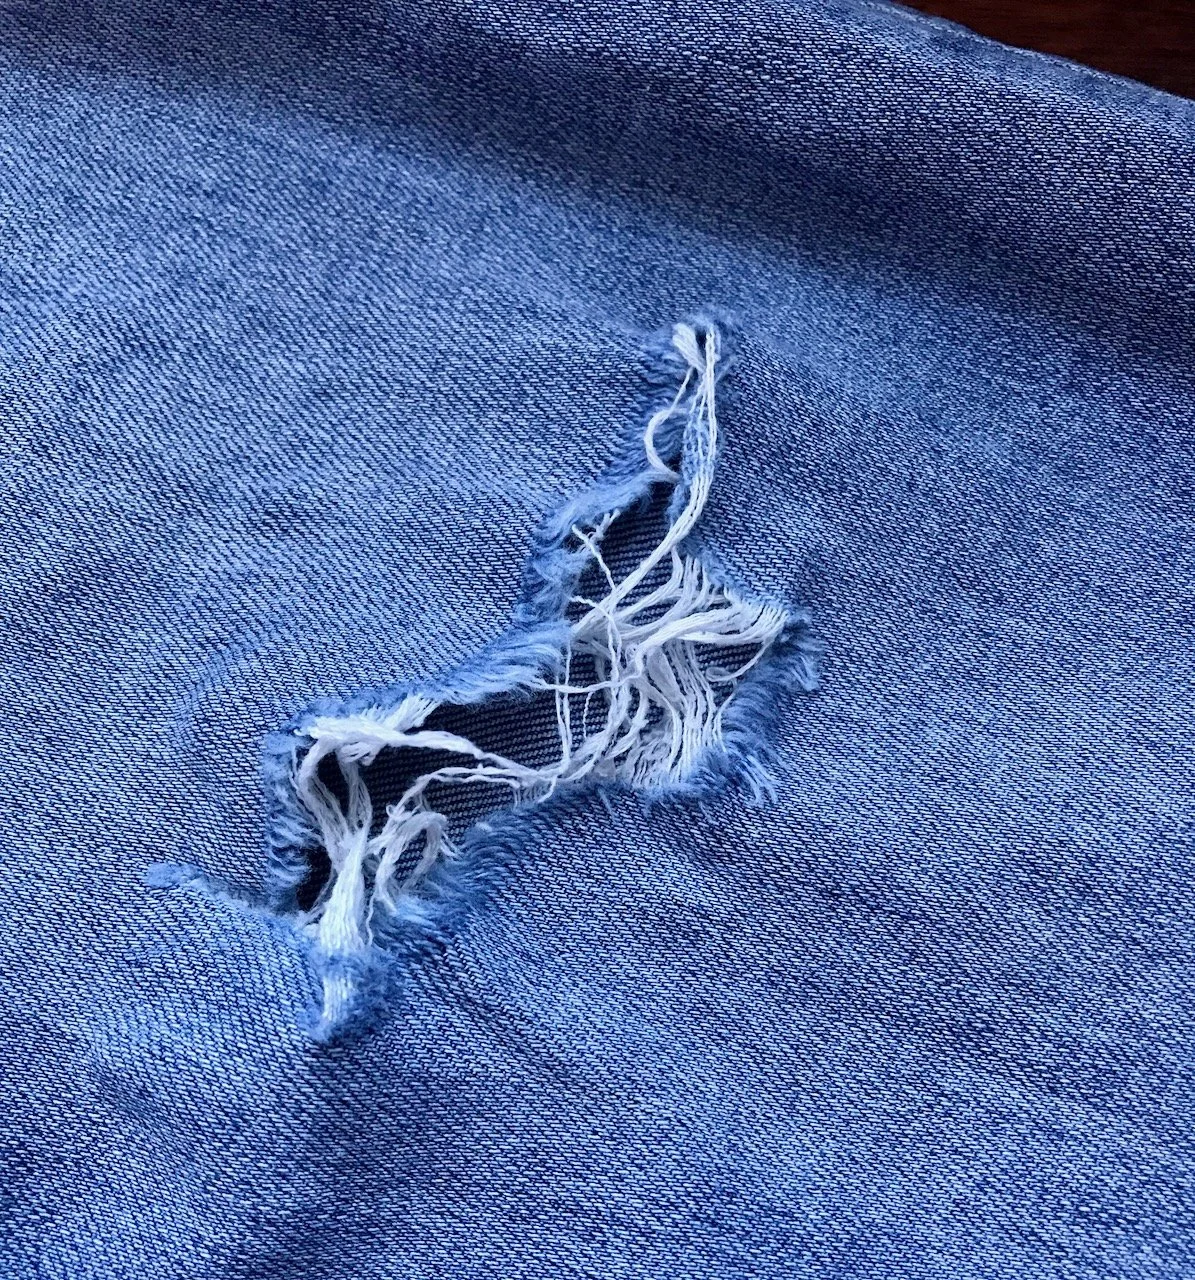
This is where I started from:

I bought a pack of iron-on denim patches - there’s patches for denim of every shade imaginable, and because I wanted to patch from the inside I chose the grey denim patch, as that’s the colour I’m least likely to own jeans in! I pinned that on the inside, remembering not to have the sticky side up, as sticking the patch to my iron wouldn’t be good at all.

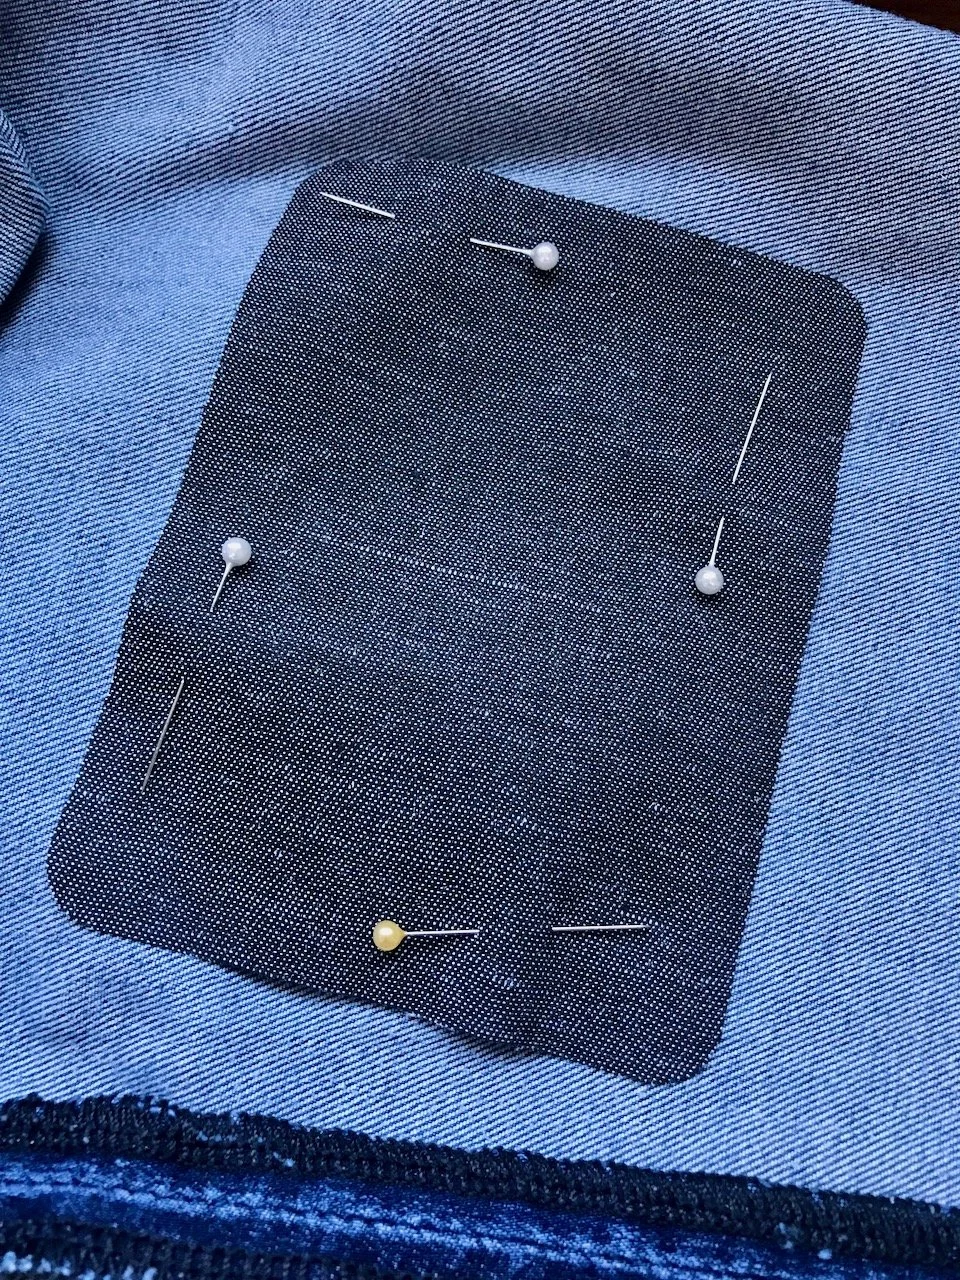
I realised that with the sticky side up and a hole on the other (right) side, that my newly patched jeans would quickly become a dust and fluff magnet. Also not a good look.

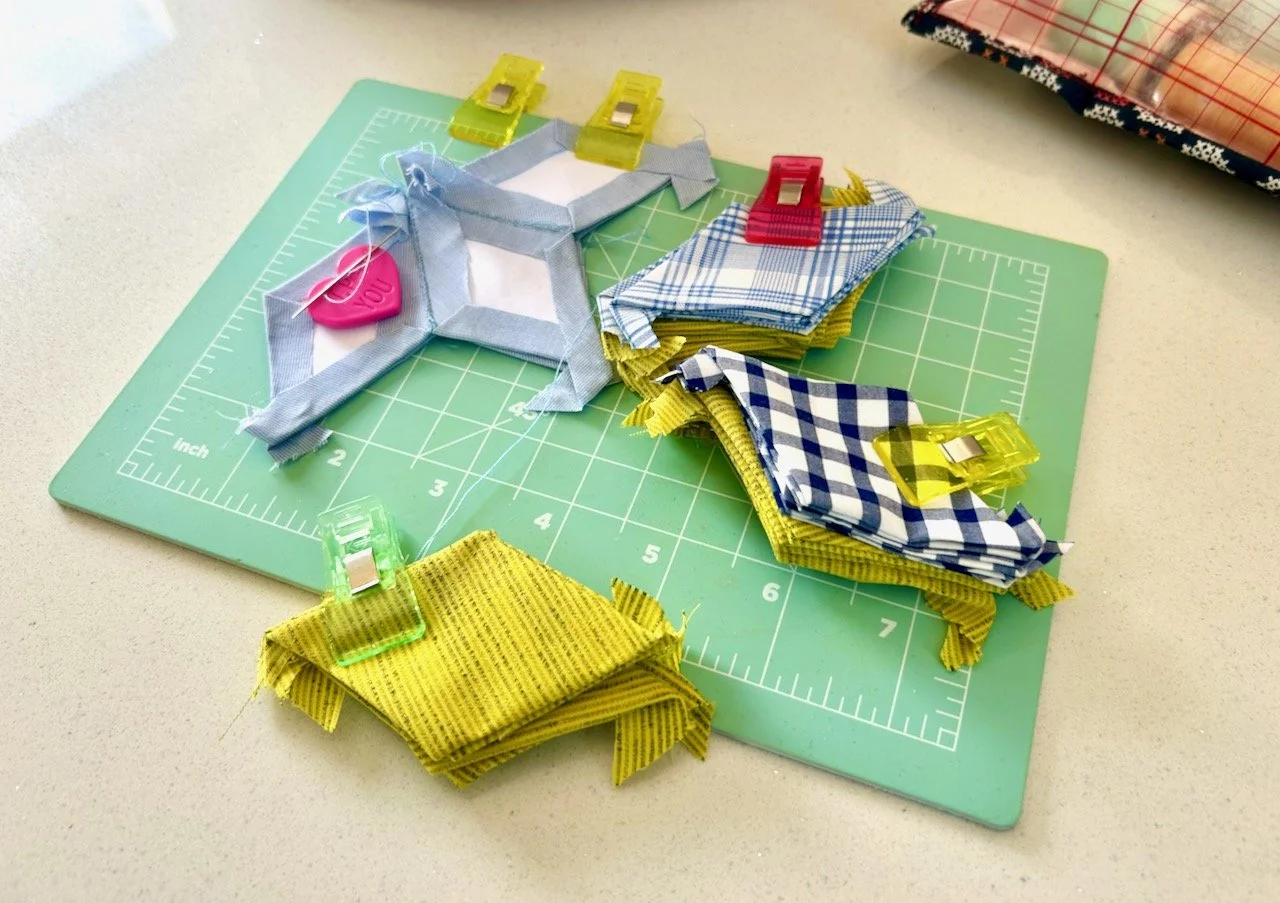
So I hunted through my stash for a small piece of fabric to insert into the hole and make use of the stick from the iron-on patch.

pretty and ditsy floral fabric inserted into the hole - viewing from the right side of the jeans

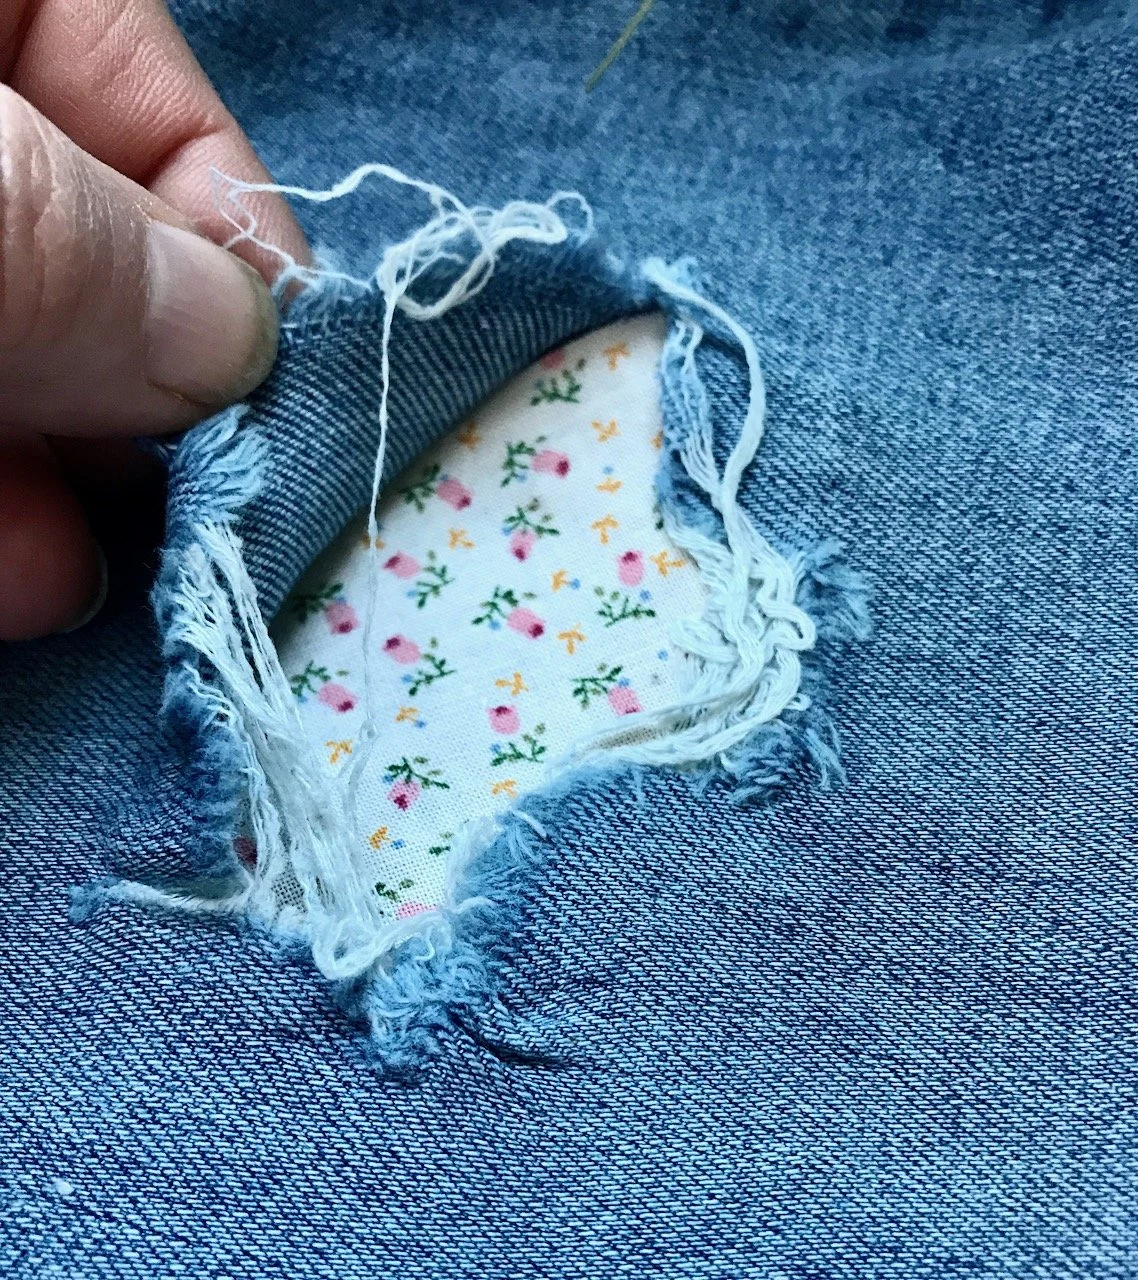
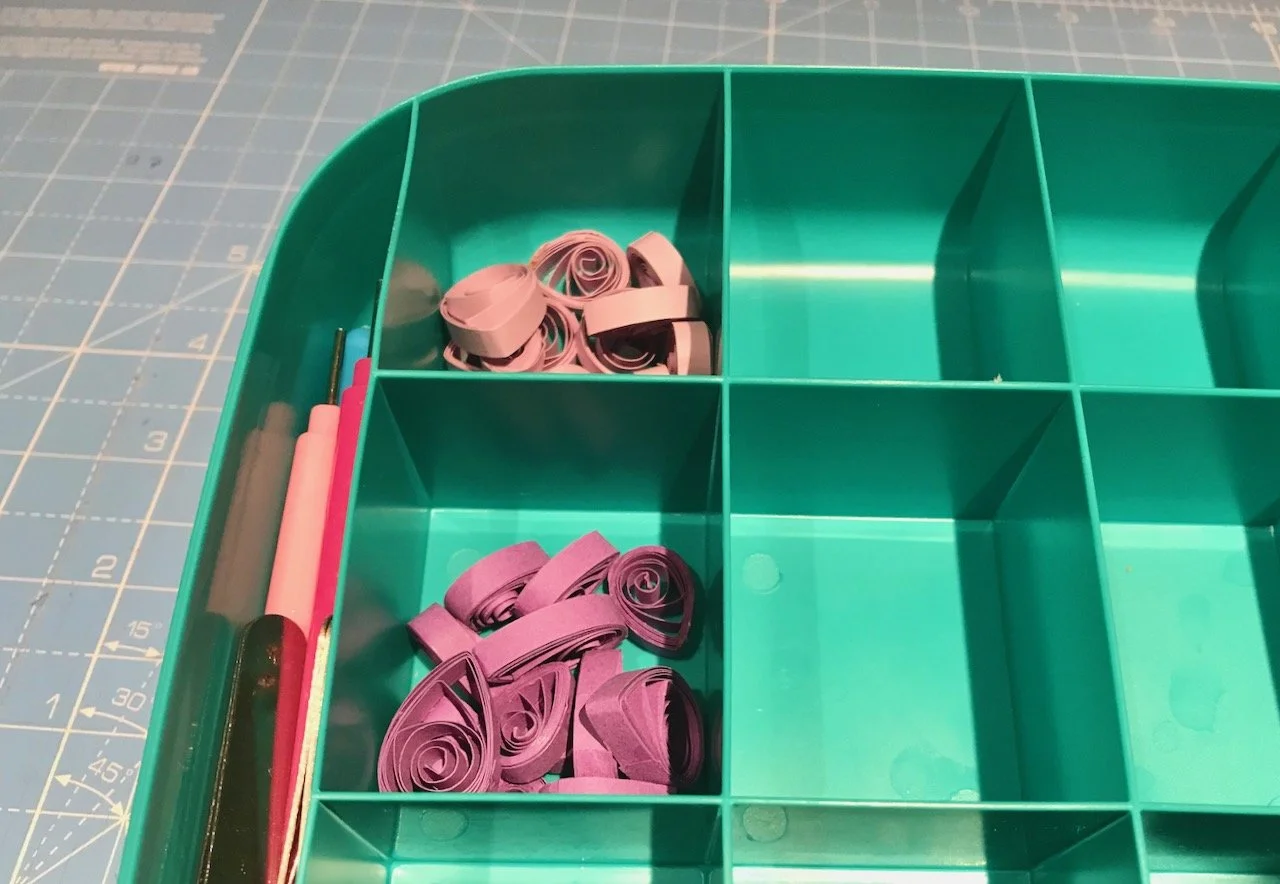
And while this fixed the fluff and dust magnet problem, it didn’t really solve everything. With the patch and material in place the hole wasn’t attached at its edges. And that’s when I had the idea to get out my box of random embroidery threads

A box of colourful embroidery threads alongside the patched jeans

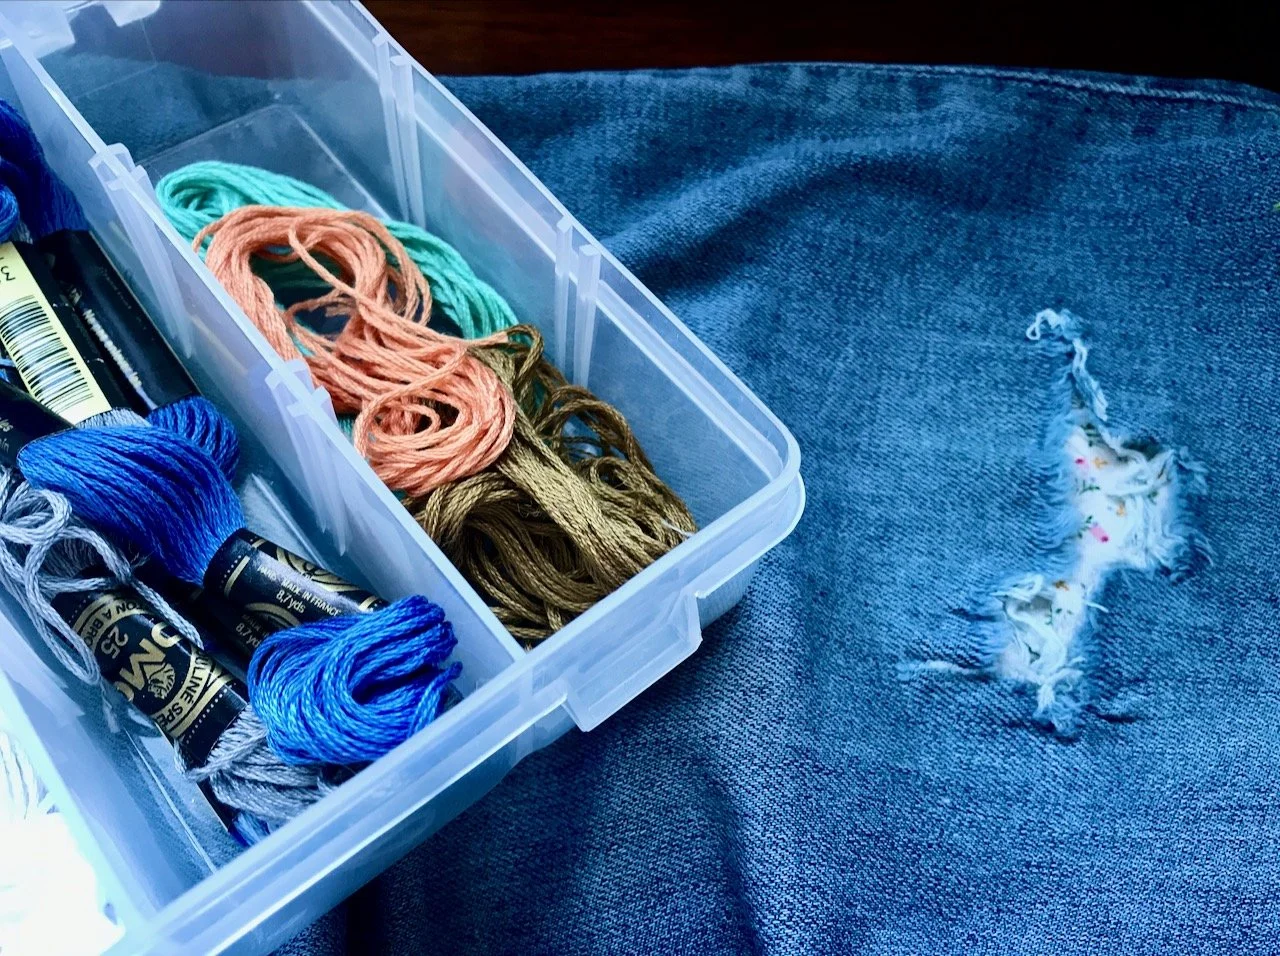
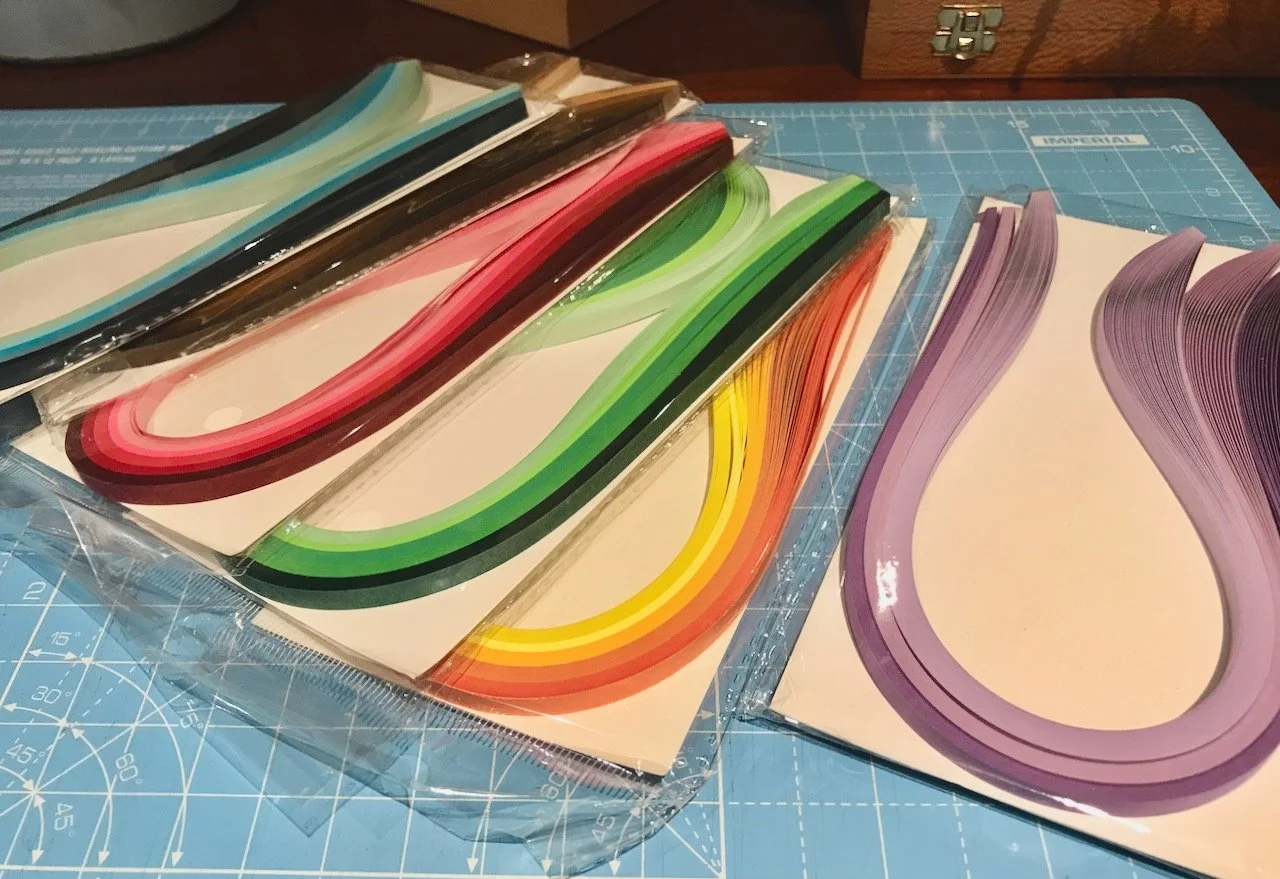
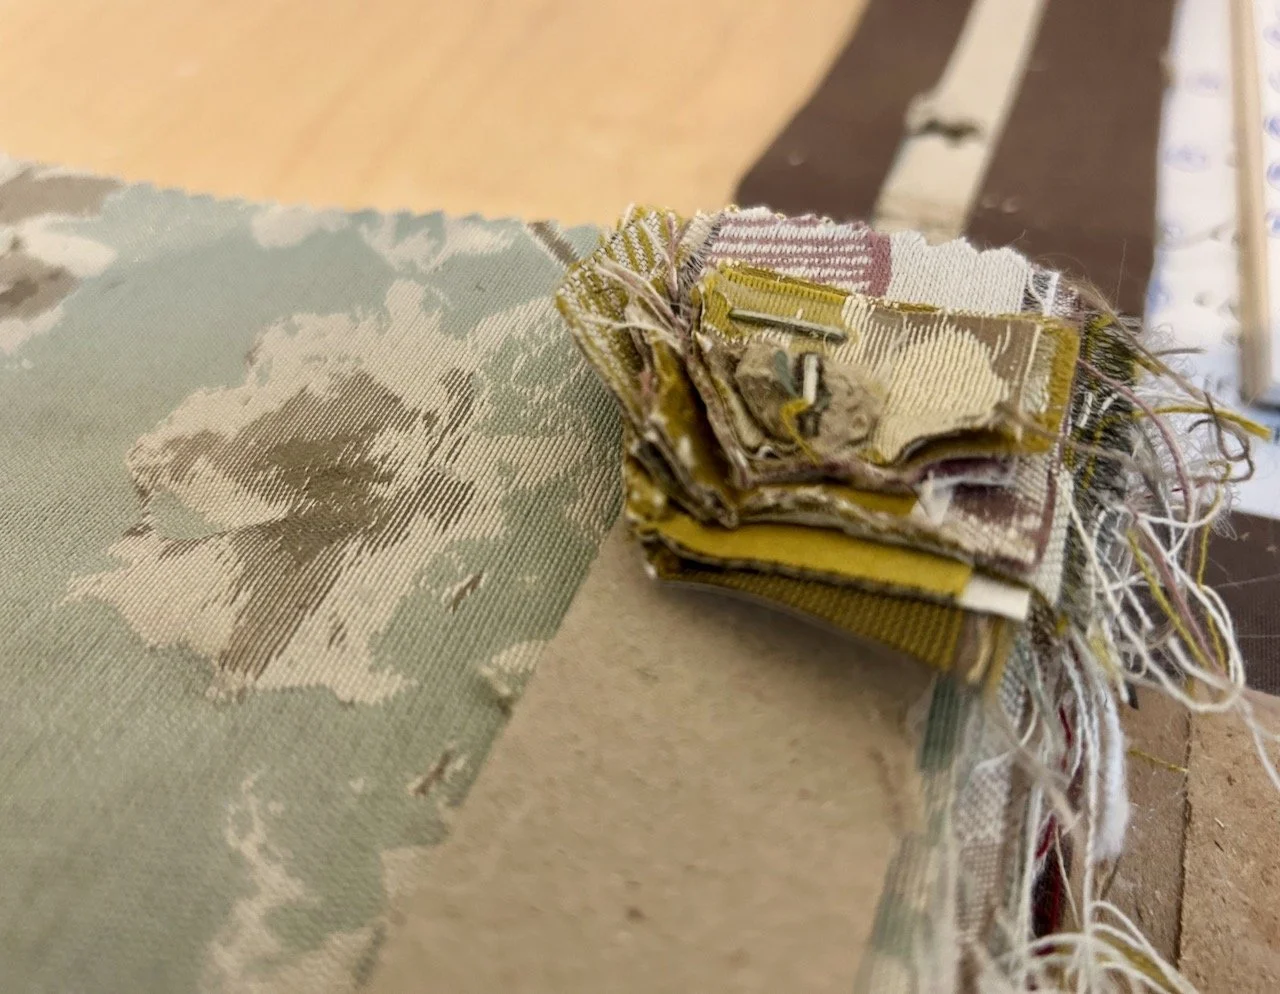
I soon realised that the scrap of material I’d chosen must be very me, as the colours in the first section of the embroidery threads matched it pretty well. I contemplated doing something with the peach, green and brown threads but also didn’t want to restrict what I could wear my jeans with. In my head adding colours to the jeans would do this, but luckily in the next section over was a selection of blue threads. These were left over from some cross stitch pictures which I made many years ago, and which I wish I still had. Sadly I think I must have thrown those out a while back, as even with all the sorting out I’ve been doing I haven’t found them yet.

But as you can tell I have strong memories of those four pictures - they were a labour of self love - and so I quickly knew that I would use the variegated blue thread to secure the loose denim.

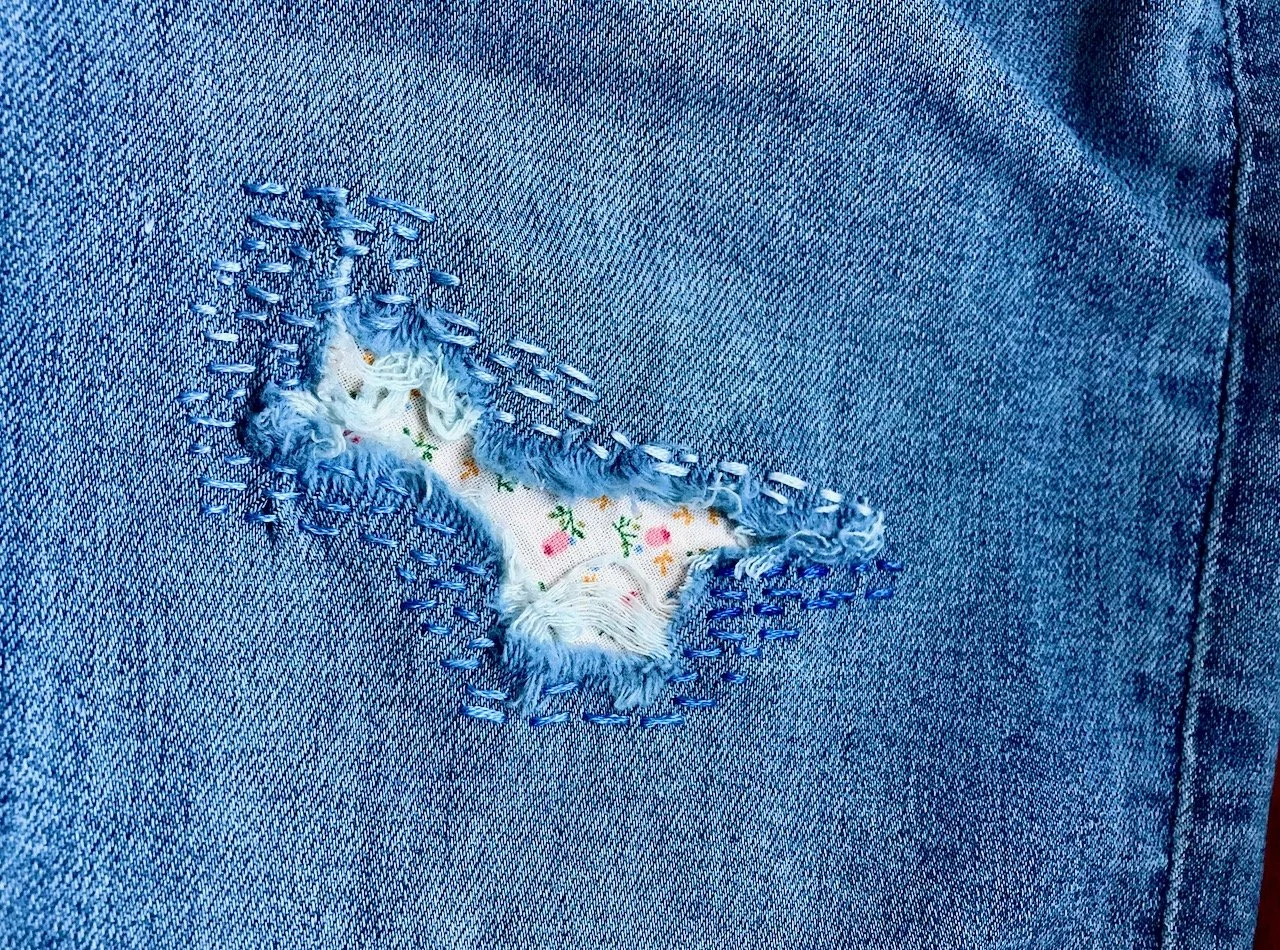
I decided on a few rows of simple running stitch to secure the fabric decoratively, and I’m really pleased how it turned out. It’s a pretty way of extending the life of these jeans, which apart from a larger than intended rip are perfectly fine.

Next time, I may even be braver!

I was featured on Blogger Showcase

Starting to make up my Vintage Sweethearts blanket

This project has been on the go for a few years, no surprises there then! It was released in sections in Crochet Now, I think back in 2017, and then later in full to purchase on Cherry Heart’s blog. When I first saw the Vintage Sweethearts blanket I knew it would be one I’d be making. As everything I decided to put my own spin on it by choosing my own colours - so my vintage colour way is quite a bit brighter than either of the kits offered at the time it was a crochet along or CAL, and I’m not sorry about that.

In lockdown I picked it up again and made some real progress. As I wasn’t doing this as a CAL I decided to make all of the squares of one design up at once, carefully storing those for the appropriate sections together so that I could follow the making up instructions. And that worked well, with small sandwich bags marked for each section and squares added as they were completed.

During lockdown I remember running out of yellow and lilac and deliberating if I should send for some more wool, but thinking it would surely only be a small amount, or to substitute with wool I already had. I decided to substitute, I’m sure the reasoning was that it was already colourful and adding a small amount of additional colours could only enhance the look.

While clearing through things in our spare bedroom recently I rediscovered the sections still in the sandwich bags, and so I got them out and worked out how much there was left to do. It turned out not much at all, six of the very small squares - and I finished the last of these on Christmas Eve.

Making it up in 2023

So my next job was to start sewing it together. For some reason, it’s not my favourite part of projects and I know that without some accountability it could fester in a cupboard for a while - and it’s way too pretty for that!

Actually the fact that it’s broken down into sections helps, I’m about to start sewing together section five (of eleven) so progress is happening…

9 brightly coloured crocheted granny squares on a wooden floor

SECTION ONE - TICK

The sections aren’t necessarily how you’d expect to make up a blanket - section one (above) has eight granny squares in a cross formation, which allows the non-square section two (below) to slot into the L at the top right of the cross. Section two starts to make use of quarter and third size granny squares, which look good but mean more seams, and more ends to sew in.

SECTION TWO - TICK

Section three takes a different approach, with the first of the larger squares in use. It’s different two as there’s two parts, and each slots into a separate side of the blanket. And the blanket is growing quite quickly, but in a peculiar and non-uniform shape.

PART OF SECTION 3 LAID OUT AND ALONGSIDE SECTION 2

SECTION 3A - LAID OUT

SECTION 3B - LAID OUT

Section four has six smaller squares and four of the standard size. This section took a while to complete - so many ends! And yes, I know there’s a school of thought to sew them in as you go, but I’m always so keen to get on with actually crocheting the next bit, even though it leaves a mammoth task at the end.

SECTION FOUR WITH 4 GRANNIES AND SIX SMALLER GRANNIES

SECTION 4 - TICK

It’s also clear that I’ll soon run out of floor to lay the whole blanket out, but I’ll tackle that when I come to it - which could be soon!

SECTION 4 ATTACHED TO THE BLANKET

SECTION 4 - ATTACHED

I’ve made it through four complete sections, with the fifth laid out ready to sew. A busy few days has kept me away from this, but I’m hoping to get back to it soon - this doesn’t even sound like me talking! Clearly batching the sections has worked break this into a smaller task, and may even help me get over my dislike of making things up, who knows?

SECTION 5 - THE NEXT EIGHT SQUARES TO BE SEWN TOGETHER

SECTION FIVE - READY TO GO

I’m amazed though at how many ends these four sections have generated.

I’ve split them into longer and shorter piles - the shorter ones will be no use for anything so they’ll go in the bin, but the longer ones I plan to attach them to create a multi-coloured random coloured ball of scrappy wool for more squares and another project, which combines granny squares and some sewing, if it all works out. Watch this space, but don’t hold your breath!

I was featured on Blogger Showcase

A mindful afternoon twiddling

I’ve recently spent an afternoon doing as what only be described as ‘twiddling paper’ and once again I’ve been inspired by many fantastic paper craft and quilling artists over on Instagram. What they can do with twirls of paper is just amazing, and clearly they’re far from my beginner level.

However, as I’m firmly of the belief that everyone has to start at the beginning, and that starting is better than not I decided to get some pre-cut strips of paper and some basic tools, and try it out for myself.

Now this is clearly where this post strays into ‘all the gear, no idea’ territory but with an online tutorial or two under my belt I was ready to get started.

Rainbow tonal packs of strips of coloured paper pre-cut for quilling

How pretty do all the tonal strips of paper look?

Tweezers, quilling tools and a cork backed guide

This flower template also came with the kit, but was quickly put aside for a more ‘advanced’ day.

Laminated paper with various flower designs for quilling

So how did I get on? Well, I had some success - though not much - and it was a great way to spend an afternoon. I think it’s something I’ll try again and aim to develop further so that I can incorporate the shapes into card making, but in reality I’m a long way off some of the wonderful creations I’ve seen. Thankfully I’m also a realist and realise Rome wasn’t built in a day.

mid and light mauve quilled 'swirls' in a tray with partitions (mostly empty!)

For now though my quilling adventures have been cut short as a plaster on your index finger doesn’t provide the dexterity needed for such detailed craft. I’ll return to this again, soon hopefully. And my finger? Well it’s the most mundane of injuries - a simple, but dramatic, cut through picking up the food processor vegetable slicer the wrong way, ouch. Those blades are sharp, way sharper than I expected!

I was featured on Blogger Showcase