Baubles and bells, some new additions to my Christmas decorations

Recently I shared a look at some of the Homesense Christmas range, today I'm sharing some of my gloriously, pretty new baubles - all of which are from Homesense this year. It's a bit too early for me to have our tree up - I really am not that organised, and on a more practical level we still need to decide where it'll go, and clean that bit of the house!

But I am feeling more festive than I normally am - maybe it's the influx of mince pies, maybe it's our Advent calendar... But whatever it is, I dug out a metal card holder, which I rarely use as a card holder, and finally unboxed those new decorations.

decorated baubles that have an egg-shaped appeal
Standing back and admiring my decorating ability, I realised it needed something more, so I dived back into my box of decorations and emerged with the bell and gingham bow garland from last year. Homesense have some ideas (10 in fact) on how you can impress your guests for less.
bells, bows, stars and baubles

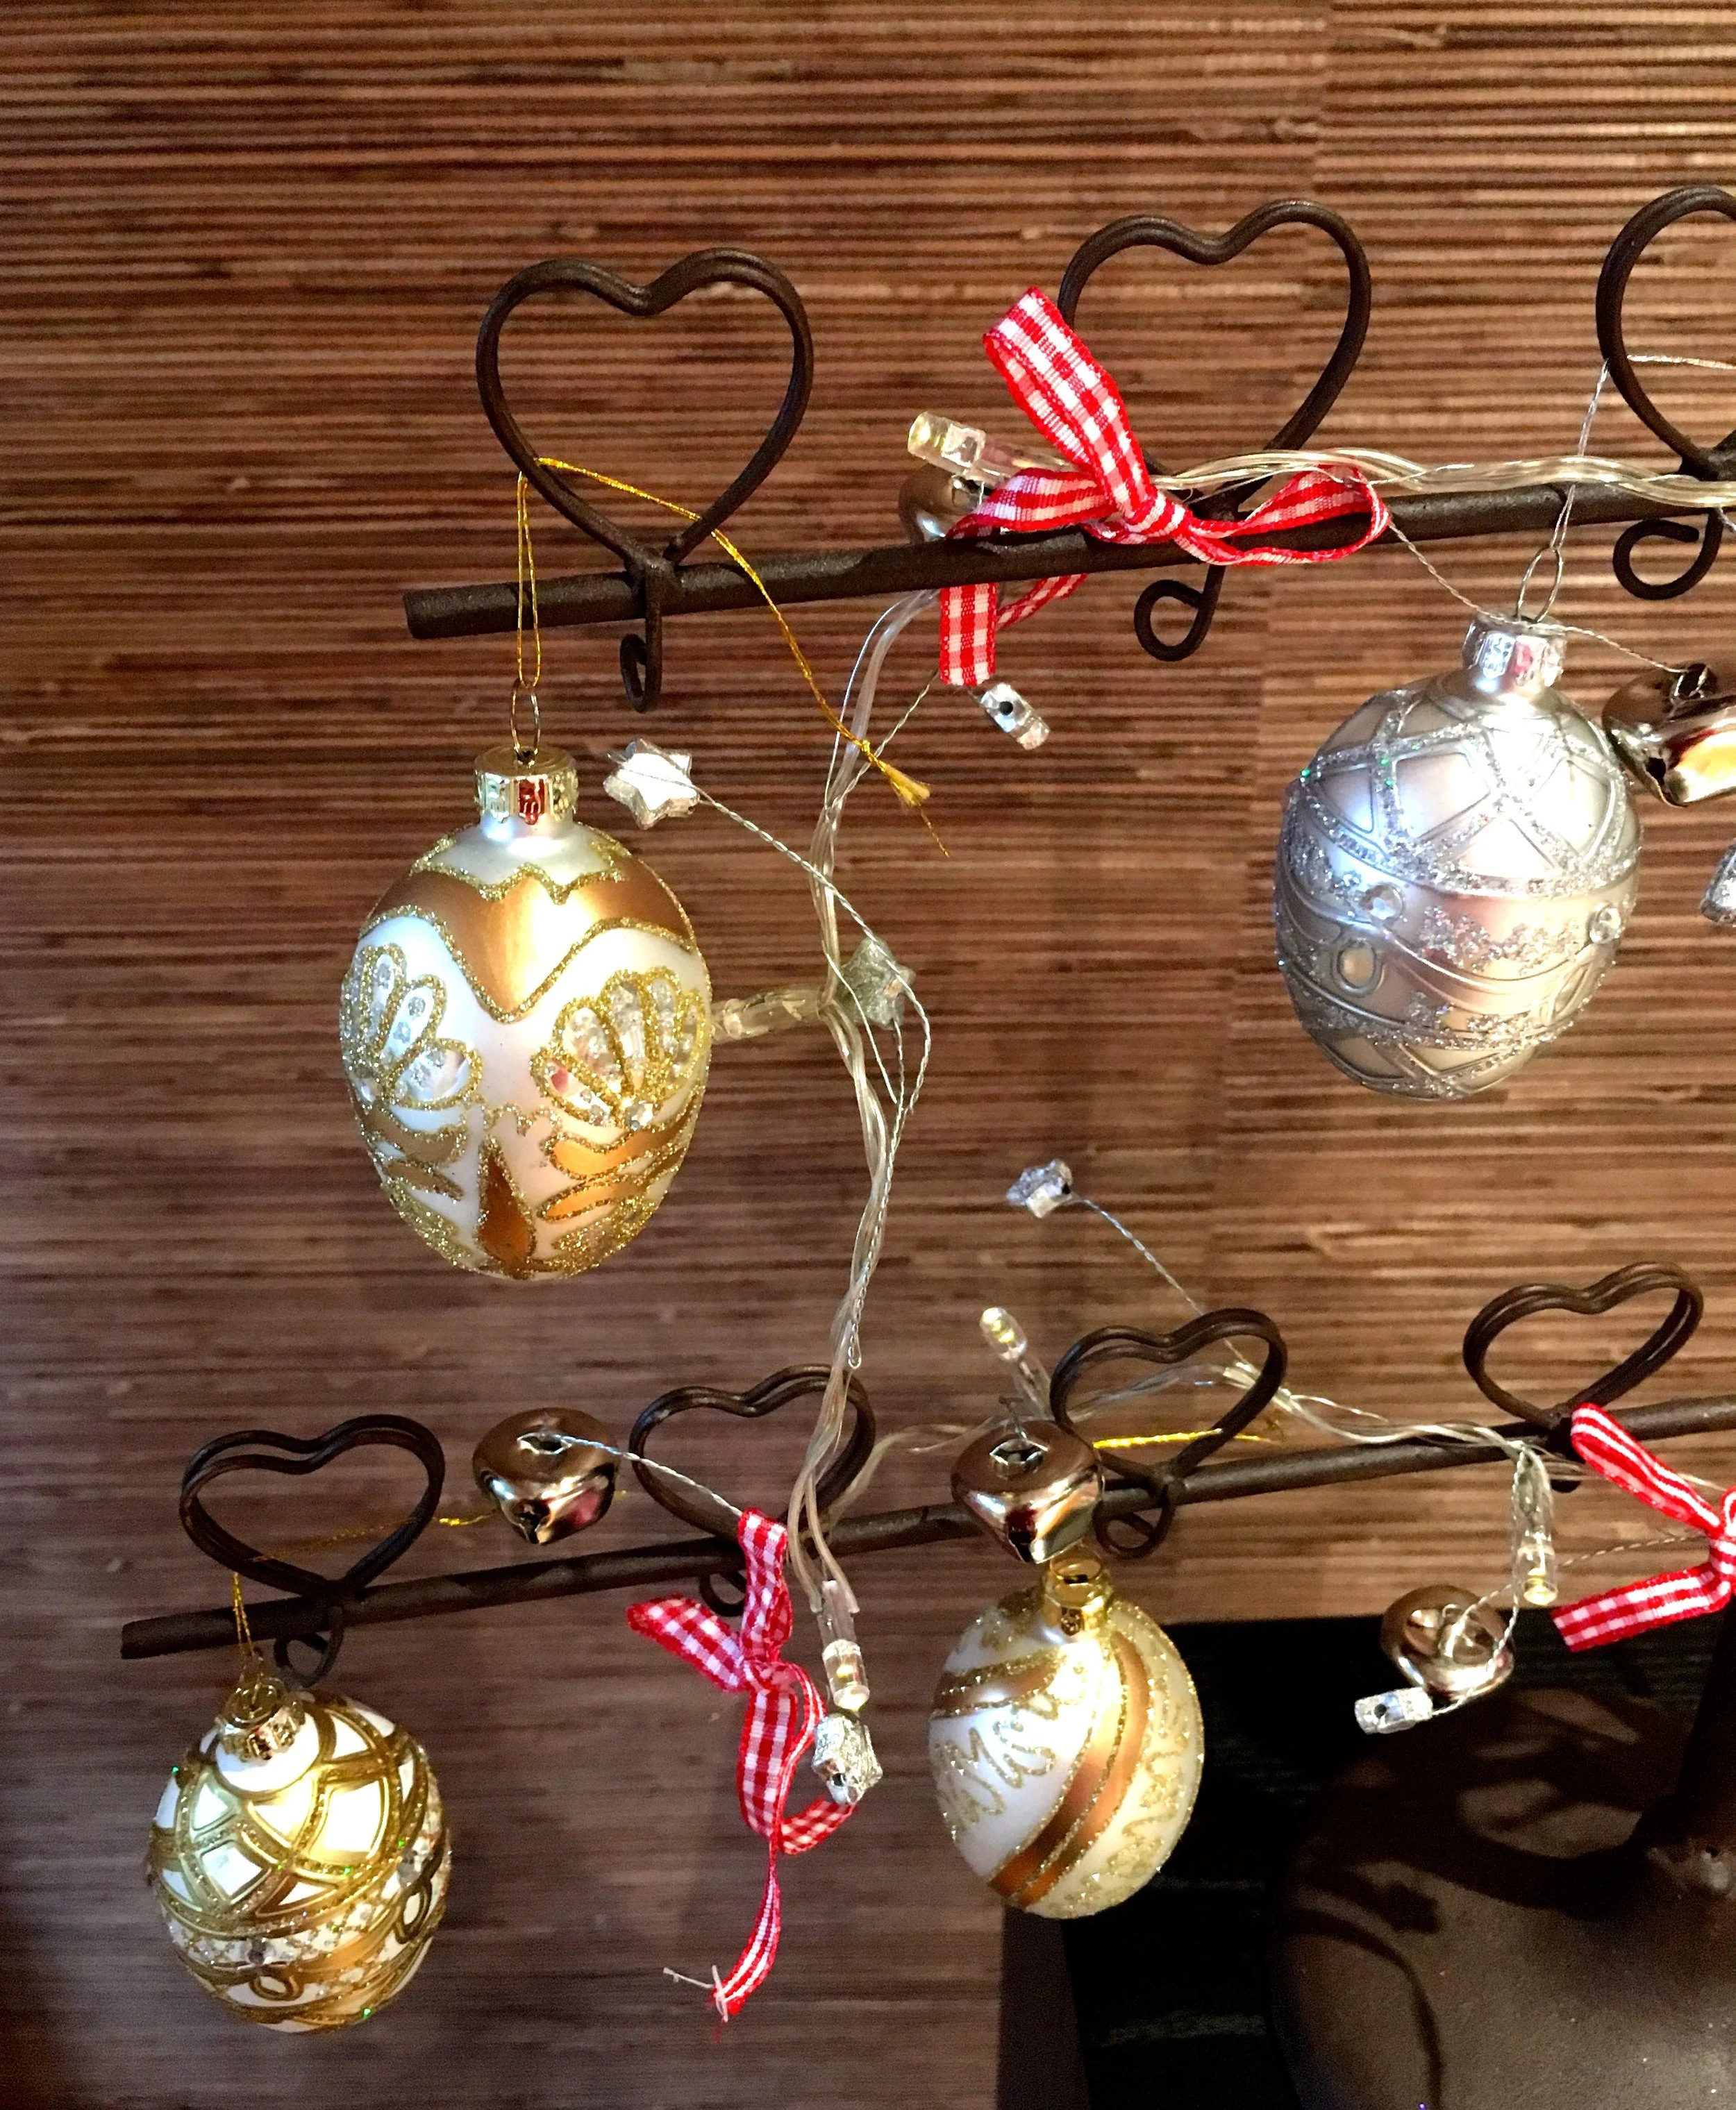
I'm liking how the stars and bells have curled themselves around these new highly decorative baubles, and how well the whole lot looks against the bamboo wallpaper in the background.

gingham bows and led lights alongside the new baubles

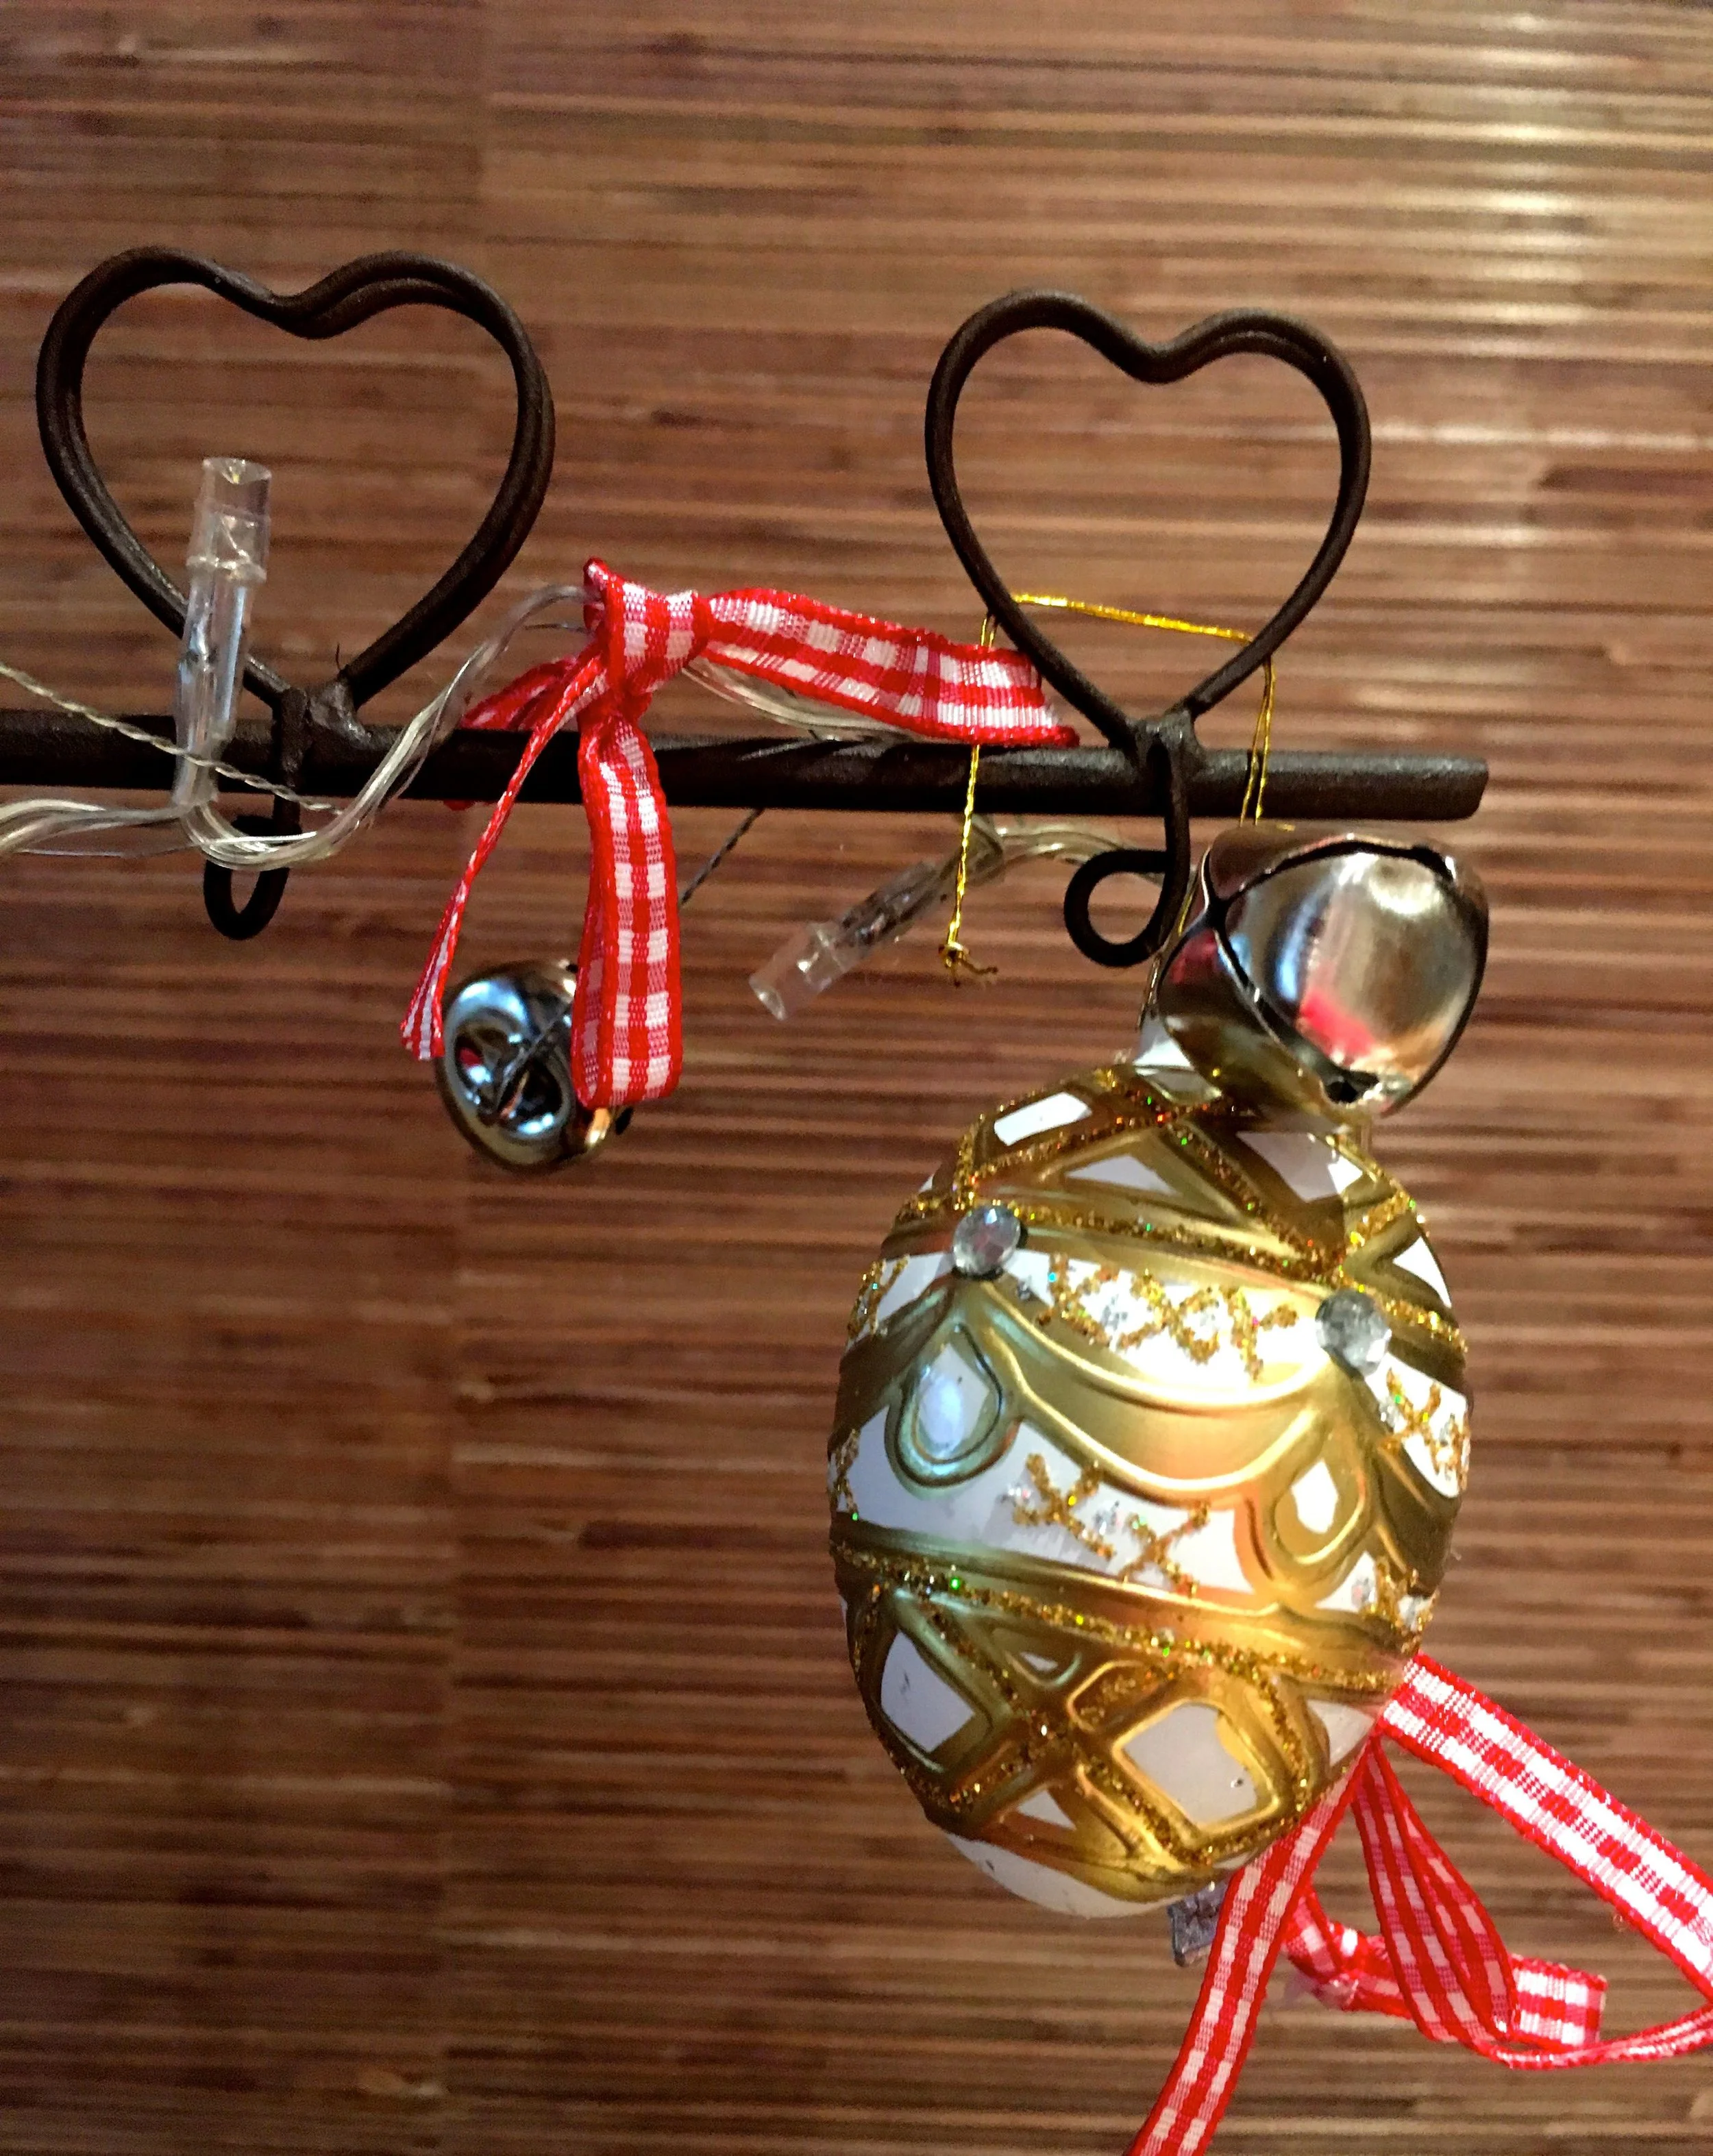
They really do have a feel of a Fabergé egg don't they?  Thankfully at nowhere near the price!

this metal card holder often doubles up as an impromptu tree

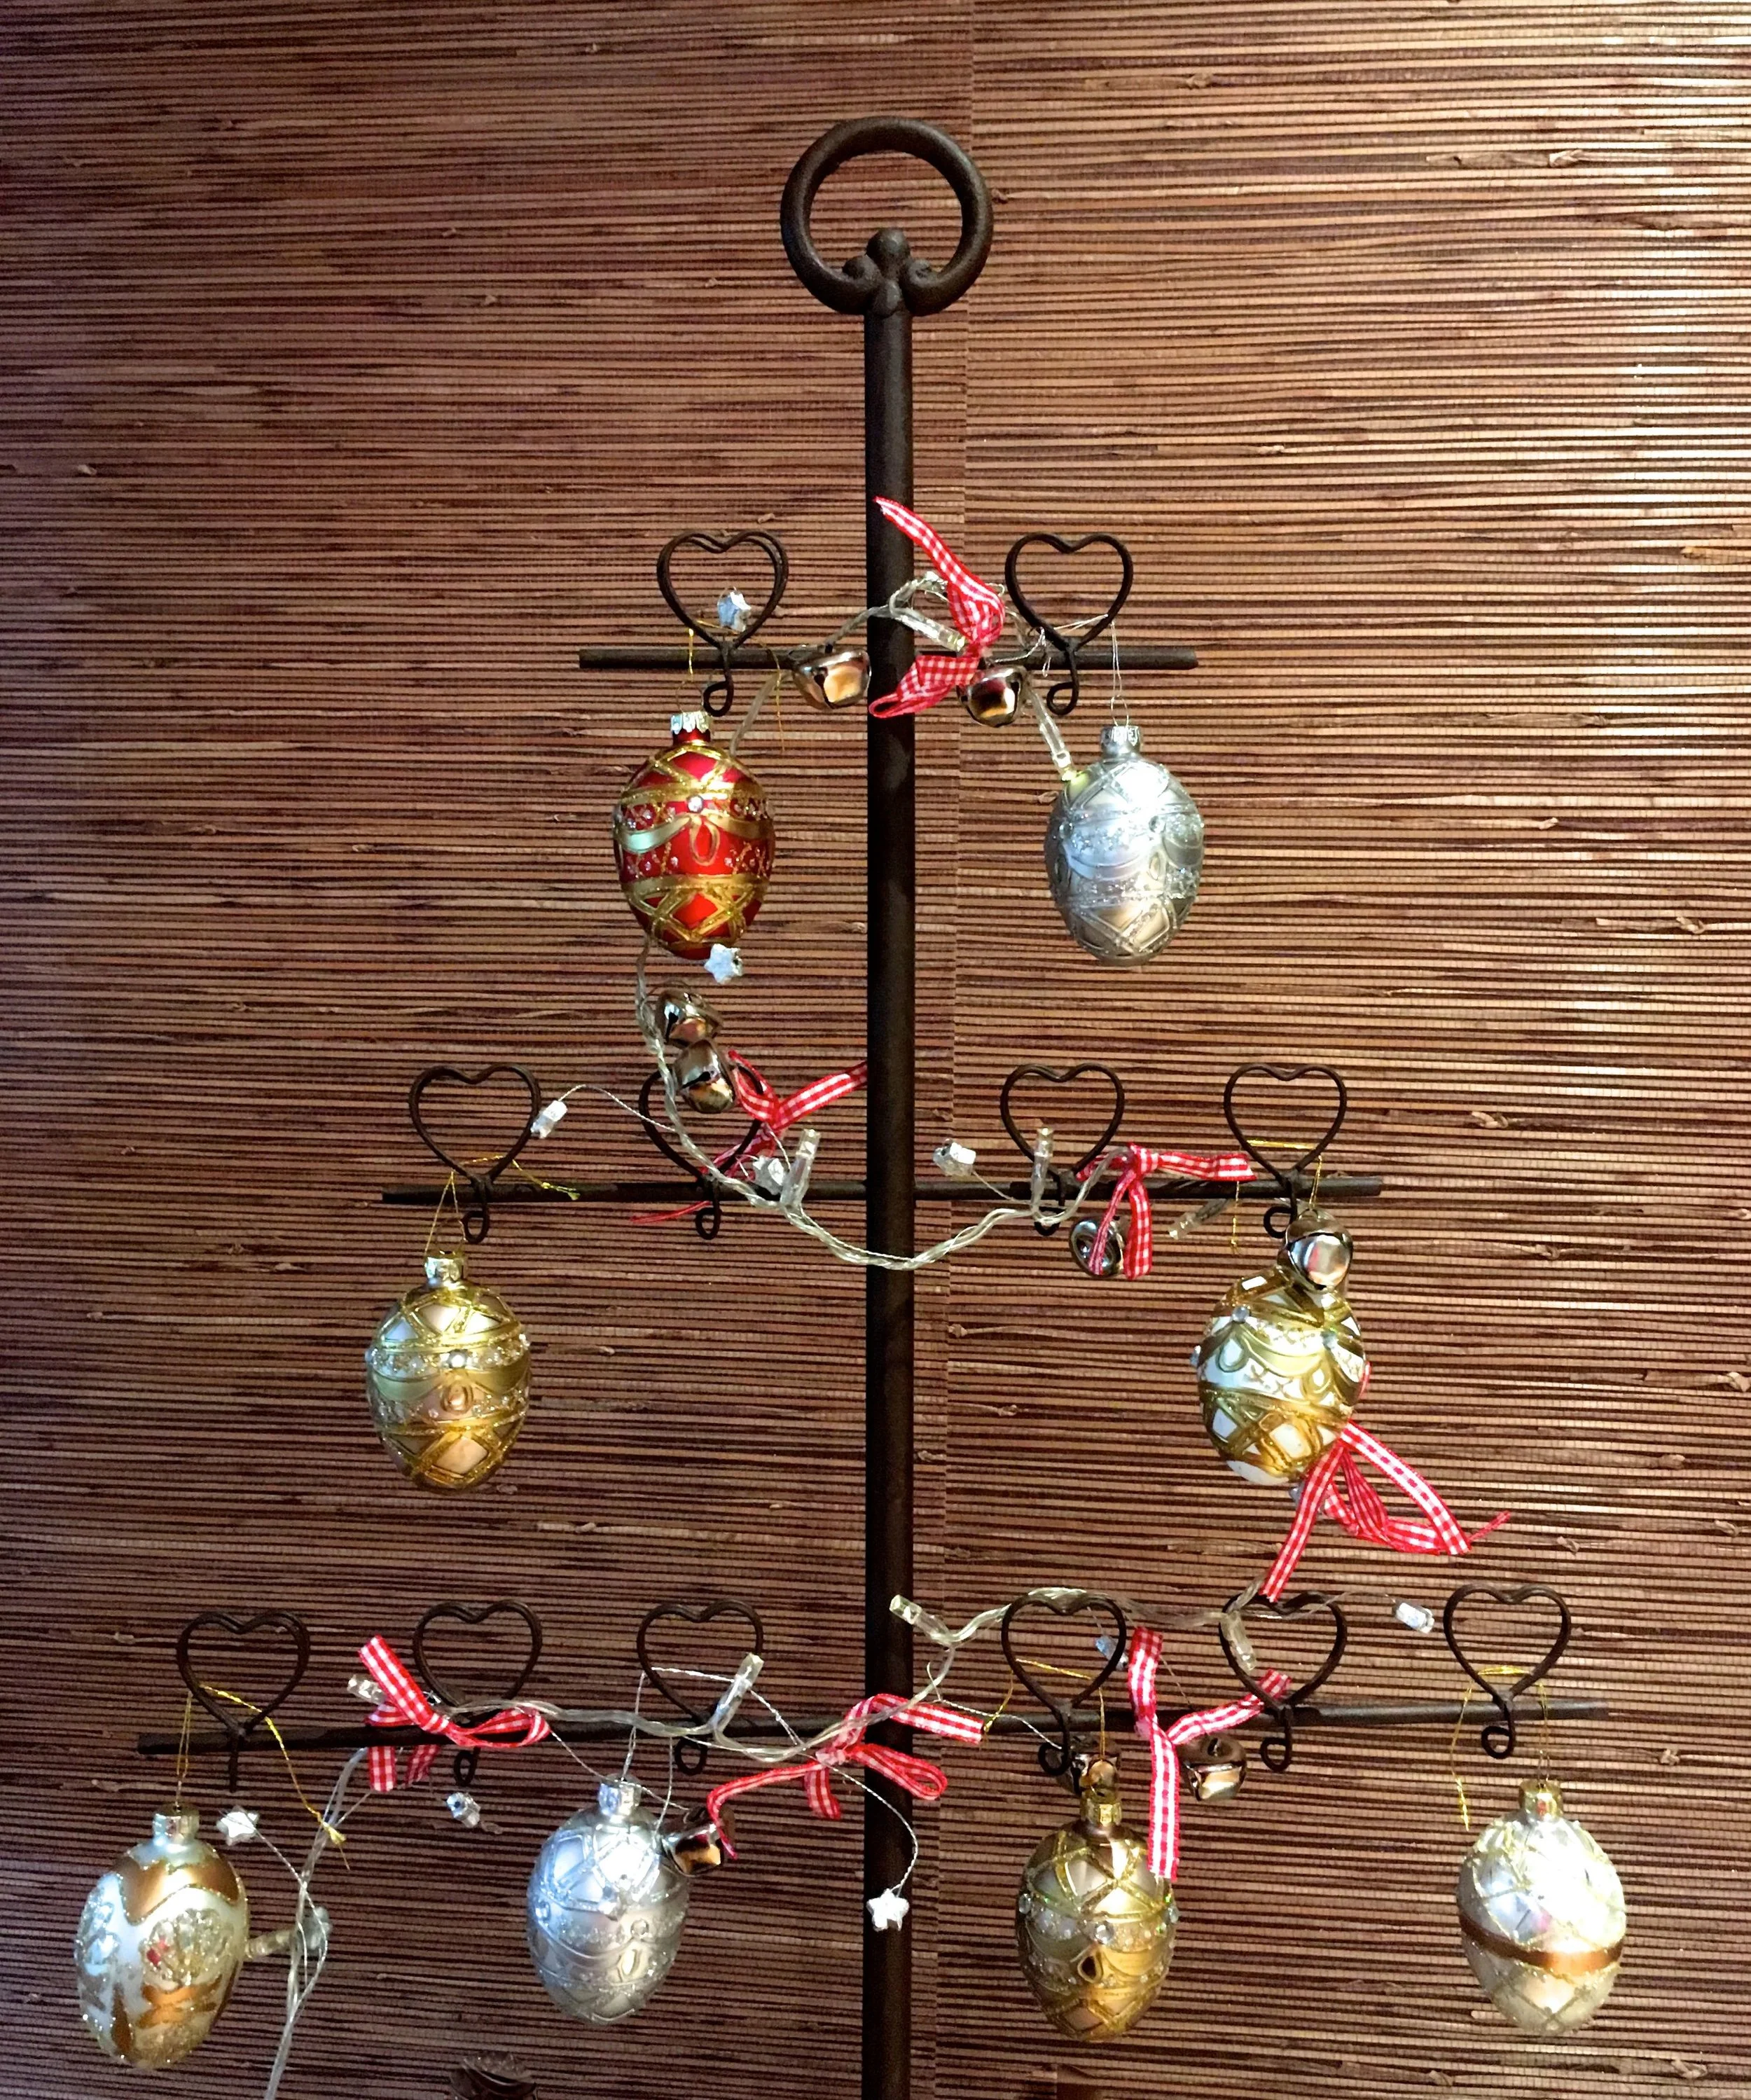
The decorations are creeping in - and up - but while it might feel festive here on my blog, I predict it won't be for a week or two before our tree goes up.  But no doubt, that will be here before we know it!

What do you think of my new baubles?

My handmade Advent calendar

A few weeks ago I shared my prototype box for what I hoped would be my advent calendar.  The good news is that it's finished, but a few days into December. In preparation I'd bought a new die for my die cutting machine from Tonic Studios. Initially I was looking for a pillow box, but when I saw the Marquee Box I realised its potential and my plans changed.

I sussed out how it could work using the prototype, which I cut from the header page of some Christmas scrapbook paper, and as a fan of patchwork and colour, liked how it came out so have kept that in the final design.

The prototype box

Twenty four boxes is quite a few though. Each box needed two cuts of the die, so after a small workout for my arm and forty eight cuts later I was ready to assemble my boxes. The sheer number of these put me off for a bit, despite the start of the month looming. But with some pre-folding and a tray in front of the TV I set about sticking.

I'd tasked MOH to buy contents for half of the boxes, and I set about buying contents for the other half. Somehow all of our boxes have ended up with chocolate fillings, but that's no bad thing.

It did feel like a bit of a production line, and on more than one occasion I did wonder why I'd started, and if perhaps doing something for the twelve days of Christmas instead. But I'd started...

A collection of boxes, assembled and filled

And so I finished. A few days in to December!

I was able to make use of lots of things I had too, which is always a winner for me. I had the scrapbook paper, I recycled tissue paper inside the boxes, the stars which I used for the numbers were from many years before - I'd previously used them as decorative touches on gifts, tags and cards, and the ribbon that I used to close the boxes were left over from an earlier craft project.

So apart from the die cut and the contents it turned into quite a thrifty project. 

Our handmade advent calendar assembled and in place
 
a few more of the twenty four boxes of our advent calendar

I considered hanging the boxes, and wanted to use the silver pegs - that I've had for ages, and would you believe it there were 24 - and some bakers twine, which I've several reels of. The weight of the boxes though didn't really work for hanging vertically as I planned, and as we don't hang things on our wall, I was after another solution.

In the end I kept it simple and strung them together placing them under our television - the other place I'd considered was on top of a radiator, but knowing the contents that wouldn't work!

Looking from above at our handmade advent calendar

But I'm pleased with how they turned out, and it looks as if we've a village of festive boxes. Although not all of the paper I used was Christmas paper, however it all works together, and you can see the prototype box taking pride of place in the photo below (day 6).

Not all the papers I used were Christmas papers, but they all work together

A longer project than I expected but one that will provide fun - and chocolate - throughout the month. 

I love it - and I even got MOH involved too, as well as buying some of the contents, he was also chief number sticker on, as I thought I'd remember what was in each box, and so would lose the randomness of the contents! 

What do you think - would you make your own?

A Christmas stocking, or two

It's been a few years since I hung my Christmas stocking up, but when Turtle Mat got in touch recently and invited me to take part in their Christmas Stocking challenge, my interest was piqued. I remembered - and still have - my Christmas stocking from when I was a child and thought it would be good fun to dig that out, as well as make another.

I'm under no illusions that I'd be able to make something as lovely, as what I can only call my vintage Christmas stocking, gorgeous isn't it? I remember hanging it at the end of my bed on Christmas Eve and leaving a glass of milk and a mince pie out for Father Christmas, and then waking in the morning full of awe that he'd been. And at the same time investigating to see what he'd brought.

My vintage christmas stocking complete with a glitter name

I'm sure there's a story behind this Christmas stocking that I don't remember all of right now, but my brother had one similar too. I'm sure mum and dad will fill me in. But onto the other stocking. In the box of craft supplies I received there was some hessian, felt, tinsel, cotton lace trim, some bells, a robin or two and some glitter.  It was clear that I'd be making a different style of stocking. 

I used my stocking as a template and discovered how messy hessian is work with. And how awkward this open weave type is. I remember making a hessian cushion in needlecraft in Senior School, and remembered that the fibres played havoc with my black school blazer, it was no better with my navy cords this time around. 

A hessian stocking trimmed with felt and lace

But eventually I had a stocking edged with blue felt. How to decorate it took me a while to decide on, and then inspiration struck. I'd use the cotton lace trim to form a Christmas tree and add some bells as decoration and top it with tinsel. And so I did.  

A lace christmas tree on a hessian christmas stocking, there's bells and a robin nesting there too

It wasn't long before a robin took up residency... 

I’m rather pleased with how it turned out, different to my hopes, but nice in its rustic way, but still not a patch on my vintage stocking, is it? 

Have you hung your Christmas stocking? Let's hope Santa comes...  


* This is a collaborative post, but all views and opinions are my own.