


52 Cookbooks #24: Leon Moroccan meatballs

Well if you're going to cook a recipe from the Leon chain you might as well as cook their iconic meatballs!  So that's the recipe I chose from the first Leon cookbook by Allegra McEvedy.

I love Leon's food and marvel at how they manage to make brown rice taste appealing to the masses!  The book was first published in 2008, and I probably bought it that year.

There's an interesting fact in the intro to this recipe which is that since Leon opened they have rolled over 5 million meatballs (by hand!) which side by side they could run the entire length of the Central line and back again - and that was in 2008!

Which is a whole lot of balls.  And I wonder how many more times it'd be now...

The recipe calls for lamb mince, which was unfortunate as I'd defrosted minced beef - oh well, onwards and upwards. Instead of breadcrumbs it uses some wholemeal flatbreads soaked in milk (in the shops they use water to keep it dairy-free, but Allegra McEvedy says they're softer with milk but it's not a biggie) I used milk, but swapped the flatbreads for a slice of crust-less sourdough. 

I also out-sourced the meatball shaping to MOH. Didn't he do well? (...she says sounding very much like Brucie)

The other ingredients in the meatballs are: parsley, mint, dried oregano and garlic. Yeap, they're pretty fragrant!

They're browned and put to one side while you make the sauce which has a lovely spicy Harissa kick.  As you'd expect there's olive oil, garlic and chopped tomatoes as well as the Harissa, some basil and some more parsley. 

Then the meatballs go back in and you cook it "until the sauce looks about right" - that's my kind of recipe!

Yum. Yum. Yum. 

I served this with brown rice (which I love) a la Leon style, but went for green beans instead of coleslaw. 

The verdict:

  • I think I was always going to like these, they're iconic. 

  • I was glad I delegated the meatball shaping, but MOH didn't seem to mind. 

  • The sauce was good and would be good on its own with pasta. 

  • We had some left, which I plan on scoffing when MOH goes out to watch the last England game at the pub!!

How my garden fared fending for itself...

Before we headed to Portugal I had some prep work to do with my veg plants as the tomatoes, cucumber, chillies and peppers were still sitting snugly in the greenhouse. If the weather turned nice while we were gone, I knew they wouldn't survive. 

That meant prepping my greenhouse bed, adding some mulch and compost to it before planting the cucumbers, chillies and peppers in it and giving each of them their own little water reservoir made of an old plastic bottle with holes pierced into the cap, filled with water and plunged into the soil and with luck they'd do their job. 

image.jpg

For the tomatoes I potted them on and hoped the time they'd been spending out of the greenhouse each day would be enough to prepare them for permanent outdoor living. Then I placed them on an old wet towel - laced with slug pellets - to give them some water, knowing that the towel would take a while to dry out and would retain any rainwater far longer than newspaper would. 

It's practical and functional, but not very pretty!

image.jpg

As you can see I left the greenhouse door open but left some old mushroom crates in the doorway as a deterrent for anything that might have fancied some shelter. I'm not sure if it really was much of a deterrent, but it made me feel better!

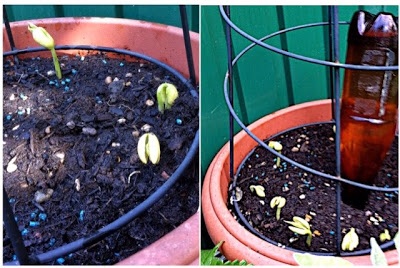
The Borlotti beans, which were just peeking through also got the personal water reservoir treatment.

image.jpg

So did it work?

In the main, it did. All my plants survived - I know there was some rain while we were away so that will have helped - but even so, some of my plants even flourished!  

Some of my climbing beans failed to germinate, and since we've been back I've planted some more so hopefully these will fare better. 

But the greenhouse reservoirs were empty and the plants had grown.

image.jpg

And there were even flowers on the chillies and peppers.  The lettuces were growing well. 

image.jpg
image.jpg

And the tomato towel had done its job. 

image.jpg

And the Borlotti beans were starting to wind their way up the frame. 

image.jpg

Elsewhere in the garden there were successes and some thirsty plants!  The angelicas needed some water to revive them. 

image.jpg

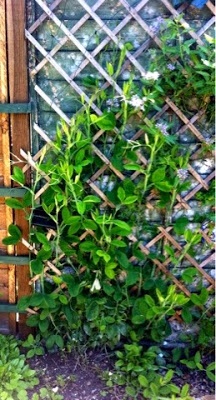
But the sweet peas had shot up - and they've continued to grow, but still no flowers yet!  They're late this year. 

image.jpg

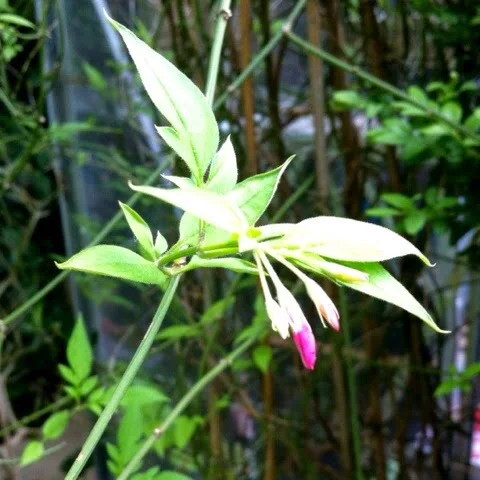
The Philadelphus was starting to flower and fill the end of our garden with its white flowers and scent and the pink jasmine was just coming into bud. 

image.jpg

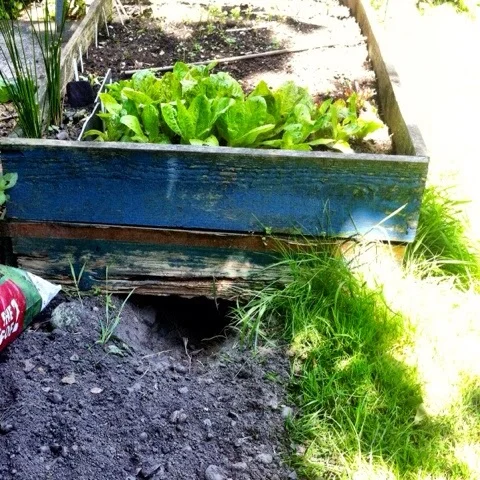
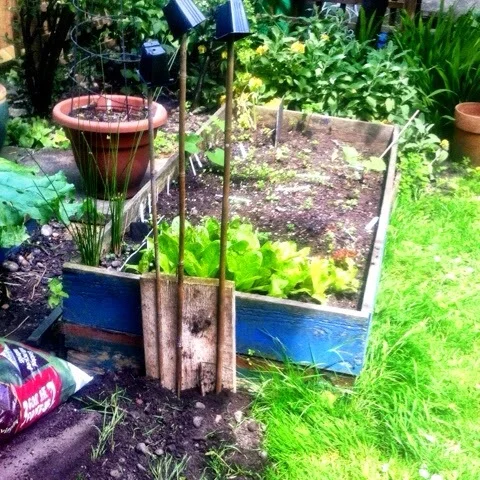
The local wildlife had also made their mark.  Something - I think, but don't know for sure, a fox - had dug under my veg bed. 

image.jpg

After getting MOH to poke a long stick into the hole - I'm brave like that - and once we were sure there was no sign of life I filled the hole back up.

The next morning I discovered the hole had been re-dug, so I thought I'd better up my game. This was my second response:

image.jpg

It hasn't been re-dug so I was feeling rather smug with myself. That is until I spotted this:

image.jpg

Not only had the hole reappeared from the other side, this time lettuces had also been cast aside and my other seedlings had either been displaced or covered over. Most of the lettuce remain ok and the coriander and some dwarf beans survived - others may also have survived. I guess I'll find out as they grow! But this year I don't think I'll be having the neatly organised veg bed I'd hoped for!

Not to be outfoxed by the wildlife I made my countermove - with imaginative use of the old mushroom boxes and bamboo canes - which has so far remained in place. 

image.jpg

No doubt the wildlife is regrouping and planning its next move.  

So please keep your fingers crossed that it's got bored and moved somewhere else...

Update: the wildlife has made its next move, see my Tweet:

image.jpg

An afternoon scrubbing!

Our wooden garden table has been looking a bit tired of late, it's done the silvery thing it's supposed to, but to be honest I don't think it's its best look.

With the nice weather we had last week - let's hope it makes a reappearance soon - we were using the table a lot more, so I was keen for it to look a bit more presentable.  

I'd also taken to having my breakfast out in the garden, so I wasn't too impressed to discover some birds had left a special deposit for me to find...  I squirted some kitchen spray to make things more hygienic, only to discover I now had a clean patch on the table. Oops!

However, I did quite like the look of the cleaner, more hygienic bit:

There was only one thing for it. 

Yes the whole thing (and the chairs) needed a good scrubbing.

As the weather was nice I made it my job for the afternoon, but first I needed a brush. 

I found this one in the local hardware shop for £1.95 - bargain!

So my afternoon of scrubbing got underway, then it was into the sun for the table and two of the chairs to dry and for me to soak up a few rays too!

I had some "fun" with the brush...

Fairly early on in my scrubbing session the bristle section flew off and detached itself from the handle; thankfully it was easy to reattach and after that it decided to stay put.

The pointy end came in useful, as did the handle - which was why I'd chosen it over a more conventional brush.

However I did end up with a blister on the knuckle of my right ring finger, which wasn't so good.

But on the plus side, look at how much better it looks!

Then it was time to oil them - and more time to dry (for them) and sun (for me)

I'm not sure we've cleaned it this much before (that's the Royal We there...) and I'm really pleased with the results:

It's something I'd definitely do again (despite the blister), which is lucky really as I've still two more chairs to go!  

So if you've been thinking about cleaning your wooden garden furniture - give it a go - it gives it a whole new lease of life.  

Don't forget to try a test patch - just like I did. Ahem!

And let me know how you get on.