My garden in November

This month it seems my photos are mainly of the mahonias on misty days and a snowy garden. Snow in November - albeit towards the end of the month - still seems early, but there was still plenty of autumnal colours around the garden, plus pops of colour from the fuchsias, and like last month there was plenty of yellow too!

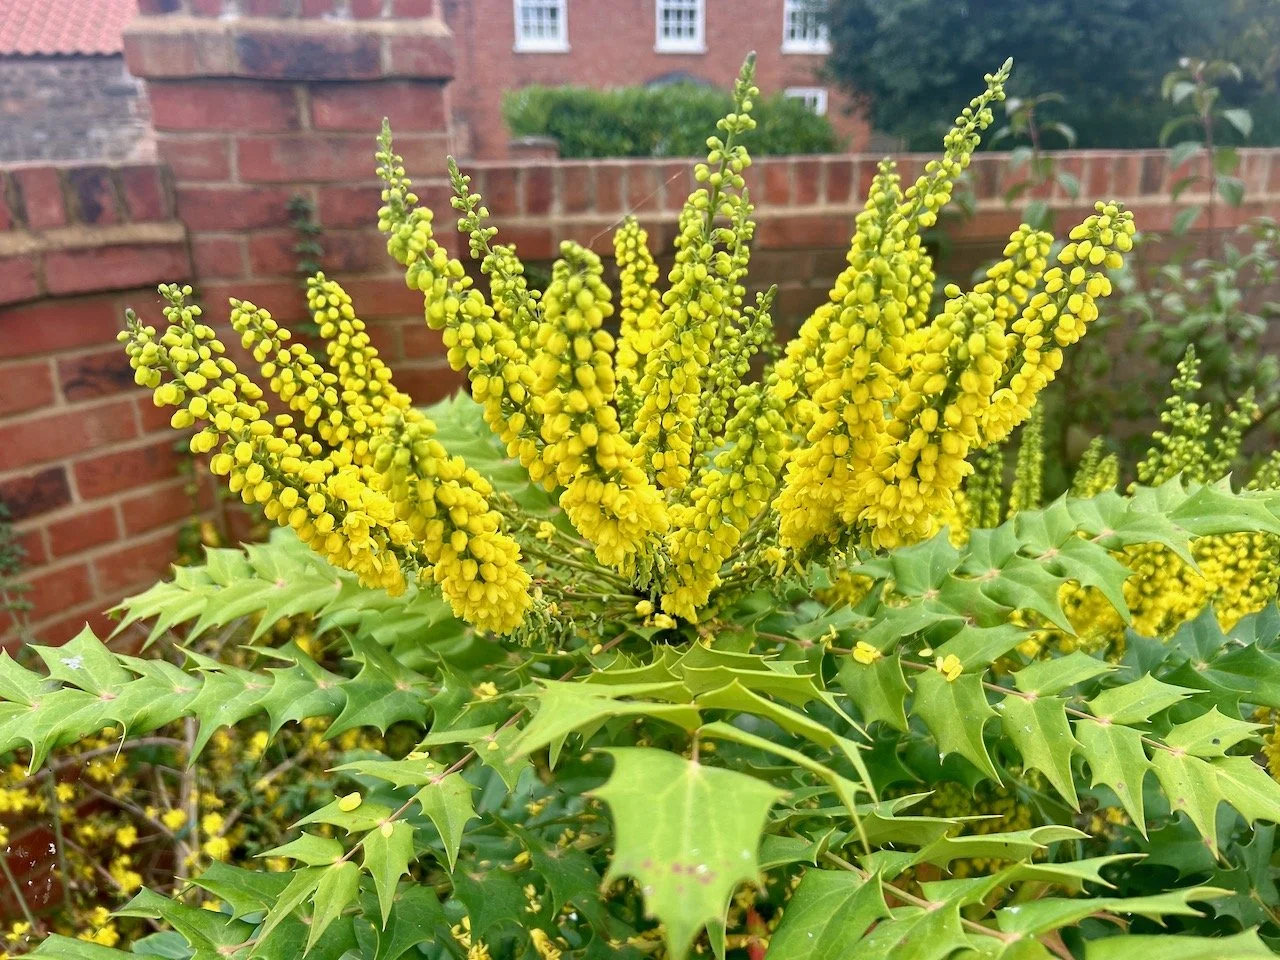
The mahonias are quickly becoming a favourite plant of mine, although they are prickly! Many a time I’ve been working in the border only to suddenly realise I’m way closer than I thought to its prickly leaves - and it’s not shy in letting me know! I haven’t pruned these yet at all, and having learnt recently that the more you cut holly the pricklier it becomes, I think it’s something I think I’ll need to look up before I do.

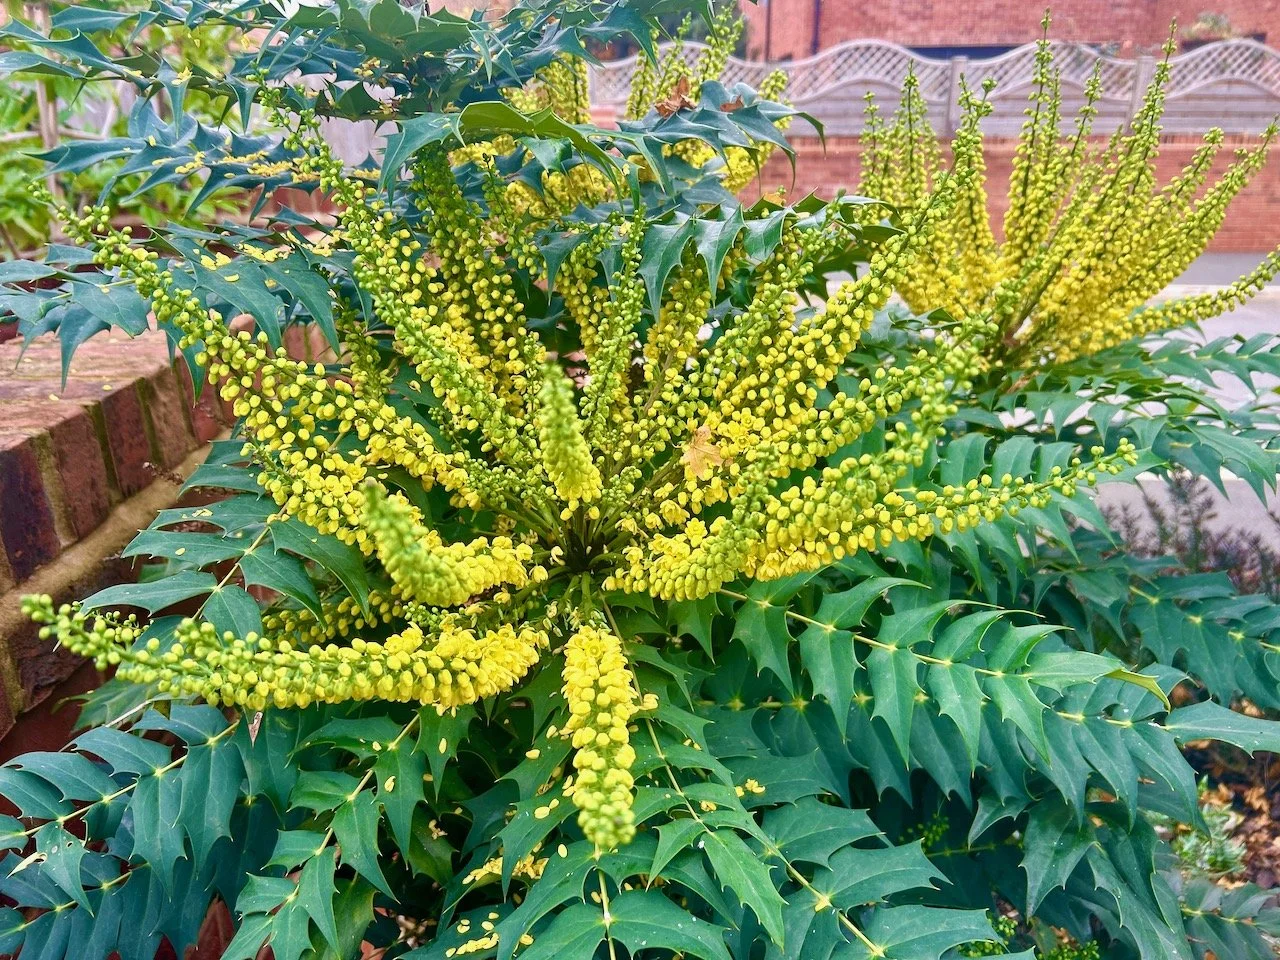
The thing about the holly though is interesting. It’s often pricklier at the height where deers nibble (though not in London obviously) as it grows extra spiky as it believes itself to be under attack, which it sort of is, and even on the same bush the leaves much higher up will be much smoother. Isn’t that amazing?

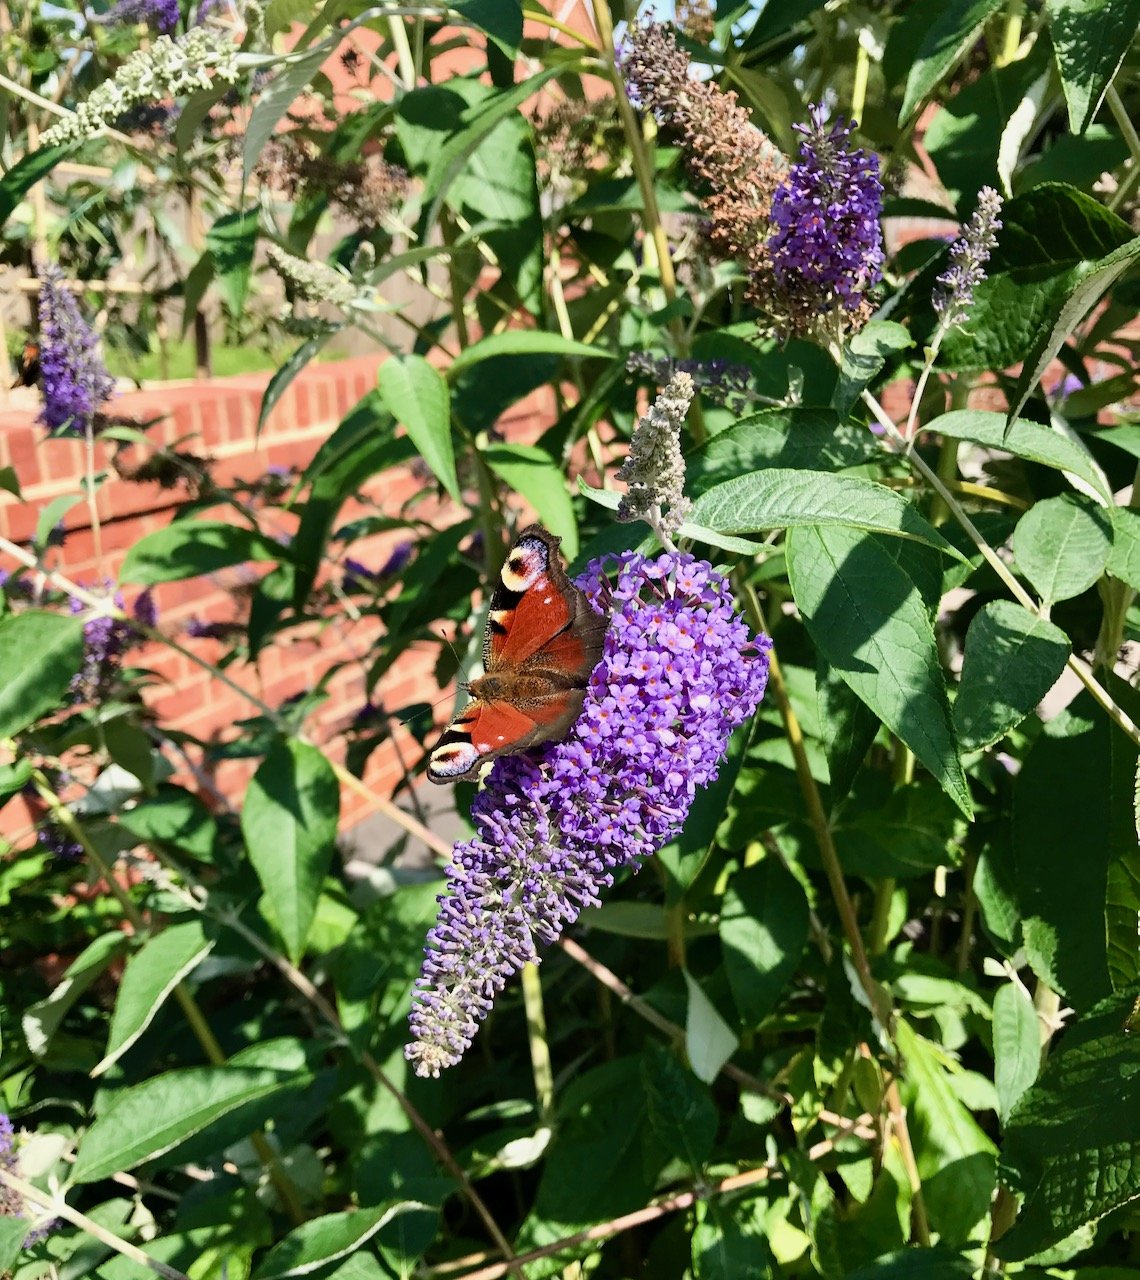
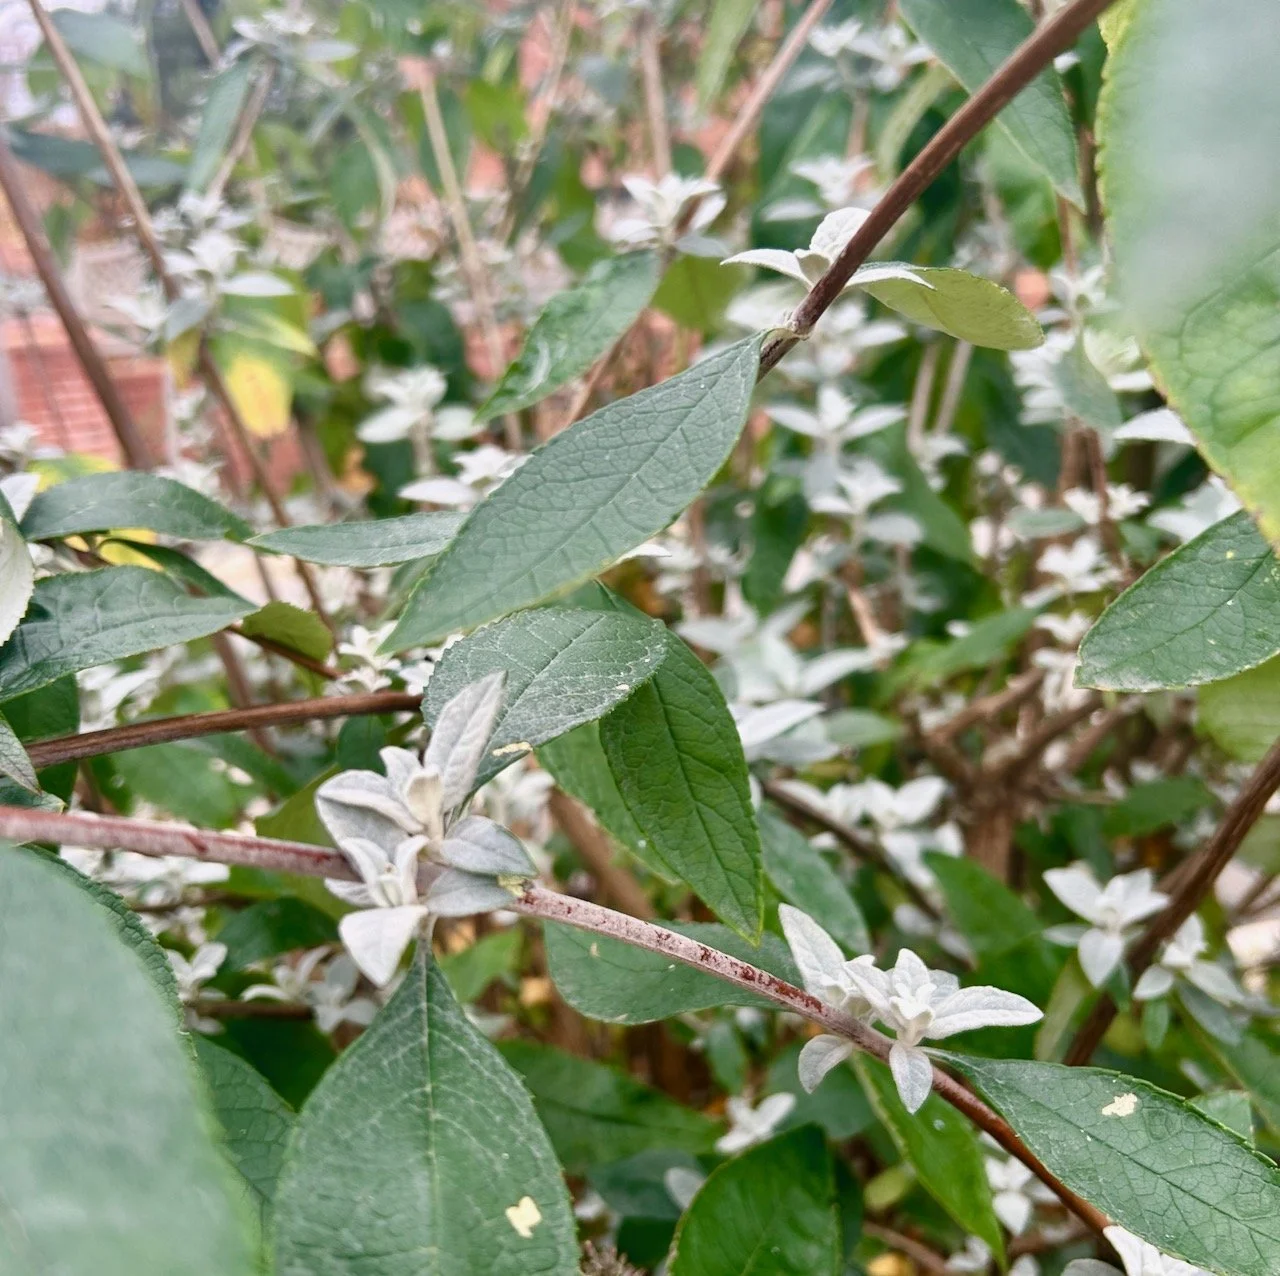
The buddleia in the outside border is still going strong, and has clearly been enjoying the milder temperatures. There’s many silvery new growth buds on its established branches, and seedlings in the gravel. I noticed a little clump much further away than usual in the gravel just yesterday, and weeding the gravel is our new perennial job!

The silver leaves of the buddleia's new growth among the established green leaves

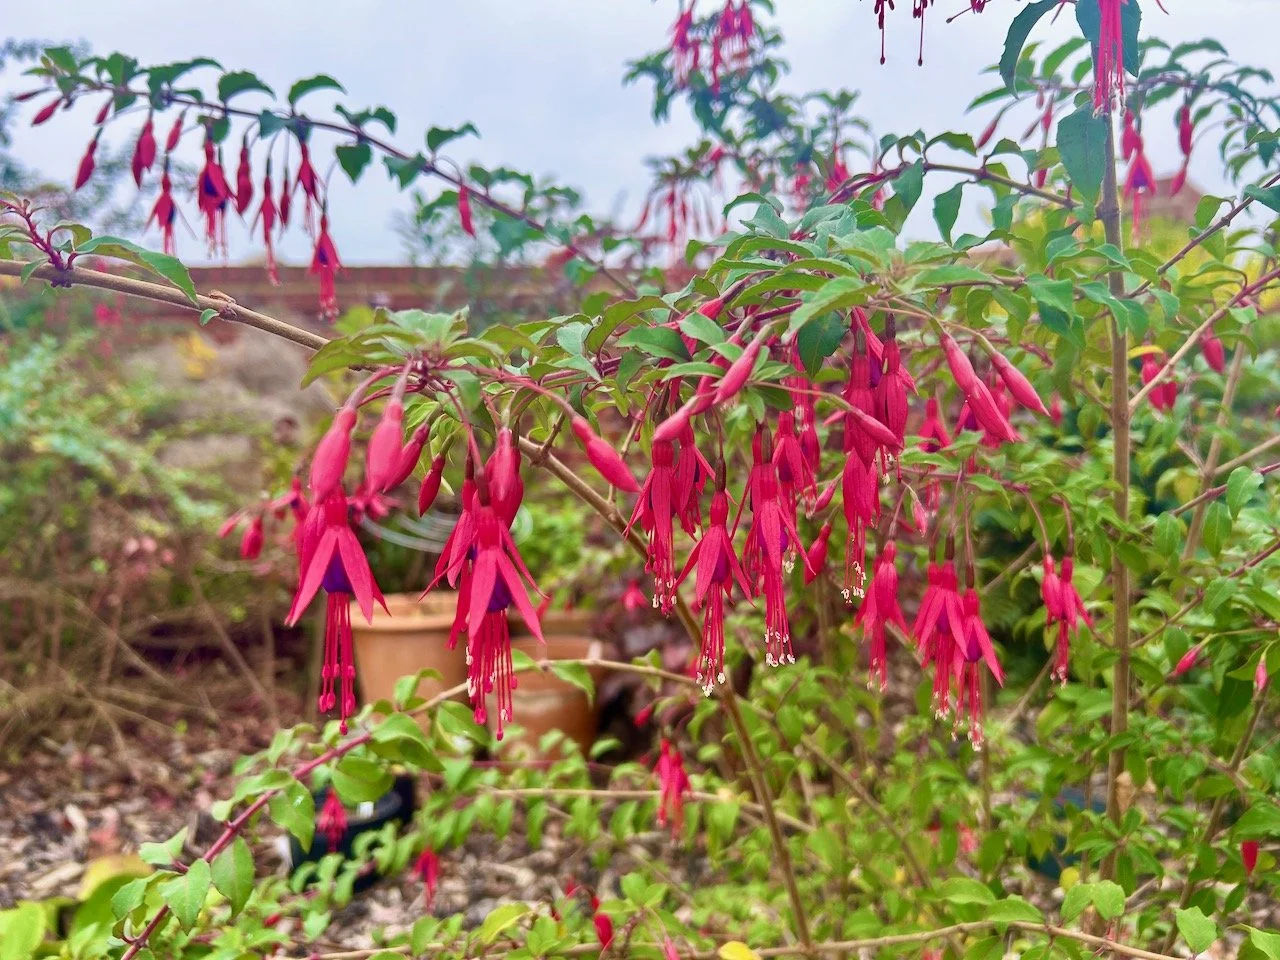
The fuchsia bushes are providing pops of colour, which is especially welcome on the greyer, more dreary days. These dancing ballerina like flowers never fail to raise a smile, so it’s been good to see them in the garden for a lengthy spell. This bush suffered a little with the snow I mentioned earlier, and some remedial ‘knocking the snow off’ action was required.

Bright pink 'dancing' fuchsias against a misty sky
The mahonia in the large border with its flowering yellow crown - it's almost as high as the brick wall behind it now

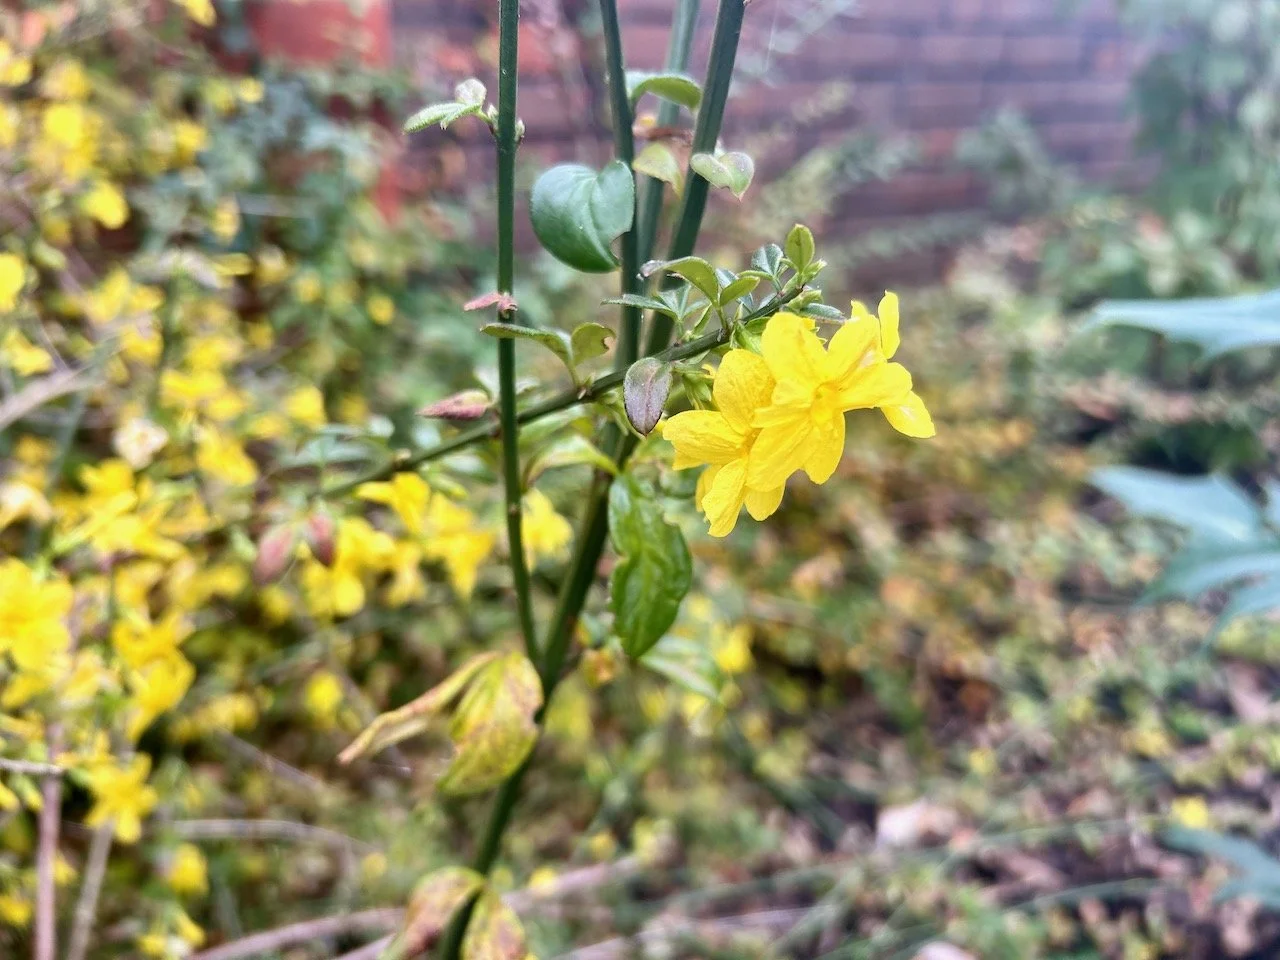
It wasn’t just the mahonias bringing yellow to the garden, the winter jasmine has also started to flow this month. It’s a bit wild though, as it doesn’t have any support and is growing freeform. My plan is to get some tensioning wire and train it to grow along the inside of the wall, but I’ve still to work out exactly what I need and which is the best to opt for. I think the answer to both of my questions is to get something, try it out and if it does what I want then great, buy some more and if not, try something else!

The winter jasmine with its yellow flower - flowering without support

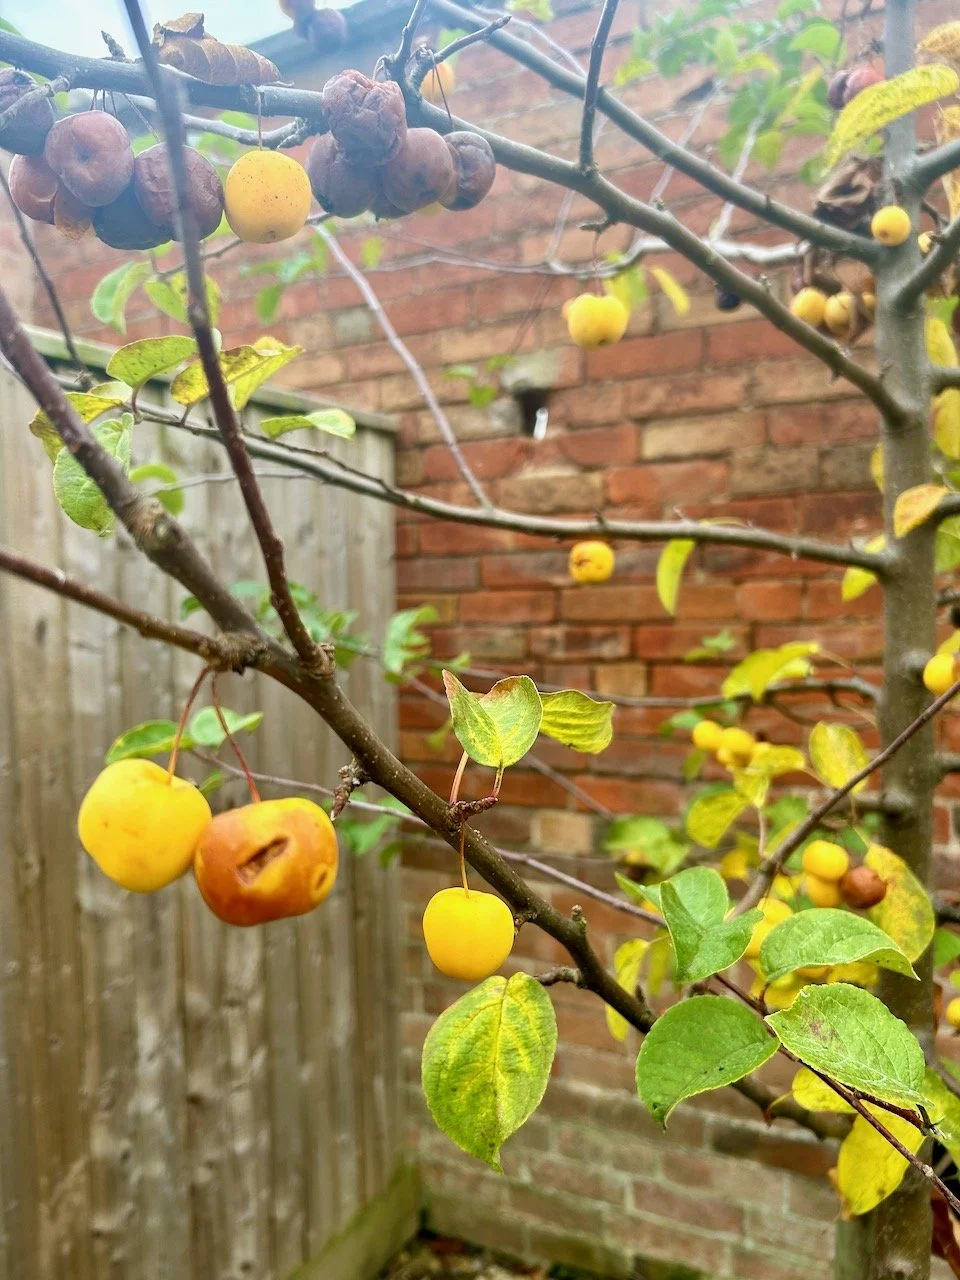
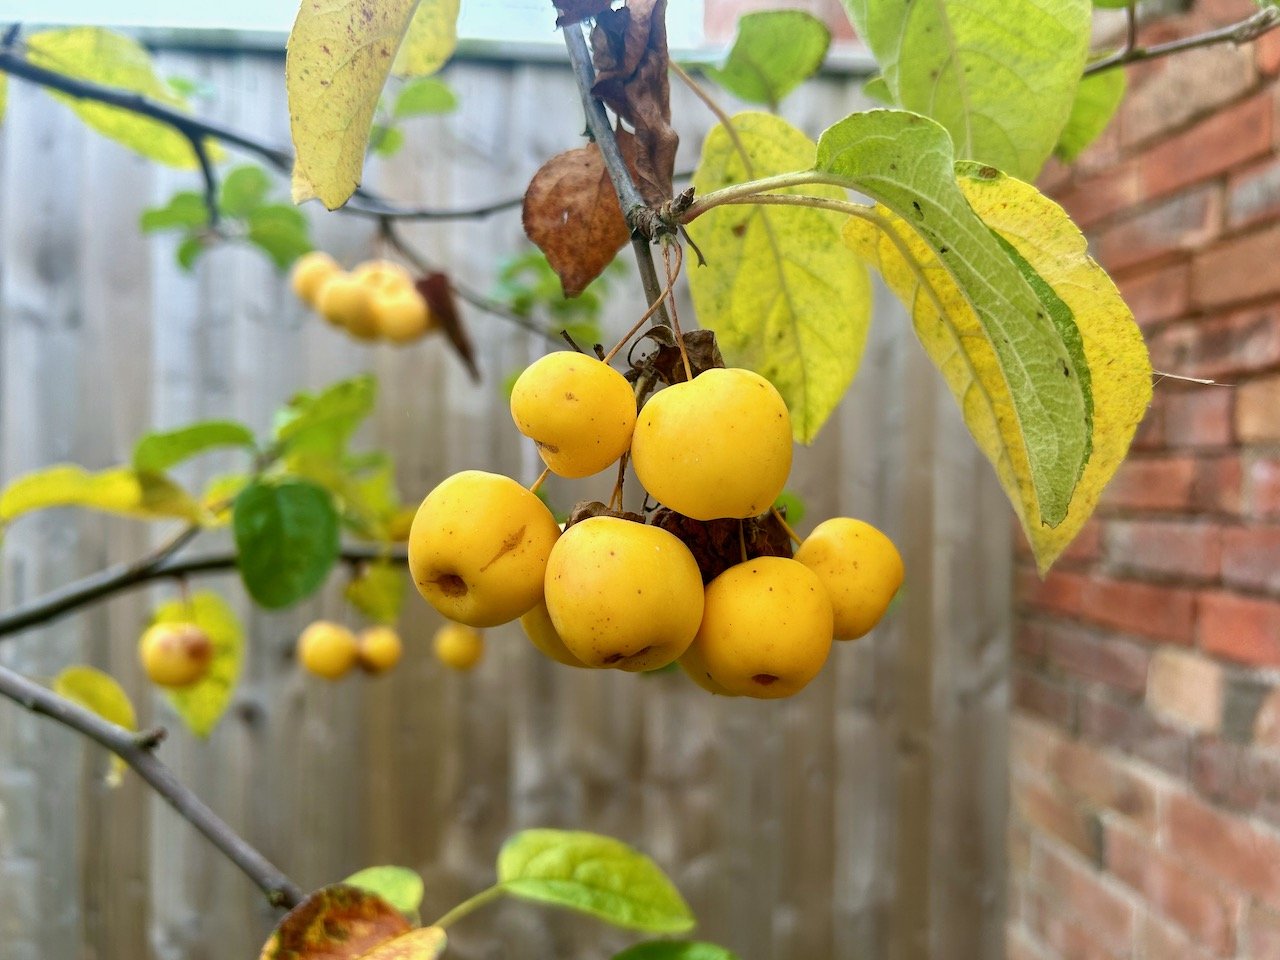
At the other end of the garden the little crab apple tree is hanging onto its fruits - just. There haven’t been as many fruits as last year, which given that I gave the tree its first prune isn’t surprising, and so I haven’t picked any to use this year. That’s a second year running, but I”m hopeful that next year it will be as prolific as it was the first year we were here and I’ll be able to use them in the kitchen, and hopefully as decorations.

overripe and yellow rotting crab apples on an almost bare crab apple tree
A bunch of mostly yellow 'cherry like' crab apples with autumn leaves above

Ah yes, the snow. It was quite a surprise really, despite it being forecast. Mostly because when we went to bed it was raining/sleeting - and the perceived wisdom that it wouldn’t settle. But it did!

The main border covered in snow - looking up into the village
Admiring the shadow of the crab apple tree on the wall, but also the sun on the snow covered lawn

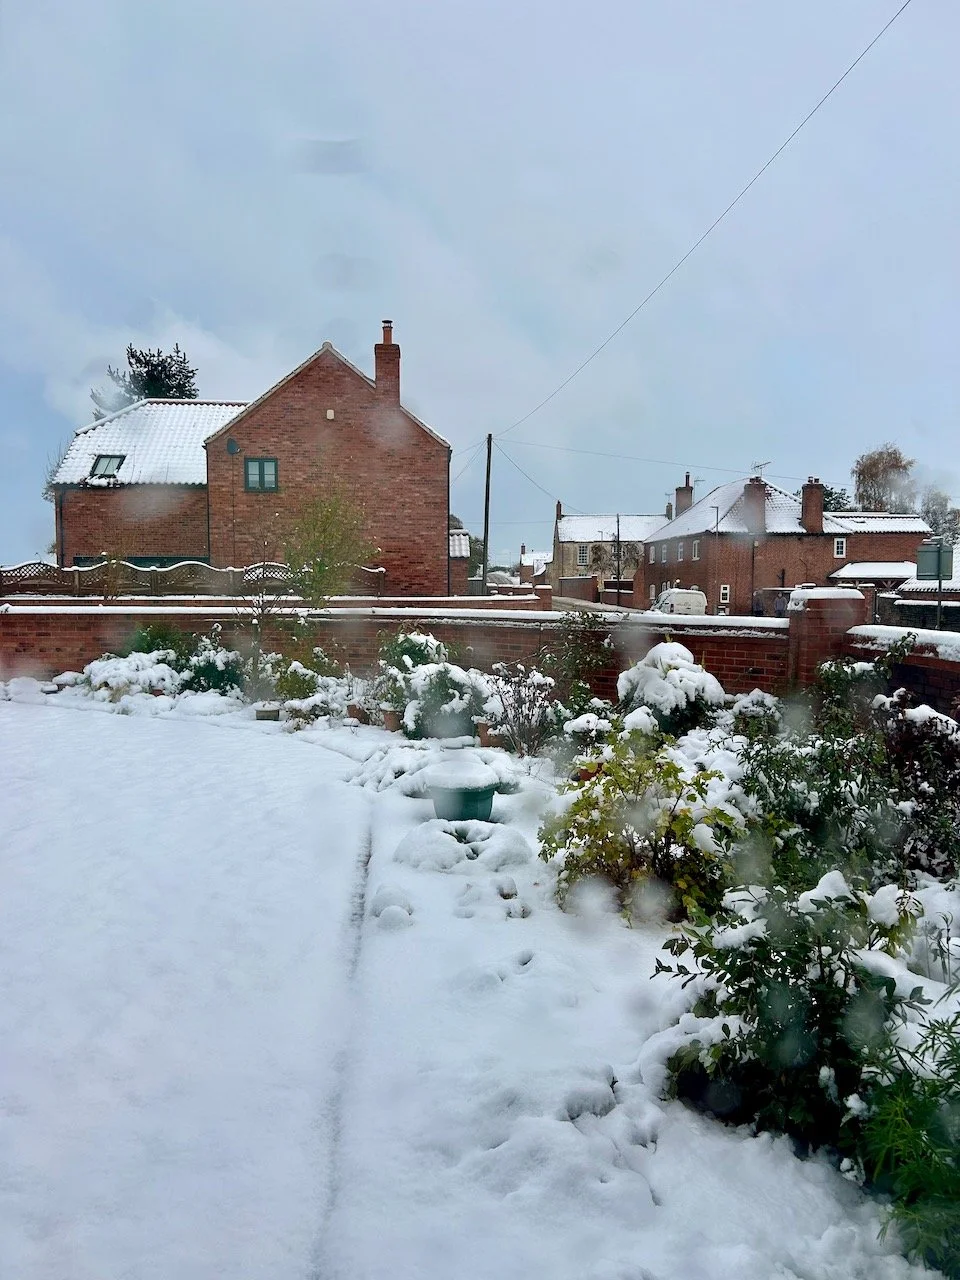
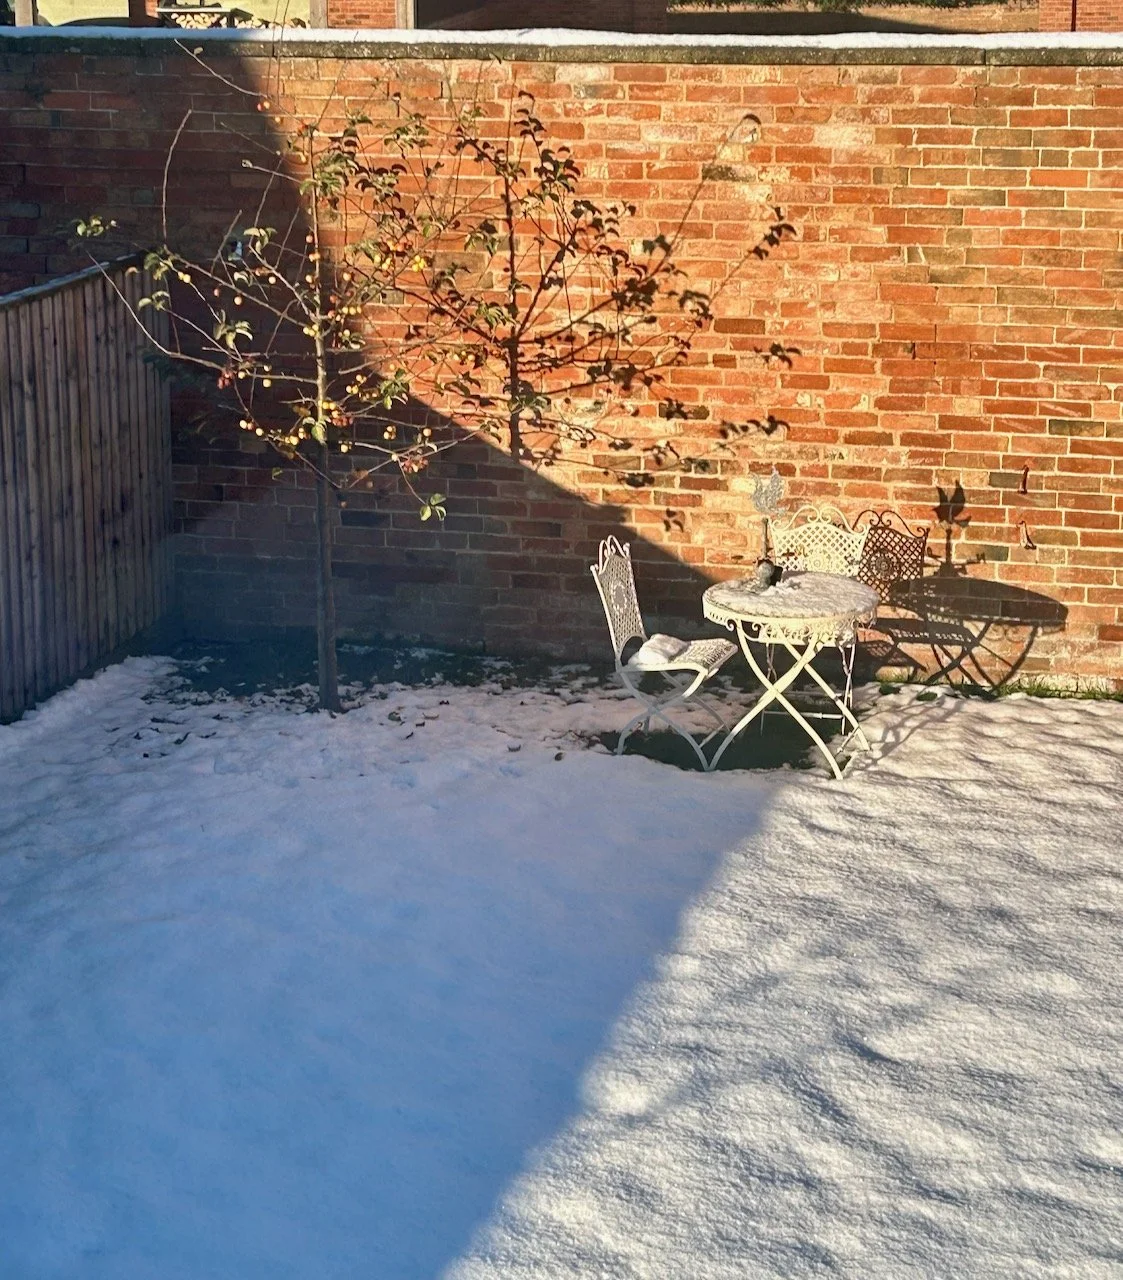
It definitely makes everything look pretty, and I particularly enjoyed seeing the sun shine onto the snow and the shadows it cast onto the wall at the back. It’s true too that the second day of the snow is often the best - you’re over the shock of its arrival, the roads are recovering and the sun comes out.

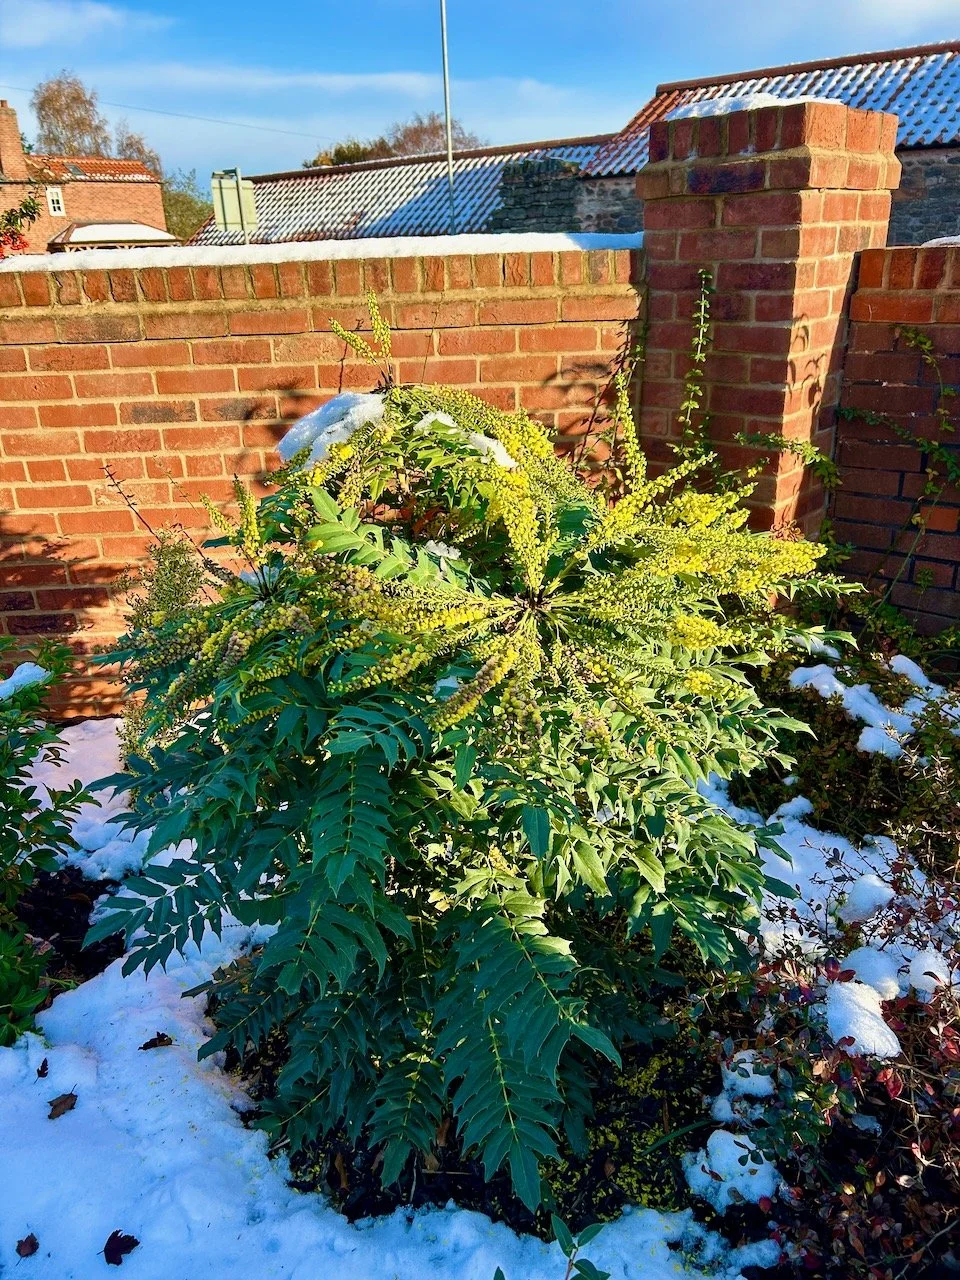
Thankfully the mahonias didn’t mind the sun either!

PostCommentLove

Adding a log store and storage to our garden

While we have an established border in a corner of our new build garden, what I realised fairly quickly is we don’t have is a space to store things such as ‘resting’ pots, or open compost bags without them being on show, or taking up unnecessary room in the garage. We also brought some seasoned logs with us when we moved, which had spent a year or so in the garage and while they were living their best - and driest - life, the garage was never intended as their long term home.

I’d been using the area inside the trellis to store pots and some compost bags, as well as leaving it on the paving outside the garage - but neither of these were ideal. We do have a space alongside the garages, where our many wheelie bins live (we have four, or rather three and a half - recycling, glass recycling, garden waste and general waste). These are out of sight as, unless you have to, no one wants to see their bins do they?

That empty space had potential, I was sure and so I started to look at mini sheds - but didn’t find what I was after, not that I really knew what I was looking for either. I changed tack and started looking at log stores, and I had a bit more luck. , but they still weren’t right.

Then I struck gold, and found a log store which also had a small storage section. Perfect. Or it would have been as it wasn’t in stock. Sigh.

But I find one I did. The same model, but cheaper. That never happens does it?!

And so it duly arrived from Robert Dyas with delivery by Forest Garden in our often wet summer. It needed assembling and MOH set to work, working in the garage - which was just as well, as it meant he could continue when the summer weather was slightly more than inclement.

We’d worked out that between us we could lift it into position without adding the weight of the roof, and the final touches could be added when it was in situ. Thankfully the weather gods were on our side too, and we were blessed with a gloriously sunny day on the day we planned to tackle this.

This is the corner where it was going.

A cleared corner area almost ready for the log store's permanent home

Of course it needed some prep work first. We cleared back the top gravel, and were pleased to discover compacted earth beneath. I’d got some weed suppressant - but importantly permeable - ground cover that I wanted to put down, and planned to use the metal pins to keep that in place.

That didn’t work so well. I was lucky with the first one - it went straight in. Then wherever we tried we hit something harder and bent the pin. A plan B was needed.

Plan B made use of the gravel to anchor the weed suppressor. And I thanked my lucky stars that we’d opted to put the log store here, originally we thought we might make this another small planting area for a climbing rose - but that wouldn’t have happened given what we discovered.

But working with what we had, it was soon in place, fitting nicely into the space we had and which we’d planned for it to use.

It wasn’t long before MOH had attached the roof and finishing struts, and attached the door too. That needed a small adjustment to make it fit a little less snugly - we needed to be able to open the door, and no doubt the wood would swell a little in wet weather too, so with the adjustments made, it was time to fill it.

It didn’t take me long to stack our logs or collect the open compost bags from their various storage spots around the garden. And I couldn’t be happier - we have cleared some space in the garage, and brought all the compost bags together to create a functional and secure storage area. We don’t use a lot of logs though, and in truth this is probably more space than we need for logs, but if we need to we can add another storage area relatively easily, but we’ll see how we go for now.

But the weather wasn’t done with us yet!

The log store now with a tarpaulin covering the logs

From being the driest they’ve ever been, the logs soon got a dousing - well actually several - from heavy rain. They weren’t soaked but wetter than you’d really want them to be, and so we added a tarpaulin to give them some protection.

I never knew how many sizes you could get tarpaulins in - but of course, none exactly matched the size we had. In the end we went with a custom-sized tarpaulin, as i) it will fit, ii) it will hopefully last and iii) it actually wasn’t that expensive - with delivery this was just over twenty pounds, so not extortionate - and definitely worth having.

Though having it a week earlier would have been better!

PostCommentLove

Making green tomato chilli ketchup

Years ago I made the best green tomato chilli ketchup but somehow lost the printed copy of the recipe and I’ve been kicking myself ever since, especially as the recipe was removed from the website I’d found it on. Sigh. This year when dad said did I want any green tomatoes I searched harder online for something similar to the previous recipe - and found this Green Tomato Recipe on the From The Larder website, and it gets a huge thumbs up from me.

And of course with anything made with green tomatoes - fresh bright green tomatoes go in, and ends up as something more brown - but don’t let that put you off.

No really don’t.

This has a great taste and is so useful. I love it alongside roasted squash and rice and even in sandwiches.

The recipe calls for 1kg of green tomatoes, and while I had a lot from dad (and I mean a lot) some had ripened as they sat alongside the already red ones and so had made their way into roasted tomato pasta sauce and subsequently the freezer, I was still a few short. And this handful topped me up to the full kilo - a quick last picking from my own tomato plants and I was good to go.

There’s a bit of chopping involved as you’d expect, but nothing too onerous. And don’t they look so fresh and vibrant?

Young, fresh green tomatoes quartered on a wooden chopping board

I debated (with myself, in my head!) about if I should use my preserving pan or not. And in the end the logical answer of ‘you’re preserving so why the heck not’ won out, and I’m so glad I did.

It is a large pan, and even though the amount of ketchup I was making was relatively small using this pan meant I was confident it would all fit in and there’d be no risk of anything bubbling over.

In preparation I’d even saved one of those almost 700g passata jars, but I didn’t use that in the end instead opting for smaller jars. I mean, it often takes me more than one attempt to use all the passata and I knew I’d be using the ketchup in smaller amounts, so it made sense to fill smaller jars.

This is very much like the recipe I remembered and I’m so pleased to have found it, and to have had the green tomatoes. I think next time I’d probably add more than one green chilli, and would consider adding some grated ginger too for an extra bit of zing, but that’s for next time when no doubt I’ll have lost the recipe again.

We’re already almost through one of the smallest jars, with the others safely stored on the top shelf of my pantry. And I couldn’t be happier!

PostCommentLove