Giving my sewing box a new lease of life

When Clare from Maybush Studio got in touch about getting involved with a project using Chalk Paint Spray I couldn't tell you how keen I was. I've been wary about using chalk paint because I thought it couldn't be as good as everyone says and I was tempted to see how it worked as a spray.

I also had the perfect project in mind.

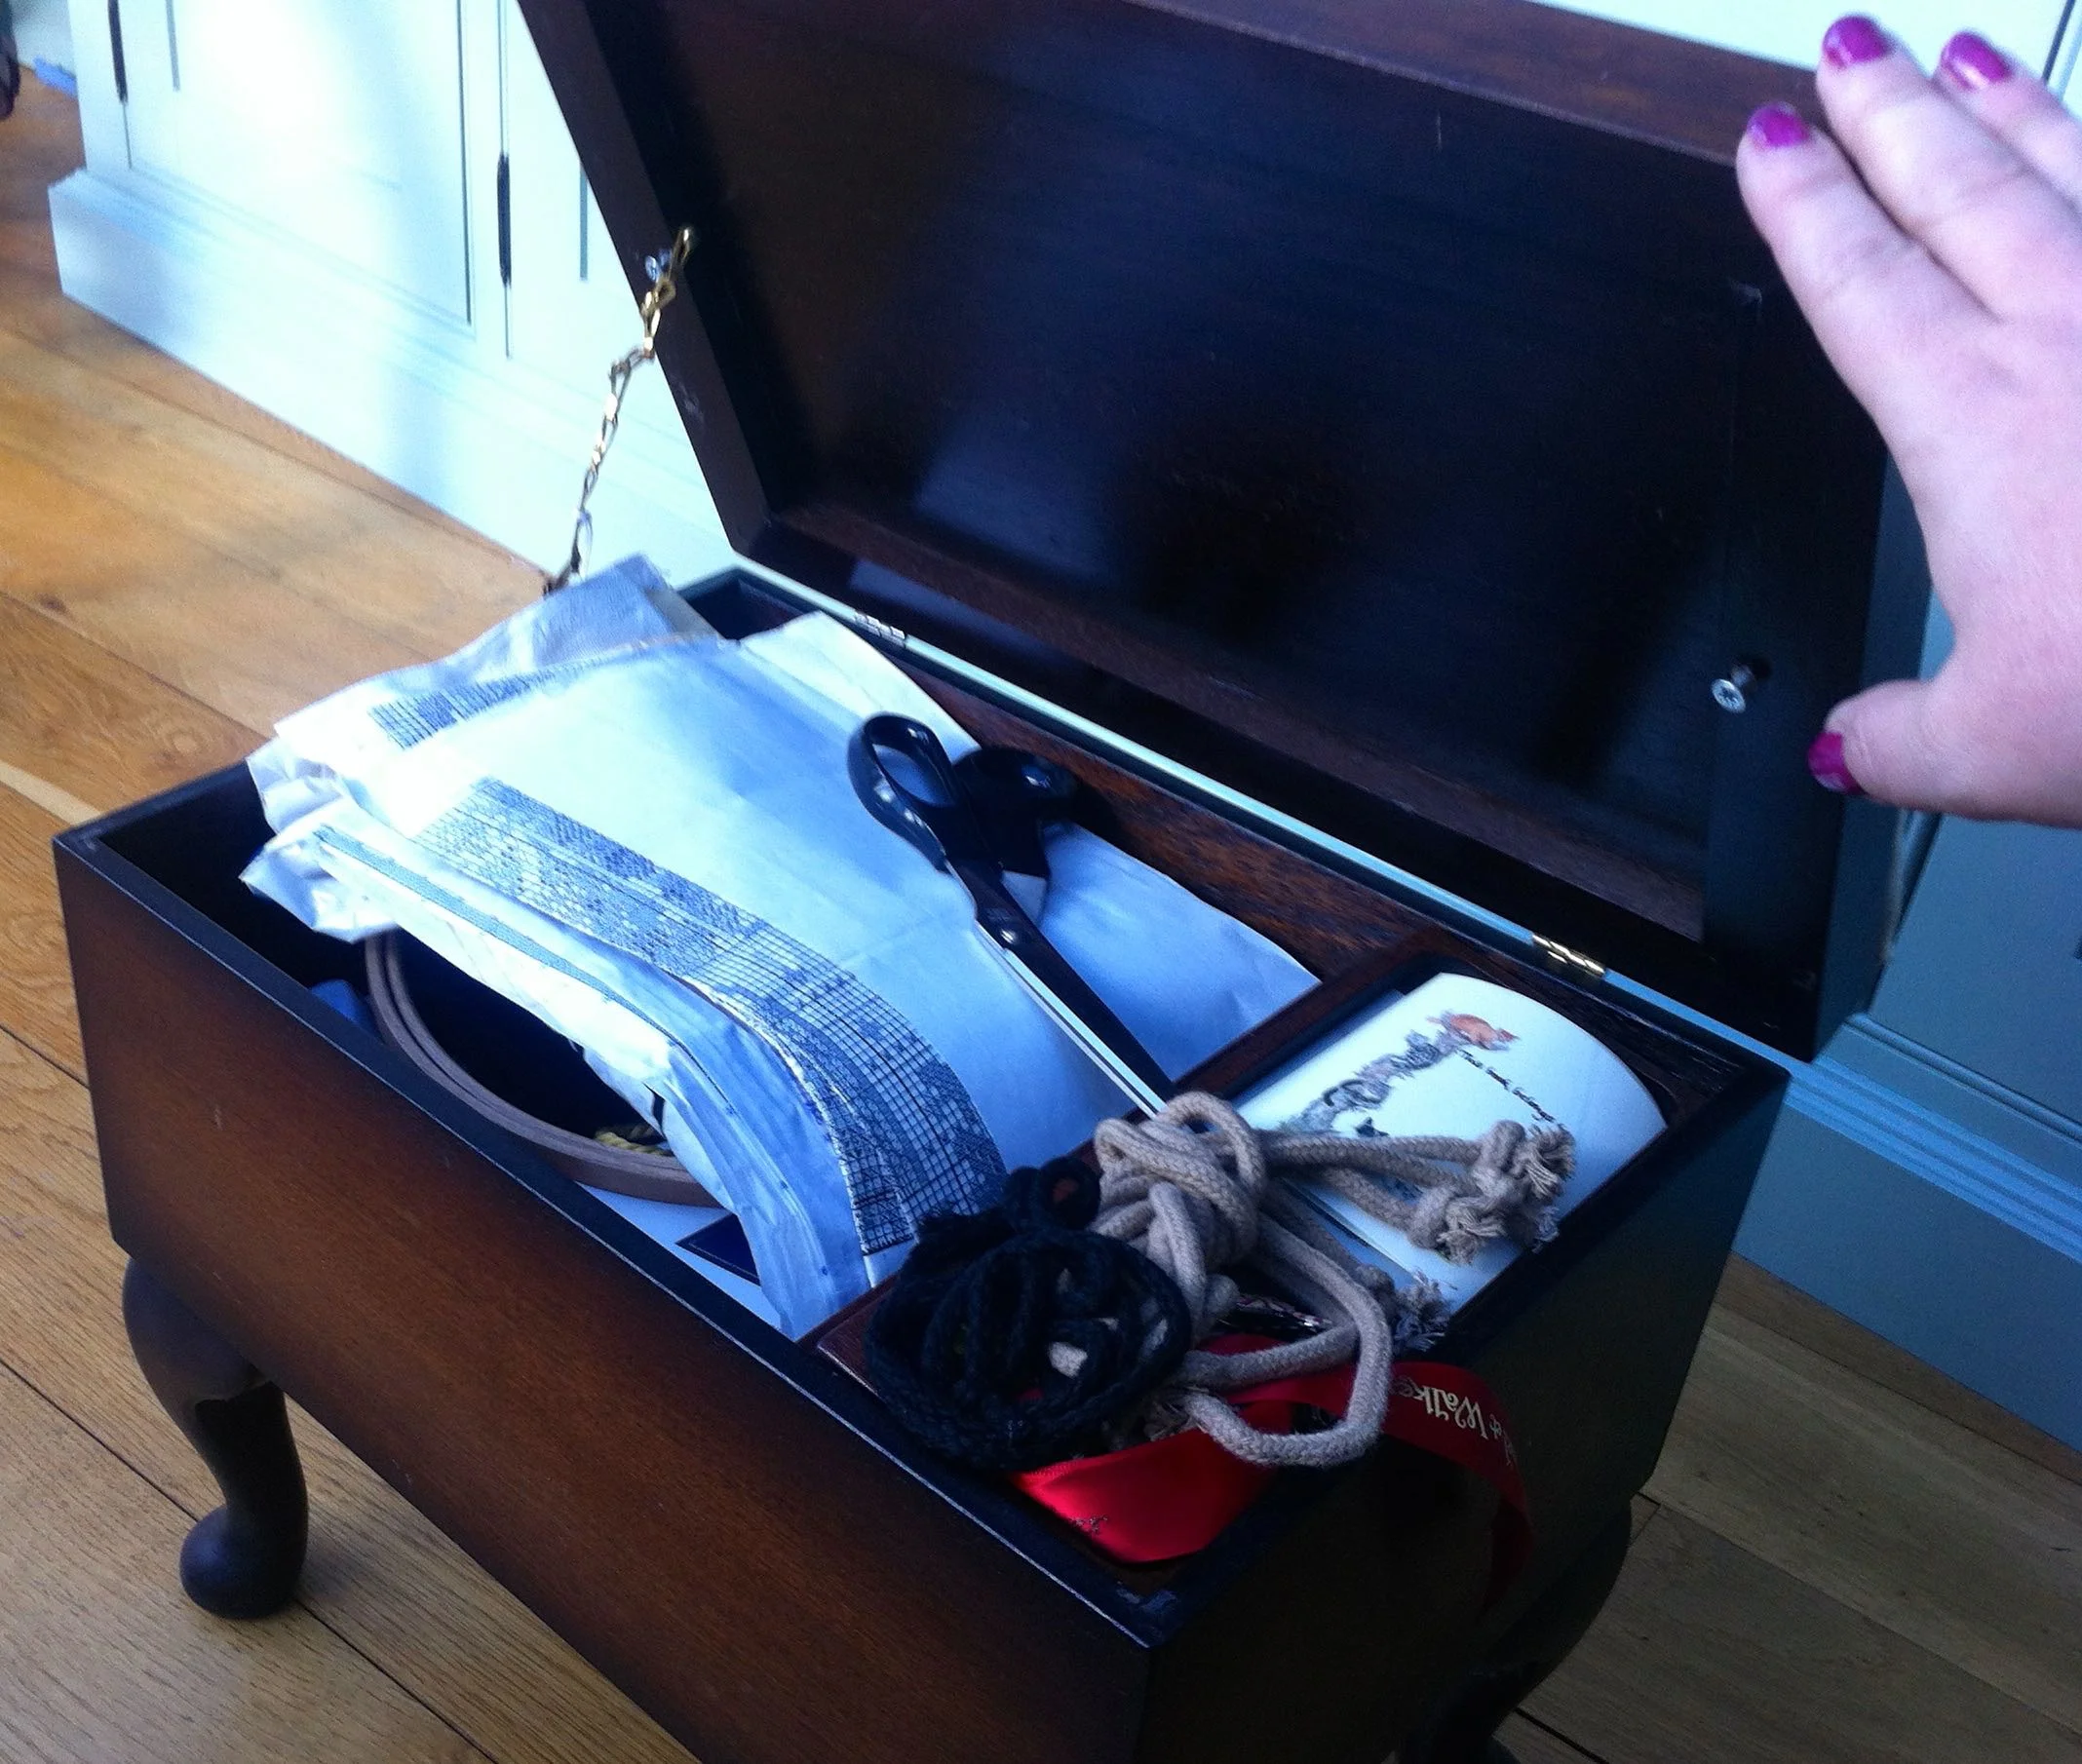
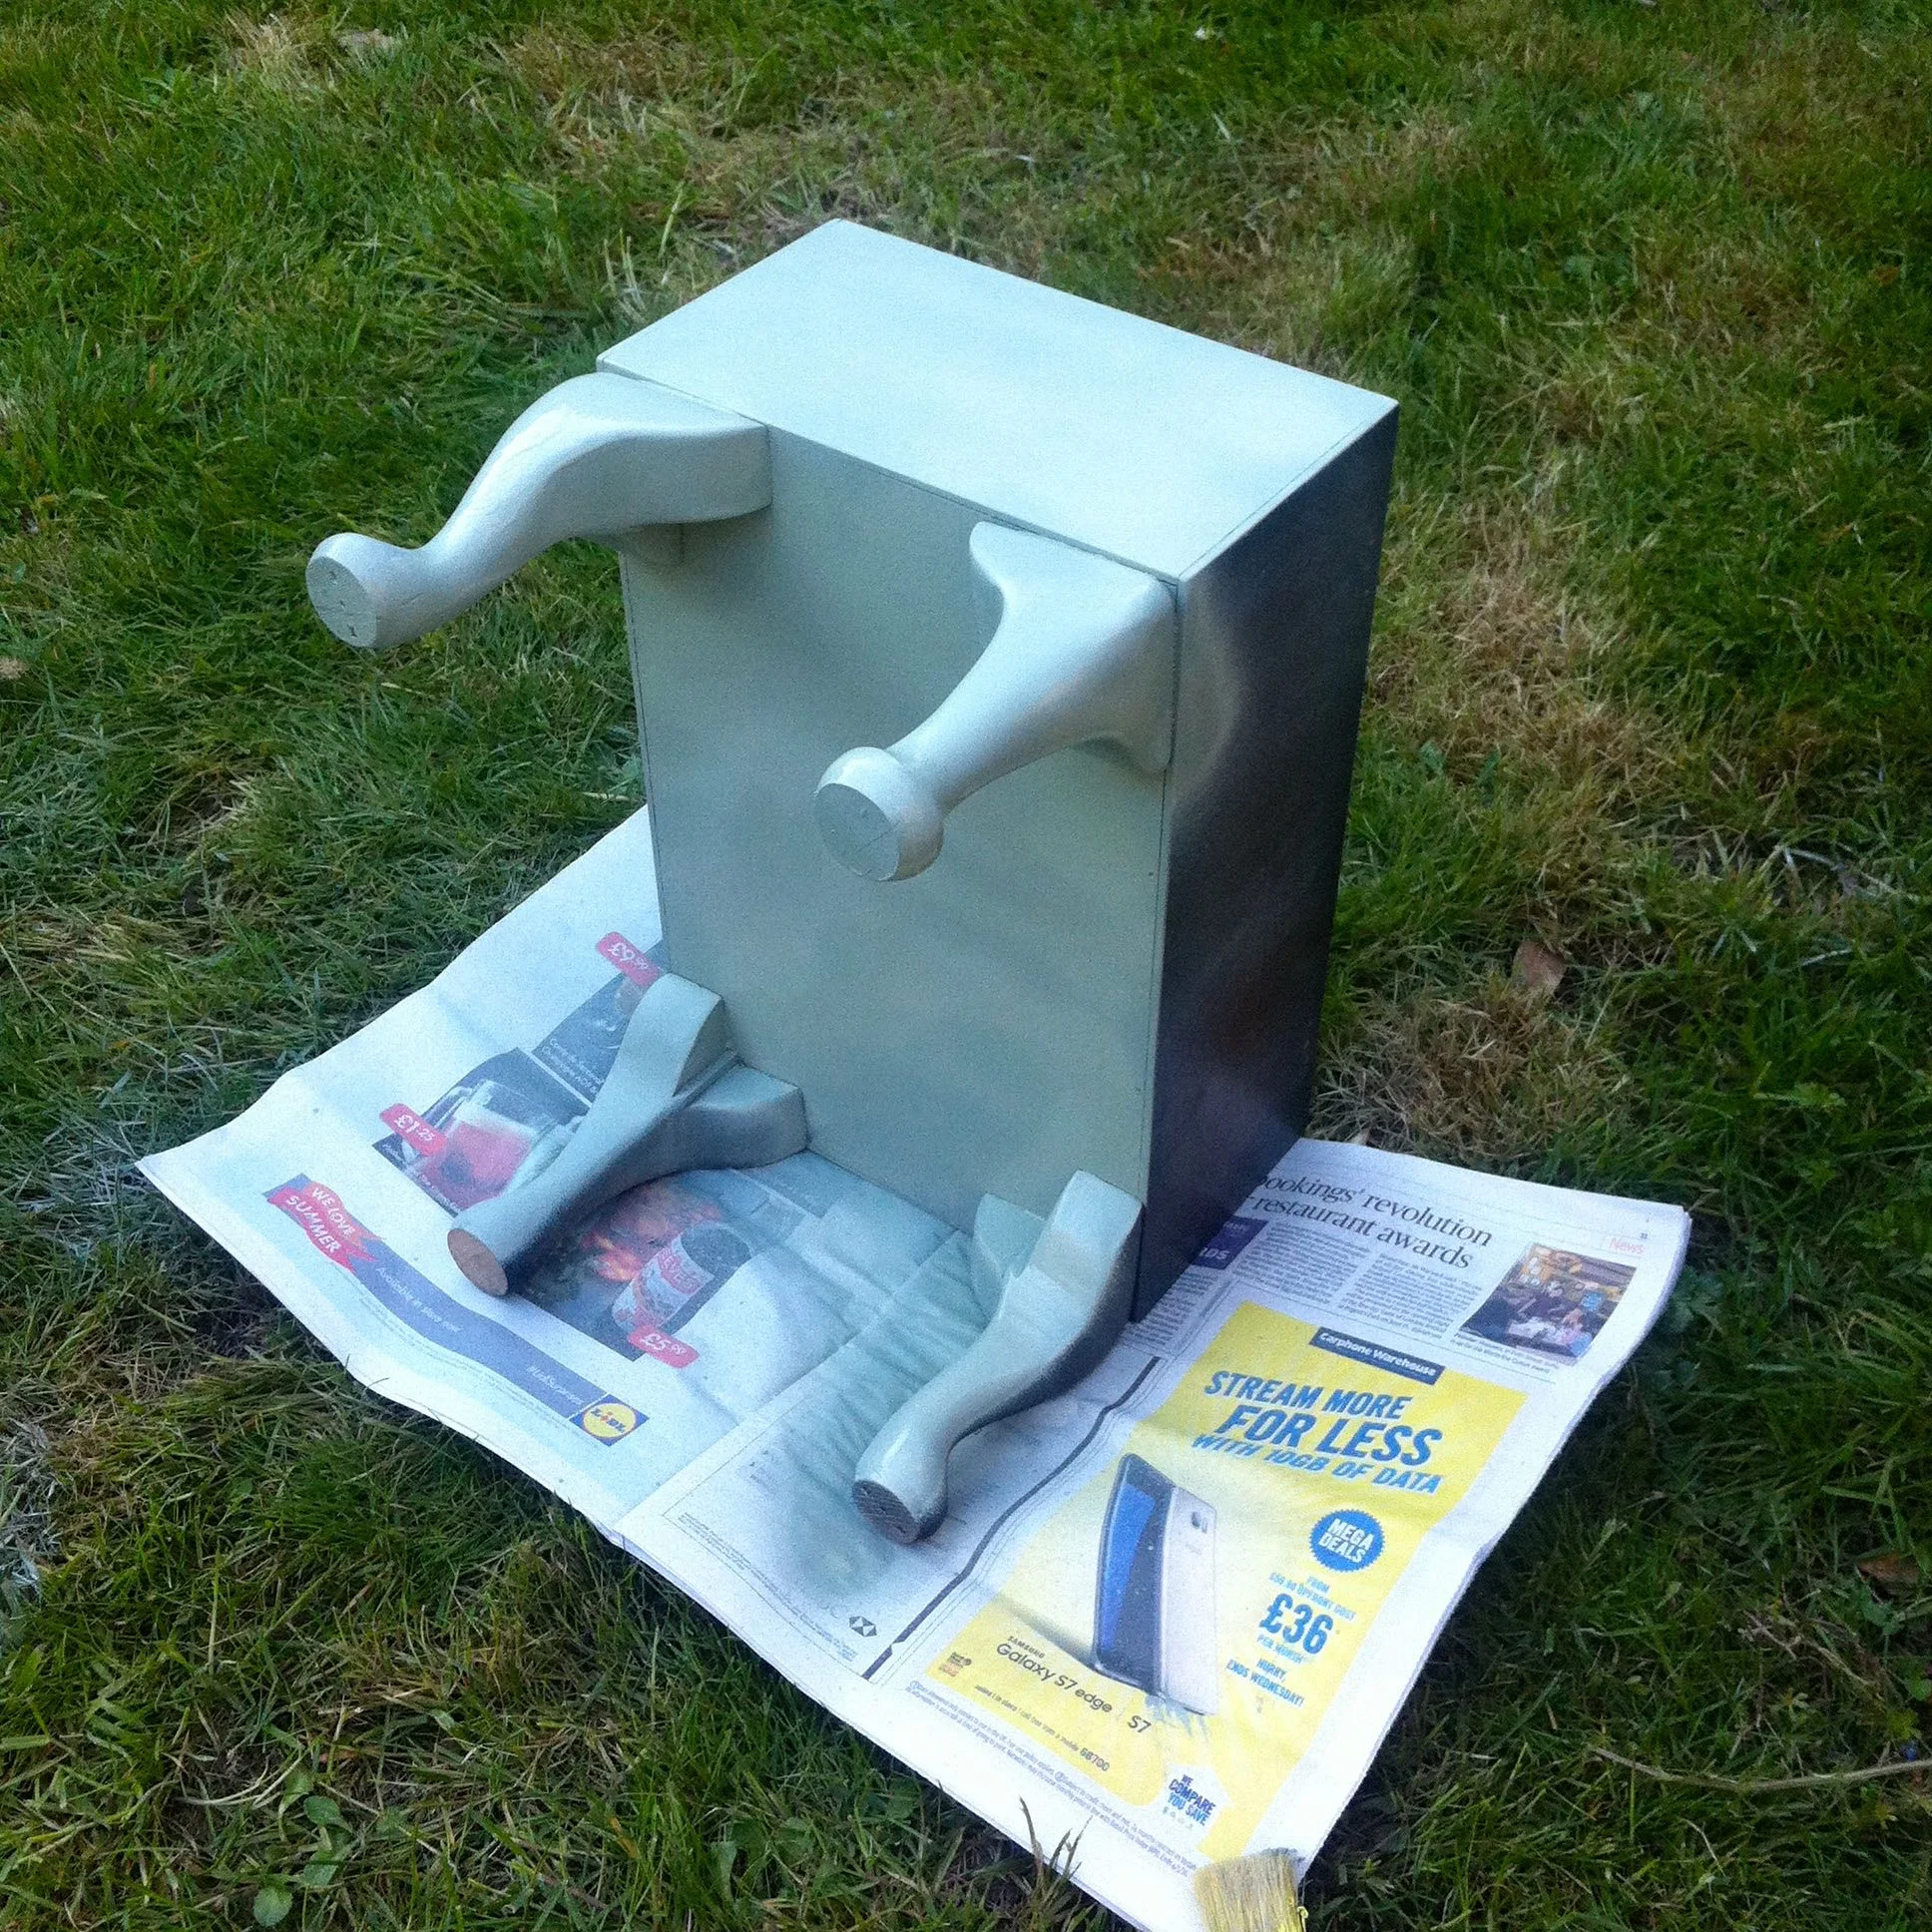
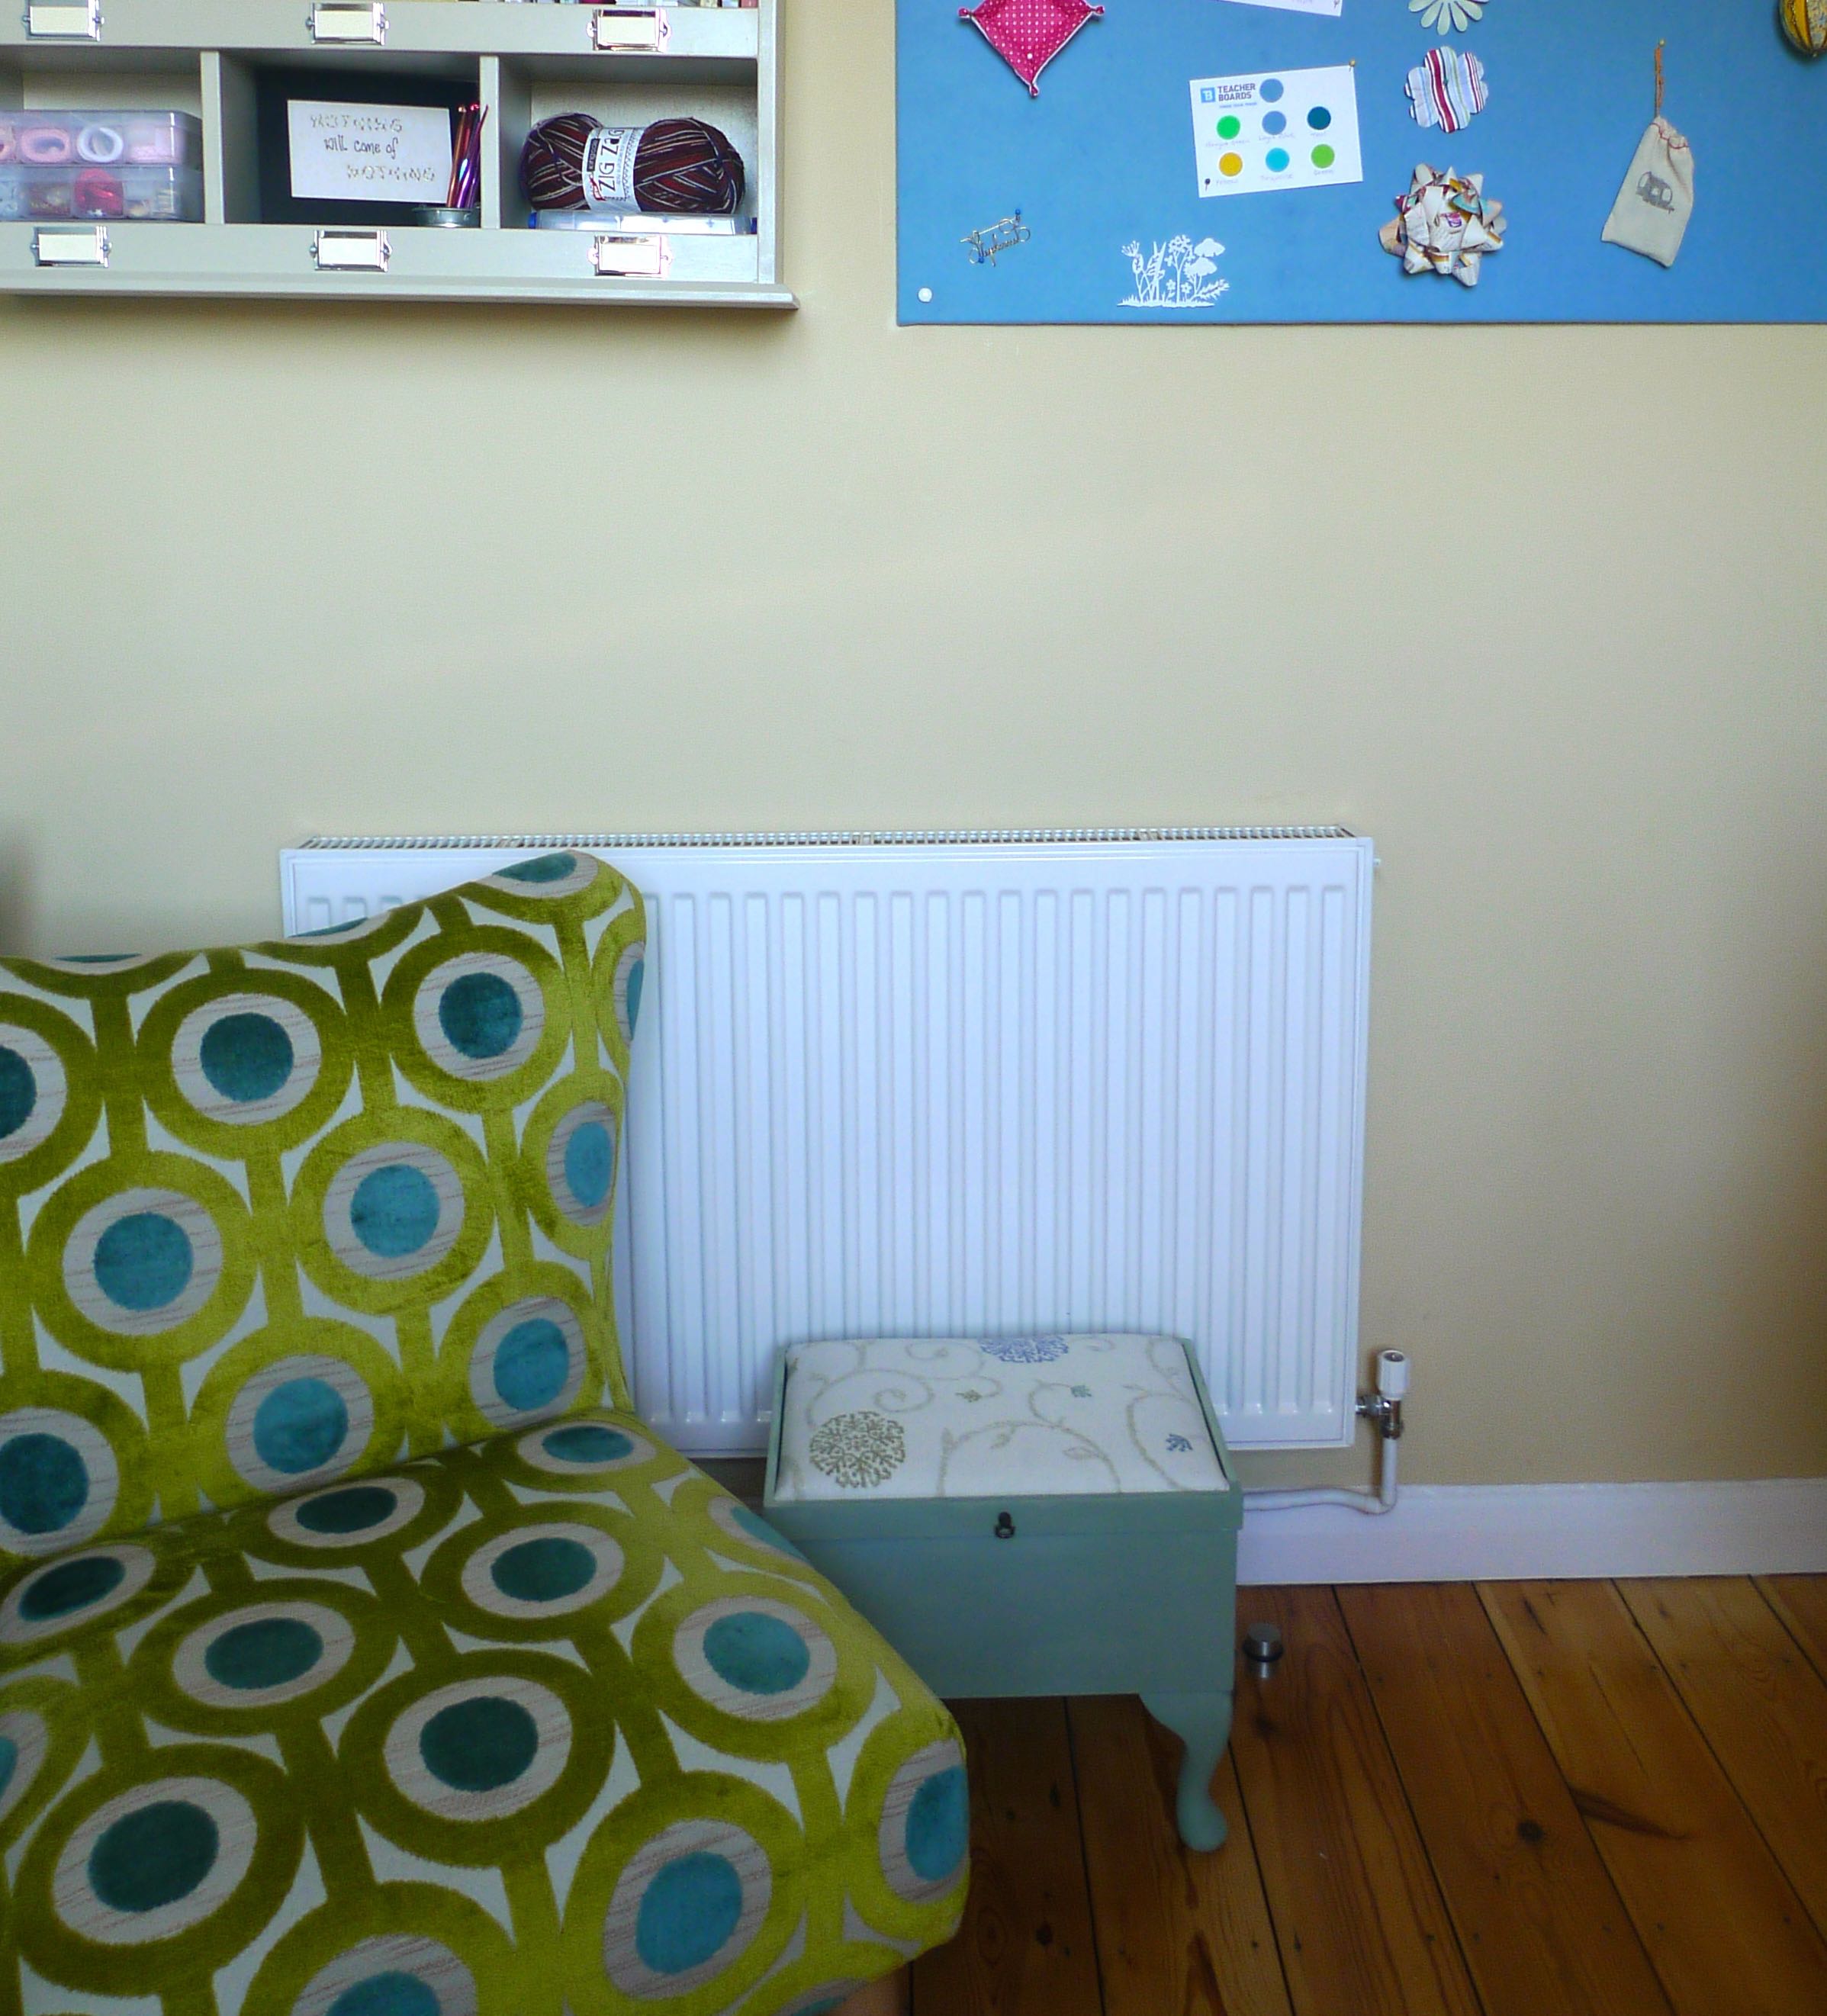
I've had this sewing stool for many years and for a while now it's been relegated to our conservatory and was one of the things I planned to get rid of in my 2016 items in 2016.  But I knew it'd be perfect for this so it was promptly promoted to My Next Project!
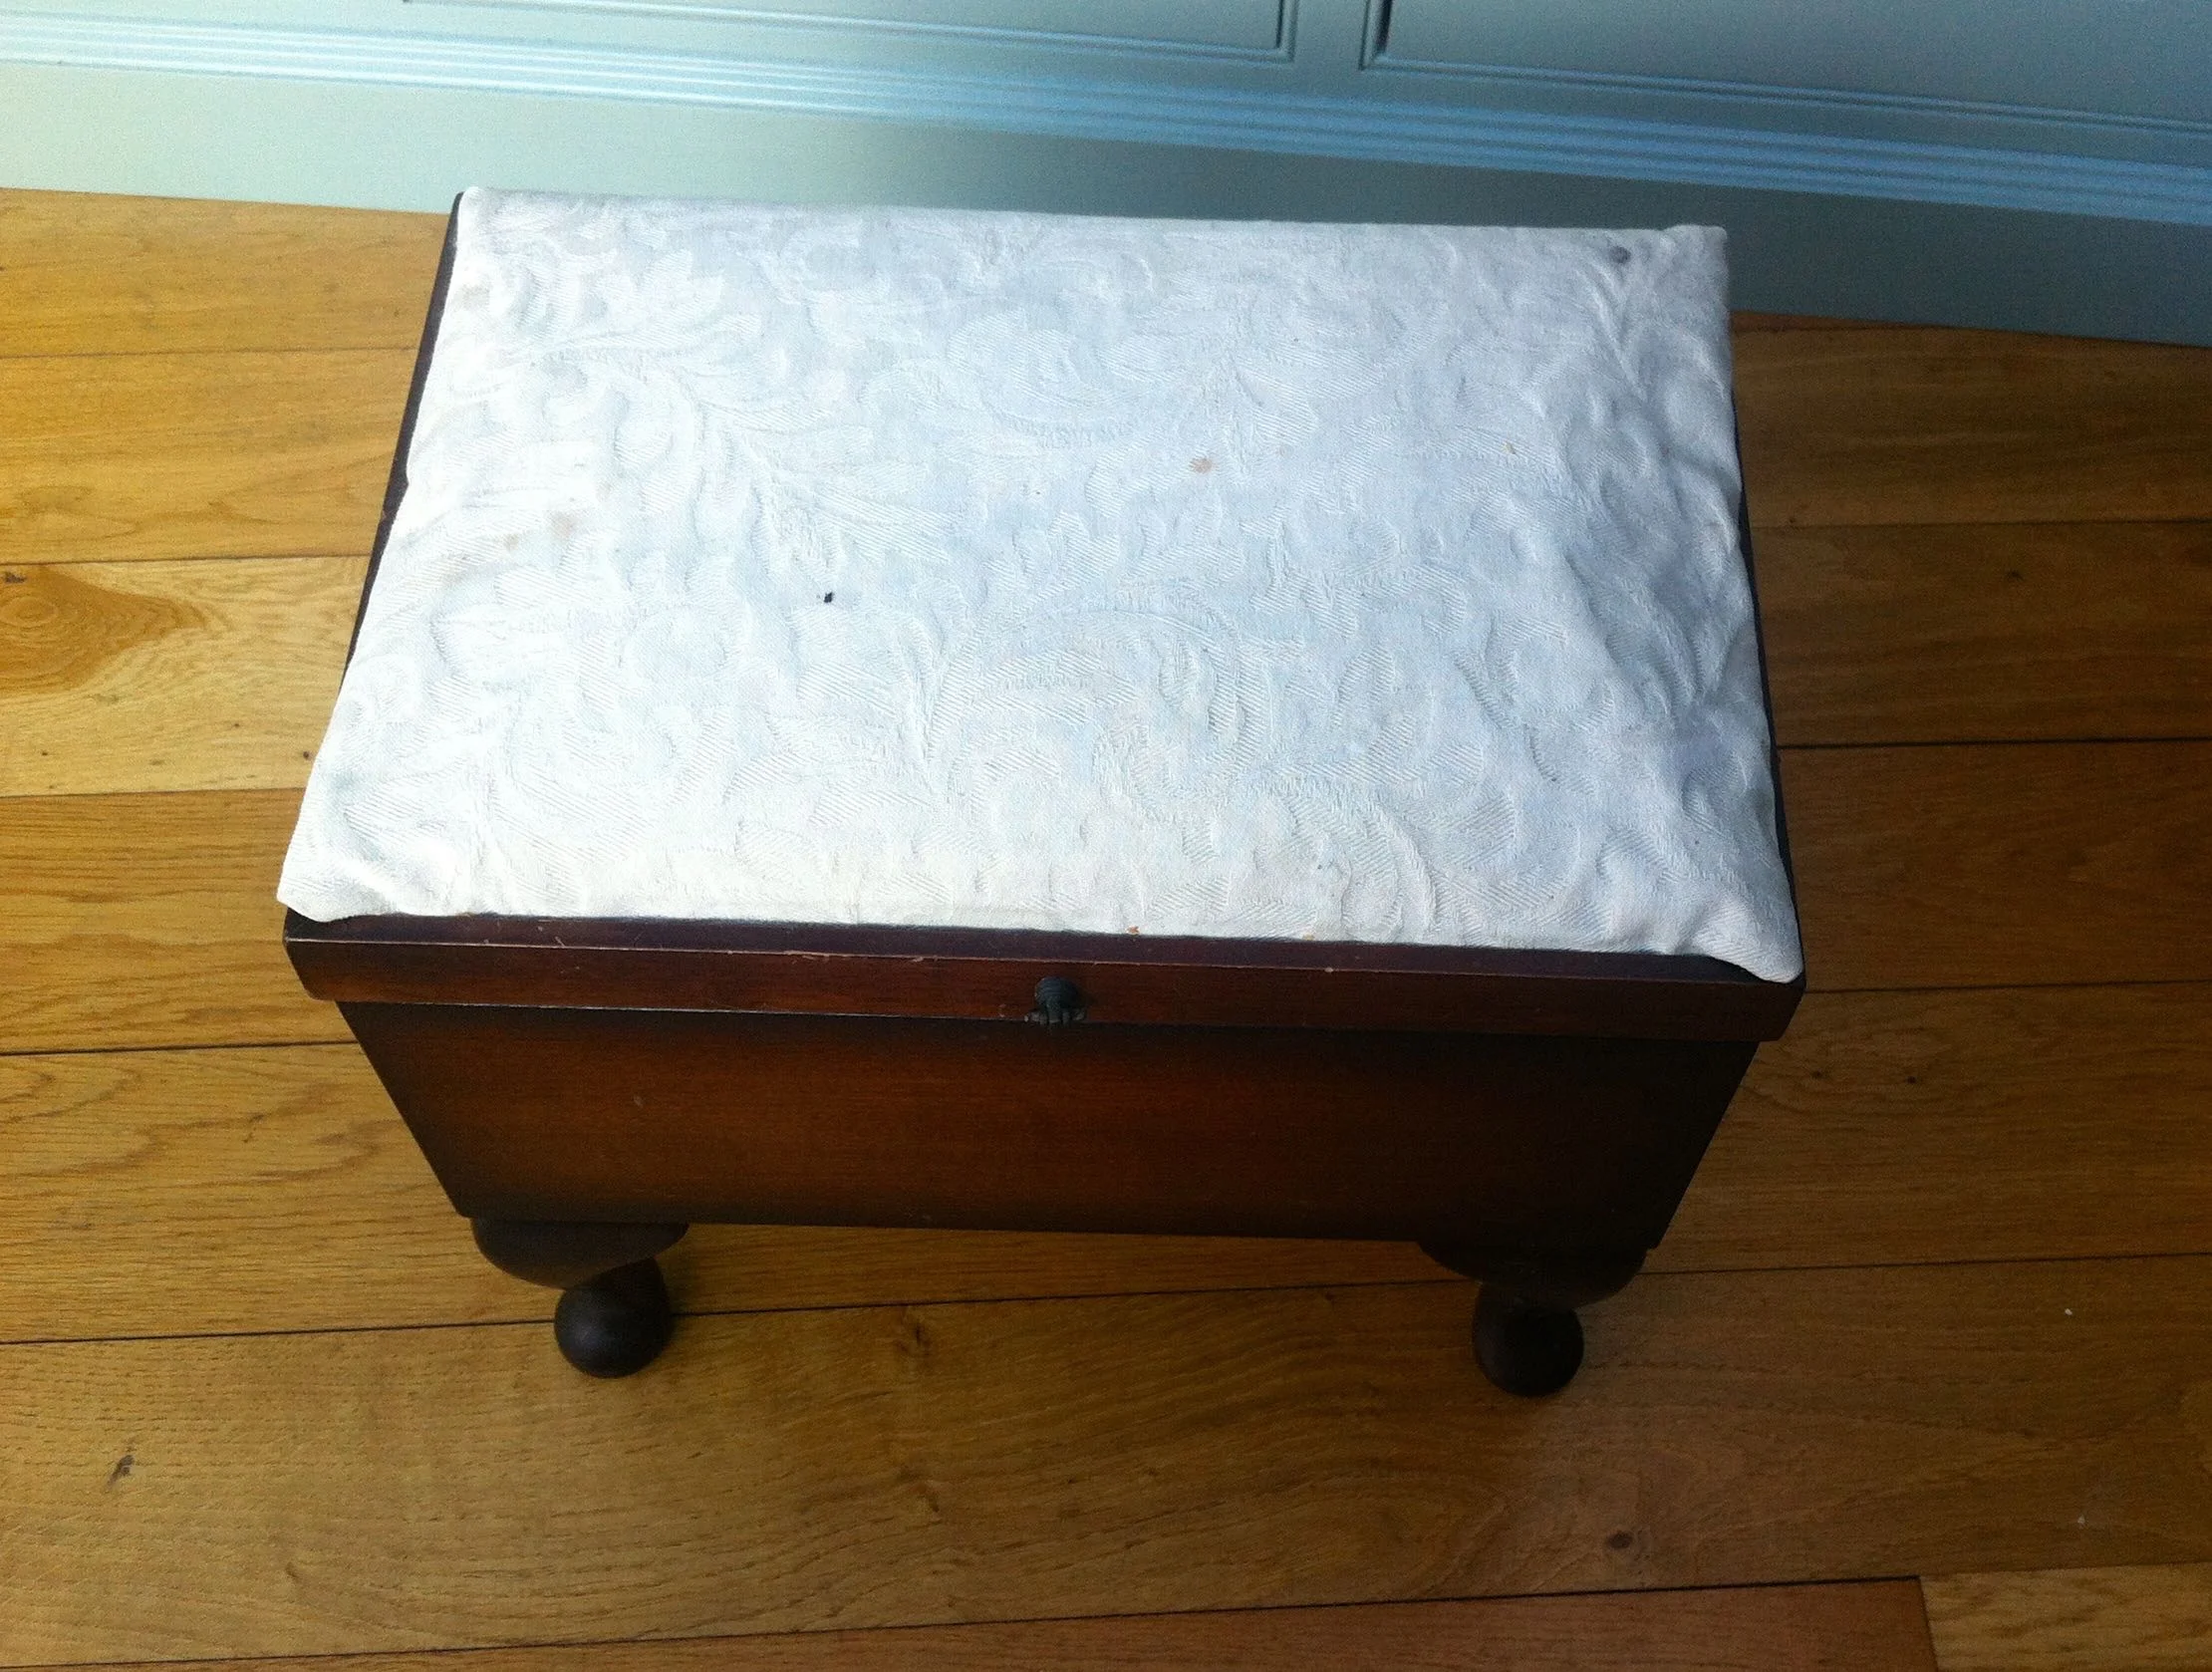
BEFORE

BEFORE

AND FULL OF STUFF...

AND FULL OF STUFF...

First though I had to empty it. It was stuffed full of stuff - most of it craft-related but also randomly a runner for the table. I wondered where that had gone...

With it emptied I dismantled it, removing the cushion pad, its cover, the hinges and other ironmongery.
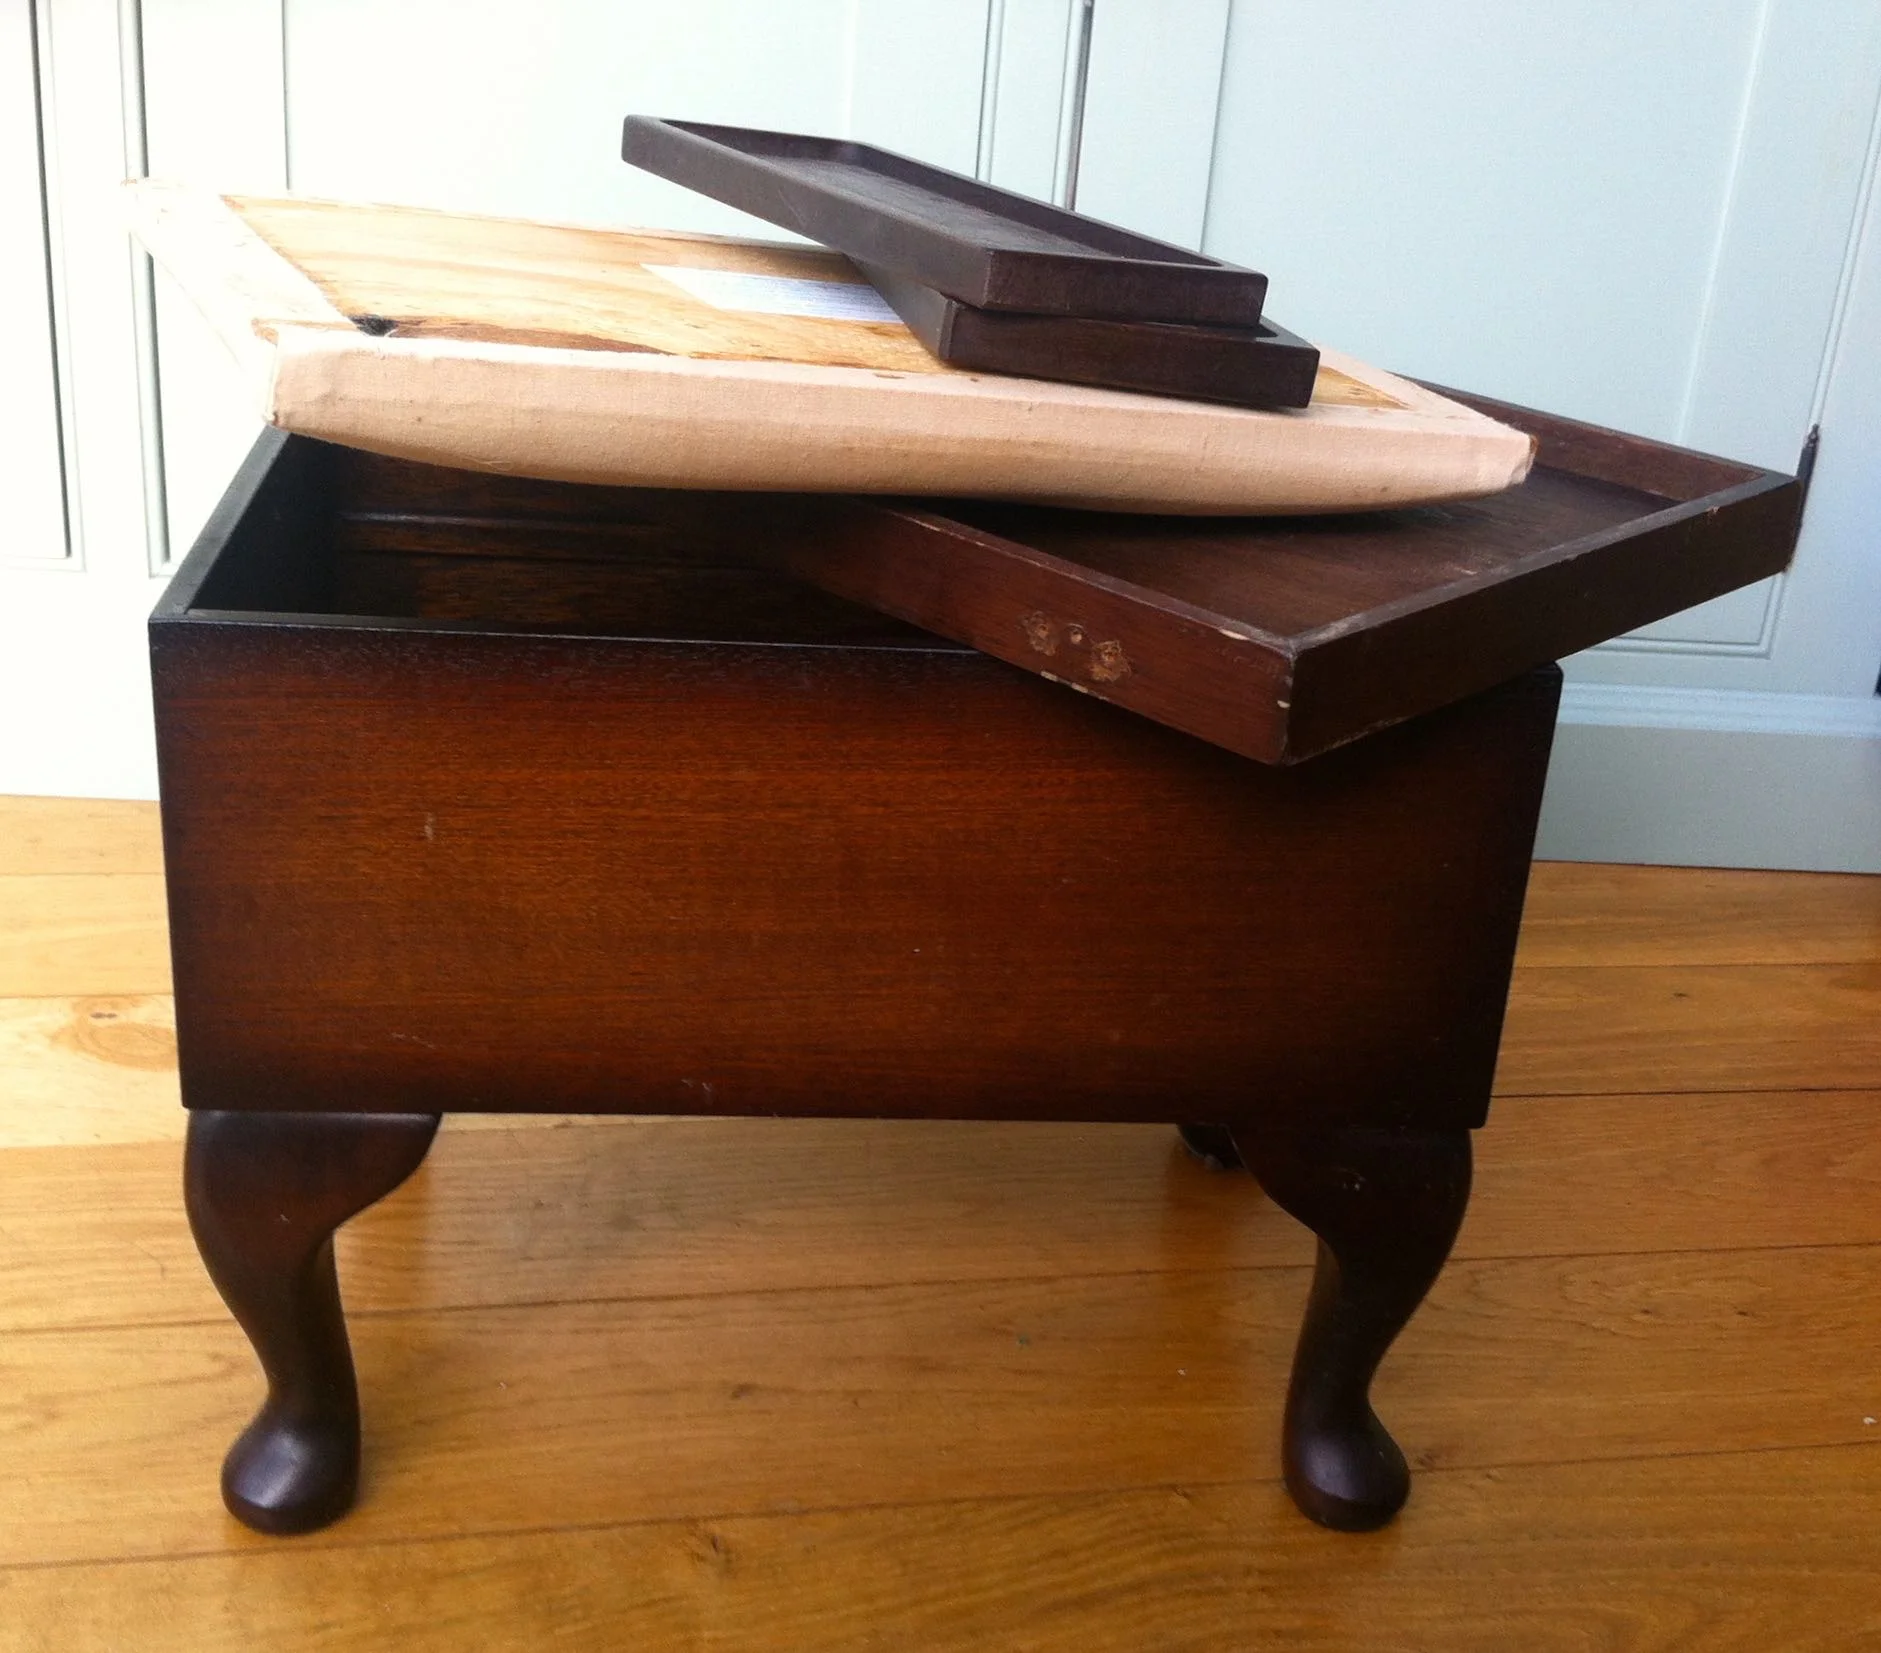
DISMANTLED!

DISMANTLED!

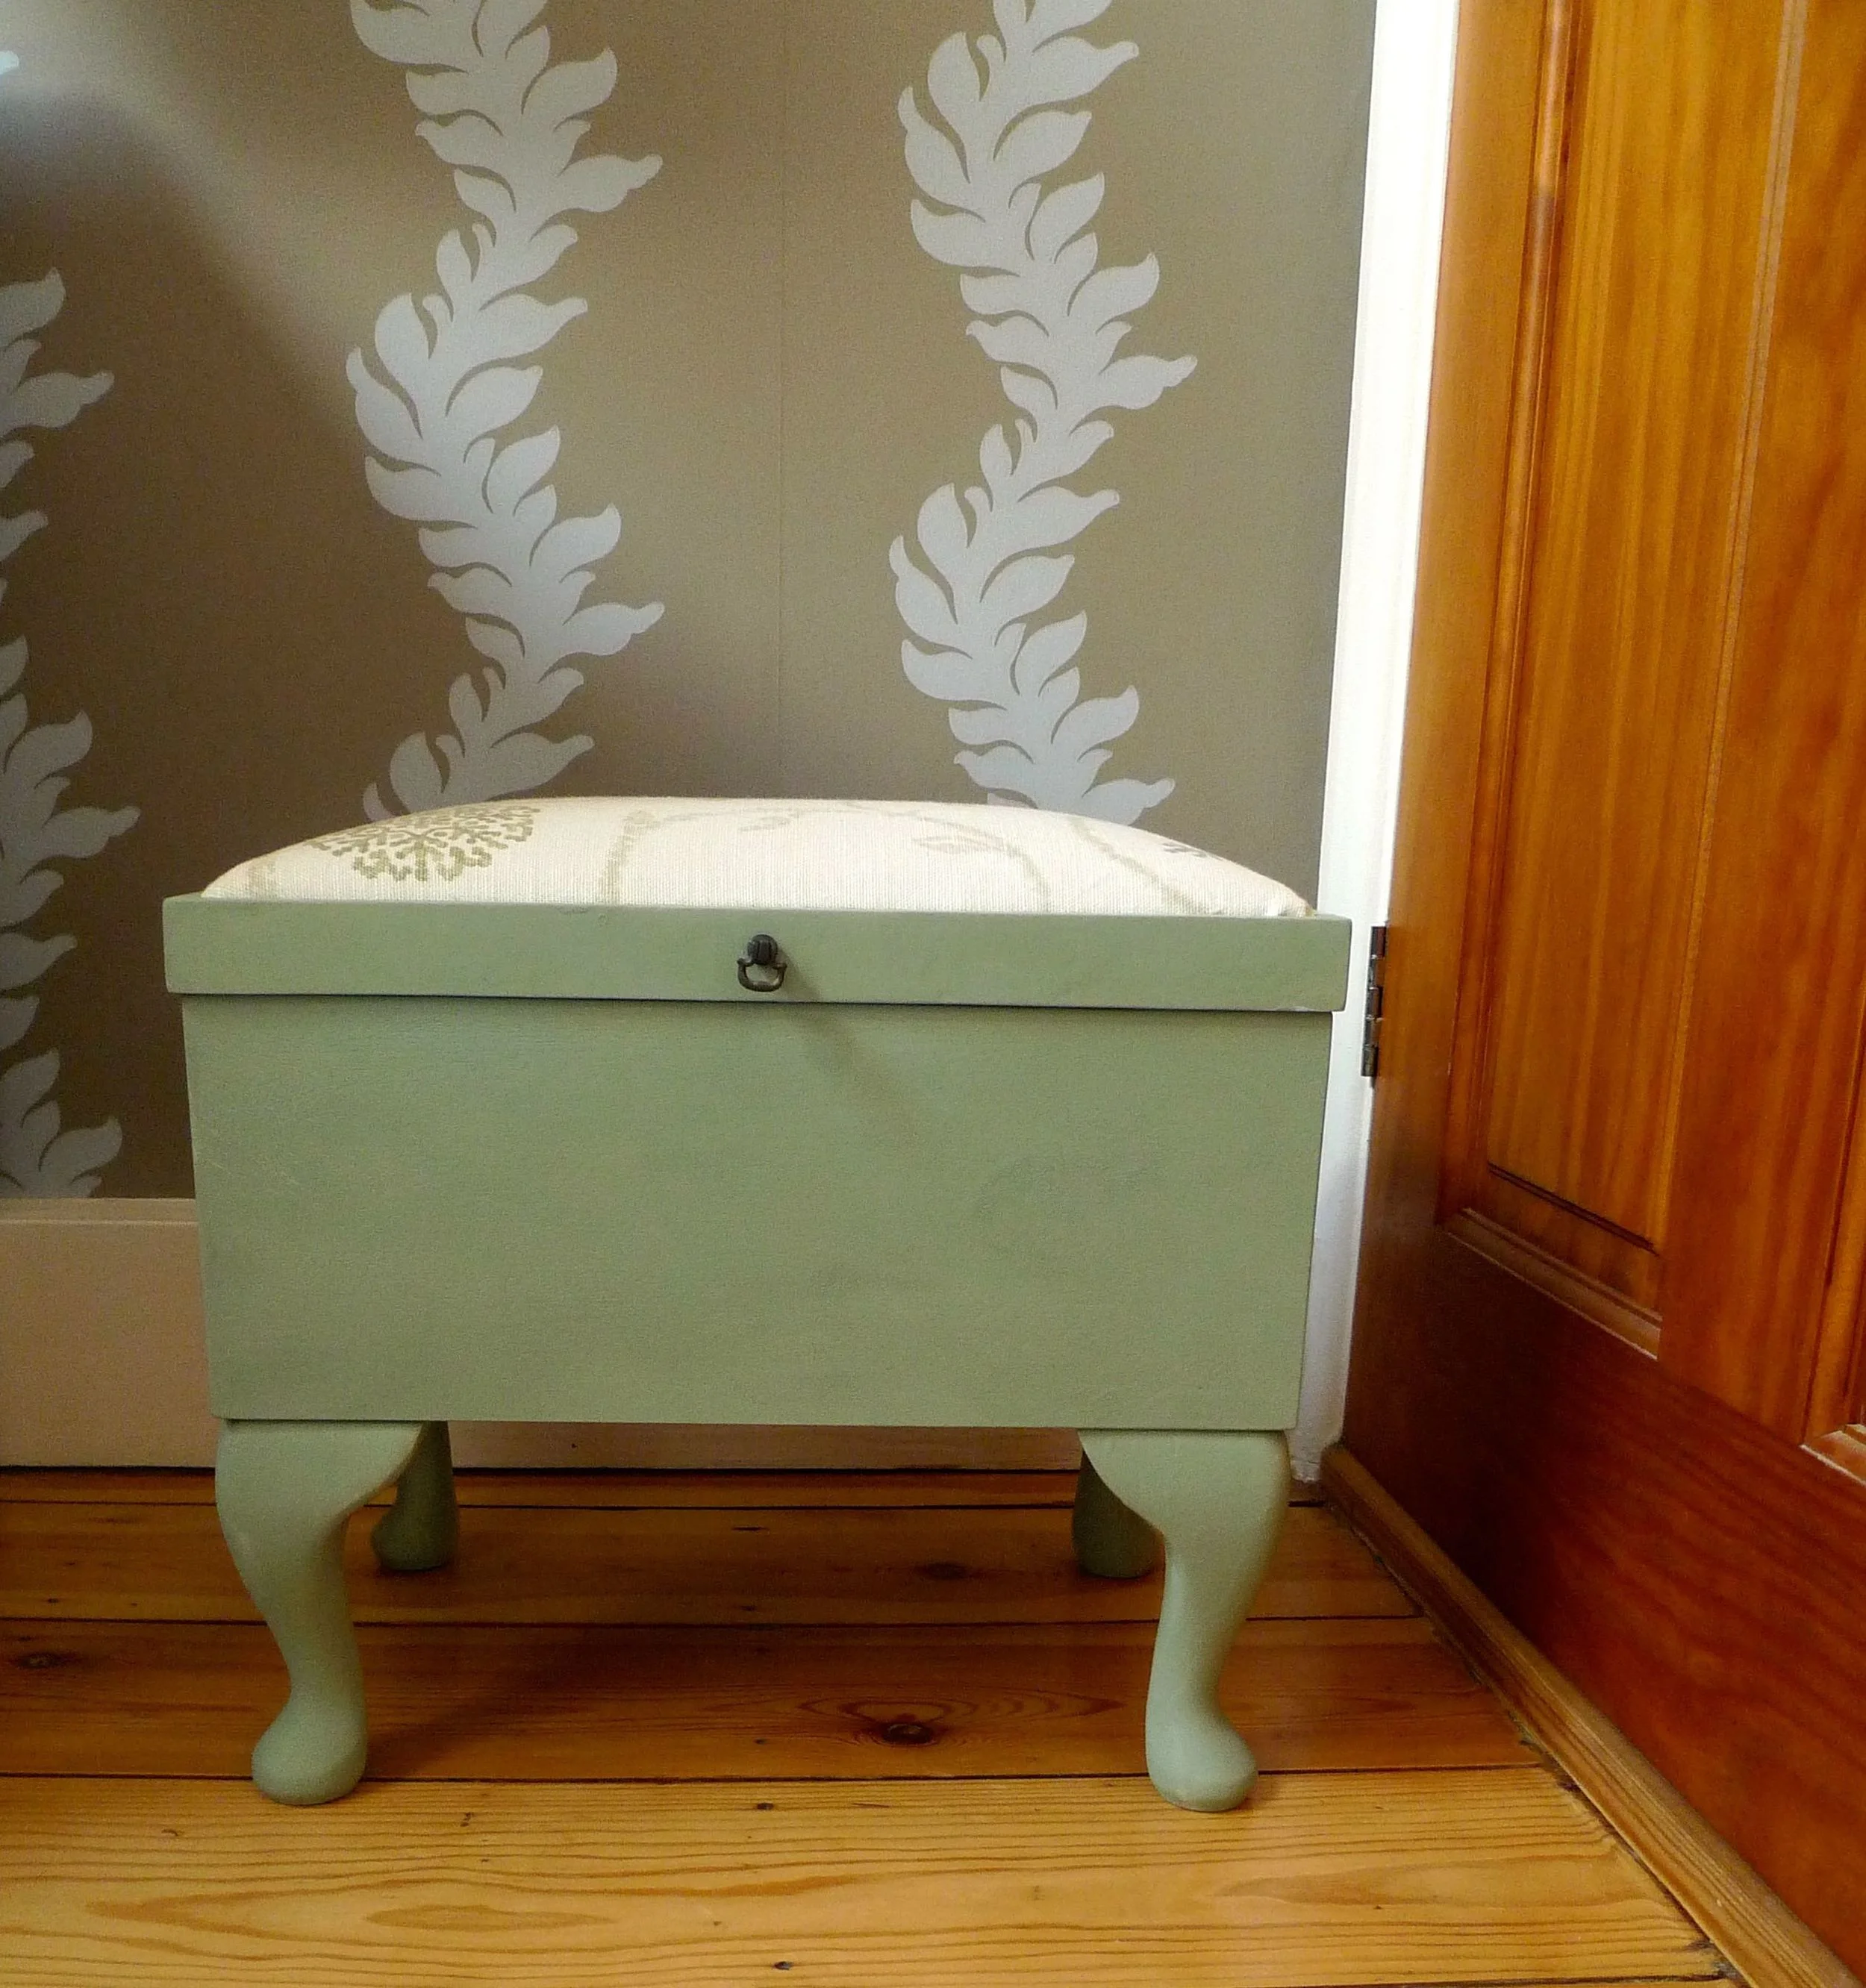
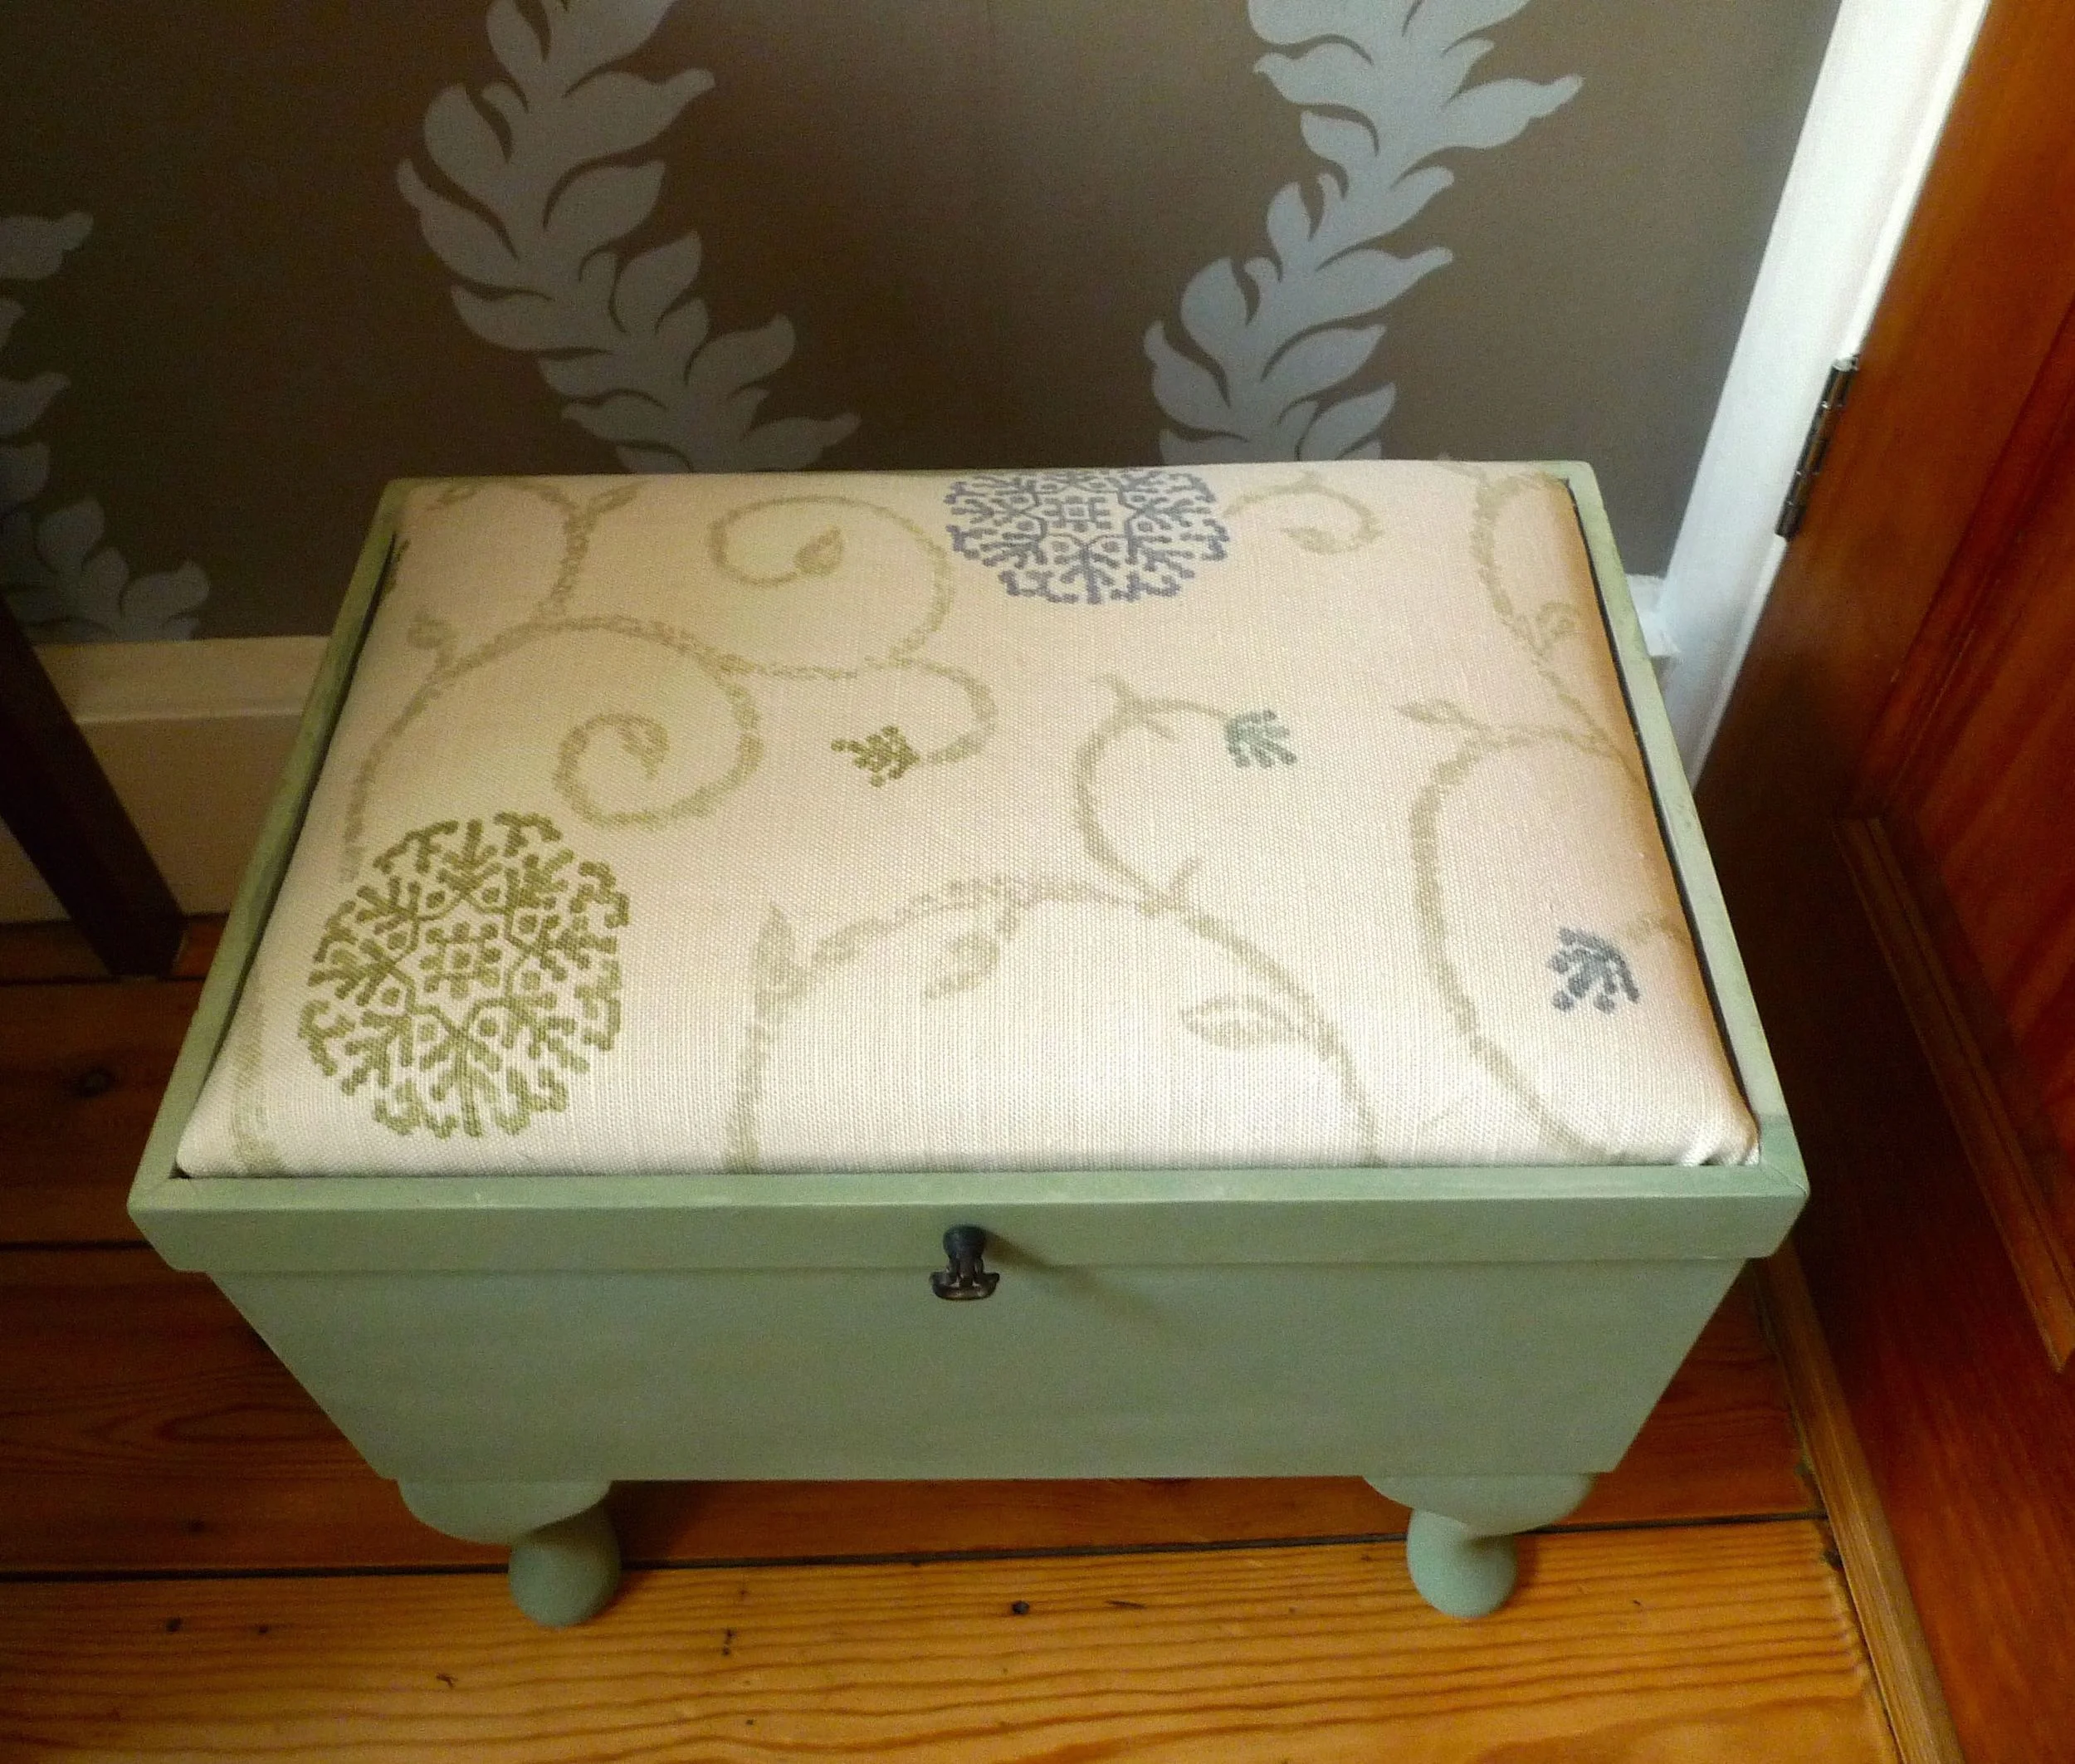
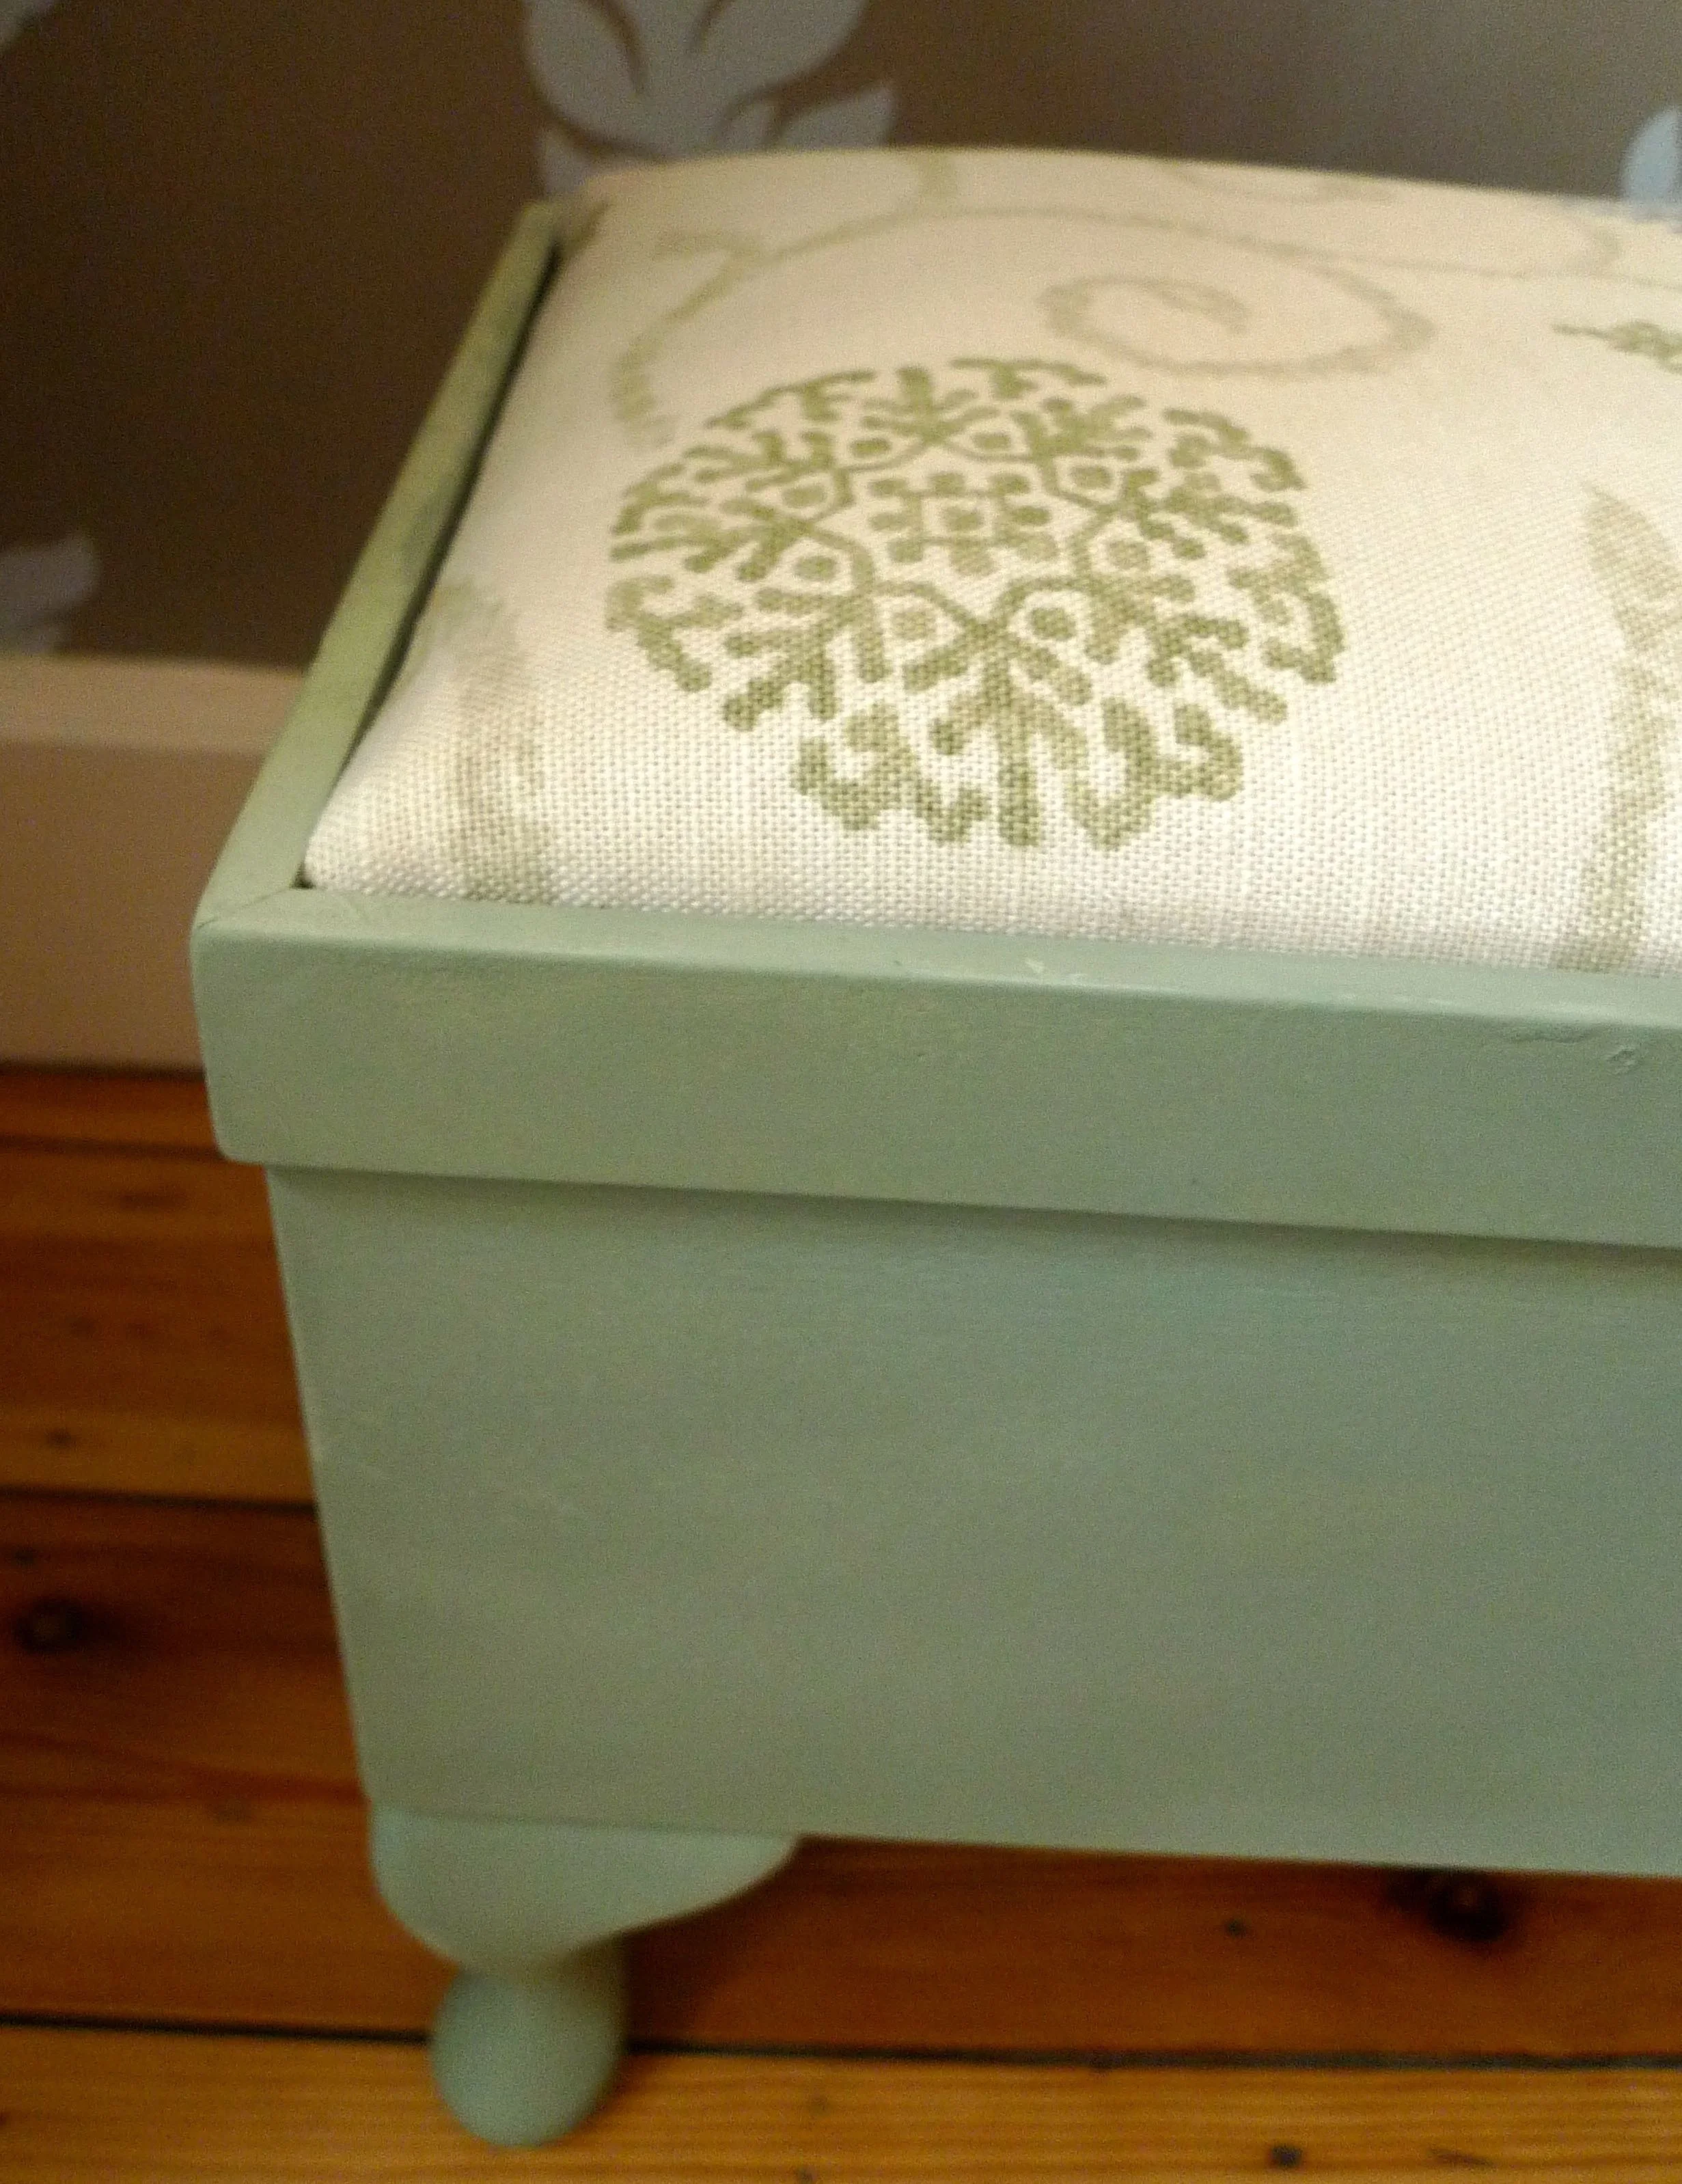
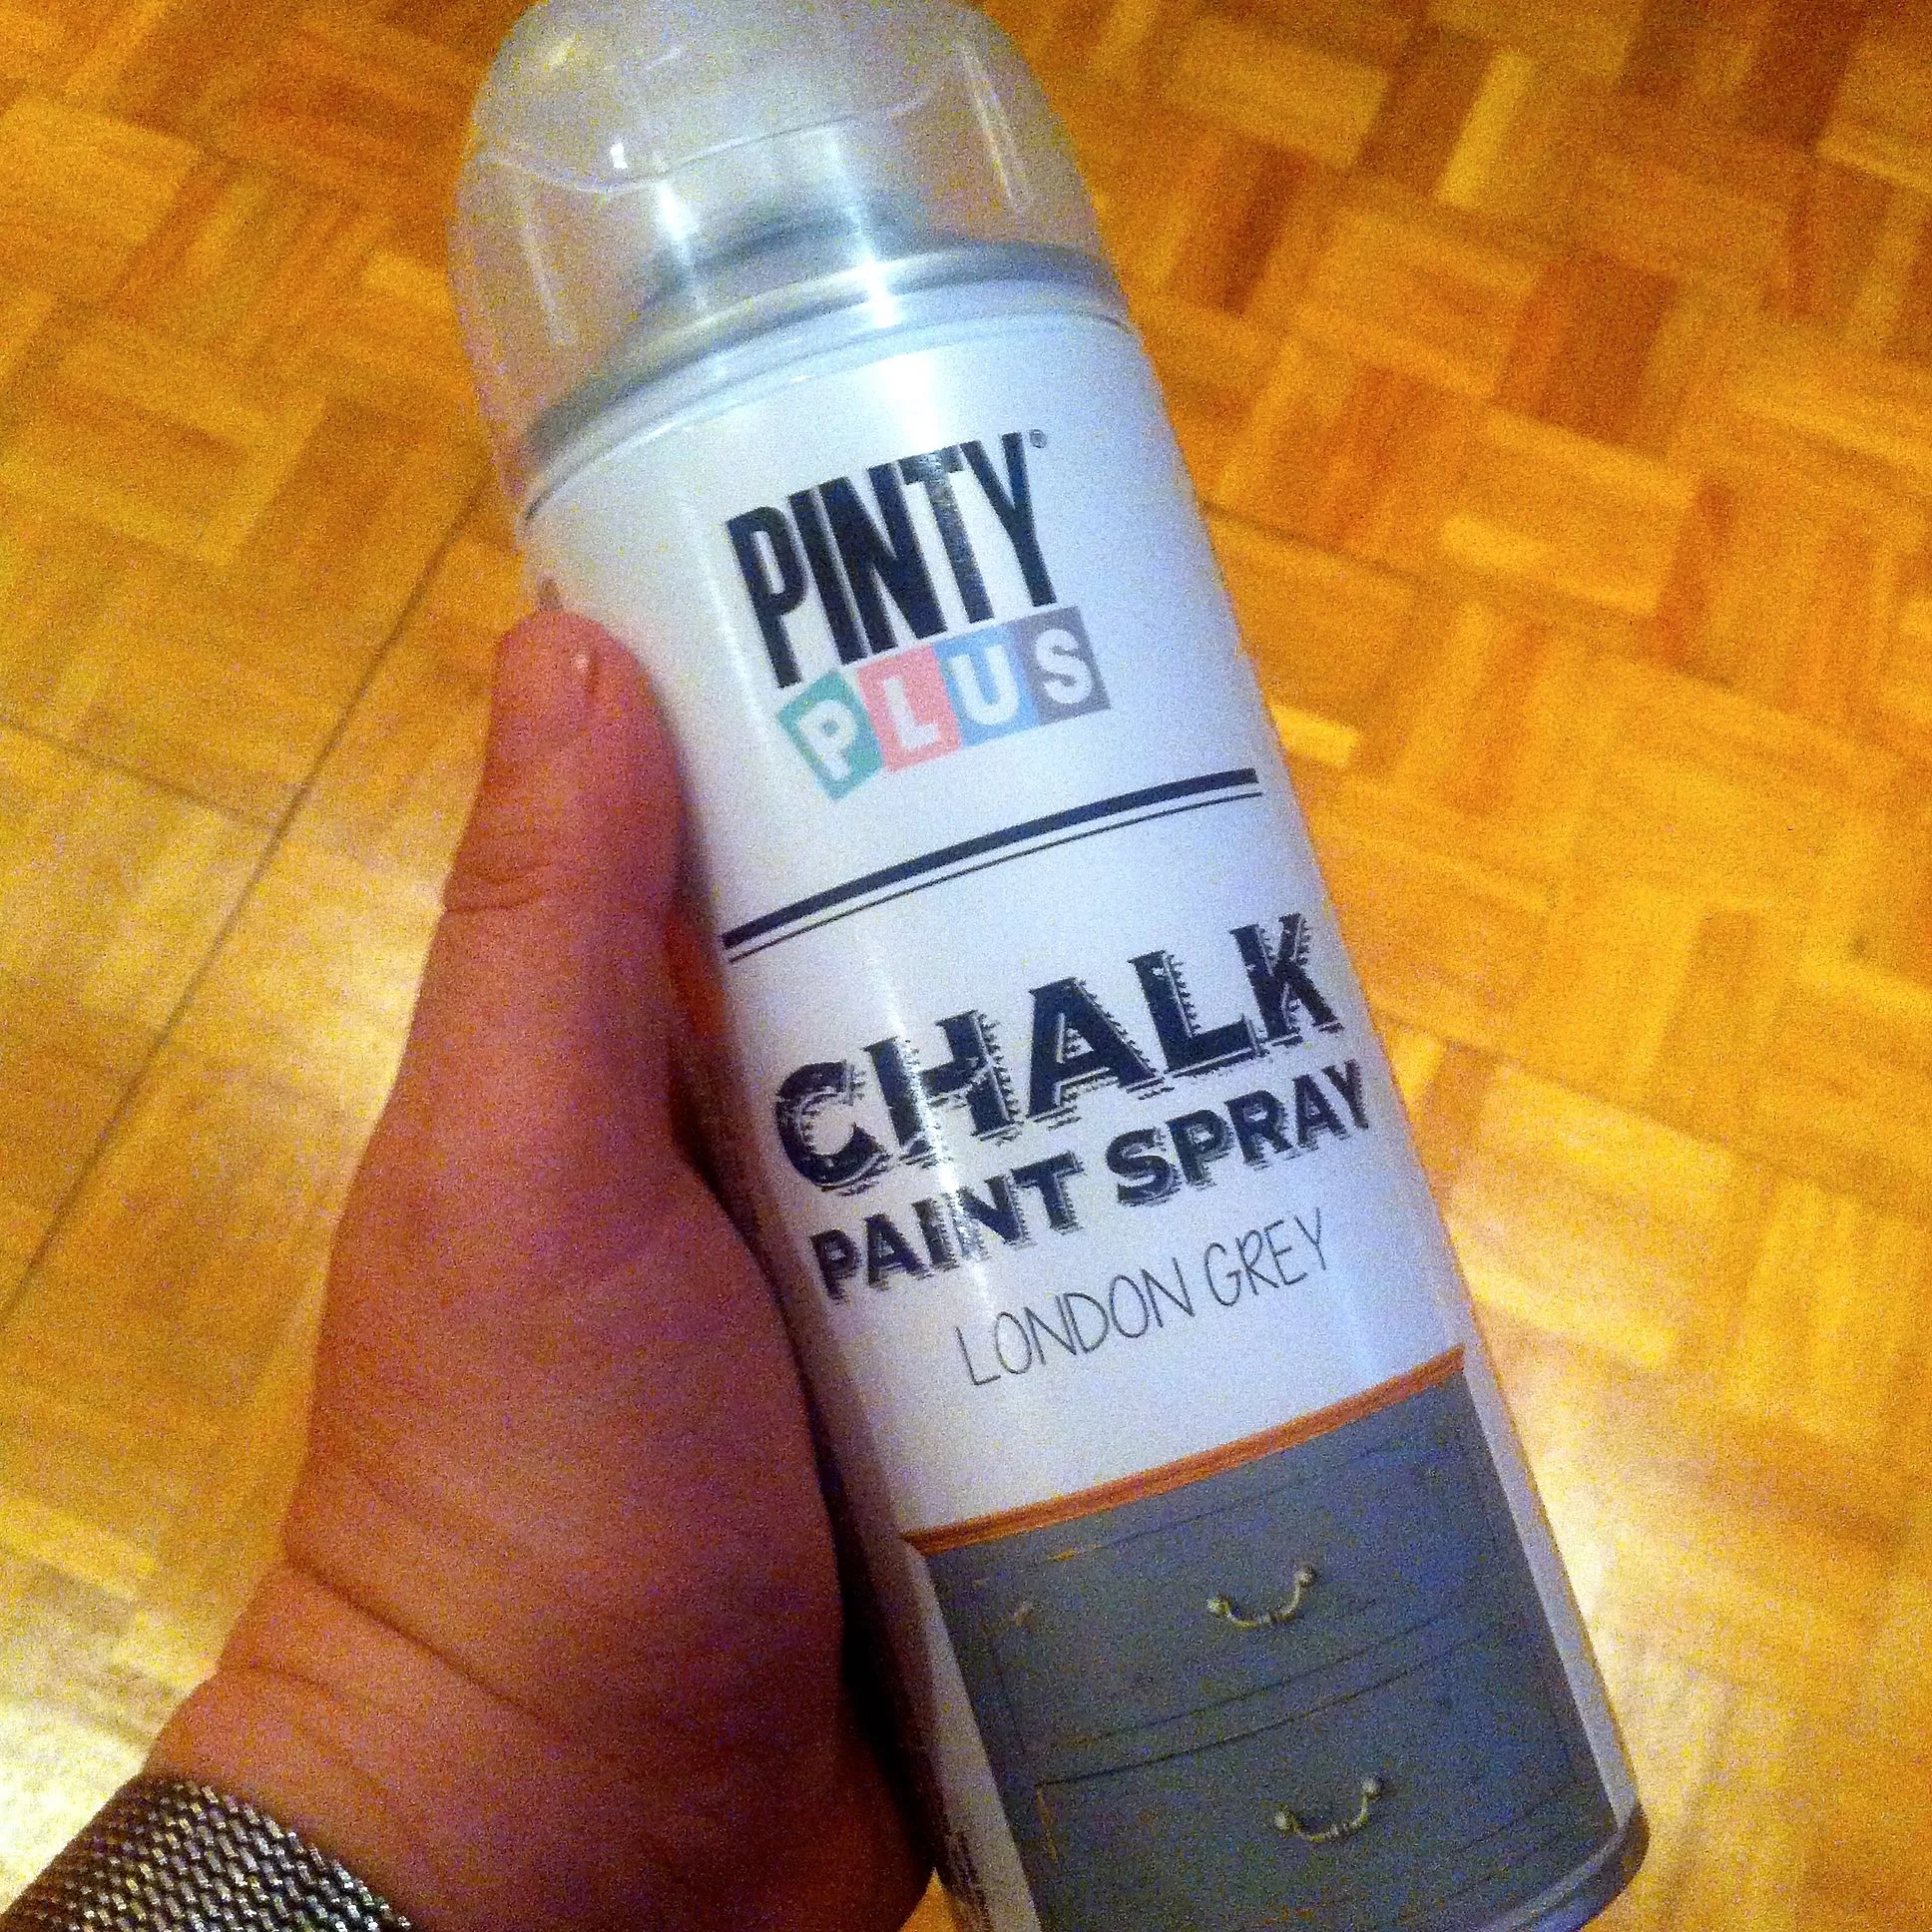
I was keen to get started and I was also keen to see how the colours I'd chosen would turn out.  I chose London Grey for the outside, and that is as I hoped a greeny-grey. For the inside I wanted something brighter and contrasting, so chose Light Turquoise.

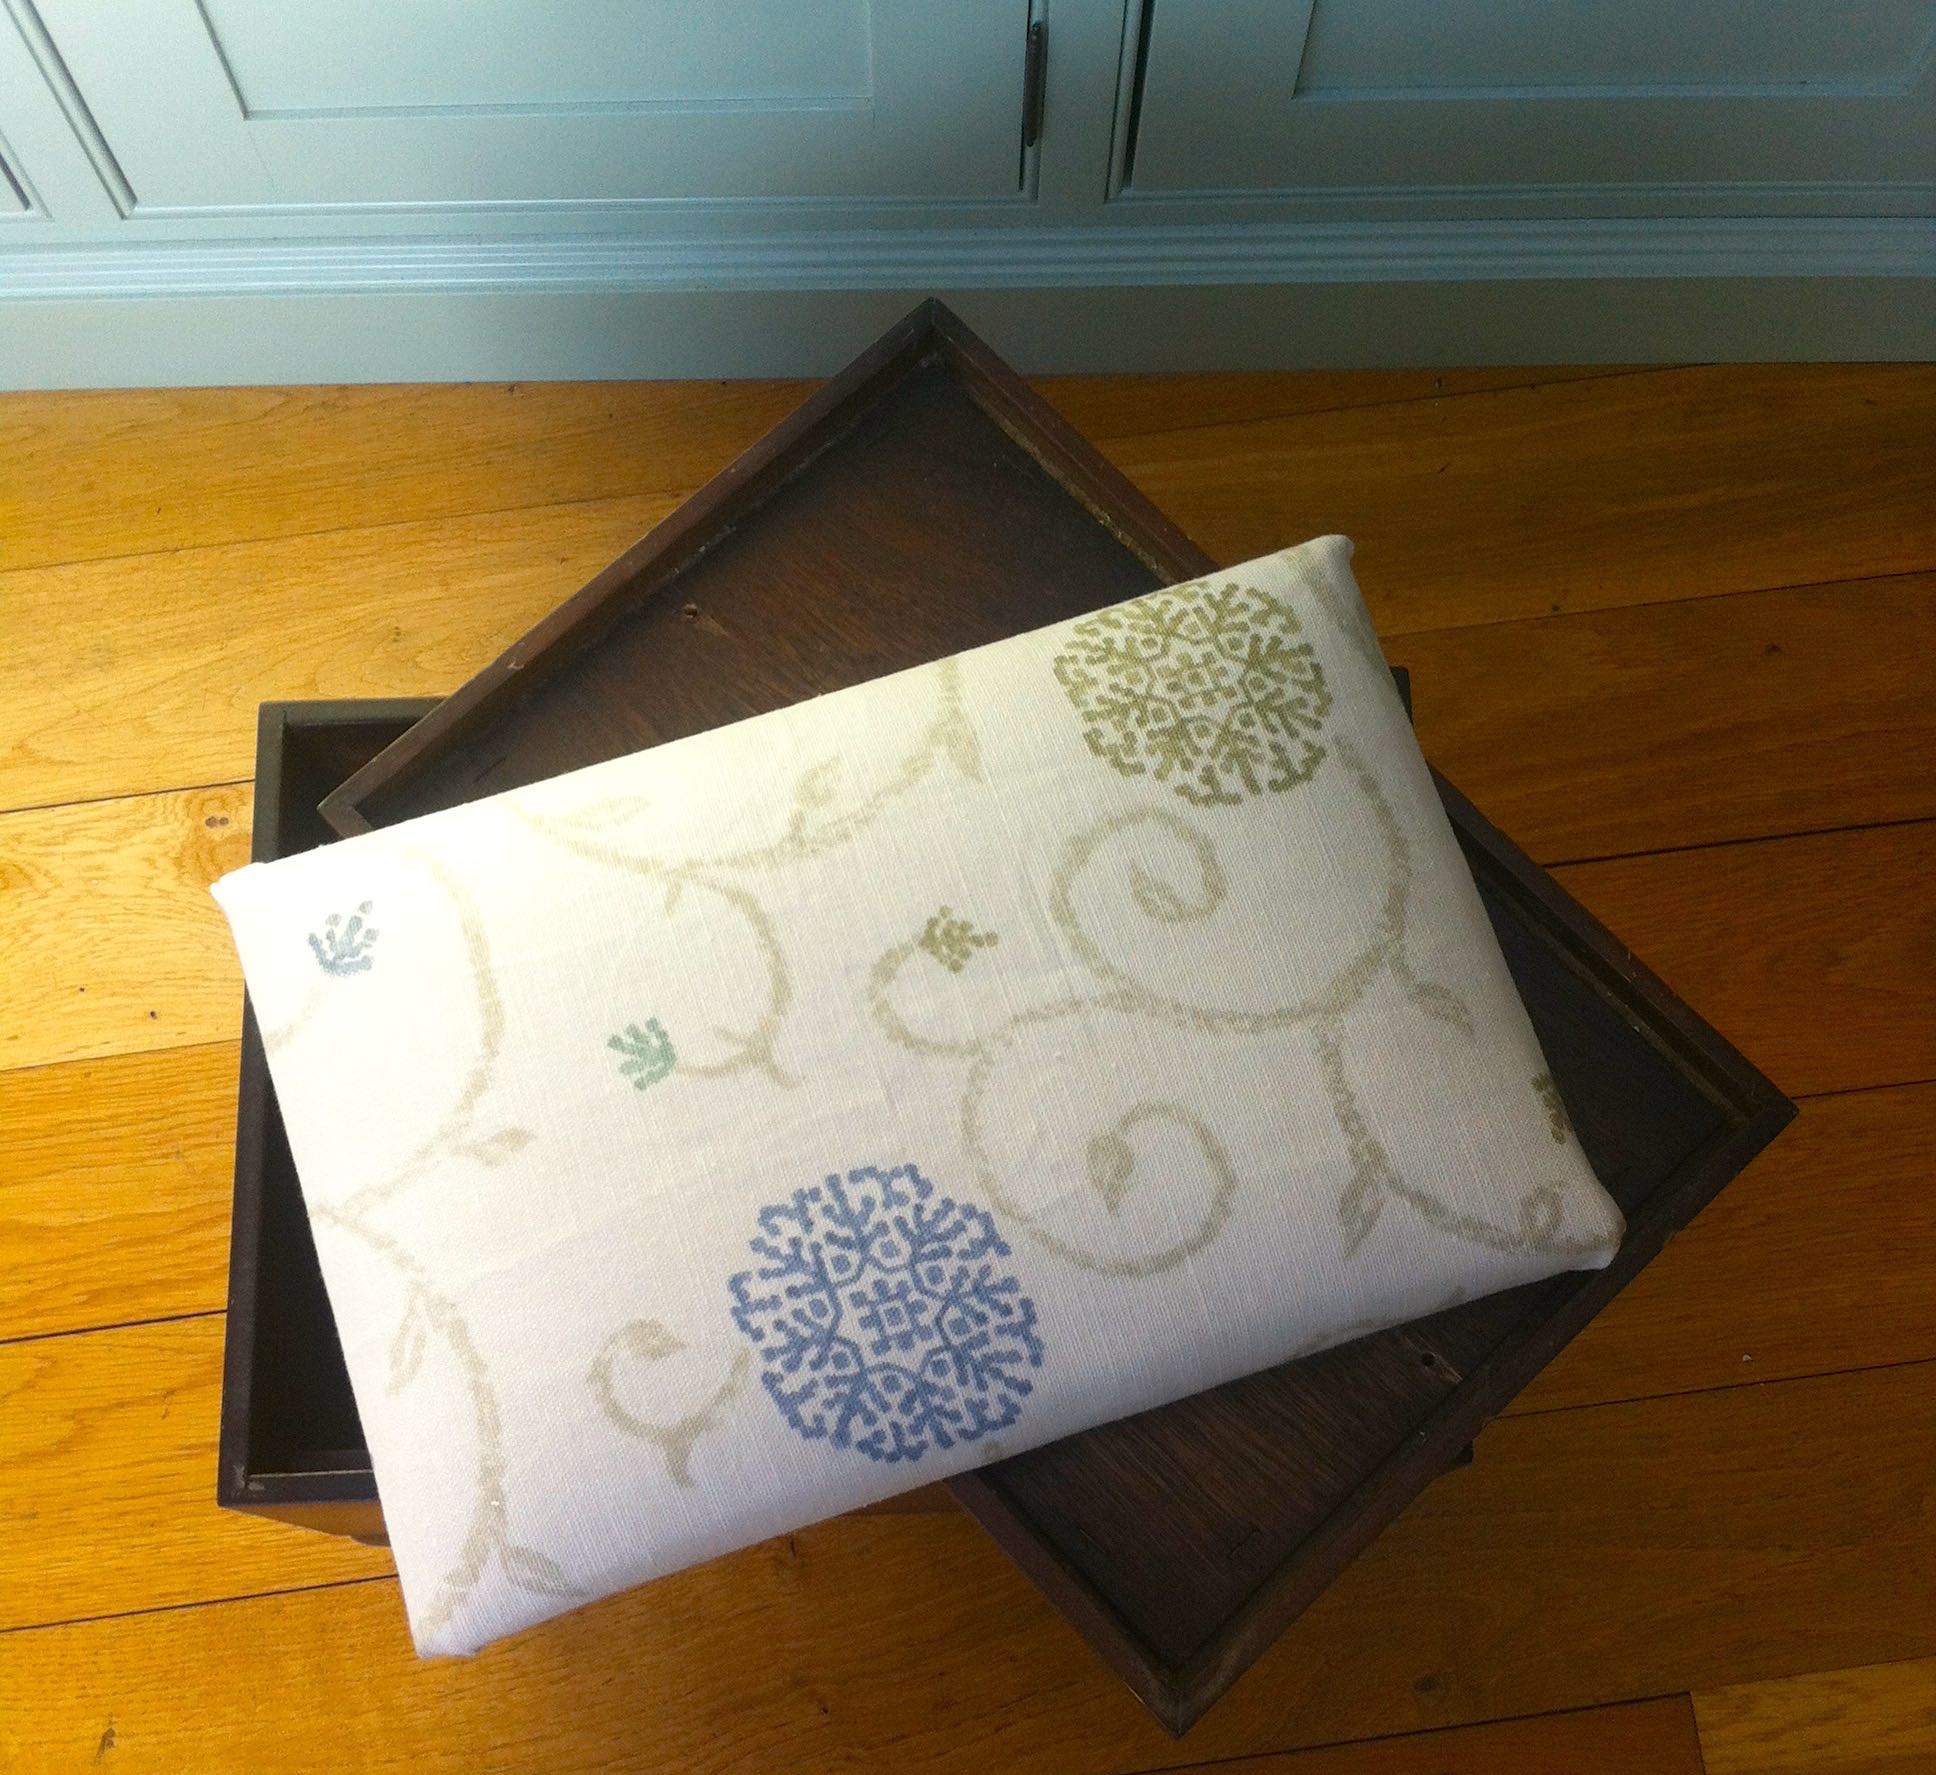
I started small and sprayed the two removable trays, one in each colour.

It was really easy to do, and I couldn't help but start spraying some more.  It was easily touch-dry within twenty minutes. 

While I was waiting those first twenty minutes I recovered the top cushion.  I had in my mind that I'd use a floral fabric for the top, something Cath Kidstone-esque, but when I saw the colours I changed my plan.  You see the colours were very similar to the colours we've used throughout our house; the London Grey is very similar to Farrow & Ball's Old White and the Light Turquoise like their Teresa's Green.  

So I knew that the leftover material I had from our spare bedroom curtains would be perfect.  And isn't it?

RECOVERED CUSHION

I sprayed the inside first, and then because it was so easy and just a little bit addictive I quite quickly started on the outside.  I sprayed the edges where the colours met freehand, which despite my tremor worked out well.

LIGHT TURQUOISE CHALK PAINT SPRAY
LONDON GREY CHALK PAINT SPRAY

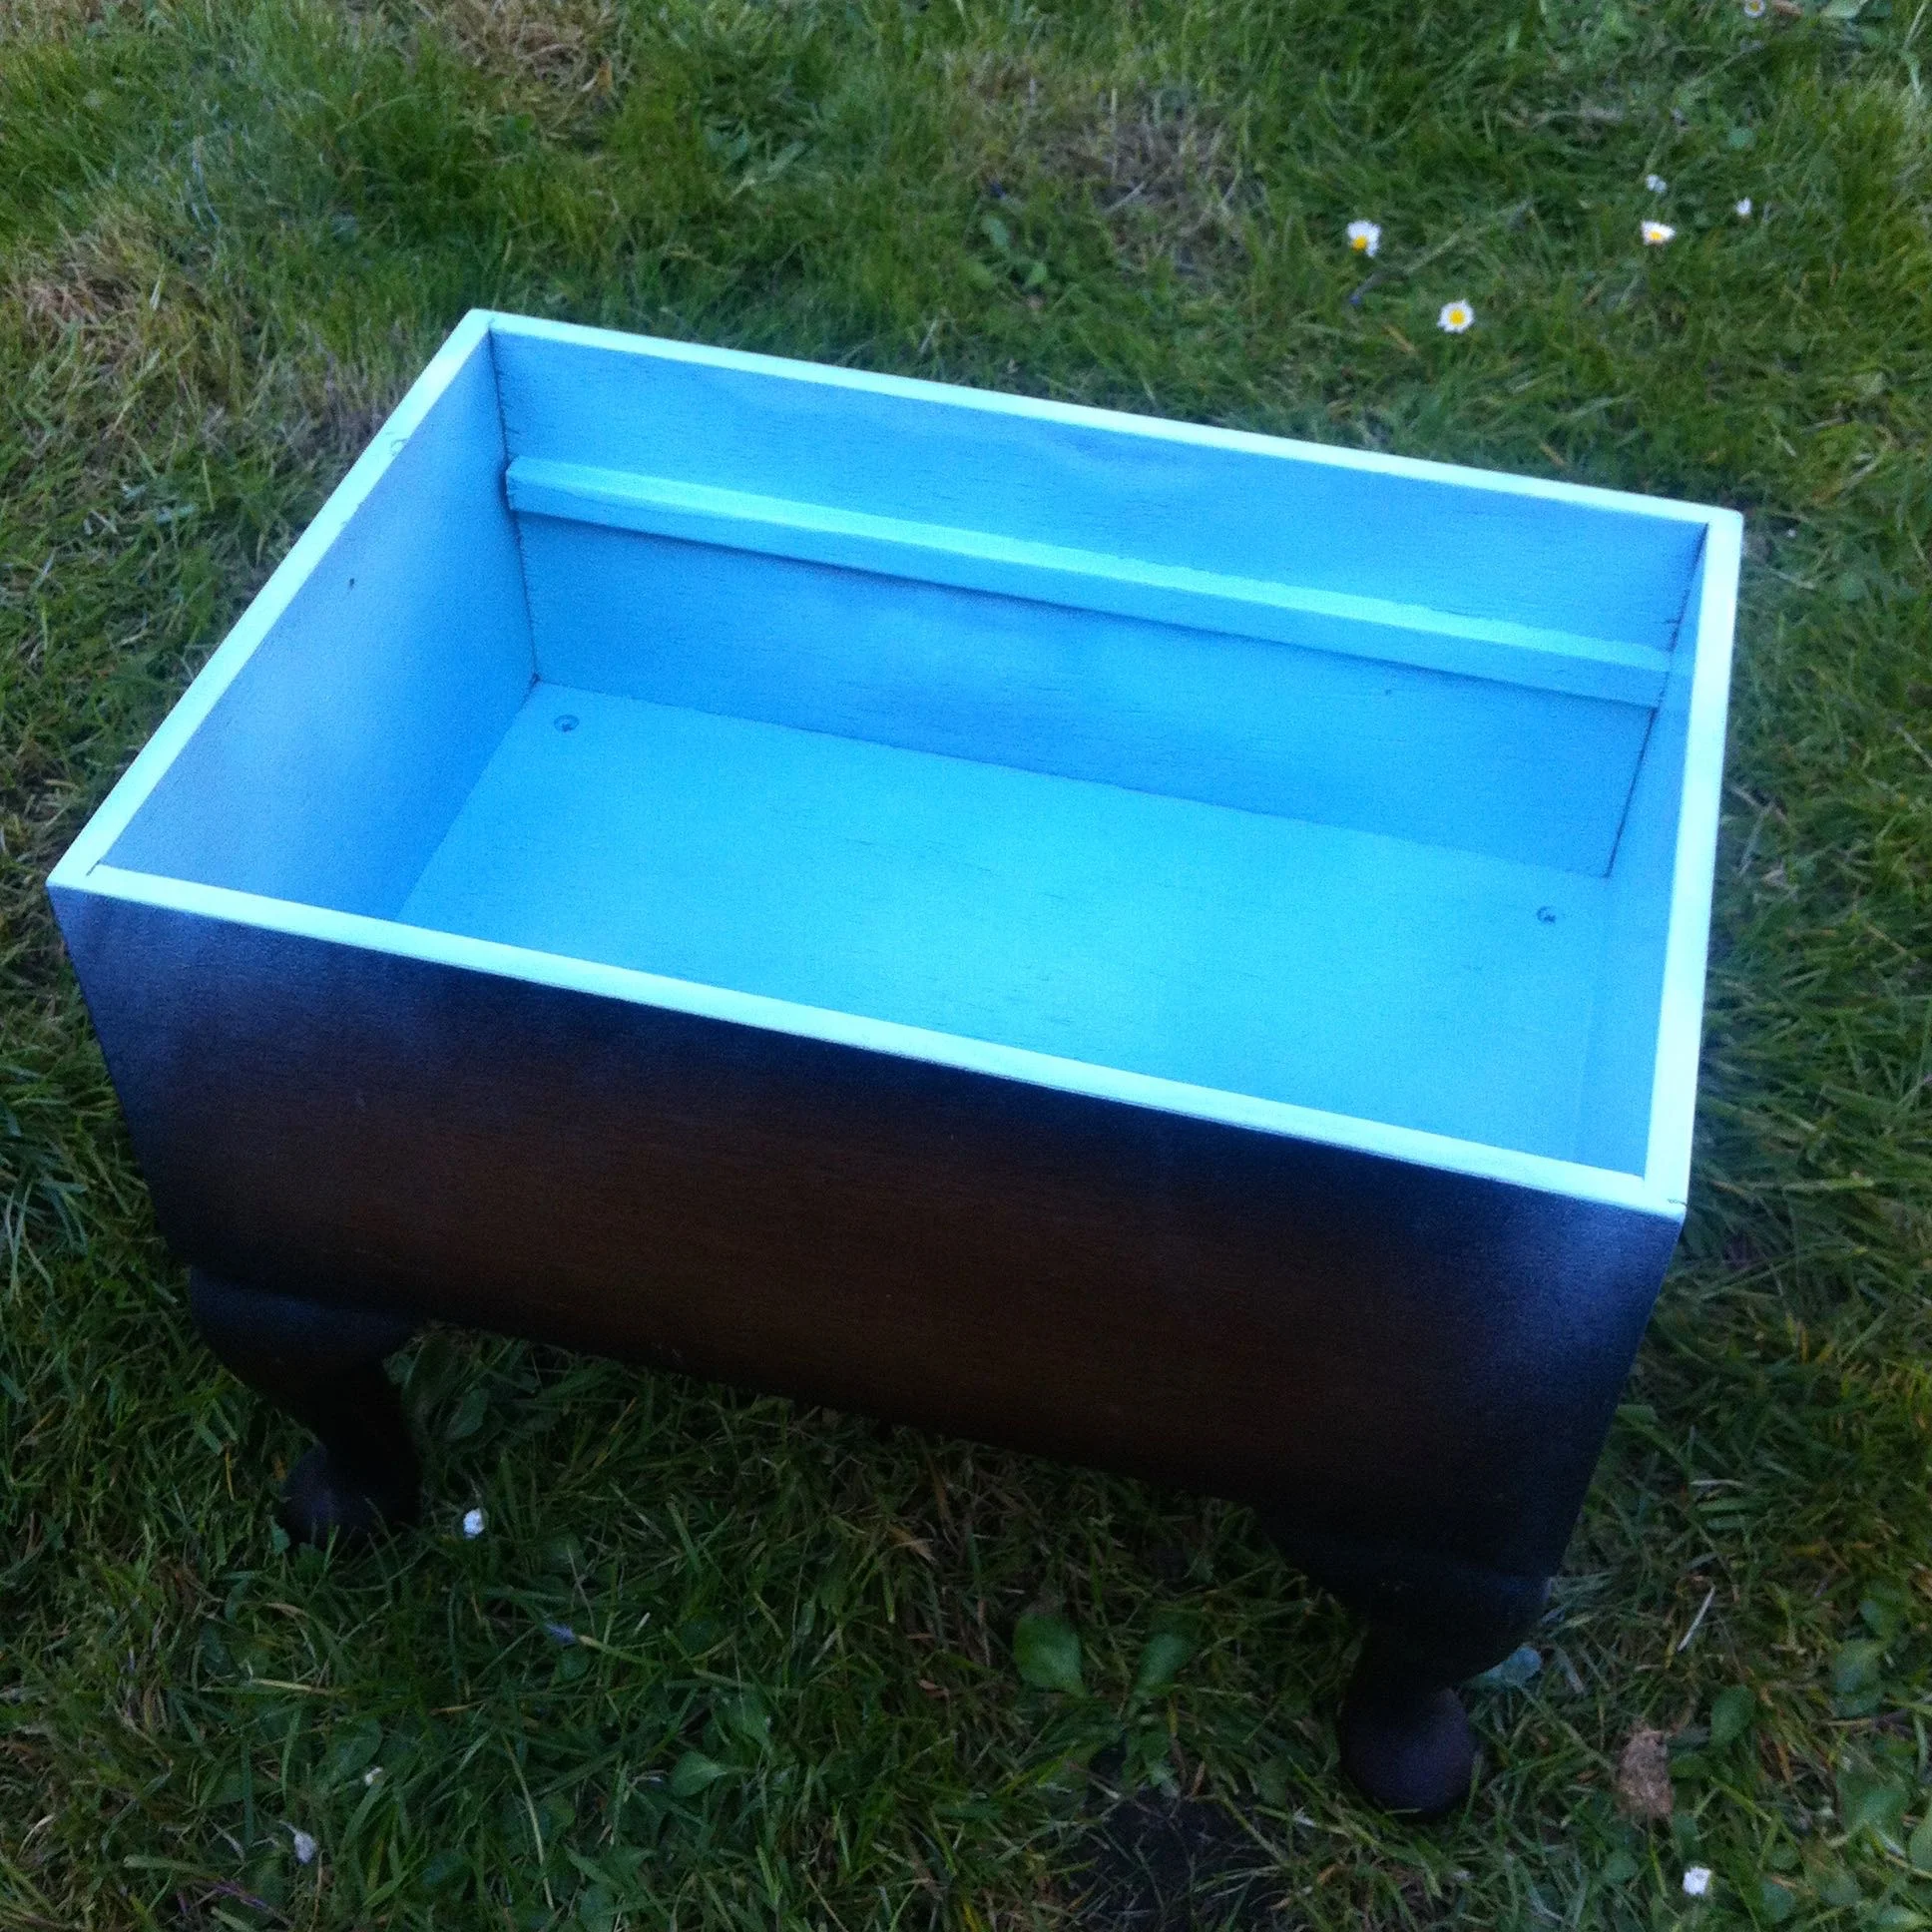
The hardest part in this project has been waiting the twenty minutes for the paint to dry so I could spray some more!  But I managed to curb my enthusiasm and take this (relatively) slowly.  I'd given each surface two coats and left it to dry thoroughly overnight before reassembling the stool.

I think it's turned out really well.  I was in two minds whether to apply a finishing spray or not. So far I haven't because I'm pleased with the velvety finish I currently have - I think I'll test run that on a spare piece of wood so I know how it'll turn out.  

FINISHED SEWING STOOL
TOP VIEW
CLOSE UP

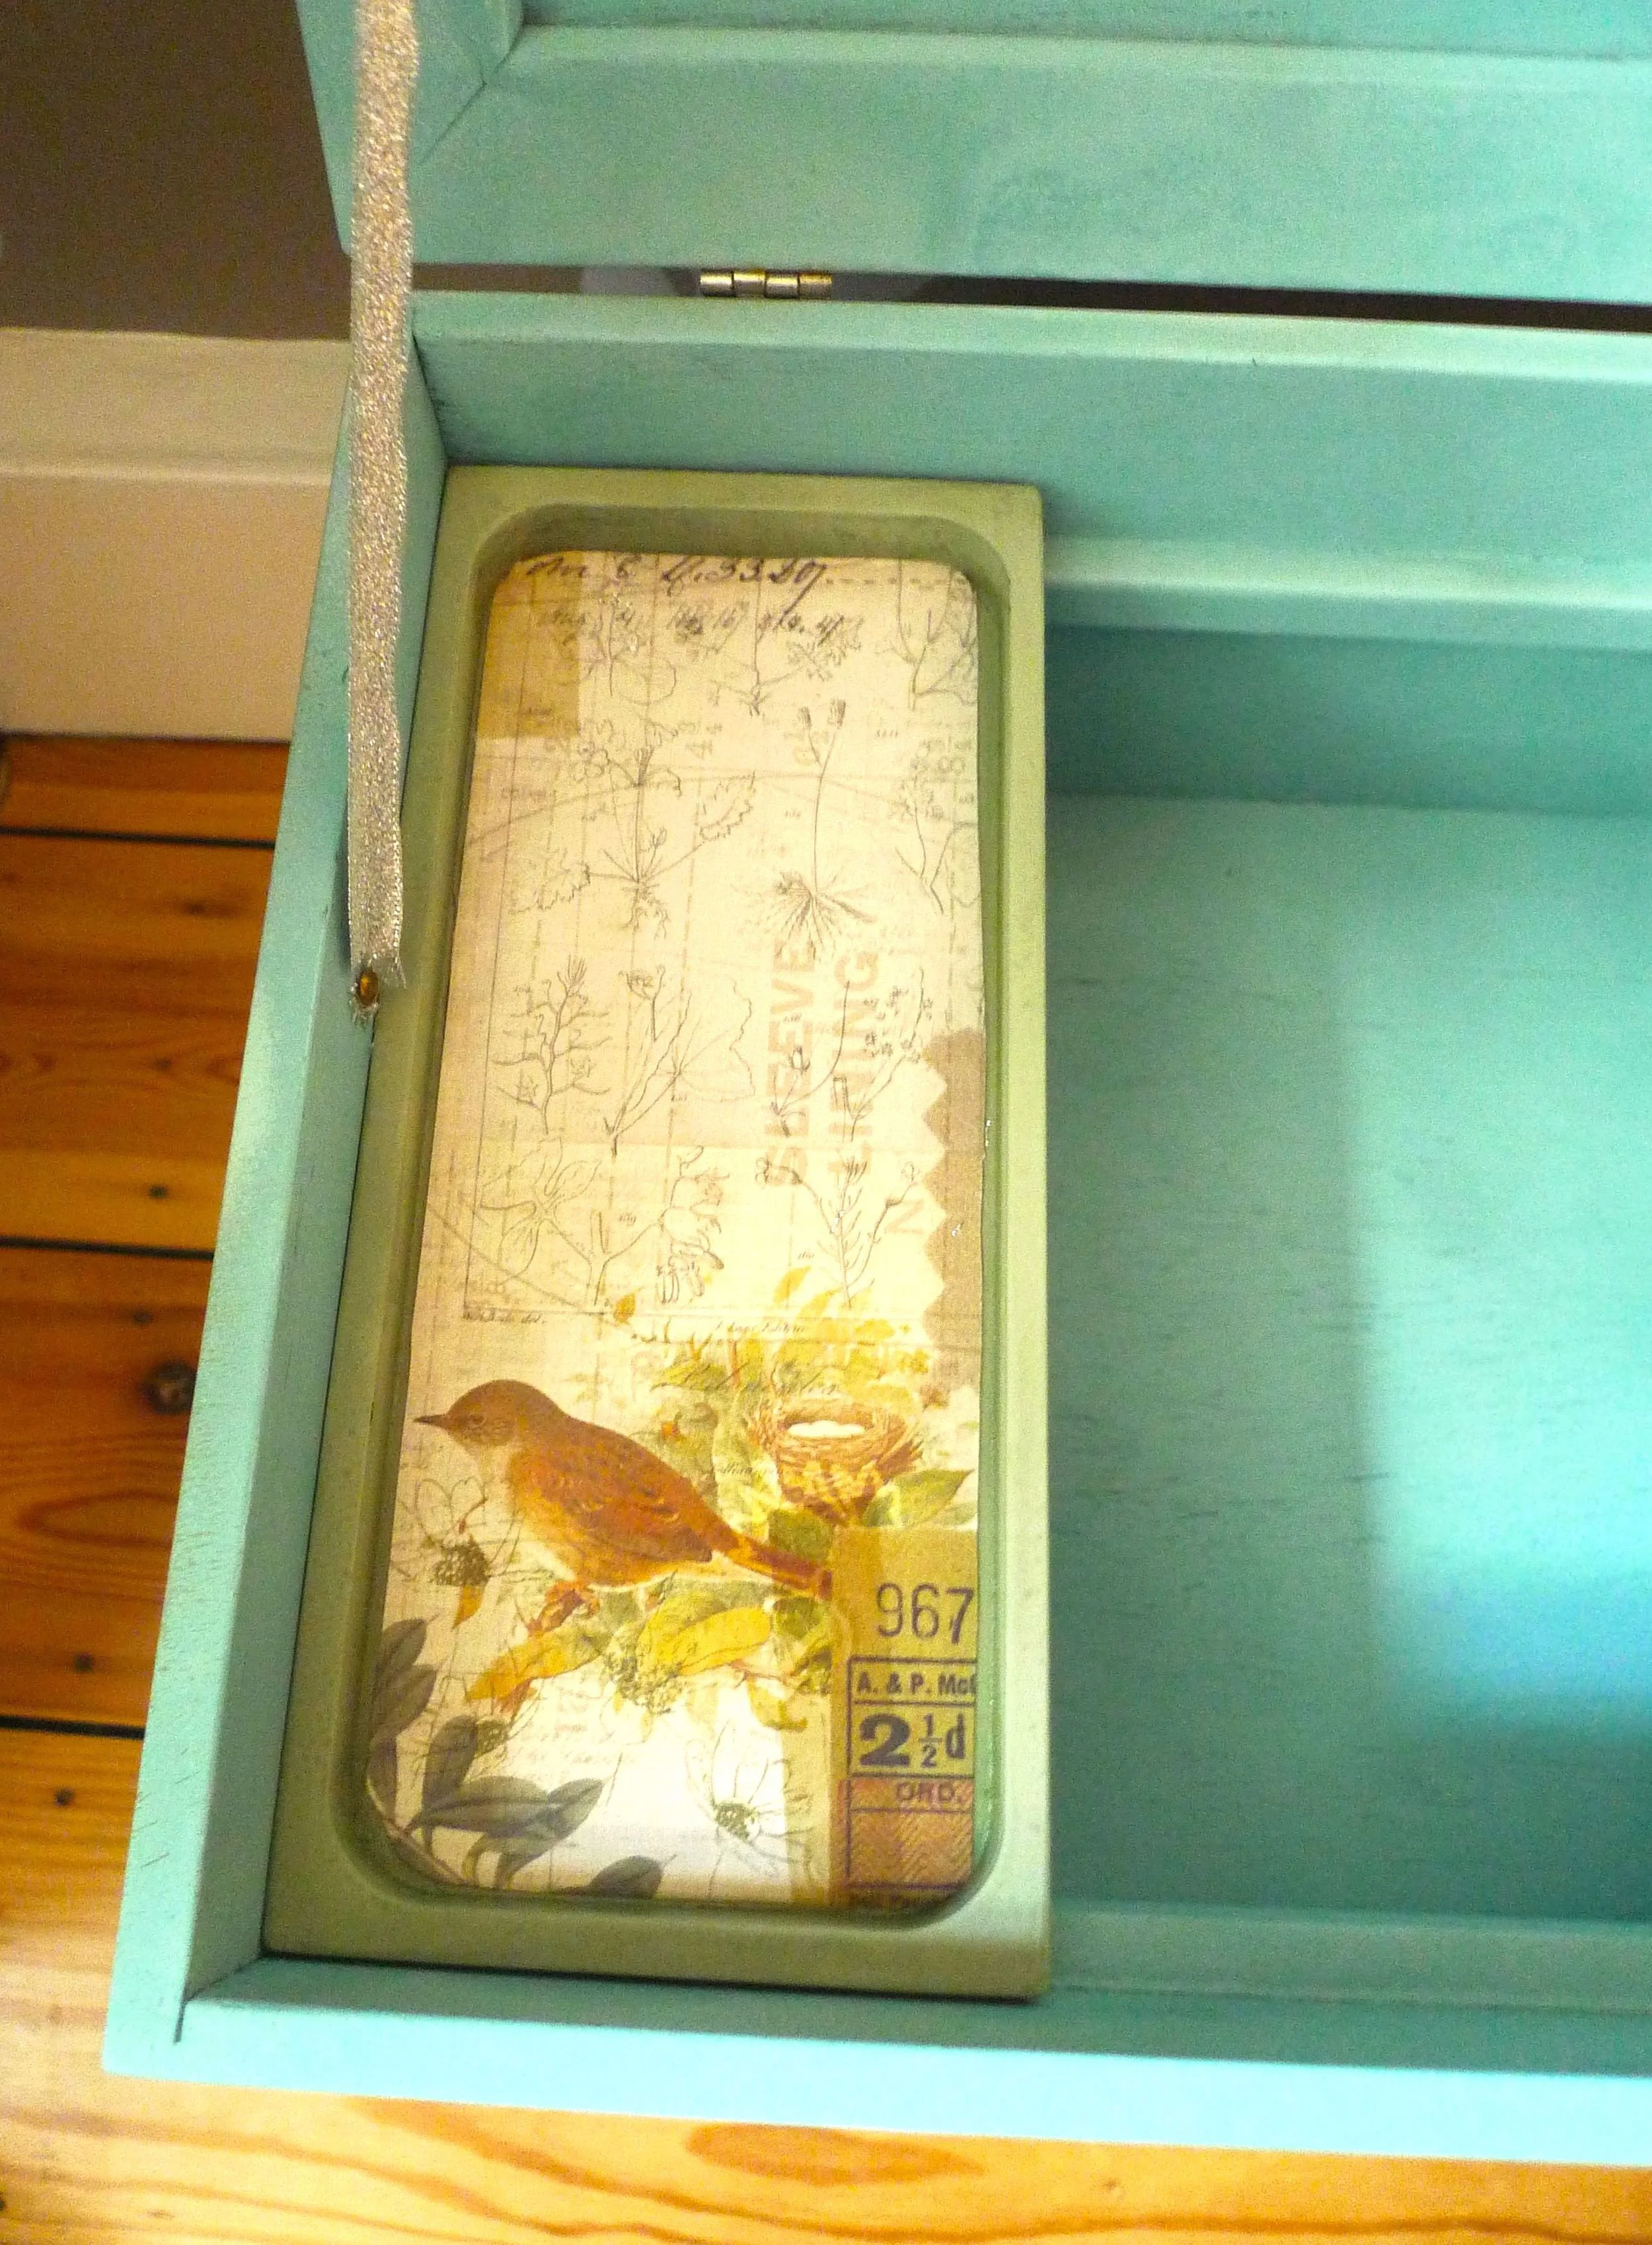
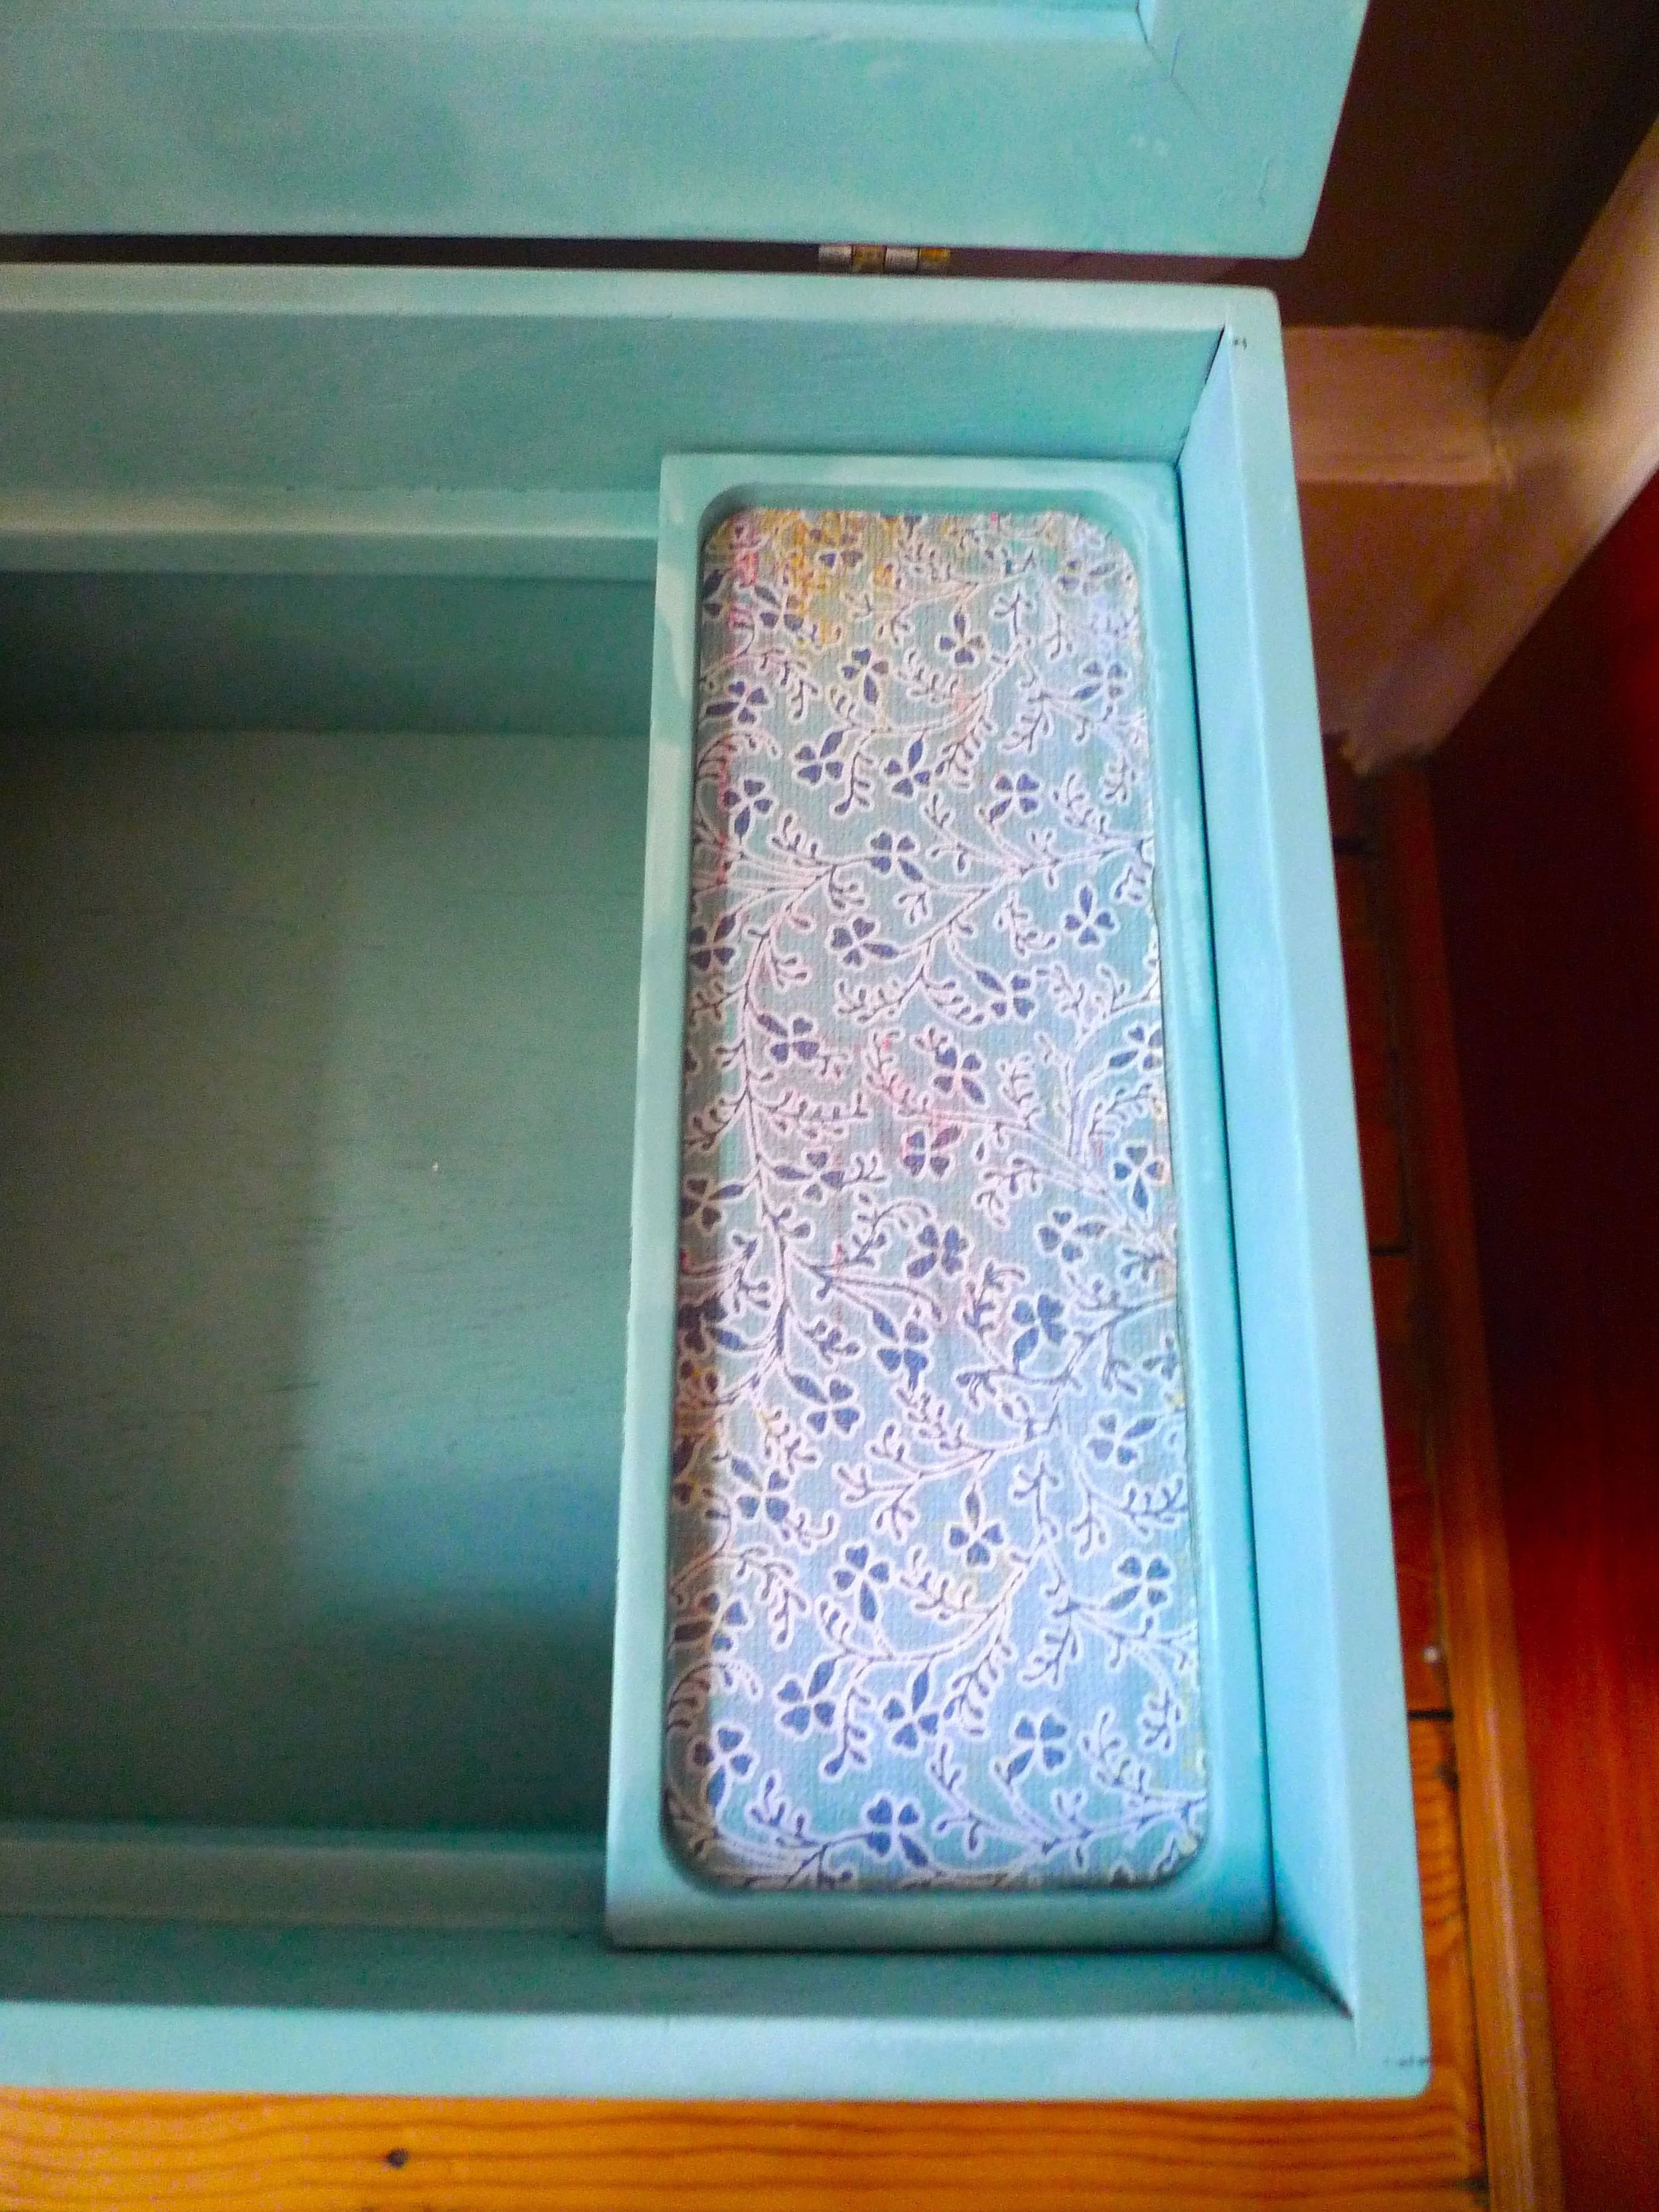
I decided to add some scrapbook paper into the removable trays to give them some extra character, and I think these look great. I simply used PVA Craft Glue to stick the paper to the trays.

INSIDE
LONDON GREY TRAY CLOSE UP
LIGHT TURQUOISE TRAY CLOSE UP

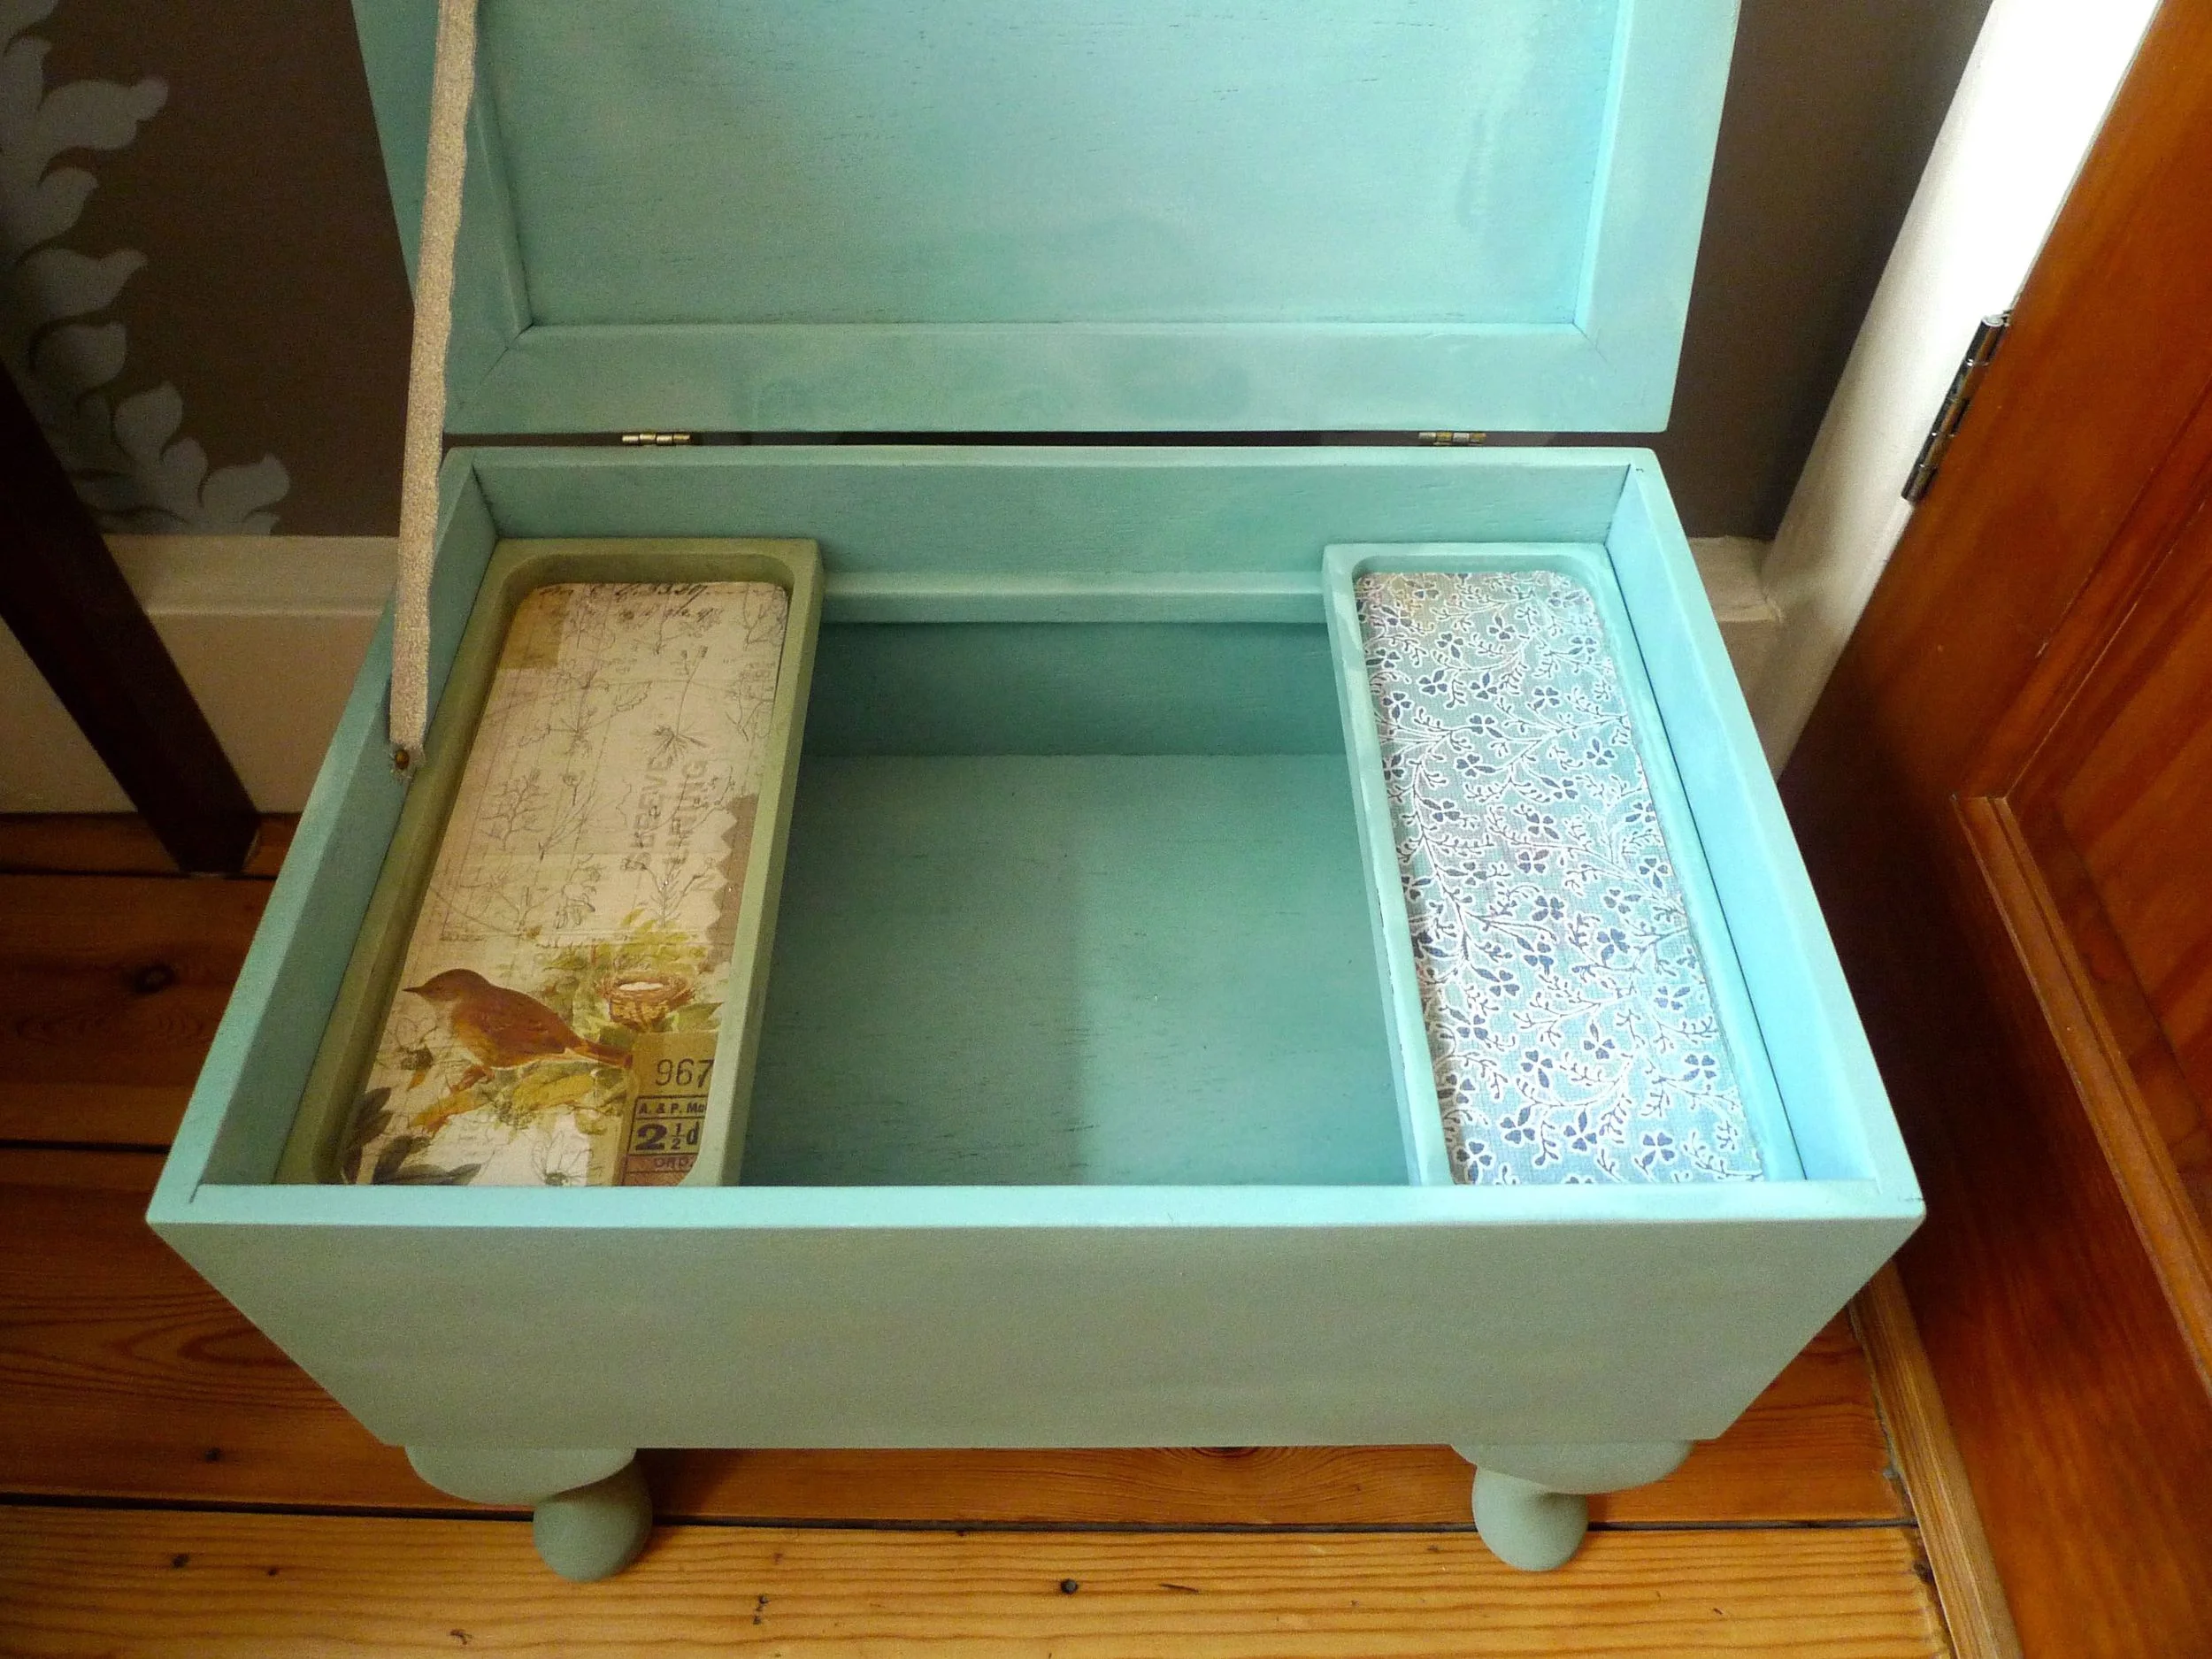
And now the contents looks much tidier too.  I'm sure that won't last, but I'm loving how it turned out and how it fits into my craft-room-cum-study. I've now the perfect sewing corner!

SEWING BOX BACK IN USE
SEWING CORNER

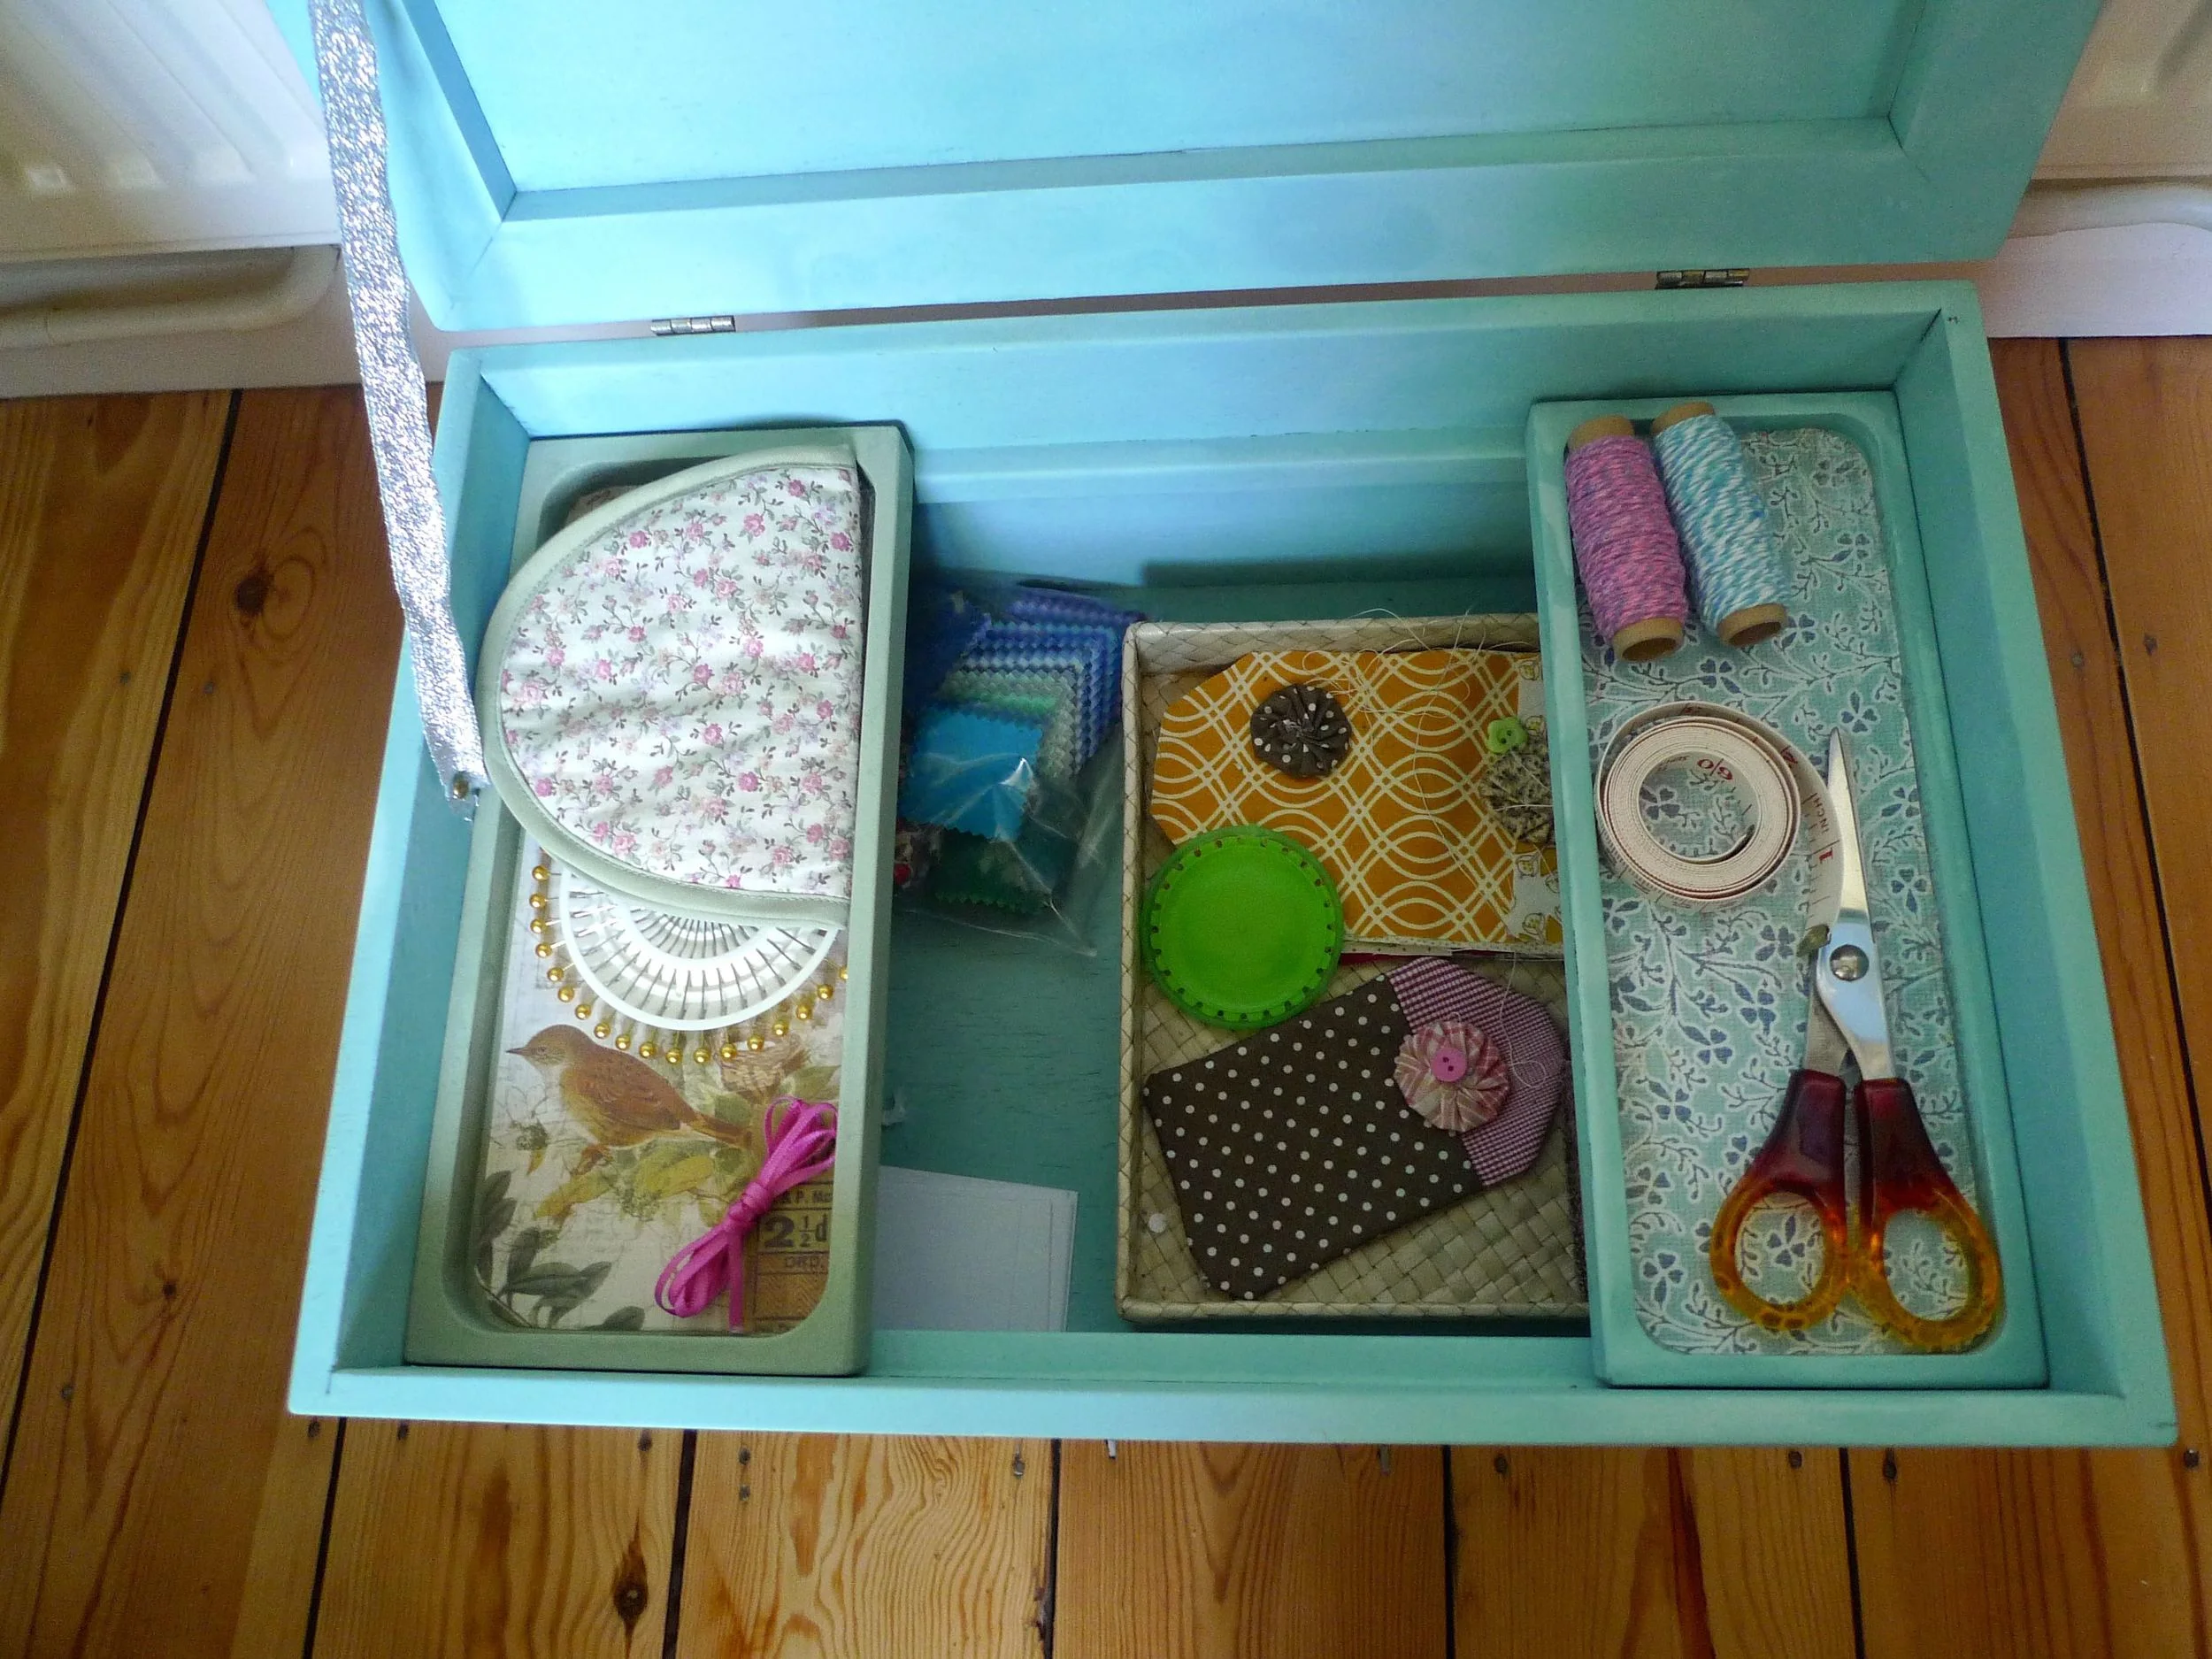
The only downside I've found with this product is that now I want to find even more projects to revamp and upcycle!  

I've even challenged MOH to help me find my next project - the paint can be used on many surfaces including wood, canvas, metal, plastic, cardboard and glass.

What I used

1 x London Grey Pinty Plus Chalk Paint Spray

1 x Light Turquoise Pinty Plus Chalk Paint Spray

I found coverage to be good.  I gave each surface of my sewing stool two coats of paint and while the London Grey can is emptier, I didn't use it completely.

While I cleaned the surfaces I didn't sand them down before painting. I hoped that everything I'd read about chalk paint covering any surface would be true - and it was.

I have another smaller project which I still need to complete - and one I'll share here too - and while this is a small project I'm confident I'll have plenty left for that.

The Pinty Plus Chalk Spray Paint is available from the Novasol Spray website, each 400ml can costs £11.50


This is a collaborative post with Novasol Spray who provided me with the materials for this project, but all words and opinions are my own.

A DIY makeover for my bookshelves

And hopefully a slightly more interesting post than that title sounds!

In our study (aka my craft room) we have two Billy bookcases and two of those shelves are devoted to my collections of Good Food and Olive magazines which are growing. The oldest magazine dates back to 2003, a year after we bought this house and clearly when my recipe know-how was starting to fade a bit...

And with so many magazines, it was getting hard to keep them upright so I had a plan.

I headed off to the big orange DIY store clutching my measurements and managed to get there on a day when the big cutting machine was working. Handing over the sizes I wanted cut I waited for the man to do his stuff and left with lots of smaller bits of MDF!

Back home I got to work to insert the cut MDF as uprights

installing uprights

Even though my measuring - and the cutting - was accurate, there were some variations between the space and the MDF upright, so I added some draught excluder to the top of the MDF to help wedge it in place.

filling the gap

This worked well and ensured the uprights stood firm, and I took a moment to work out what to do next.

CONTEMPLATING MY NEXT MOVE

CONTEMPLATING MY NEXT MOVE

uprights installed

That was to carry on and repeat this for the second shelf before putting the magazines back in place.  I've left the MDF unfinished and unpainted as it's already a close match to the colour of the unit, and I think it works well.

With the uprights in place, there was only one thing left to do - and that was to step back and admire my morning's work.

magazines back on the shelf

It looks like there's enough space for my subscriptions to carry on for a little while yet!

Protecting fences and wooden garden furniture

It's been a bit windy lately hasn't it, with the storm Barney throwing high winds at many parts of the UK which if the forecasters are correct is likely to continue for a few days yet. I've blown across the car park after work a few times this week, so when Kent Blaxill about this post, it made me think how much our fences, decking and wooden garden furniture go through at this time of year.

There are things we can do of course to help protect them. We have a large green tarpaulin which we throw over our patio furniture, tying it to the legs of the furniture to ensure it stays in place. All we need to do over the winter is to check those knots are still secure, or otherwise I fear we'd find it at least a few gardens down. Not with the garden furniture still attached.

We haven't had any damage to our fence in the winds thankfully, although it took a few days before I got a chance to get out into the garden in daylight to check. But I remember the shock in the last storm when we experienced damage. There was however, a feeling of space in the garden!

For fences and decking there's things we can do there too. Usually when we put our garden "to bed" for the year we check our fences so if nothing else we know they're in good condition. It's a good idea to check to see if there are branches close by which could damage the fence and to see if any of the panels are becoming more delicate, as these are more likely to encounter any damage. Checking the posts are still sturdy is also worth doing.

I don't think you can beat the look of a new fence, the photos above are of our completed fencing shortly after it was replaced last year. It doesn't look anywhere near as new now though and we could treat it to protect it and give it a boost. 

This time of year is a good time to treat fences, the plants are dying back which makes it easier to get close to the fence. Something like Sadolin Superdec would, I think work well. It has an opaque finish, is available in neutral colours and provides up to eight years of protection, which all sounds great.

Do you give your fences a yearly health check?

This is a collaborative post with Kent Blaxill, but all words and opinions are my own.