52 Cookbooks #40: Sardine 'rillettes' with parsley & lemon

This week my recipe is one for lunch, and so easy it's almost a non-recipe. Lunches are something I need to get better at as the weather turns colder and damper as salad, bread and cheese hastily thrown together are unlikely to cut it and provide the cuddle a bowl of soup can! This looked as if it'd be a good alternative as a quick-but-still-relatively-good-for-you lunch. 

image.jpg

The book I've chosen this week - the Frugal Cook by Fiona Beckett -  isn't one I've used much, and I suspect I was drawn to it because of its title, for ideas on using veg from the garden (or dad's allotment) and making the best of leftovers, as I dislike throwing food away. 

There's plenty of good advice in the book on topics such as the skill of stretching food and tips to cut your food bills which are fairly obvious, but it's good to see them written down. They range from "only shop when you need to" to "buy produce in season and buy it loose" to my favourite which is "not to follow recipes slavishly!"  If you read my blog regularly - and this series especially - you'll know I'm a natural at this...

In the intro to this recipe, it says that part of the trick of getting away with budget ingredients is to make them sound interesting, which can be done by giving it a sexy name.  So yes, you've rumbled me and I'm actually making a jazzed-up sardines on toast.  However I have to disagree on the naming of this recipe - I don't think rillettes is making this any sexier, I think I'd prefer to call it Posh Sardines on Toast as to me rillettes isn't particularly sexy. But maybe that's just me...

image.jpg

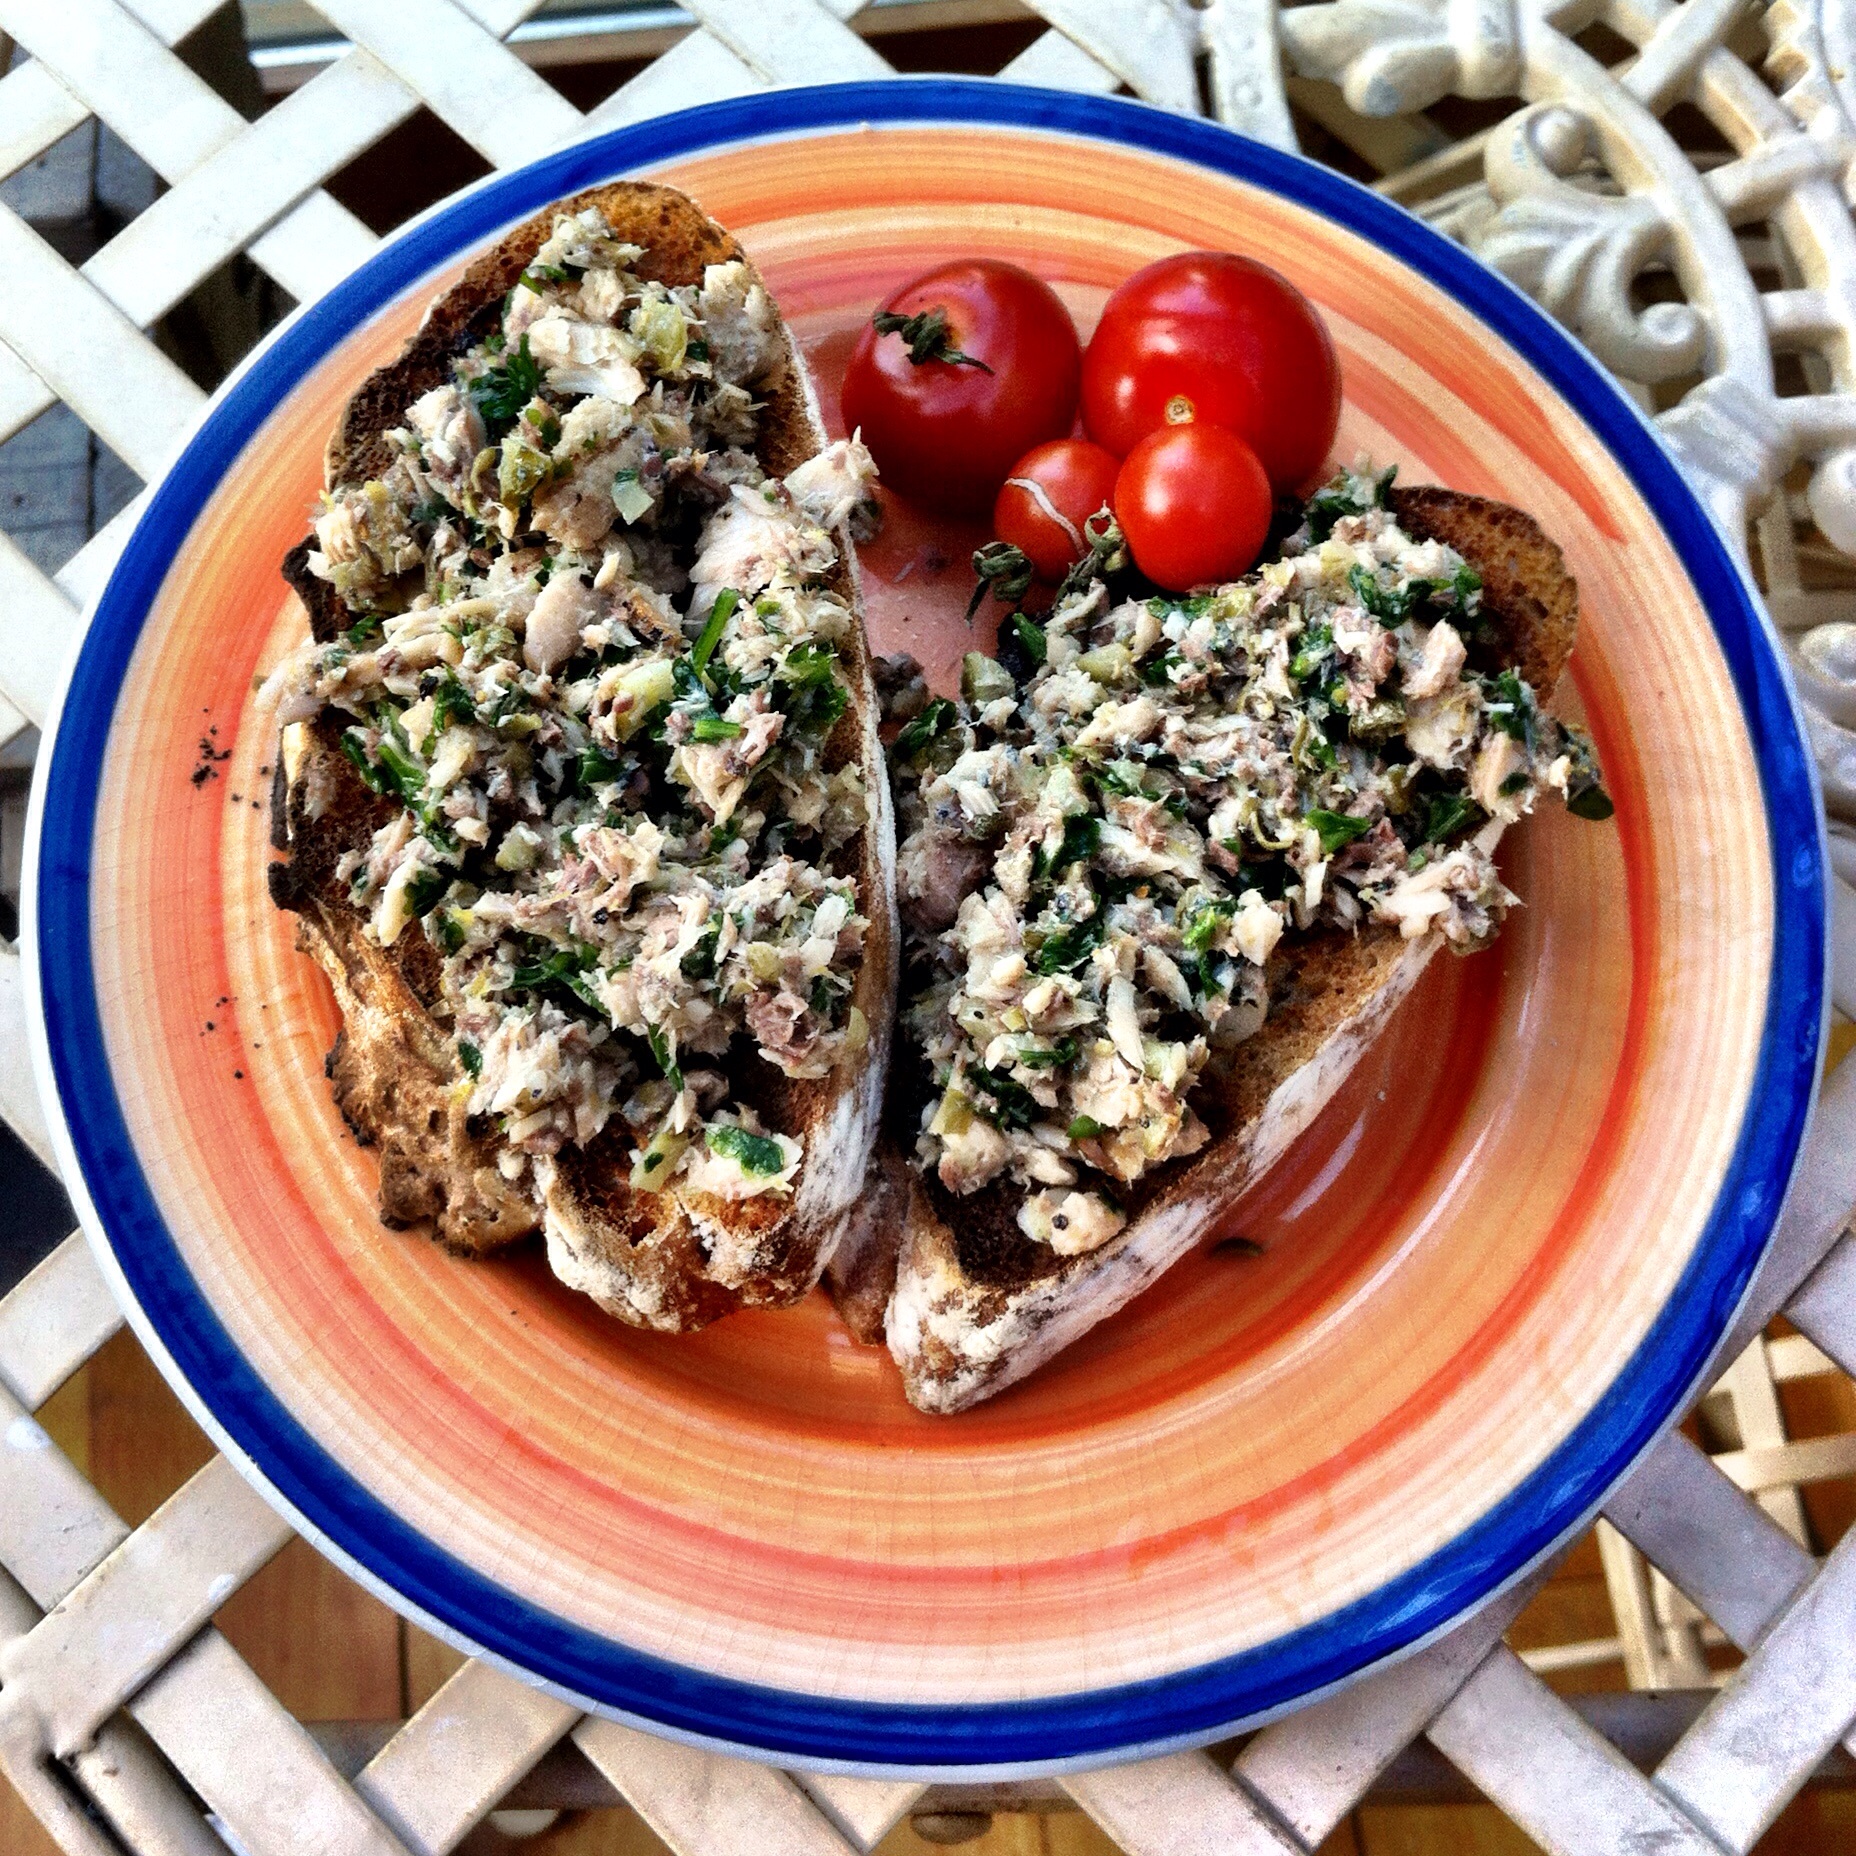
Back to the recipe. I carefully opened this pretty can of sardines, drained the brine and mashed them with a fork. I grated in the rind of half a lemon, chopped a teaspoon of capers and a small gherkin and added that too. Next it was to the freezer for a tablespoon of parsley from the garden, that went in with some black pepper and a drizzle of olive oil. 

Once this was mixed and tasted for seasoning, I piled it onto two slices of toast added some of our smaller tomatoes, sat down and tucked in.  

image.jpg

The verdict:

- this was so easy, I'm almost embarrassed to say I needed a recipe for it!

- it tasted great though and is a quick and easy store cupboard lunch

- this is a lunch I'm adding to my repertoire! 

52 Cookbooks #39: Chard Gratin

This week I've chosen Chard Gratin from this fabulous Sarah Raven Garden Cookbook. Not only is the cover brightly coloured, it's also full of fab recipes split into chapters of crops you'd grow in your garden.

This means it's an invaluable source of inspiration for me around this time of year - I've also made the tomato chilli jam and Kentish Apple cake this autumn - when my kitchen is full of veg we've grown and usually some from my dad too!  See a previous Word of the week: Abundance  where I share more on this year's home-grown veg crop. 

image.jpg

52 Cookbooks: the challenge is to cook a new recipe from one of my (many) cookbooks each week for a year...

With still more chard to use I thought this chard gratin would help put a serious dent in my crop!  And although chard isn't MOH's favourite vegetable I thought I'd try my luck... usually I tell him it's spinach but there was no hiding the chard this time round!  So having 'fessed up and said there was chard for tea that night, and not getting too much of a reaction I cut just over half a kilo of chard from the garden.

image.jpg

I like to grow the rainbow variety (sometimes labelled as rainbow beet on seed packets) as it looks nice and cheery in the veg patch. I don't find that it freezes that well - although I have done so in the past, and use the frozen chard to bulk out casseroles and stews. I think it's a veg better used fresh and I'm sure I'll be getting a little more inventive with it over the coming weeks too!

This year I've a lot of yellow chard, some red and very little of the white variety. That's why after blanching the stems it all looks a little yellow...

image.jpg

So after cooking the stems and blanching the leaves (separately) and trying to squeeze as much water out as possible I was ready to start assembling the dish. 

My Top Tip: using a silicone sieve worked well as I wrung the whole sieve rather than just the leaves, and while my hands were wet they weren't covered in chard leaves. 

This recipe adds a garlic clove and three anchovies to the chard stalks. Now I don't mind anchovies but I know some people detest them, however these are cooked so they melt and really do give an extra depth to this. So I'd urge you to add some for flavour even if it's not as many as the recipe says. 

The chard stalk mixture goes at the bottom of the dish, followed by the blanched leaves, some marjoram leaves (also from the garden) and a grating of nutmeg.  Then I poured over about 100ml of single cream, seasoned it and added a generous grating of Parmesan and it was ready for the oven. 

image.jpg

I prepared the gratin to this stage and left it to cook later when MOH got in. That night though he was later than normal and I suspected some chard-avoidance tactics were in play, however he assured me it was just another busy day at work where he'd lost track of time and had actually forgotten there was chard for tea...

In the book Sarah includes optional instructions for including mussels to make a meal-in-one recipe, however as I'm allergic to mussels (but love them dearly) this is a no go for me, sadly. 

The gratin cooks in the oven for 25-30 minutes and looked great when it came out of the oven. I'd cooked some sausages and parsnips alongside this, so it was an easy cook and a lovely autumnal dinner. 

image.jpg

The verdict

  • This was quite a substantial dinner for the two of us, I hadn't cooked potatoes and was glad of that!
  • MOH said "it's ok... for chard!" - so high praise indeed!
  • I'd cook this again and think, with other vegetables this would comfortably serve four people. 
  • Or any leftovers would be good to stir through some pasta. 
  • I've still some chard left, so I may cook it again sooner than I think! :)

52 Cookbooks #38: Spiced Blackberry Jam

So having foraged some blackberries the race began on how to use them. I'd pondered pairing them with some apples but decided to add walnuts to my apple crumble instead -

see 52 Cookbooks #37: Apple & Walnut Crumble

I thought about an apple and blackberry upside down cake, but we already had the crumble and some apple compote for breakfast, so I wasn't sure when we'd find time to eat cake as well...

52 Cookbooks: the challenge is to cook a new recipe from one of my (many) cookbooks each week for a year...

52 Cookbooks: the challenge is to cook a new recipe from one of my (many) cookbooks each week for a year...

Obviously though, we'd try our best...

I wanted something that would last longer and decided some jam would be just the thing, so I turned to this lovely book - 100 jams, jellies, preserves & pickles by Gloria Nicol, which I'd dropped very heavy hints about and MOH bought for me.

You know the sort of husband "hints" that go something like "I'd really like this book" followed by "you could buy it for me for x."  That generally tends to work... but is often greeted with a "but x is months away yet" response. 

So jam it was. And a spiced one at that.

The foraged blackberries went into the saucepan with a cinnamon stick, two star anise and three cloves, plus two tablespoons of water (to prevent the berries catching on the bottom).  The smells were divine!

image.jpg

The berries cooked down and I used the back of a spoon to mash them further. At this point in the recipe it was optional to sieve the liquid. As the pips were putting me off a crumble or a cake I knew for the jam to stand any chance of being opened, those pips had to go. So strain it I did - and it wasn't as bad as I thought it'd be.

The juice went back in the pan with two tablespoons of lemon juice and 700g of sugar. I used preserving sugar which looks (but doesn't taste) like rock salt - I checked!

image.jpg

With all the sugar dissolved it was time to head for a rapid boil. The colours as it started to boil were amazing, as was the smell...

image.jpg

I was nervous about knowing when I'd reached the setting point - I used the cold saucer method - but each time I tested it, it seemed fairly runny but was clearly thicker than when it started. I gave it a bit longer to be on the safe side and then decanted it into some jars I'd sterilised in the oven.

I poured the jam into a jug and filled the jars from that as if I didn't I had visions of having a very jammy kitchen. It seemed to work but I suspect a tool specifically for the job - like a jam funnel - would have been easier.

Then it was time to add some labels and leave it to cool. It seems I needed have worried about reaching the setting point as later on I tipped the jars upside down to see if they'd set. There was no movement, which was a good thing. But now I'm (mildly) worried that they've set like rubber!

Either way I'm pretty sure they'll taste scrummy if the tasting from the spoon is anything to go by!

image.jpg

The verdict

  • This was easy to prepare and cook and I'm hoping the results match up to the smells that filled my kitchen!
  • The recipe says this makes 1.2kg of jam - my output was these two jars - I thought there'd be more. I guess if I hadn't've strained the fruit there would be more. 
  • Straining the jam was less fuss than I expected, and something I'd do again. 
  • Saving all those old jars throughout the year definitely pays off in autumn!
Post Comment Love